Week 17
Wildcard Week
Learning outcomes:
- Demonstrate workflows used in the chosen process.
- Select and apply suitable materials and processes to create your project.
Have you:
- Shown how you made your project.
- Described problems and how you fixed them.
- Included your design files and ‘hero shot’ photos of the project.
1. Introduction to the wildcard week
For this week's assignment I am going to do a process that I need for my final project. This process includes:
- 3D Scanning the person who will be my model for the final project
- Computer designing the t-shirt pattern
- Check that the t-shirt pattern fits the model
- Laser cut the pattern pieces.
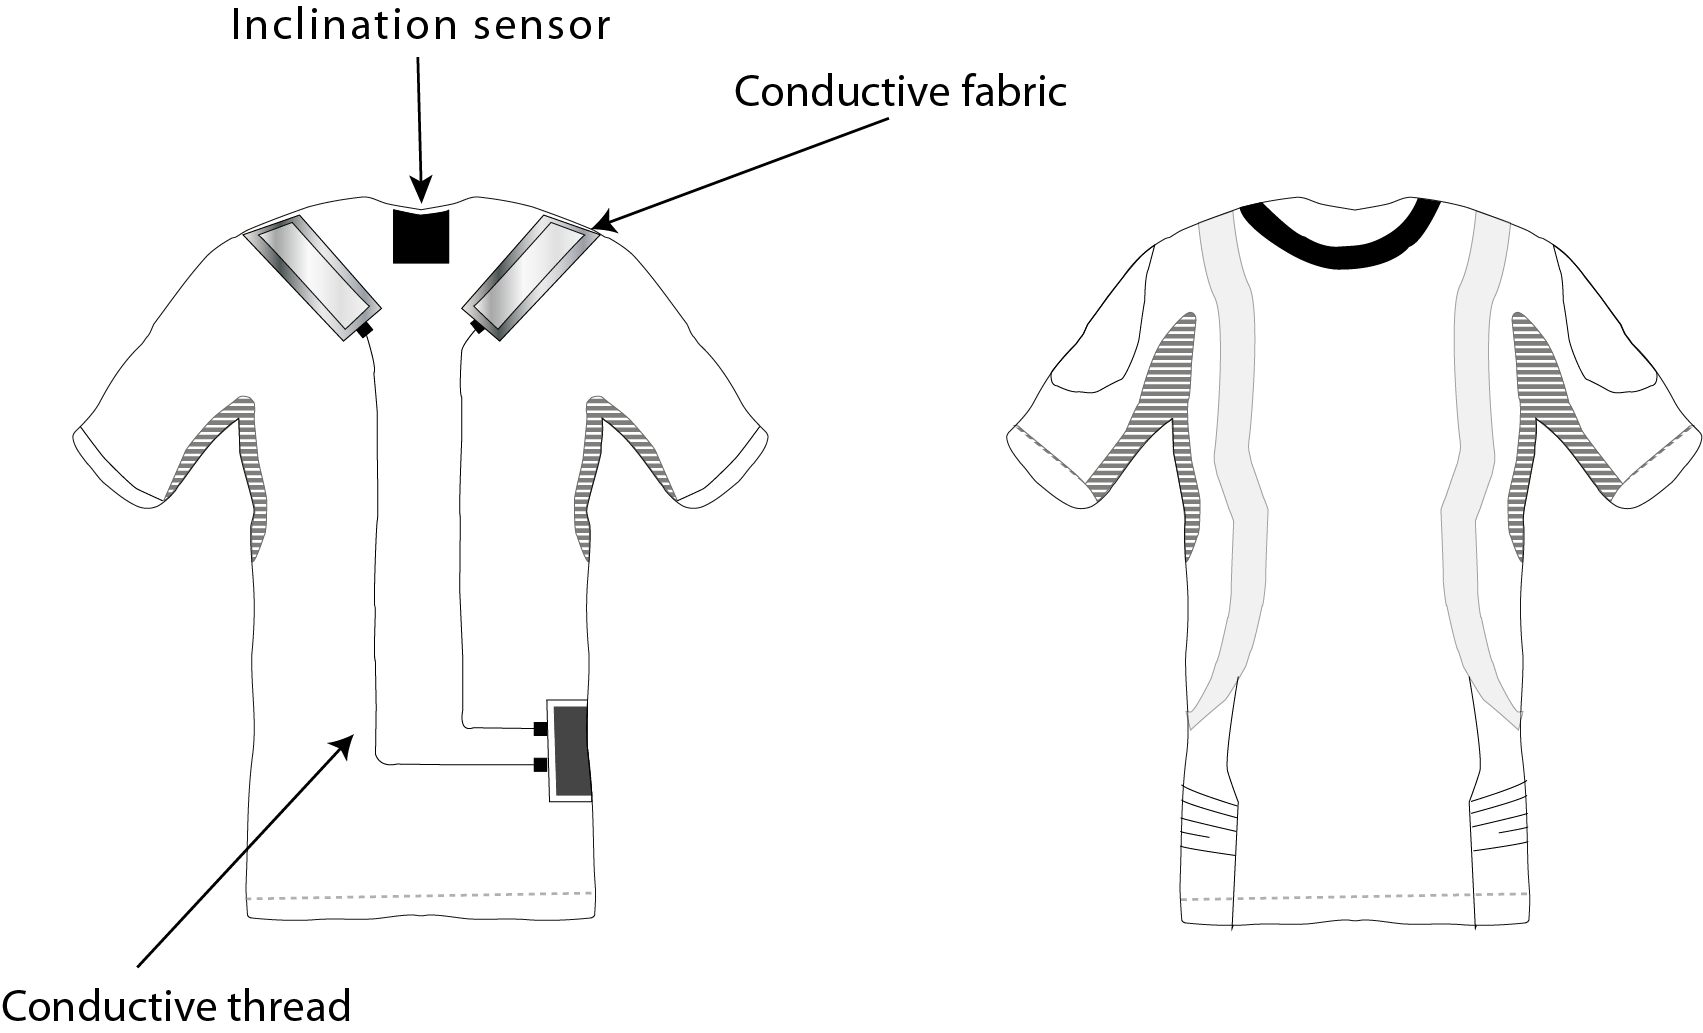
- Sew conductive fabric to the t-shirt and the different parts of the t-shirt.
First steps towards this design were to do the 2D and 3D models of the project. This designs can be found at week's 3 documentation. The idea was to design the patterns required for a t-shirt that will include the conductive fabric and were the boards of my project will be placed. The first design that I did of the t-shirt included in the third week was::
2. 3D Scaning my model
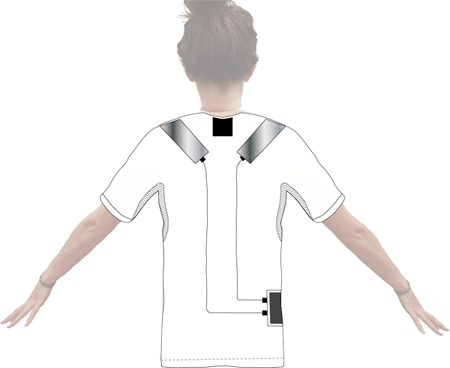
For my final project I want to create a t-shirt that will incorporate the different boards and sensors that I want to measure. As I can not measure myself I am going to use a friend as a model. To be able to design the t-shirt accurately I 3D scanned my friend using the Sense scanner that I learned how to use in week 06.
Note: as I am interested in the back more than the fron in the body I placed her backwards to the light, that is why her front part of the body is quite dark.
2. Designing the tshirt patterns
A. Using Seamly2D
To design the patterns I could have use one of the CAD programs that I have been using during the rest of the Fab Academy weeks but my instructor talked to me about this one and I gave it a try!
About Seamly2D
'Seamly2D is a cross-platform patternmaking program which allows designers to create and model patterns of clothing. This software allows pattern creation using either standard sizing tables or an individual’s set of measurements.'
In the introduction of this software it is said that other CAD programs can be used but they are not as specific towards pattern design. They miss tools like adding seam allowance, truing a dart or walking a seam.
The idea of my posture corrector is to be personalize to each individual. The first one that I will make be addapted to the measurements of a friend of mine, and then to be able to change the measurements adapting them to other people. This programs allows you to do this in a easier way.
I dowloaded the program in the project webpage and I followed some tutorials for how to configure the program. This tutorials can be found on the project's wiki. A really good thing about this software is the documentation.Ebook
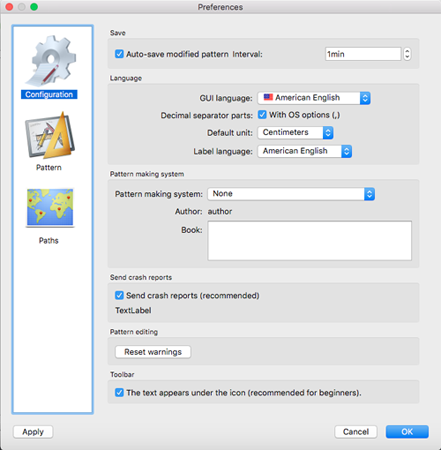
Preferences configuration
As it is also explained in the wiki is important to be aware of the prefences, it allows you to not only change the language and units measurements but also the Pattern settings.
Creating individual model
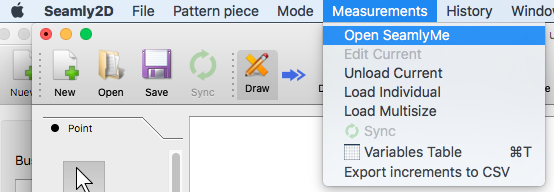
It is important for my project to take the right measurements as I need the t-shirt to be as narrow as posible for it to stretch when the body is moving. For doing so I went to Measurements->Open SeamlyMe
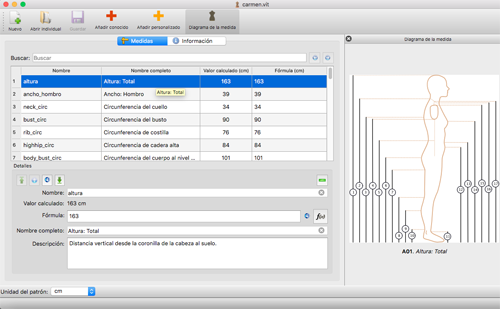
A new window will pop up and there you can click on New and a table will open where you can select which measurements you want to have. In my case as I am designing a t-shirt I don't really need the measurements of the legs. I only selected the measurements of the back, arms and chest.
Once selected, I had a table with the measurements that I needed to take. I called my friend Carmen and I started to measure her:
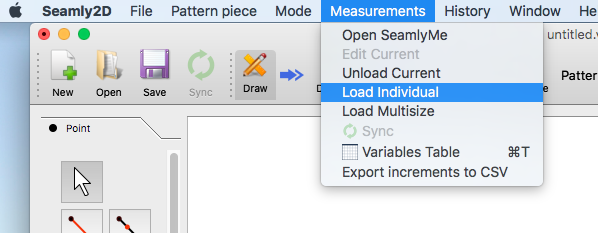
When you add all the measurements yo go back to the main window and you load the individual you just have created:
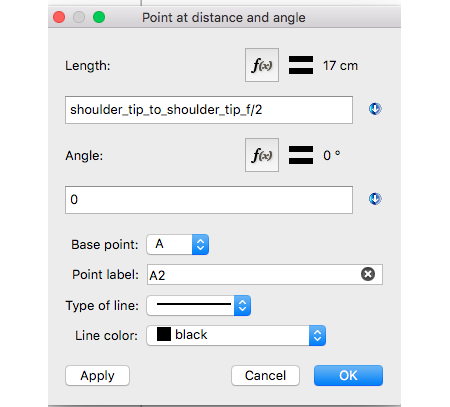
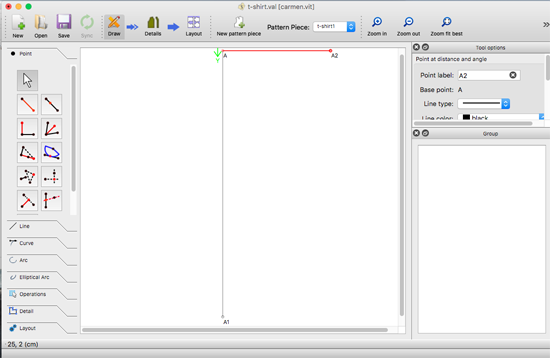
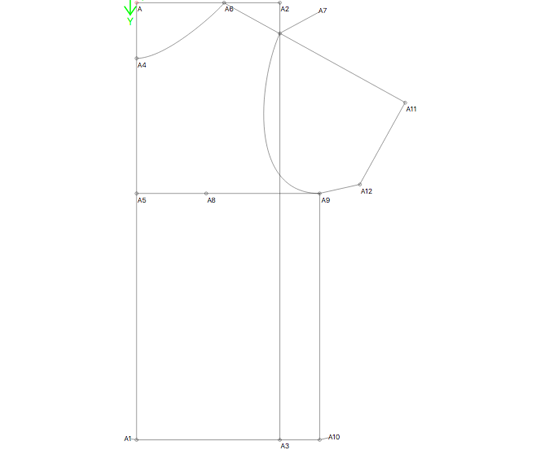
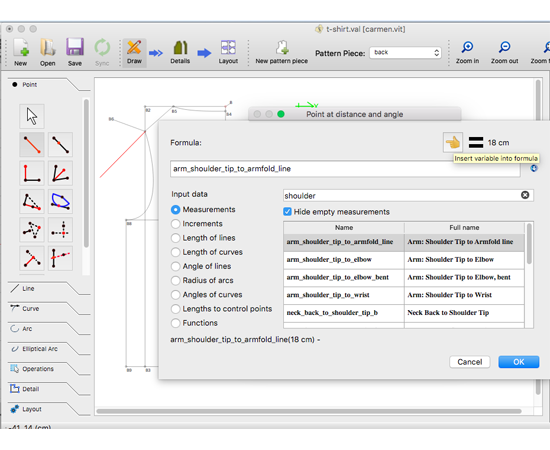
Next steps include the design of the t-shirt using the measurements. I followed this tutorial to create a pattern piece. The basic process is to design the lines that will define your shape selecting the dimension acording to the measurements that you have taken and the angle that you want that line to have.
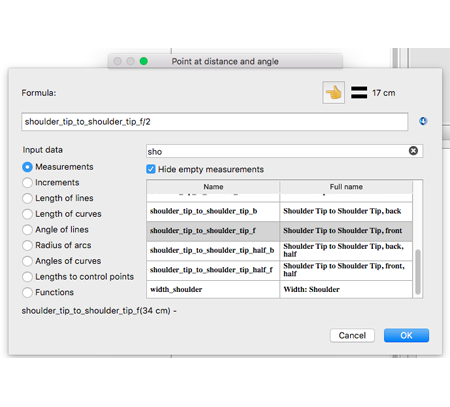
The turotial walks through the basic steps that need to be perform to create a bodice. At the begining I strugle a bit with these steps as the measurements that I had taken were not as accurate as they should be.
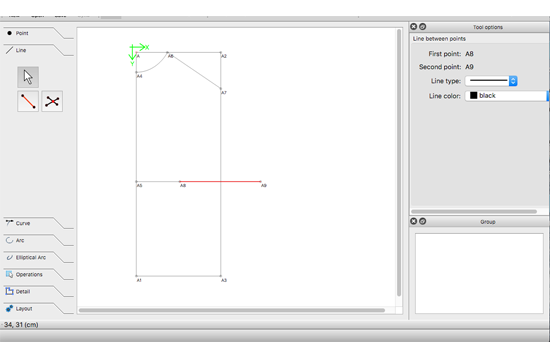
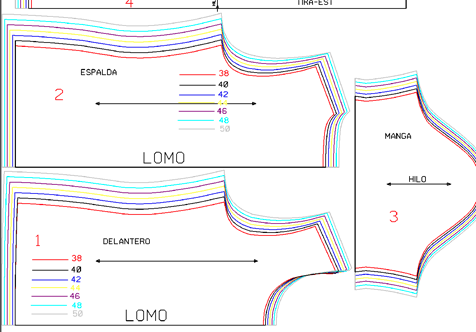
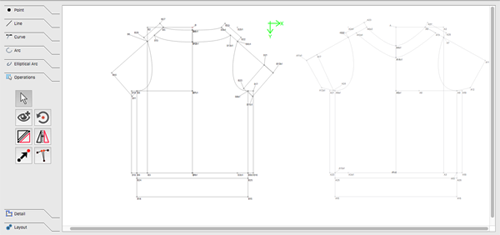
 The back and the front part are quite similar with the difference of the width (due to the bust in women) and the height of the neck that in this case I will make the one in the front part bigger.
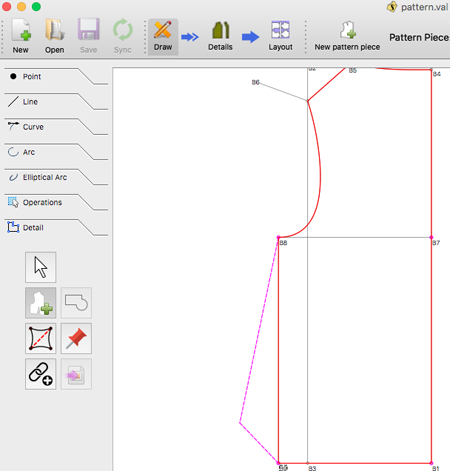
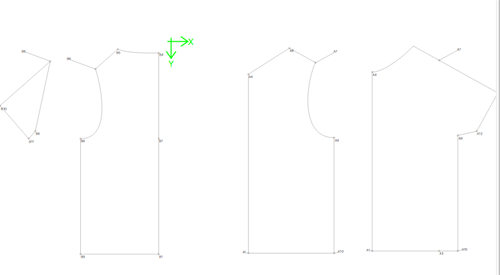
Once you have the design you go to Detail->Workpiece tool and you select the shape you want to export. For doing so you have to click on the corners of the lines and on the curves.
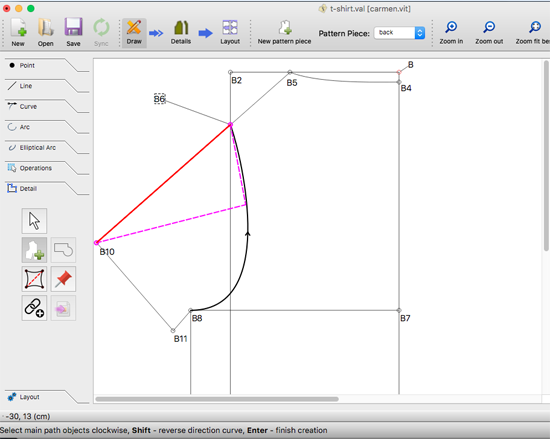
Designing the sleeves:
I also strugle when designing the sleeves as I found difficult to know the shape that they required. I search for information and this image gave me a clearer idea.
 What I did was I drew in Seamly2D the sleeve using the curve cut on the body piece and the measurements of the shoulder length.
Problem!
When I went to use the workpiece tool for exporting the sleeve design I wouldn't allow me to select all the lines that I needed for the sleeve and I was loosing a lot of time trying to find out what was the problem I ended up exporting them in .dxf as they were and then adjust it in Fusion 360.
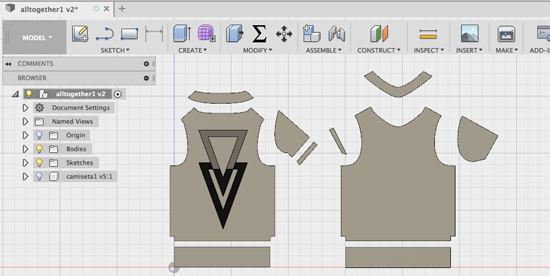
Using Fusion 360 to fix the sleeves:
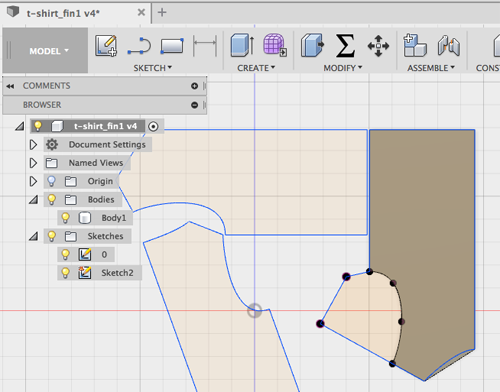
I exported the .dxf and I opened in Fusion 360.

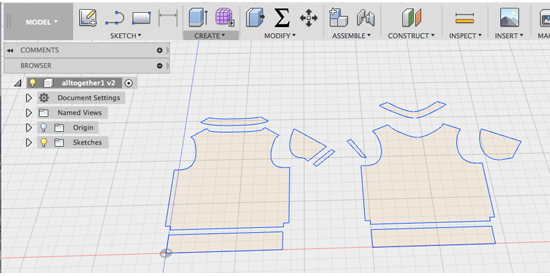
Then I created two new sketches to draw the shape of the sleeves. I decided to work with bodies as I find it easier. I tried two ways for drawing the sleeves:
1. Exporting the triangle to Fusion and then draw the missing spline.
2. Exporting the whole t-shirt and then projecting the sleeve lines drawing only from scratch the projected spline.
This second way was easier as you don't have to worry about the triangle to perfectly fit the size of the t-shirt.
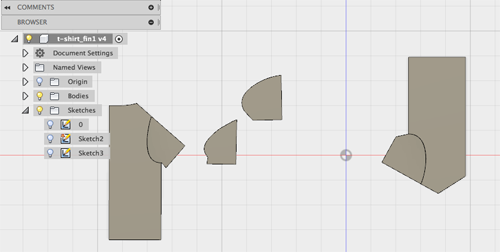
When I had the sleeve bodies I put them together by moving them with the point-to-point tool.
Note:
As I cut this pattern with the laser cutter I can't perform the cut with the t-shirt folded as the top part won't be attach to the base in that case, so I mirrowed the main bodies. Then I add the allowence that I need to sew the pieces to the bottom and to the shoulder unions. I gave them 2cm on the bottom and 1cm on the sides.
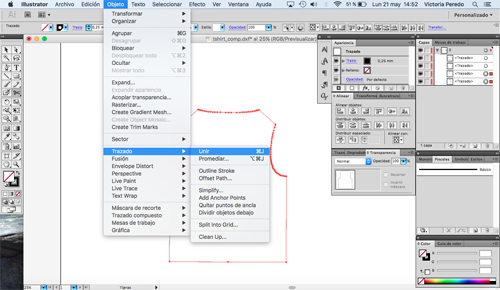
Finishing touches with Illustrator:
I exported the .dxf from Fusion and I edit it on Illustrator. Once I had all the different pieces I opened the .dxf file in Illustrator as I had extra lines on the design that I didn't need; like the one in the middle of the front and back part of the t-shirt and the same one on the sleeves. I exported the .dxf and I went to the laser cutter.
Solving previous problems
At this point I had some of the main components of the t-shirt but I was still missing some of them like the necks, the extra fabric for the sleeves, for the neck... And it was when I was designing the neck that I discovered why before I was not able to export the whole shape of the sleeve. The curve of the sleeve was in the oposite direction when sewing so instead of selecting it by clicking I had to select it holding the SHIFT key!
Designing the accesories
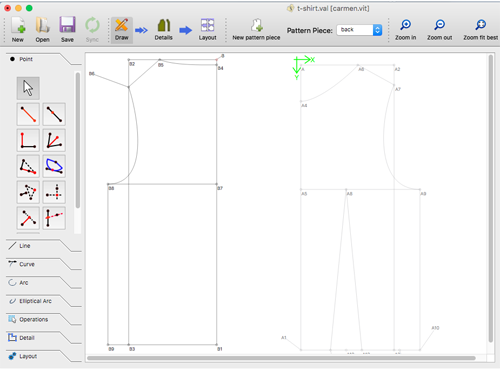
Once I had the design of the main parts of the t-shirt I designed the extra fabric that goes on the sleeves, the bottom part of the body and the neck. I also designed the way the conductive fabric will be placed on the tshirt. As I said before, the t-shirt will be cut with the laser so I need the whole shape not only half of it. Instead of using Fusion for that I used the tool Operations->Flipping objects by axis and I created the whole design in Seamly 2D.
 Then I selected individually the different cuts that I needed with the worpiece tool:
 And then I went to the Layout tab to export it as a .dxf. In the Details view I opened the options menu for each piece by right clicking on top of them and I selected the option of avoid fliping the objects. I thought that will make the process easier.
Designing the shape of the conductive thread:
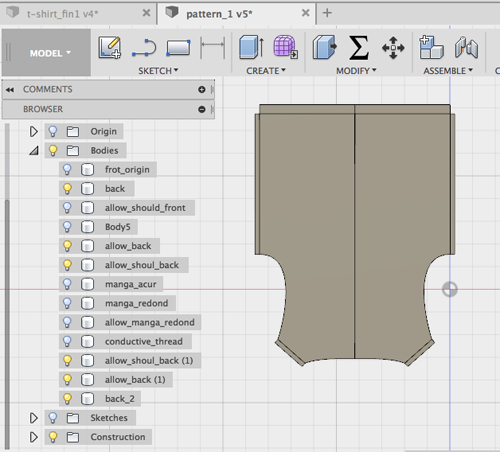
I could have designed this part also in Seamly but I also had to put the sleeves together so I did it directly in Fusion.
The sleeves are different on the front and back part of the t-shirt, so although in the end I manage to export the whole shape from Seamly, both sides need to be cut together.
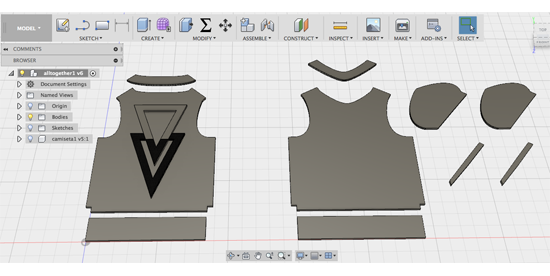
Using Fusion I could also give the t-shirt different appearances and see how it will look. The idea of the conductive fabric design is that it can be stretched horizontally and vertically and also that the ends of the fabric where I will measure finish in the bottom part of the t-shirt to be close to the board that will be located on the right side of the body. This board was designed on the Networking week.
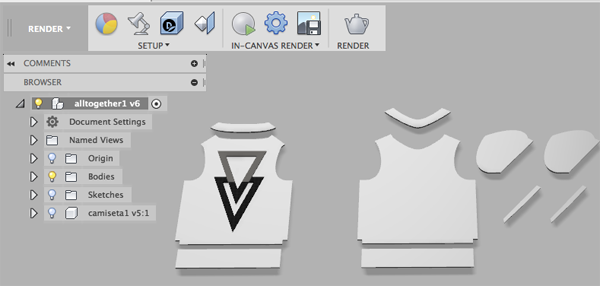
Also, an important thing to take into account is that the signal from the fabric to the board will be transmited with the conductive thread but this thread shouldn't be touching the skin so the ideal thing is that the conductive is swe on top of another piece of fabric. For desigining purposes I decided to put some black fabric.
B. Checking that the t-shirt pattern fits the model
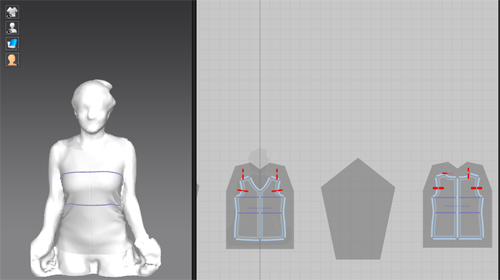
When I was looking for how to design the sleeves of the t-shirt I found a tutorial of this program that explained you how to build a t-shirt in Marvelous Designer which help me to understand how to do them. I was very curious about this program as it seemt to give you both the 3D and 2D design of clothes so I went to the webpage and I found out that there is a month free trial license. I downloaded it and I gave it a try.
As I had scanned my friend to have her measurements I inserted her in this program and I tried to design a t-shirt.
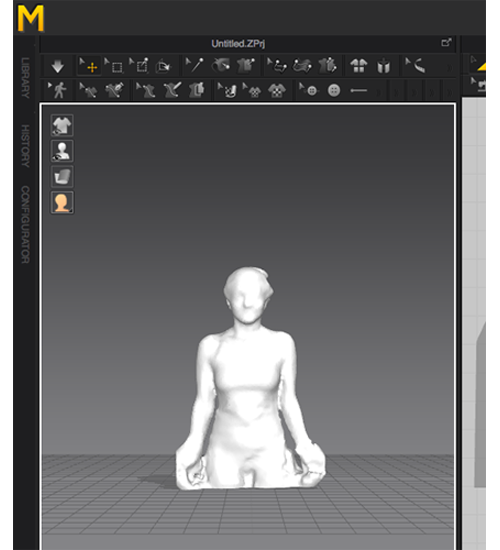
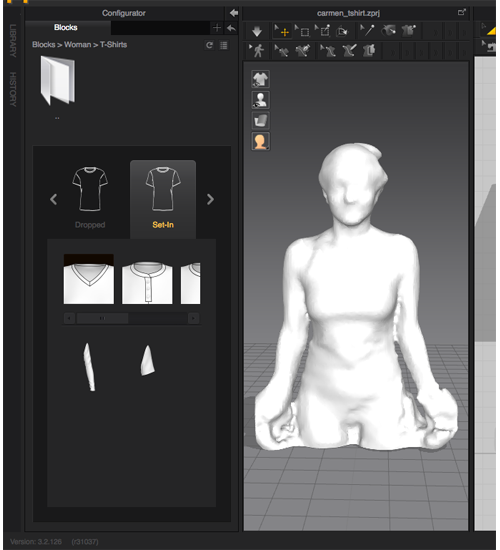
This program has a set of default blocks that you can add to your design. As it can be seen in the picture I coudl choose to add a set-in t-shirt, with a V-neck. You add it and then the t-shirt will appear in the middle of the window and you have to move it to be around the body of your 3D model.
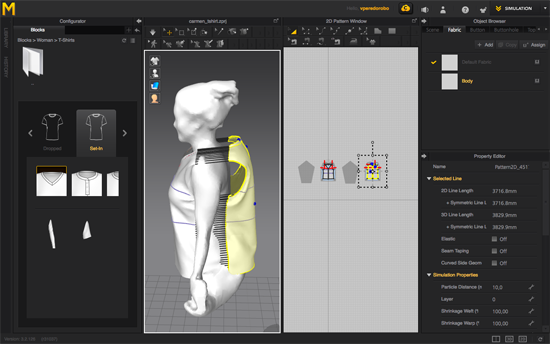
Click on simulate for the t-shirt to adapt to the body
When you have placed the t-shirt around the body you click on the Simulate symbol and this will make the t-shirt to adapt around the body.
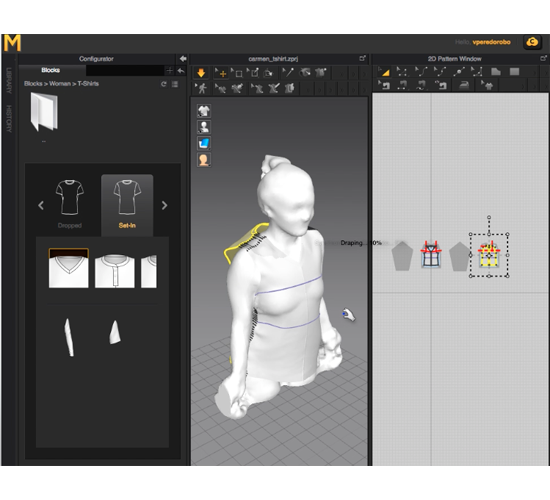
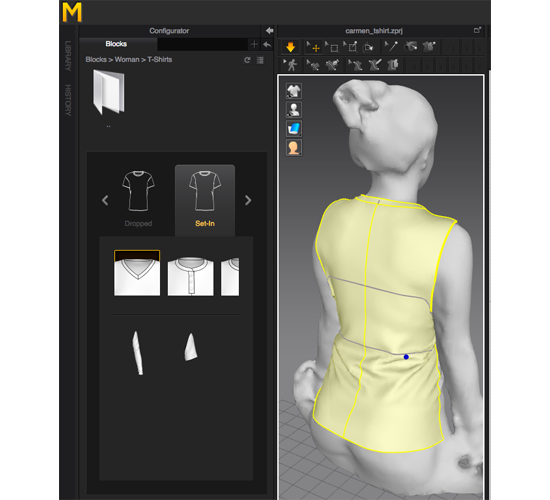
What I find very good about this program that it gives you not only the 3D model but also the 2D one so you can have the patterns directly.
3. Cutting with the Laser cutter:
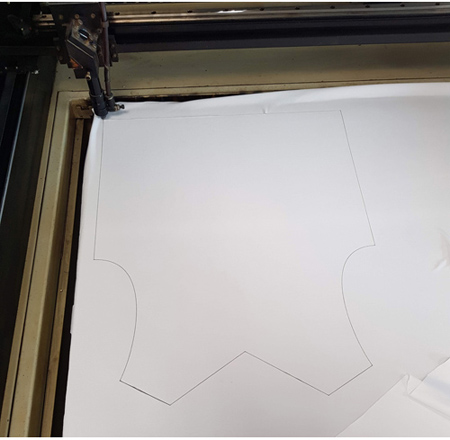
When fabric is cut with the laser cutter, specially elastic fabric, it ends up folding on the edges and not getting a result as accurate as it should be.
In order to solve this problem and cut accurately the fabric I used a 3M adhesive that won't allow movement when the laser is cutting it. I sprayed it on top of a plastic sheet and then I placed the fabric on top of it. This product is non-staining.
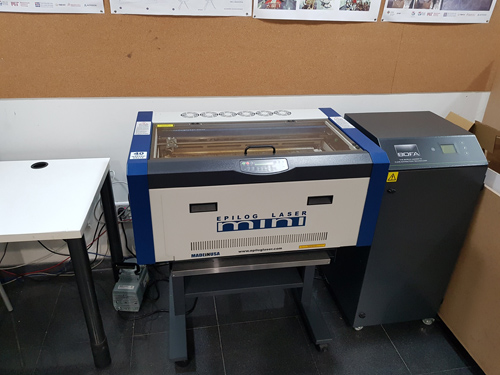

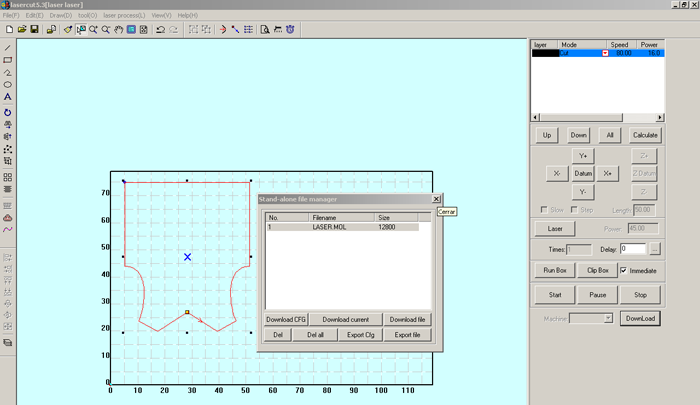
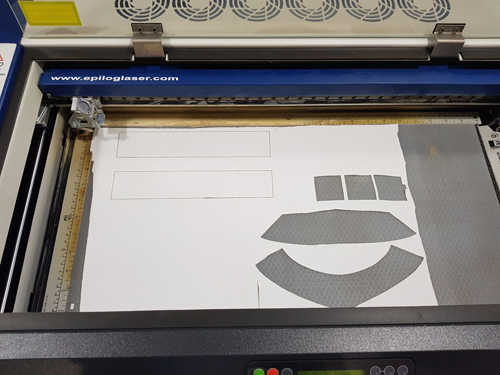
As the t-shirt was bigger than the Epilog laser that I usually used, I used the Laser Project.
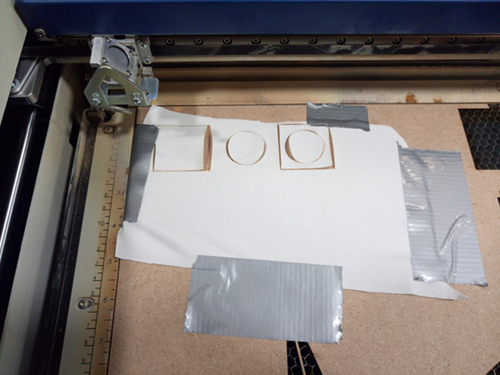
For cutting the fabric the first thing I did was to perform a test cutting a square of 40x40mm and a circle of 30x40 to calculate the speed and power parameters.

- First attempt was with: Speed: 20, Power: 17 and Corner power: 14.
- We decided that we needed to give it more speed adn tried with Speed: 80, Power: 14 and Corner power: 13.
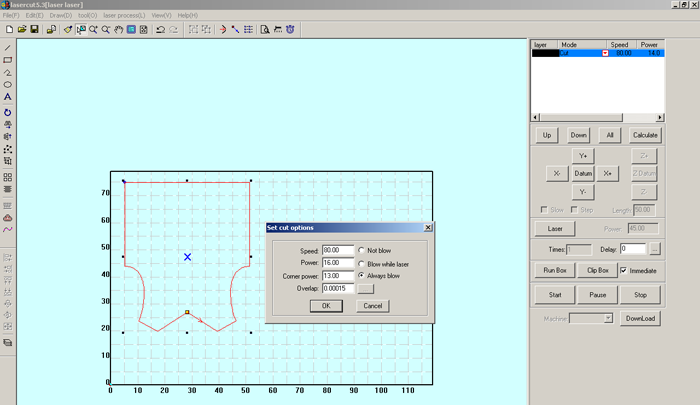
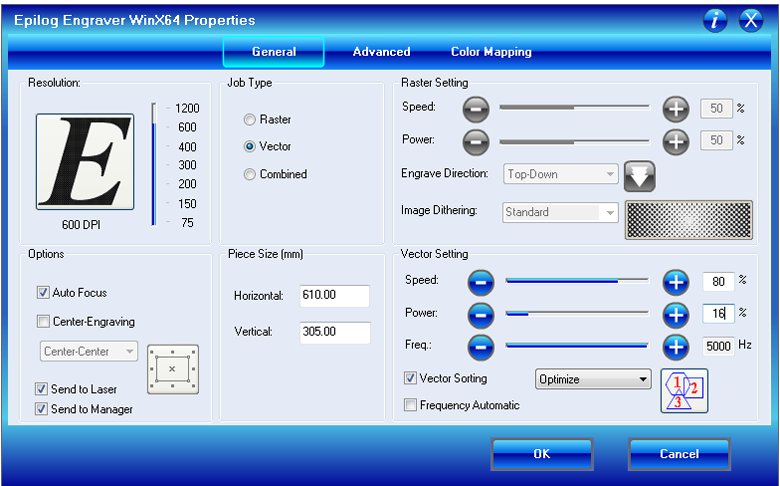
- The circle was perfect but the square was not perfectly cut so we make that power a bit higher and that were the parameters that we used:
Speed = 80
Power = 16
Corner power = 13
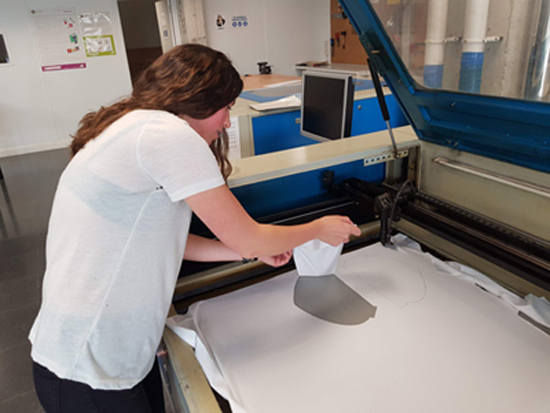
I downloaded the file to the laser cutter and there I placed the head of the laser at the point where I wanted to start and I clicked on START.
 I repeated the same process for the other t-shirt components.
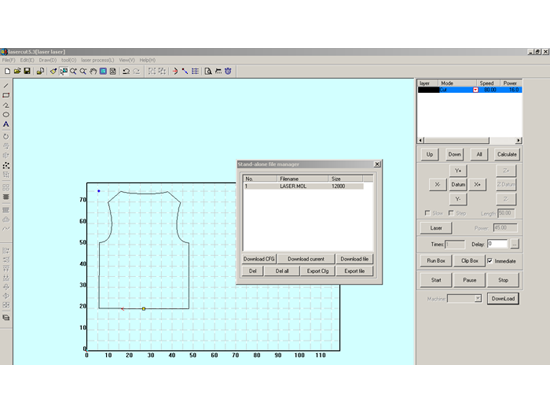

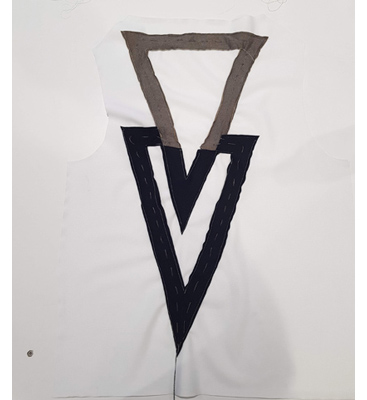
Once I had finished cutting the main parts of the t-shirt I cut the black fabric that I will use to sew the conductive thread of top of it, the conductive fabric and then the extra pieces for the neck, sleeves and bottom part of the body.
Cutting with Epilog laser
For this smaller cuts I used the small Epilog laser so I first tried with the same parameters as I used in the other one but I changed them:
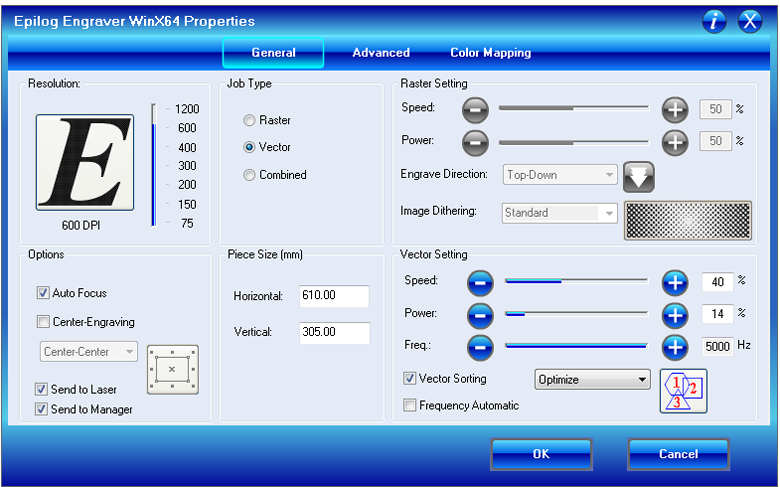
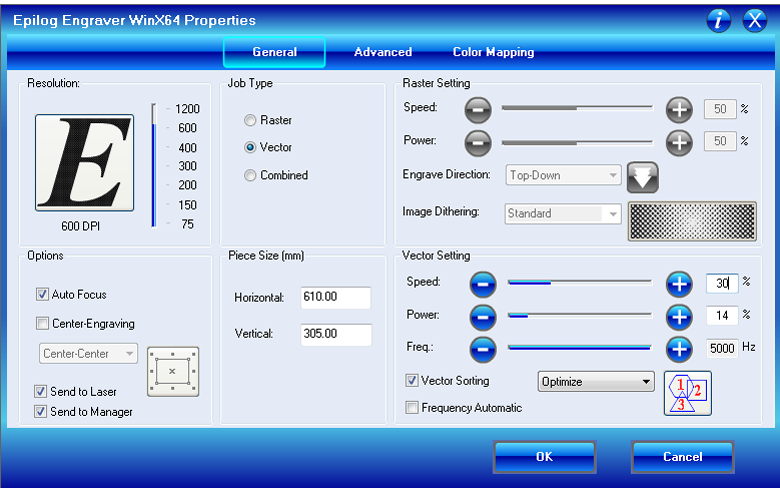
- Speed: 30
- Power: 14
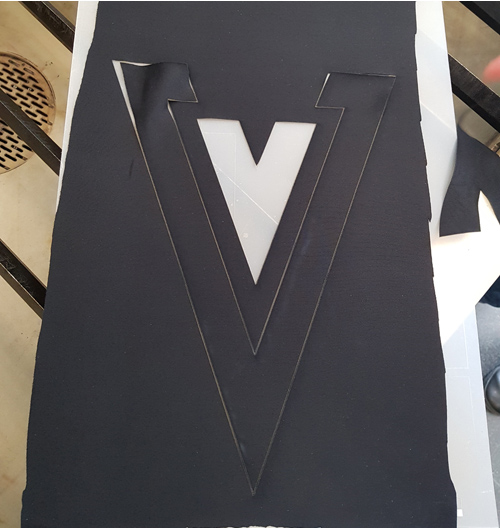
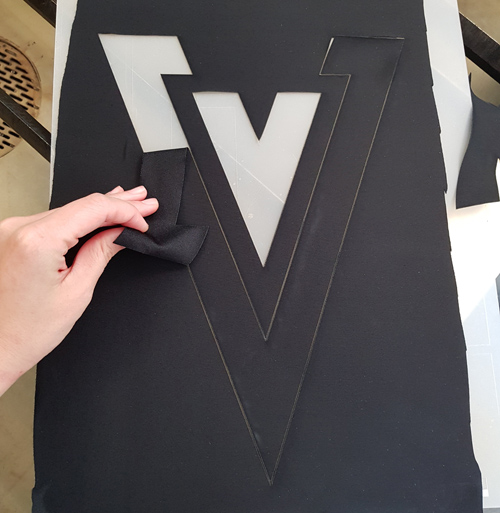
Final result of the different parts of the t-shirt together is this one:
4. Sewing the t-shirt
Once I had the different pieces I had to sew them together. I did a bit of research on what parts to sew first and I decided that the more logical way will be the next one:
- The thread to the conductive and black fabric (for the conductive fabric and board communication)
- The conductive and black fabric to the back part of the t-shirt
- The allowence parts of the neck to the corresponding body parts (front and back)
- The allowence parts to the sleeves
- The shoulders, joining the front with the back part
- The sleeves to the front and back part.
- Sides of the T-shirt
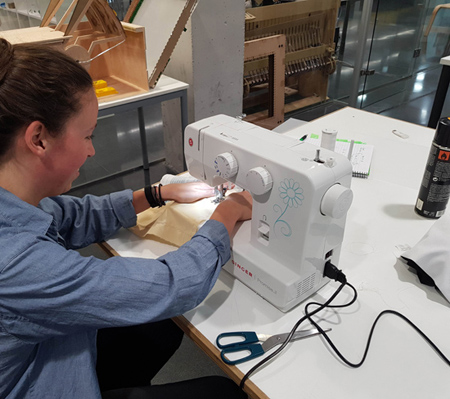
The sweing machine that I will use is the Singer Promise II.
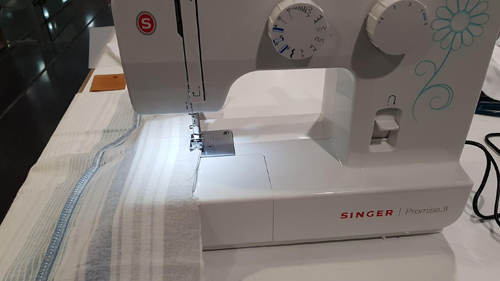 As it was my first time using a sewing machine I had to practice before moving on to my t-shirt! I practice how to sew straight lines and how to attach different parts together as straight as possible.
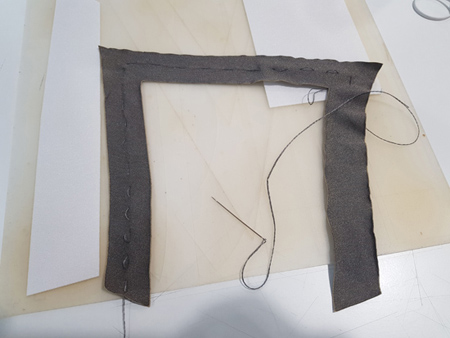
Once I had a bit more practice I started to sew my t-shirt. It was not as easy as i thought it will be! As the material that I am using is elastic I had to make sure that it was not twisting while sewing. For keeping the different pieces together I first tried by joining them with stitches:
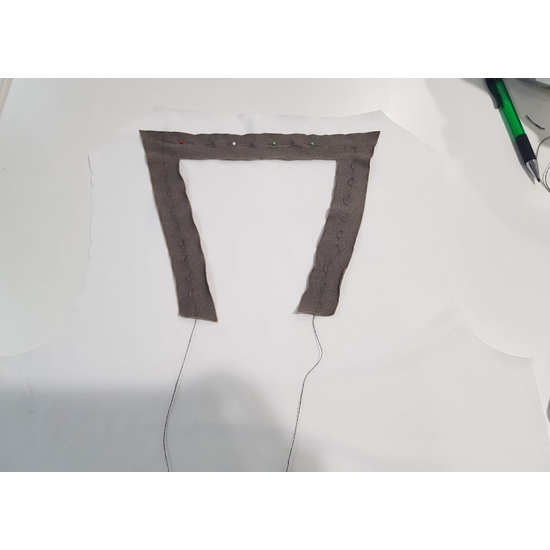
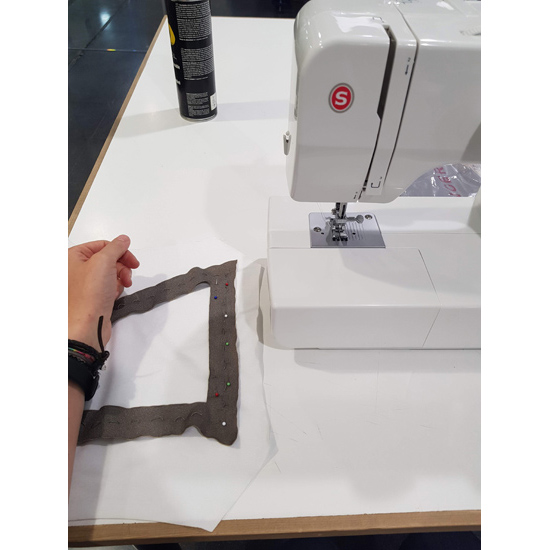
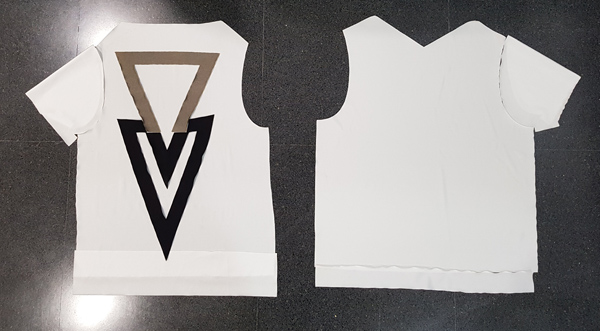
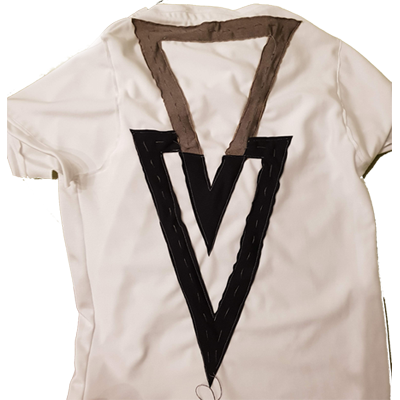
But I actually found easier to baste it as the stitches were getting on my way when sewing with the machine. As I said before this material is elastic and when I sew the first thing, the top triangle to the t-shirt it was quite twisted to one of the sides. Then I sew the neck and the sleeves as you can see on the next picture on the right.
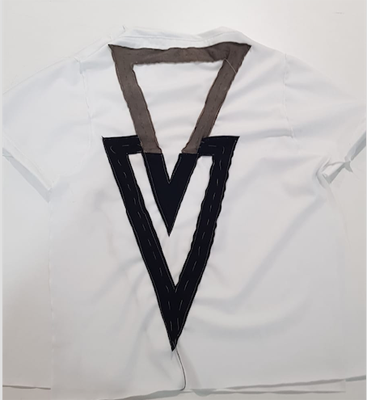
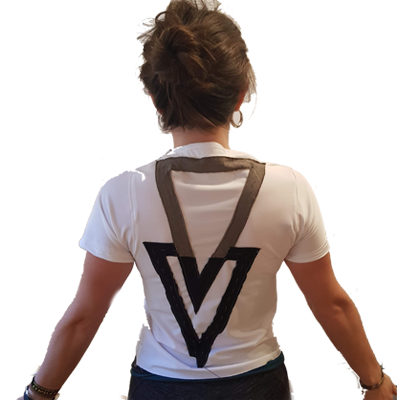
The final result was not perfect but my friend tried it and... it fit! So for beign the first try it is good enough!
Downloads:
- Seamly 2D: T-shirt pattern
- .dxf file: Link
- Fusion 3D model: link