TODO LIST
- Group Assignment : review the safety data sheets for each of your molding and casting materials, then make and compare test casts with each of them
- Individual Assignment : design a 3D mold around the stock and tooling that you'll be using, machine it, and use it to cast parts
Introduction
In this week assignment we need to design 3D mold design and caste the parts. First of all i made the mold making in two methods with different designs. We can either use a PCB milling machine or the CNC router to make the mold design. Then can be use different type of materials like Silicon rubber, plastics etc.. to make the mold part. Then after i need to cast the part. There is wide veriety of caste materials available i choose one that suits best for my mold.
What is molding & casting?
A mold or mould is a hollowed-out block that is filled with a liquid or pliable material such as plastic, glass, metal, or ceramic raw material.[2] The liquid hardens or sets inside the mold, adopting its shape. A mold is the counterpart to a cast. The very common bi-valve molding process uses two molds, one for each half of the object. Articulated moulds have multiple pieces that come together to form the complete mold, and then disassemble to release the finished casting; they are expensive, but necessary when the casting shape has complex overhangs.[3][better source needed] Piece-molding uses a number of different molds, each creating a section of a complicated object. This is generally only used for larger and more valuable objects. A manufacturer who makes molds is called a moldmaker. A release agent is typically used to make removal of the hardened/set substance from the mold easily. Typical uses for molded plastics include molded furniture, molded household goods, molded cases, and structural materials.Learn more from here.
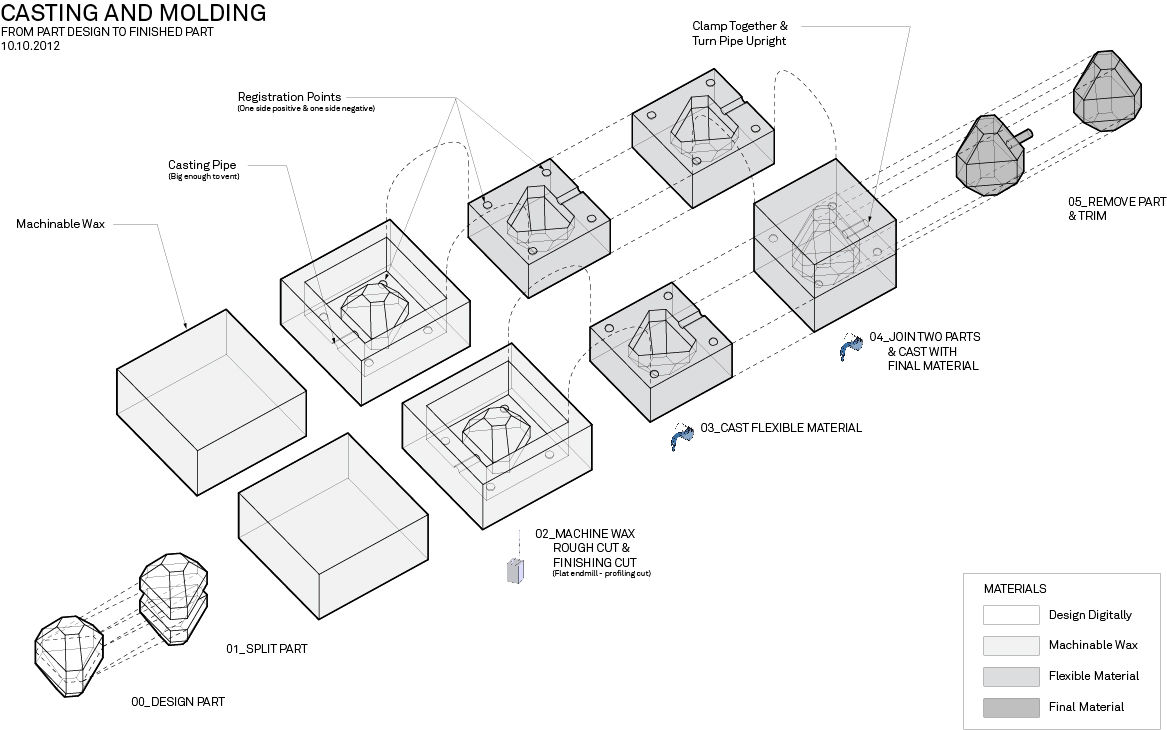
Casting is a manufacturing process in which a liquid material is usually poured into a mold, which contains a hollow cavity of the desired shape, and then allowed to solidify. The solidified part is also known as a casting, which is ejected or broken out of the mold to complete the process. Casting materials are usually metals or various cold setting materials that cure after mixing two or more components together; examples are epoxy, concrete, plaster and clay. Casting is most often used for making complex shapes that would be otherwise difficult or uneconomical to make by other methods. Learn more from here.
Mold making : First Try
This is my first attempt to making a mold. iam doing this with some doubts in my head. Atlast of this try i hope, it defenitly cleared out. Iam pretty sure i will make some mistake in this part.
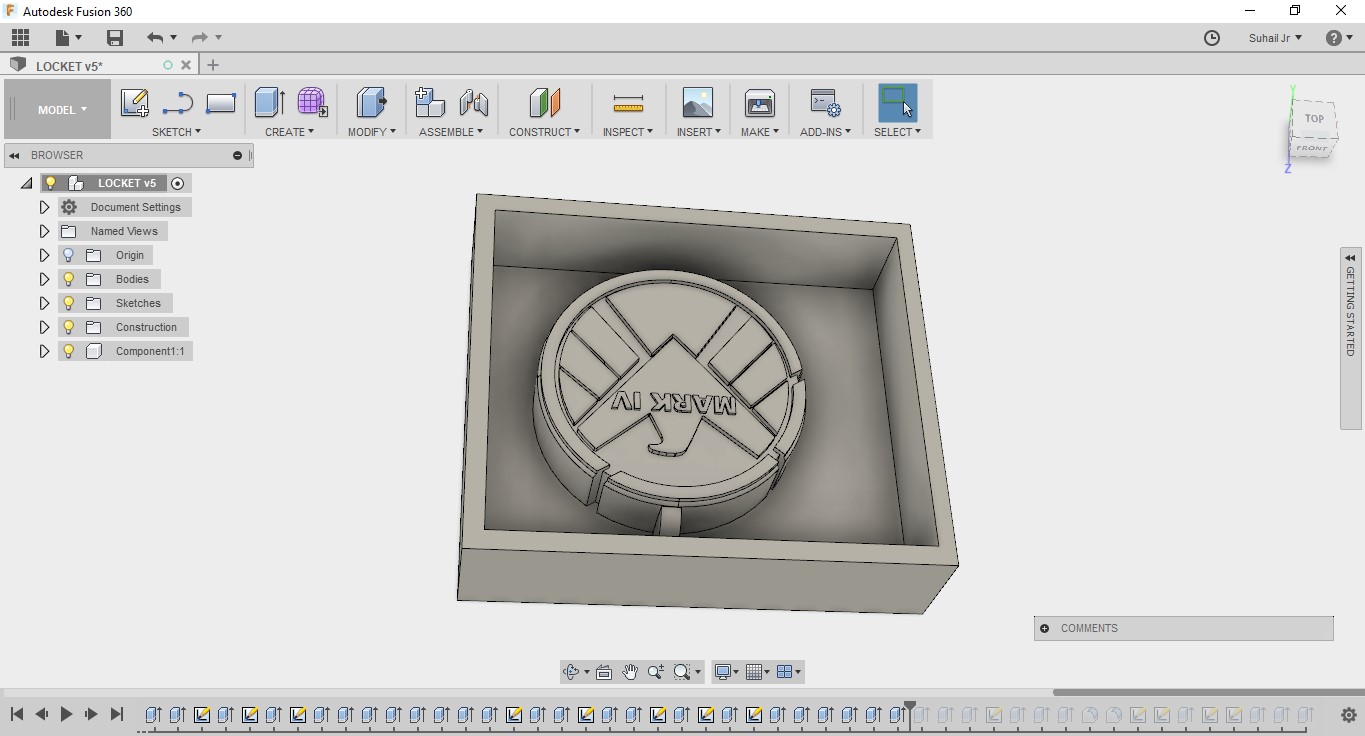
Designing the Mold in Fusion360
I started to think what design i would choose to make the mold. I'am a big fan of marvels movies and comics. I recently strated to watch marvels agents of shiled TV series. I decided to design a S.H.I.E.L.D logo locket mold. Technically SHIELD agents don't have a SHIELD locket, may be can supply those for them. So, i fire up fusion 360 then started to make the mold design. I made the Logo in a Rectangular box, through this method i can easly make a negative mold of it.
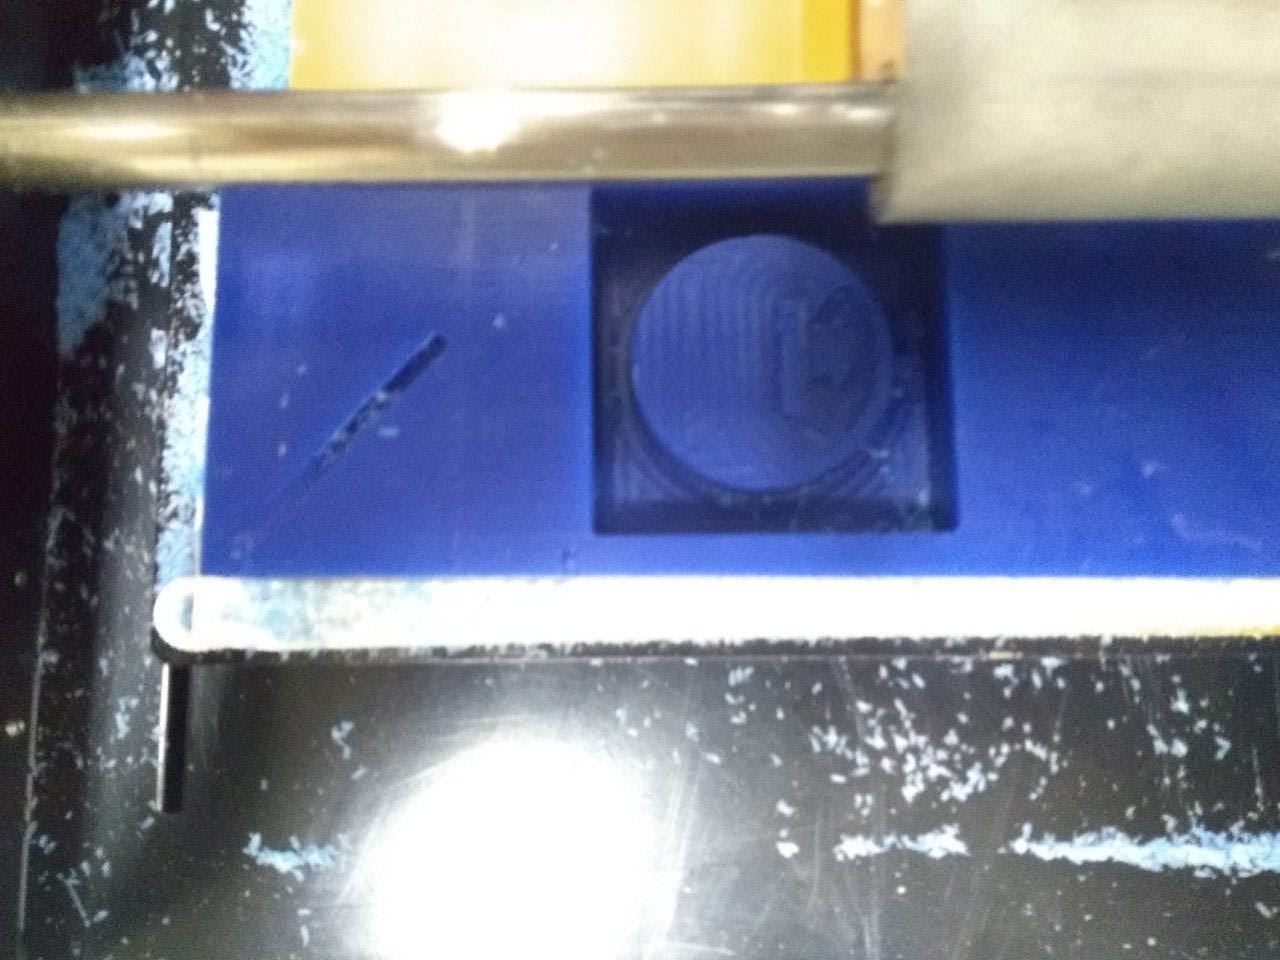
Milling the mold design using Modela MDX 20
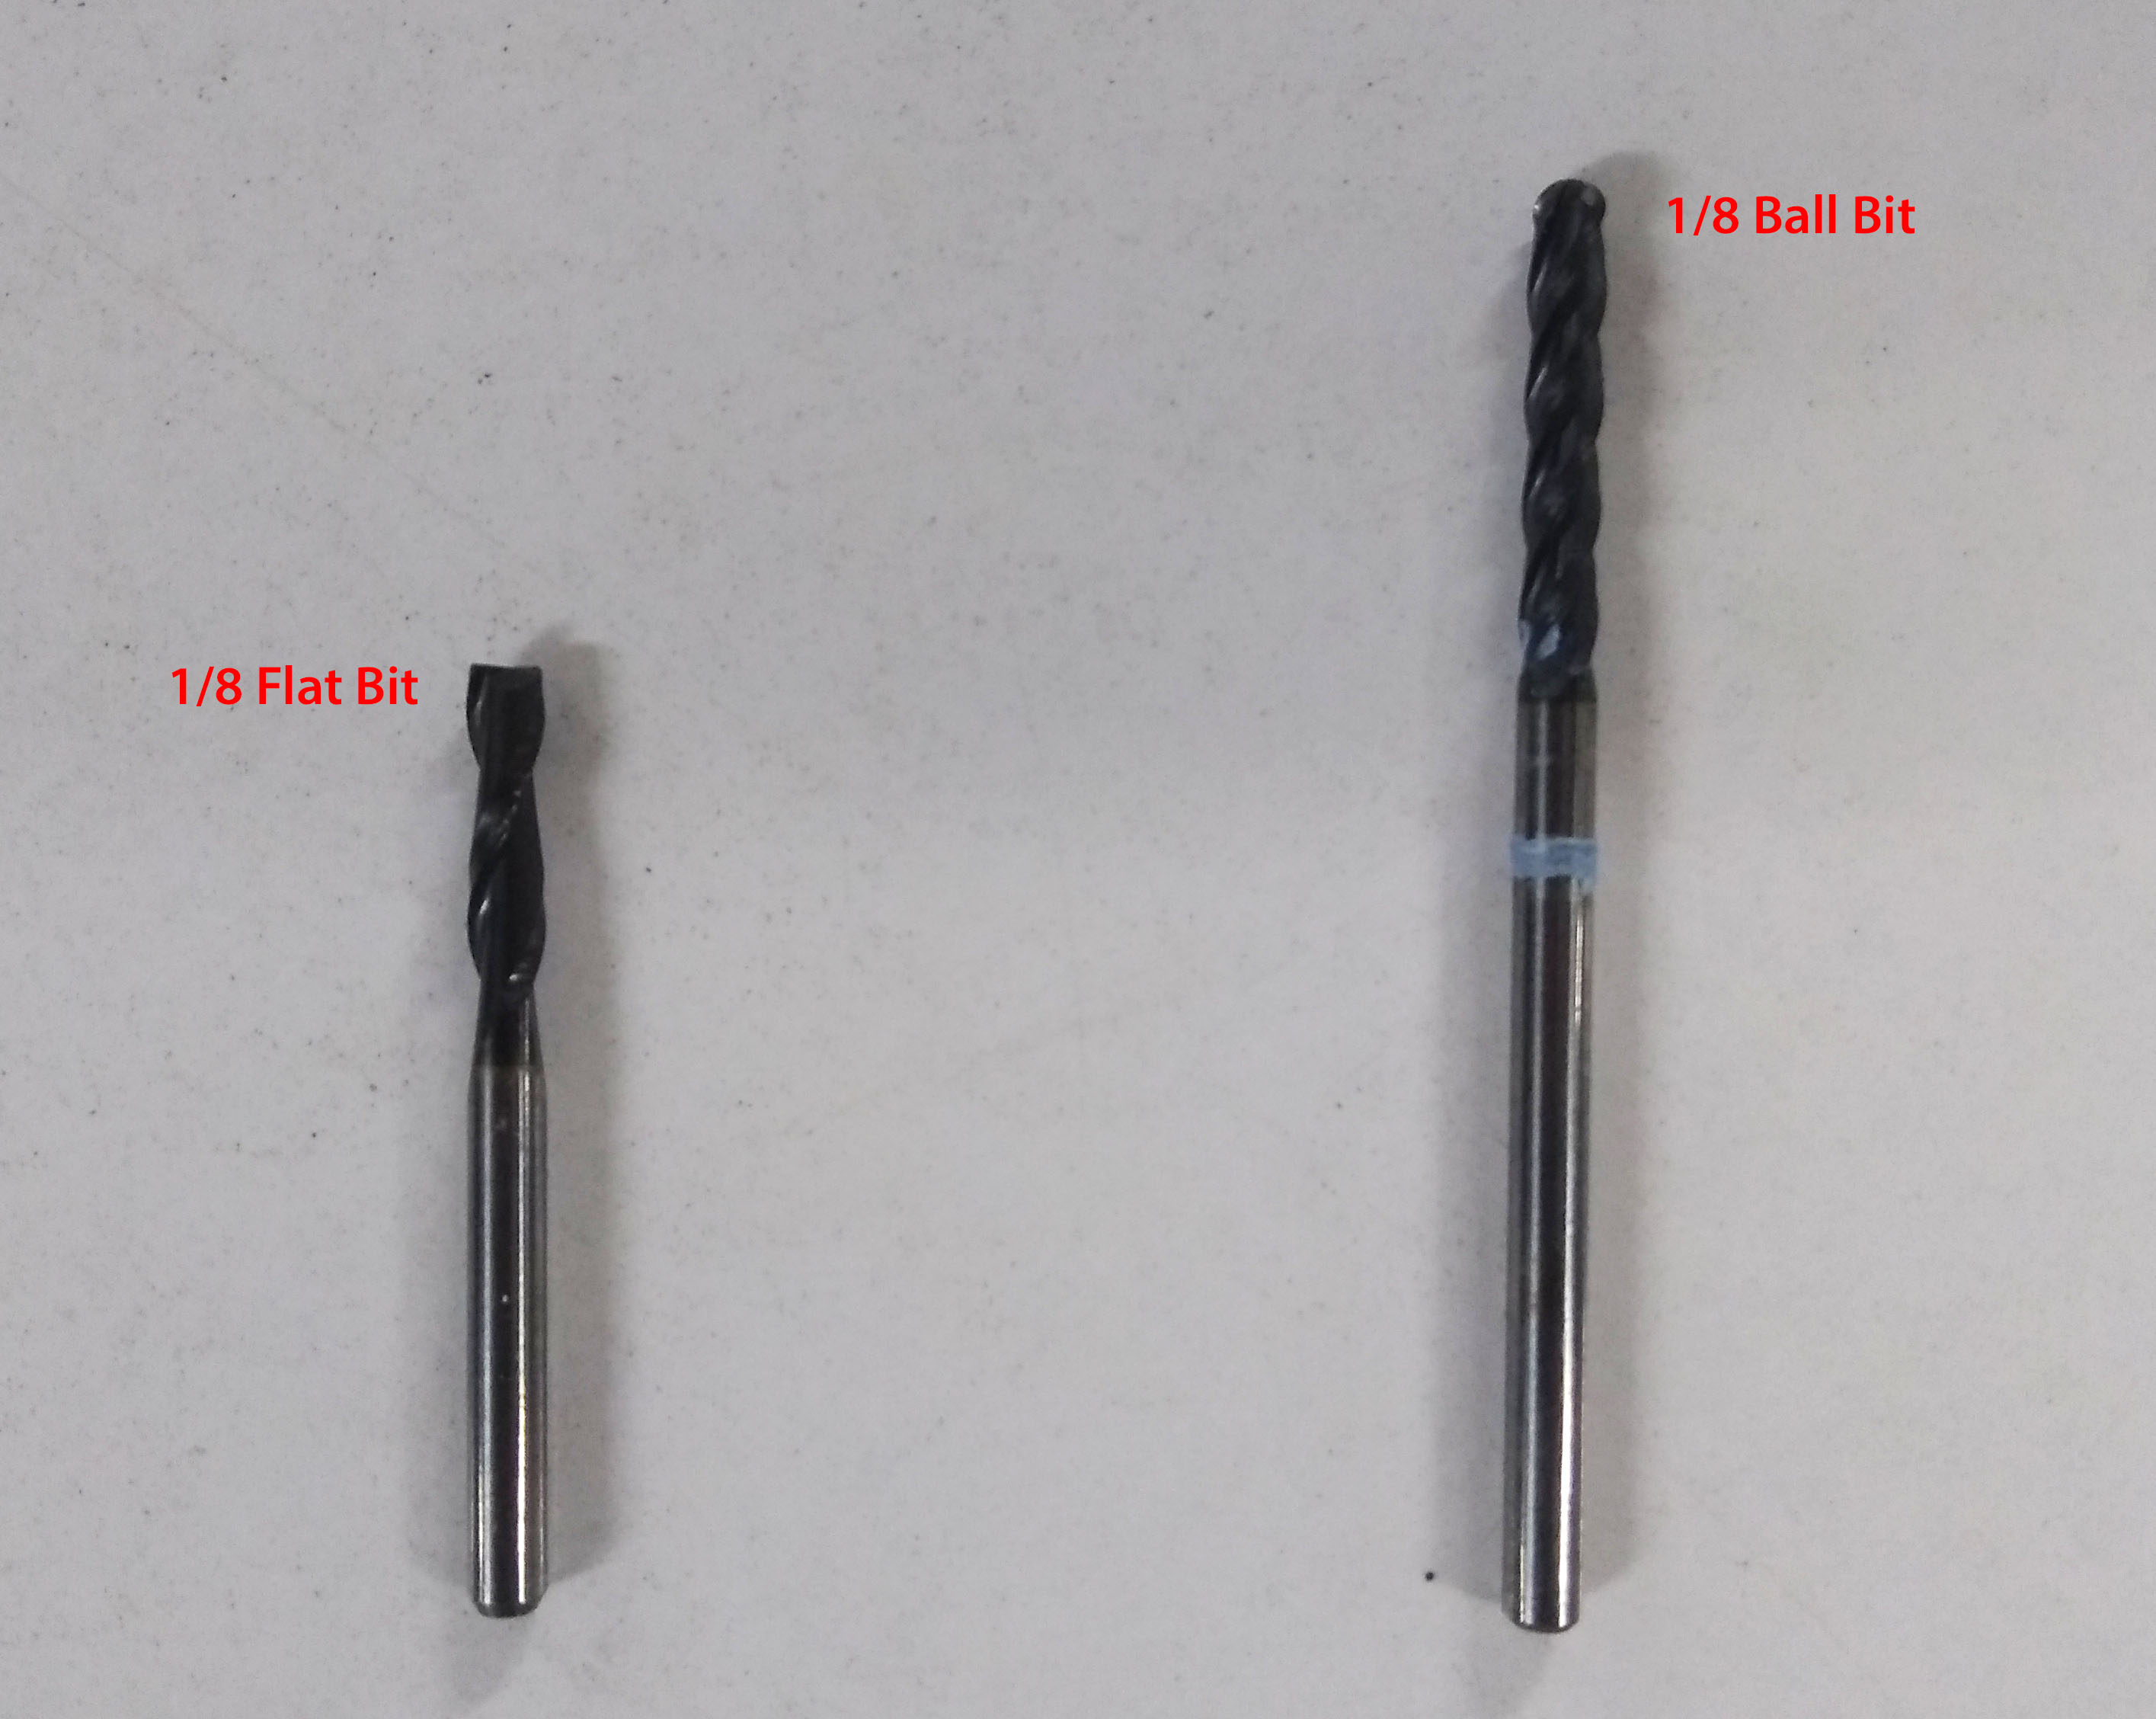
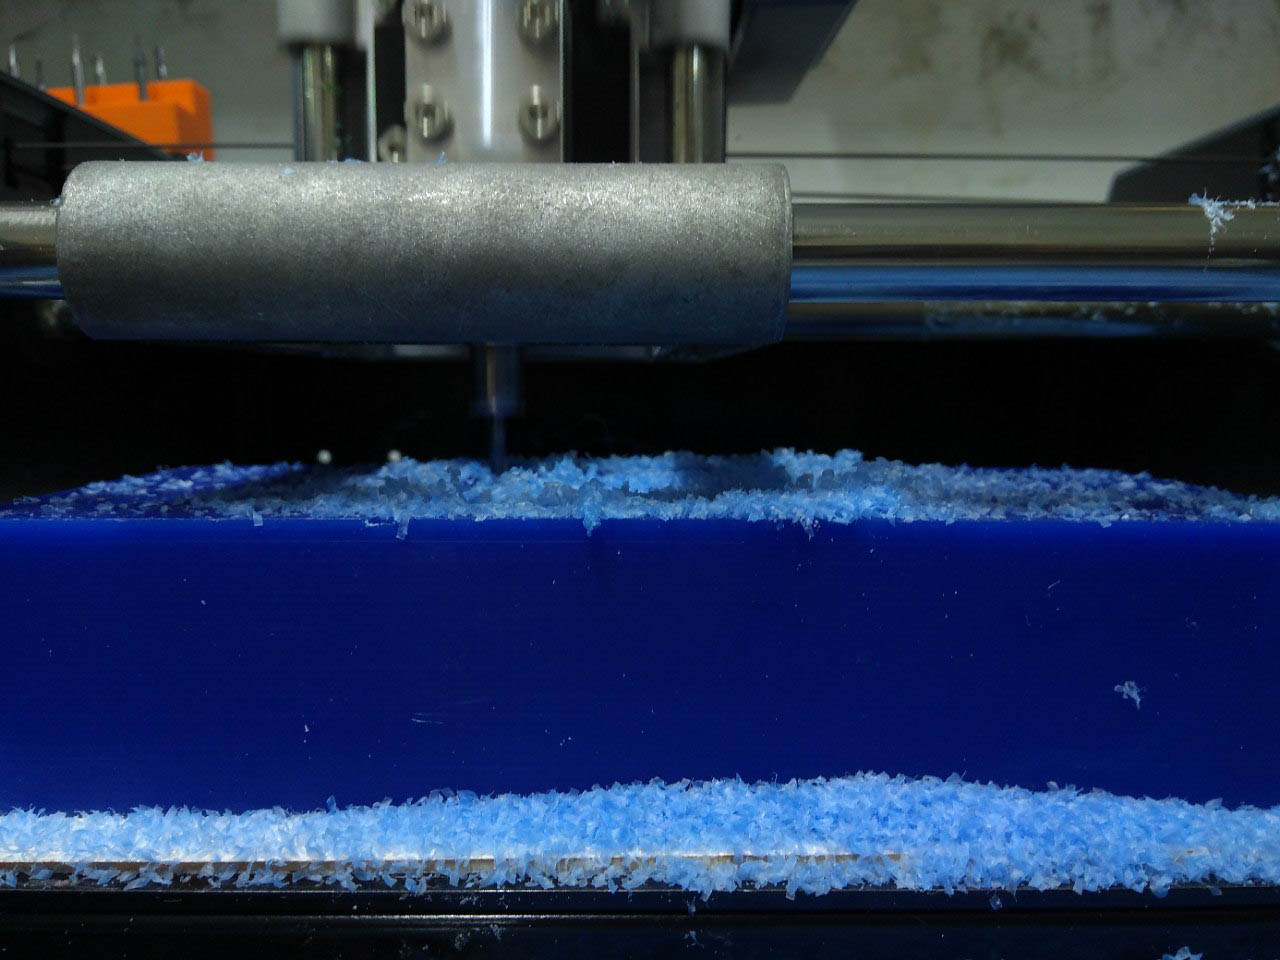
Modela milling is also capable od doing milling 3D design on materials like wax and wood. My design is small in size. so i decided to use the Modela milling machine to millout mi mold design. I used a WaX block as the material to make the mold. I used a 1/8 Flat end milling machine to make rough mill and then used a 1/8 Ball end milling bit to make a finishing mill. The process is almost same as we do for milling PCB. but in software side we shoul consider some prperties that i will mension later.
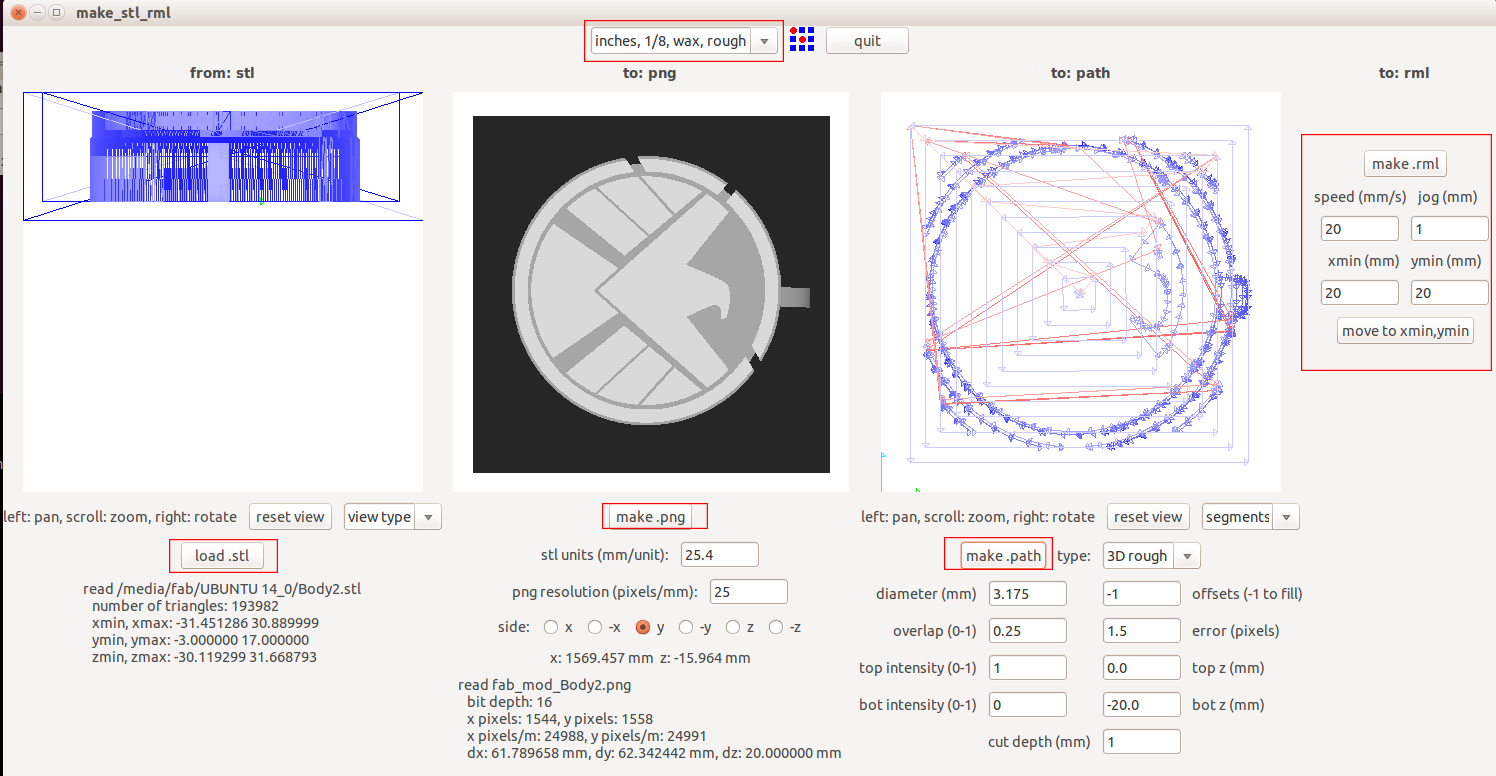
Fab Modules Setting and Properties
No open fab modules.select input file as STL and select Roland MDX 20 as the machine. The click the OK button. In the next window select the 1/8 rough bit then load the STL file that you needed to mill. Then click on the Make path button. Set the dezired X and Y position. Then click on Make RML button and click SEND IT button. A new window will show up click Bigin milling button to start the milling process.
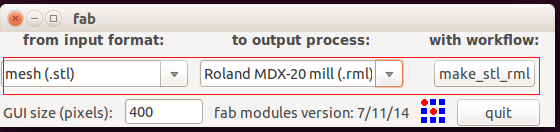
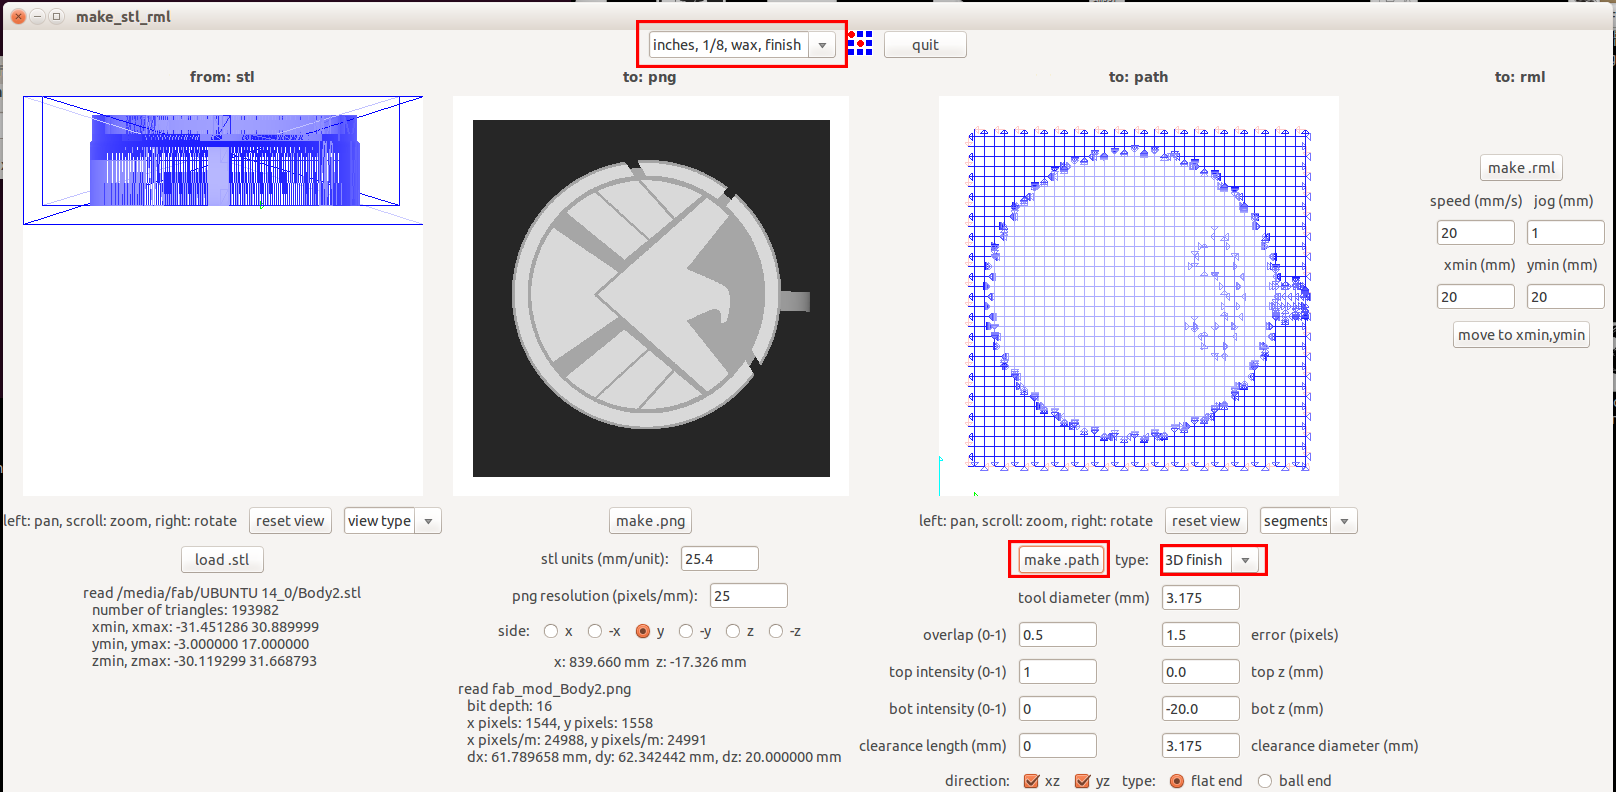
After the rough milling process completed. I just changed the rough milling to finish milling and set the bit to 1/8 finish mill in fab modules. then continued the milling processs once again.
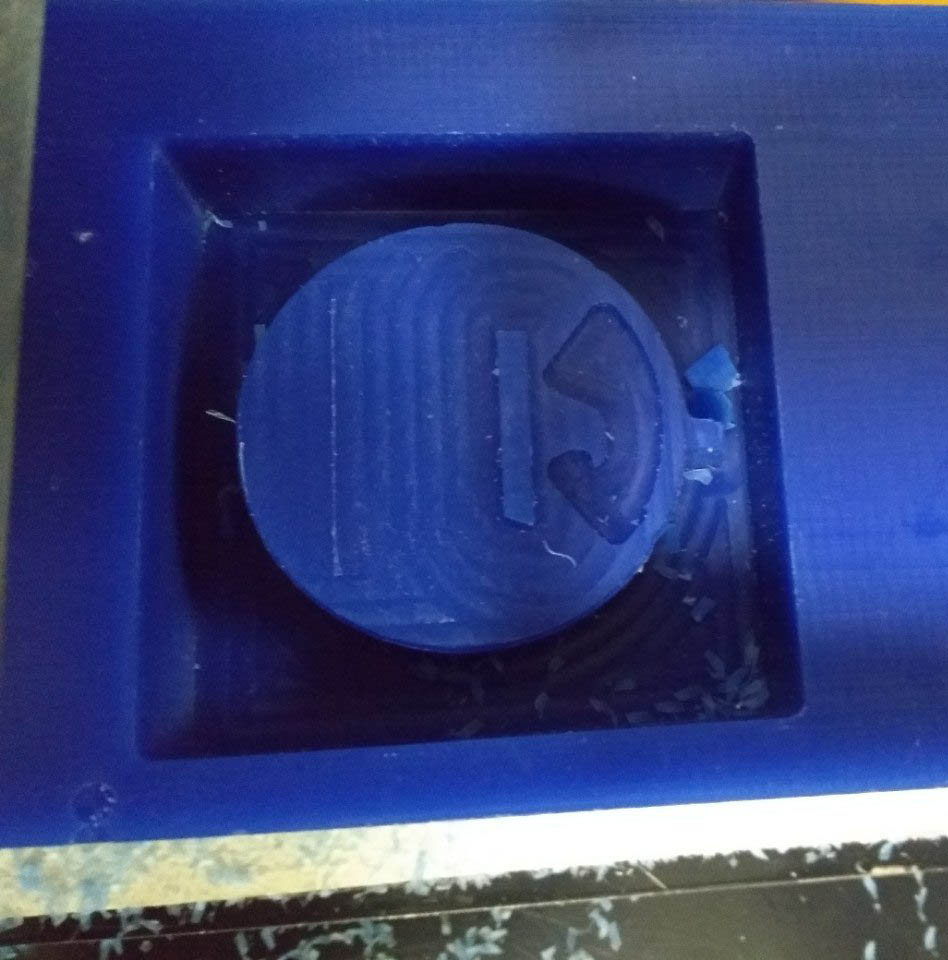
The Design doesnt milled out correctly : Reason and my mistake !
The mistake that i made is, i need to use the 1/8 ball end bit for finish milling. But i wrongly used the same bit(1/8 flat bit) with 1/8 flat finish cut setting. But this is not affect much in the milling process said by one of my instructor. The main problem for doesnt millout the design corectly is, my design is small in size(3.5cm diameter). So using the 1/8 milling bit some of the parts can't be millout. so the machine will skip that part. In my design there is small gaps in between the extruded SHIELD logo. its width smaller than the bit size. So, these will skip by the machine. So do have only one choice, scale up the design. So its not a good choice for me. technically it is a locket, it should me in smaller size. So the other choice is to 3D print the design and make a negative mold out of it. But it will take about 10 hours to 3D print. So i removed the Box and 3D printed the Locket design only. I can put the design in a platic box and make the mold out of it. I know This is not the proper way to make the molding but it is a try and i really need to make SHIELD locket.
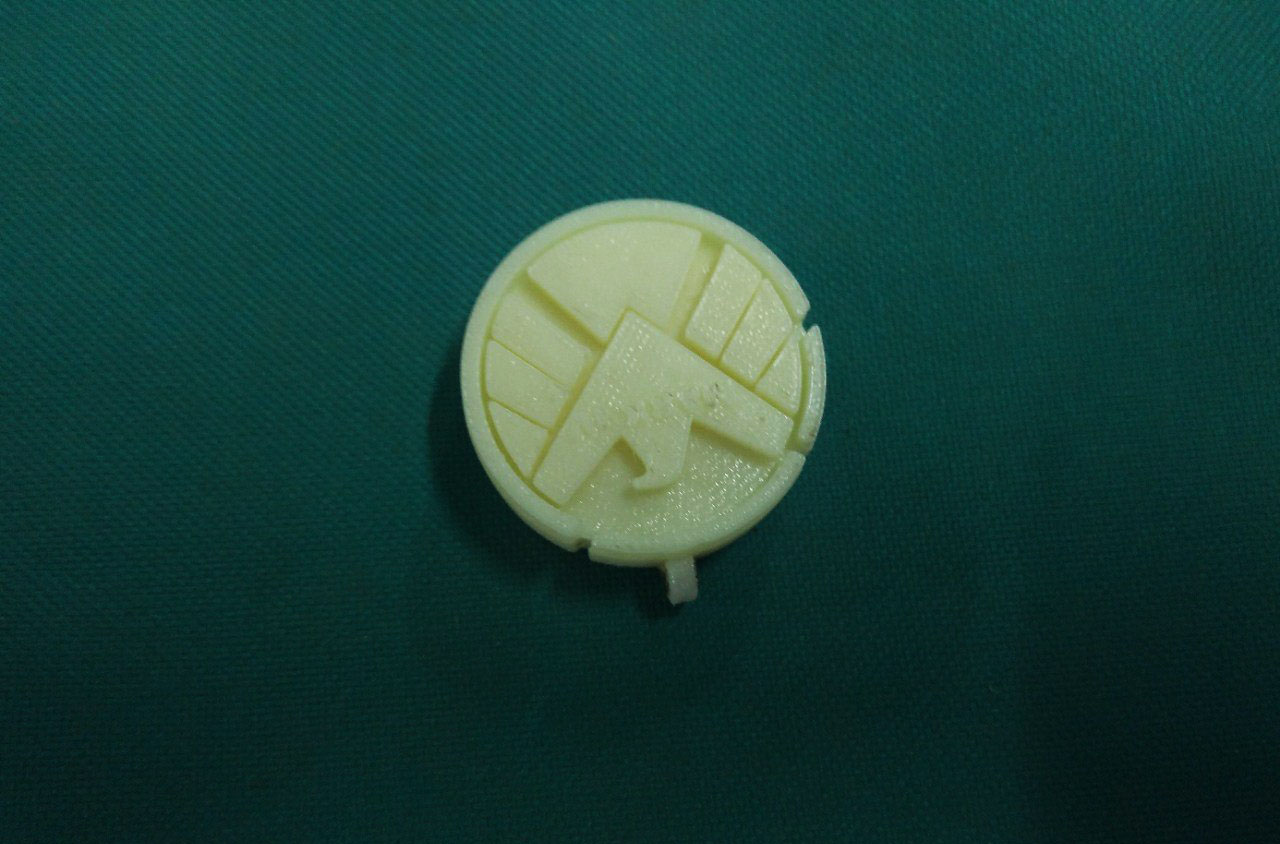
3D print the SHIELD locket and Making the mold.
I used Dimension 3D printer to 3D print the SHIELD locket. Here is the 3D printed SHIELD locket!
Now i need to make a negative mold out of it. So my question was, what material i need to choose for making the mold. I selected a Silocn rubber compound as the material for making the mold. I does not need to caste metals so, Silcon rubber compund it good enough to make resin caste. Iam using Smooth-ON's Mold max 60 silcon rubber mold compound. Mold Ma 60 is a Shore 60A tin catalyzed silicone rubber formulated for applications requiring high heat resistance (up to 560°F/294°C). It features a low mixed viscosity and cured rubber exhibits very low linear shrinkage. Parts A & B are mixed 100A & 3B by weight. Pot life is 40 minutes and cure time is 24 hours. Applications include making foundry patterns, flat pattern reproductions and casting low-melt metal alloys such as tin and pewter. Learn more
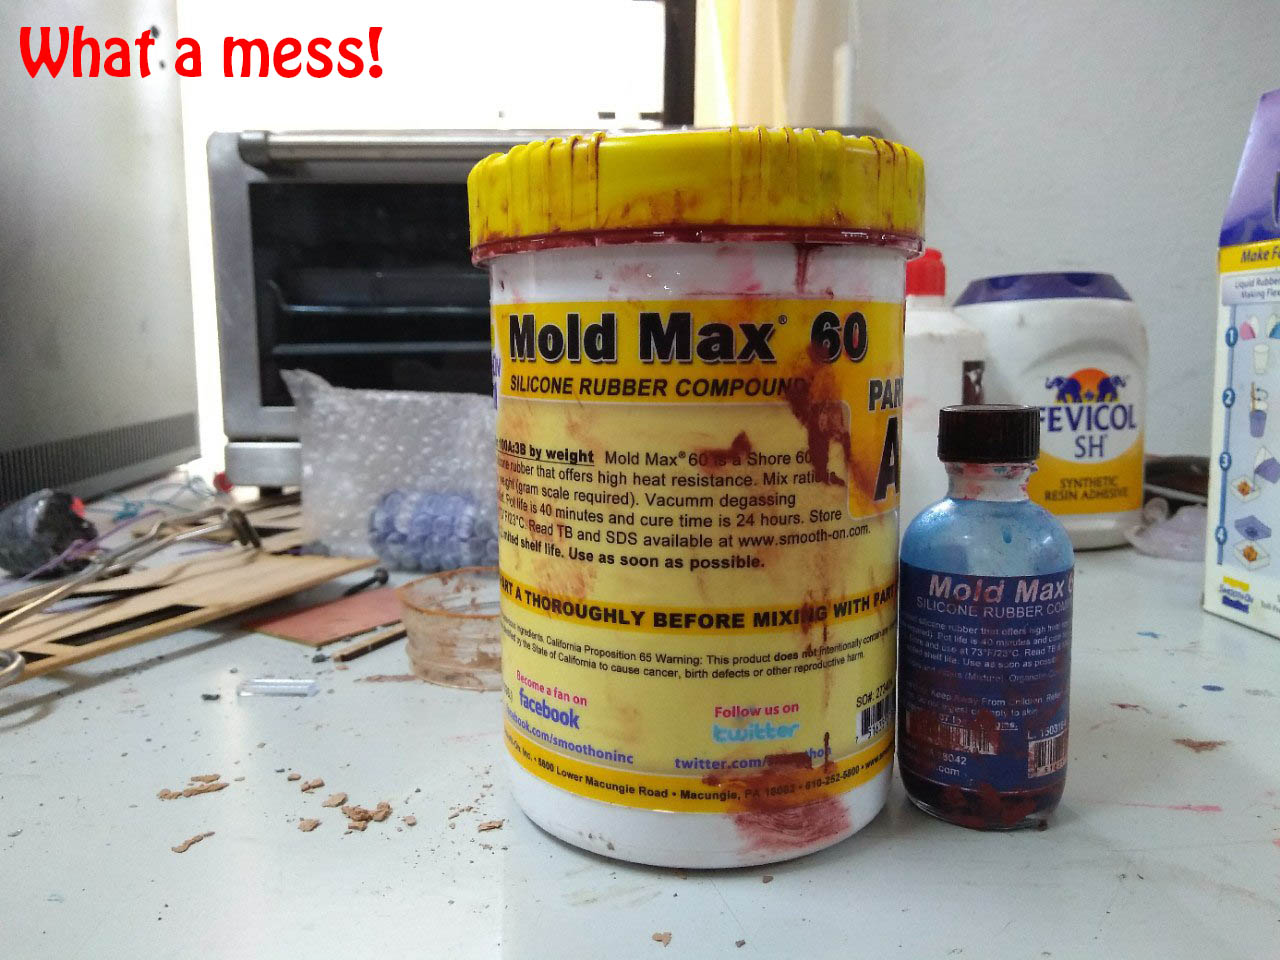
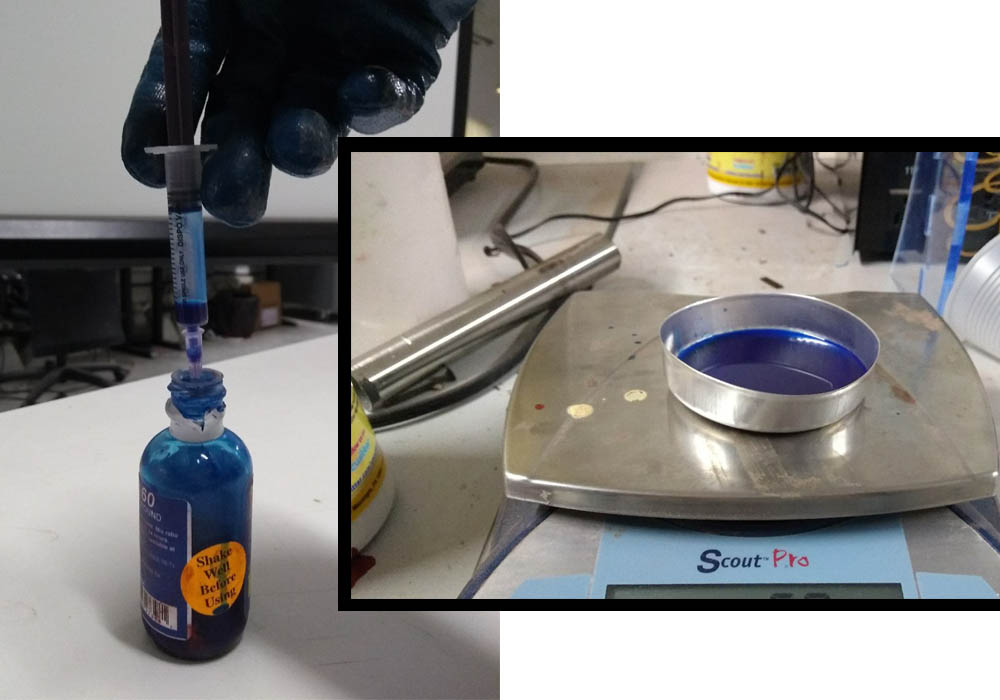
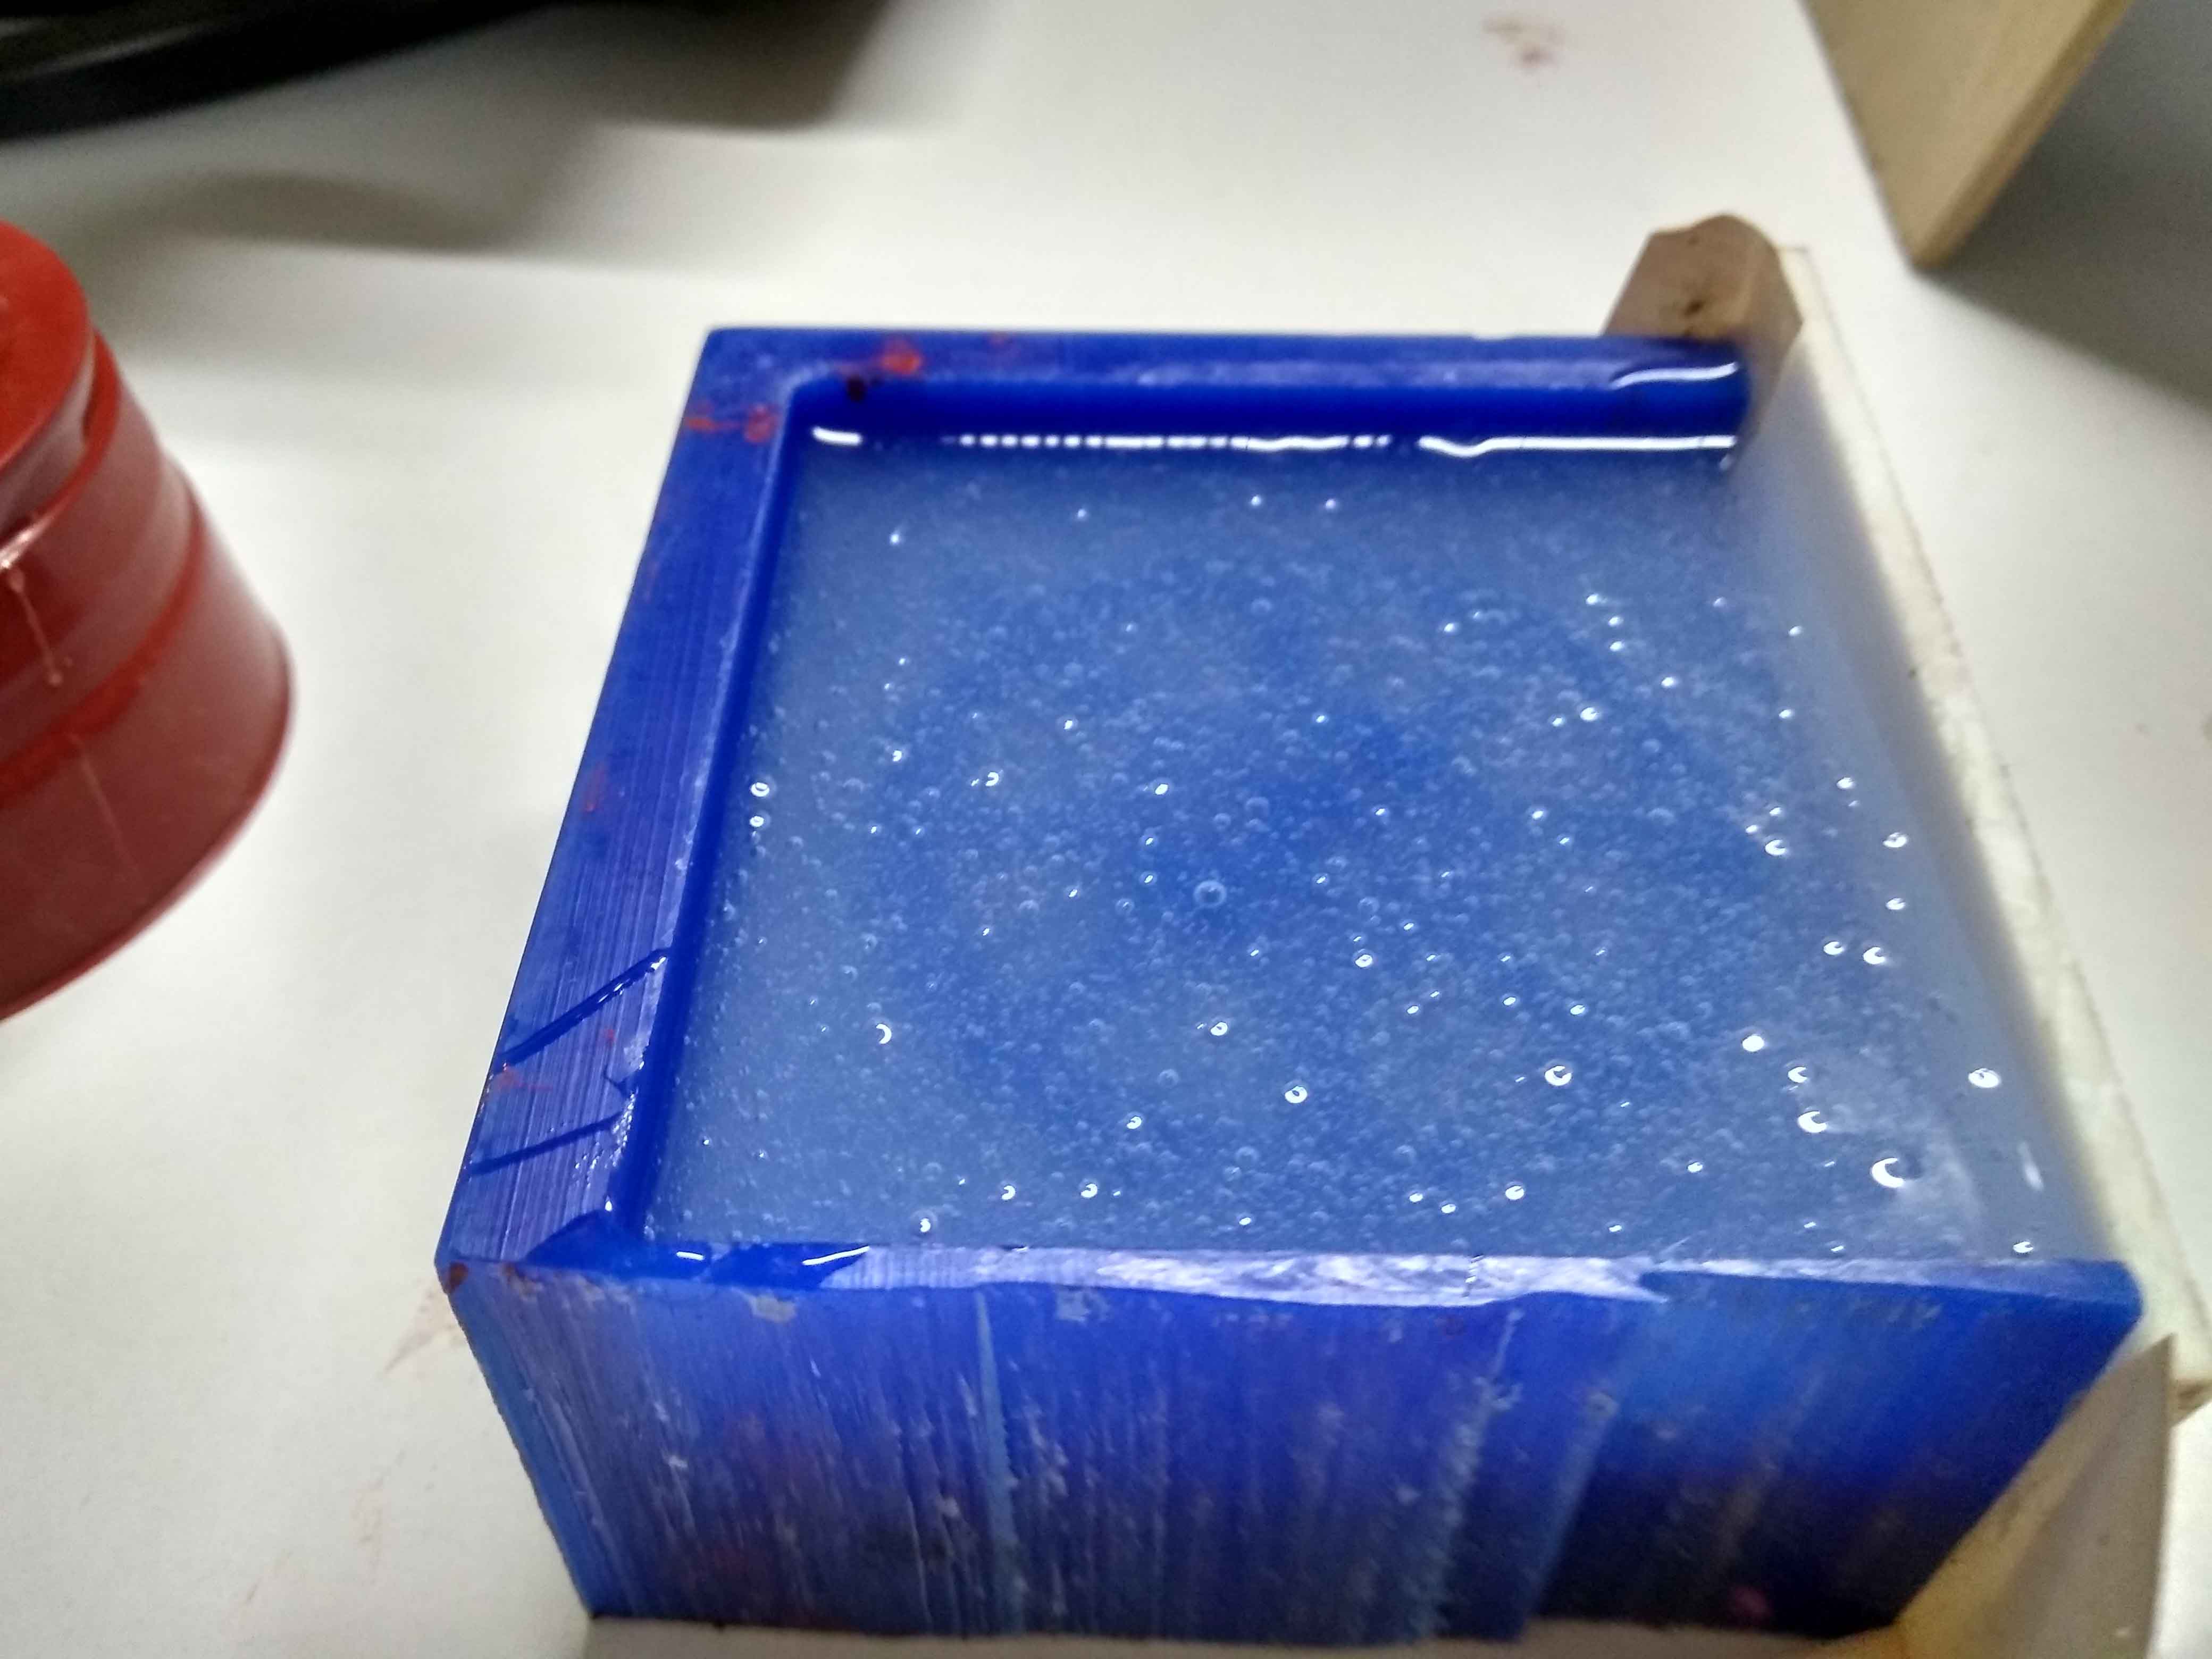
The silicon rubber compound does have PARTA & PARTB. The documentations says that i need to mix both PARTA and PARTB in a 100 : 3 ratio. So i took 100 gram of PARTA aka the Silicon rubber compound and 3 gram of PARTB aka developer. i used a syringe to take the PARTB accurately because i need a little of it. then mix them well for about 8 to 10 minutes.The i placed the 3D printed part in a plastic glass using a double side tape andslowly pour the mix in to glass. Also take care of avoiding forming bubbles. After that i just continously shaked the glass to fill them in the gaps and remove bubbles. The cure time for the Silcon rubber is 24 Hours. So, i need to wait a long time.

Ok, Now i need wait a long time to cure the mold. The mold cure time about to 24 Hours. Mean time, i wan't to make a small circuit board that will will turn on a LED in dark. This is for placing the circuit board in the caste. The locket will much more interactive and fun through this way.
Making The Circuit Board
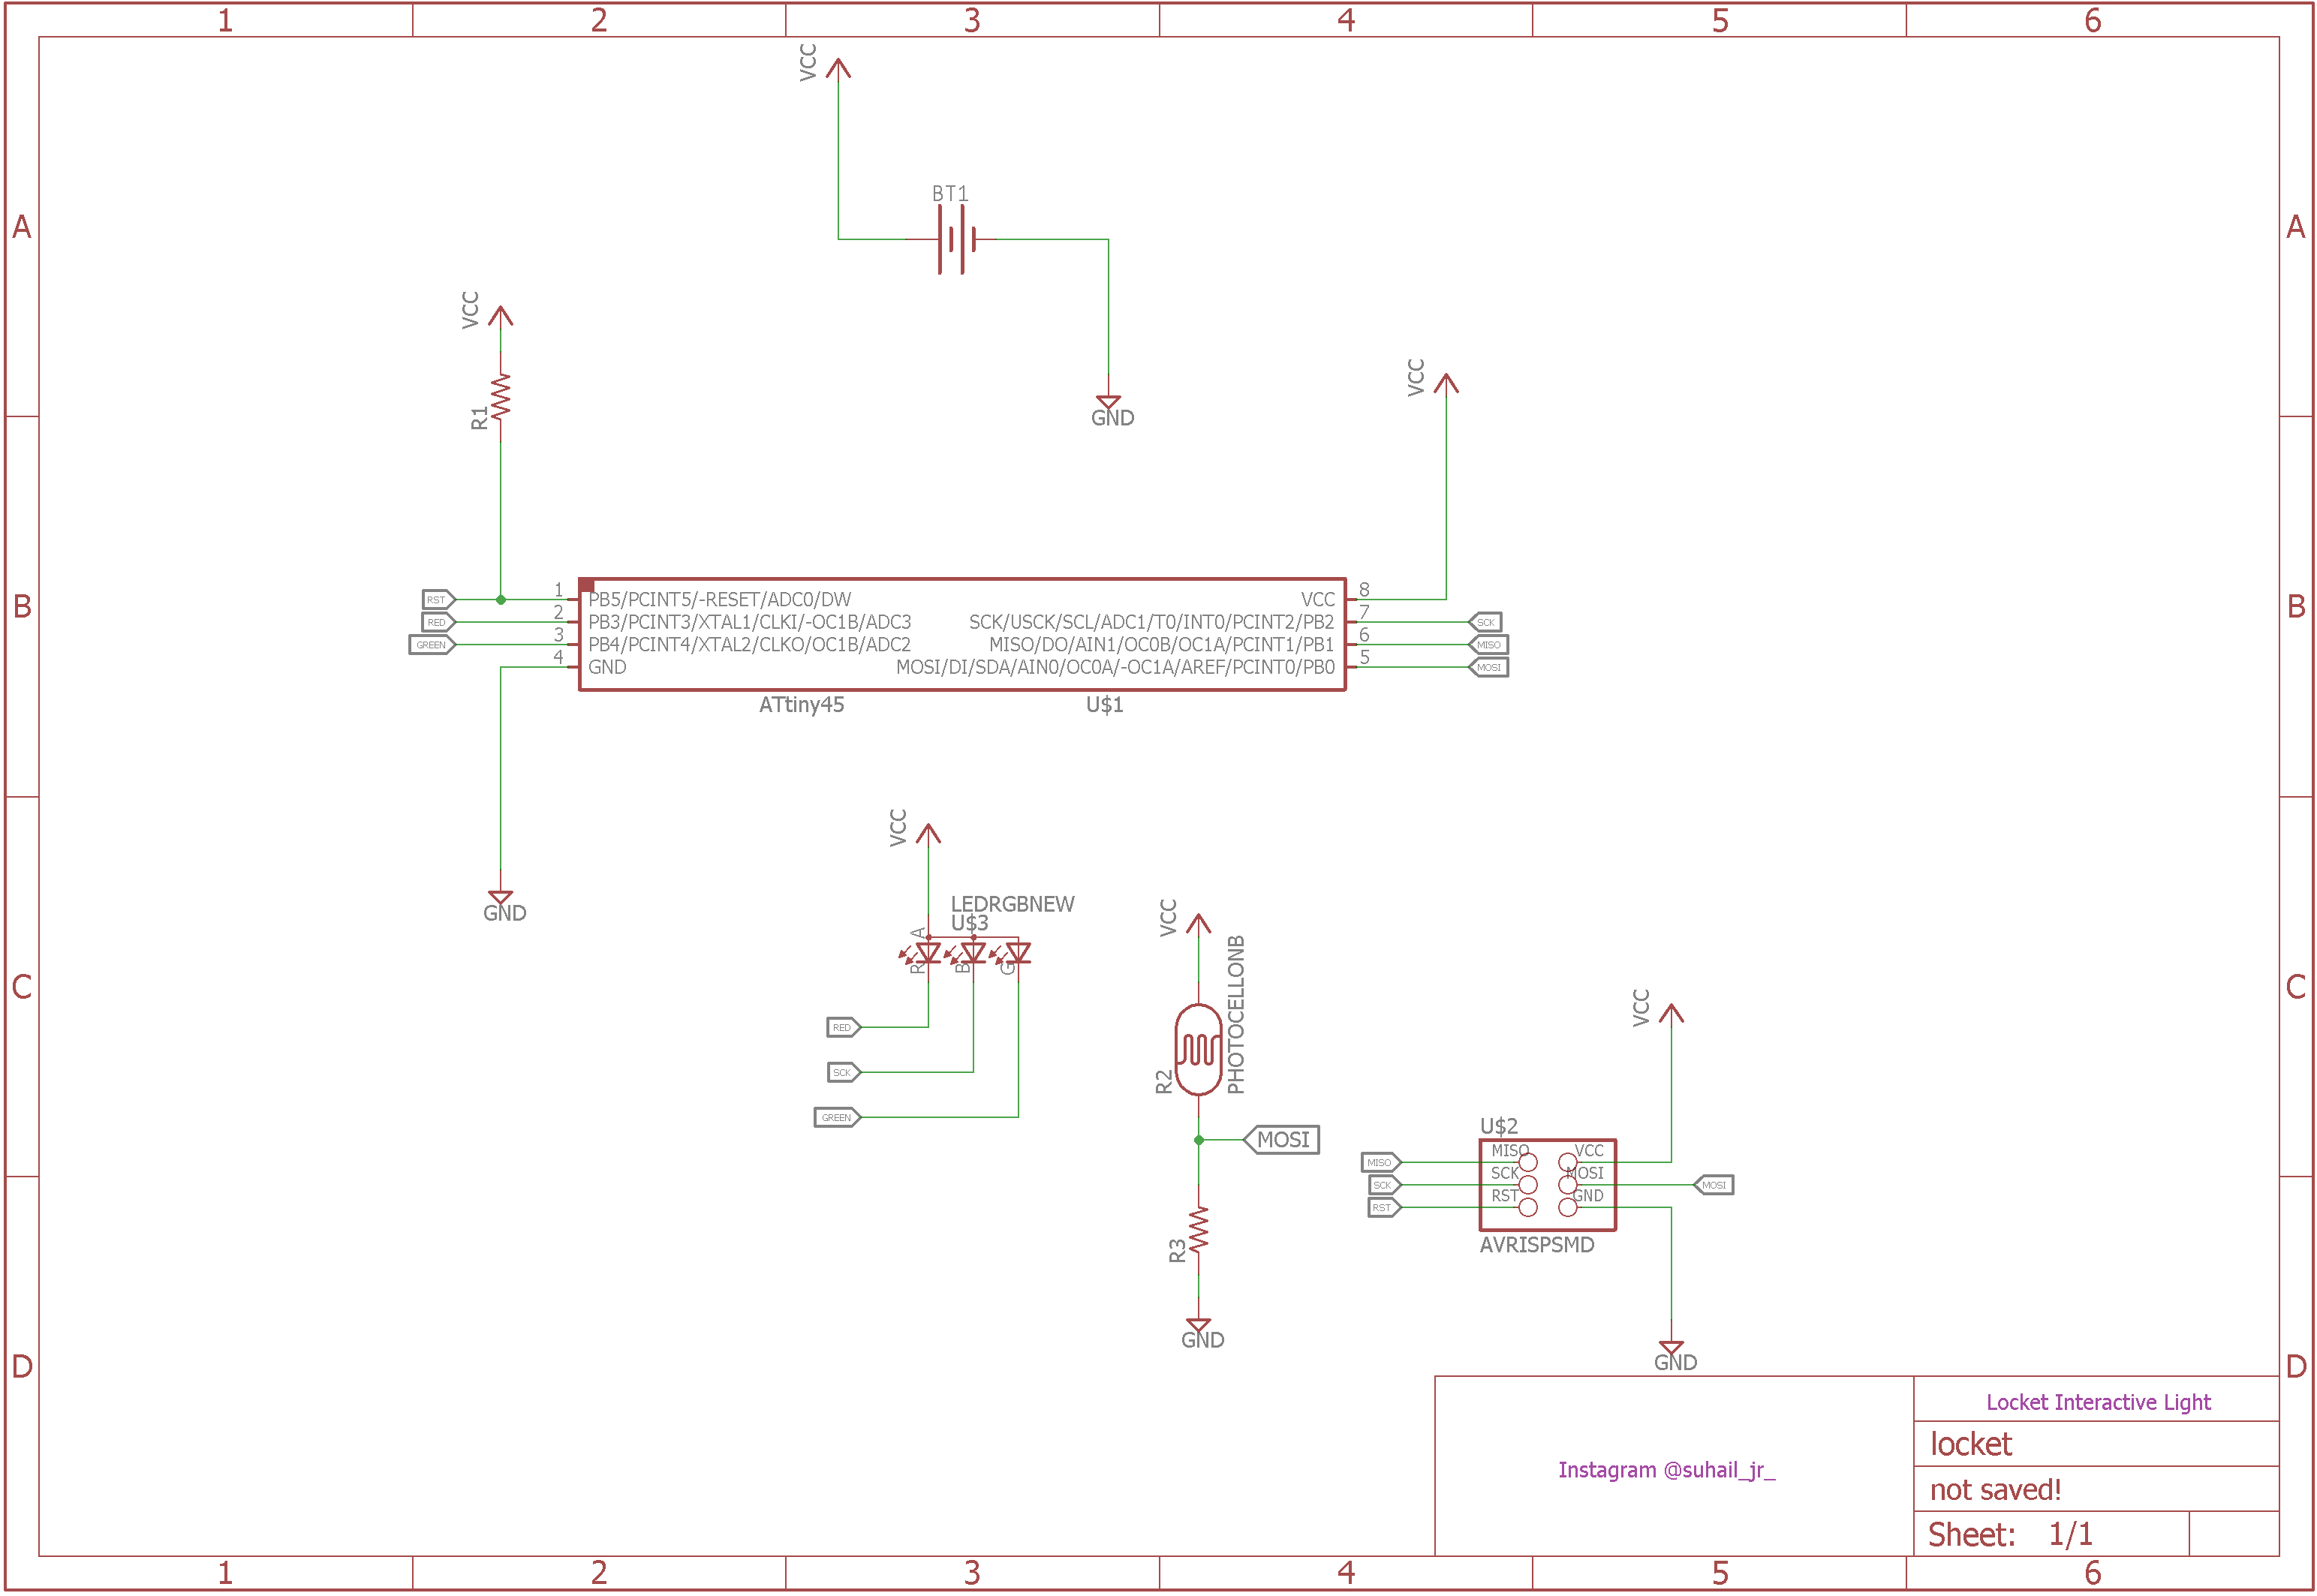
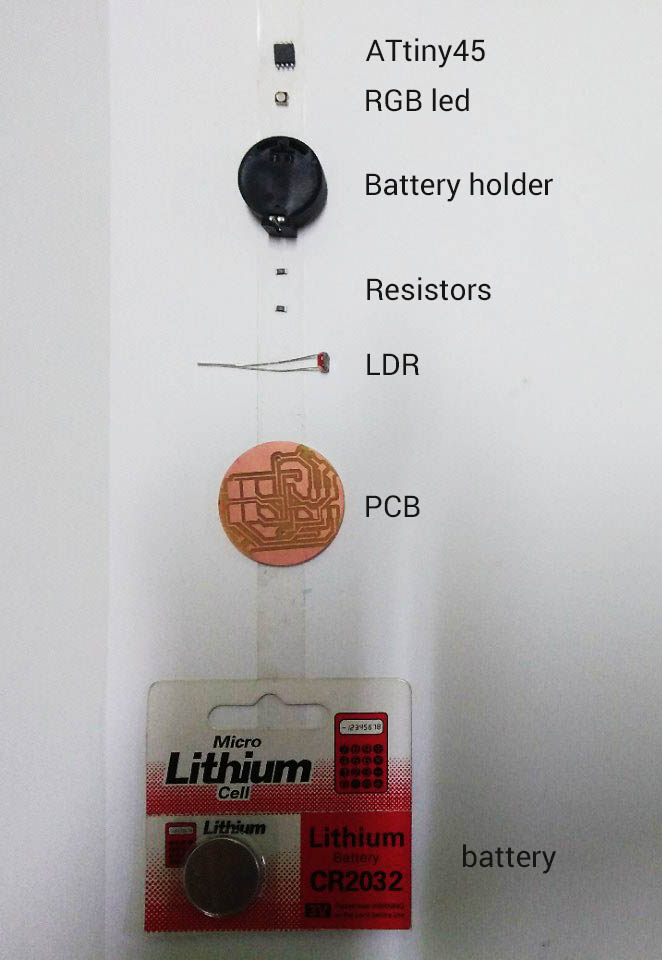
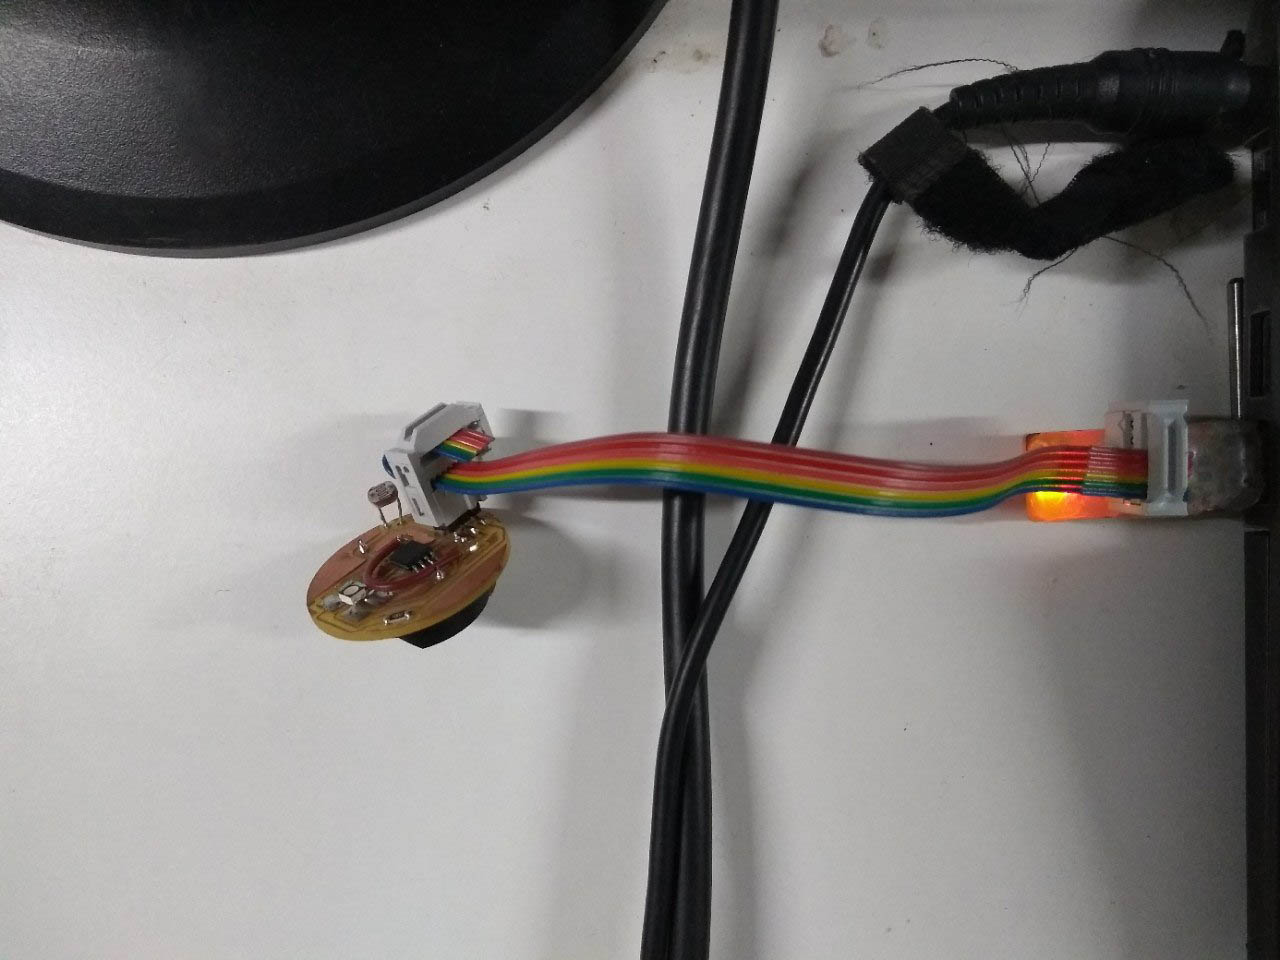
I previously said that i need to make a simple circuit that turn ON a LED in Dark or while i place my hand on the locket. So i started to build a circuit. I used a Attiny45 microcontroller, and avoid external clock and used the internal clock. I used a RGB led to get a fire color( a mix of RED and Green). And A LDR for sensing the darkness. I used a 3volt coin cell battery for powering the circuit. The BLUE pin of the RGB led is not using. So, i conected the Blue pin to the SCK pin of the Attiny45. So, when the board is in programming, the RGB led Turn ON a blue color( technically blink but barely see with naked eye). You can download the PCB designs and layouts in the source download area below of this page. The schematics of the circuit is given below.
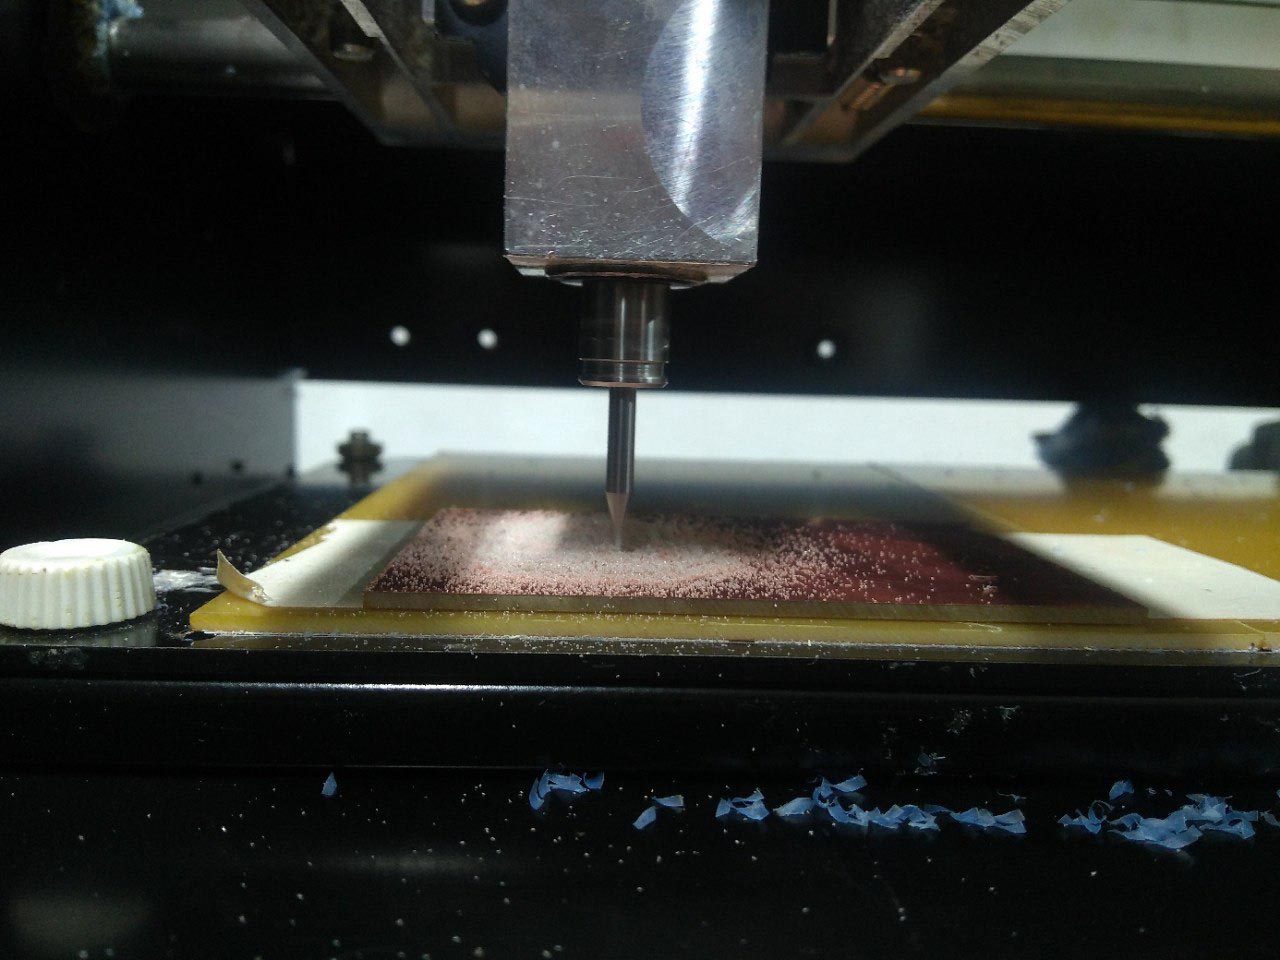
Then i milled the PCB using the PCB milling machine that we usually mill out a PCB in our previous weeks. I used a THT type Battery holder for the coin cell battery so i also need to do the Drills for the battery holder.
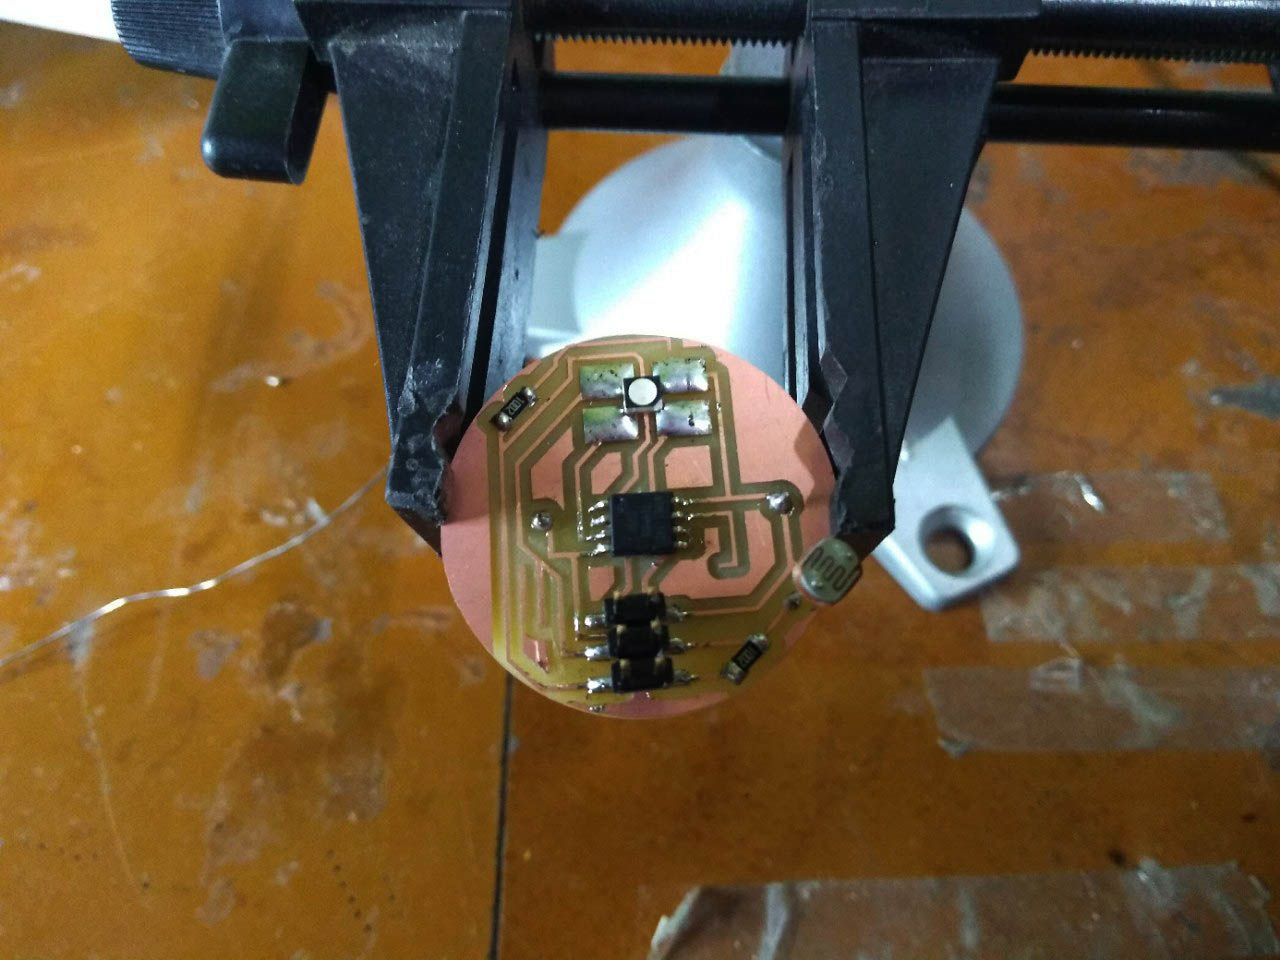
Now i need to solder the components on the PCB. First i soldered all the SMD parts. then the battery holder. finally the ISP headers for programming the PCB. I will remove the programming headers after programe the PCB so i did a bare solder for the ISP header.
Components List
- 1 x ATtiny45
- 1 x PLCC4 RGB LED
- 2 x 10k Resistors
- 1 x 3v CR2032 Battery
- 1 x 3v CR2032 Battery holder
- 1 x 3x2 header pin
- 1 x LDR
Programming the board
I wrote a code for turn the LED on while the LDR gets Darkness. The LED color is flame color. Its more with a flame color LED light. I wrote the code in arduino and uploaded the code into the the board Using the FABISP. Make sure you sleceted the Attiny45 and the internal 1mhz clock If you confused how to do, then reffer my week7 from Here.
Source Code
void setup() {
  pinMode(0,INPUT);
  pinMode(A3,OUTPUT);
  pinMode(A2,OUTPUT);
  pinMode(A1,OUTPUT);
 digitalWrite(A3,LOW);
    digitalWrite(A2,LOW);
    digitalWrite(A1,LOW);
}

void loop() {

  int ldrVal = digitalRead(0);

  if(ldrVal<1)
  {
    analogWrite(A3,0);
    analogWrite(A2,120);
    analogWrite(A1,255);
    delay(30);


  }
  else{
    analogWrite(A3,255);
    analogWrite(A2,255);
    analogWrite(A1,255);
  }
}
Back to molding!
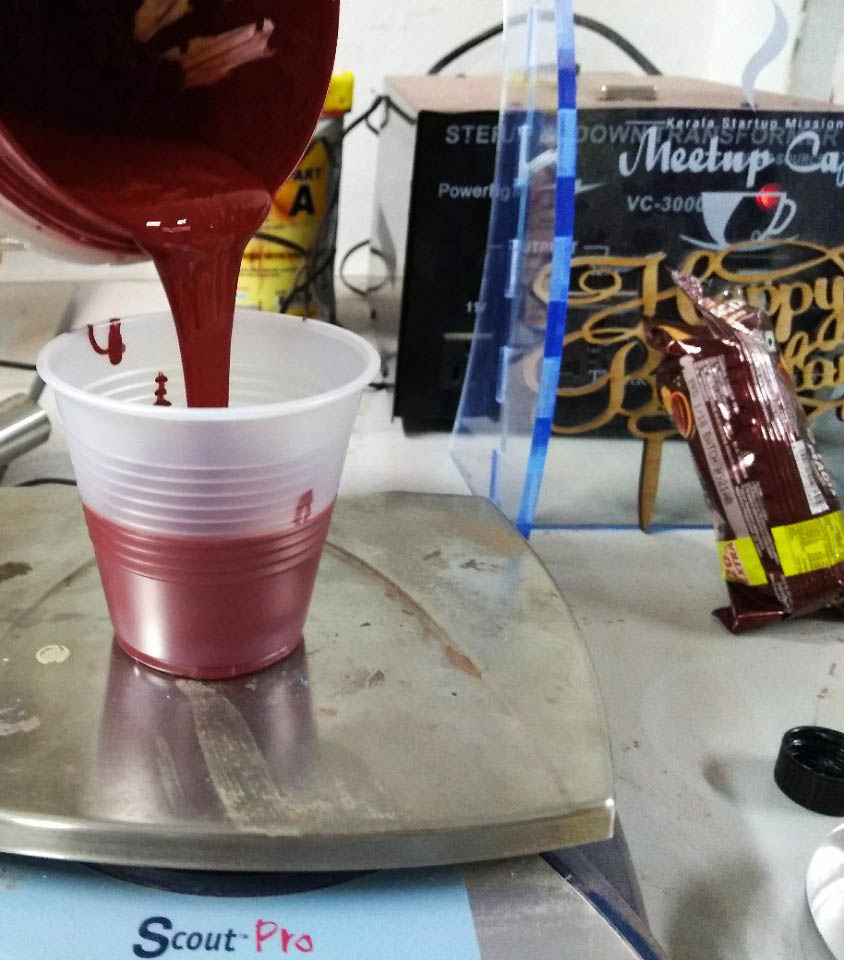
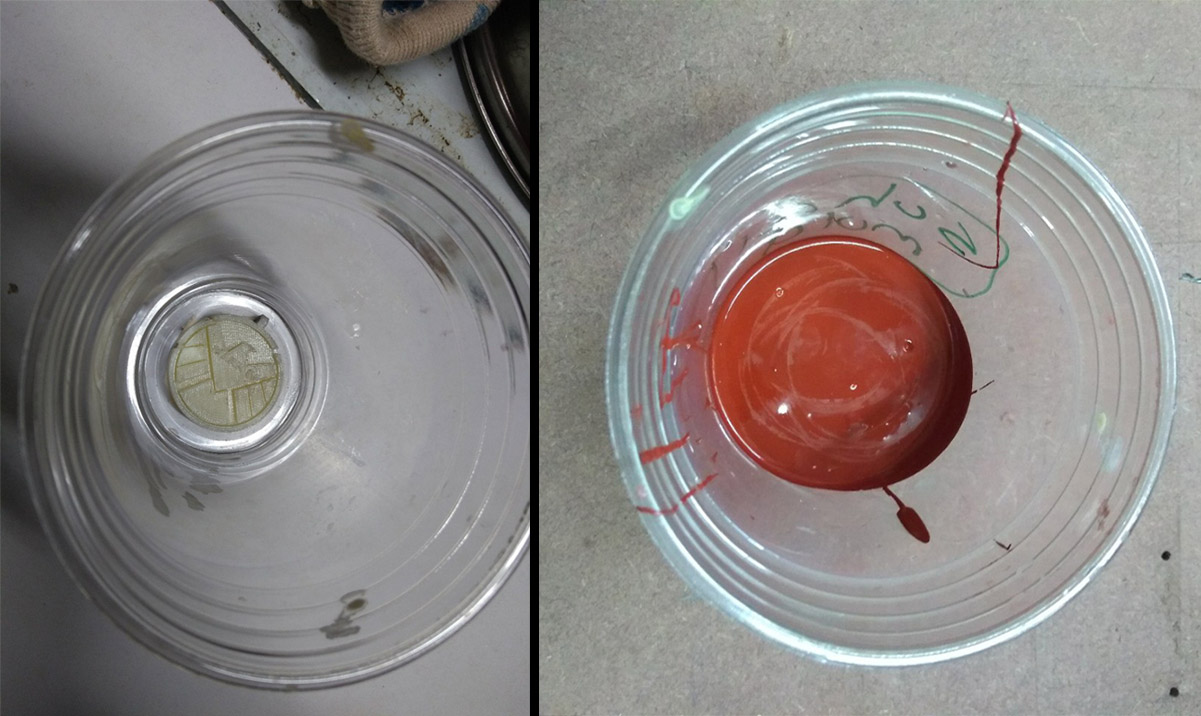
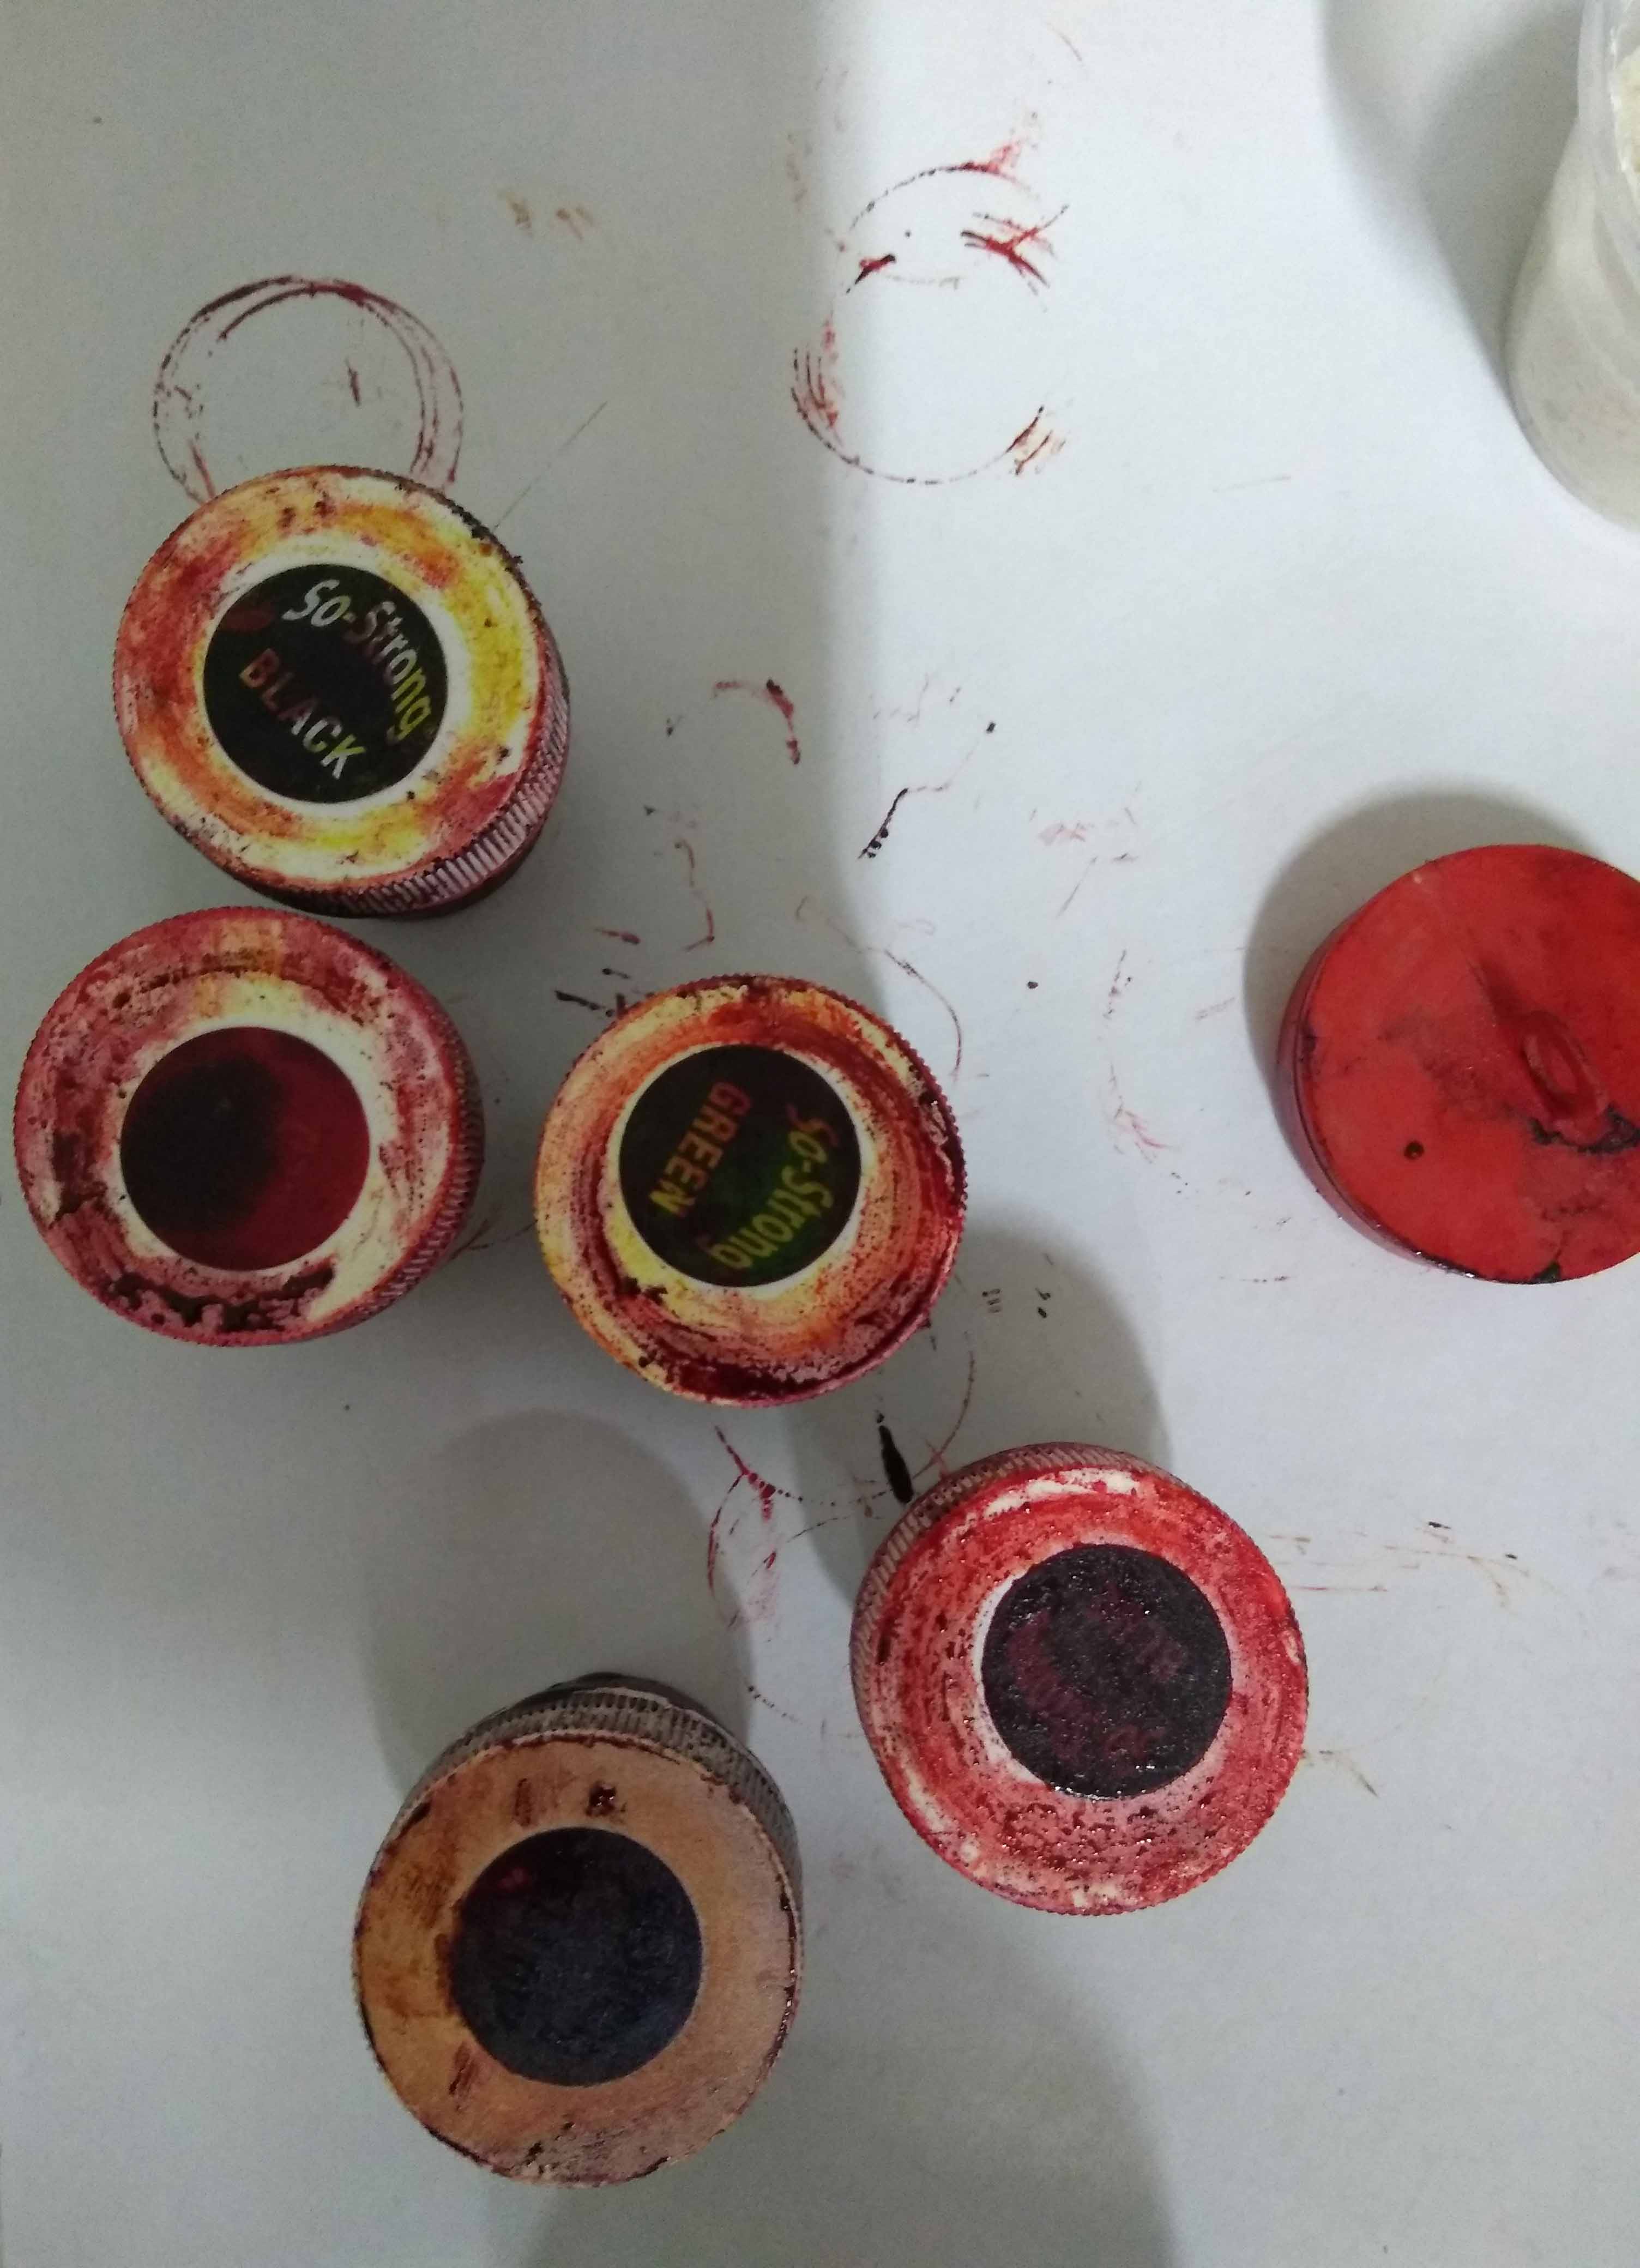
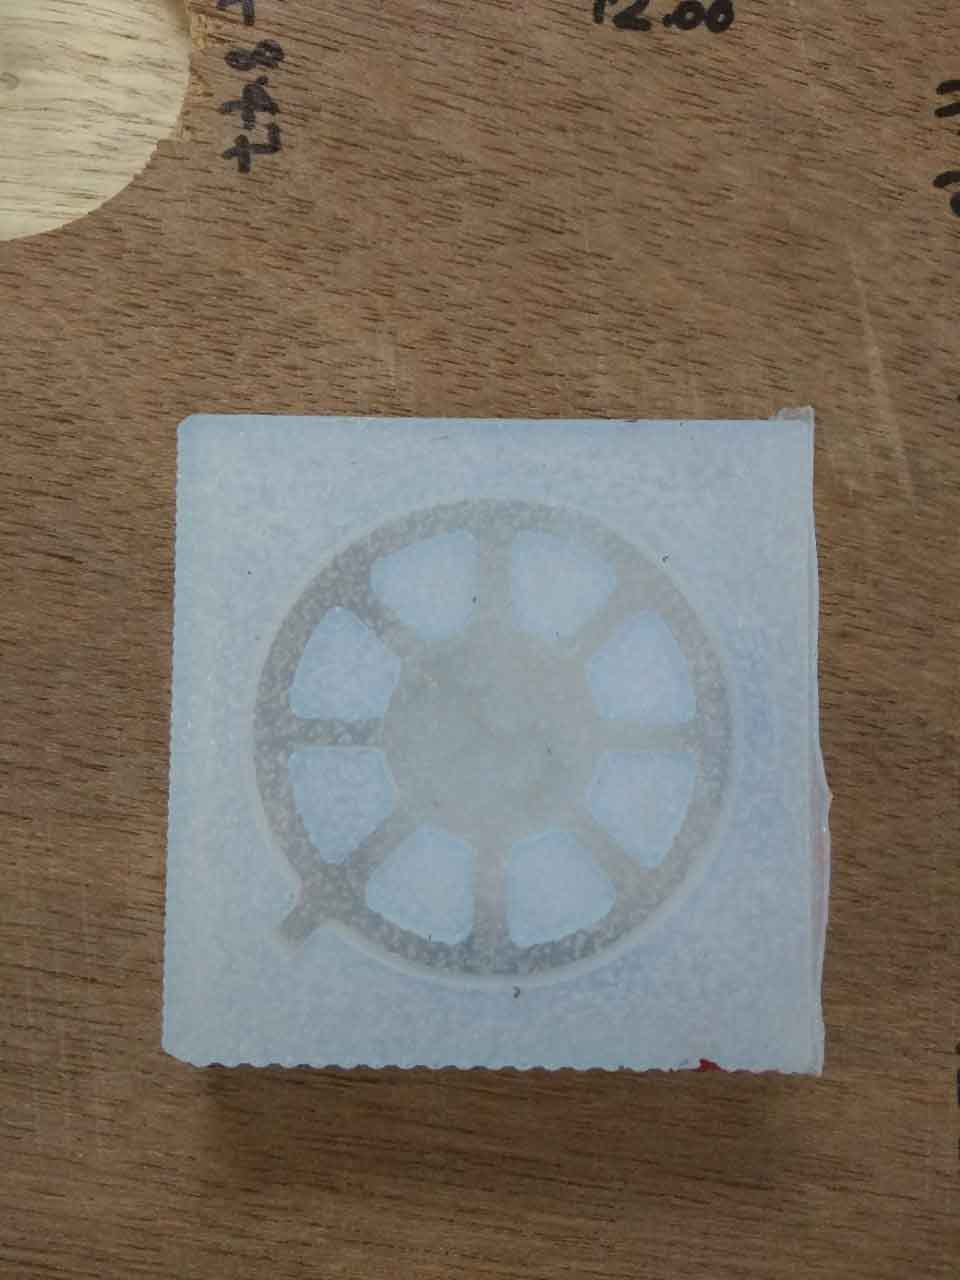
Now get back to molding, The mold has been cured now. Now i need to caste the material. I used resin for casting the mold.The Resin have PARTA & PARTB. I ration for mixing is 100 : 60 ratio. So, take a 100 gram of PARTA and 60gram of PARTB. I know this is too much for my casting. But the excess material will used to caste the shapes from other molds that previously made my mates. I mixed the Two parts. Then i need to add some color to the resin. I used 1 drope Green color pigment and 1 drope of yellow color pigment then pour the resin to the mold. After that i our a drop of the mixed color to the mold then mixed with a tooth pin. My expectation to make a cloud design inside the locket. The documentaion says it will only takes upto 24 minutes. But mine takes about 5 to 6 hours. I dont know what the problem was. After it cured a half, i slowly placed the PCB into the resin. After curing the Resin i take out the Casted resin out of the mold. It works perfect.
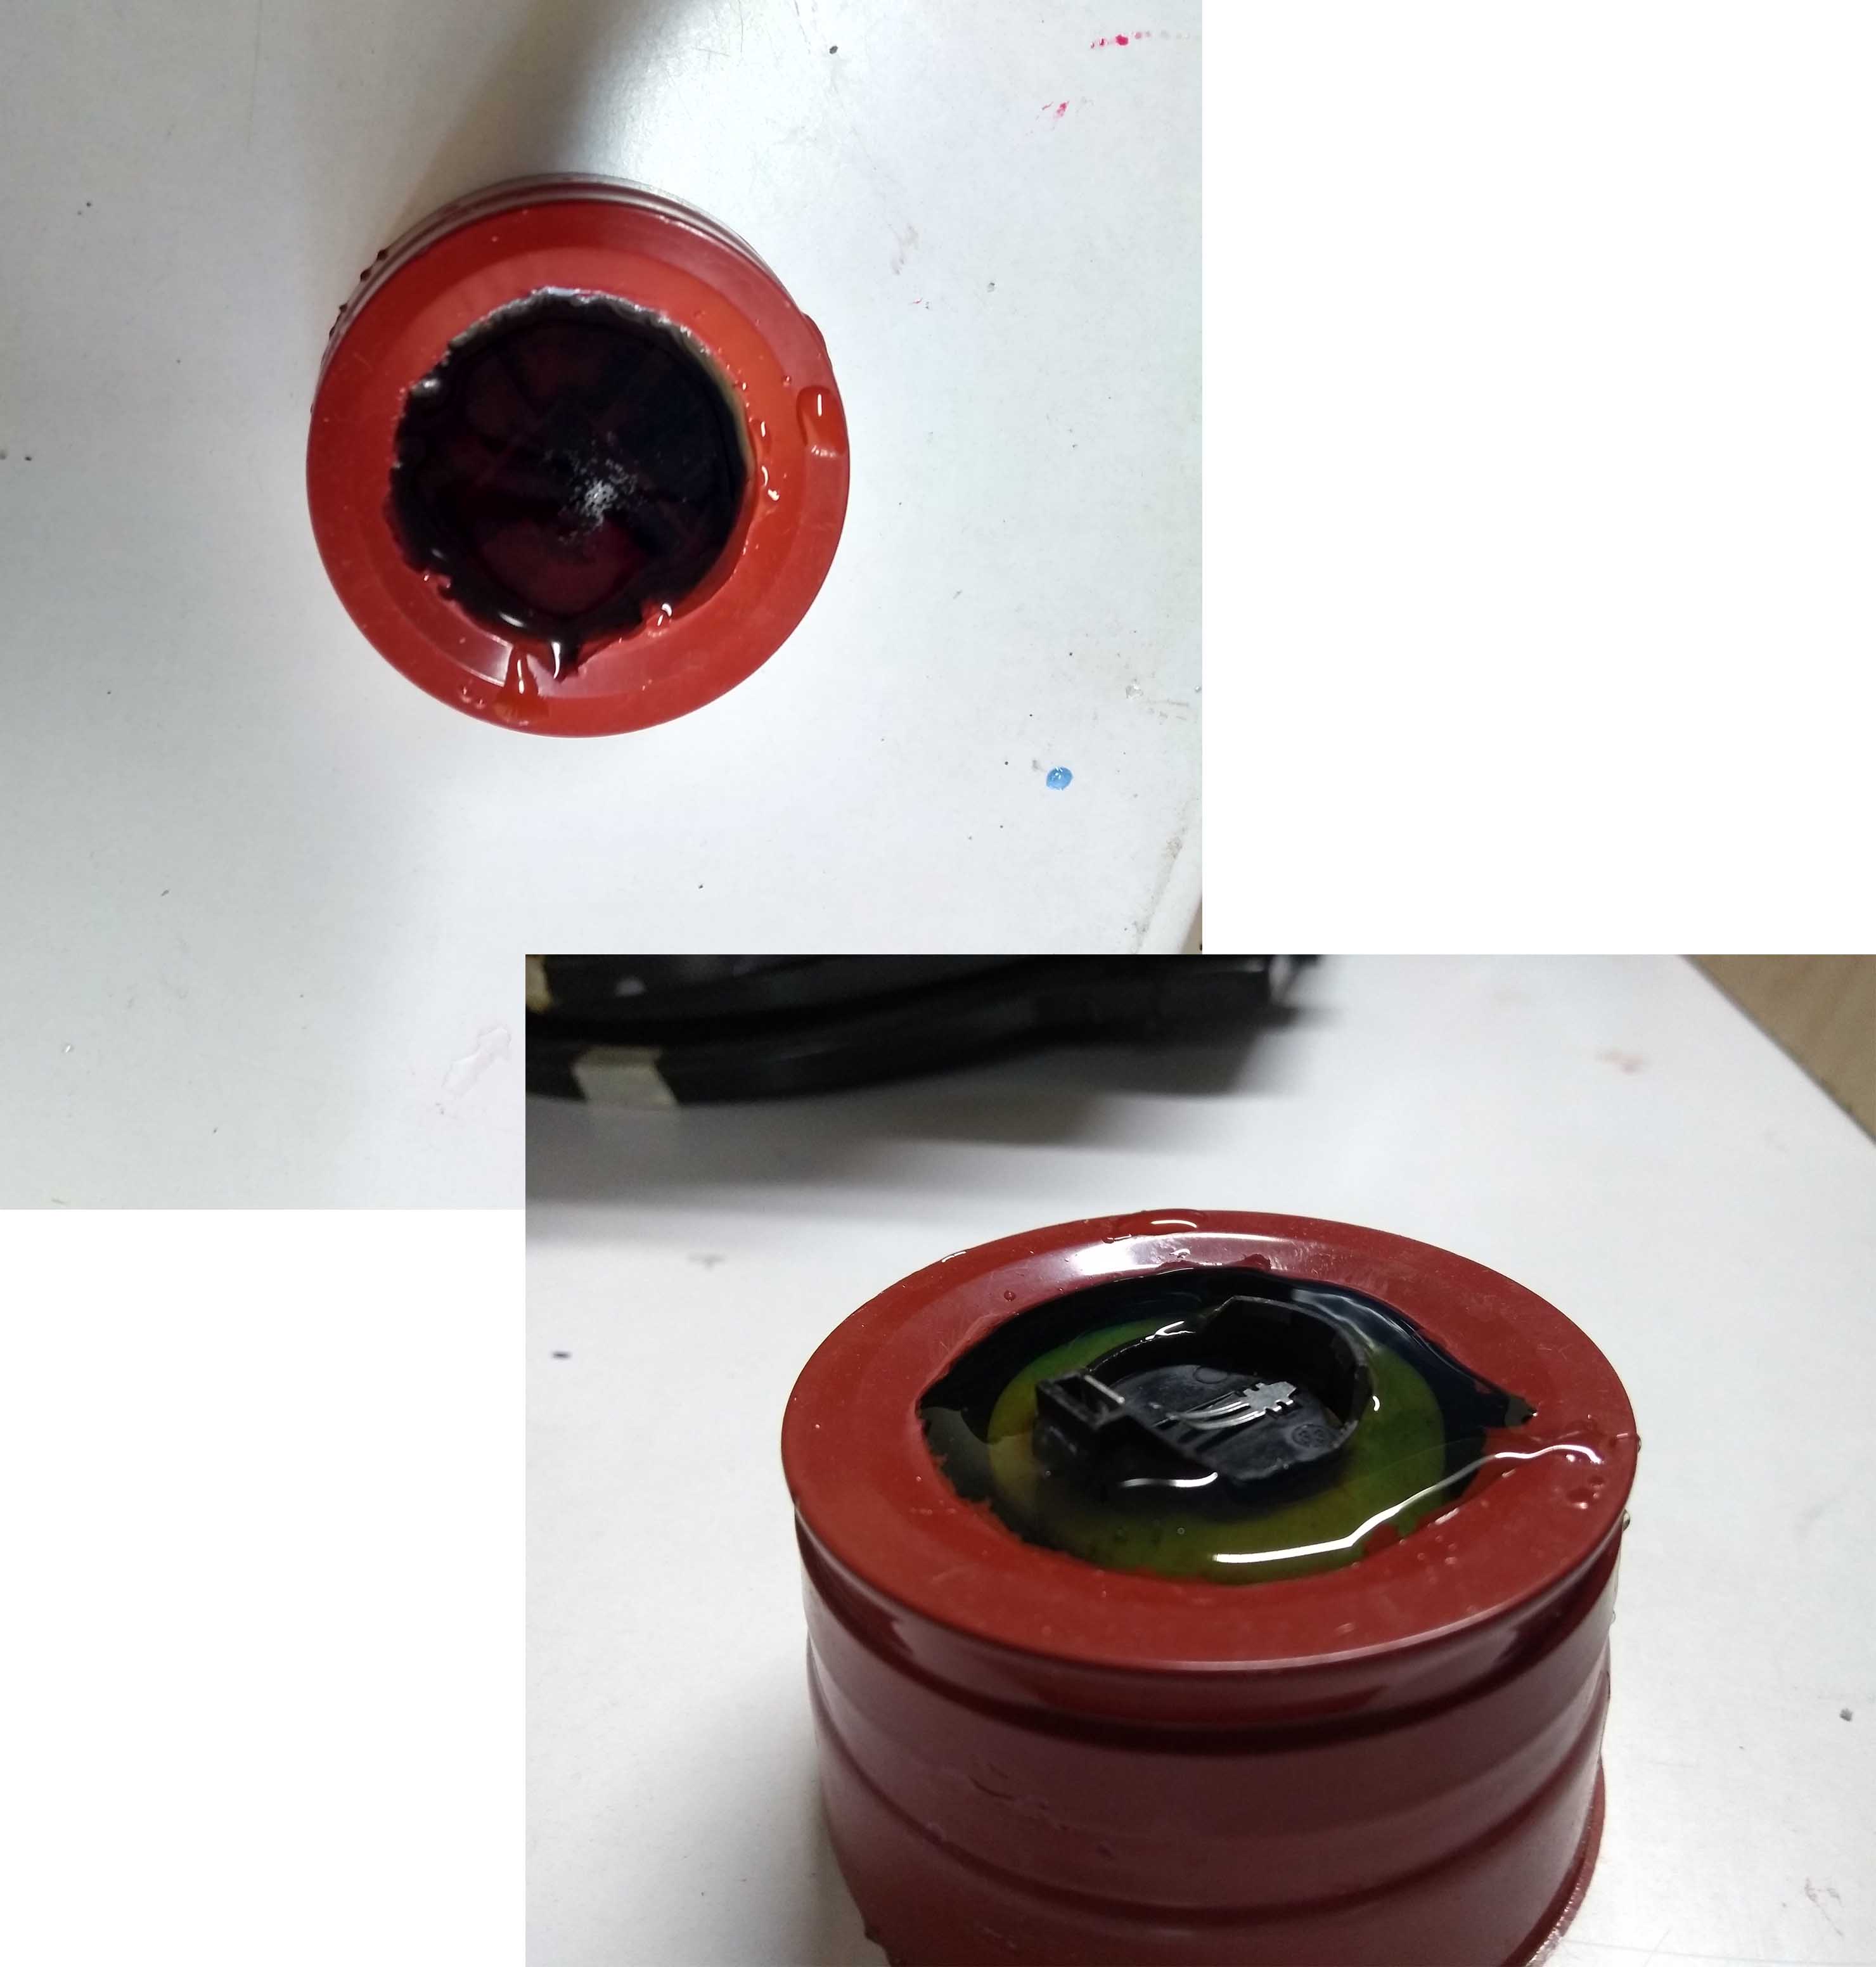
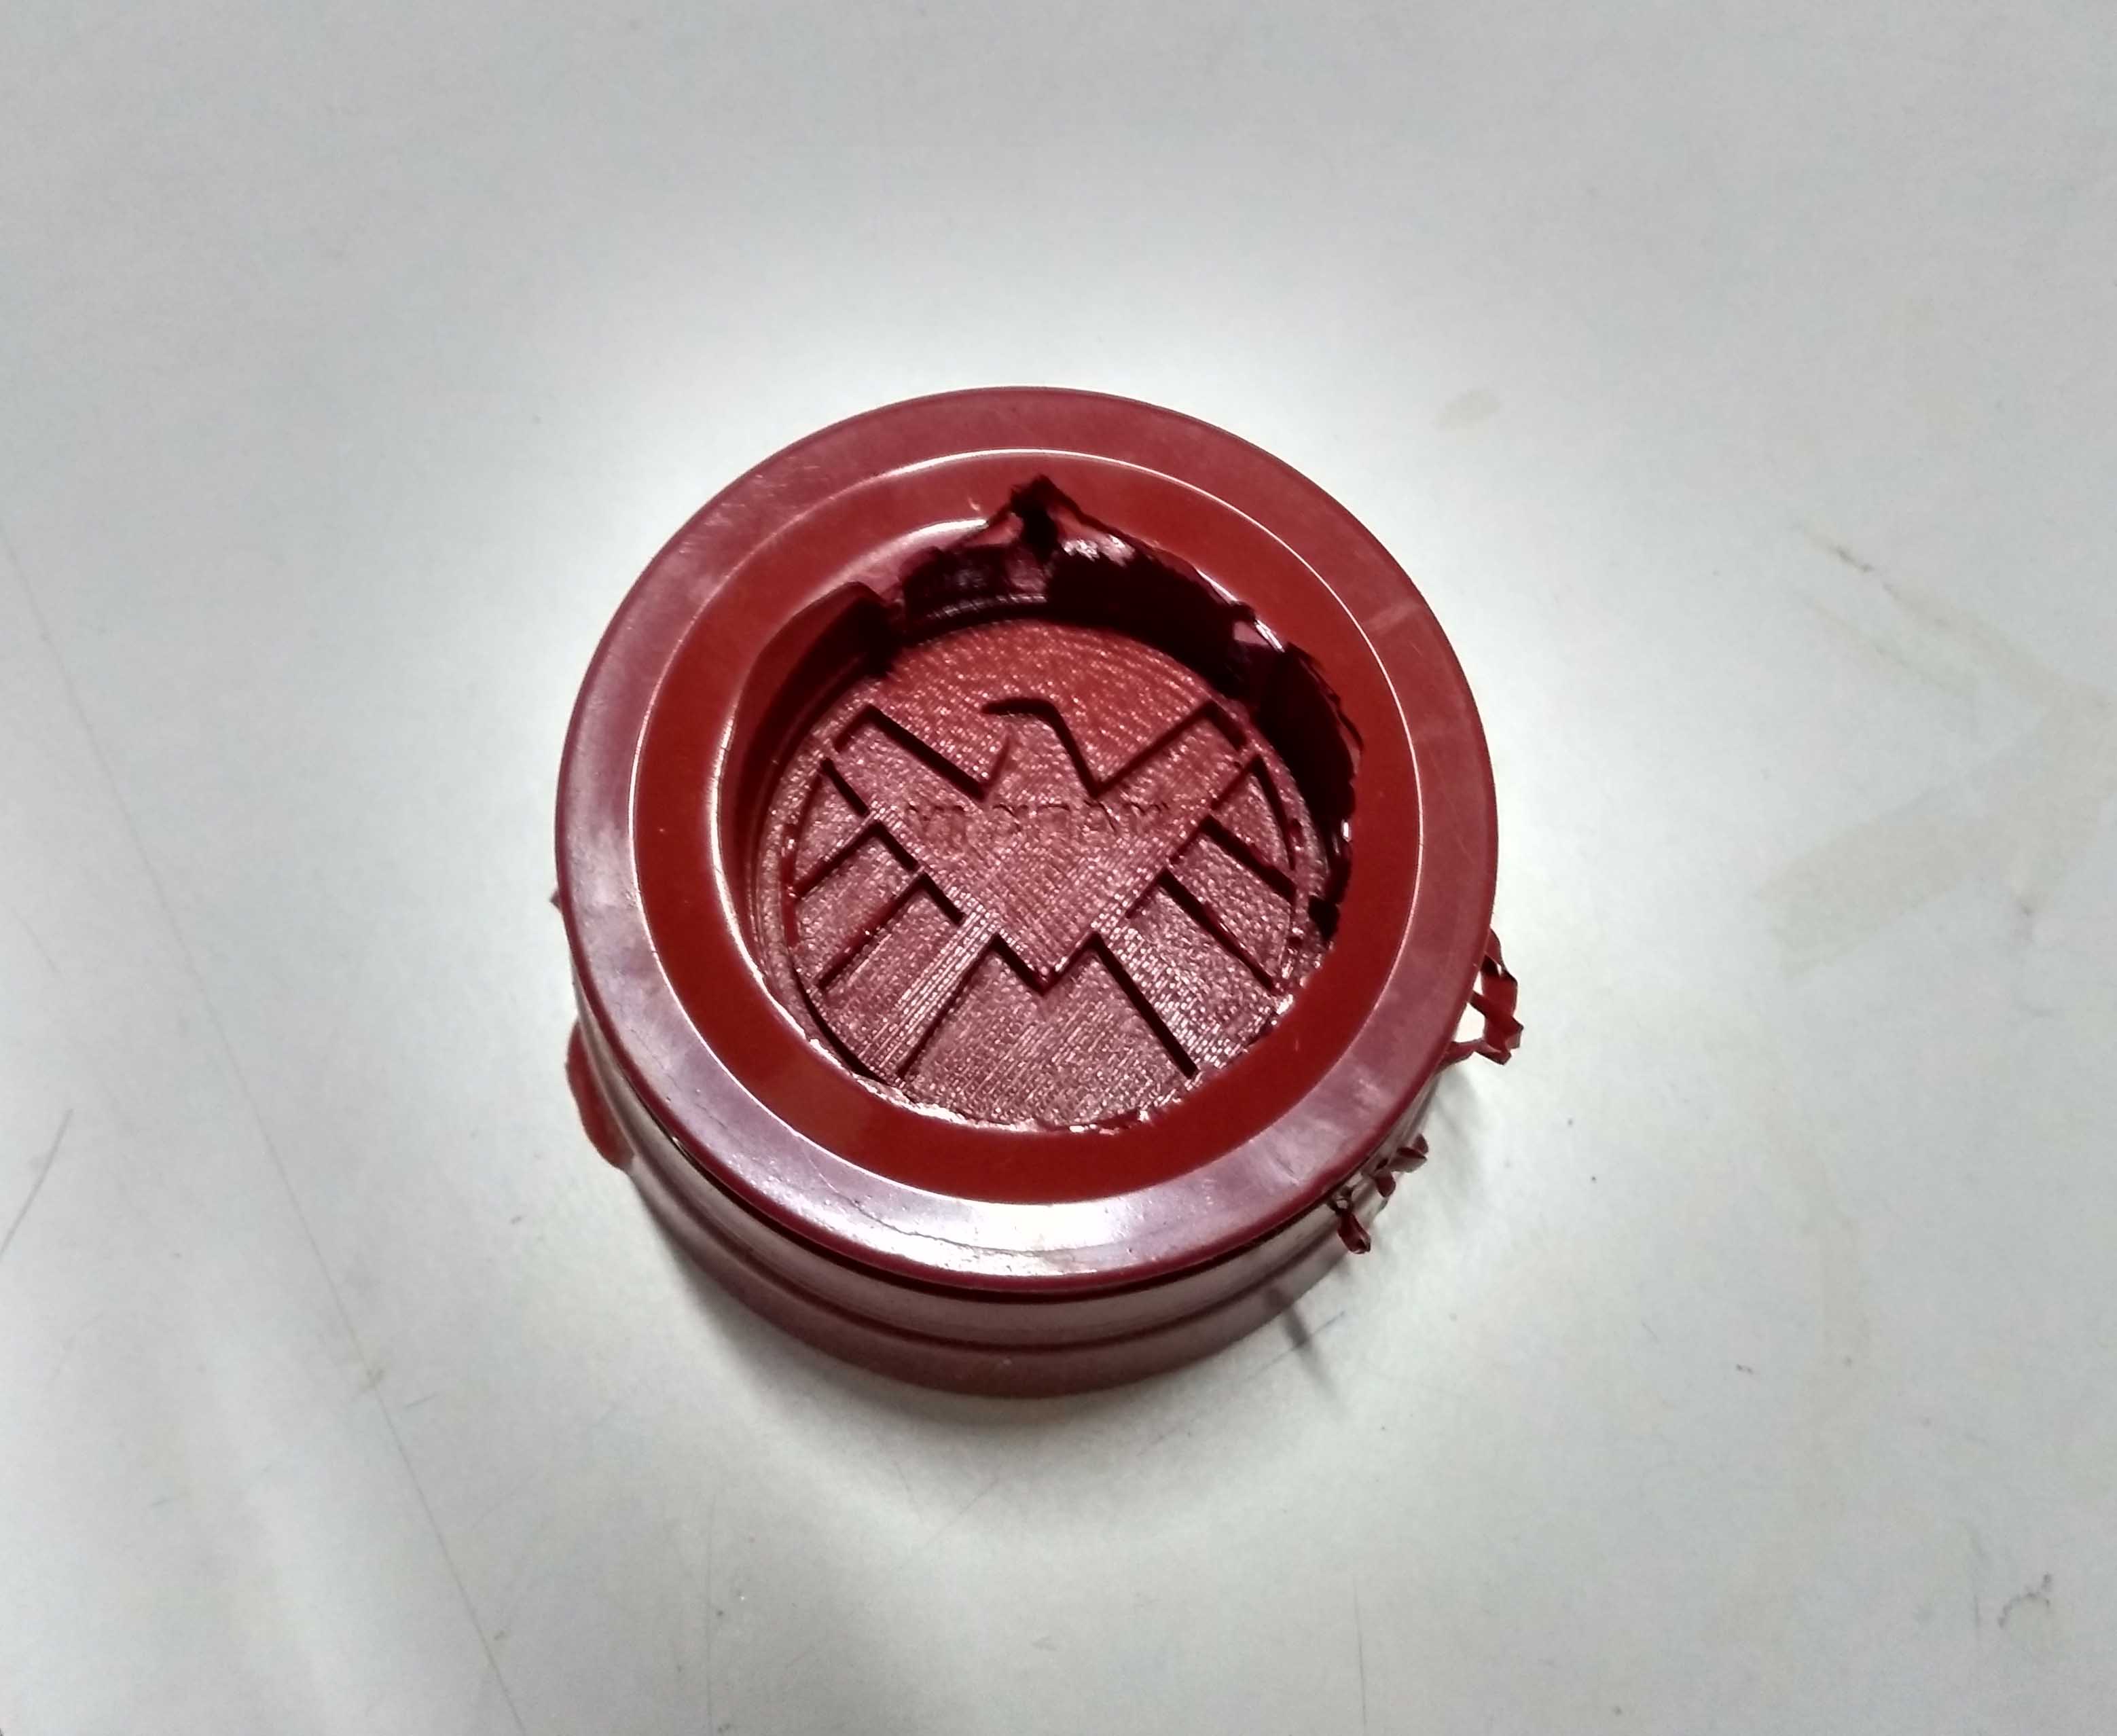
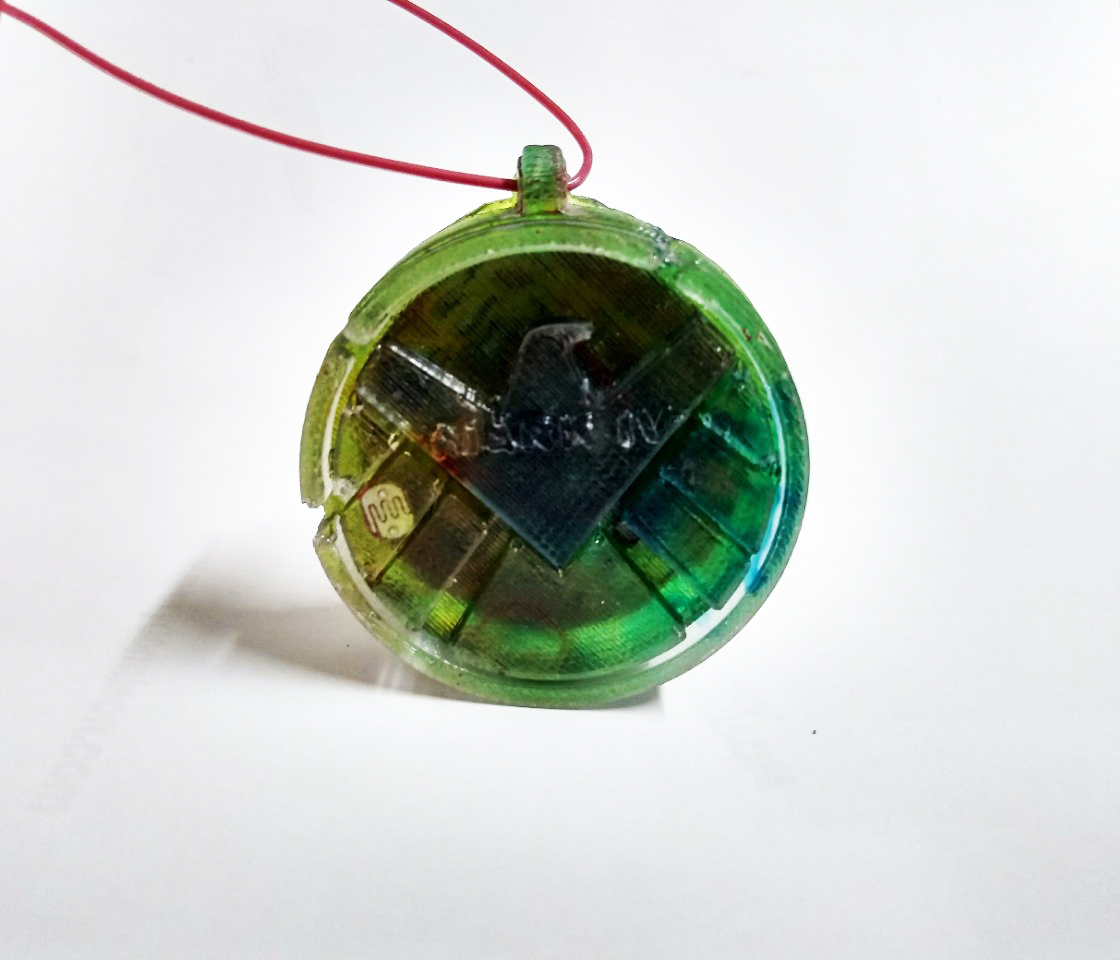
After the caste was cured. i take out the shape. And cleaned weel. Then after i power the circuit board inside the locket using the 3v CR2032 coincel baterry. Then drill a hole for inserting the chain.


Hero shot
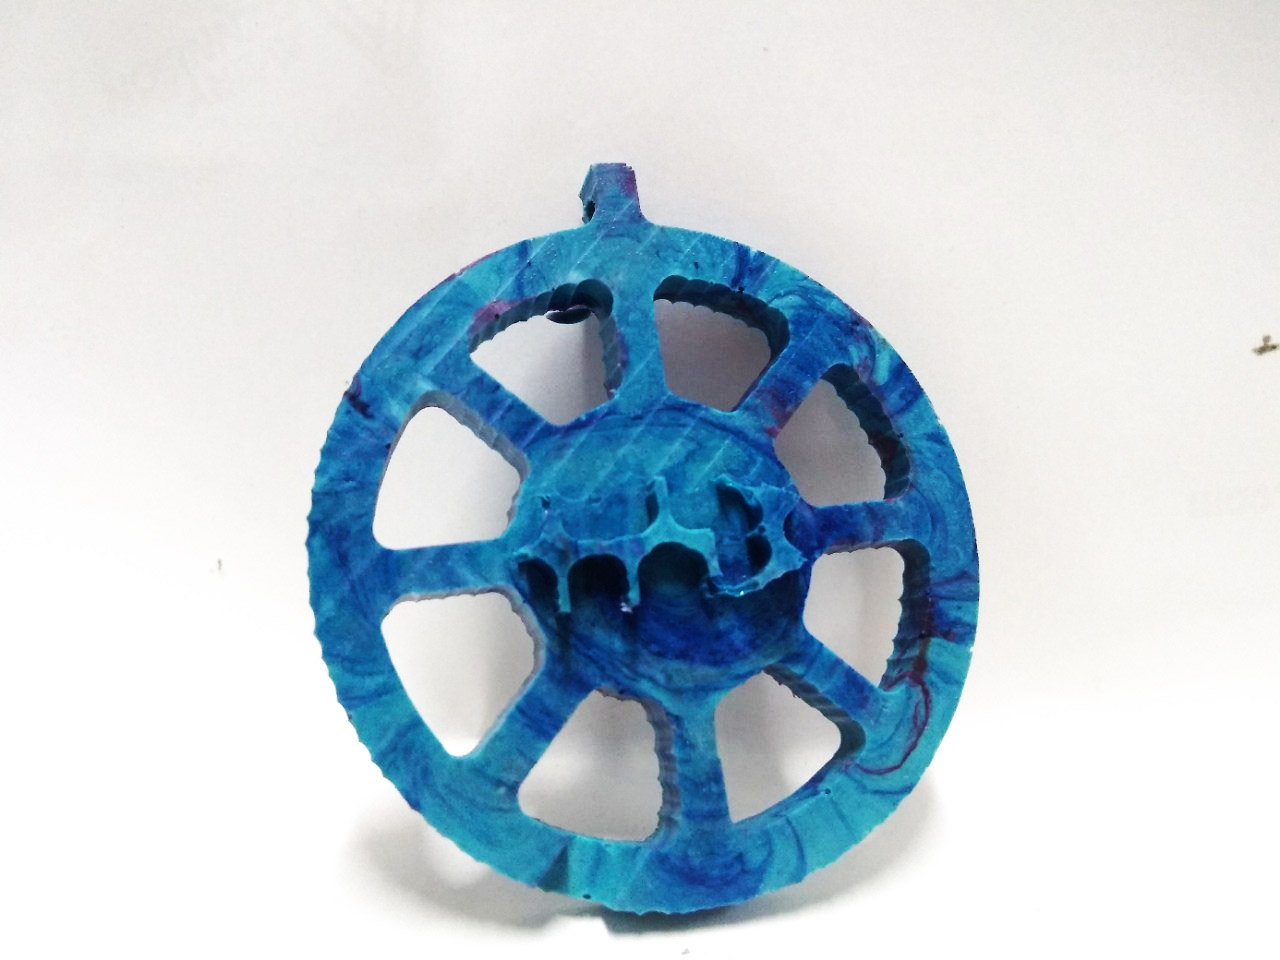
Mold making part 2
Now i need to make another mold by using the Modella mdx20. I used wax as the material. I designed a different mold for this time. But it is same as a locket. Then i mill out the design in wax block same as i did earlier. But a side exceeds the WAX. so i lost a side wall. but i managed to stick a acrylic piece in that side using double side tape. After that i used a clear silicon mold rubber. This silicon rubber will hold in high temperature. Means, we can caste metals too. The documentations says that i need to take eaqual amount of PARTA and PARTB. 100: 10 ratio. So i took both PARTA and PARTB equal amount. Then mix them and stire it well. It usually formed a lot of bubbles, i shaked many times. It reduced a littleamount of bubbles but small bubbles may exist but it wont affect the mold, i think so. After then i pour it into the Wax.The cure time is 1 hour.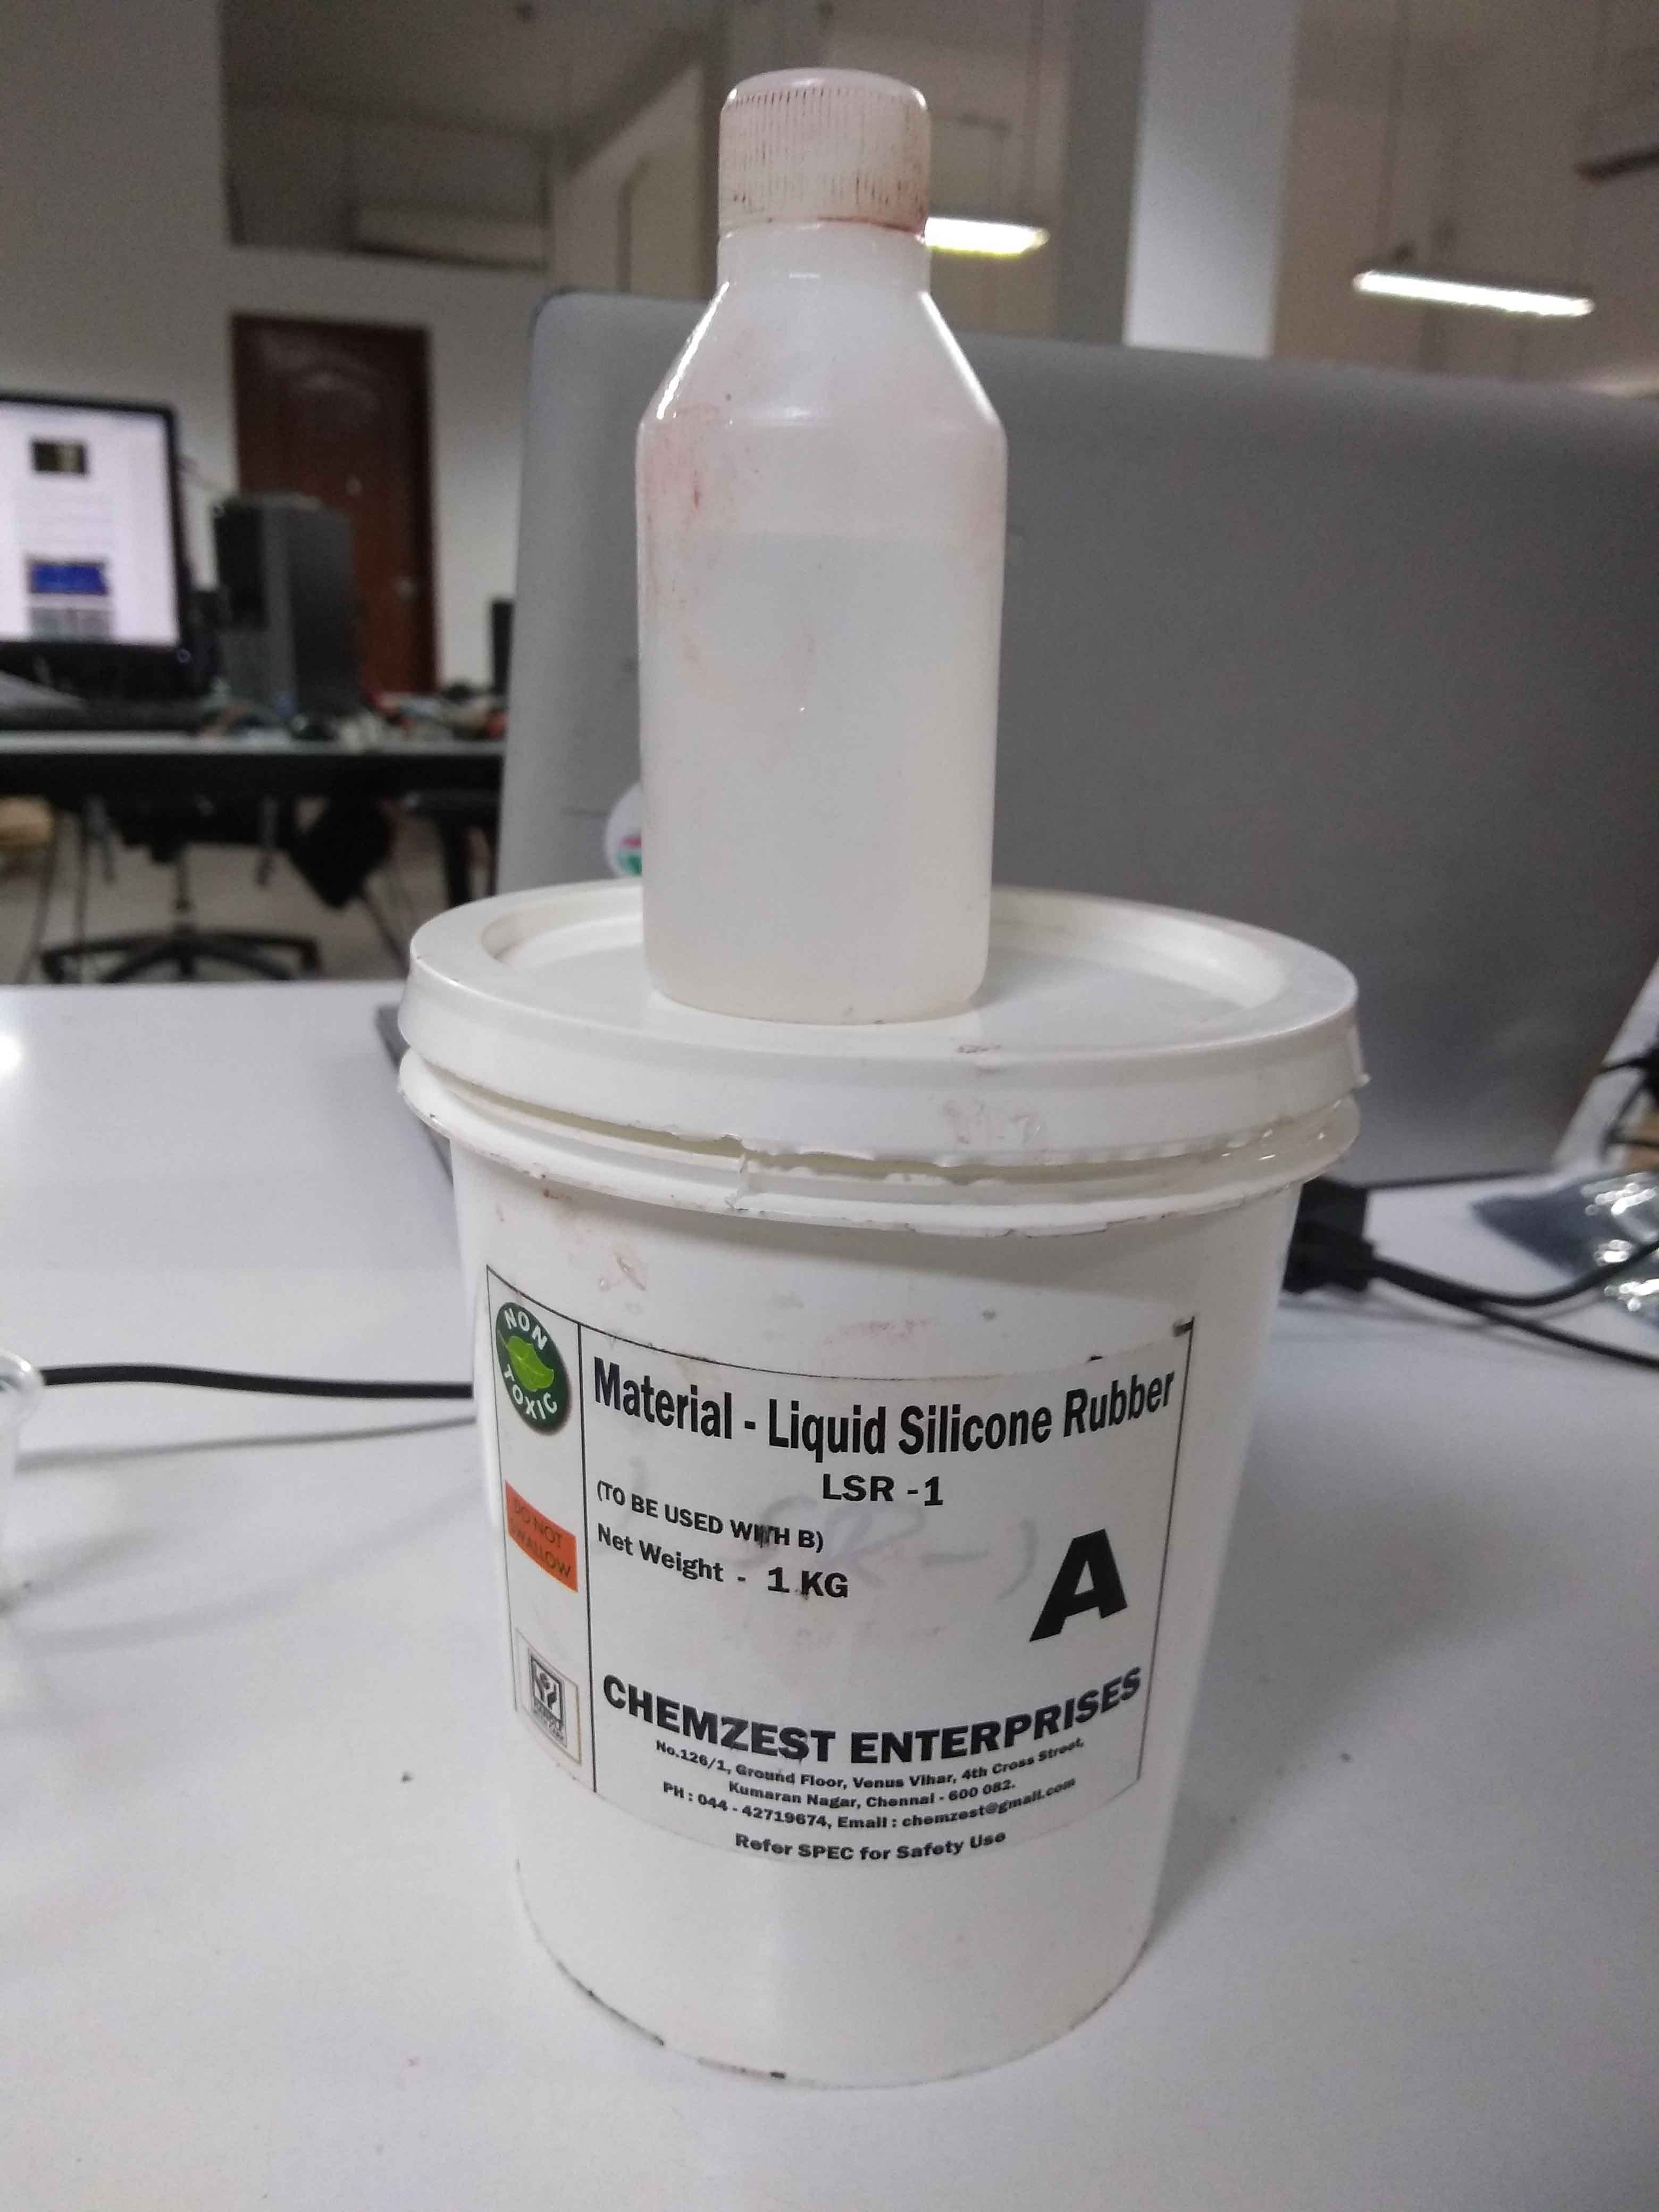
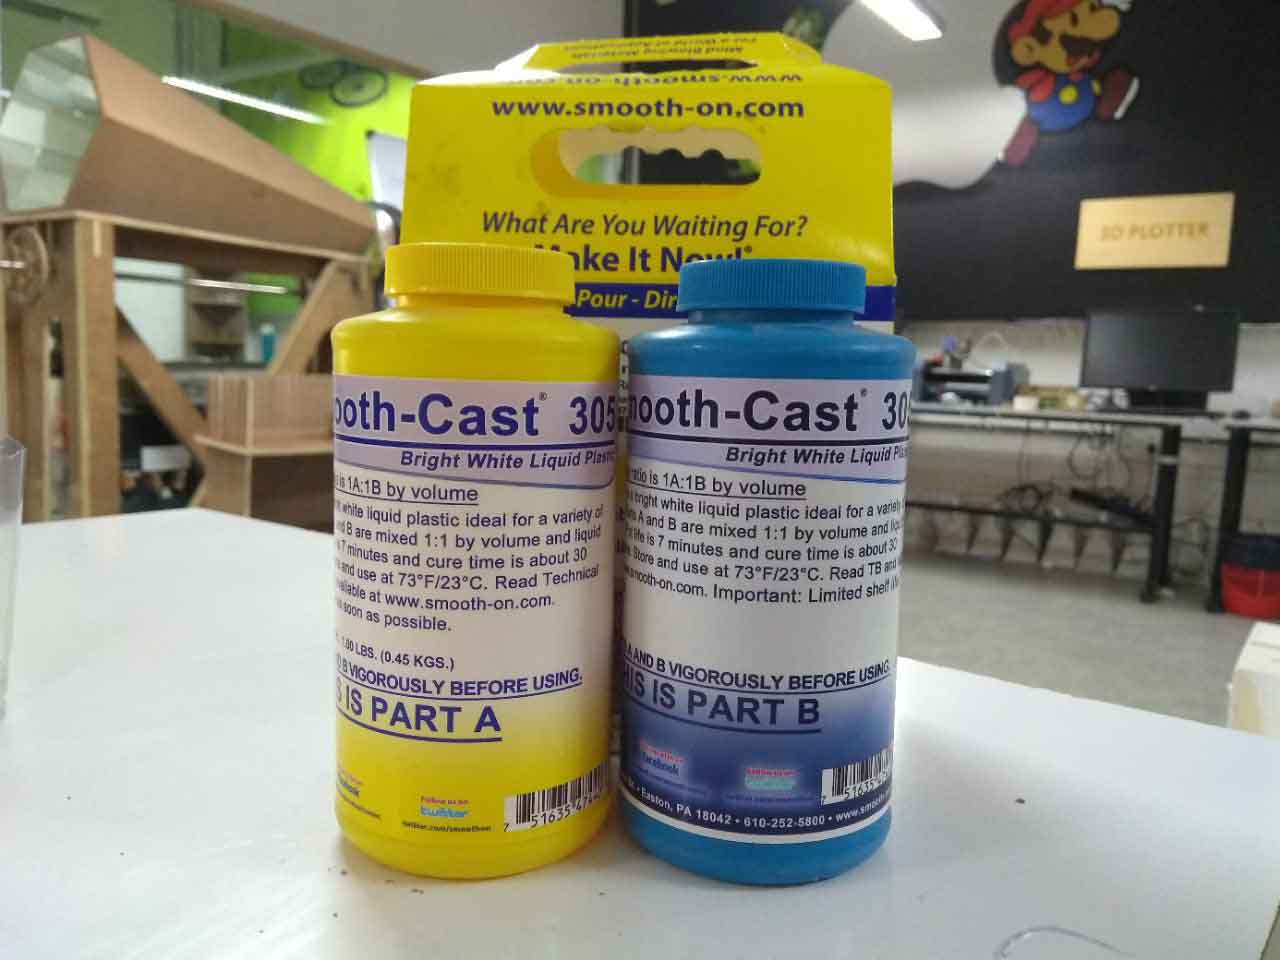
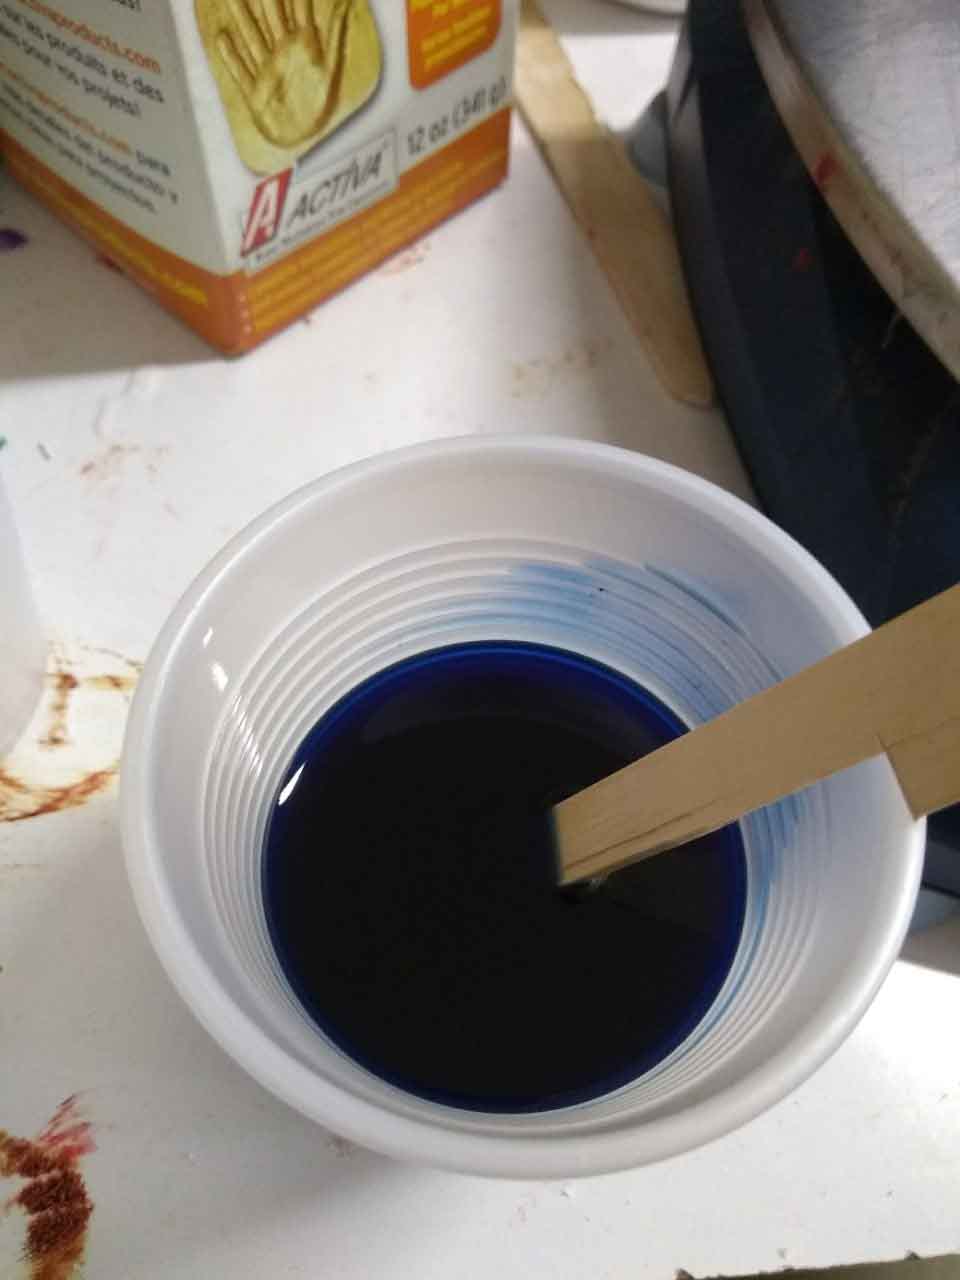
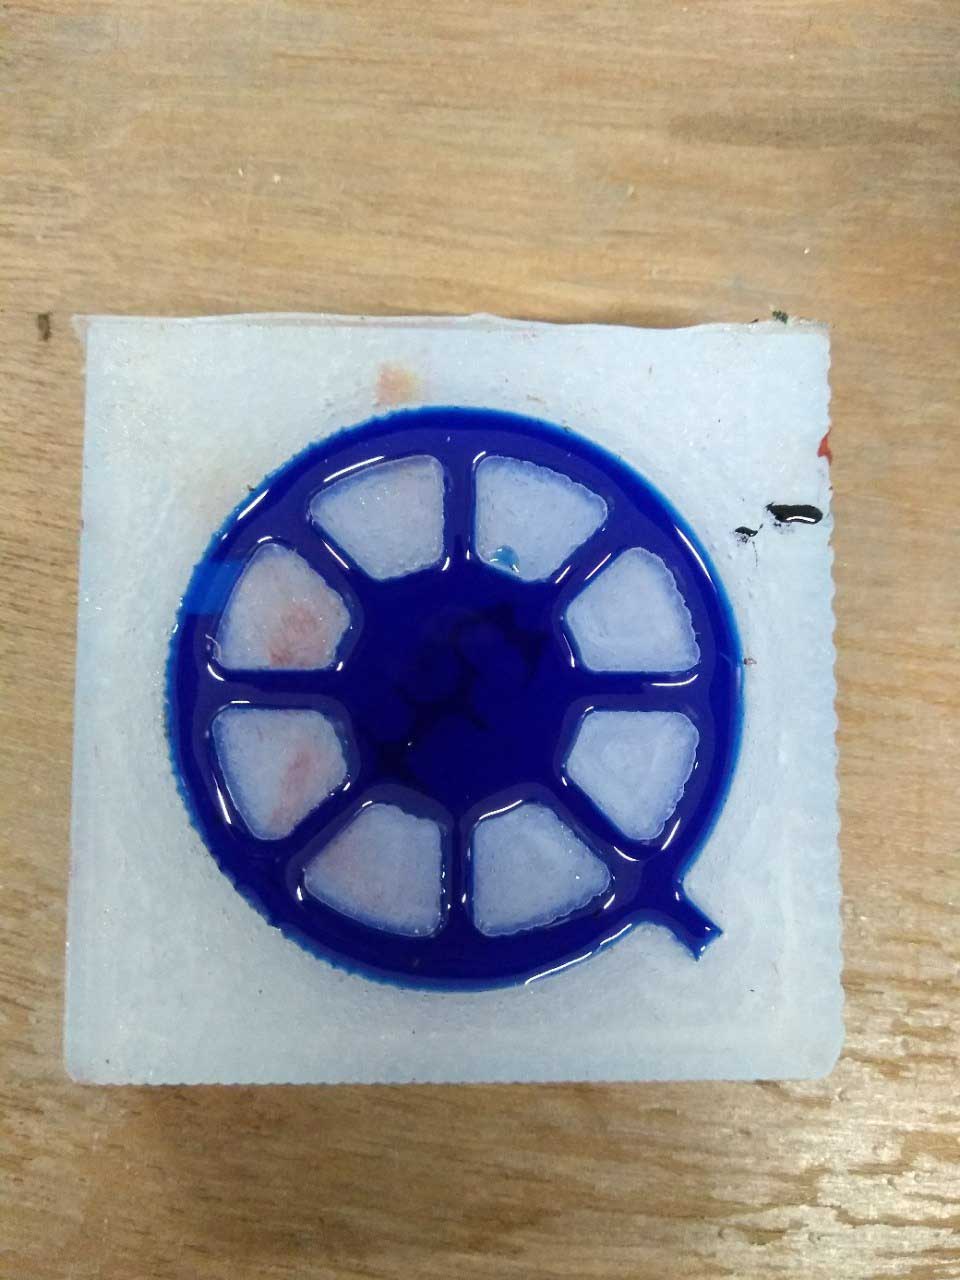
Then after, i pull out the mold out of the wax. Now i need to do the casting. I selected the liquid plastic as the material for casting. The ratio for the PARTA and PARTB is 1 :1 ratio. So, i take both of the 10grams. Then mixed it together and stire well. Then i mixed green, blue ,white and a little red color pigents and stired it for a 2 second. this will give us a good looking design. the i poured the mix into the mold. The curing time is takes 30 minutes. Then i pulled out the casted plastic.
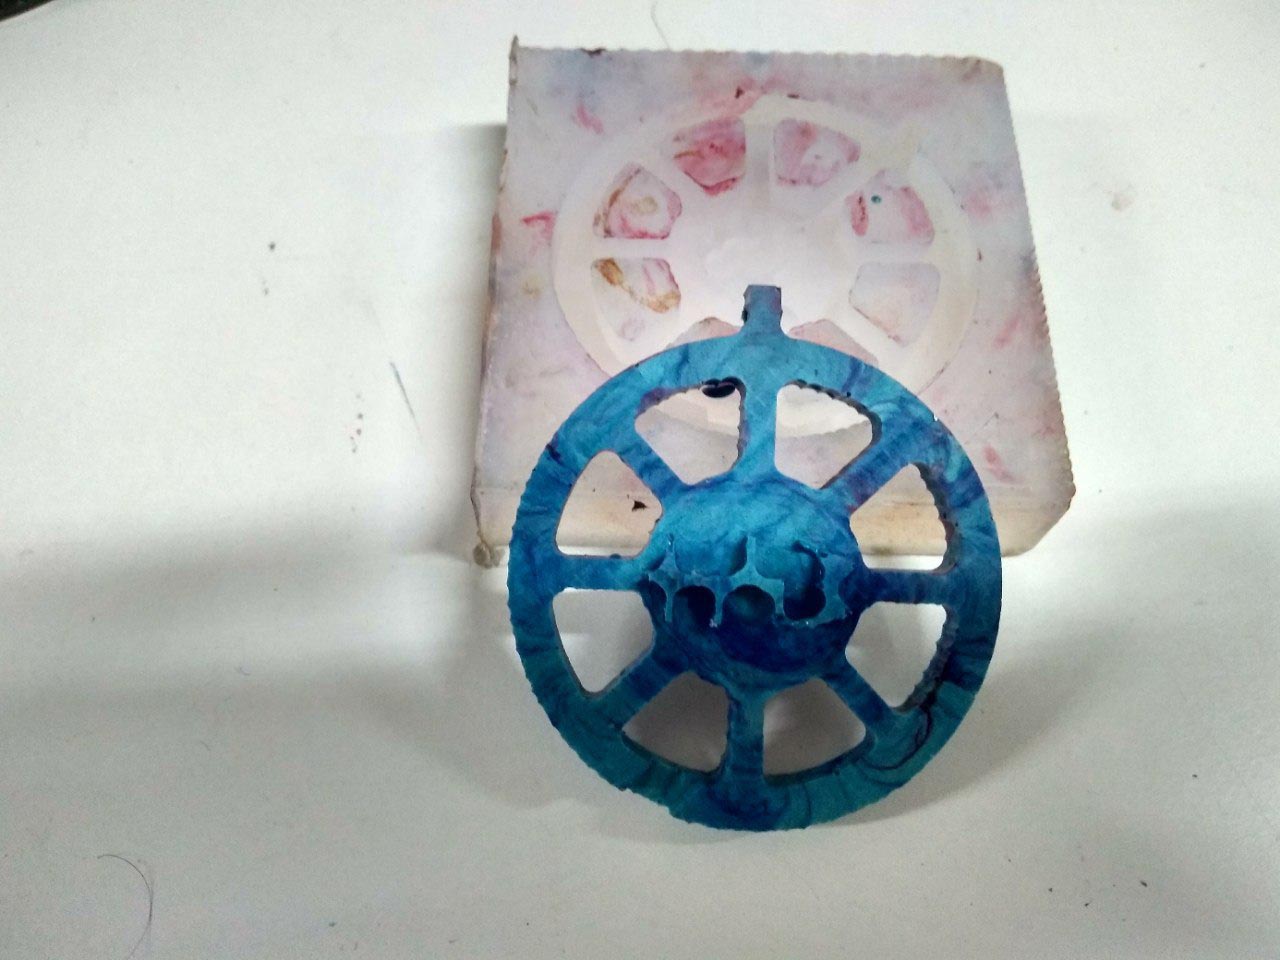
Hero shot
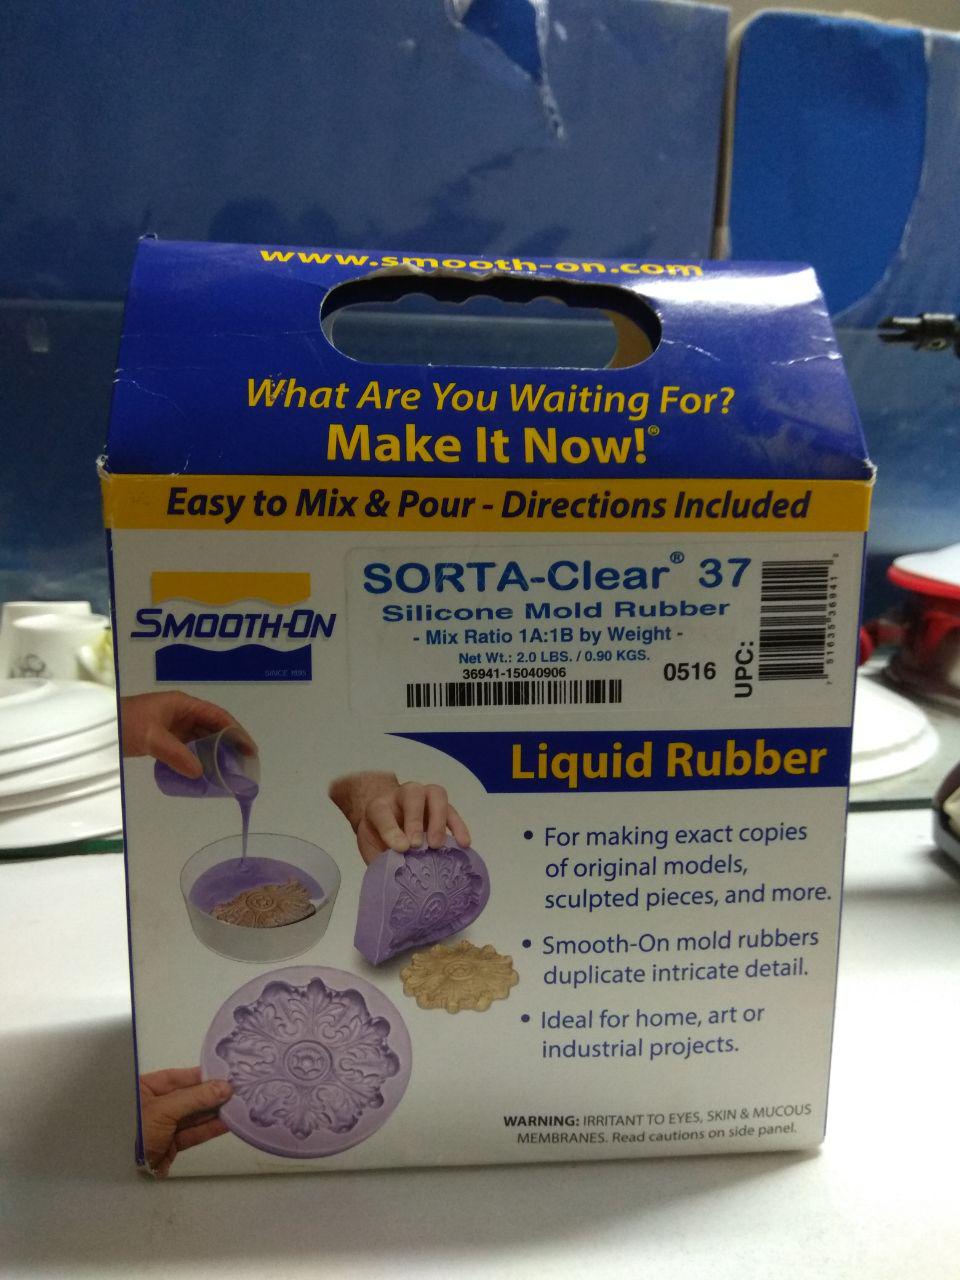
Group Assignment
In this week our Group assignment was Review the safety requrements and data sheets for each of your molding and casting materials that is available in our lab .First we review the SORTA-Clear material for making rubber mold. SORTA-Clear Series rubbers are premium water white translucent silicone rubbers (platinum catalyst) which cure at room temperature with negligible shrinkage. SortA Clear 37 has Shore 37A hardness and features high tensile and tear strength. This product also offers the convenience of a 1A:1B by volume mix ratio. You can find the data sheet from here.
- Hazard(s) Identification
- Composition / Information on Ingredients
- First Aid Measures
- Fire-Fighting Measures
- Handling and Storage
- Exposure Controls / Personal Protection
Not a hazardous substance or mixture according to United States Occupational Safety and Health Administration (OSHA) Hazard Communication Standard (29 CFR 1910.1200), the Canadian Workplace Hazardous Materials Information System (WHMIS) and Regulation (EC) No 1272/2008 and subsequent amendments
No ingredients are hazardous according to Regulation 2012 OSHA Hazard Communication Standard 29 CFR 1910.1200 criteria.
Inhalation: Remove source(s) of contamination and move victim to fresh air. If breathing has stopped, give artificial respiration, then oxygen if needed. Contact physician immediately.
Eye Contact: Flush eyes with plenty of water. If irritation persists, seek medical attention.
Skin Contact: In case of skin contact, wash thoroughly with soap and water.
Ingestion: Do not induce vomiting unless instructed by a physician. Never give anything by mouth to an unconscious person
Use water spray to cool fire-exposed surfaces and to protect personnel. Shut off “fuel” to fire. If a leak or spill has not ignited, use water spray to disperse the vapors. Either allow fire to burn under controlled conditions or extinguish with foam or dry chemical. Try to cover liquid spills with foam. Because fire may produce toxic thermal decomposition products, wear a self-contained breathing apparatus (SCBA) with a full face piece operated in pressure demand or positive-pressure mode.
Keep container(s) tightly closed and properly labeled. Store in cool, dry, well ventilated place away from heat, direct sunlight, strong oxidizers and any incompatibles. Store in approved containers and protect against physical damage. Keep containers securely sealed when not in use. Indoor storage should meet OSHA standards and appropriate fire codes. Containers that have been opened must be carefully resealed to prevent leakage. Empty containers retain residue and may be dangerous. Avoid water contamination.
Hand Protection: Wear any liquid-tight gloves such as butyl rubber, neoprene or PVC.
Eye Protection: Safety glasses with side shields per OSHA eye- and face-protection regulations 29 CFR 1910.133 and European Standard EN166. Contact lenses are not eye protective devices. Appropriate eye protection must be worn instead of, or in conjunction with contact lenses.
Other Protective Clothing/Equipment: Additional protective clothing or equipment is not normally required. Provide eye bath and safety shower.
Comments: Never eat, drink, or smoke in work areas. Practice good personal hygiene after using this material, especially before eating, drinking, smoking, using the toilet, or applying cosmetics. Wash thoroughly after handling.
Smooth cast liquid plastic
The Smooth-Cast™ 300 Series of liquid plastics are ultra-low viscosity casting resins that yield castings that are bright white and virtually bubble free. Vacuum degassing is not necessary. They offer the convenience of a 1A:1B by volume or 100A:90B by weight mix ratio. The differences between them are pot life and demold time
Inhalation: Remove source(s) of contamination and move victim to fresh air. If breathing has stopped, give artificial respiration, then oxygen if needed. Contact physician immediately.
Eye Contact: Flush eyes with plenty of water. If irritation persists, seek medical attention.
Skin Contact: In case of skin contact, wash thoroughly with soap and water.
Ingestion: Do not induce vomiting unless instructed by a physician. Never give anything by mouth to an unconscious person.
The material safety data sheet (MSDS) you find here
Smooth-Cast 300 PART A
- WARNING: IRRITANT TO EYES, SKIN & MUCOUS MEMBRANES :- Contains Methylene Diphenyl Isocyanate. Do not get in eyes, mucous membranes or on skin. Do not take internally. Do not breathe fumes. Use only with adequate ventilation. Wear chemical-resistant gloves and eye protection when using this product.
- First Aid : In case of eye contact, flush thoroughly with water for 15 minutes and get immediate medical attention. In case of skin contact, wash thoroughly with soap and water. If irritation persists, get medical attention. If swallowed, do not induce vomiting. Drink 1-2 glasses of water and get immediate medical attention. If vapors are inhaled or if breathing becomes difficult, remove person to fresh air. If symptoms persist, get medical attention
Smooth-Cast 300 PART B
- CAUTION: In case of eye contact, flush with water for 15 minutes. If irritation persists, get medical attention. For skin contact, wash with soap and water. Keep Out Of Reach Of Children.
- CAUTION: HOT! When combined, parts A & B generate heat in excess of 212°F (100°C) which could cause burns to the skin. Let cured plastic cool before handling.
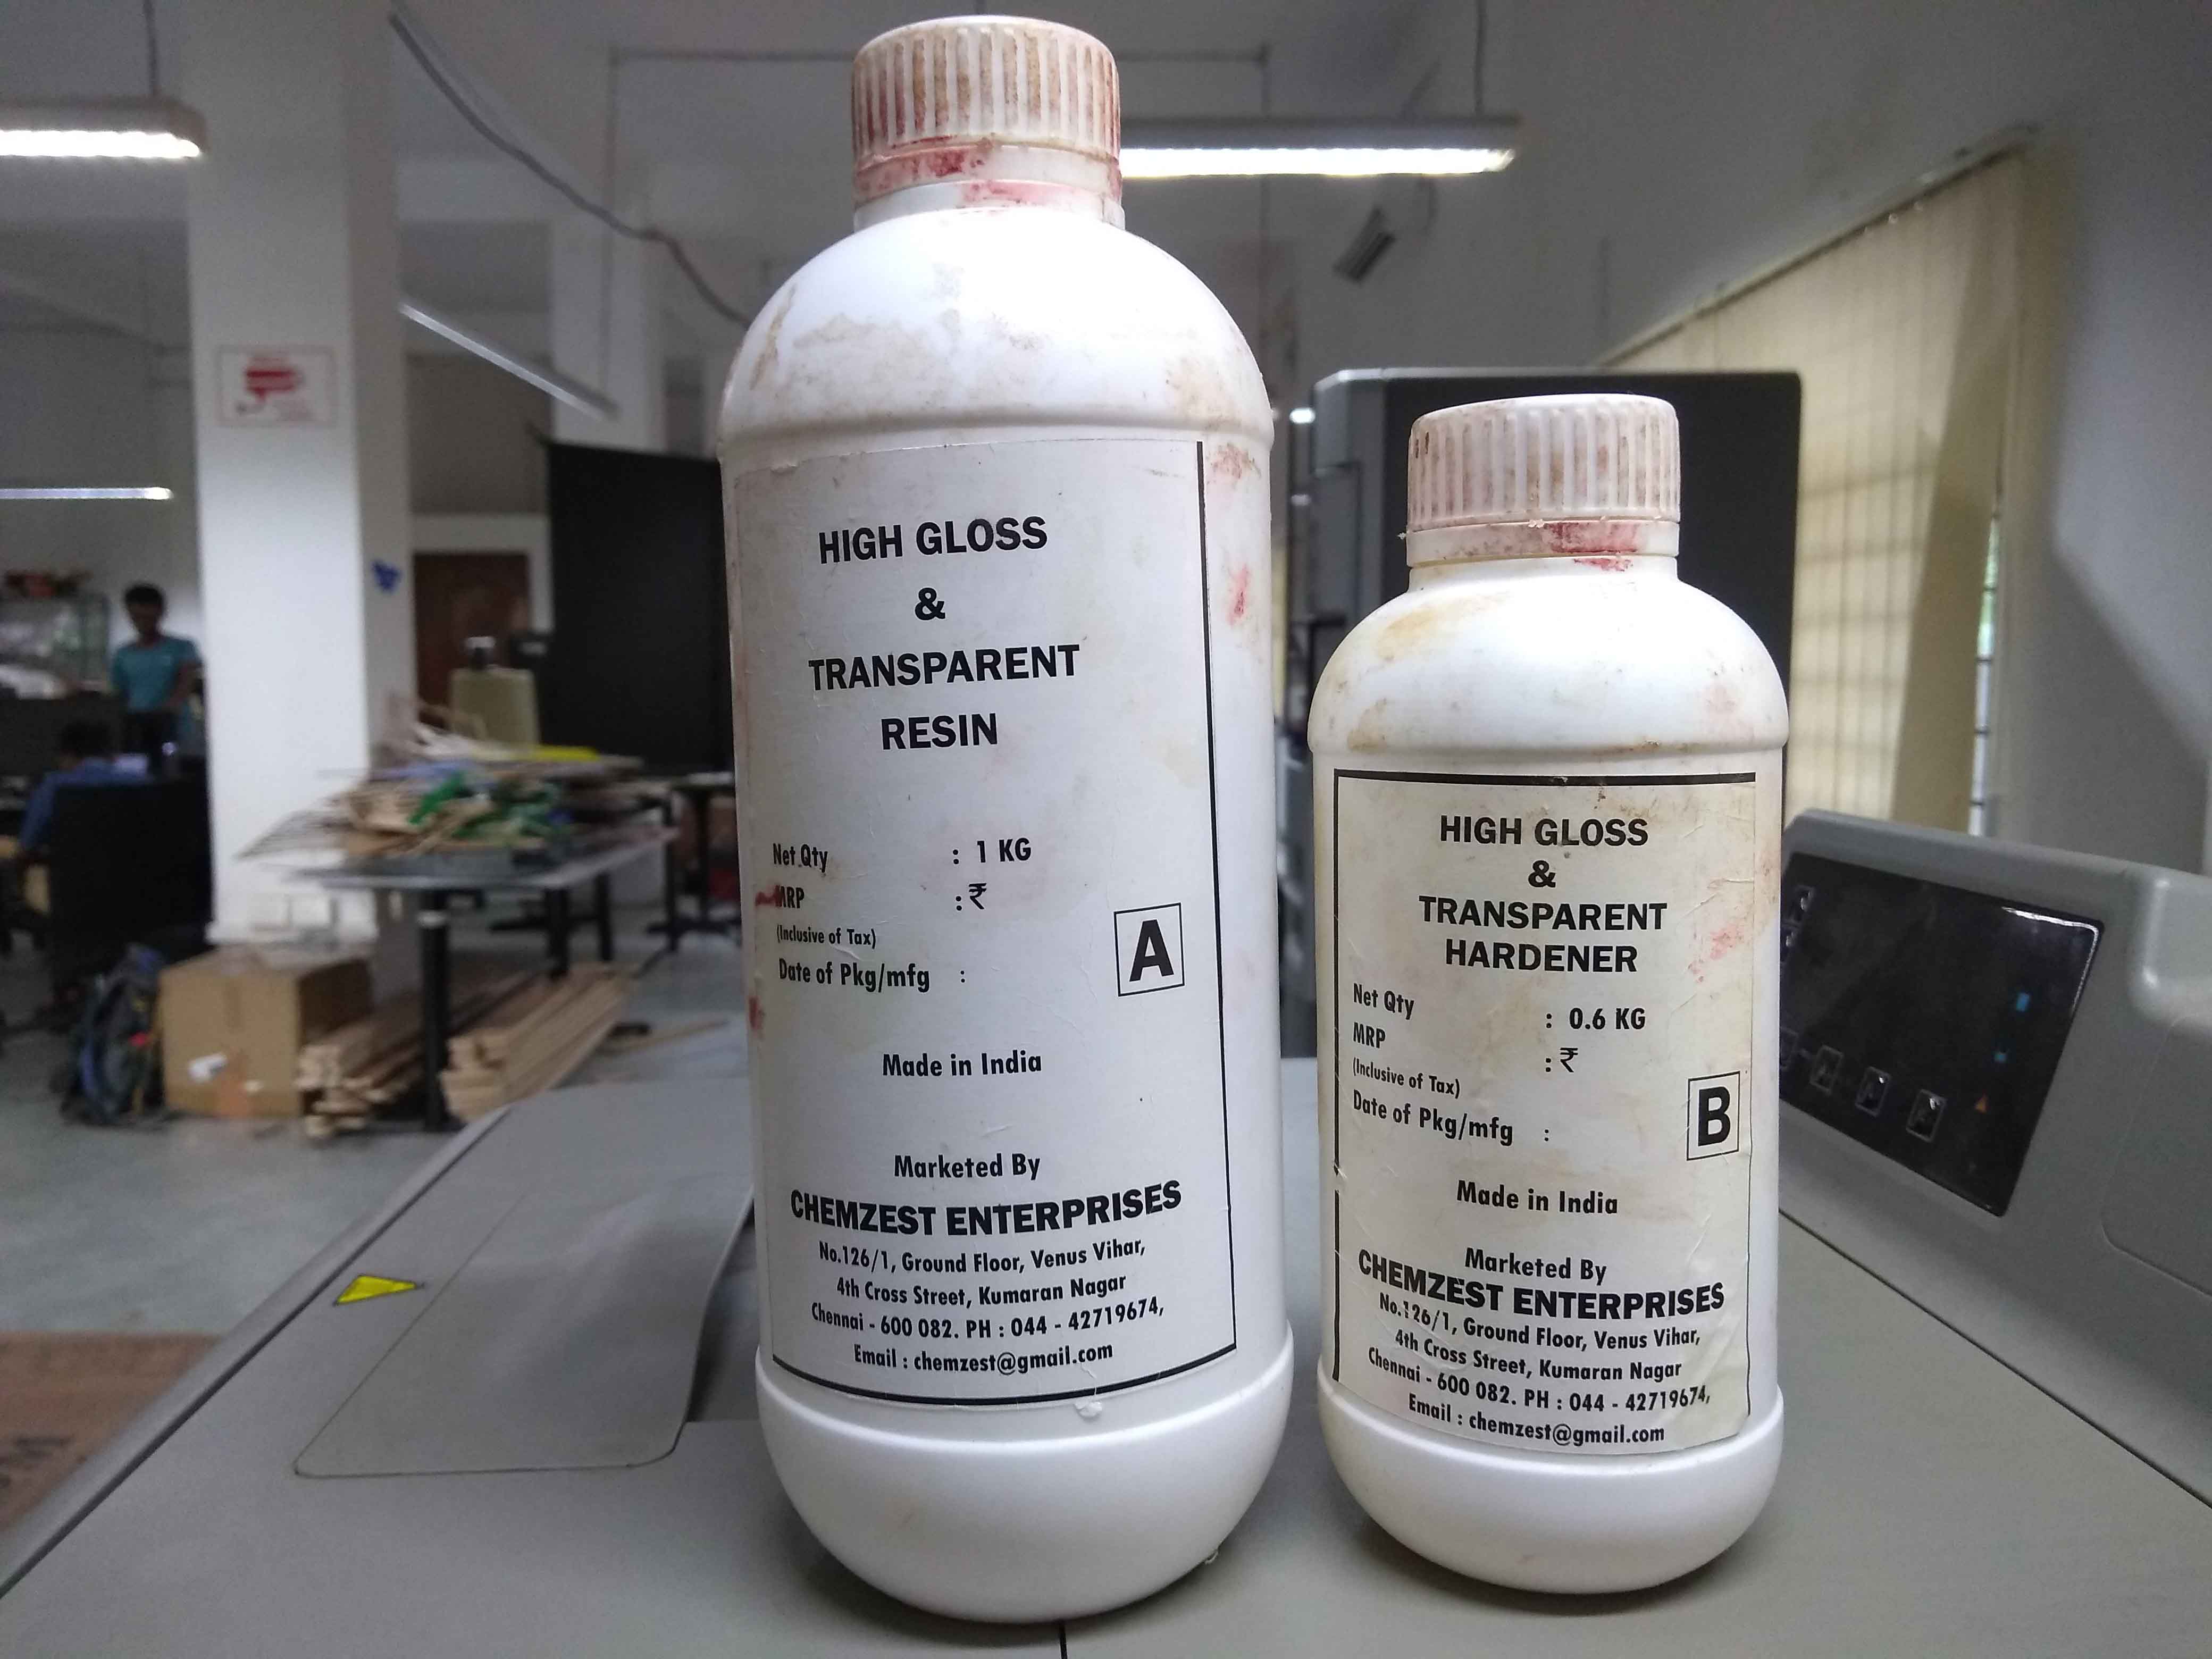
Casting Resin
Epoxy Resins are thermosetting resins, which cure by internally generated heat. Epoxy systemsconsist of two parts, resin and hardener. When mixed together, the resin and hardener activate,causing a chemical reaction, which cures (hardens) the material.We are offering High Glossy , Transparent, low viscosity and UV stable liquid epoxy resin for casting, coatings, and adhesive applications
Features & Benefits:-
- 100% Clear & Transparent.
- High Gloss Finishing
- Non Yellowing
- Can be Pigmented using suitable pigments
- Very less shrinkage
- Industry leading UV stability
- Excellent moisture protection barrier, stable in acidic pH solutions
- Excellent flow properties (low viscosity) with efficient substrate wetting
- Unique mechanical properties
FIRST AID MEASURES
- Skin contact : Remove contaminated clothing. Wash with soap and water and rinse with water.
- Eye contact : Promptly wash eyes with plenty of water while lifting the eye lids. Continue to rinse for at least 15 minutes. Contact physician if irritation persists.
- Inhalation : Take person out of the contaminated area. Remove patient to fresh air. Call a doctor in case of doubt or if symptoms persist.
- Ingestion : DO NOT INDUCE VOMITING! Put under medical supervision. If swallowed, seek immediate medical advice and show container or label to the doctor.
Mold Max 60 silicon rubber compound
Mold Max™ 60 is a Shore 60A tin catalyzed silicone rubber formulated for applications requiring high heat resistance (up to 560°F/294°C). It features a low mixed viscosity and cured rubber exhibits very low linear shrinkage. Parts A & B are mixed 100A & 3B by weight. Pot life is 40 minutes and cure time is 24 hours. Applications include making foundry patterns, flat pattern reproductions and casting low-melt metal alloys such as tin and pewter
Instructions
Please Note: THI-VEX™ Silicone Thickener is NOT recommended for use with Mold Max™ 60.
Important: you must weigh Part A & B components using a gram scale to be successful with Mold Max™ 60
Because no two applications are quite the same, a small test application to determine suitability for your project is recommended if performance of this material is in question.
Preparation - Materials should be stored and used in at room temperature (73°F/23°C). These products have a limited shelf life and should be used as soon as possible. Wear safety glasses, long sleeves and rubber gloves to minimize contamination risk. Rubber may be inhibited by sulfur base clays resulting in tackiness at the pattern interface or a total lack of cure throughout the mold. If compatibility between the rubber and the surface is a concern, a small-scale test is recommended. Apply a small amount of rubber onto a non-critical area of the pattern. Inhibition has occurred if the rubber is gummy or uncured after the recommended cure time has passed.
Applying A Sealer / Release Agent - To prevent inhibition, a “barrier coat” of clear acrylic lacquer sprayed directly onto the pattern is usually effective. Allow to thoroughly dry. Although not usually necessary, a release agent will make demolding easier when casting into or over most surfaces. Ease Release™ 200 is a proven release agent for making molds with silicone rubber and for releasing new silicone from cured silicone. Mann Ease Release™ products are available from Smooth-On or your Smooth-On distributor. IMPORTANT: To ensure thorough coverage, lightly brush the release agent with a soft brush over all surfaces of the model. Follow with light mist coating and let dry for 30 minutes.
Measuring & Mixing - Before you begin, pre-mix Part A (base) thoroughly to re-disperse fillers that may have settled. Using a gram scale, dispense required amounts of parts A and B into a mixing container and mix for 3 minutes. Scrape the sides and bottom of the container several times. After mixing parts A and B, vacuum degassing is recommended to eliminate any entrapped air. Vacuum material for 2-3 minutes (29 inches of mercury), making sure that you leave enough room in container for product expansion
Pouring / Curing / Post Curing - - For best results, pour your mixture in a single spot at the lowest point of the containment field. Let the rubber seek its level up and over the model. A uniform flow will help minimize entrapped air. The liquid rubber should level off at least 1/2” (1.3 cm) over the highest point of the model surface. Allow the mold to cure overnight (at least 24 hours) at room temperature (73°F/23°C) before demolding. Post curing the mold an additional 4 - 5 hours at 125°F (51°C) will eliminate any residual moisture and alcohol that is a by-product of the condensation reaction. This water and alcohol can inhibit the cure of some casting resins. Allow mold to cool to room temperature before using. Do not cure rubber where temperature is less than 65°F /18°C.
Decreasing demold time with Accel-T™ Silicone Cure Accelerator: Important: Thoroughly Pre-mix Accel T™ with Part B before adding Part A. Be aware that the working time is drastically reduced with the addition of Accel T™. Also, library life of cured rubber is reduced in proportion to the amount of Accel-T™ added.
Using The Mold - New silicone rubber molds exhibit natural release characteristics. Depending on what is being cast into the mold, mold lubricity may be depleted over time and parts will begin to stick. No release agent is necessary when casting wax or gypsum. Applying a release agent such as Ease Release™ 200 (available from Smooth-On) prior to casting polyurethane, polyester and epoxy resins is recommended to maximize mold life. Visit Smooth-On’s FAQ section at www.smooth-on.com for information on a powder coating technique that will yield a dry matte finish to cured castings.
Mold Performance & Storage - The physical life of the mold depends on how you use it (materials cast, frequency, etc.). Casting abrasive materials such as concrete can quickly erode mold detail, while casting non-abrasive materials (wax) will not affect mold detail. Before storing, the mold should be cleaned with a soap solution and wiped fully dry. Two part (or more) molds should be assembled. Molds should be stored on a level surface in a cool, dry environment.