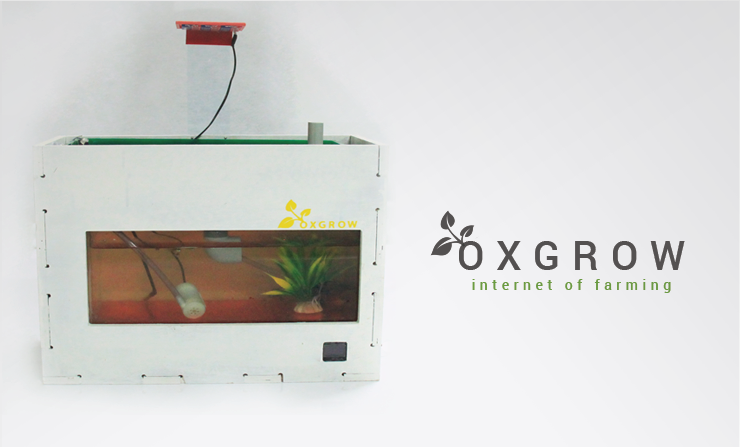
What iam going to make !
Finally i decided to build a smart aquaponics system as my fab academy final project. This is so exciting to me. I named it OXGROW. OXGROW is a desktop compatible indoor aquaponics sytem. The size and shape are more compatible to fit in your desktop or some where inside your home or office. With the help of a self sustaining ecosystem, you can grow and eat fresh and healthy vegitables and herbs.
What is Aquaponics?
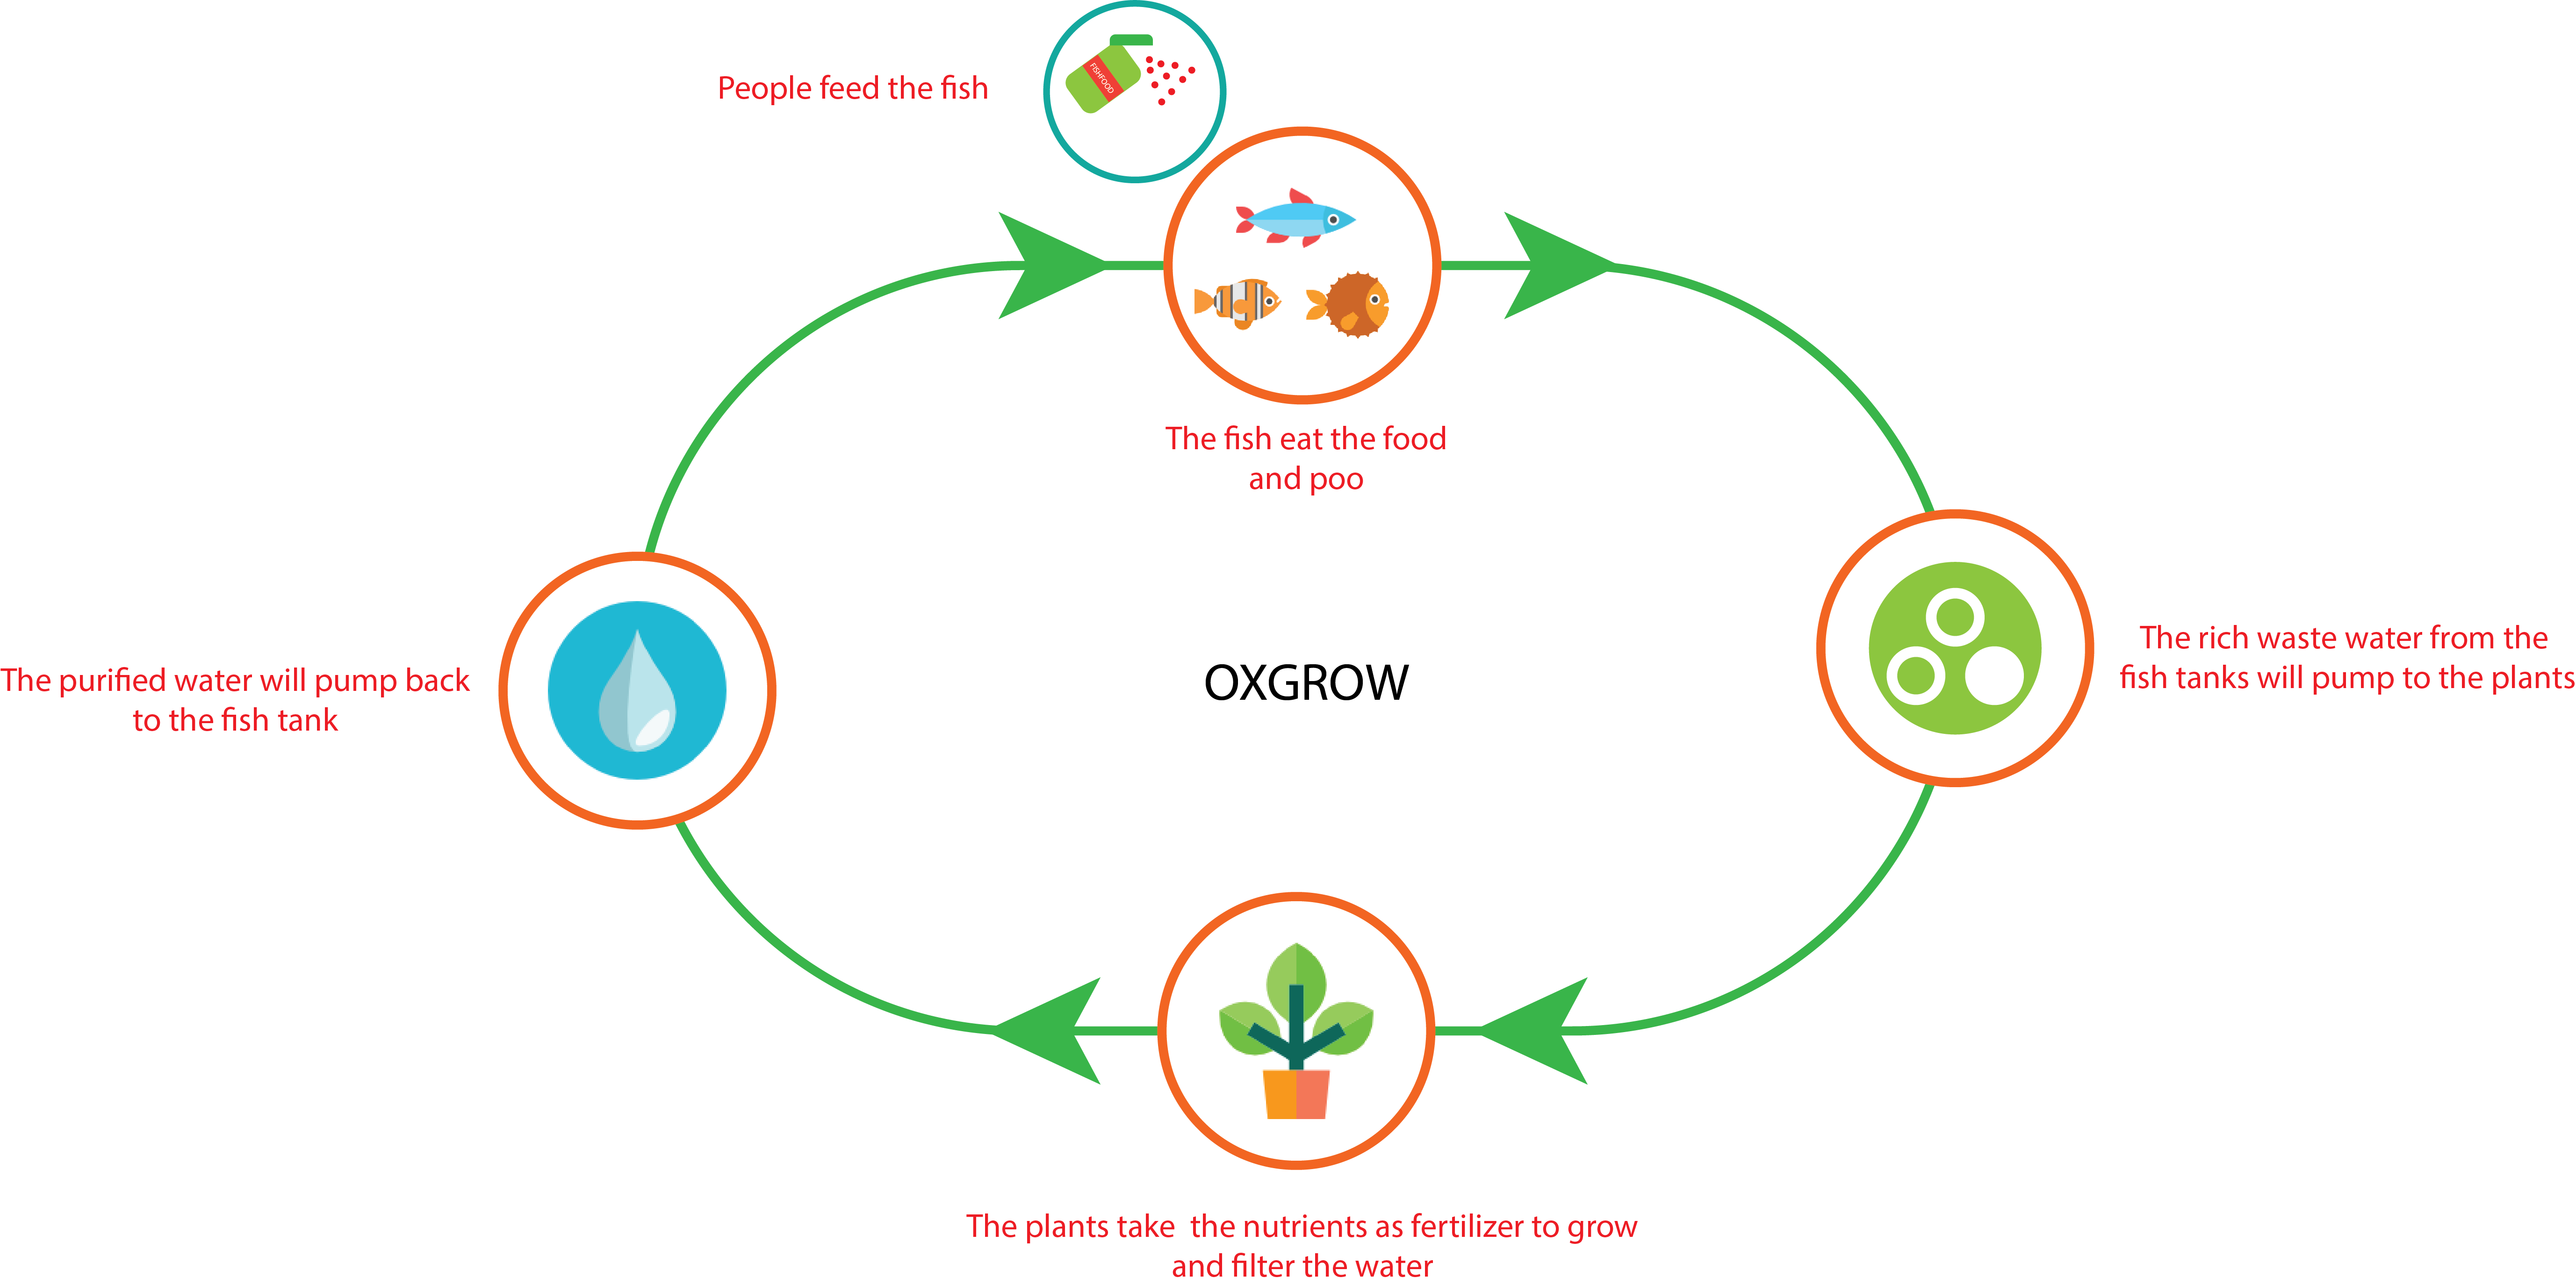
Simply, aquaponics is a integrated cultivation of fish and plants. Co-operating a living ecosystem to help each other to grow. In our case fish and plants will help each other and make a ecosystem to grow themselves by providing resources to grow one another. The Fish will produce the waste and the plants use the waste as the nutrients to grow. Then the Plants will filter the water and remove all wastes from the water, provide clean water for fish.
How it works?
My plans and concept design!
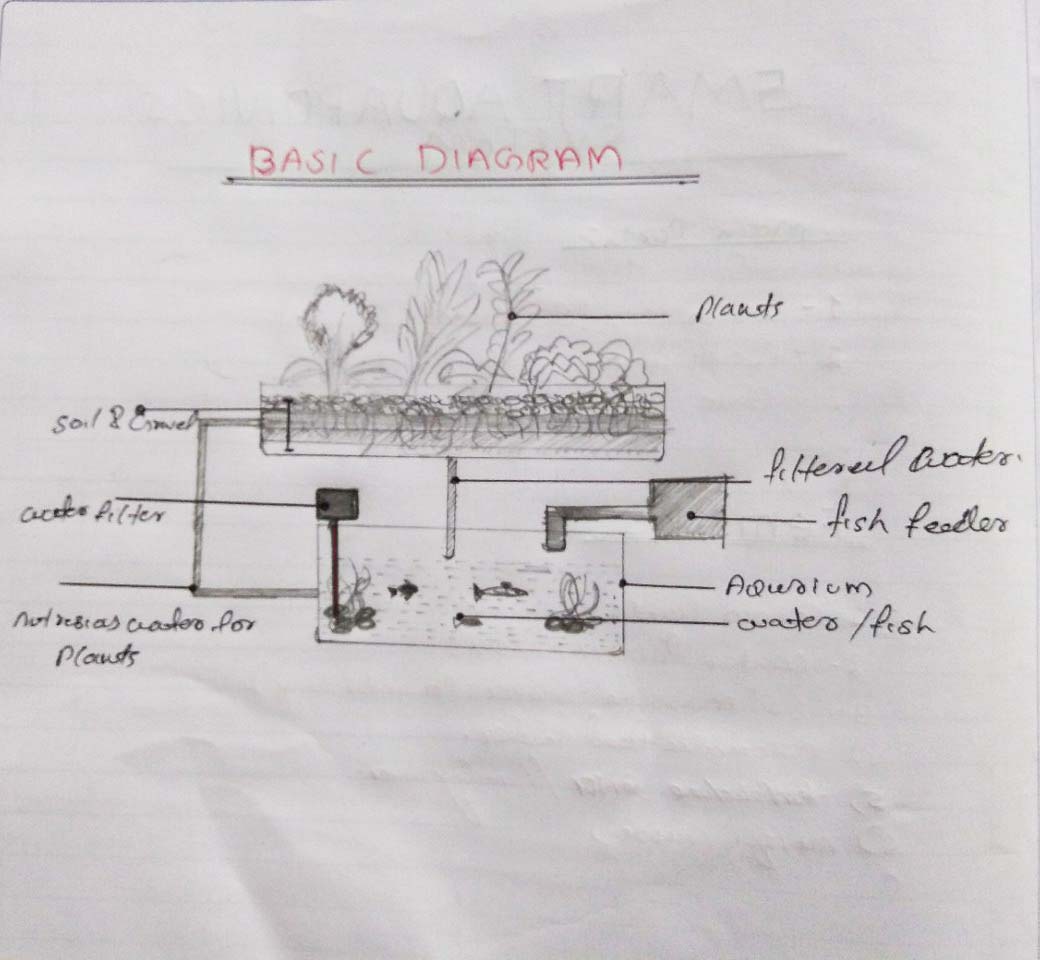
In order to go forward with the project i should need to plan to build one. First i drawn the basic diagram of the aquaponics. you can definitly find that below. Then i need to draw a 2D rough sketch of the final results. this should help me when the design process. After all the 3D concept design that will axactly tell how it should be looklike in real world.
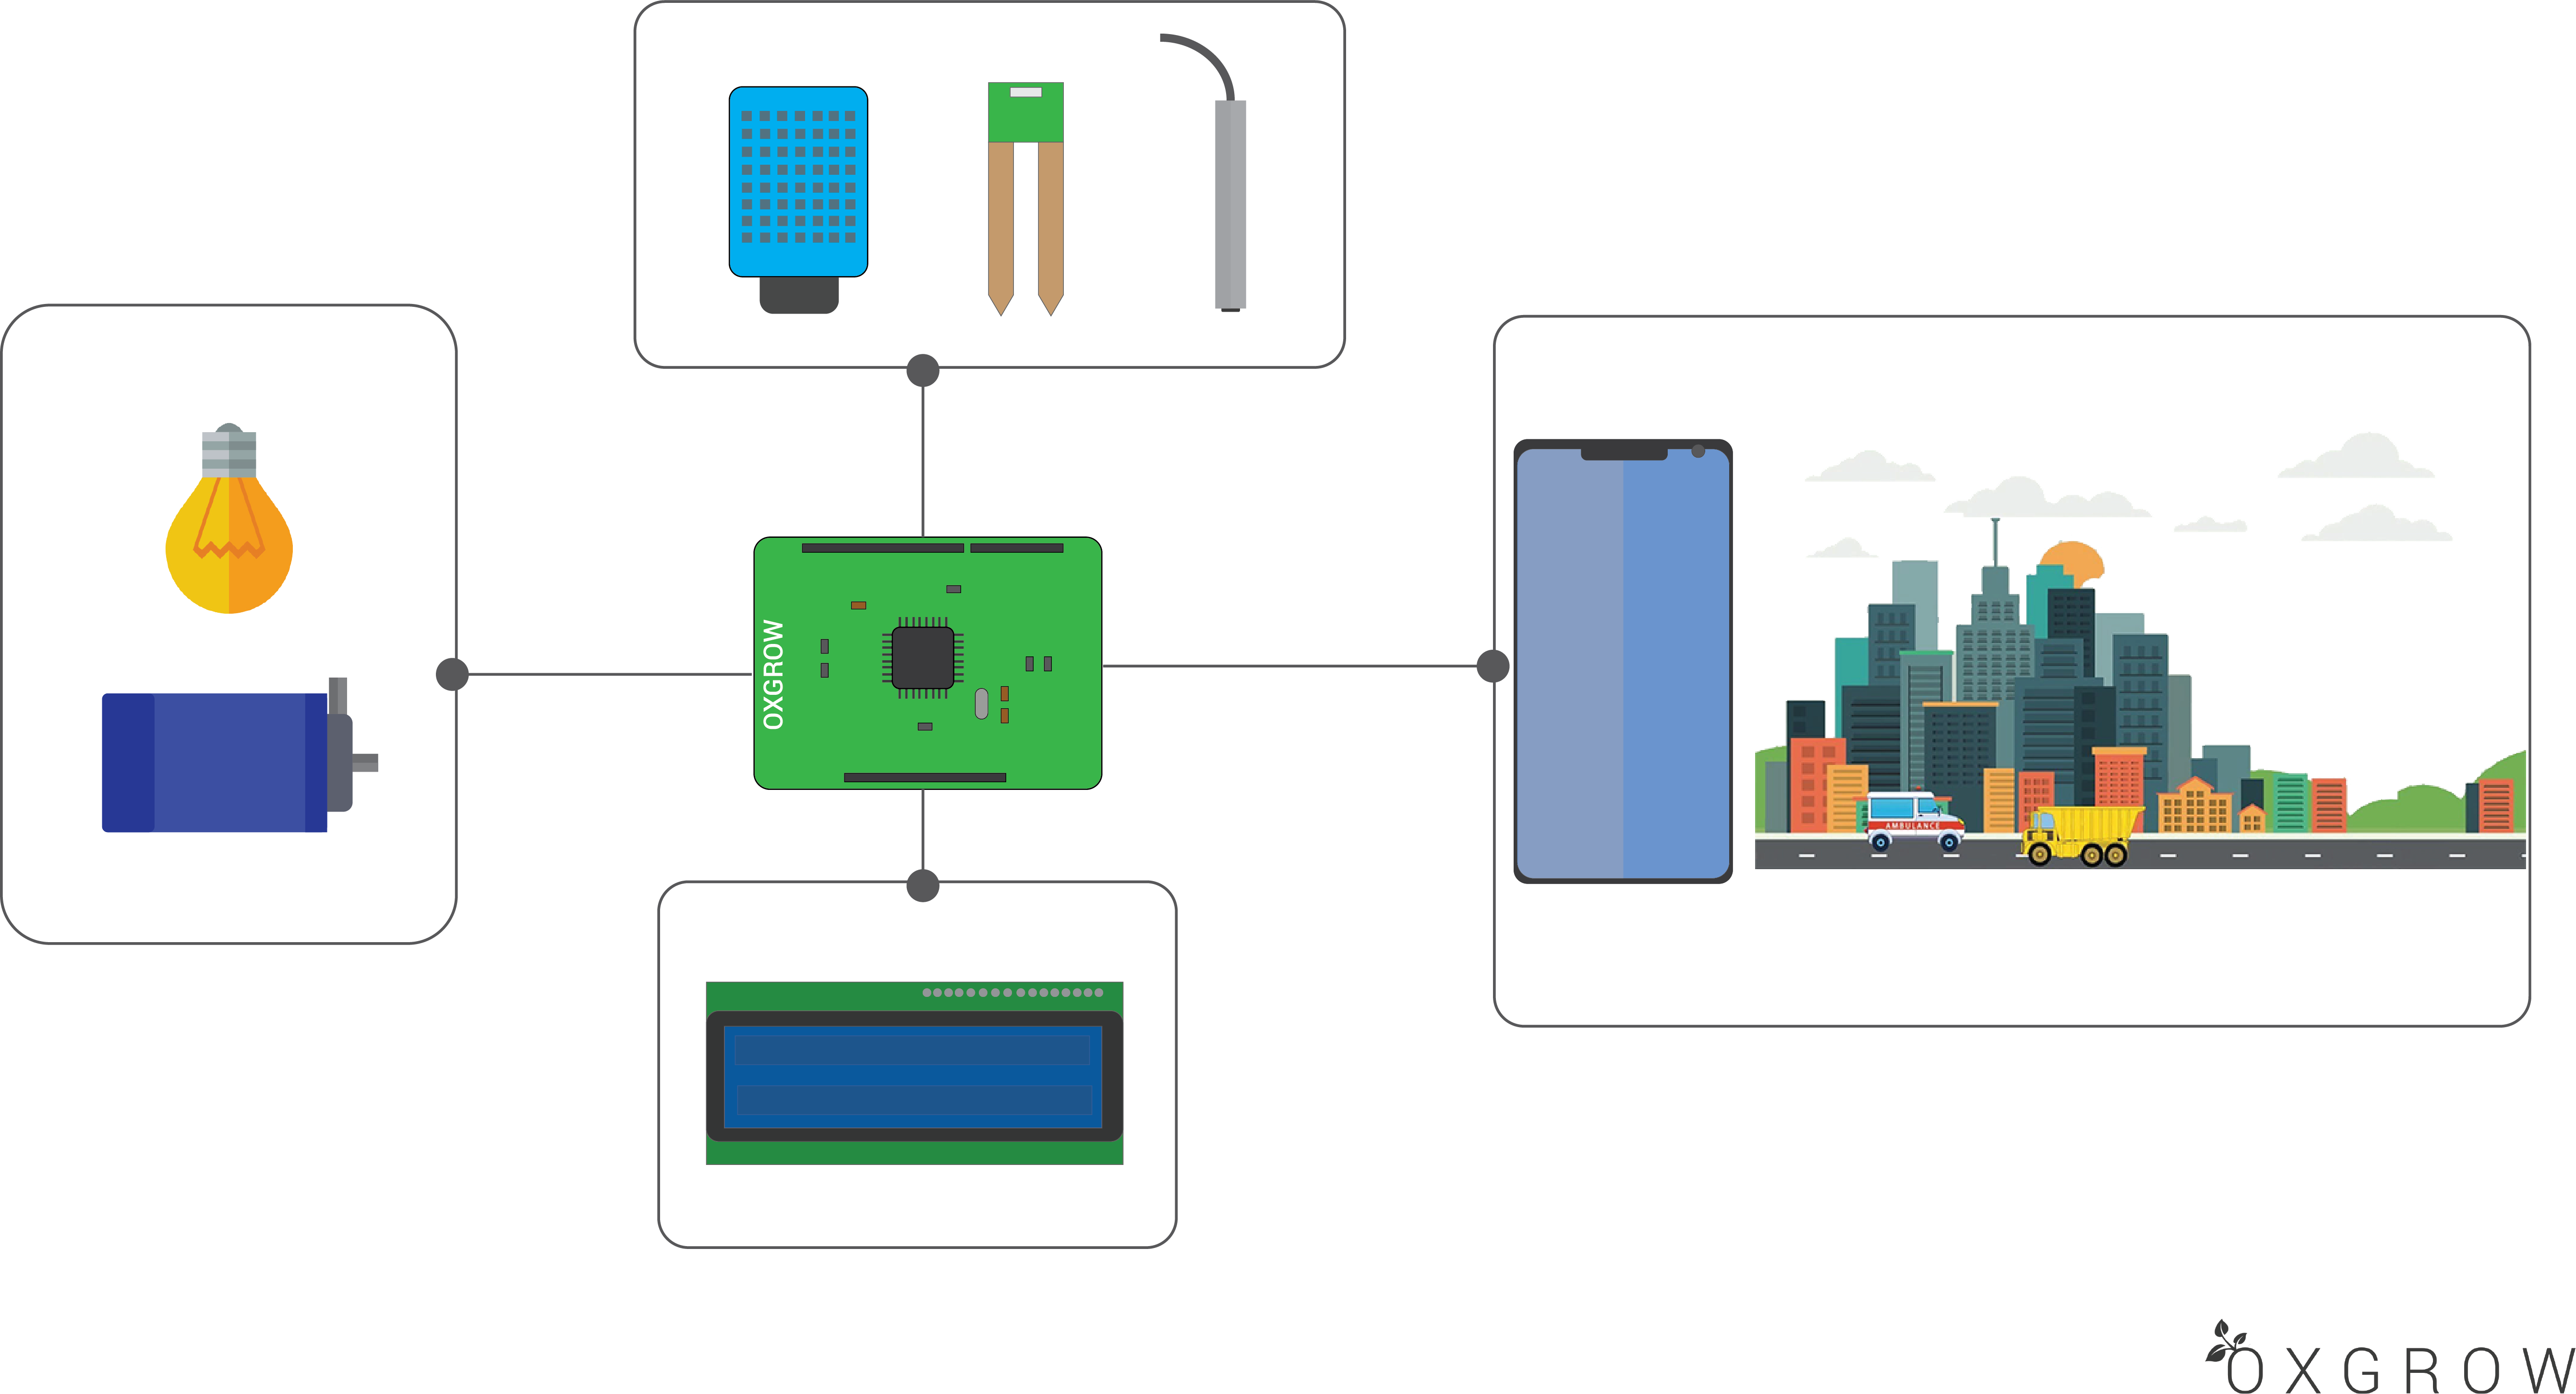
Then i made a diagram about the modules and hardware used that iam going to use in this project. May be in future, i need to be add more module if necessory.
I need to design a compatible and stylish design for the OXGROW. So the OXGROW will be interior style friendly. I drawn a basic 2D design of the overall look of OXGROW. But it should have a lot of changes in future of this project.
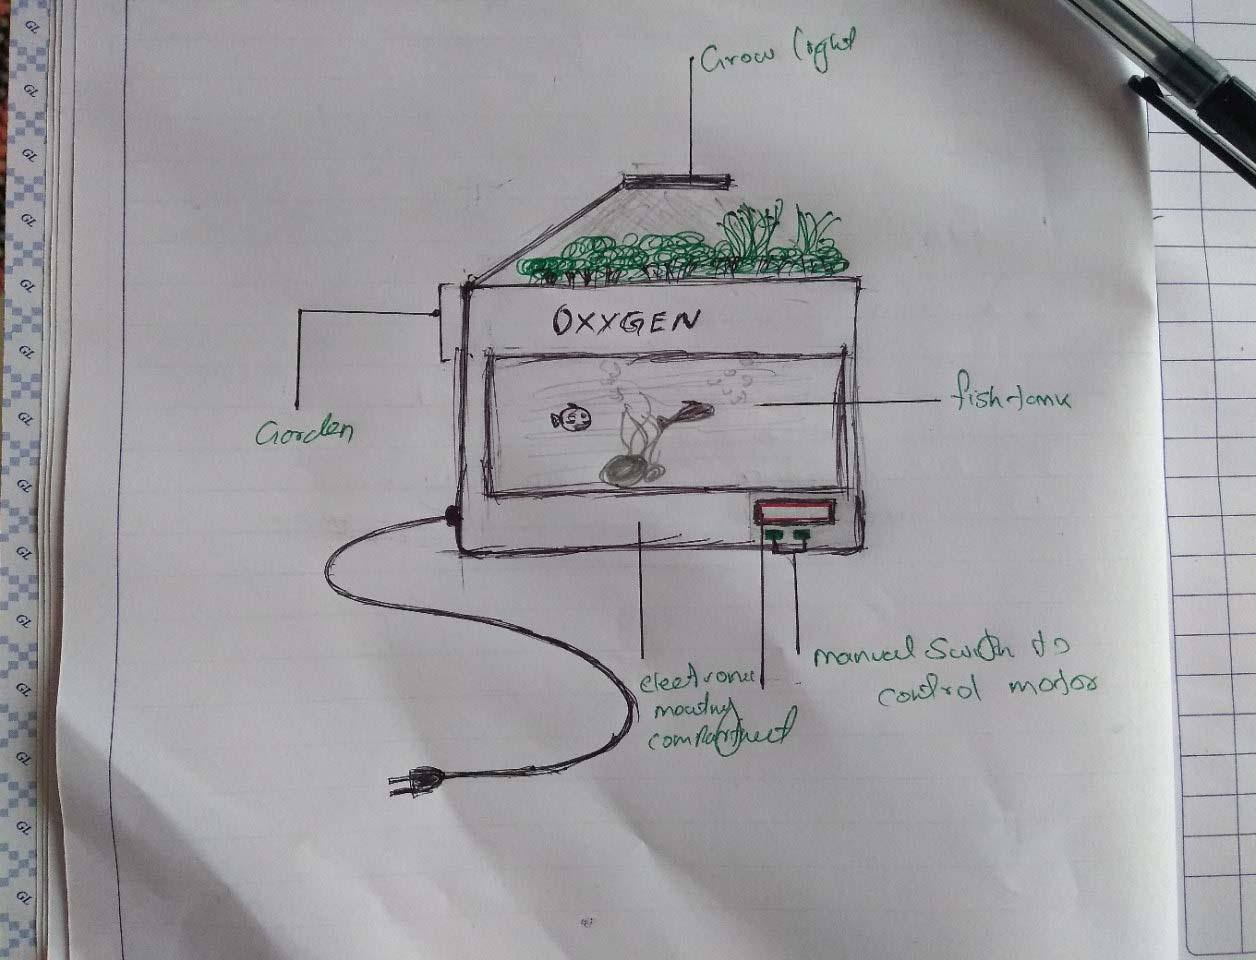
After a while i designed a basic 2D view of OXGROW final result with the help of Adobe illustrator. You can figure out what am saying this whole time by viewing this image.
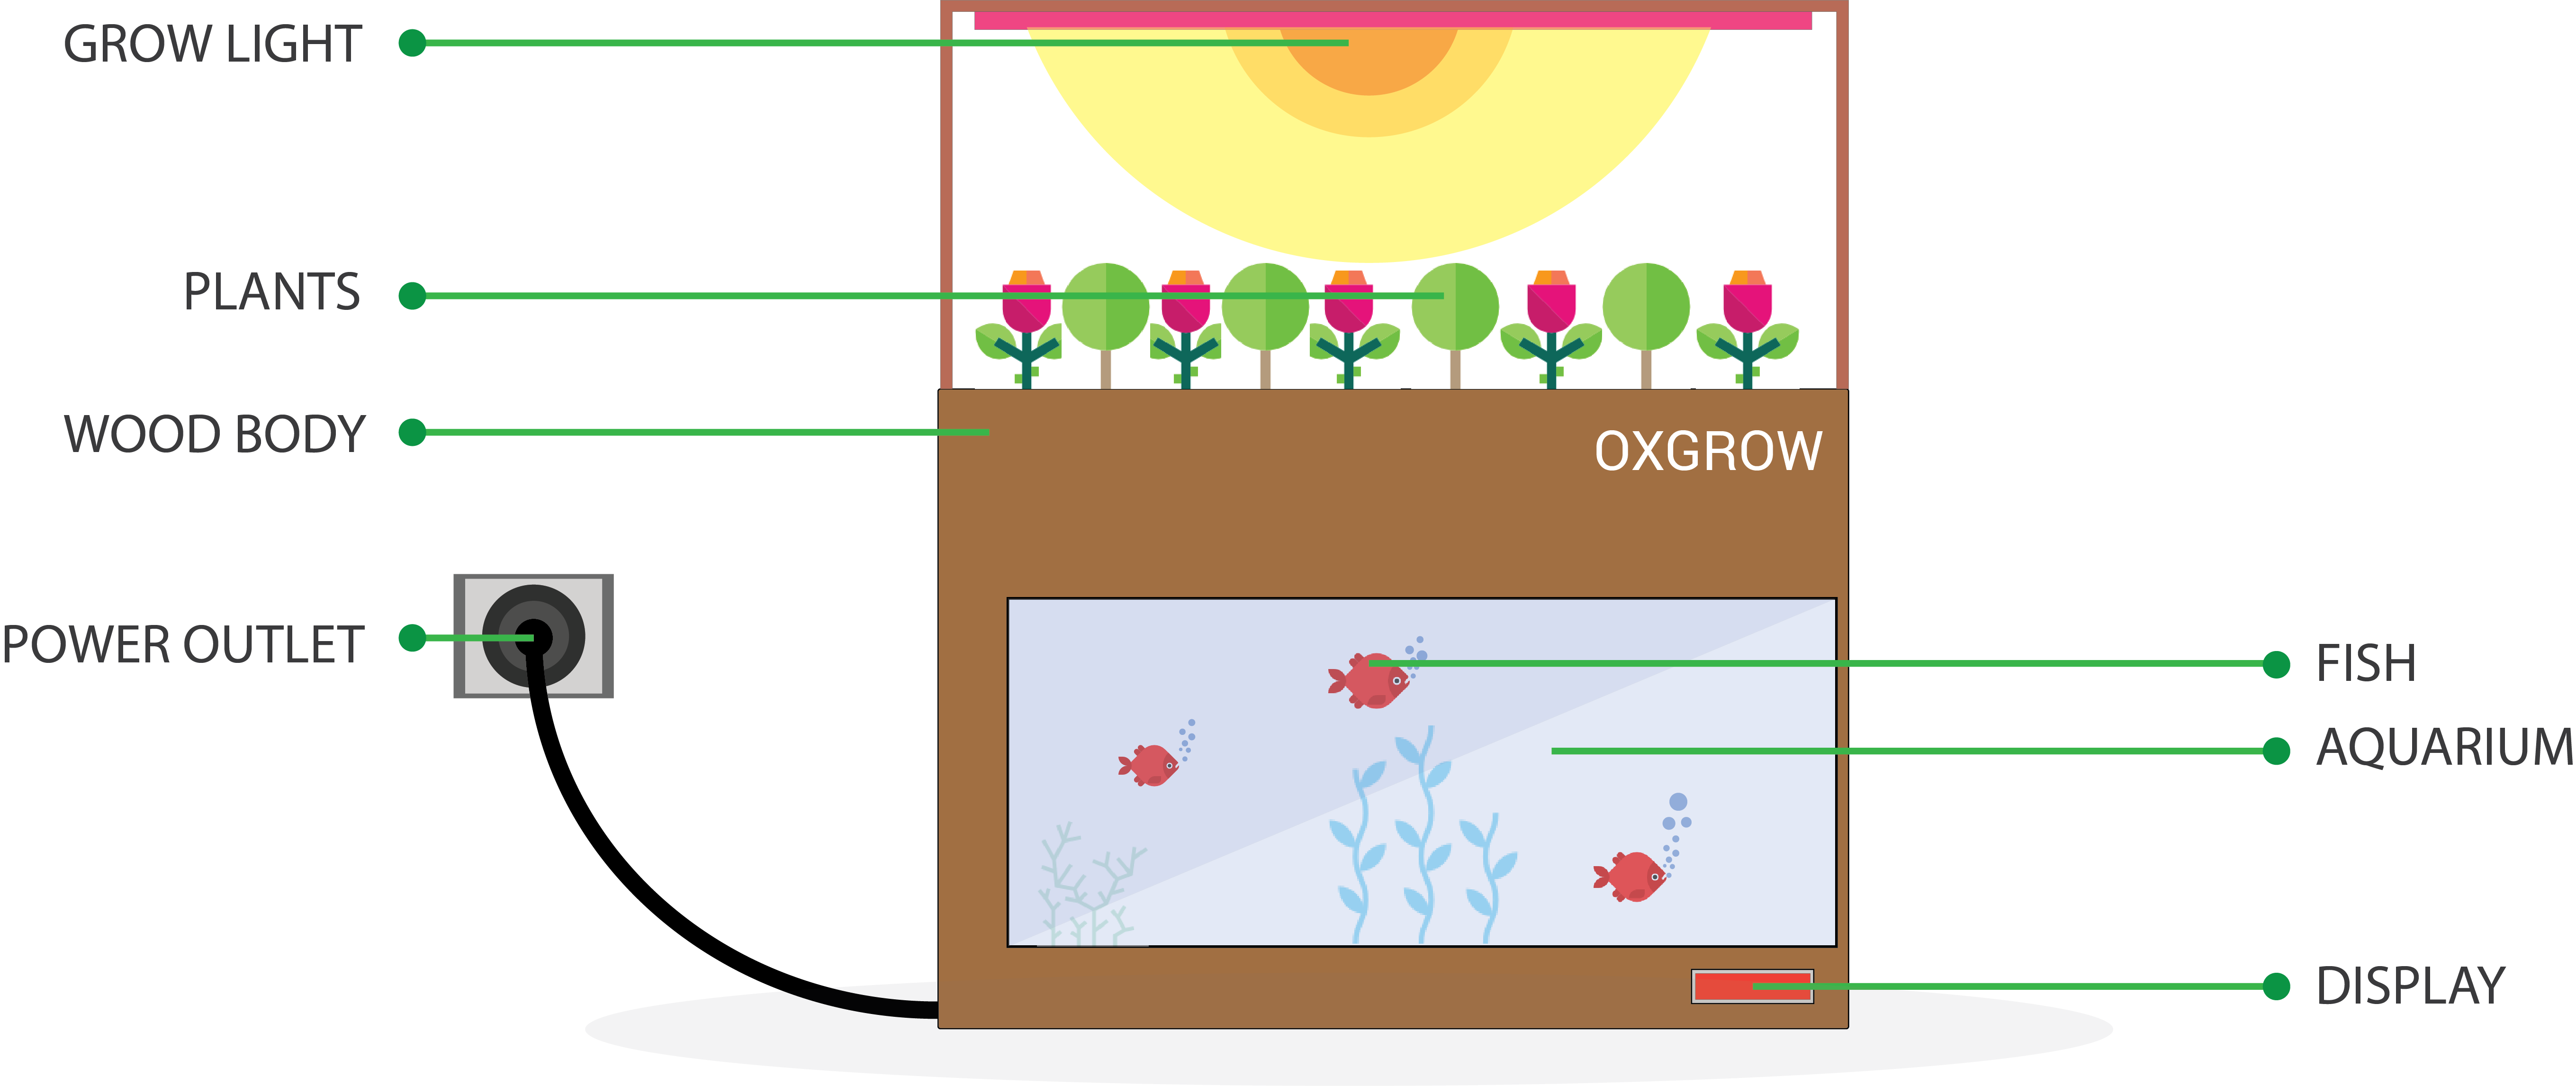
Rendered Photo Realistic image
I designed and renedered the 3D model of my OXGROW aquaponics ecosystem by using fusion360. This will give me a totall understanding of howi need to get the final result in the end of this project.

Designing the Enclossure
Body
- Width : 424mm
- Hight : 350mm
- Depth : 224mm
Aquarium
- Width : 350mm
- Hight : 156mm
- Depth : 180mm
Grow Bed
- Width : 362mm
- Hight : 86mm
- Depth : 192mm

After two hour i alomst completed the designing process. That you can see in the below images.
CNC milling the Enclossure
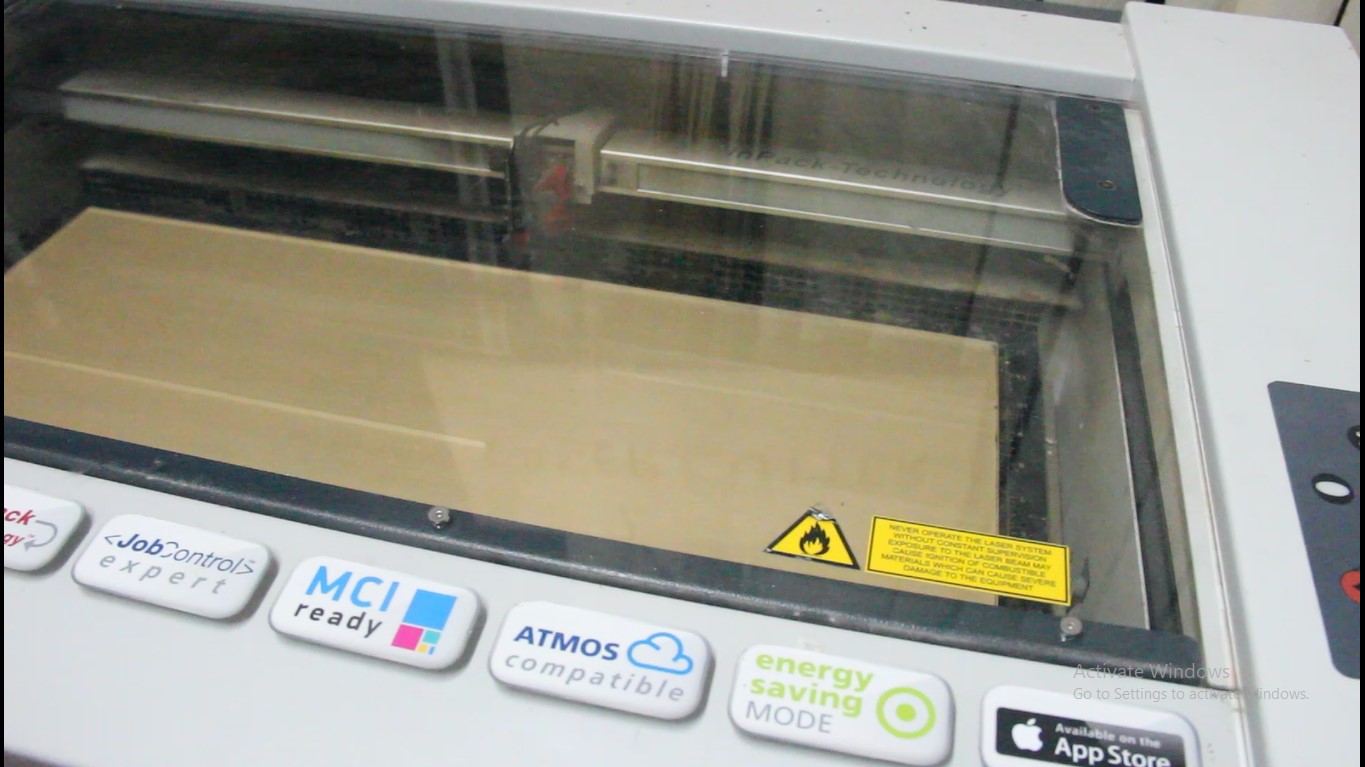
The design process is done fast as i can. Now i need to cut out the designed parts for the enclossure. We have a shopbot in our lab. I decided to use a 12mm generic plywood to make the enclossure and the support racks. I need to cut out a total of eight pieces, probably it take a half of a 4x8 feet plywood sheet. Visit my CNC machining week for more information about CNC machining.
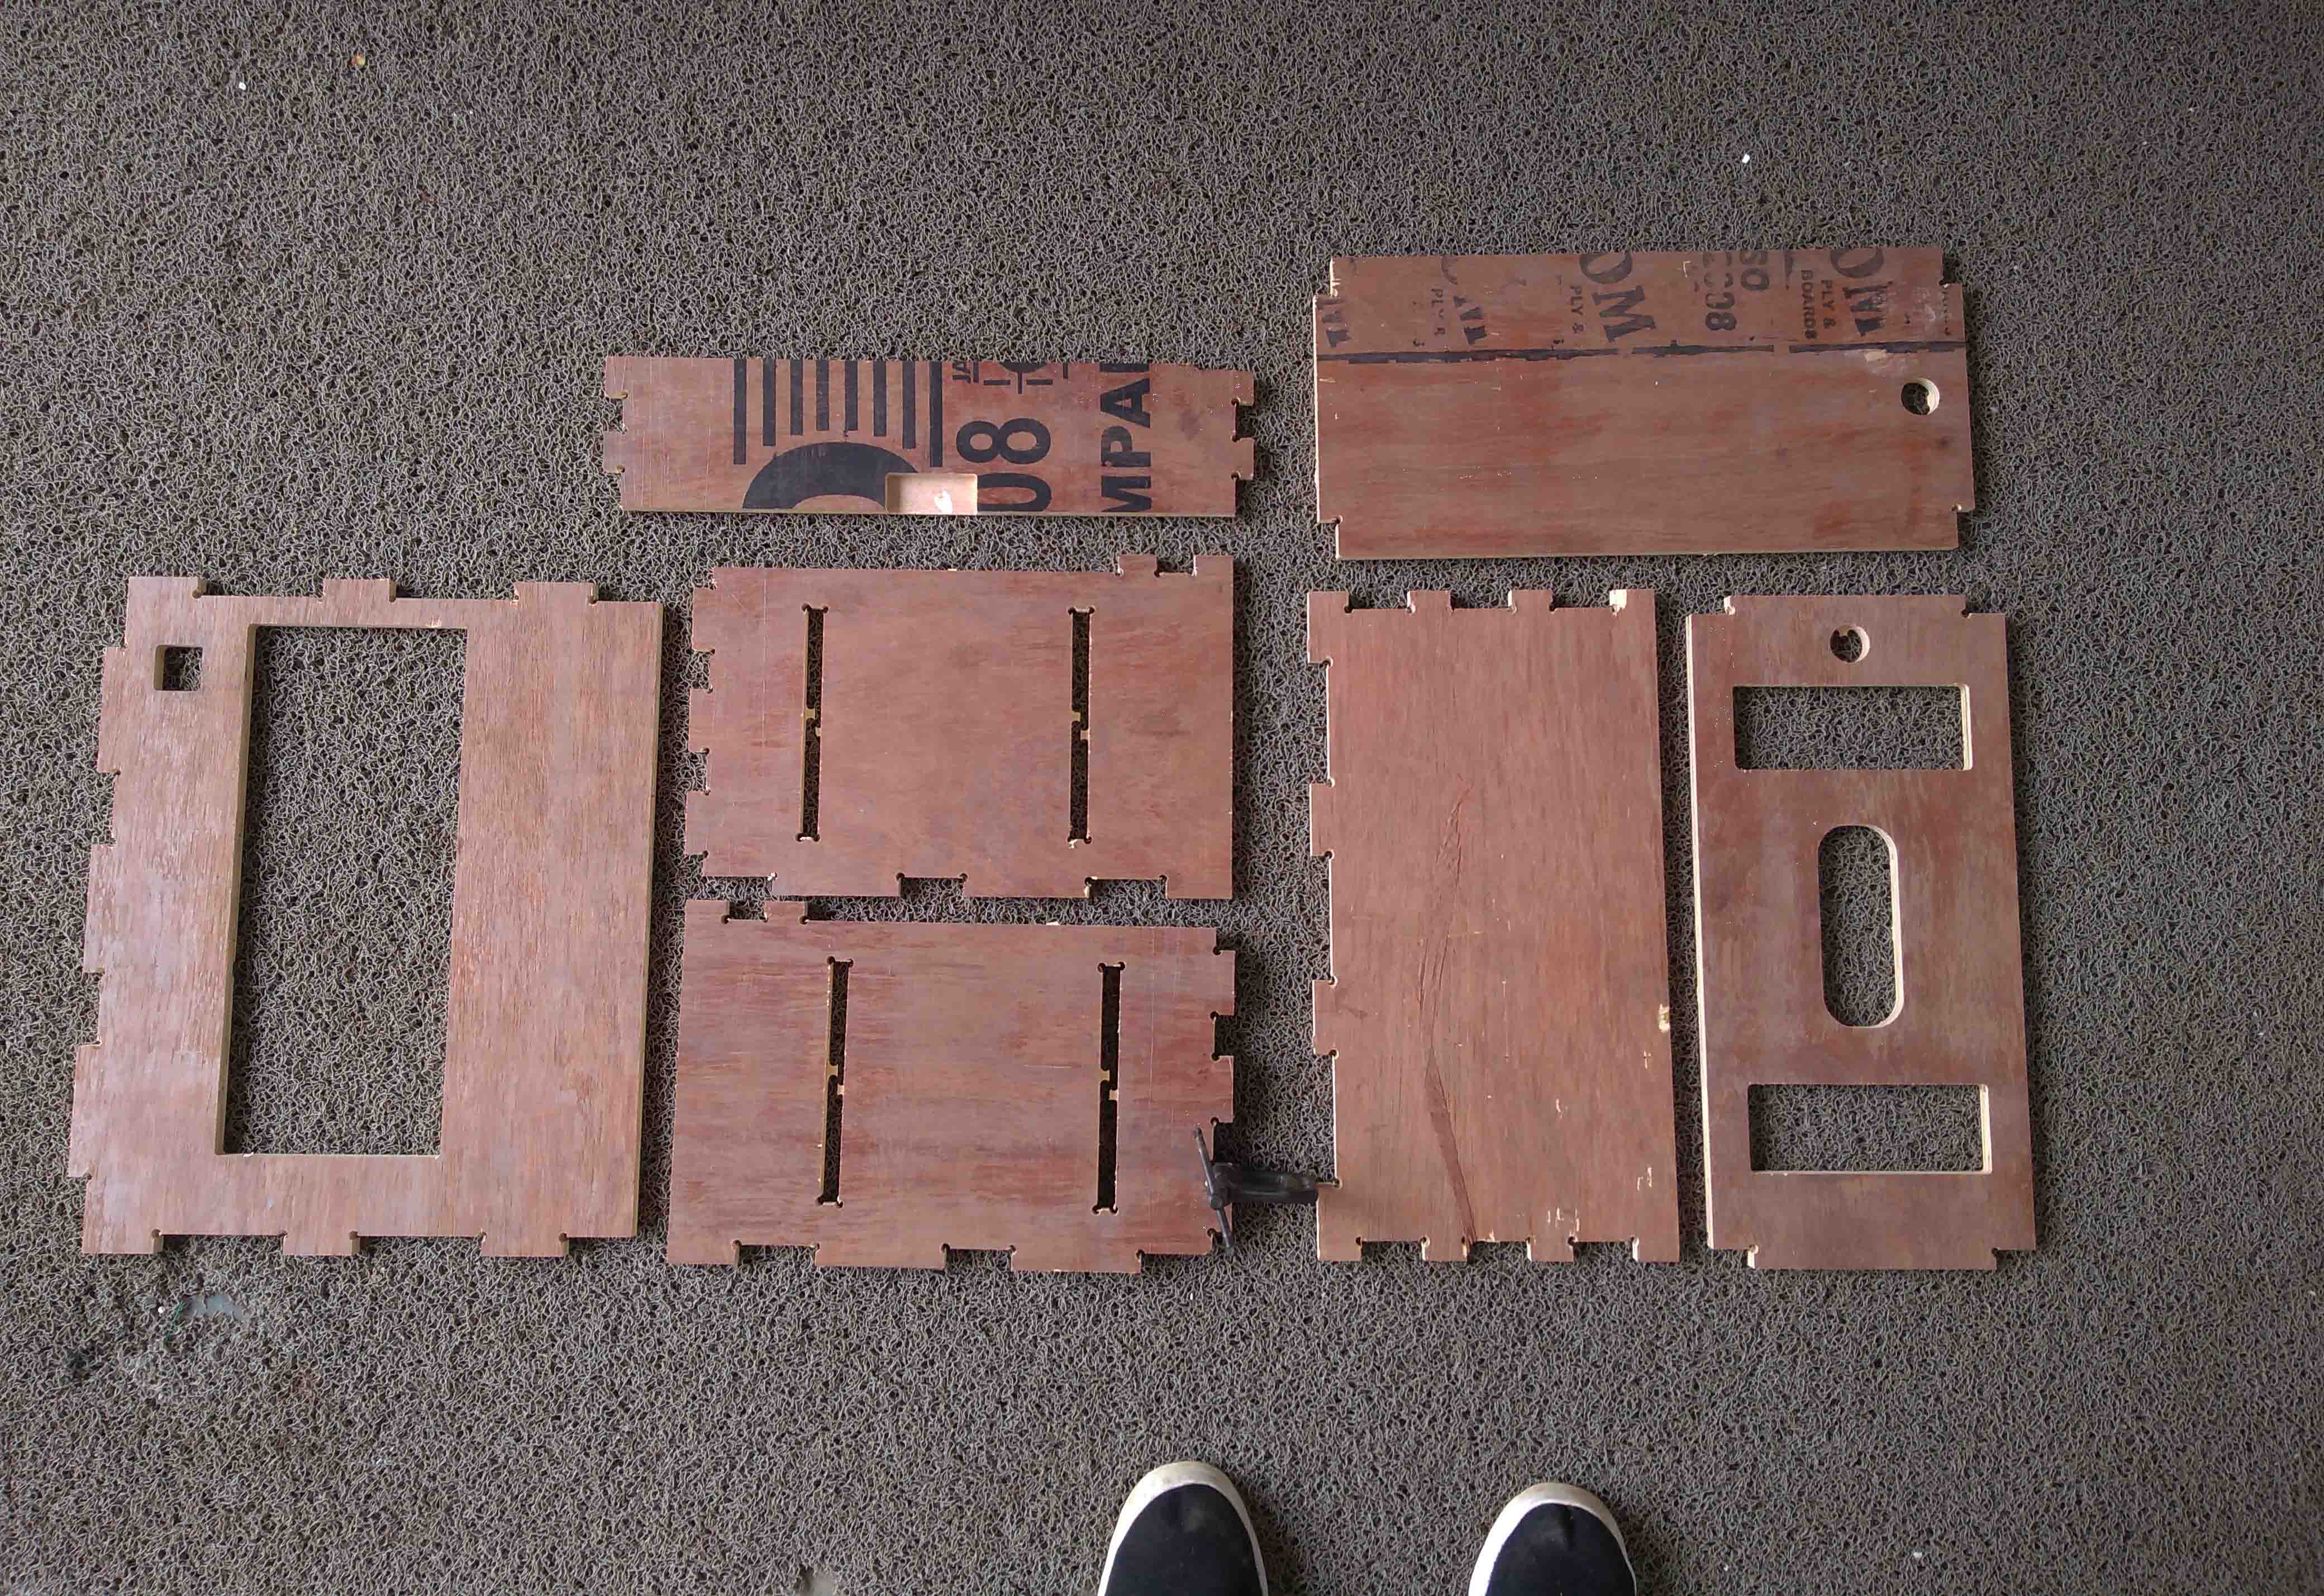
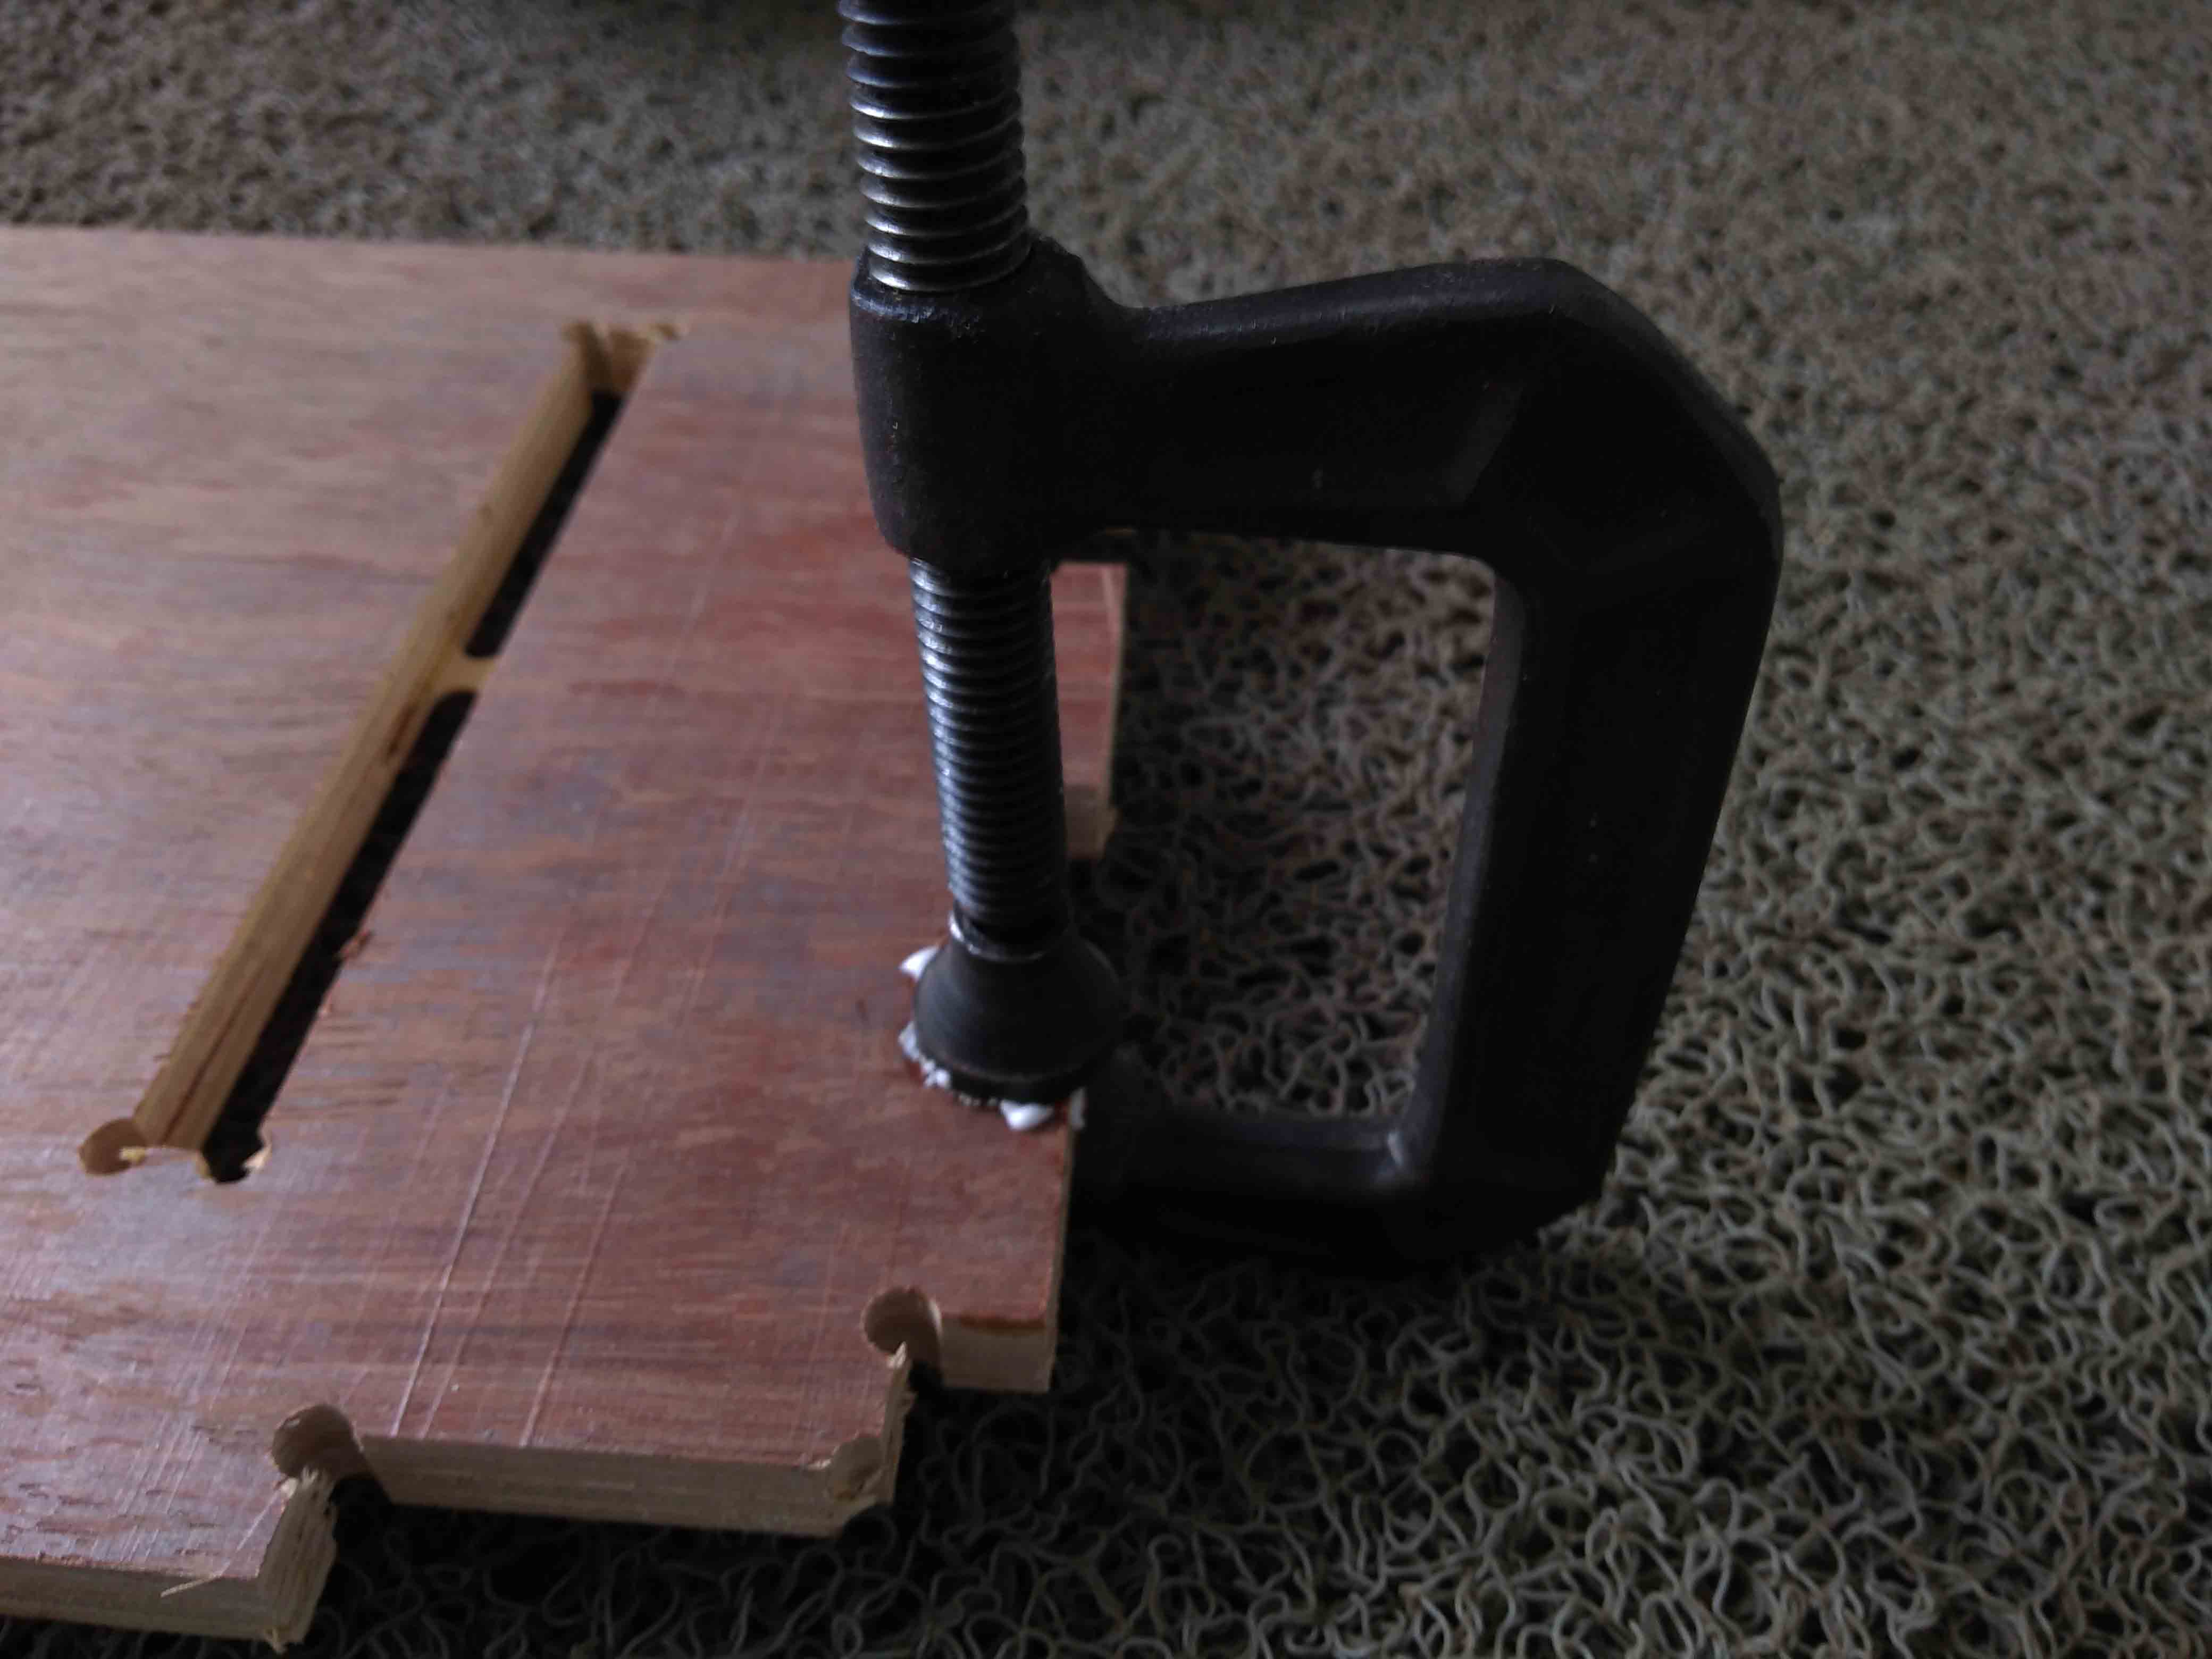
After cutting out the parts, i checked every parts are press fit each other. But when i disassemble them, some pieces from edges are ripped off. So i used some wood glue to glue them back to the place were the belong and used a G clamp to hold them together. The problem were solved, it is super strong now. They even cant noticed.
Smoothening and Painting
There are a lot of rough edges in the cut out parts. mostly it appear after CNC cutting. But here i also faced another problem, Unfortunatly i used a poor quality plywood. So there is some bumbs around some areas. All i can do is now filing and sand papering. I also need to paint the pieces, So sanding is necessory to do. I used the small files that are available in the fablab. It is pretty handy because the righ size and right files help me to remove all the rough parts from the CNC parts. Then i used 220 grit sand paper for sanding the Cut out parts. If necessory i also have 320 grit sandpaper for finishing touches. But i doesnt use the 320 grit much because the 220 grit is more enough to give a good result.

After along time of filing and sanding, roghly 3 hours i think. I take rest for a while. After that i decided to start the painting process. First i need to collect the material for painting. First i think about the can sparys but i decided to use normal painting with the brushes. Its more handy for this process. I need to paint a single coat of wood primer before painting them, adding another coat over it if necessory but it might not be needed. So first the shoping. I bought all the materials from a local hardware shop.
- 1 x White Paint matte(500grams)
- 1 x Wood primer(500grams)
- 1 x Terpendine aka tinner(250grams)
- 2 x Paint brushes (one is smooth)
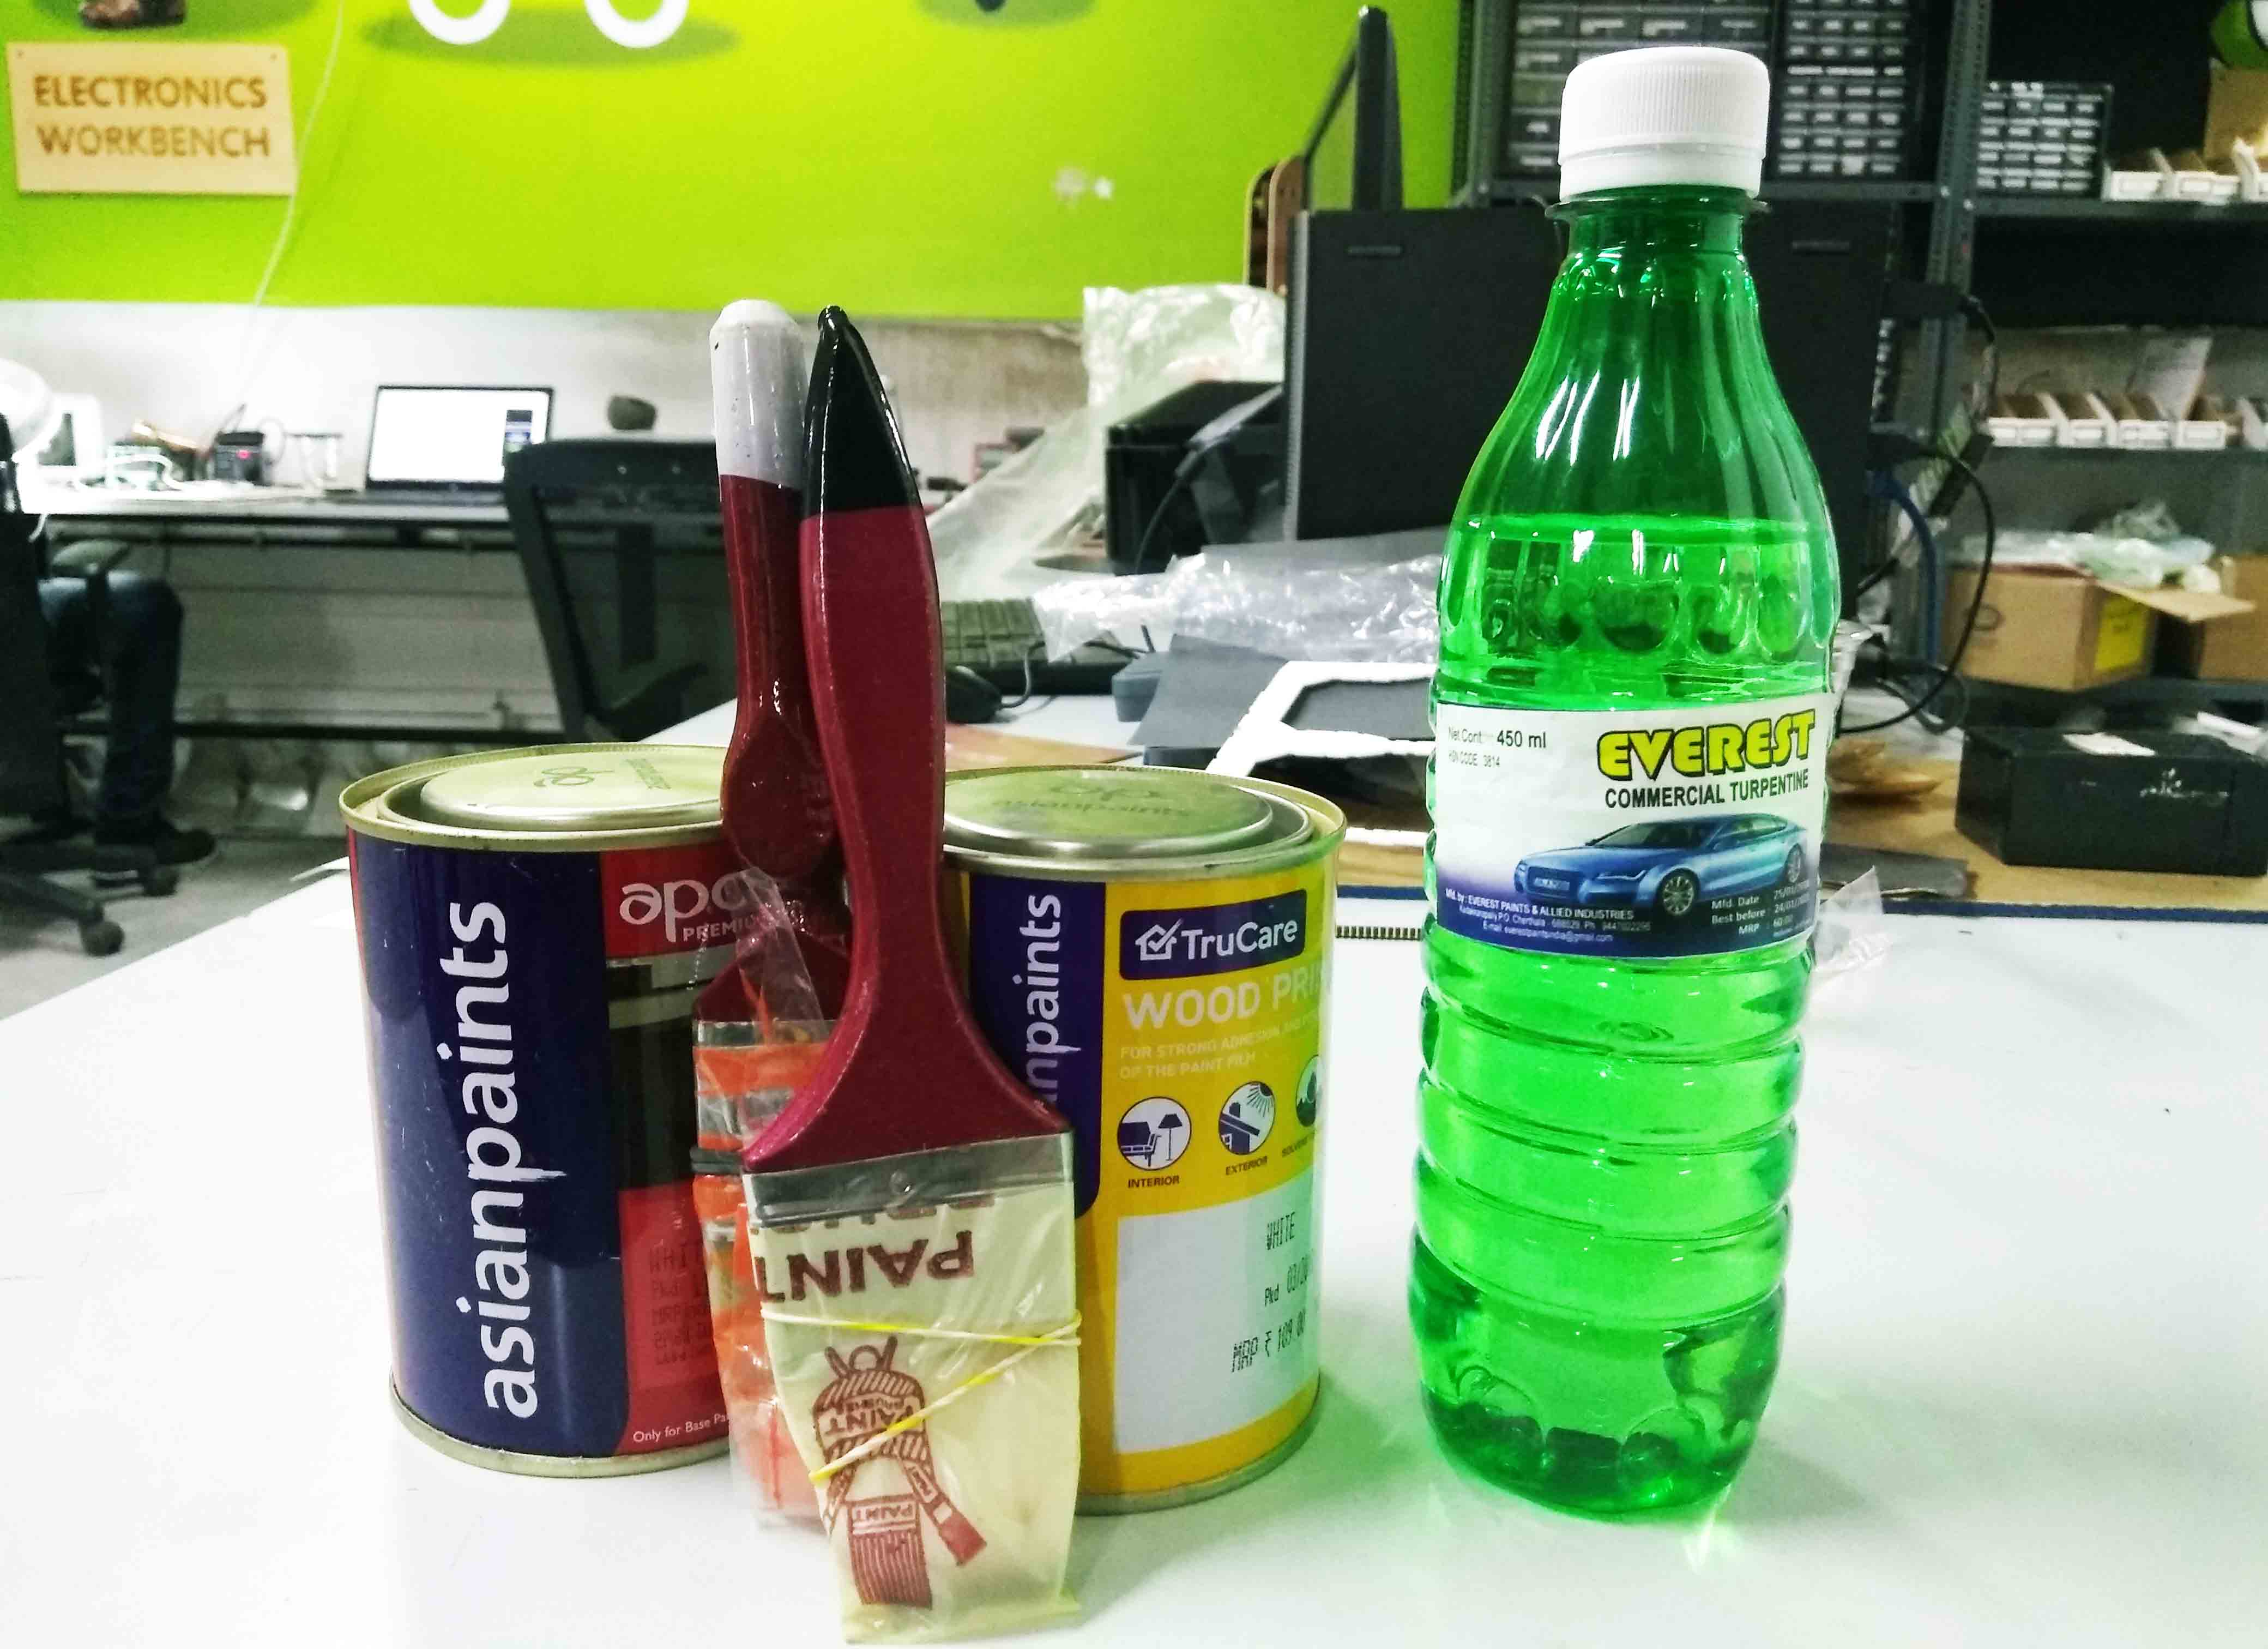
AFter gathering all the key materials. i started to paint the primer first i took all the individual parts and painted them carefully. After applying primer to all the pieces i waited to dry the primer. It took almost 6 - 8 hours of time. I can utilize this time to take a nap.
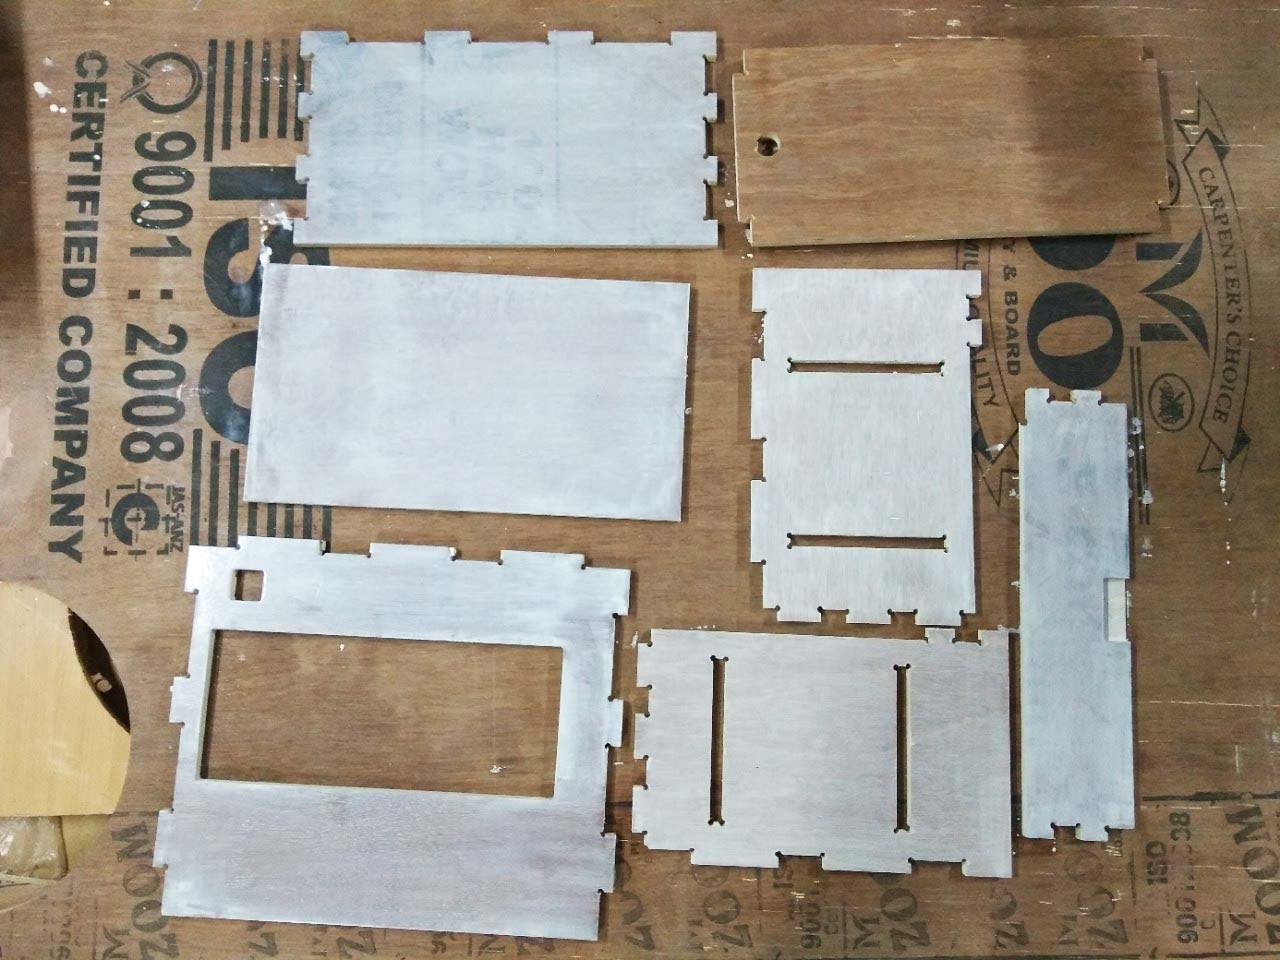
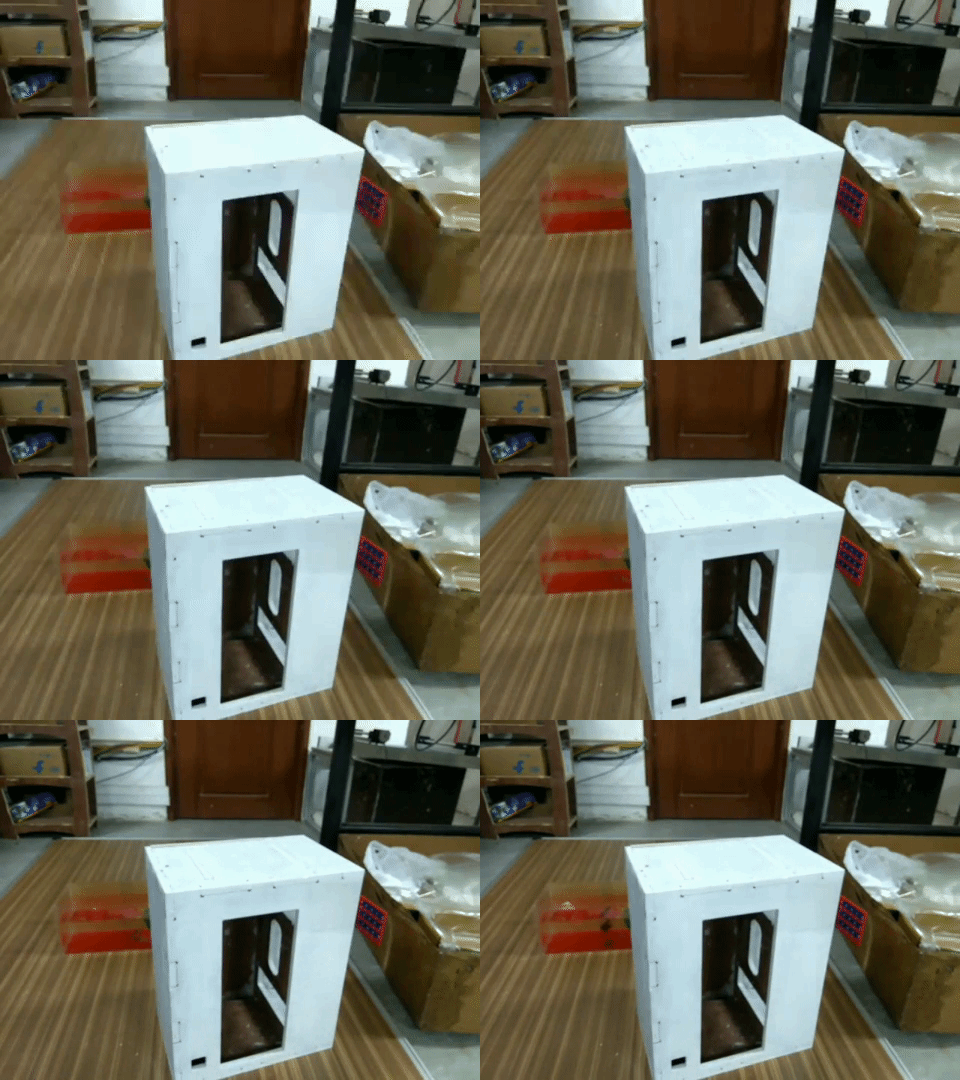
After the paint tried, I took the pieces for painting. I mixed the paint and terpendine in a ration of 4:1. I assembled the whole body, If i assemble the body after painting i wont fit well. After assembling the body, I started to paint, it take almost 2 Hours. I used to coat of paint for a finishing touch. Then i took the body for drying. The curing time for the paint is about 24 hours. So i decided to utilize these time for building the Aquarium and grow bed. Iam sorry, i forgot to take a photo after painting finished.
Building the Aquarium

After cutting out the parts. I started to glue the parts together. For this i used a heavy duty Super glue and Silicon sealant. First i attached the parts together using some masking tape that you can see the below image.
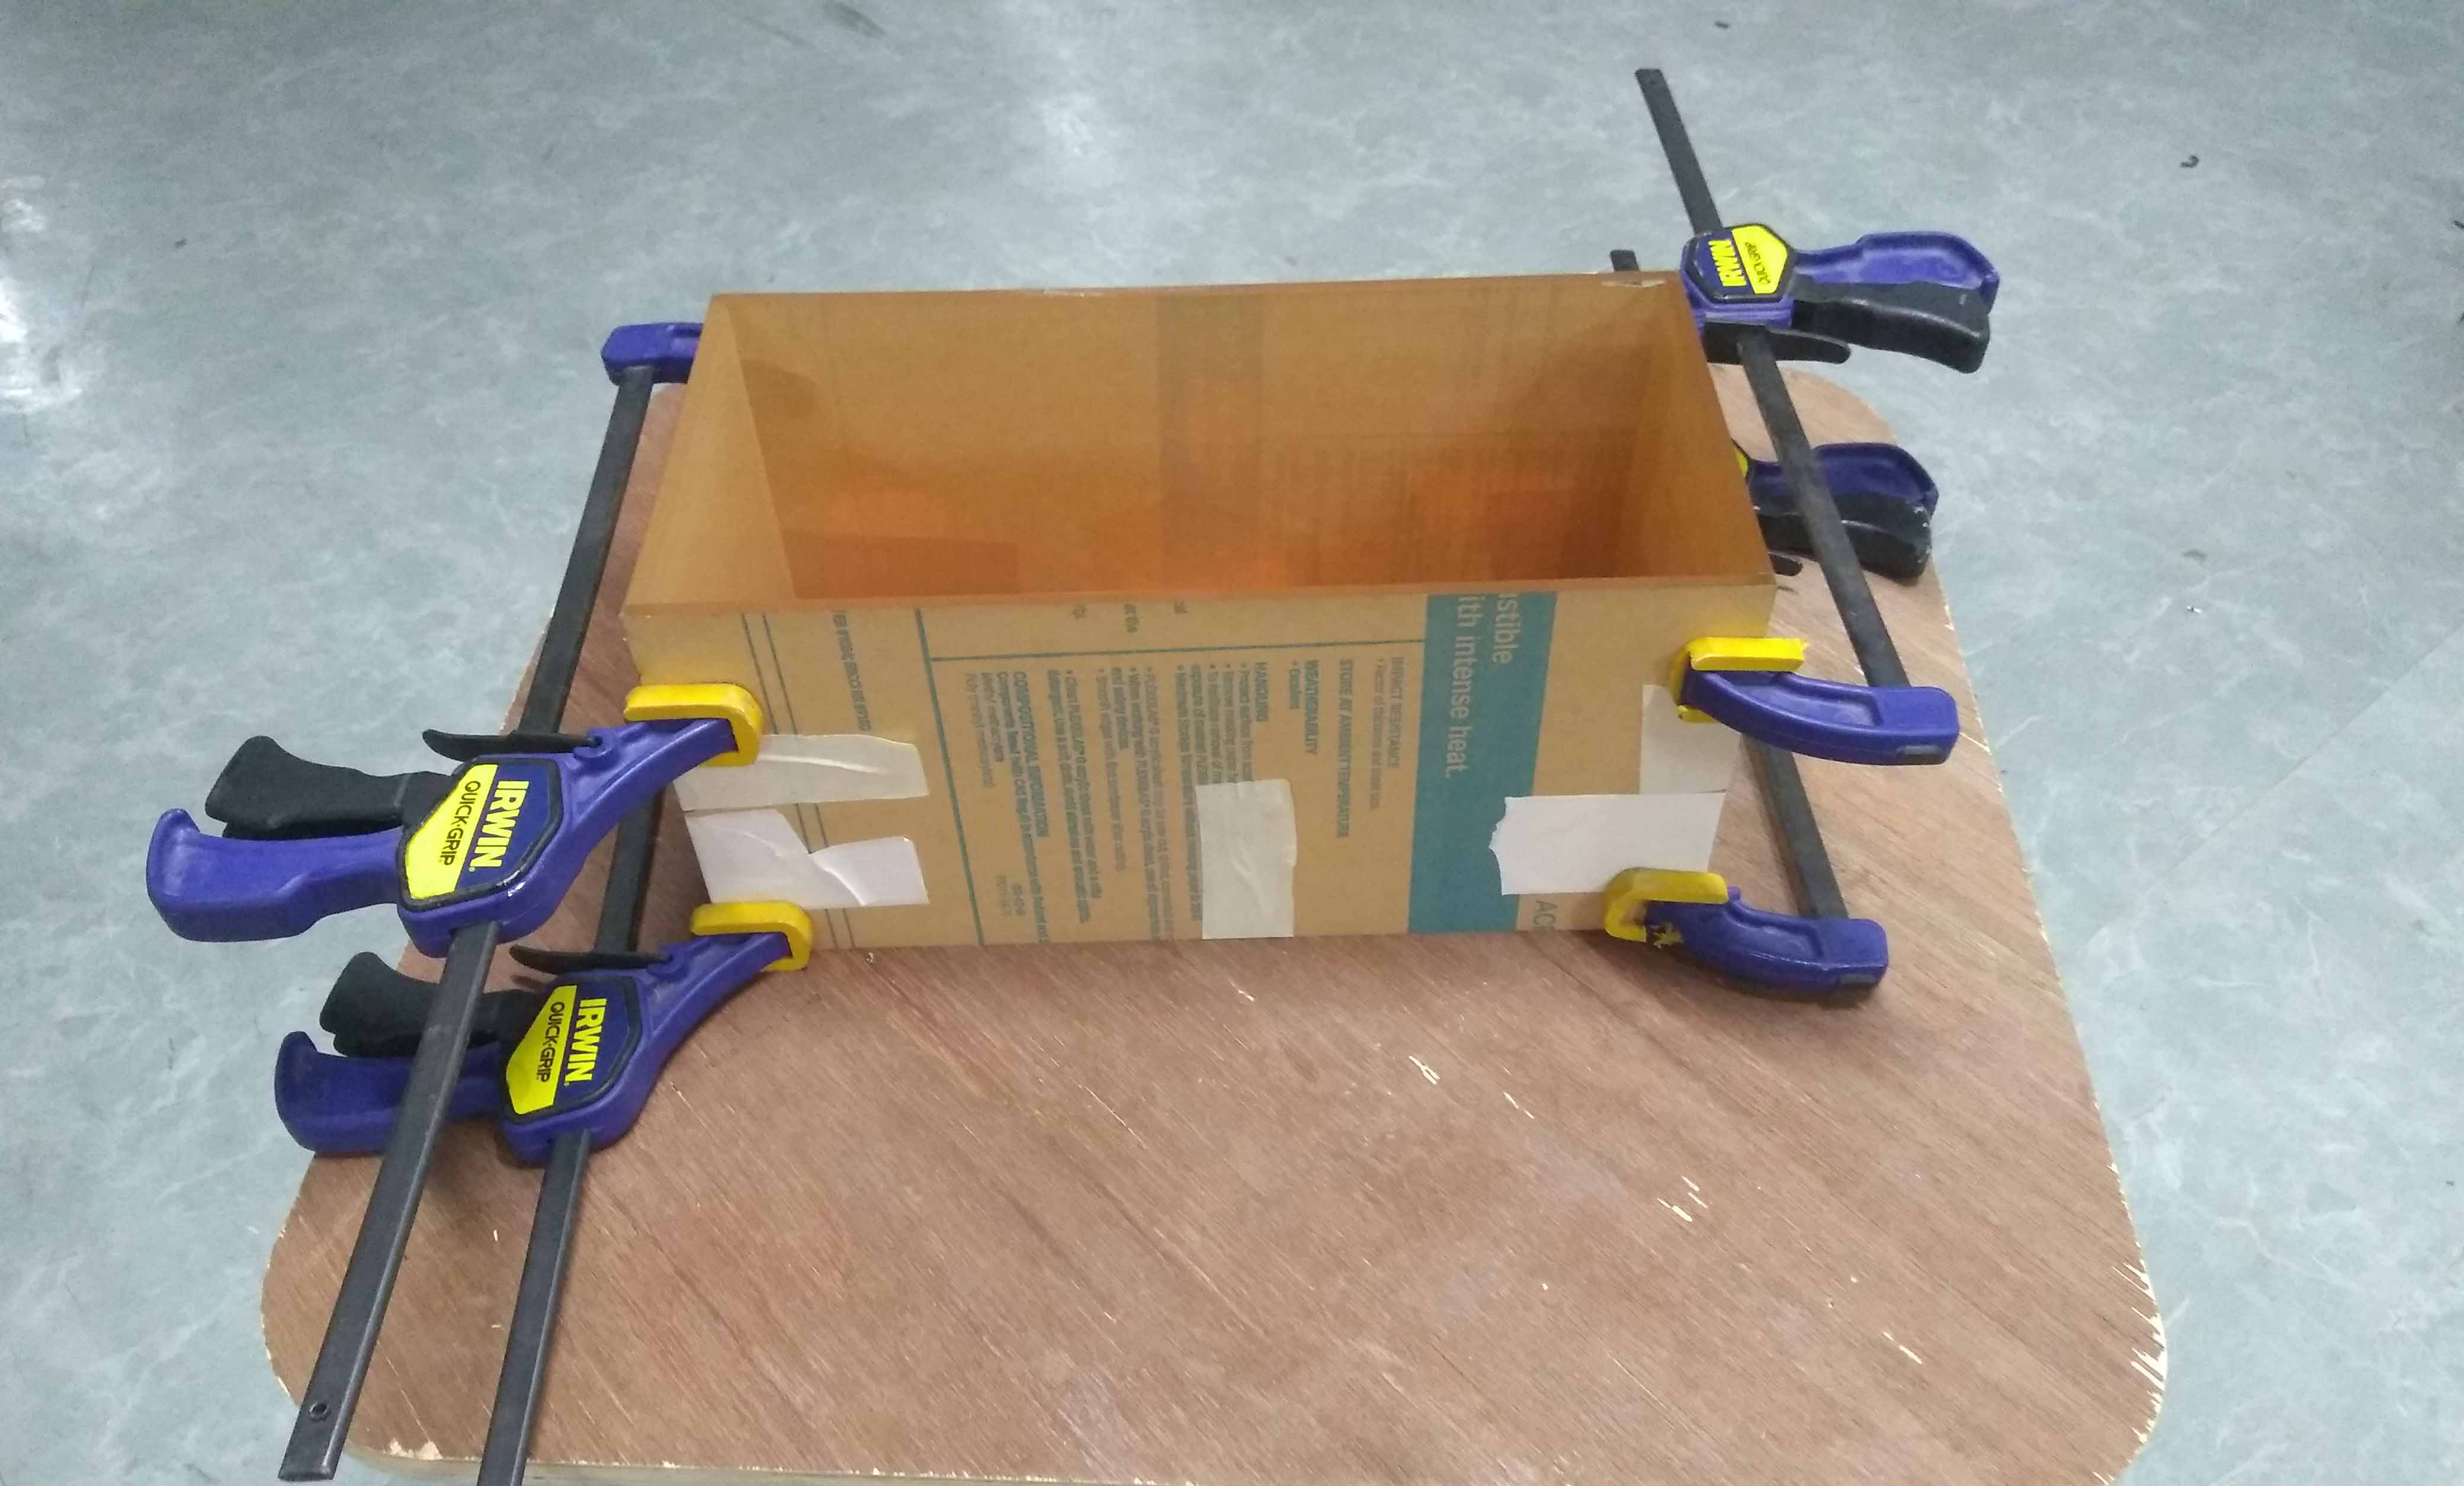
Then i also used the F clamp to holding the parts sturdy. Then i started to apply super glue in all edges with a liitle amount. AFter that i waited to cure the super glue. Then cleaned it and applied the silicon glue. The silicon glue is little tough to do. But my outcome is good enough. I used the silicon glue for sealing all edges and gaps. Then waited to cure the glue. To fully cure the glue, I need to wait about 24hours.

Building the Grow Bed
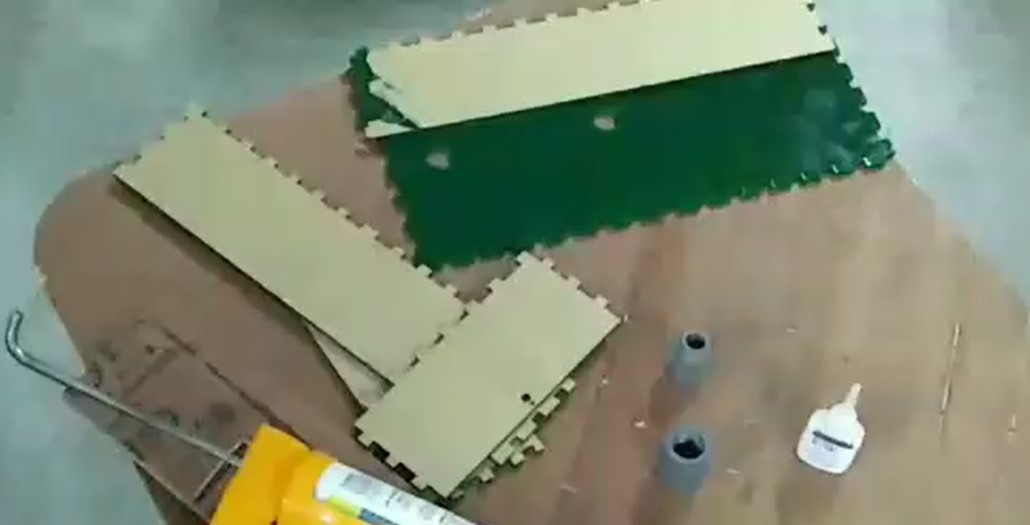
Iused the pressfit technic to attach the parts easly. After that i used the same way as i did in aquarium build to glue them together. Then i put the grow bed for curing the glue.
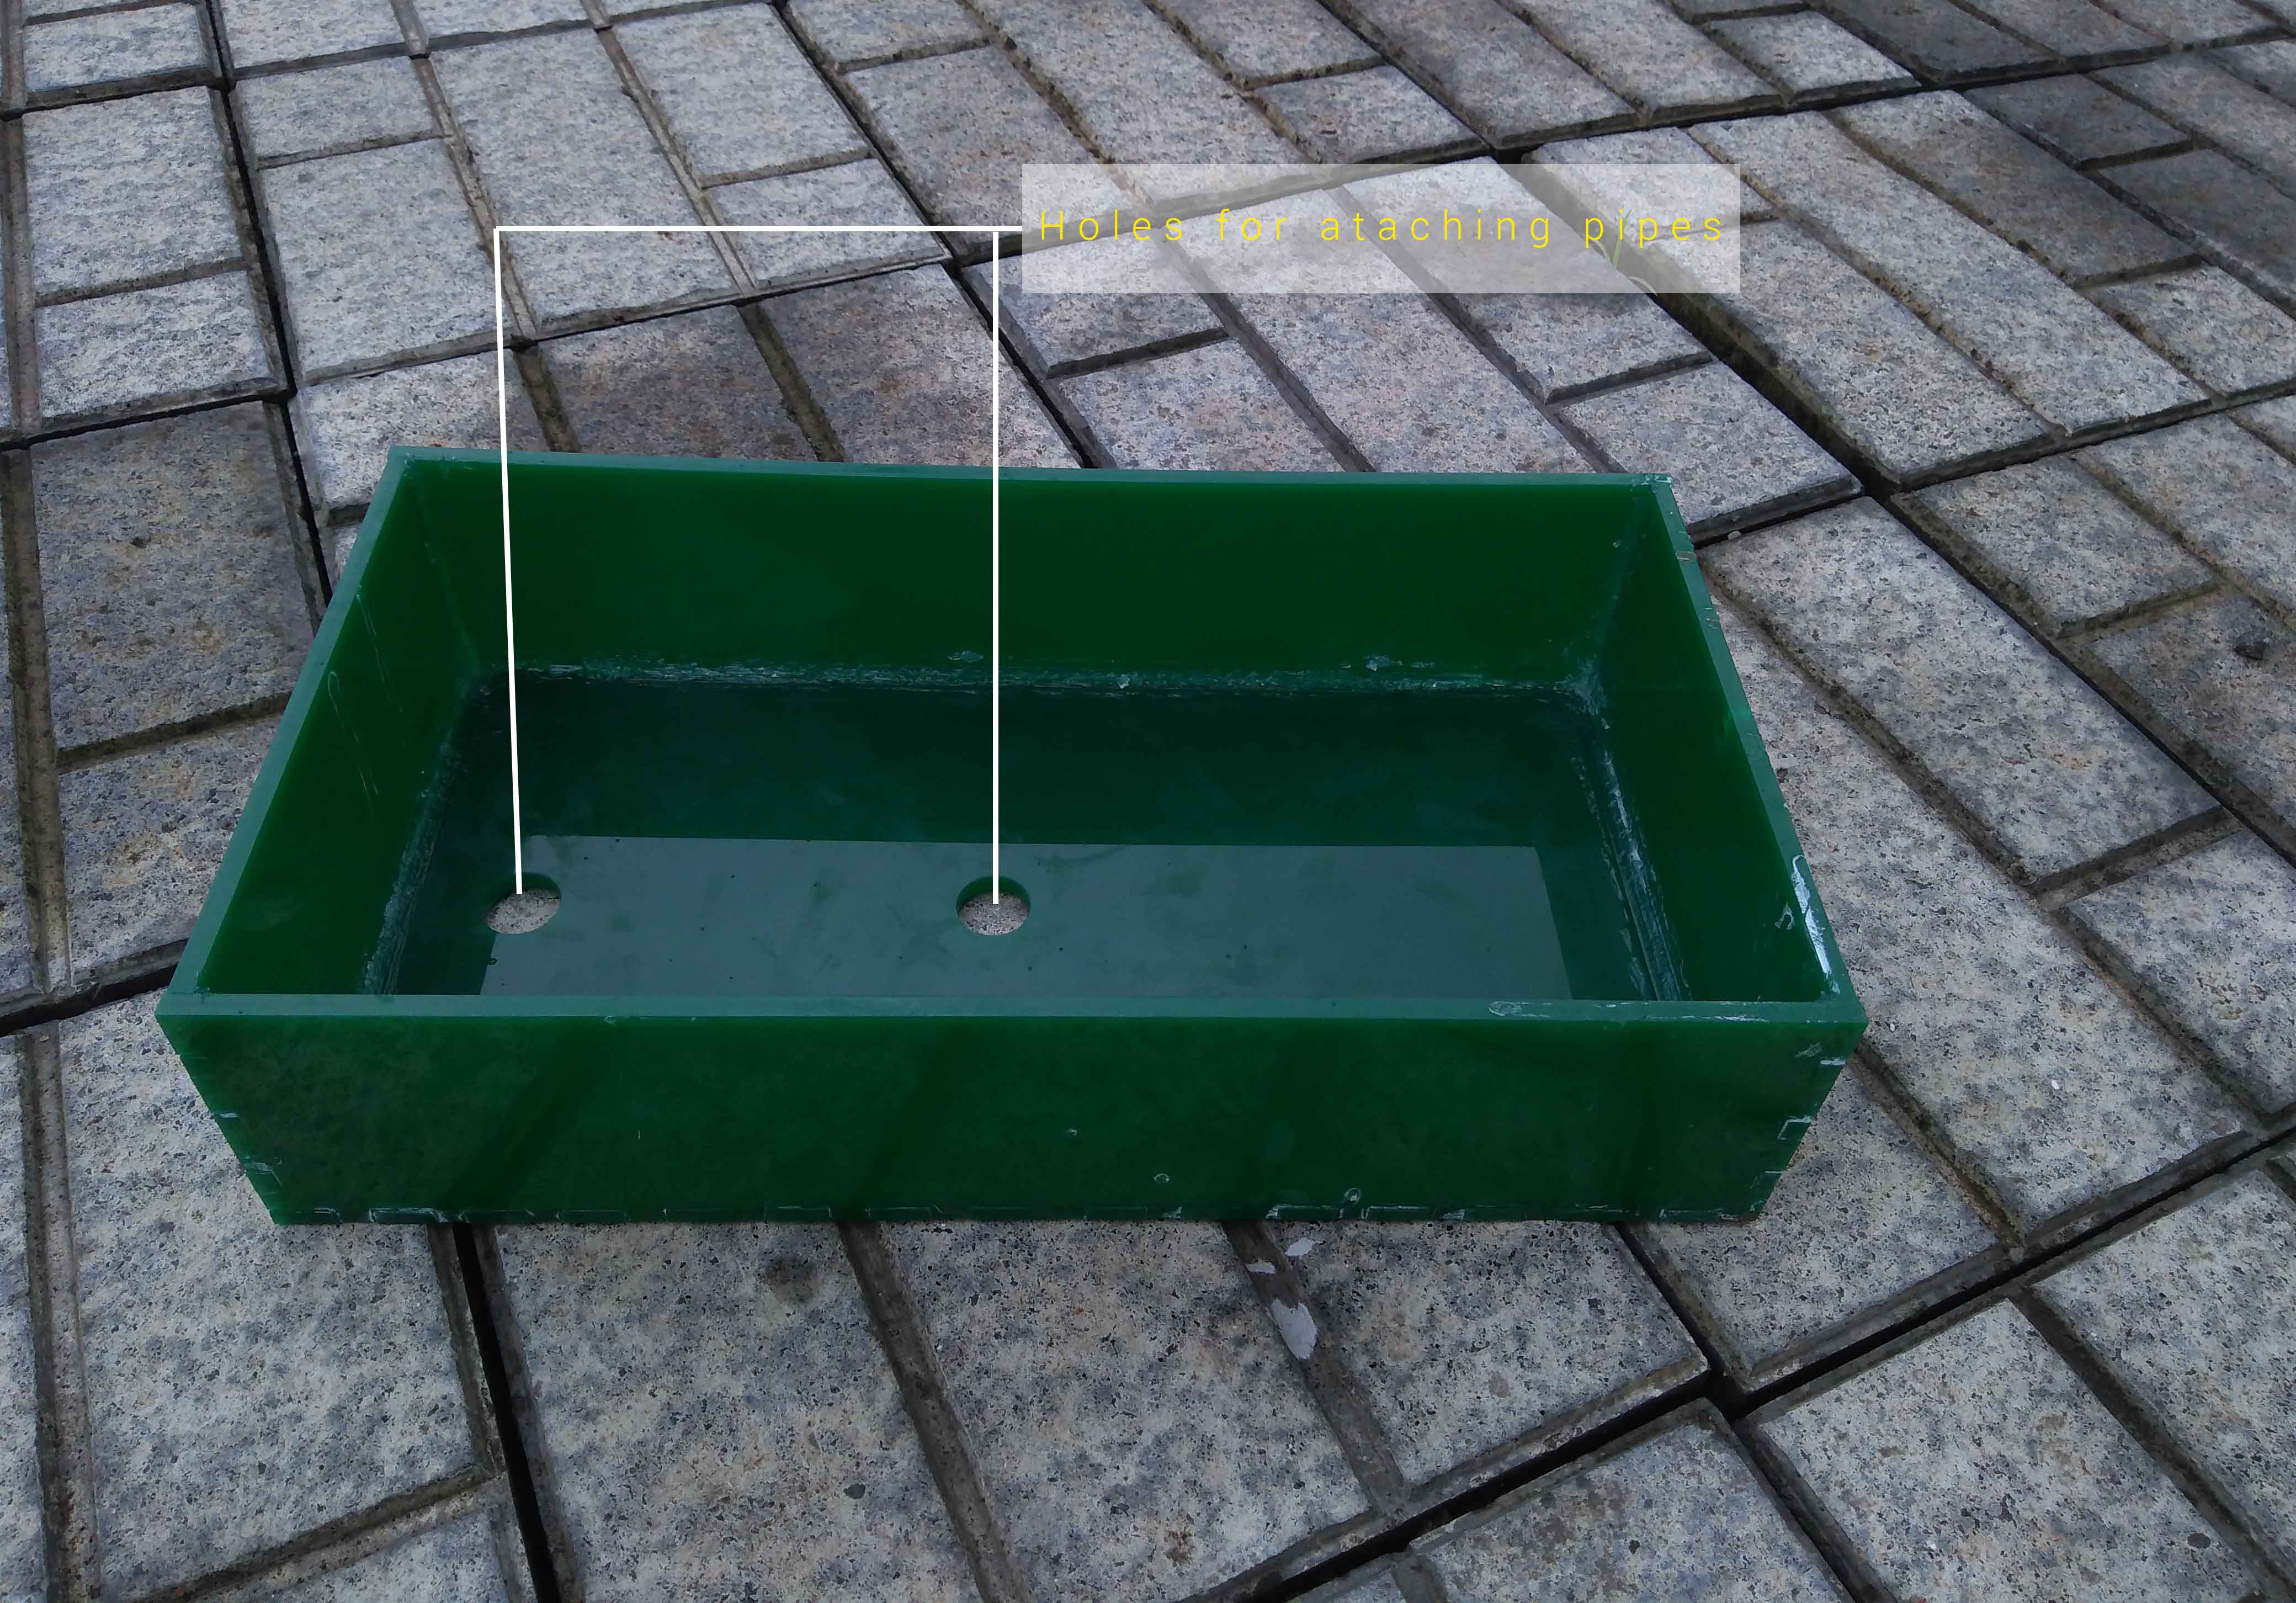
Building the Automatic Siphon
Countinues Draining
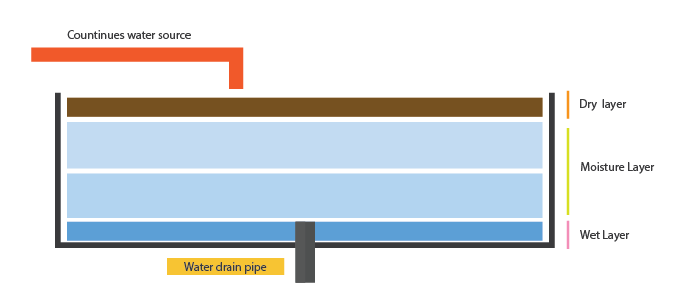
Bell Siphon
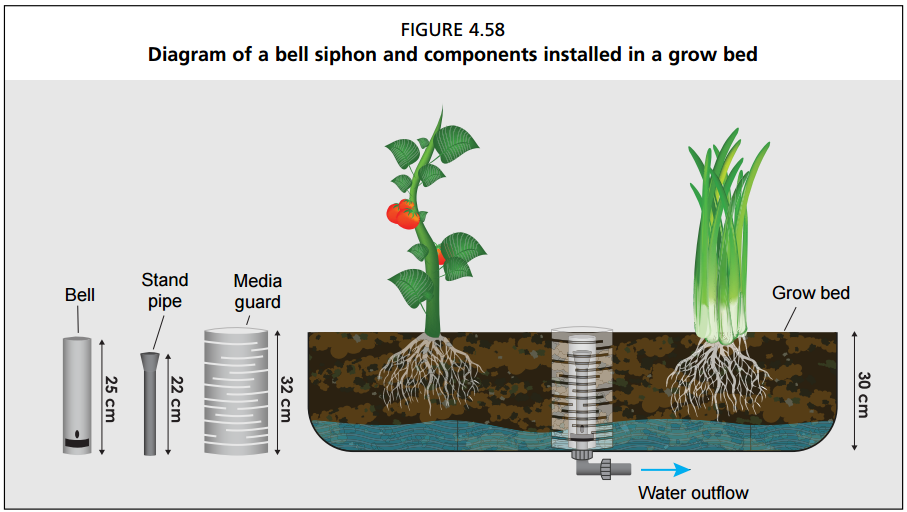
The Best for Aquaponics I choose

To build the siphon, i used 1/2inch PVC pipe, 1/2inch PVC pipe end cap and 1/2inch PVC pipe adapter. I cut a 4cm PVC pipe and conected the PVC pipe to the top of the PVC adapter. Then i placed the adapter in the hole on growbed by sandwiching a rubber washer. After that i conected another PVC screw conecter to the bottom of the growbed.
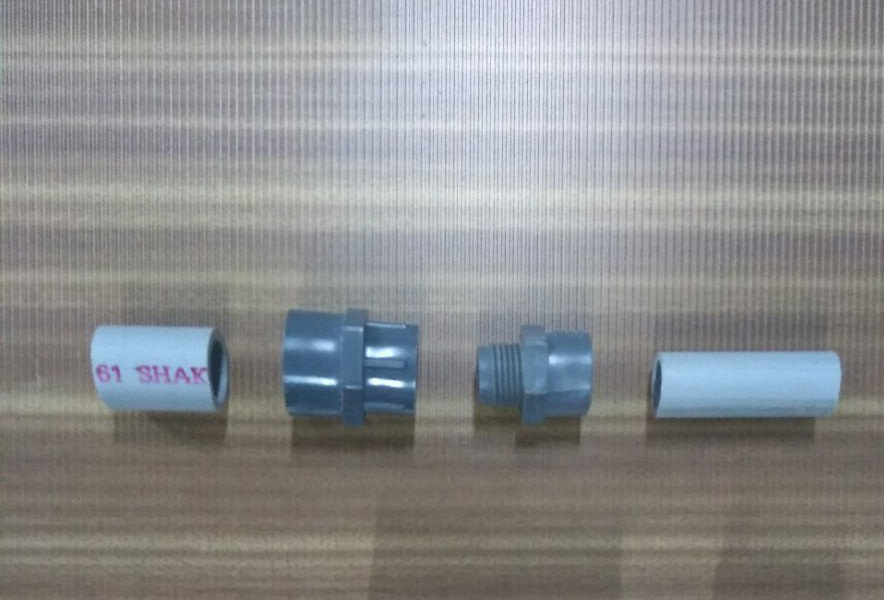
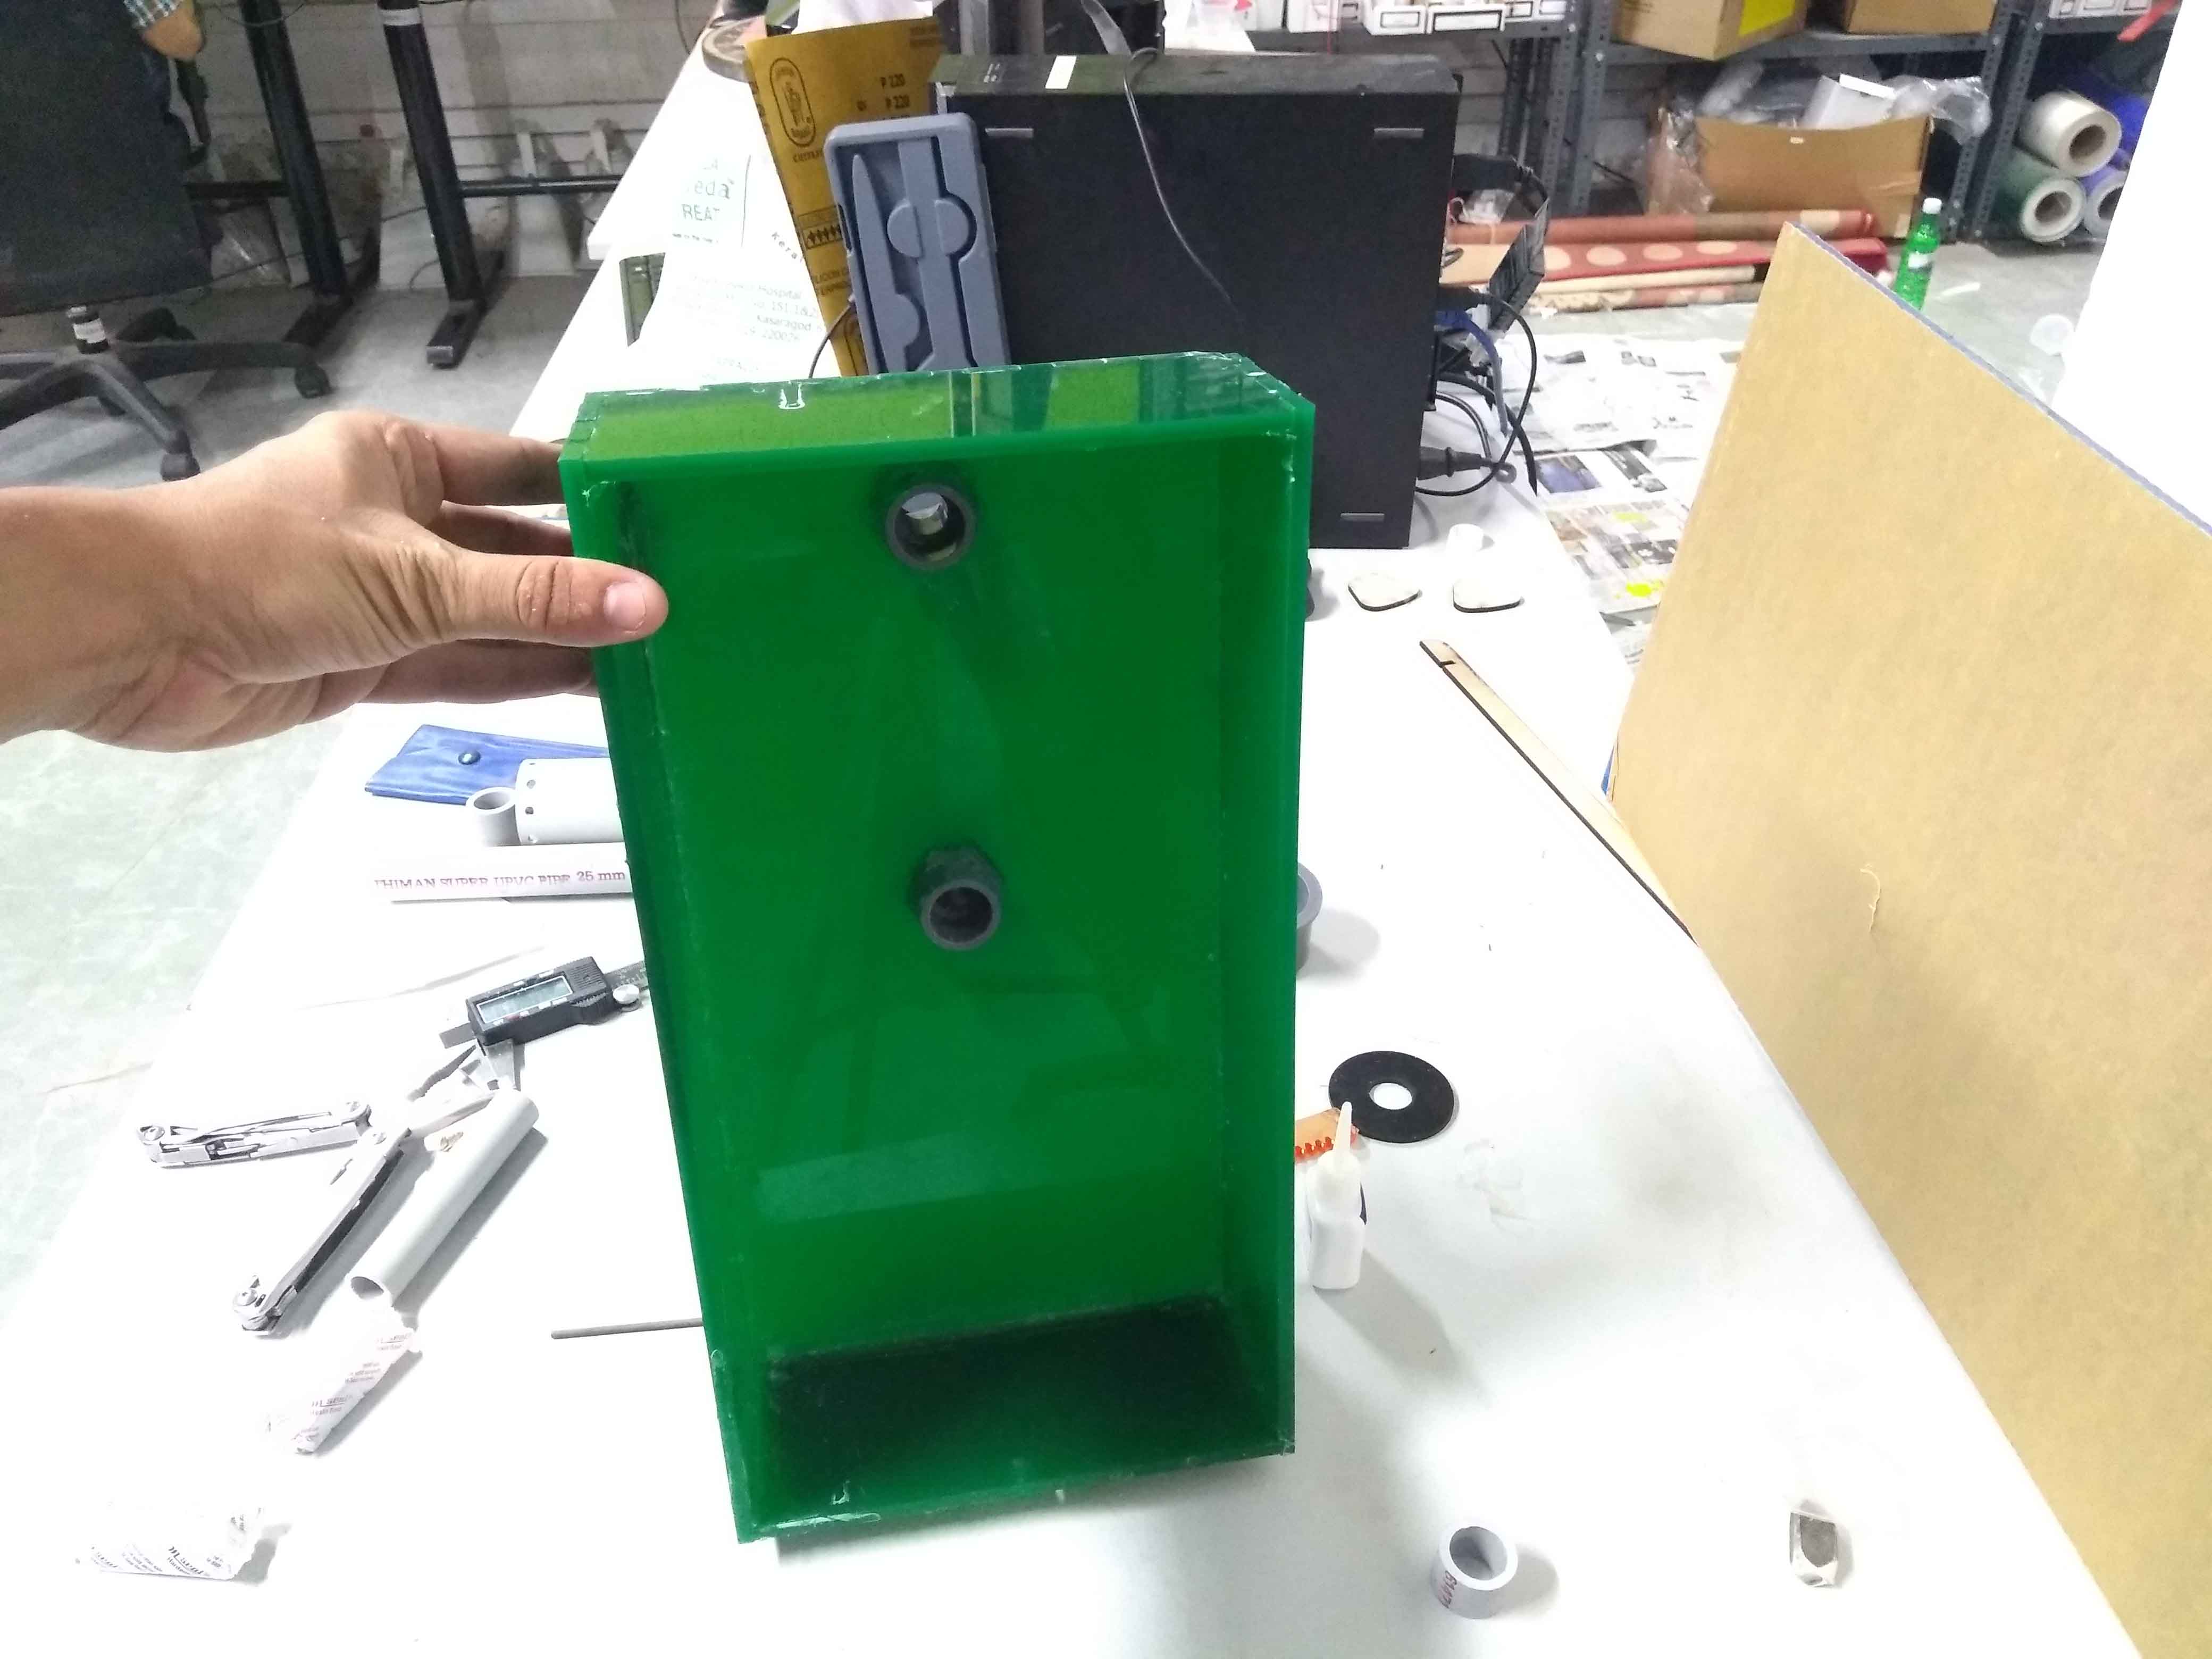
I used the same method to the second hole too. The first hole that you can see on a side of the groebed is to attach a fish feeder that i will add as future upgrade to the OXGROW. Currently we are only using one hole that you can see in the center part of the growbed, That is used to atatch my siphon.
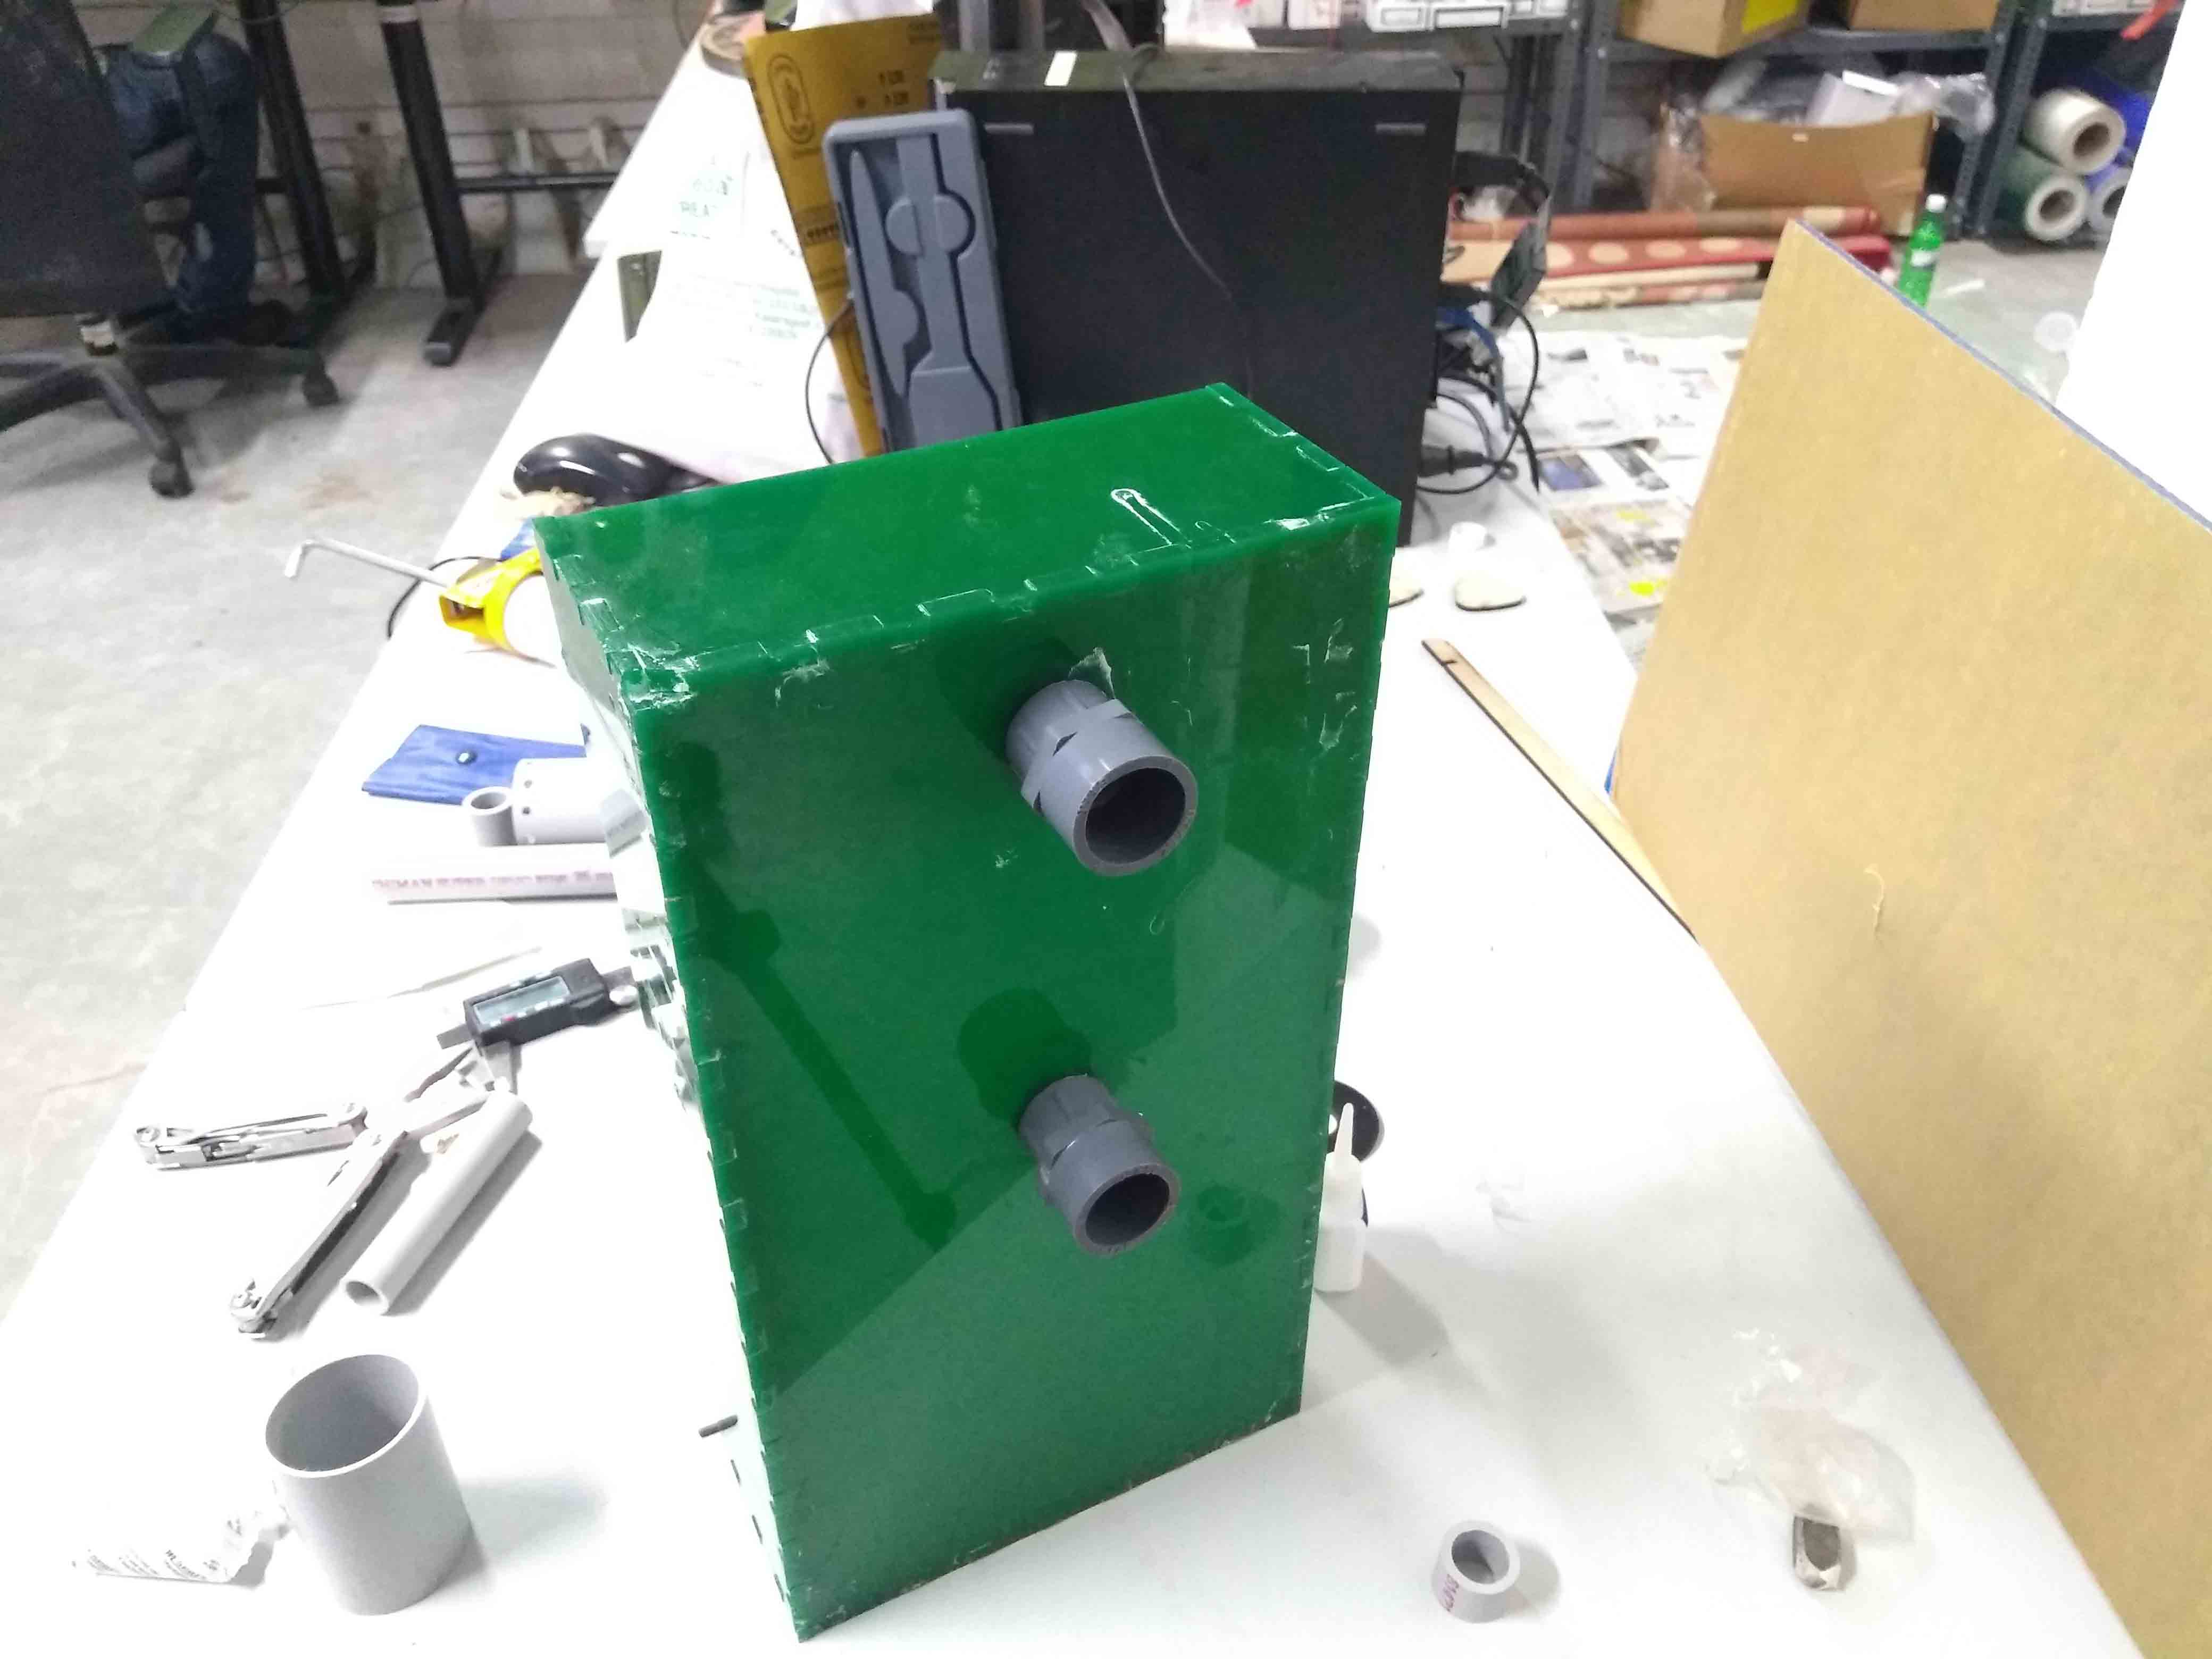
But i need to perfectly seal the pipes to avoid water leakage. For this first i choosed to use a PVC pipe sealant called Mseal, But i doesnt used it. Insted of that i used the same Silicon sealant to close all gaps. I also applied the sealant all over the corners of the growbed. I used a PVC glue to attach the PVC. It is compaltely optional because the PVC pipe joints are tight enough, but i used glue to avoid a incase.
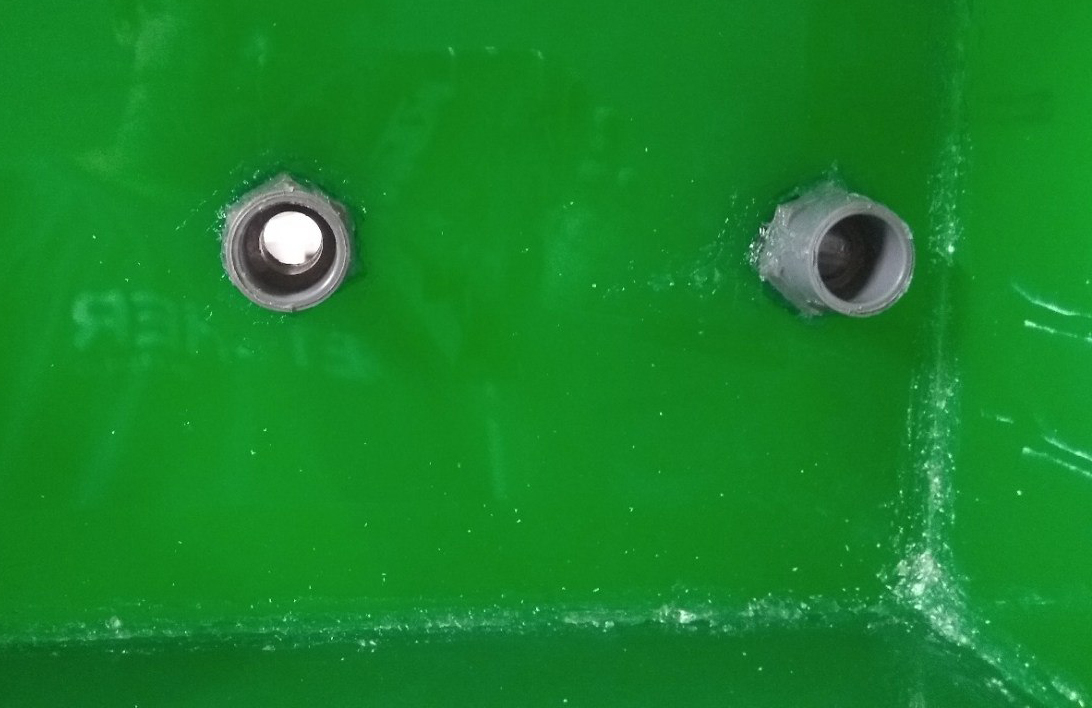
Then i placed the growbed asaid to cure the glue.
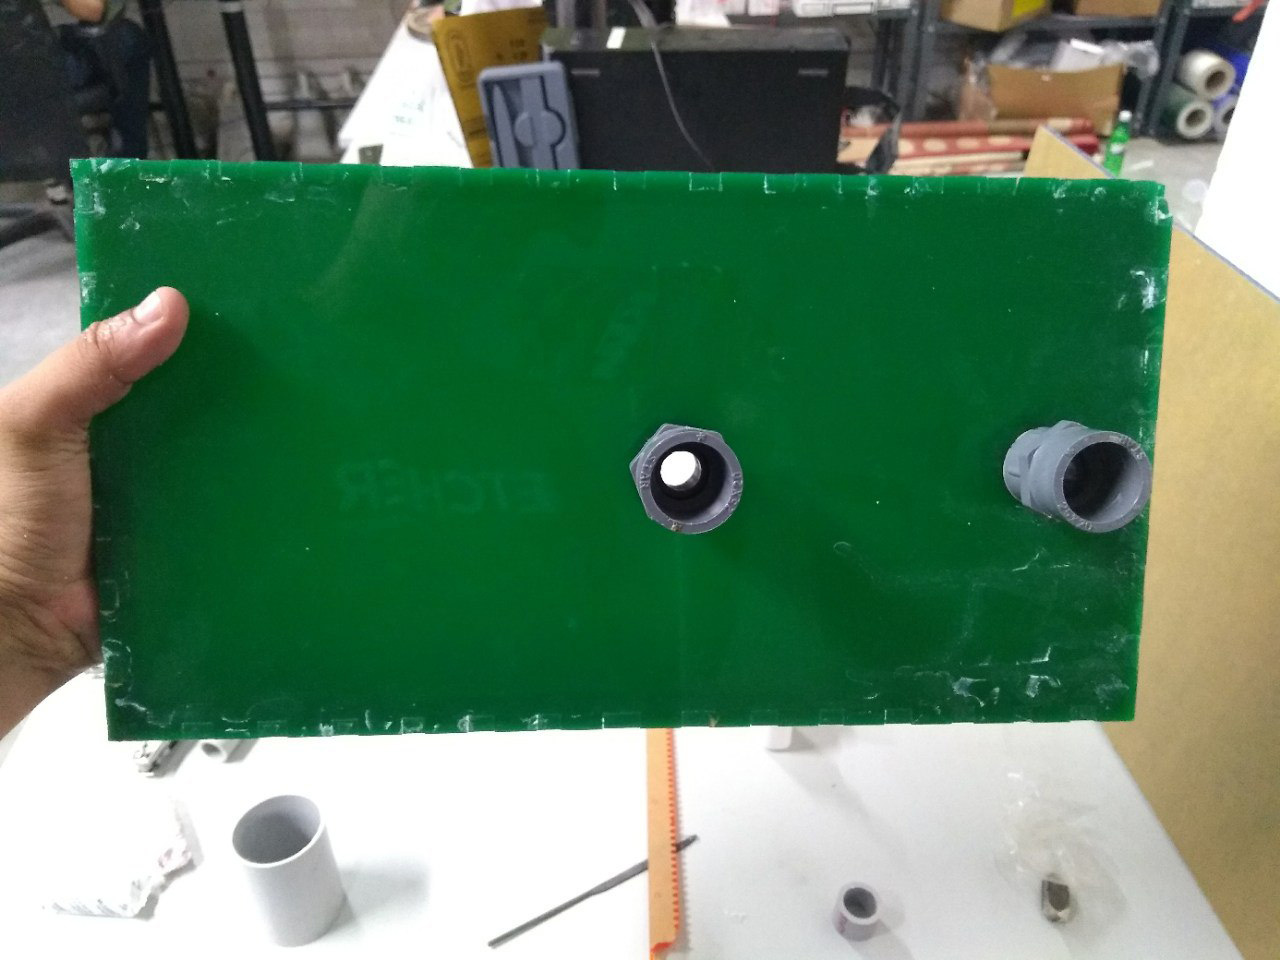
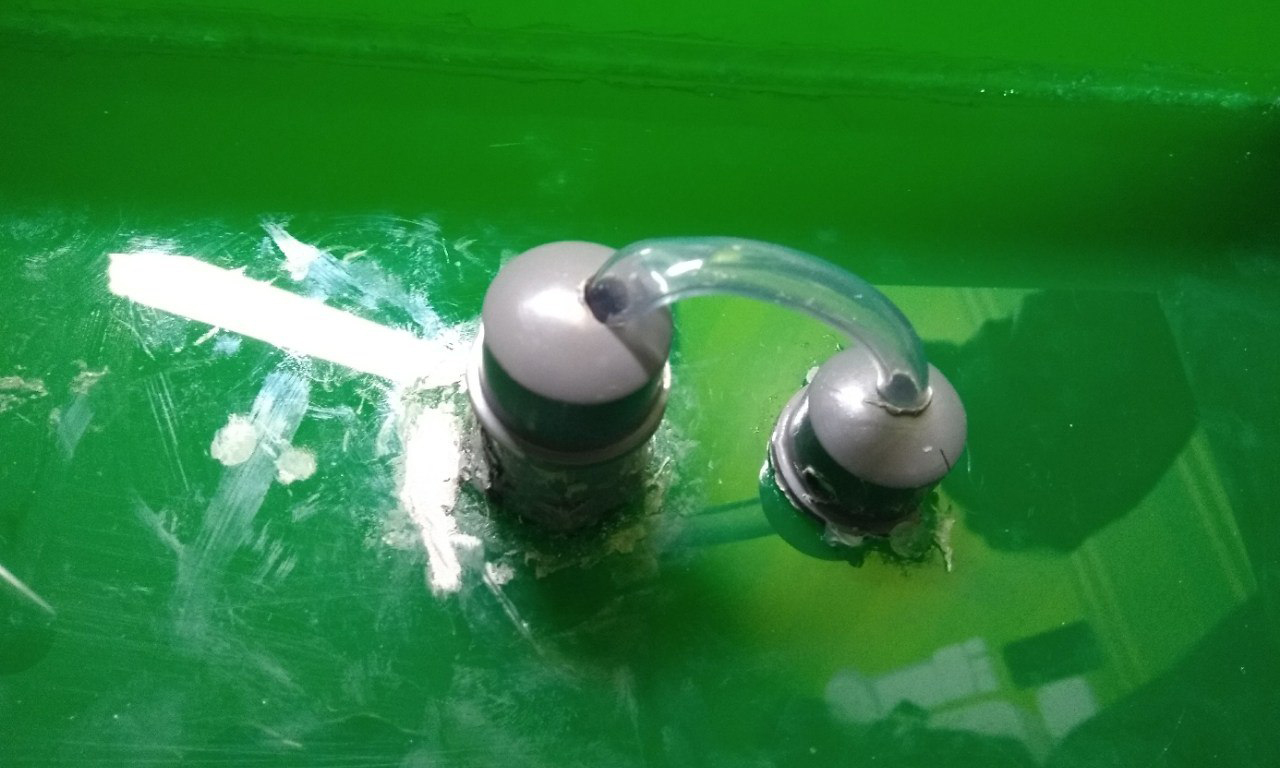
Now i need to build the siphon part. To do this i used a 150mm flexible hose tube and two 1/2inch end caps that i previously bought from the same local hardware store were i bought the paints and brushes. First i drill 5mm hile on both 1/2inch end caps. I also cut off a side on of the endcap for placing it on the growbed surface for water incoming. Then i cut a 150mm hose piece and conected the endcaps one on a end another one 8mm away from the first endcap. Then used the super glue to fix them sturdy.
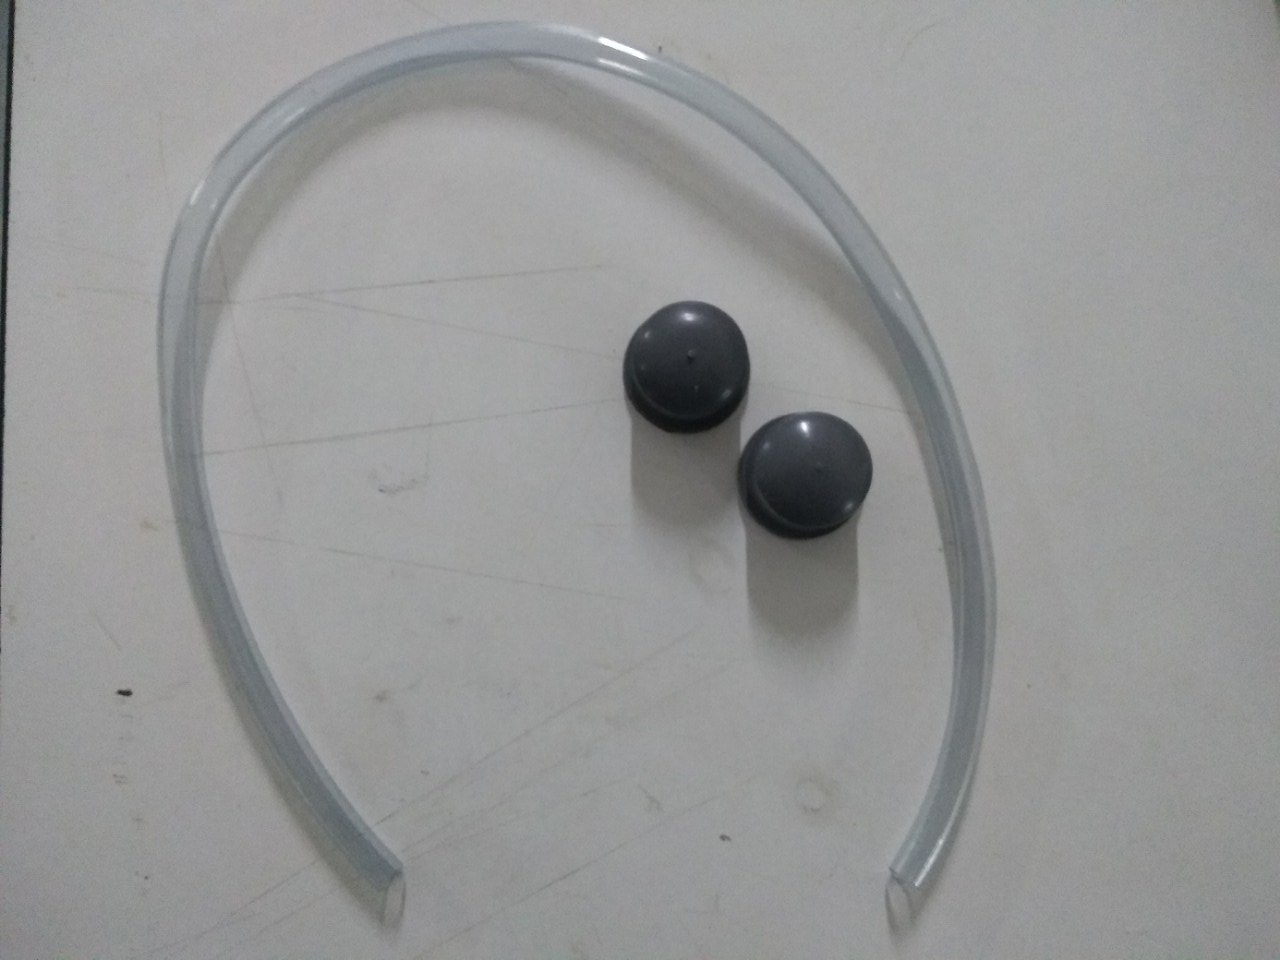
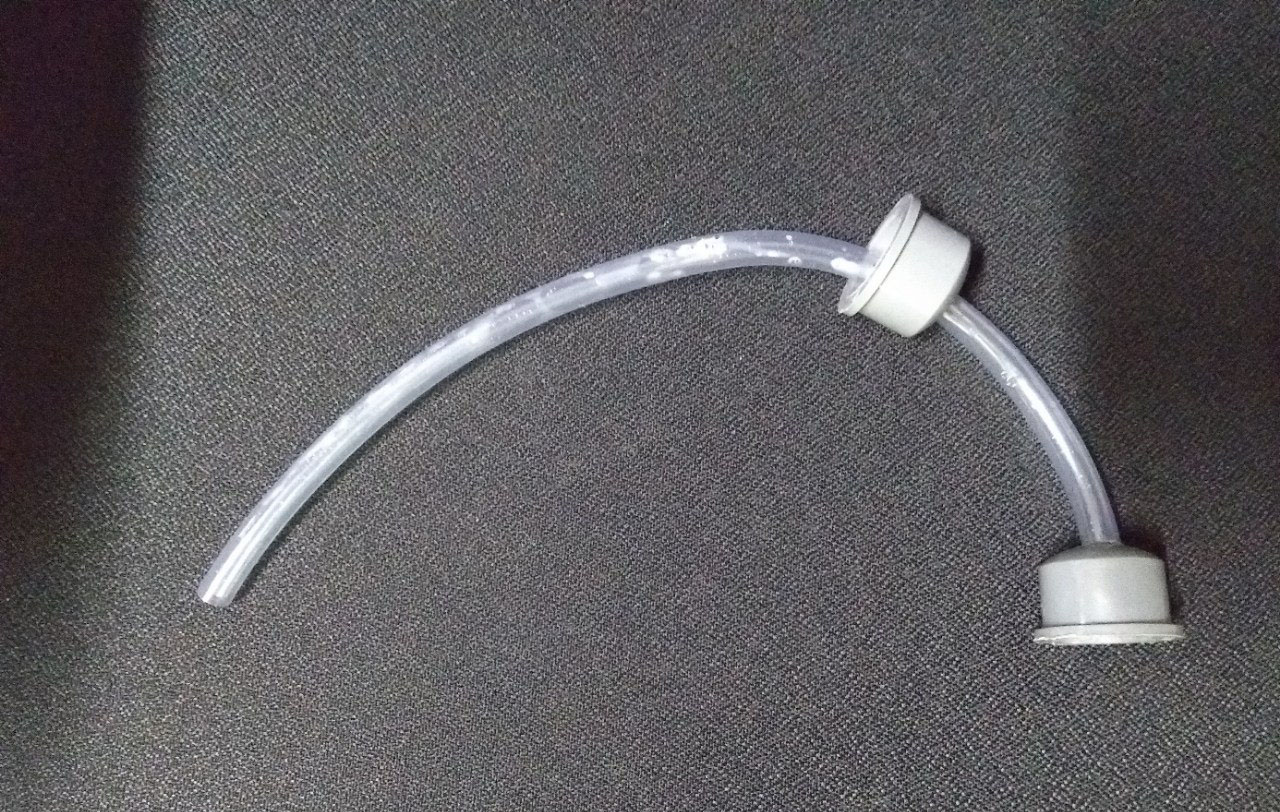
Then i conected the first endcap that i placed on the middle of the hose pipe on to the the PCV pipe, the hose pipe are go through the pipe to the aquarium. The second endcap is glue to the growbed surface to intake the water. How ever the hose pipe keep a 5mm surface clearance, by using this, there should be always keep a wet zone in growbed.
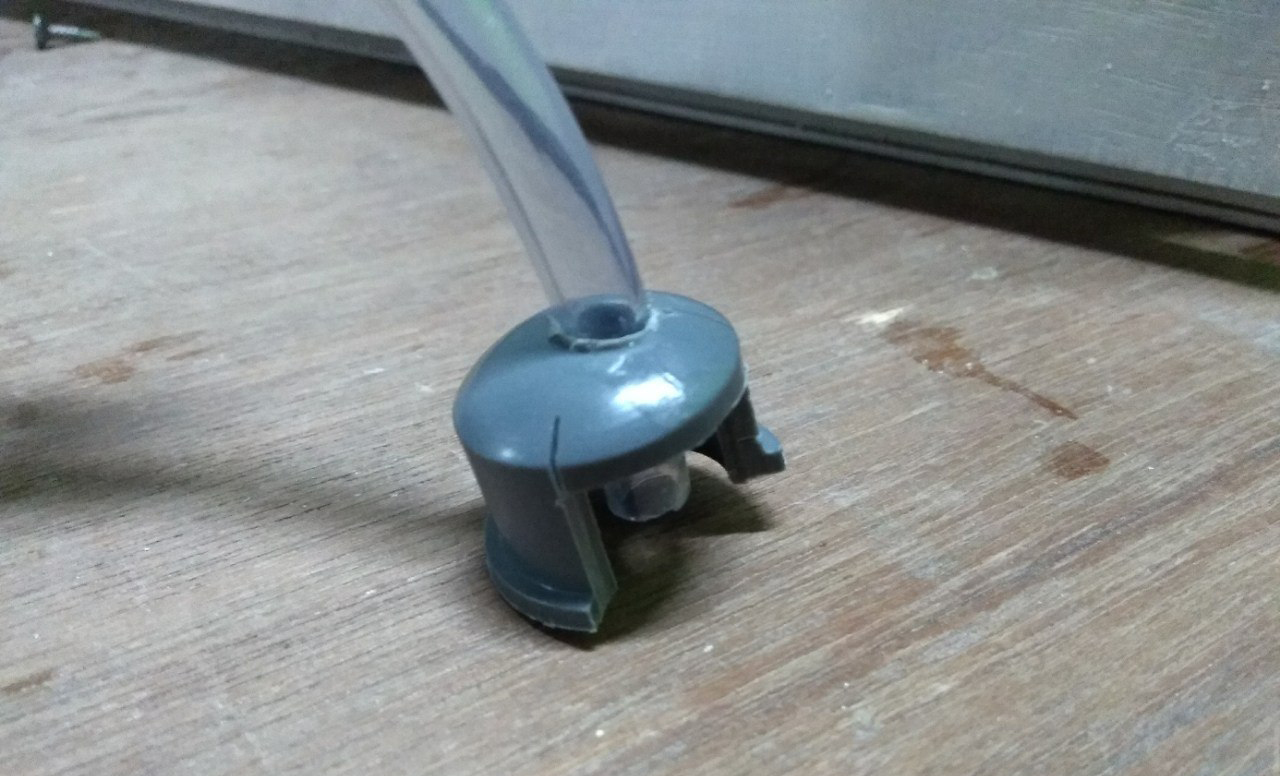
After all it should look like this. But before building this, i was made a test version of this using a disposable plastic glass and same 5mm hose pipe by adding some gravel into it. The plastic glass act as the growbed and i used the water tape as the water source. You can see the test video below.
3D printing the Hose nozzle
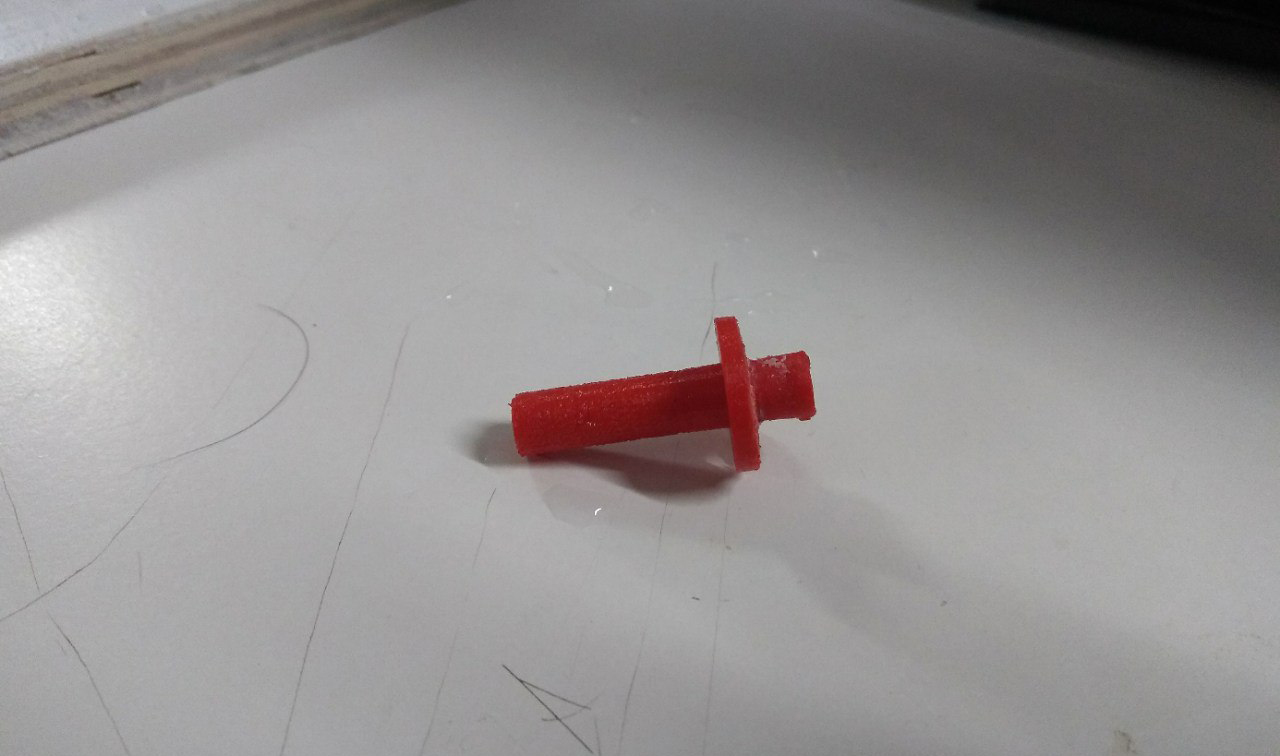
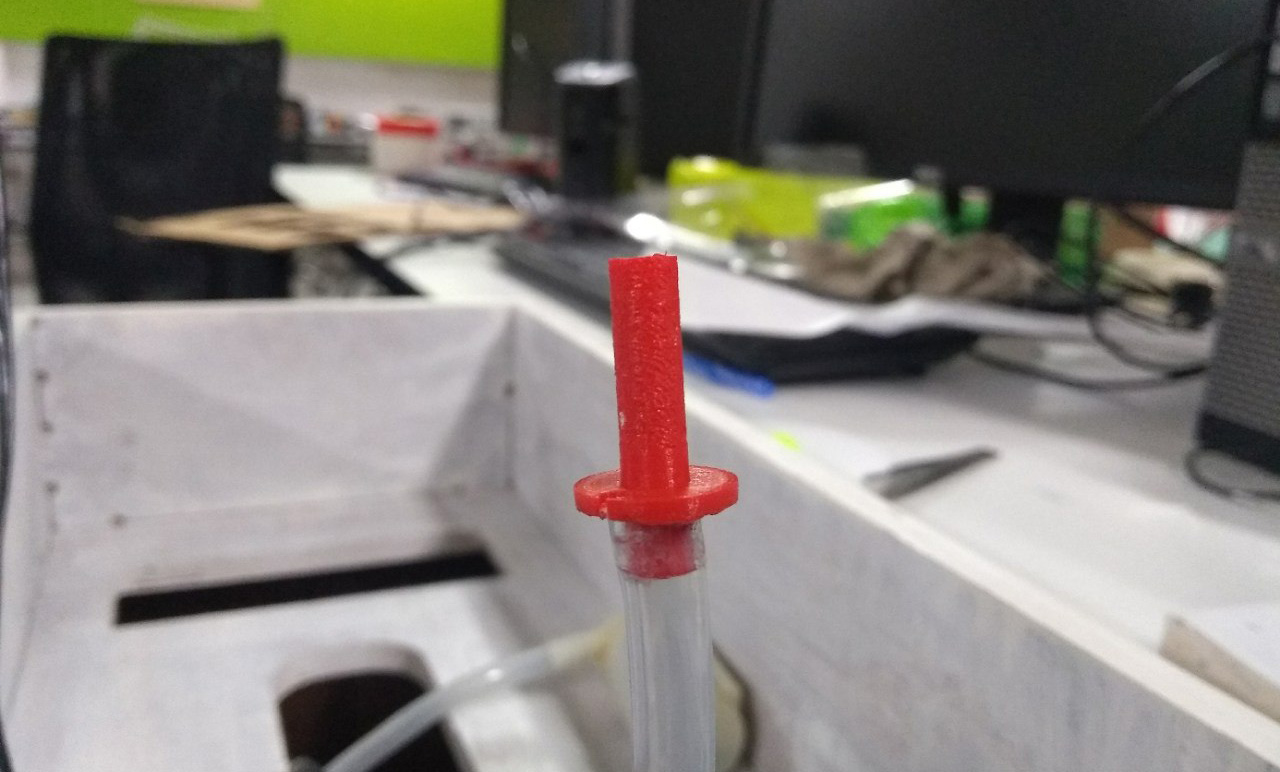
I placed a hole for attaching the water pump to the grobed. So i decided to design and 3D print a nozzle that can attach the end of the hose pipe come from the water pump on end and the other end can place through the hole to the growbed.

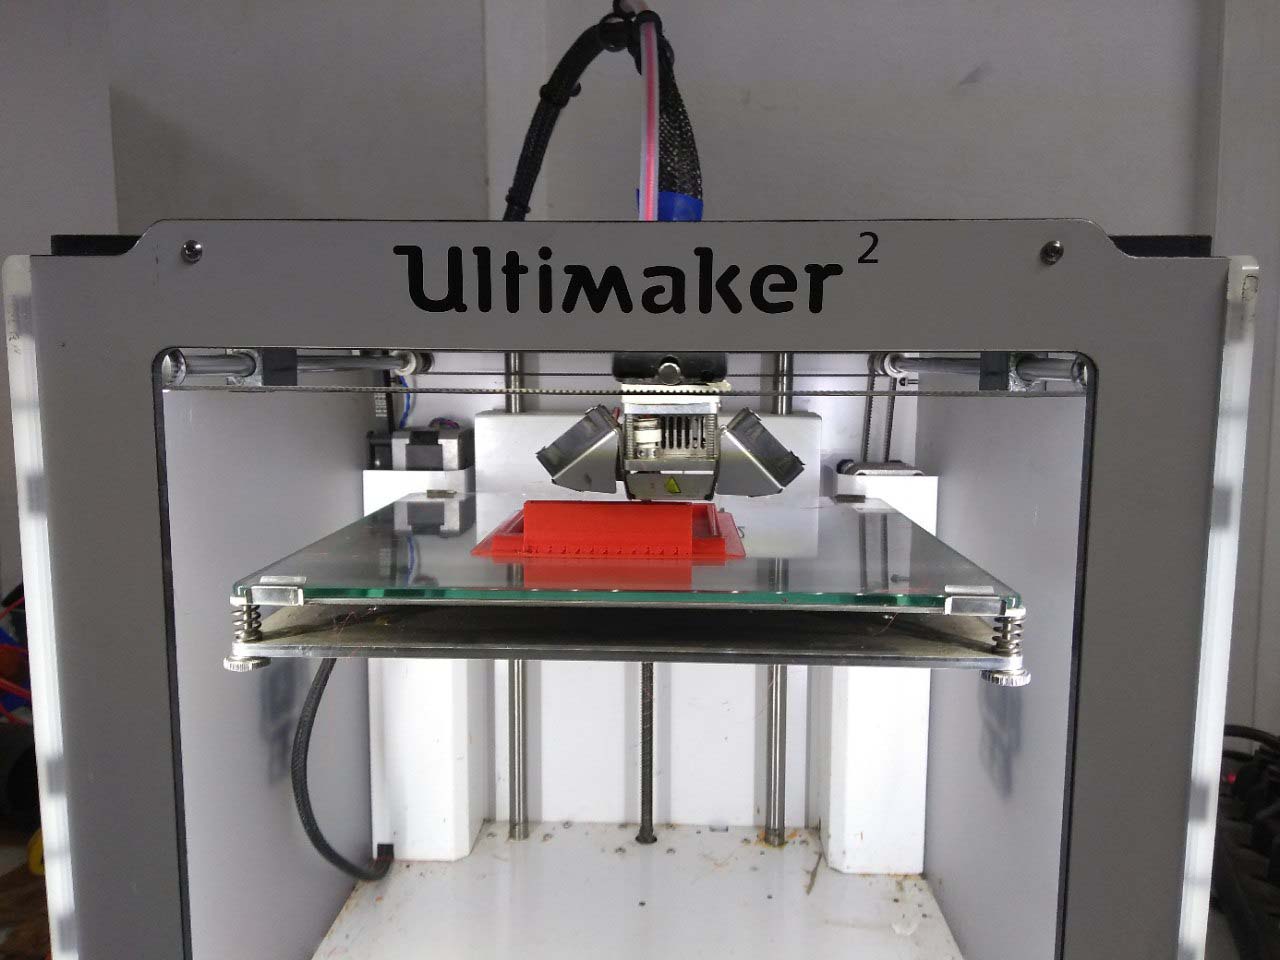
I used the ultimaker 2 3D printer that in our fablab to print out the nozzle.
Attaching the back door
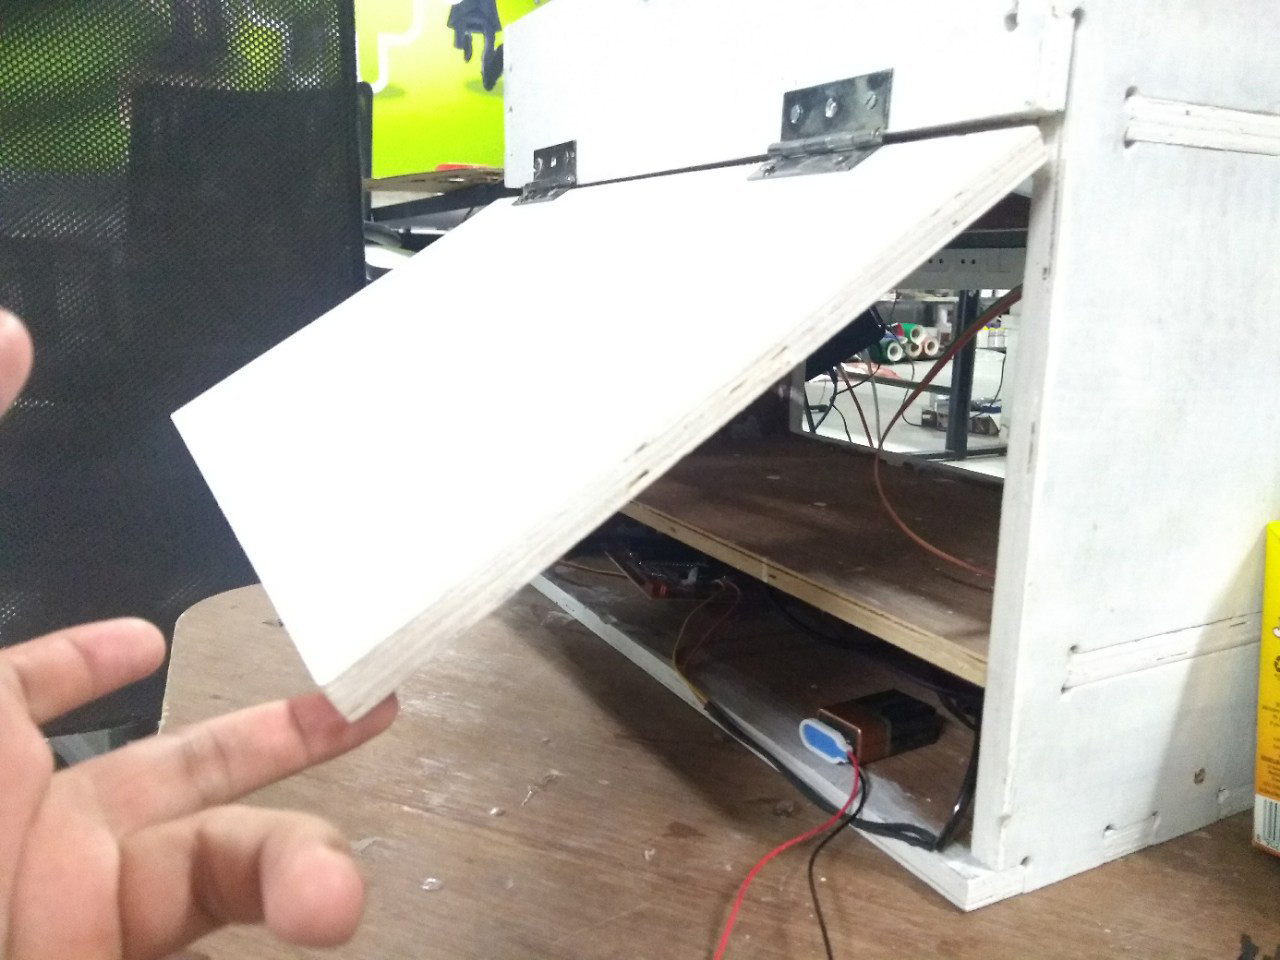
I included a door on the back of the OXGROW. The CNC part is all assembled when in the painting process. Now i need to complete the body assembling. There is only left to attach the door to the body. To do this is used two ordinary steel hinches. First i marked i placed the door piece then marked down where the hinches should placed. I drilled a the screw holes with a 4mm driller bit. Then attached the hinches to the body using 4mm screws. Then i screwed the door panel to the hinches that you can see in the image below.


Making the Grow Light
Grow light is the essential part of a indoor aquaponics system. There is only two source of light for a indoor plant one is place the plant near the windows to get the sunlight. The other way is to use growlight. The grow light is the sun of the indoor aquaponics system. The growlight is the source of light for the plants. We can use a normal bulb as a growlight. But the exact spectrum that the plants more needed should be better. So i made a little study on internet regardingthe grow light. I found out that the palnts absorb a ony abosrb the Blue spectrum (450nm) and RED spectrum (650nm) the plants only abosrb these lights from the natural light.
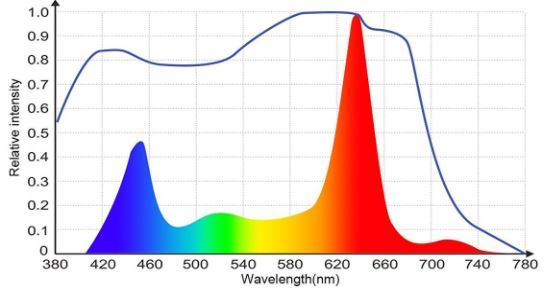
I found out, most DIY aquaponics builders are used a commercial growlight. But I have two choices either i can buy a commercial one, if i bought one then i doesnt need to bother about the quality and i can save a lot of time. But building a growlight should be better for me, i can learn and build a custom one according to my design. I decided to make one for my aquaponics.
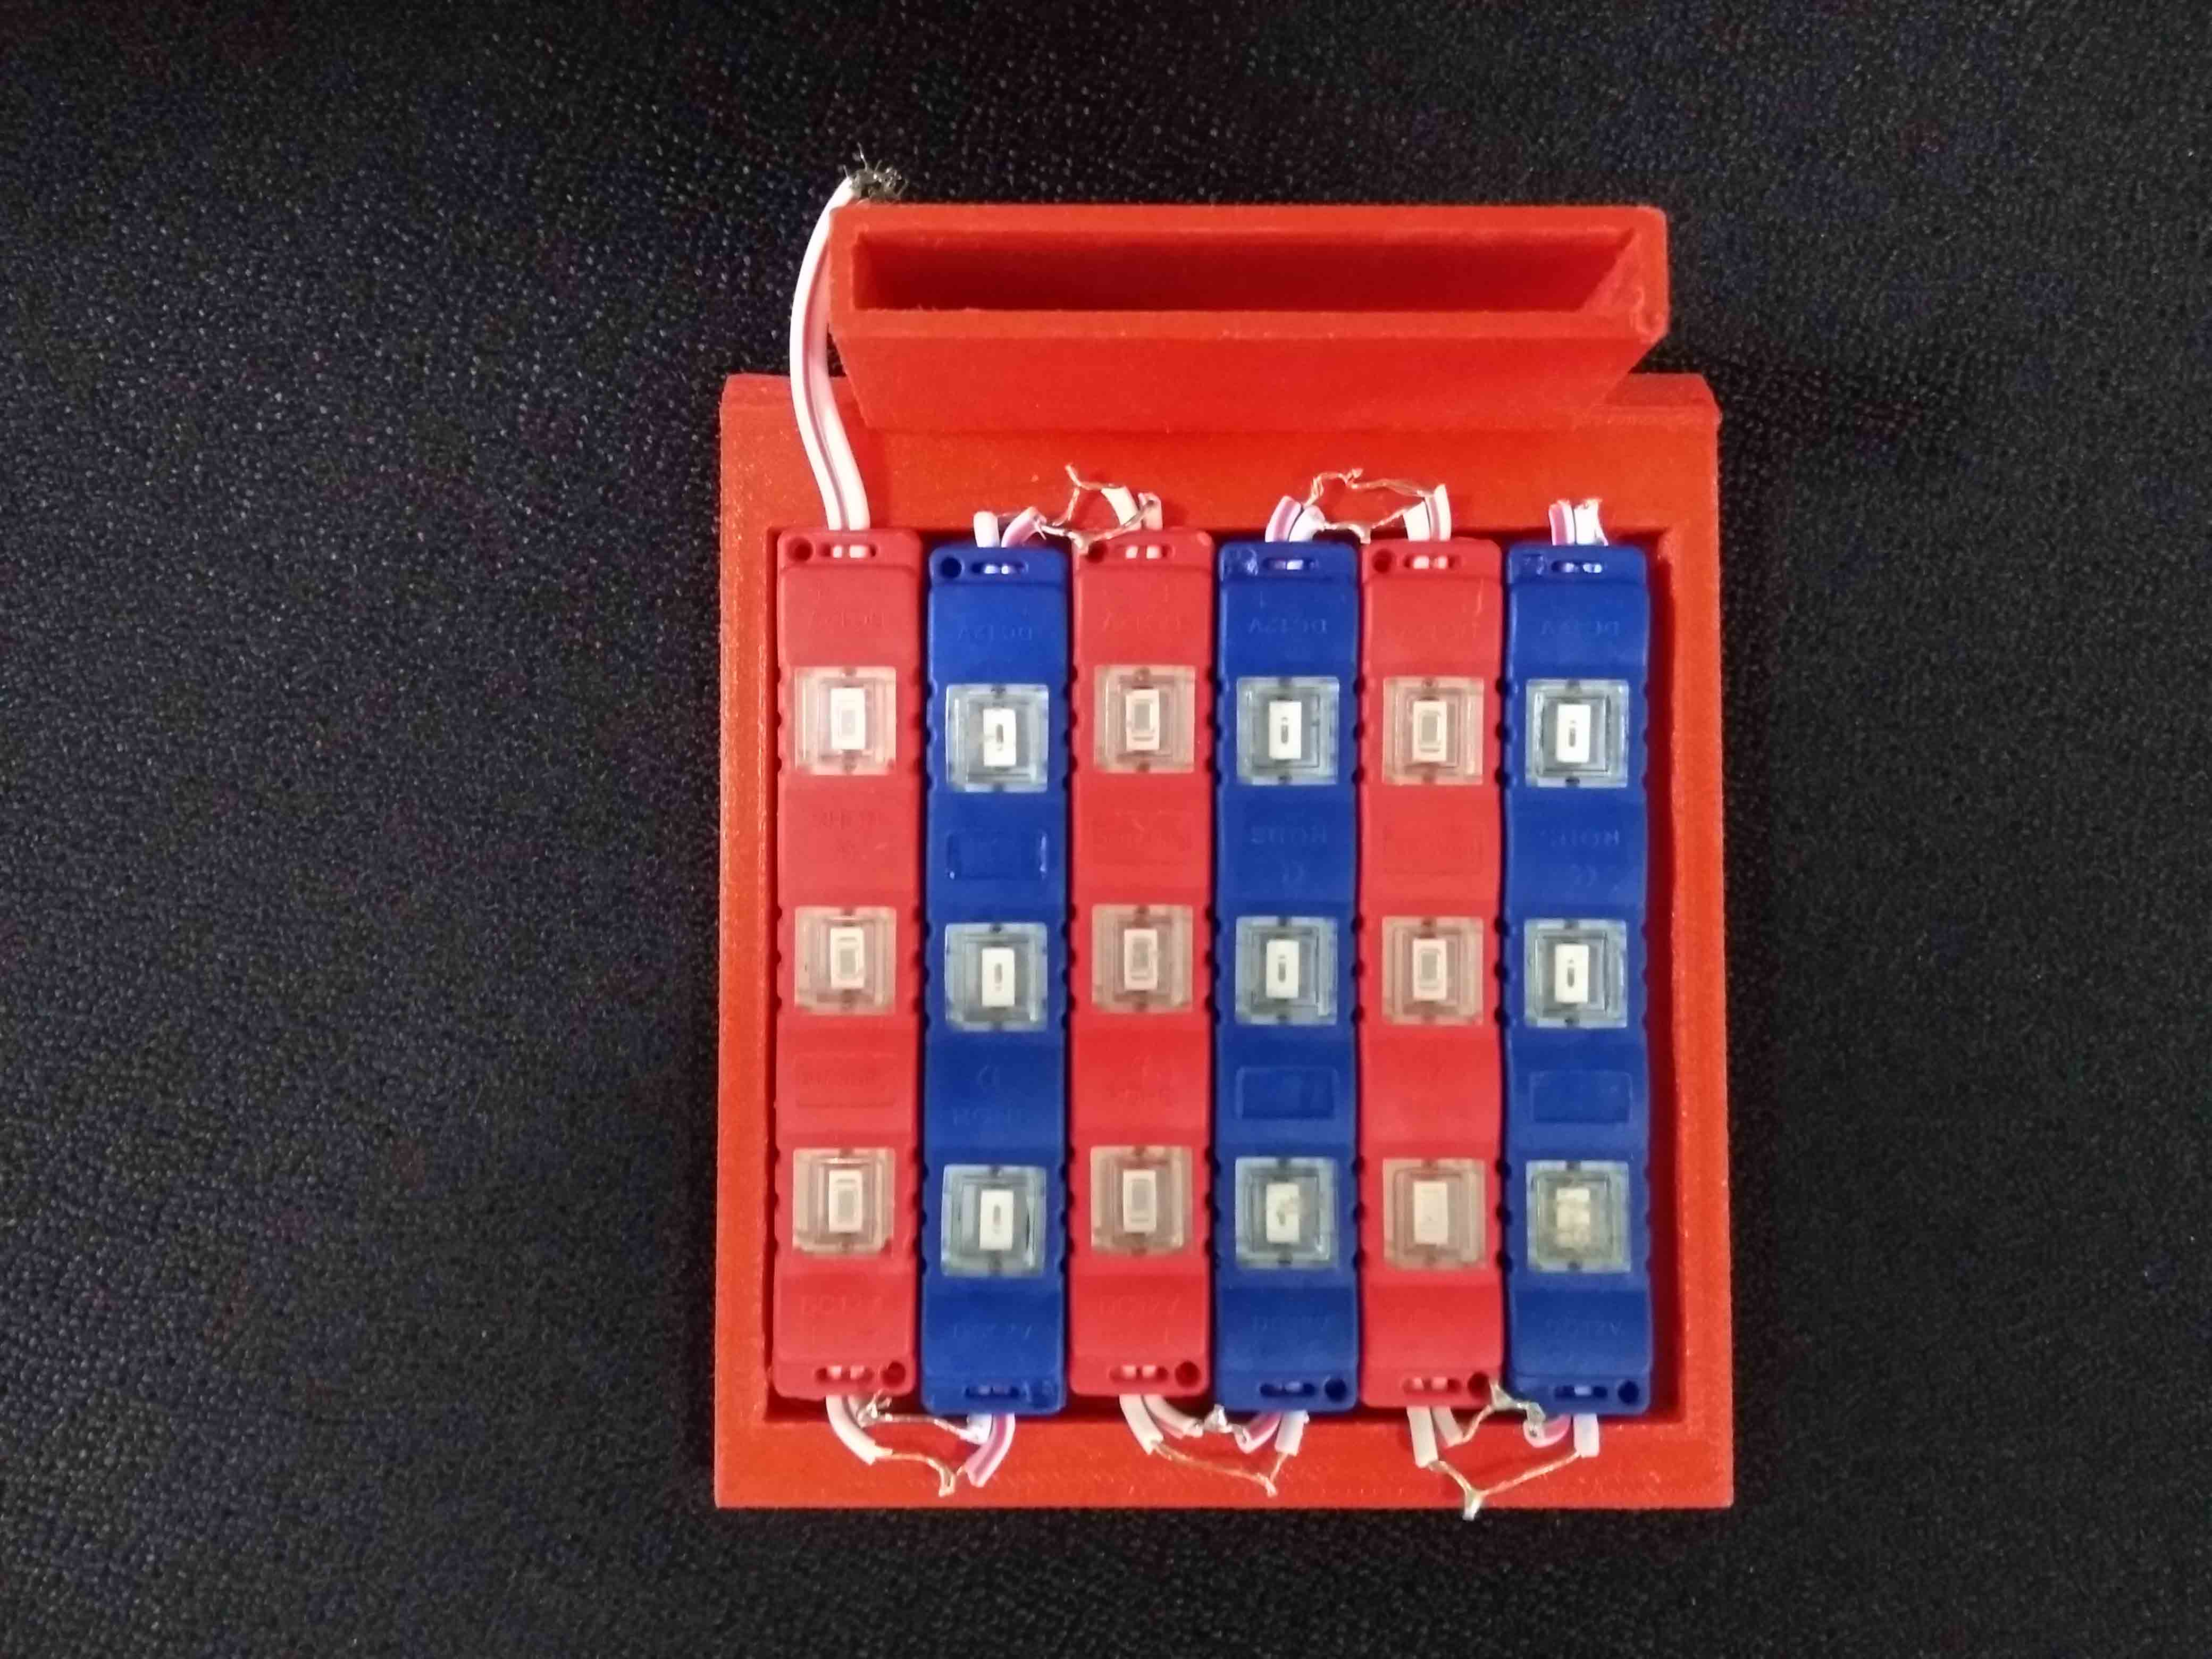
I decided to mix the red LEDs and BLUE LEDs in a ratio of 1:1. First i bought some budget friendly and quality LEDs strips from a local electronics shop. Each color have three strips and each strips have three LEDs.

I seprated each LEDs apart. Then i placed RED and BLUE LEDs strips one together in series and striped and twisted the wires together. After then i need to design a holder for the LEDs. For this I designed the holder as two parts first because 3D printing a this whole design take a lot of time and its not well strong. I designed the first part for placing the LEDs and 3D printed it.
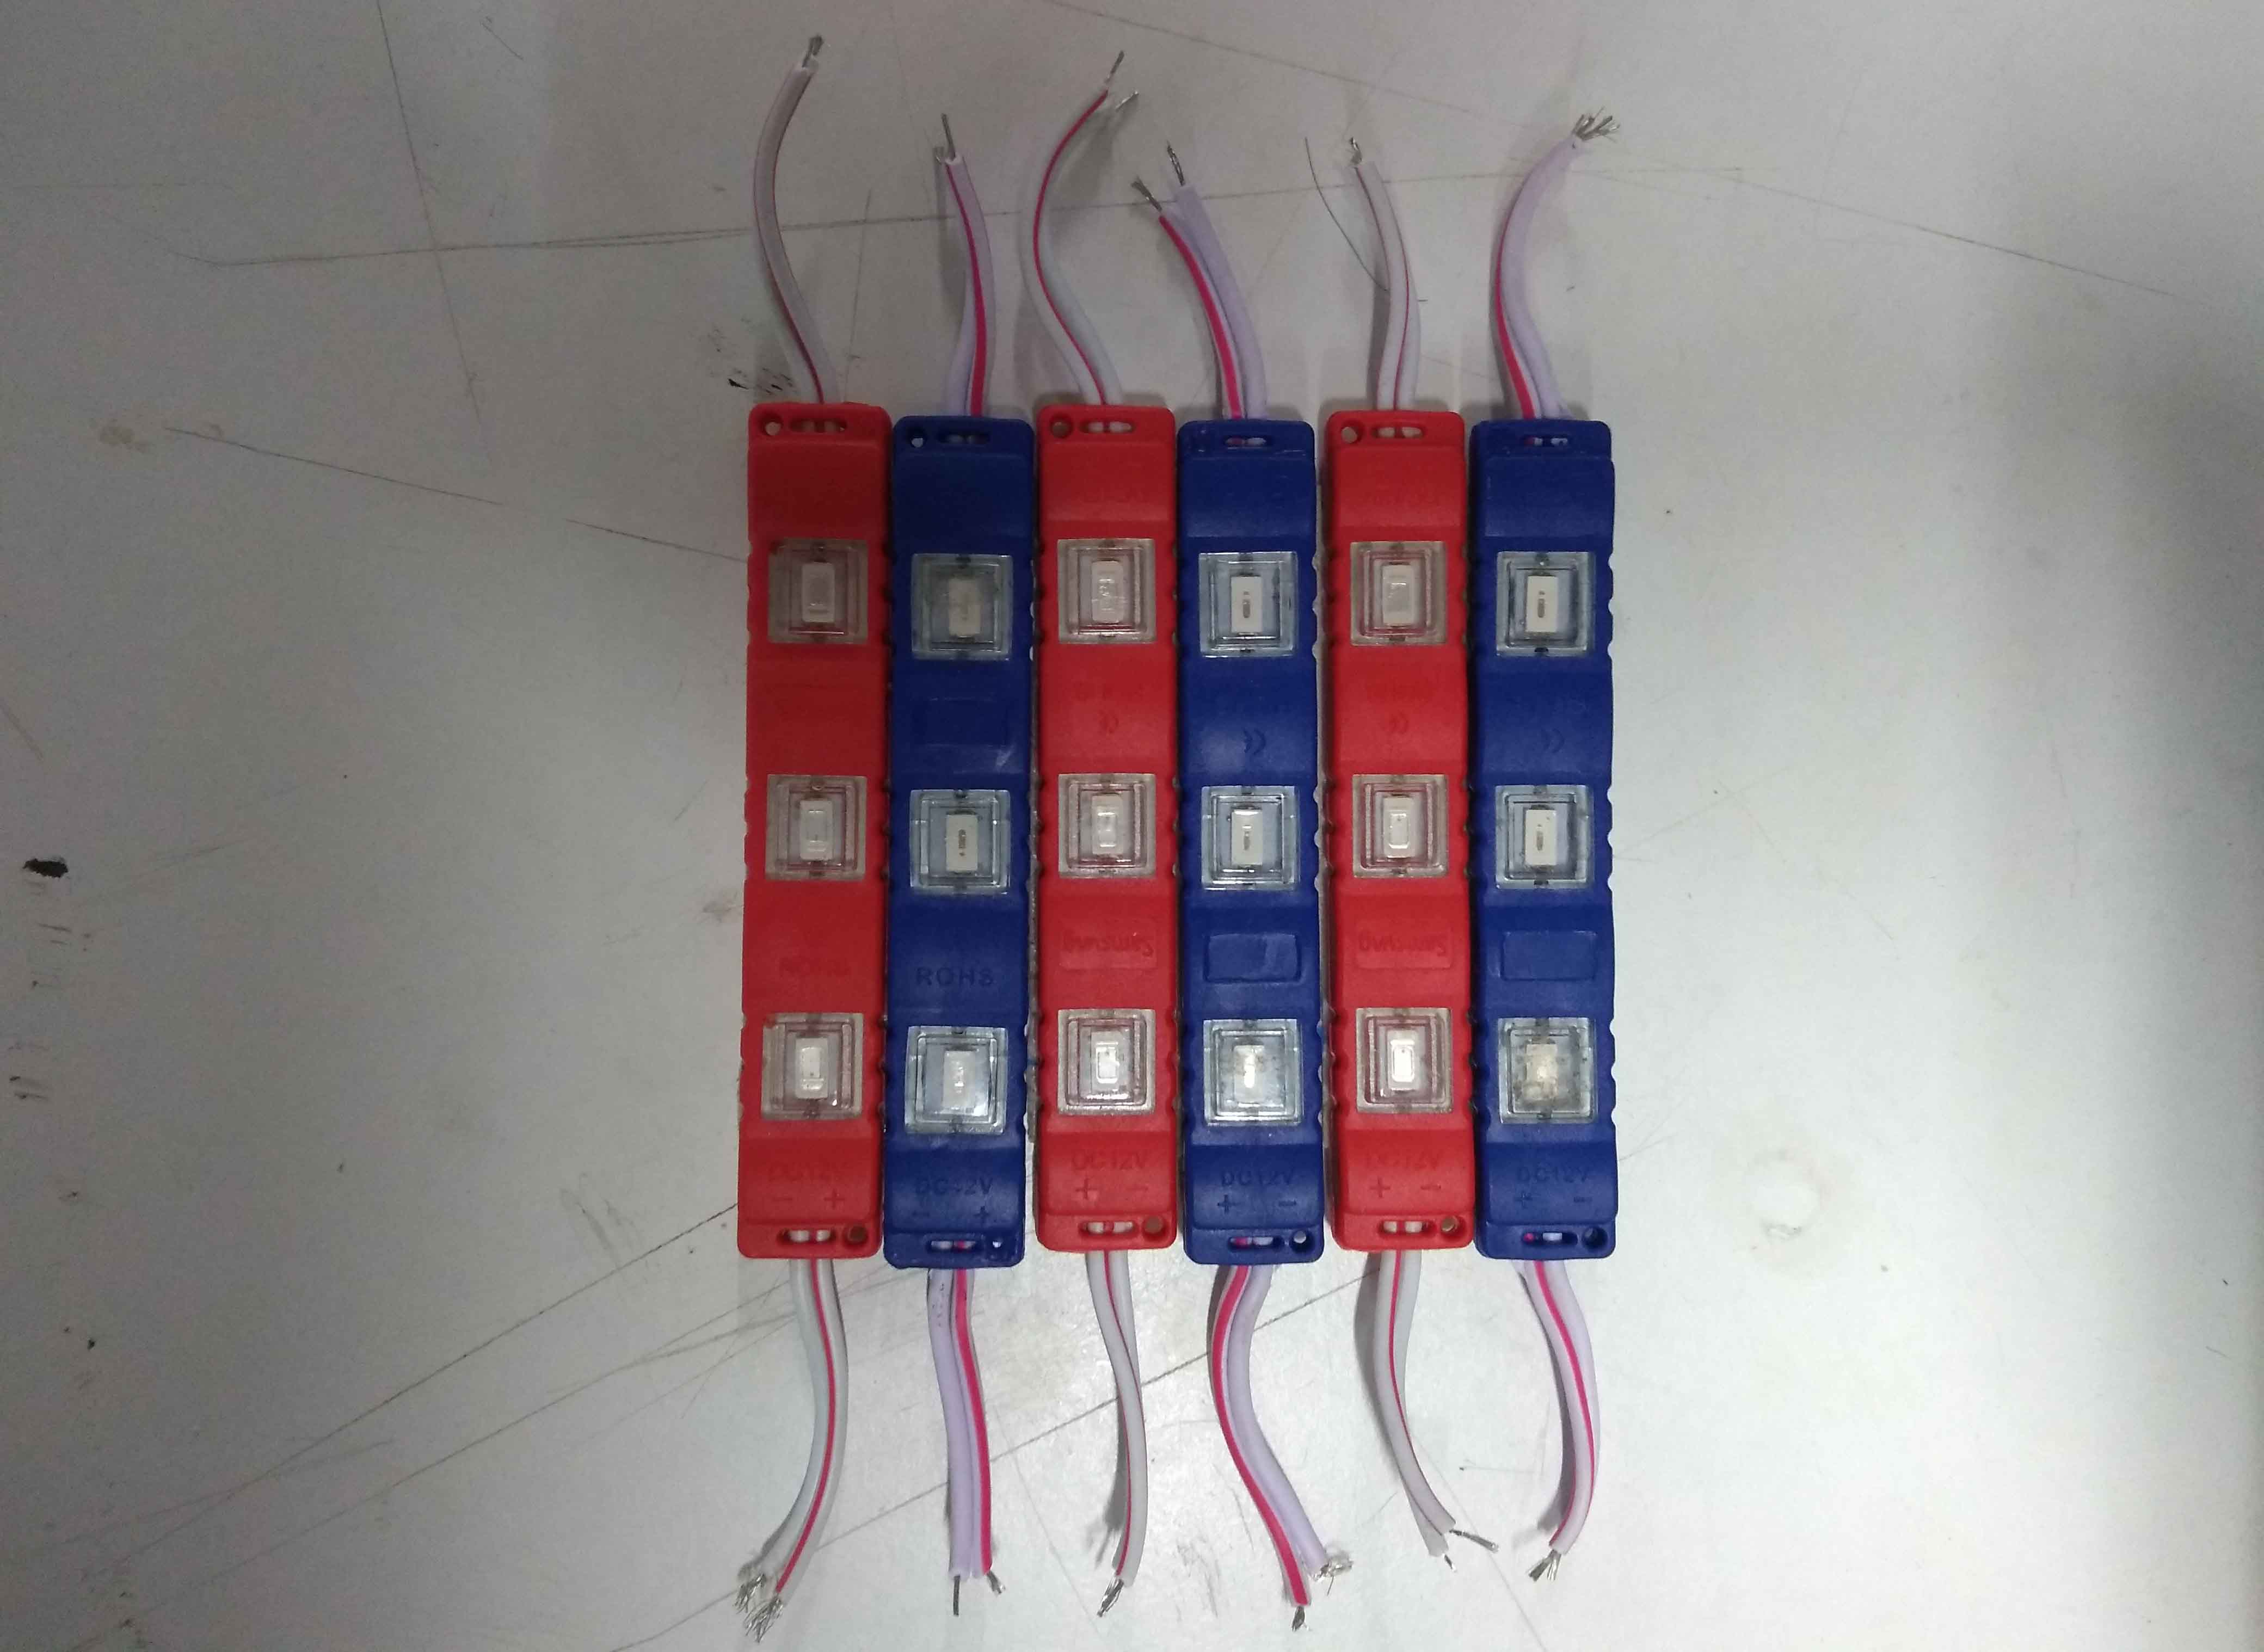
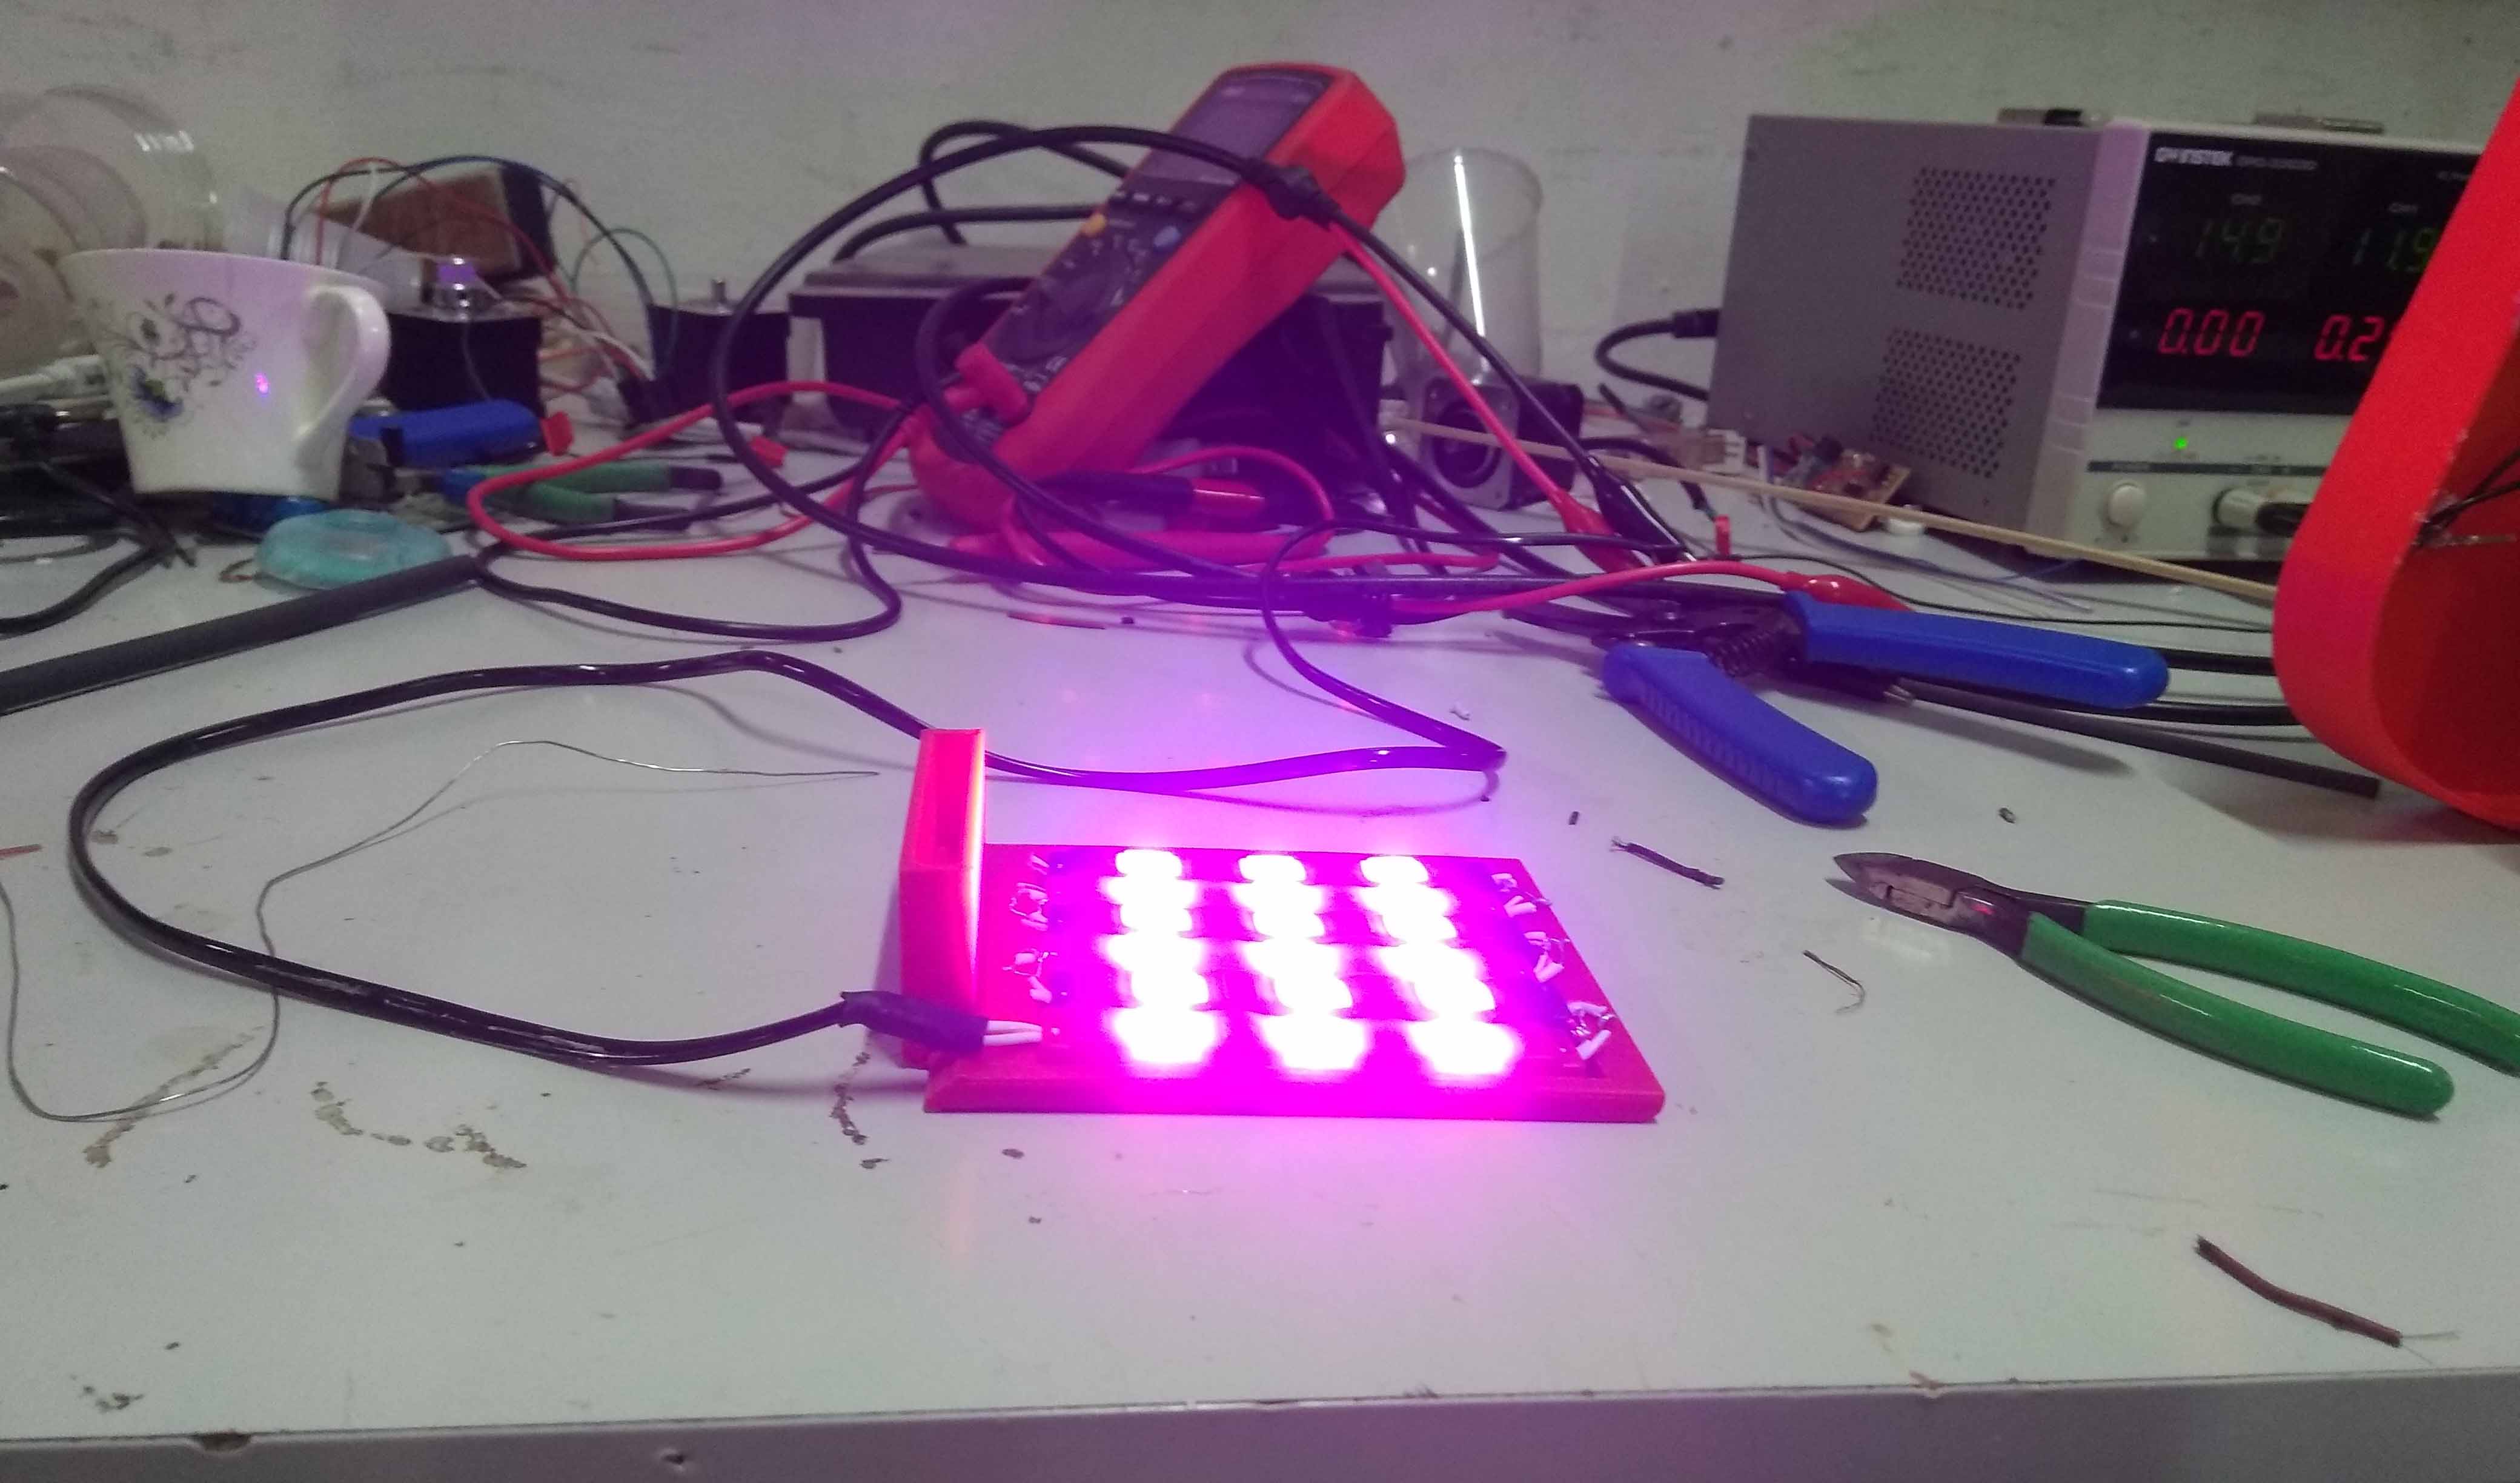
After 3D print the part I ripped of and placed the LEDs, its fit perfectly. The LEDs strips hace 3M adhessive tap in the botton so i doesnt want to use any glue to fix it in place. Then i test the LEDs by conecting to the lab bench power supply with a 12v 200mA power source. They are working perfect and well bright.
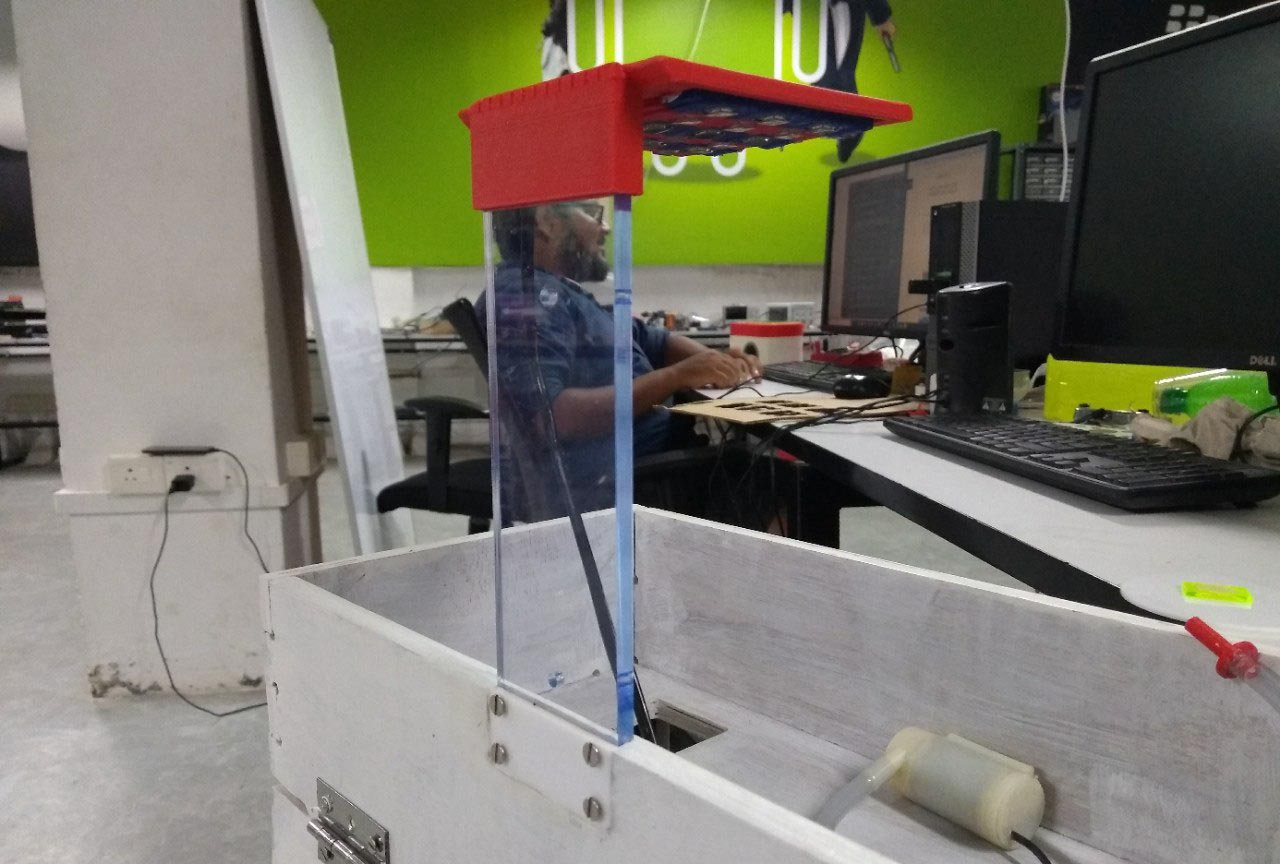
Now i need to cutout the handle part using a laser cutter. I used a 6mm clear acrylic sheet and cut the part. Then i atached the two parts together. After then i attached the handle to the pocket that i made when the enclossure parts are CNC milled. The pocket is 10mm deapth to fill the the pocket i laser cutted a 4mm white acrylic piece same size as the pocket. This will mach the enclossure color and hold the handle strong. Then i screw the handle and the pocket close piece together.

OLED Display Protective Glass
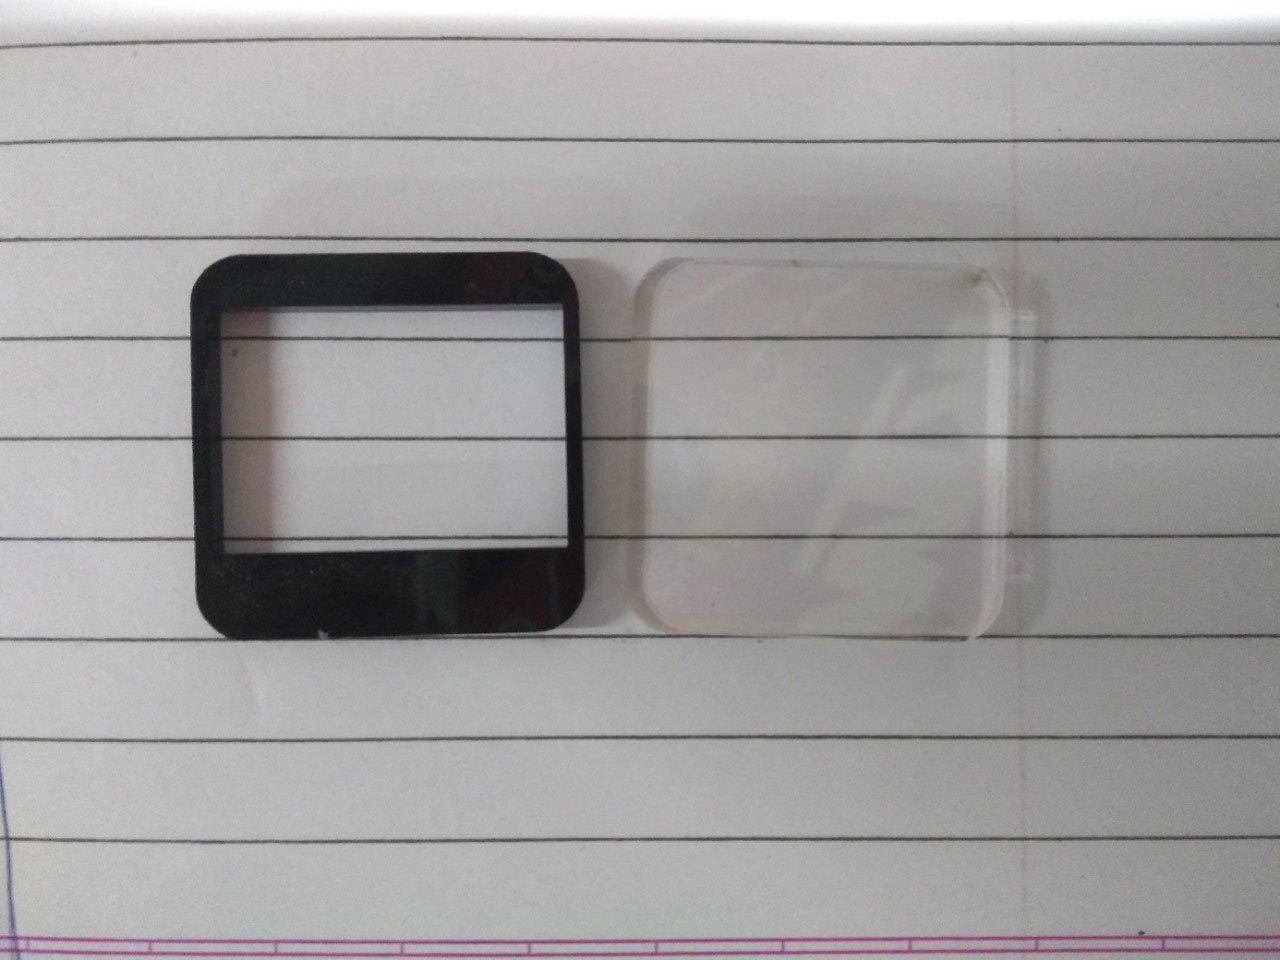
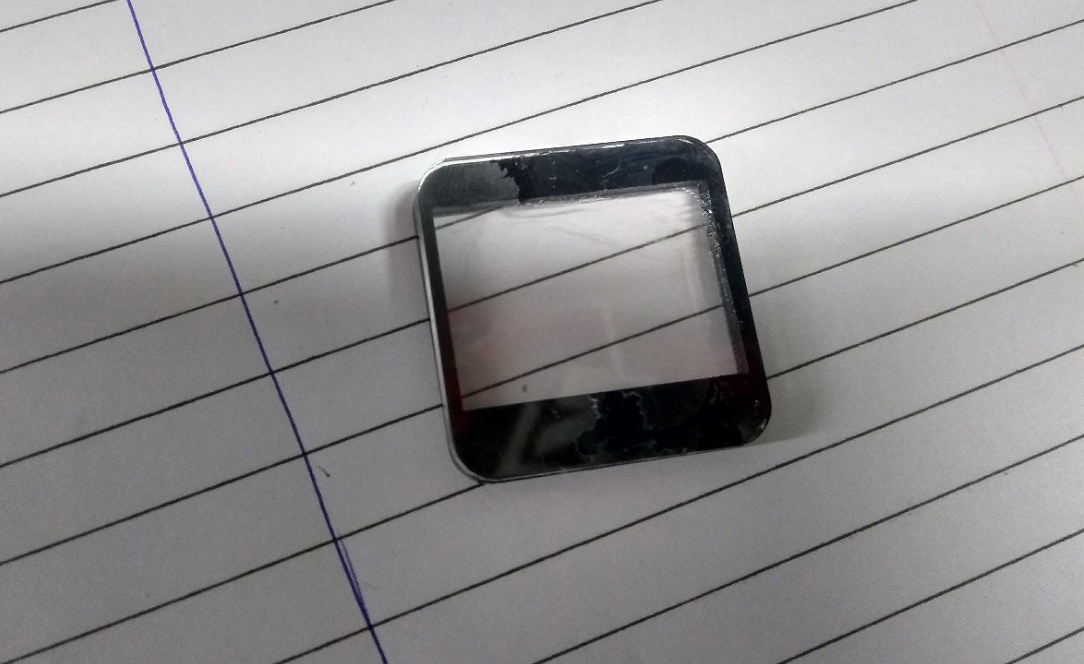
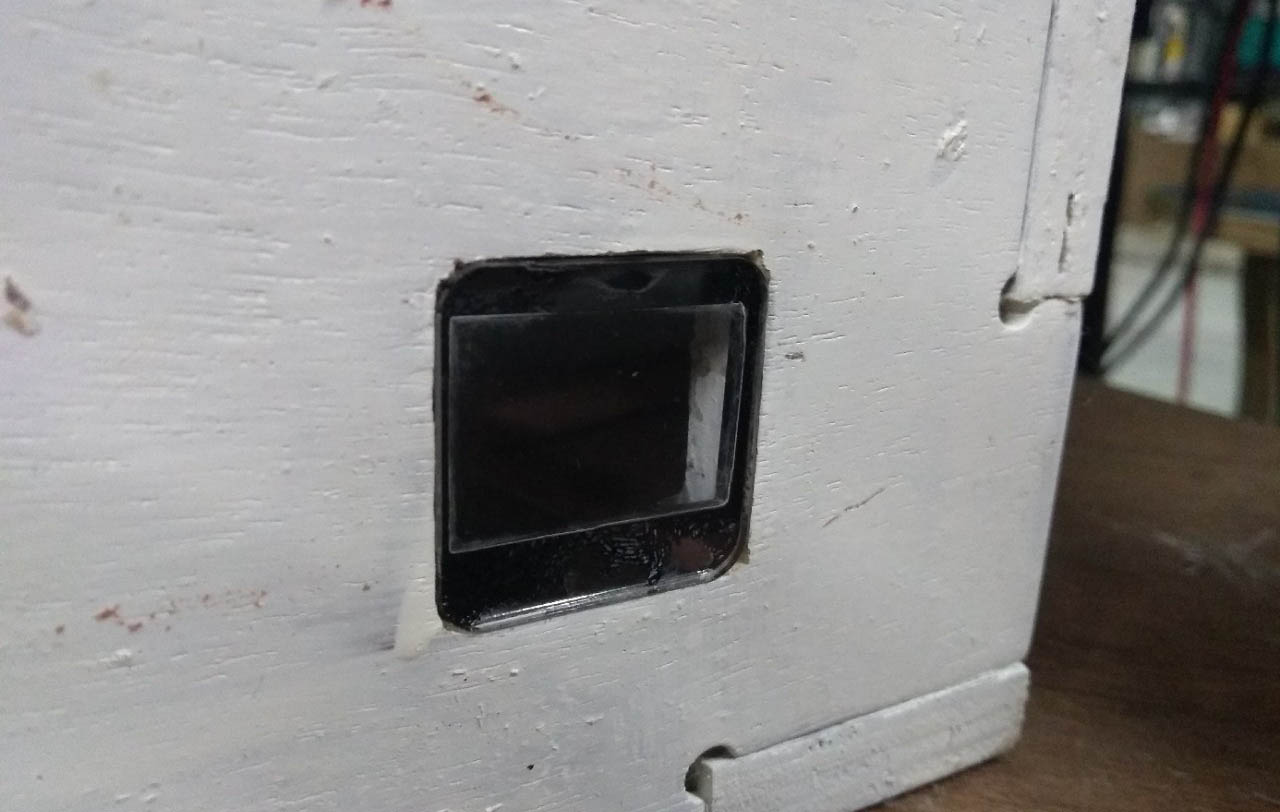
To protect the OLED display from scratches and spills and also for a nice look i designed a protective glass that fit in the hole for OLED display. I used a 3mm clear acrylic sheet and 3mm black acrylic sheet. Then laset cutten the design and glued the two piece together. Aftewr that i placed it in the pront panel of OXGROW body.
Designing and Building the Electronics
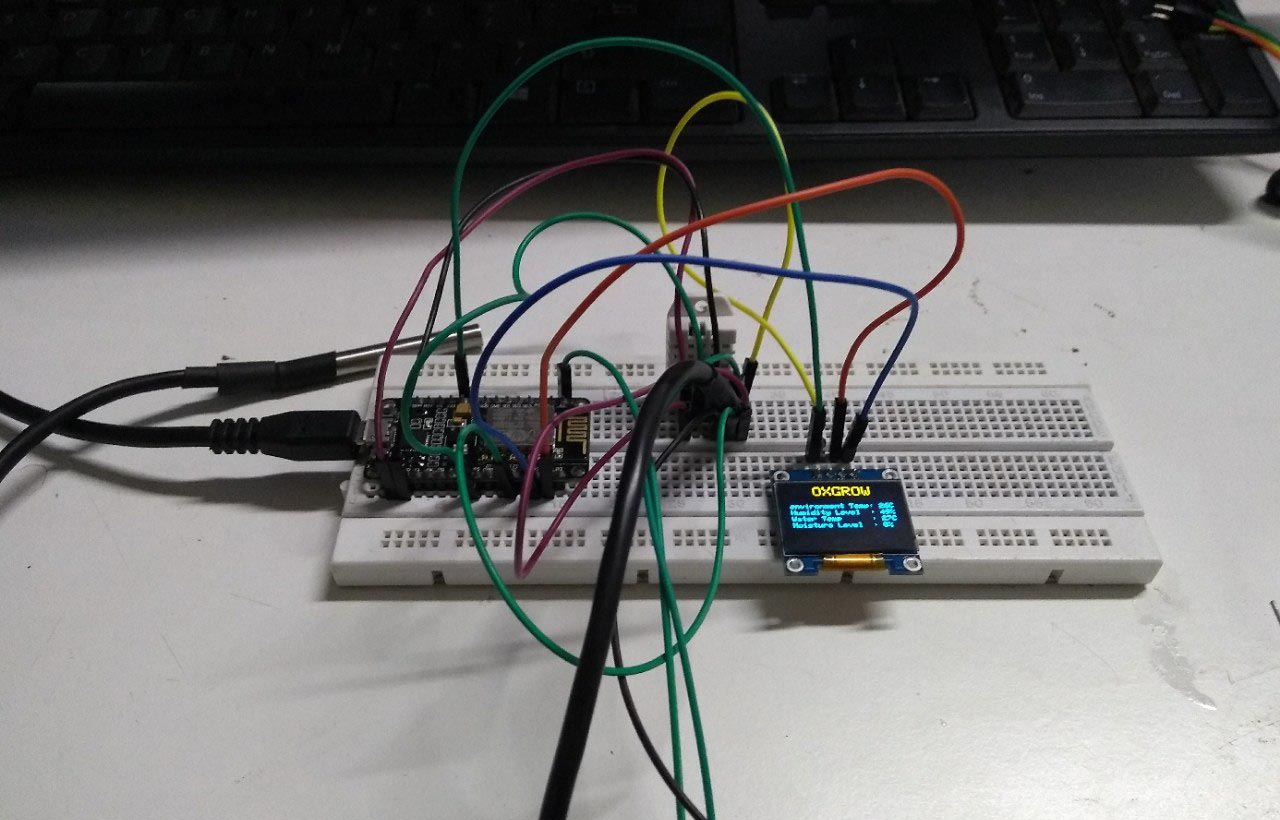
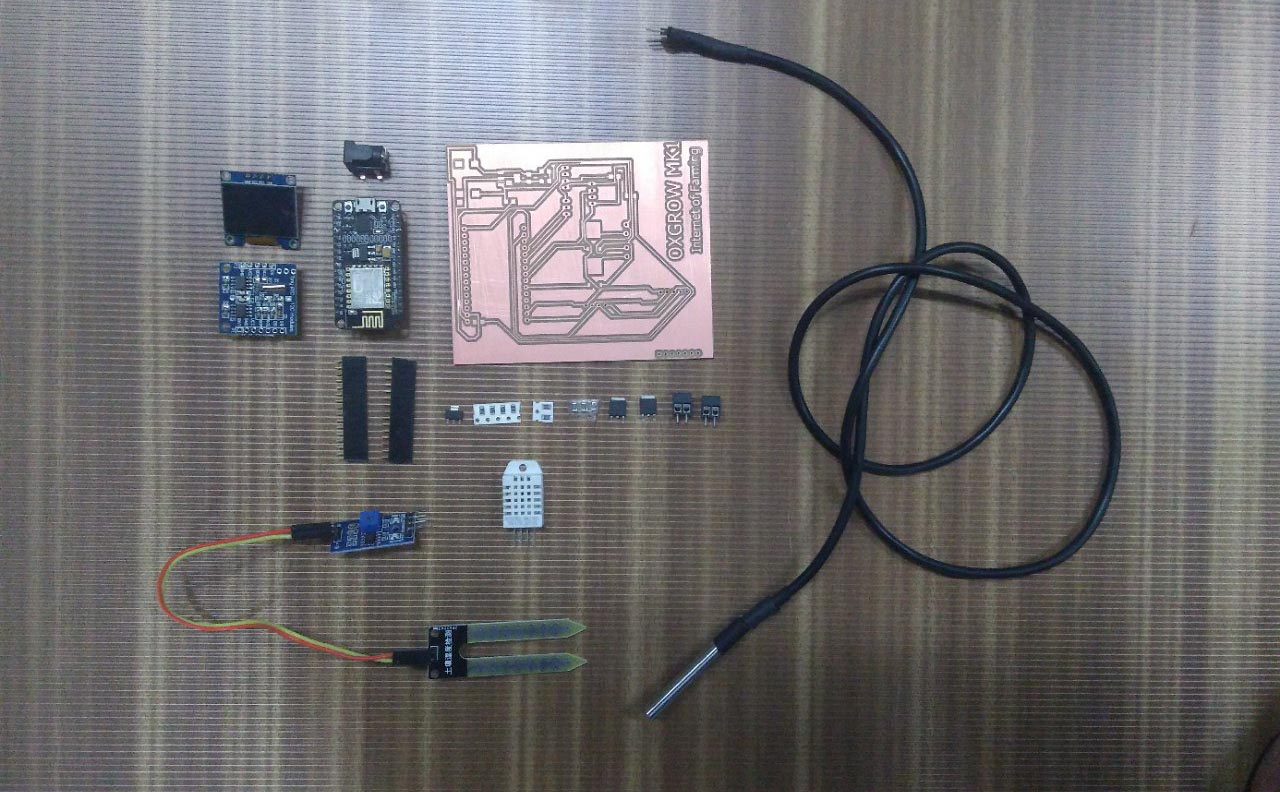
Before designing and milling the PCB i will explain the main components that i used for this project. The brain is esp8266 that i mentioned earlier, A soil moisture sensor to messure the moisture content in the growbed then a DHT22 for messuring the temperature and humidity of environment then a DS2812B waterproof temperature sensor for sensing the temperature in the aquarium then i used 128 x 64 OLED display to display the parameters to the user then i used two N channel mosfet to switch the motor and GrowLight. I used a 12v power supply adapter to power the board entirely. A LDO voltage regulator will regulate 3.3 voltage for esp8266 microcontroller.
ESp8266 12E SoC
I explain about the maon components that i using in my board. The most important part is the esp8266 SoC microcontroller unit. The esp8266 comes with inbuilt wifi that the main reason why i selected the esp8266 microcontroller. But the esp8266 have only one analog pin and it is little bit complicated when comparing with AVR microcontrollers. Unlike other microcontrollers
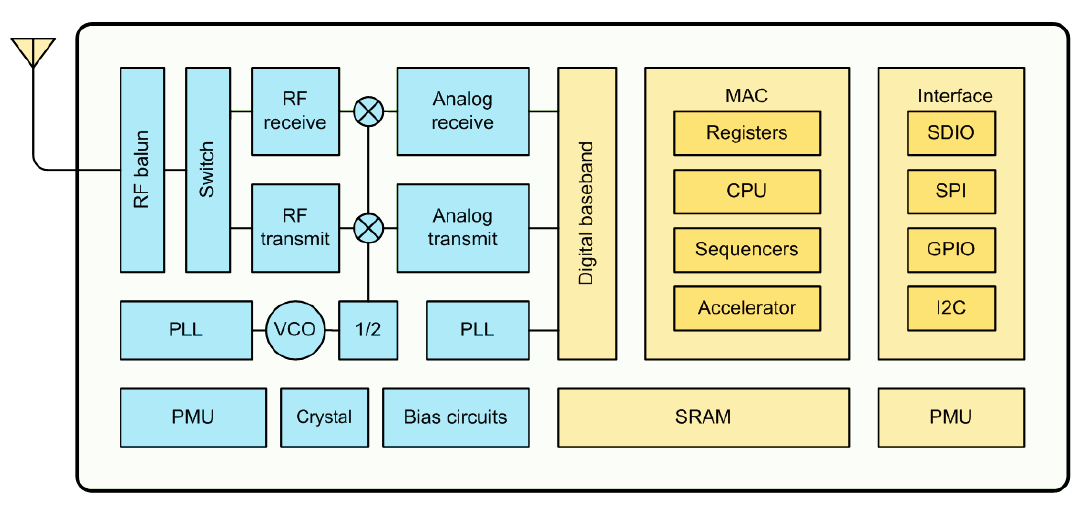

Unlike other microcontroller, we dont have access to use every I/O pins in ESP8266. Some of the configruations are performed by some I/O pins. to controll the UART download mode and Flash boot mode, i need to pull down and pull up some I/O pins in ESP8266.

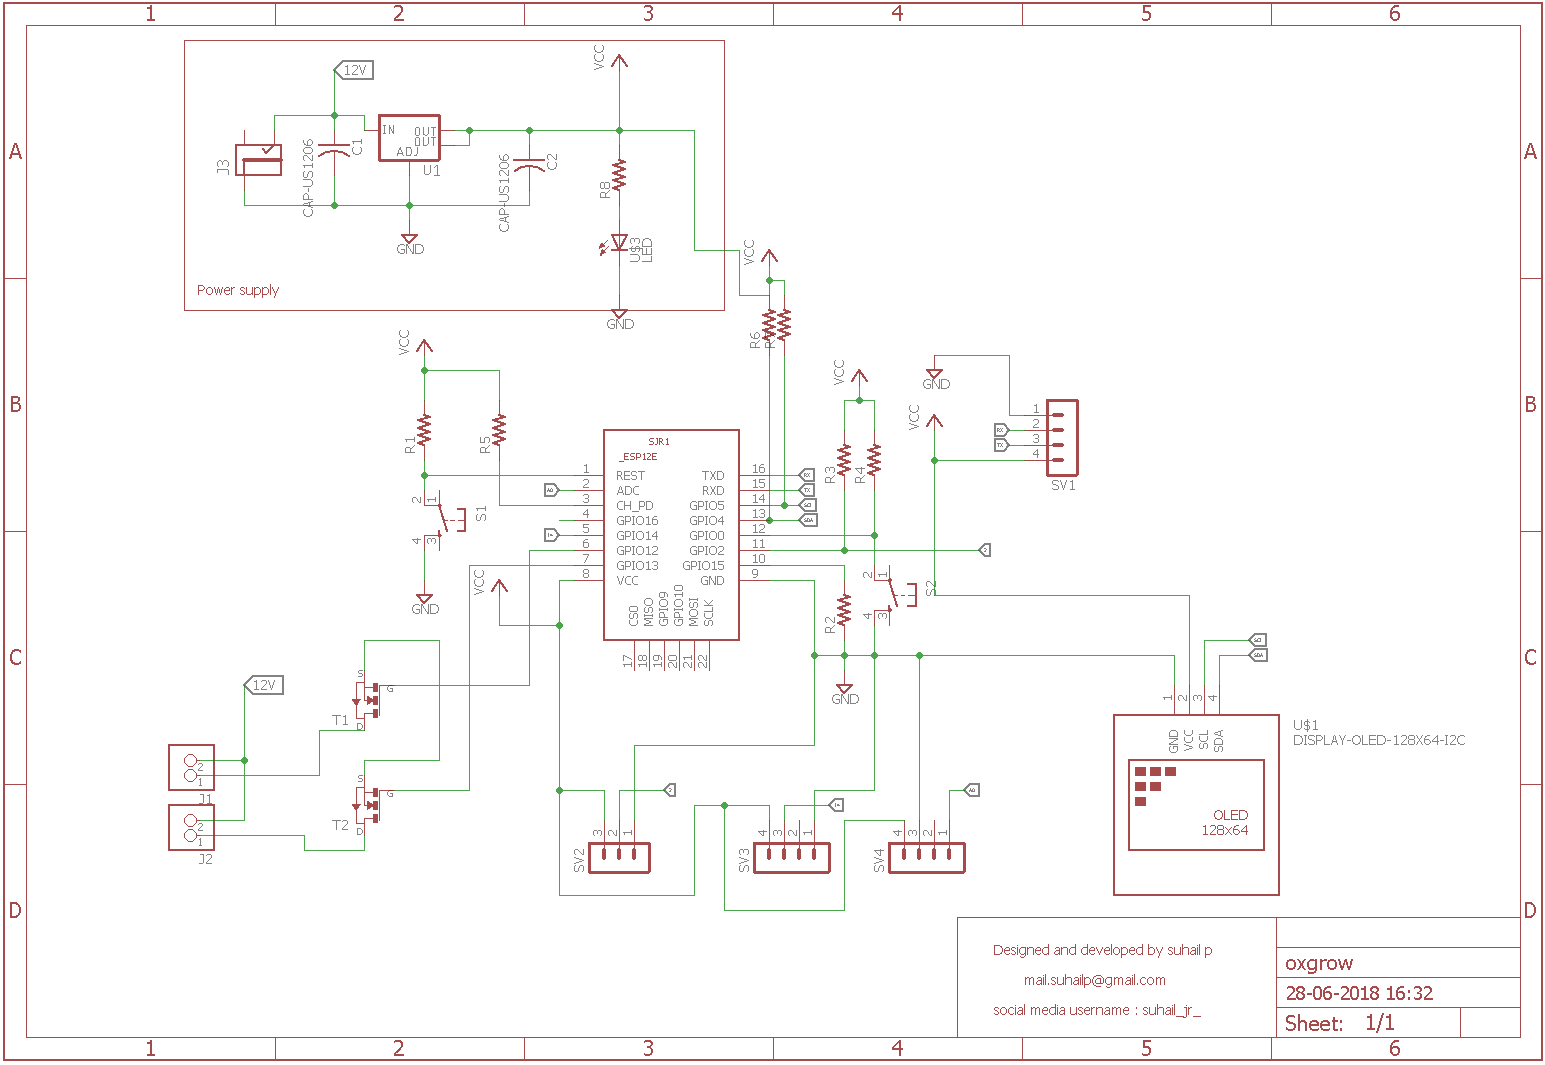
In ESP8266 we can't really use every pin , config's are controlled by some pin's that's like fuse bit's in the AVR microcontrollers, so first i designed a Minimum Config ESP8266 Board that can switch between UART Download Mode and Flash Boot Mode .and i used 9v battery with NCP1117 3.3v Regulator.
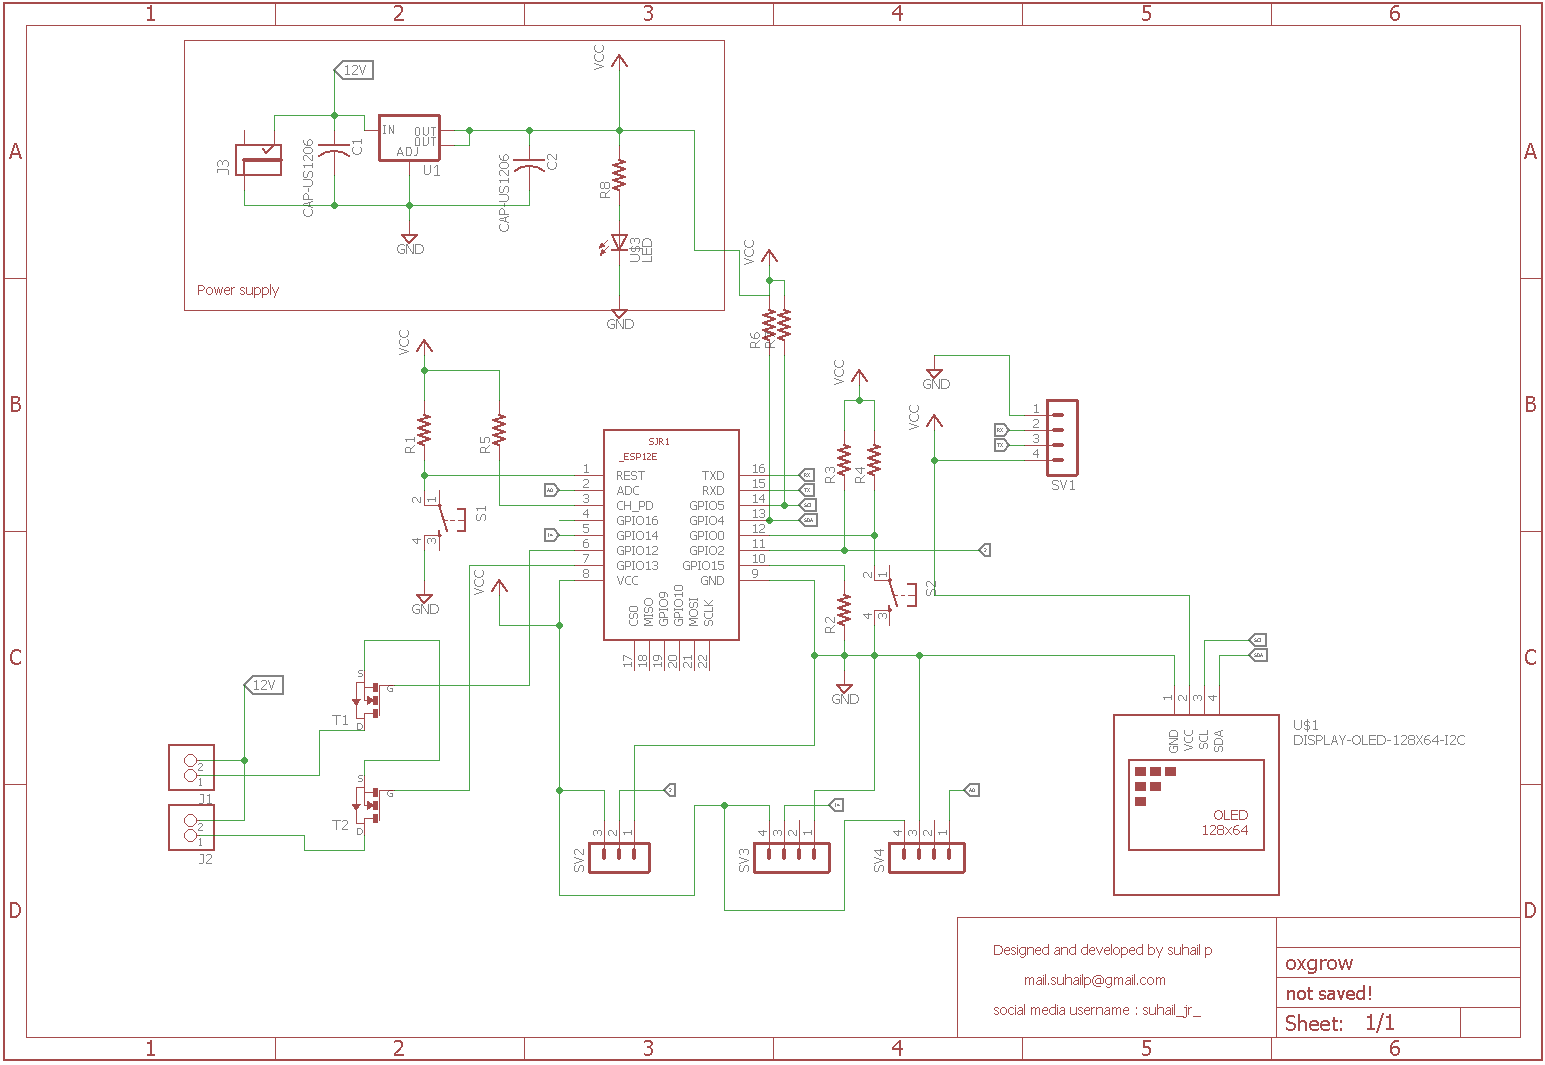
I started to design the circuit in eagle PCB CAD tool. I used two capacitors in between the NCP117 LDO regulator and added a power indicator LED. Then added the necessory pullups and pulldown resistors to the esp8266. Also i added two push button for Flash mode and Reset. I added headers pins for the sensors and display to externally plug them. and a 12V power jack for external power supply. I used two terminal conectors that conected to the N channel mosfet to controll the grow light and water pump.
In ESP8266 we can't really use every pin , config's are controlled by some pin's that's like fuse bit's in the AVR microcontrollers, so first i designed a Minimum Config ESP8266 Board that can switch between UART Download Mode and Flash Boot Mode .and i used 9v battery with NCP1117 3.3v Regulator.
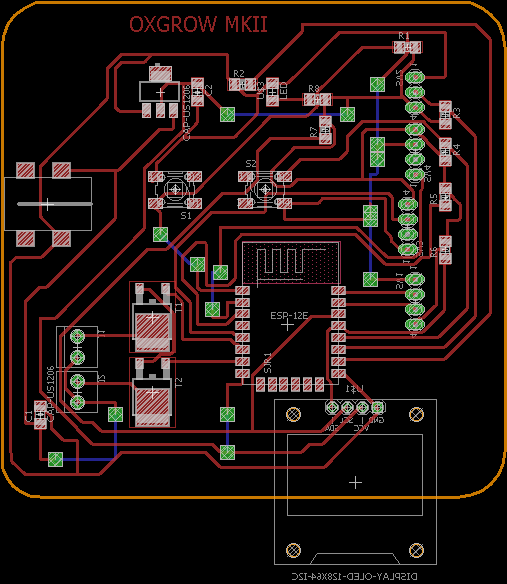
Then i open the PCB designing window and started to replace all components together and started to route the traces eith a 16 mill.
Then i milled the PCB using modella MDX20 PCB milling machine with 1/64 V bit. and cut out the PCB using 1/32 milling bit. Then i soldered all the components on the PCB.

Flashing NodeMCU Firmware
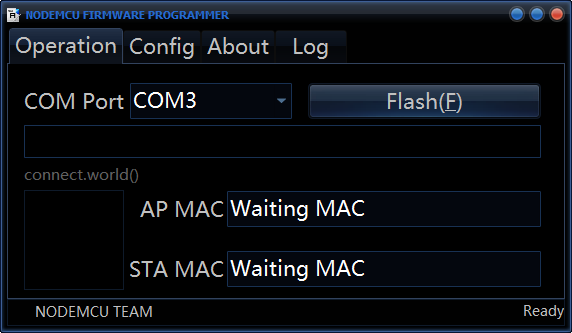
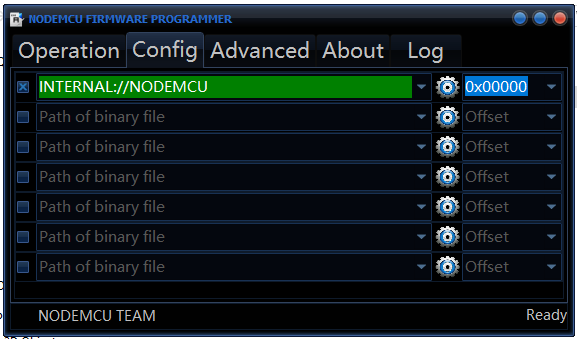
Programming the Board
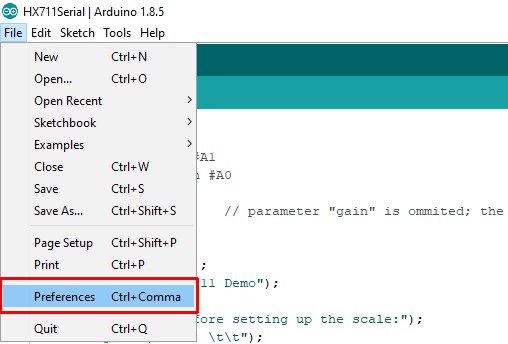
After flashing the nodeMCU firmware for esp8266. I installed the esp8266 boardmanager in arduino IDE. By going to Files-> Preferance-> Additional board manager
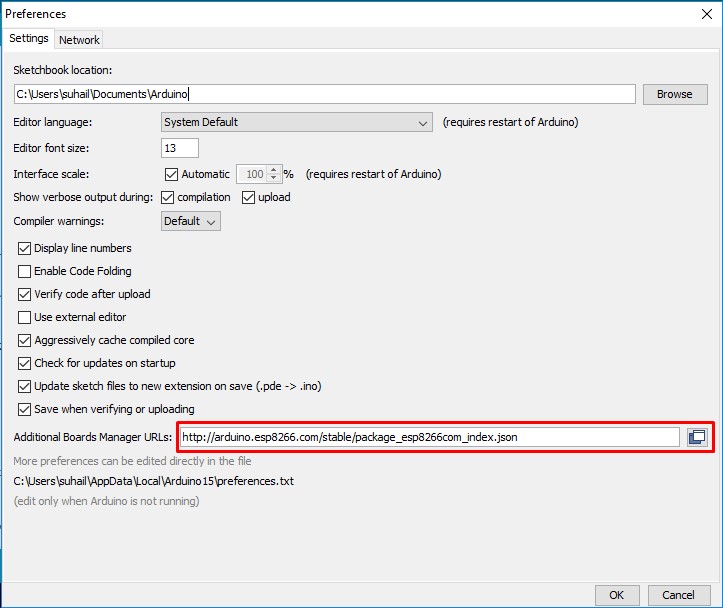
Paste the link in the text box that you can find below. Then go to tools-> Boards-> Board manager, then search for esp and intsall the esp8266 community board package. thats it.
http://arduino.esp8266.com/stable/package_esp8266com_index.json

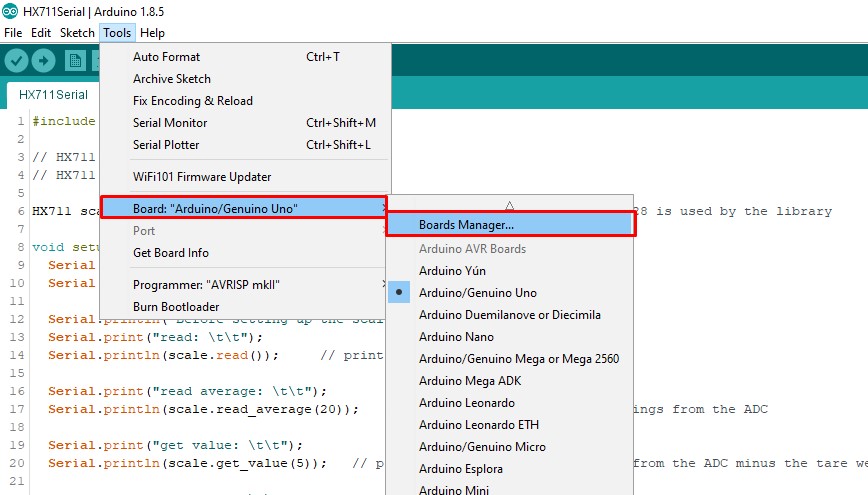
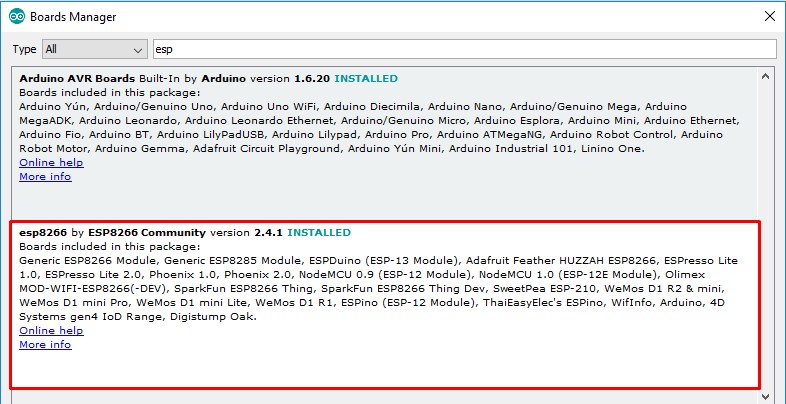
I used a USB to Serial converter module to interface the OXGROW board to the computer for program the device.
#include<DHT.h>
#include<SPI.h>
#include<Wire.h>
#include<OneWire.h>
#include<DallasTemperature.h>
#include<PubSubClient.h>
#include<Adafruit_GFX.h>
#include<Adafruit_SSD1306.h>
#include <ESP8266WiFi.h>
#include <PubSubClient.h>

const char* ssid = "KERALA STARTUP MISSION FABLAB";
const char* password = "INOVATE@KTIZ";
const char* mqtt_server = "127.0.0.1";// For safety its a demo: you need to add your VM's IP

#define motorPump D6
#define light D7
#define msensor A0
#define DHTPIN D5
#define DHTTYPE DHT22
#define ONE_WIRE_BUS D4
#define TEMPERATURE_PRECISION 9
#define OLED_RESET D8

  Adafruit_SSD1306 display(OLED_RESET);

WiFiClient espClient;
PubSubClient client(espClient);


  DHT dht(DHTPIN,DHTPIN);
  OneWire oneWire(ONE_WIRE_BUS);
  DallasTemperature sensor(&oneWire);

  DeviceAddress tempDeviceAddress;


#if (SSD1306_LCDHEIGHT != 64)
#error("Height incorrect, please fix Adafruit_SSD1306.h!");
#endif

int dhtTemp;
int dhtHum;
int mlevel;
int lvlmap;
int numberOfDevices;
int dellas;
int s;
int m;

char dtemp[6];
char dhum[6];
char dellass[6];
char lvmap[6];

void setup() {

  pinMode (motorPump,OUTPUT);
  pinMode(light,OUTPUT);
  pinMode(msensor,INPUT);
  digitalWrite(light,HIGH);
  digitalWrite(motorPump,LOW);
  display.begin(SSD1306_SWITCHCAPVCC, 0x3C);
  dht.begin();
  sensor.begin();
  display.display();
  display.clearDisplay();
  display.setTextSize(2);
  display.println(20,0);
  display.println("OXGROW");
  digitalWrite(light,HIGH);
  setup_wifi();
  client.setServer(mqtt_server, 1883);
  client.setCallback(callback);
}


void loop() {

  if (!client.connected()) {
    reconnect();
  }
  client.loop();


mlevel = analogRead(msensor);
lvlmap = map(mlevel,1023,250,0,100);

dhtTemp = dht.readTemperature();
dhtHum = dht.readHumidity();
if (isnan(dhtTemp) || isnan(dhtHum)) {
    Serial.println("Failed to read from DHT sensor!");
    return;
}
sensor.requestTemperatures();
dellas = sensor.getTempCByIndex(0);

disp();
timer();
}


void disp()
{
display.setTextSize(1);
display.setCursor(0,10);
display.println("M.level:");
display.println(lvlmap);
display.print("%");


display.setTextSize(1);
display.setCursor(0,20);
display.println("W.temp:");
display.println(dellas);
display.print("c");

display.setTextSize(1);
display.setCursor(0,30);
display.println("E.temp:");
display.println(dhtTemp);
display.print("c");

display.setTextSize(1);
display.setCursor(0,40);
display.println("E.Hum:");
display.println(dhtHum);
display.print("%");

 dtostrf(dhtTemp, 6, 2, dtemp);
 dtostrf(dhtHum, 6, 2, dhum);
 dtostrf(dellas, 6, 2, dellass);
 dtostrf(lvlmap, 6, 2, lvmap);

 client.publish("dhttemp", dtemp);
 client.publish("dhthum", dhum);
 client.publish("dellas", dellass);
 client.publish("dellas", lvmap);

}

void timer() {


  s = s + 1;
  if (s == 60) {
    s = 0;
    m = m + 1;
  }
  if (m == 1) {
    m = 0;

  digitalWrite(motorPump,HIGH);
  delay(120000);
  digitalWrite(motorPump,LOW);
  }

}
void setup_wifi() {

  delay(10);
  // We start by connecting to a WiFi network
  Serial.println();
  Serial.print("Connecting to ");
  Serial.println(ssid);

  WiFi.begin(ssid, password);

  while (WiFi.status() != WL_CONNECTED) {
    delay(500);
    Serial.print(".");
  }

  Serial.println("");
  Serial.println("WiFi connected");
  Serial.println("IP address: ");
  Serial.println(WiFi.localIP());
}
void callback(char* topic, byte* payload, unsigned int length) {
  Serial.print("Message arrived [");
  Serial.print(topic);
  Serial.print("] ");
  for (int i = 0; i < length; i++) {
    Serial.print((char)payload[i]);
  }
  Serial.println();

  // Switch on the LED if an 1 was received as first character
  if ((char)payload[0] == '1') {
    digitalWrite(BUILTIN_LED, LOW);   // Turn the LED on (Note that LOW is the voltage level
    // but actually the LED is on; this is because
    // it is acive low on the ESP-01)
  } else {
    digitalWrite(BUILTIN_LED, HIGH);  // Turn the LED off by making the voltage HIGH
  }

}

void reconnect() {

  while (!client.connected()) {
    Serial.print("Attempting MQTT connection...");
    // Attempt to connect
    if (client.connect("ESP8266Client")) {
      Serial.println("connected");


    } else {
      Serial.print("failed, rc=");
      Serial.print(client.state());
      Serial.println(" try again in 5 seconds");

      delay(5000);
    }
  }
}
Setting up MQTT Broker and Android Application
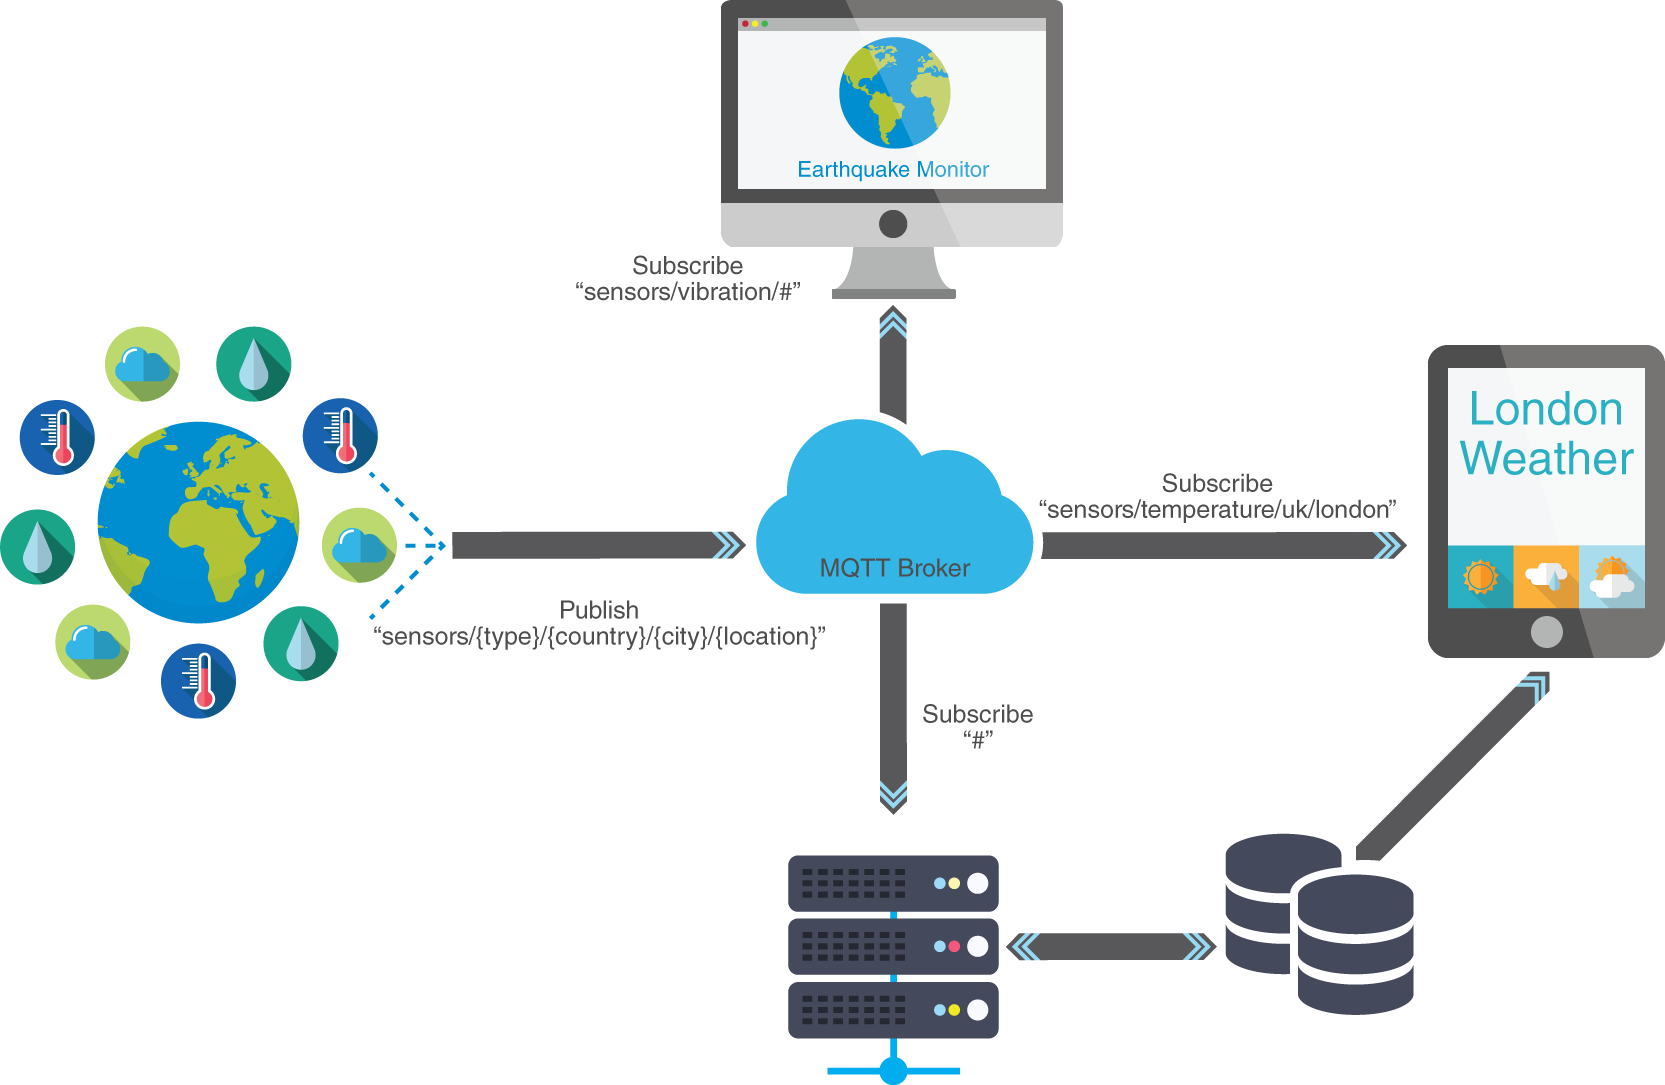
As the part of IoT(internet of things). I decided to use MQTT protocol to send and recieve the data over internet to my phone (*to any phone). So what is MQTT protocol.
MQTT Protocol
MQTT stands for MQ Telemetry Transport. It is a publish/subscribe, extremely simple and lightweight messaging protocol, designed for constrained devices and low-bandwidth, high-latency or unreliable networks. The design principles are to minimise network bandwidth and device resource requirements whilst also attempting to ensure reliability and some degree of assurance of delivery. These principles also turn out to make the protocol ideal of the emerging “machine-to-machine” (M2M) or “Internet of Things” world of connected devices, and for mobile applications
Setup Mosquitto (MQTT broker)

Then i accessed the console of the VM by using the SSH conection. To access all you need have a SSH client application and IP address of the VM, username and password. After gathering these information, i used a SSH client application called MobXtream. I used putty earlier, But these days i use MobXtream because it comes with a lot of features.
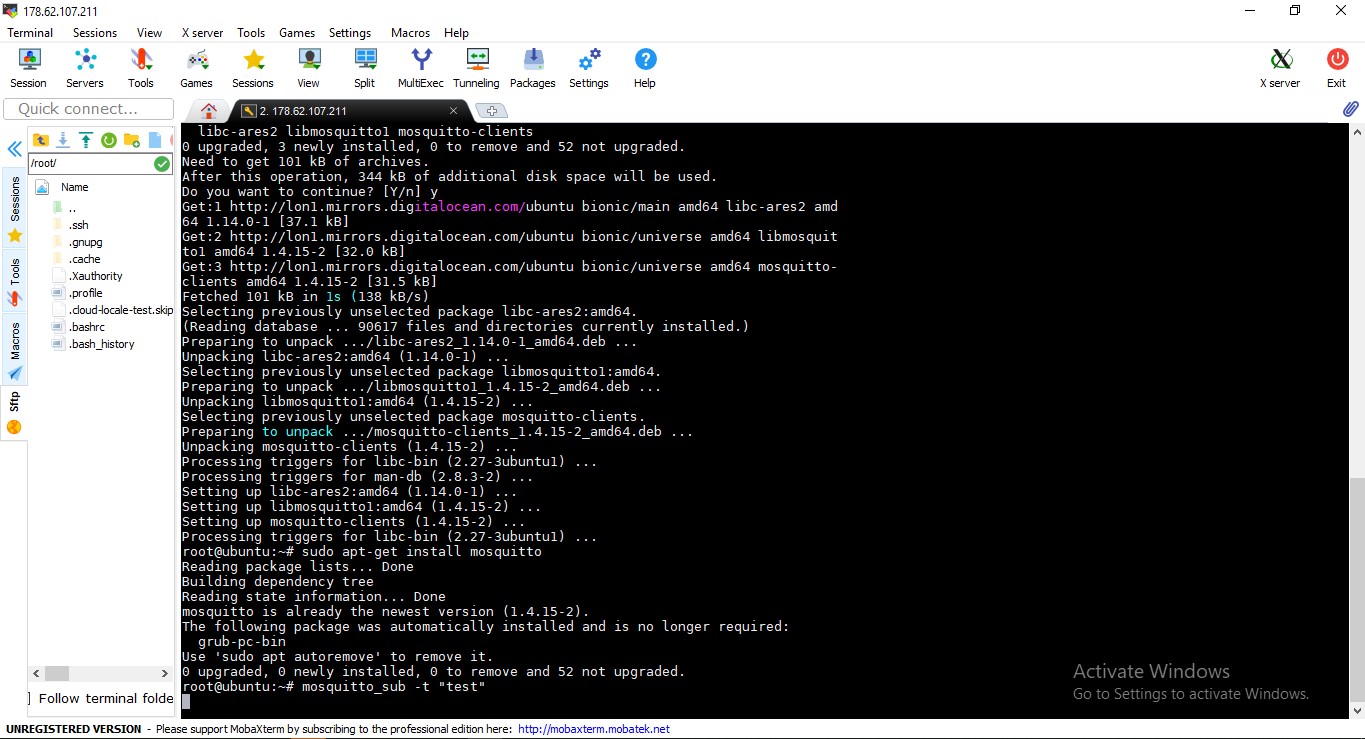
After accessing the console, i installed the opensource MQTT broker called Mosquitto. To install mosquitto, you can enter these commands.
sudo apt-get install mosquitto AFter installing Mosquitto broker you also needed to install Mosquitto client by entering this command sudo apt-get install mosquitto-clients Mosquitto clients help us easily test MQTT through a command line utility. We will use two command windows, one to subscribe to a topic named "test" and one to publish a message to it. The mosquitto service will automatically started after the installation.

Setup a Android Application.
The publisher is the OXGROW controller board. The oxgrow will countinuesly publish all the data into the MQTT broker that i previously installed in the virtual machine. To access these data we would need to subscribe to the topics. TO do this we have a lot of ways. Either we can use a MQTT dashboard android app or else we can build one by ourself. But i dont have much time to build a android app for it. So i decided to use a MQTT dashboard android app from google playstore you can download from here. The app is too easy to setup. All you need to do is add a new mqtt dashboard by touching on the '+' icon on the top right corner the give the essential information about the VM like IP address, username and password. You can add multipe devices.
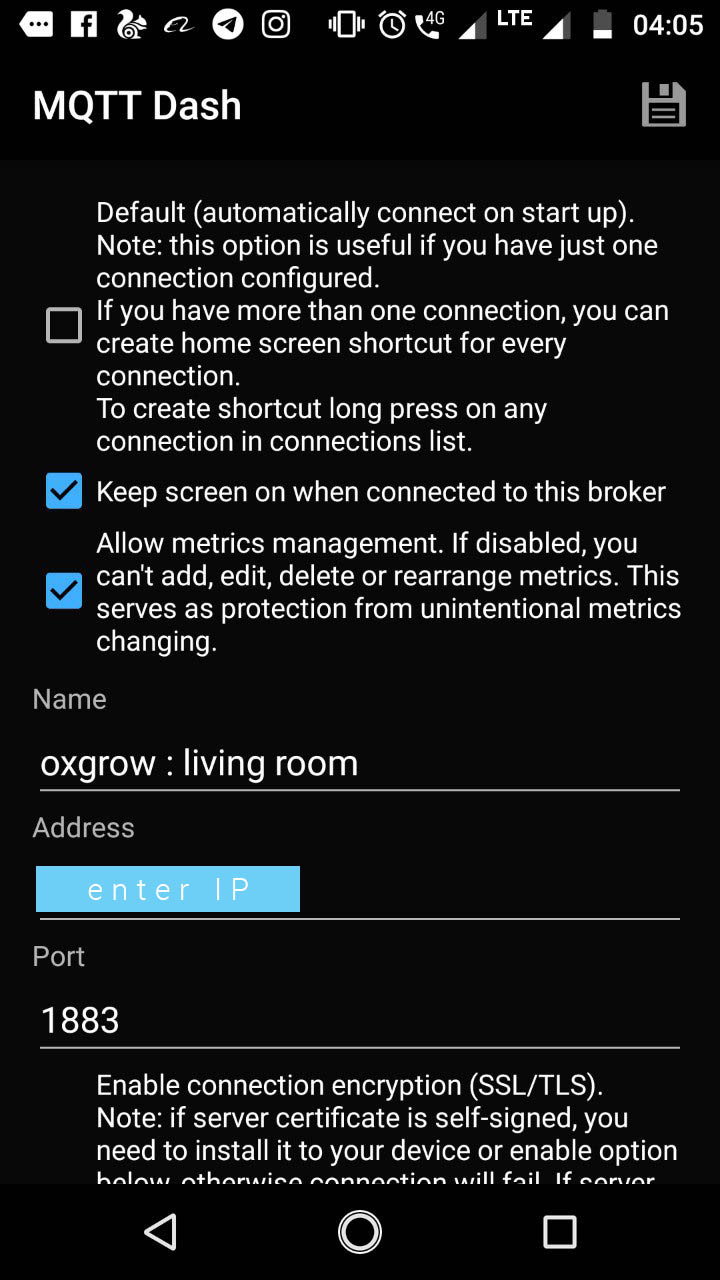
After that you could get a dash board, open that dash board and add new 'TEXT' then enter the topics and other details in the required field. then save it.
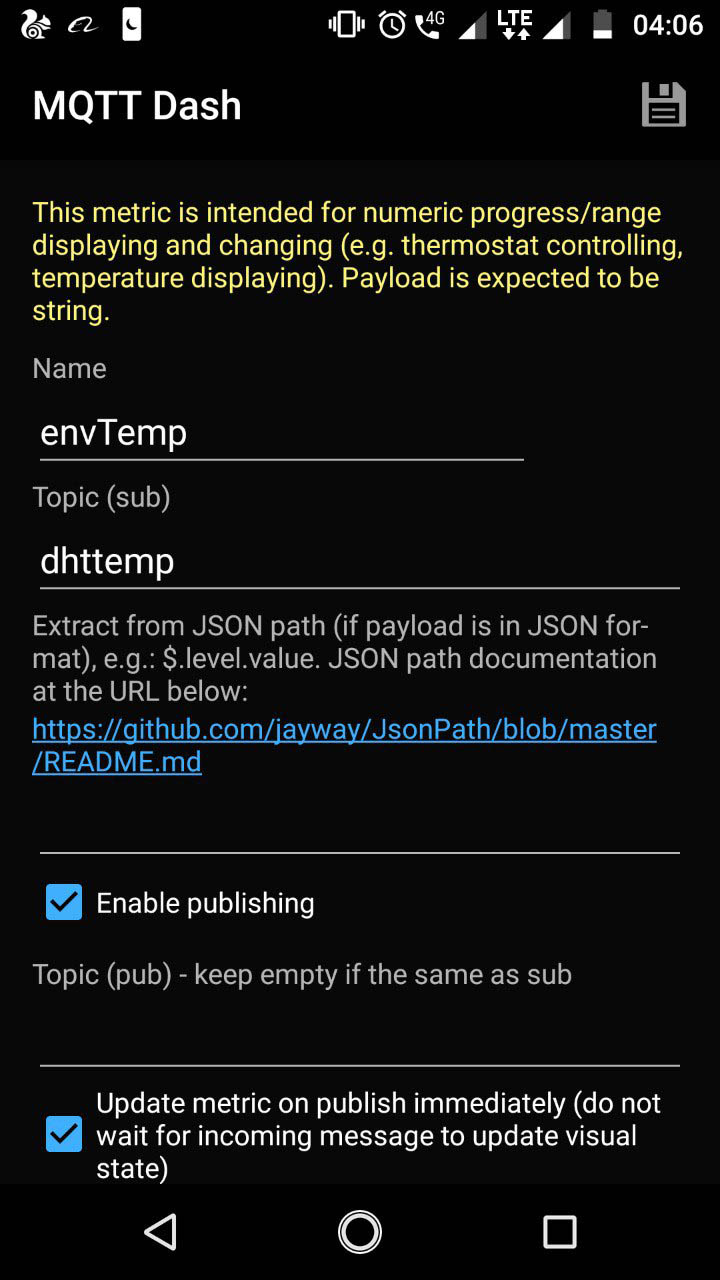
I subscribed four topics that iam publishing from the devics and it should look like this.

Cloud part is done.So what is next? Its time to assemble the OXGROW parts together and test!
Assembling OXGROW
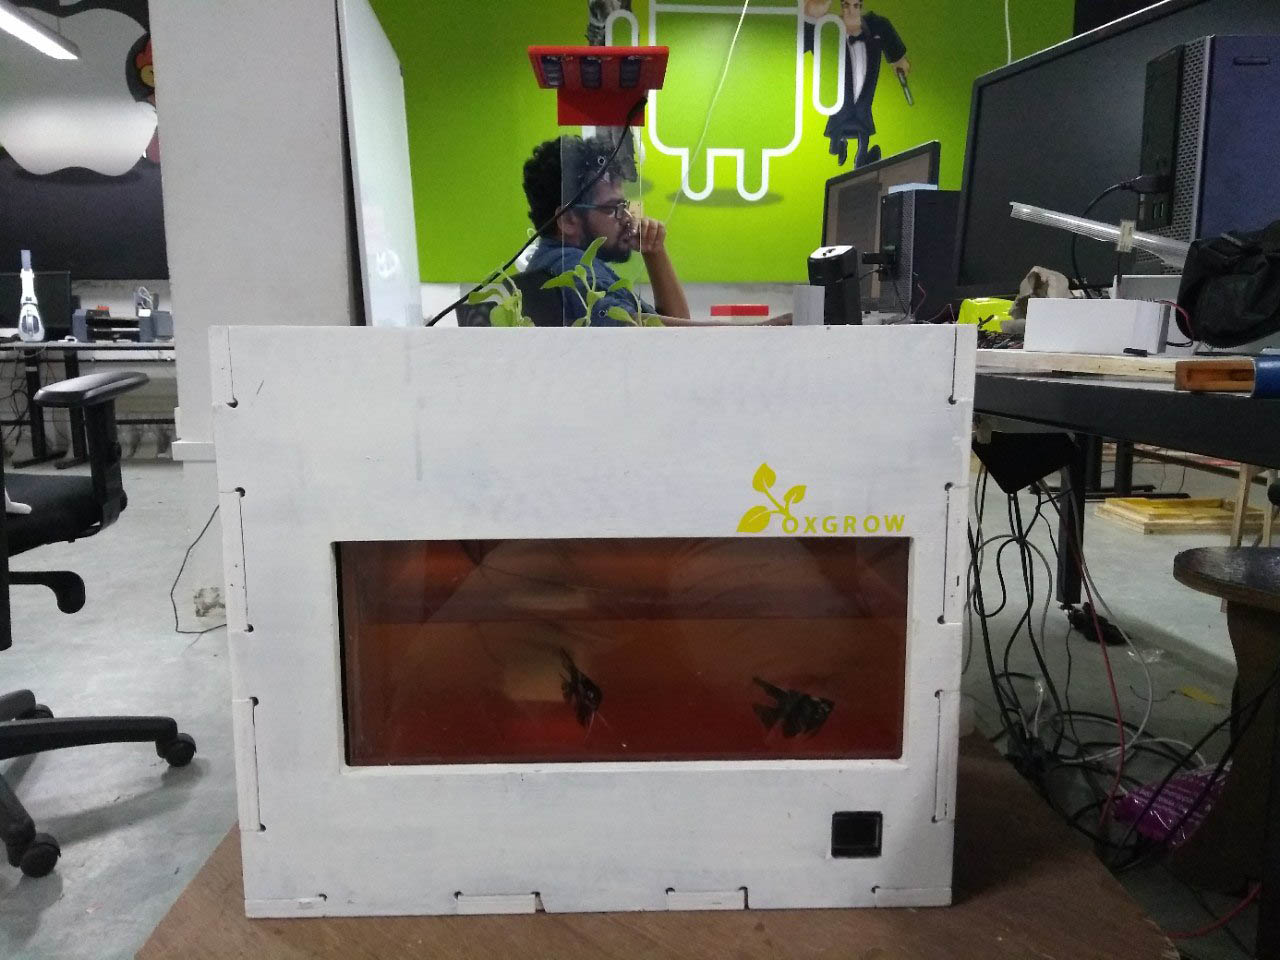
HEro Shot
