Week 9

emmbedded programming
This week assignment is the programming of echo hello world board that I design the electronic design week.I programme the echo hello world board with Arduino C.In this week i also need to read about a microcontroller datasheet.
Modern embedded systems are often based on microcontrollers (i.e. CPUs with integrated memory or peripheral interfaces),[7] but ordinary microprocessors (using external chips for memory and peripheral interface circuits) are also common, especially in more complex systems. In either case, the processor(s) used may be types ranging from general purpose to those specialized in certain class of computations, or even custom designed for the application at hand. A common standard class of dedicated processors is the digital signal processor (DSP)Modern embedded systems are often based on microcontrollers (i.e. CPUs with integrated memory or peripheral interfaces),[7] but ordinary microprocessors (using external chips for memory and peripheral interface circuits) are also common, especially in more complex systems. In either case, the processor(s) used may be types ranging from general purpose to those specialized in certain class of computations, or even custom designed for the application at hand. A common standard class of dedicated processors is the digital signal processor (DSP).
Microcontroller
The best way to understand a microcontroller is to compare it with our PC. A microcontroller is like a mini pc with the processor , RAM, I/O features etc integrated into a single component. Whereas on our PC we have separate components for each of this process. But the processing capacity and versatility of the microcontrollers are really low compared to our PC as they can only do a single task at a time.ISP Pins
These are the pins that we use to programme our MC. We have MISO(Master Input Slave Output), MOSI(Master Output Slave Input) and RESET to programme our MC. The output from the MC after flashing is done through MISO and input(programmes) to the MC is sent through MOSI. We can restart the MC by setting the reset pin to ground. So it is used to add a Reset button to our MC.CLock
Clock refers to the frequency in which an MC works. Our MC has an internal clock of 1 Mhz. But we have also connected a 20 Mhz external clock to this to increase its accuracy.I decided to read Attiny44 microcontroller.Microcontrollers it consist of CPU,Memmory Unit (RAM , ROM )and I/O's
ATtiny 44 A Microcontrollers
Attiny 44A is microcontroller from AVR family. Attiny 44A comes in dual in line 14 pin SMD package. Attiny does have High-performance, low-power Microchip AVR RISC-based CMOS 8-bit microcontroller combines 4KB ISP flash memory, 256-Byte EEPROM, 256B SRAM, 12 general purpose I/O lines, 32 general purpose working registers, an 8-bit timer/counter with two PWM channels, a 16-bit timer/counter with two PWM channels, internal and external interrupts, an 8-channel 10-bit A/D converter, a programmable gain stage (1x, 20x) for 12 differential ADC channel pairs, programmable watchdog timer with internal oscillator, a internal calibrated oscillator, and three software selectable power saving modes.
pinouts of attiny 44

Programming
There are different ways to programme the Hello-Echo board. I am planning to try Arduino IDE and Atmel Studio . Programming Arduino IDE is somewhat simpler since we are using a much simpler language and the commands are much easier to understand. In Atmel studio, we are using AVR C which is a little bit complicated compared to Arduino IDE since the commands are a bit confusing and there are some logic we have study before trying AVR C. Since I was from a mechanical background and I didn't have any prior knowledge in embedded programming I thought to go with the simpler one first.
Arduino IDE
Before starting programming I had to set up my Arduino IDE software. I downloaded the software from here
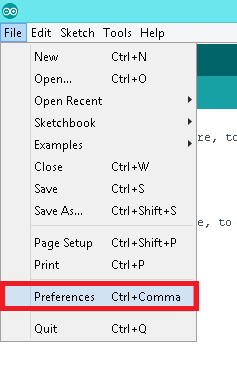
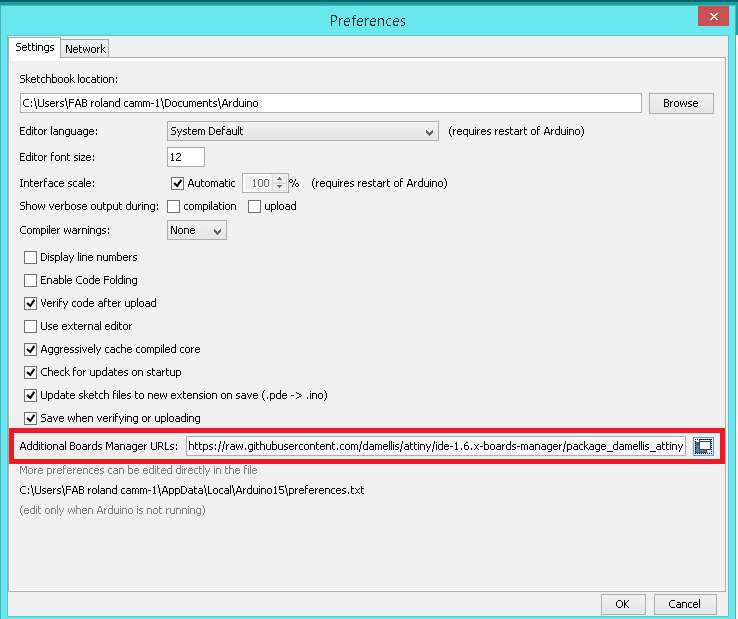
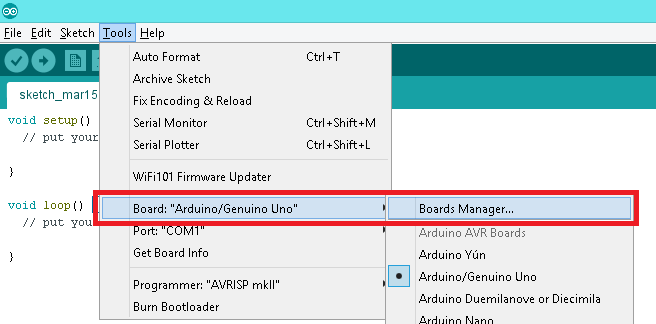
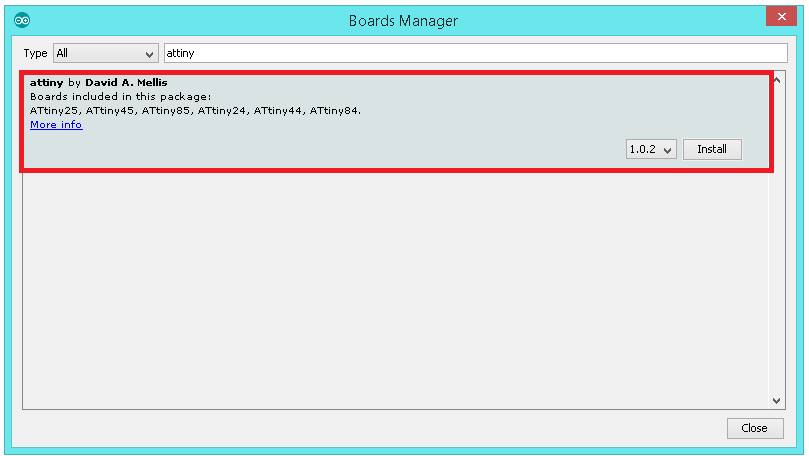
By default, the software doesn't have the Attiny44 chip libraries. SO we have to add them externally. For this 1st download and install the Arduino IDE software. Then go to file >> preferences which will open a window.
steps for programming attiny 44
1.Instal the package of attiny 44.

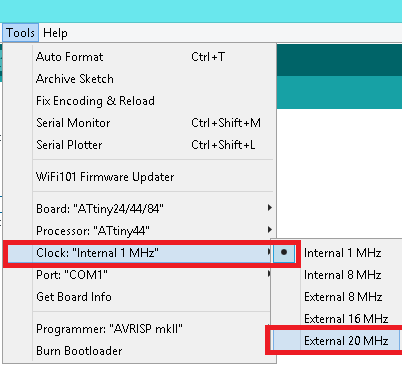
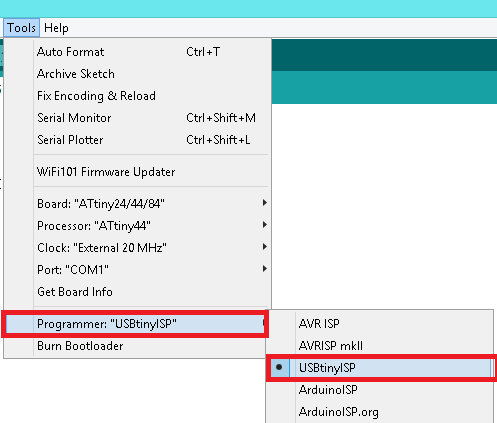
2.Write the code of attiny 44.
Arduino Code
3.Verify the code.
4.Upload the code.
Atmel Studio
In Atmel Studio we use Avr C language which is a bit difficult compared to the Arduino. Here we got to have a thorough knowledge of Microcontroller registers, logic circuits and things like that. This is where the datasheets could help us. To start programming our board using Fab ISP we have to first configure our ATmel studio. Before this first download your Atmel studio from here. Now you have to install the Avrdude which you can download from this link.Now open Atmel studio and click on the Tools tab.Click on the External tools in the pop up window.
Click on the Add button to add our fab ISP. And then fill the respective coloumns as given below. Command: C:\WinAVR-20100110\bin\avrdude.exe Arguments: -c usbtiny sp -p t44 -F -v -U flash:w:$(TargetDir)$(TargetName).hex:i Initial Directory: $(TargetDir)
Now to start a new project goto File>>New>>Project In the window select C/C++ as language and select the second one from the selected list
In the next window select Attiny as the device family and select Attiny44A from it and press ok.
Combile the code by going to Build>>Build Solution
Flash the code by clicking Tools>>'name of the ISP file you created before'