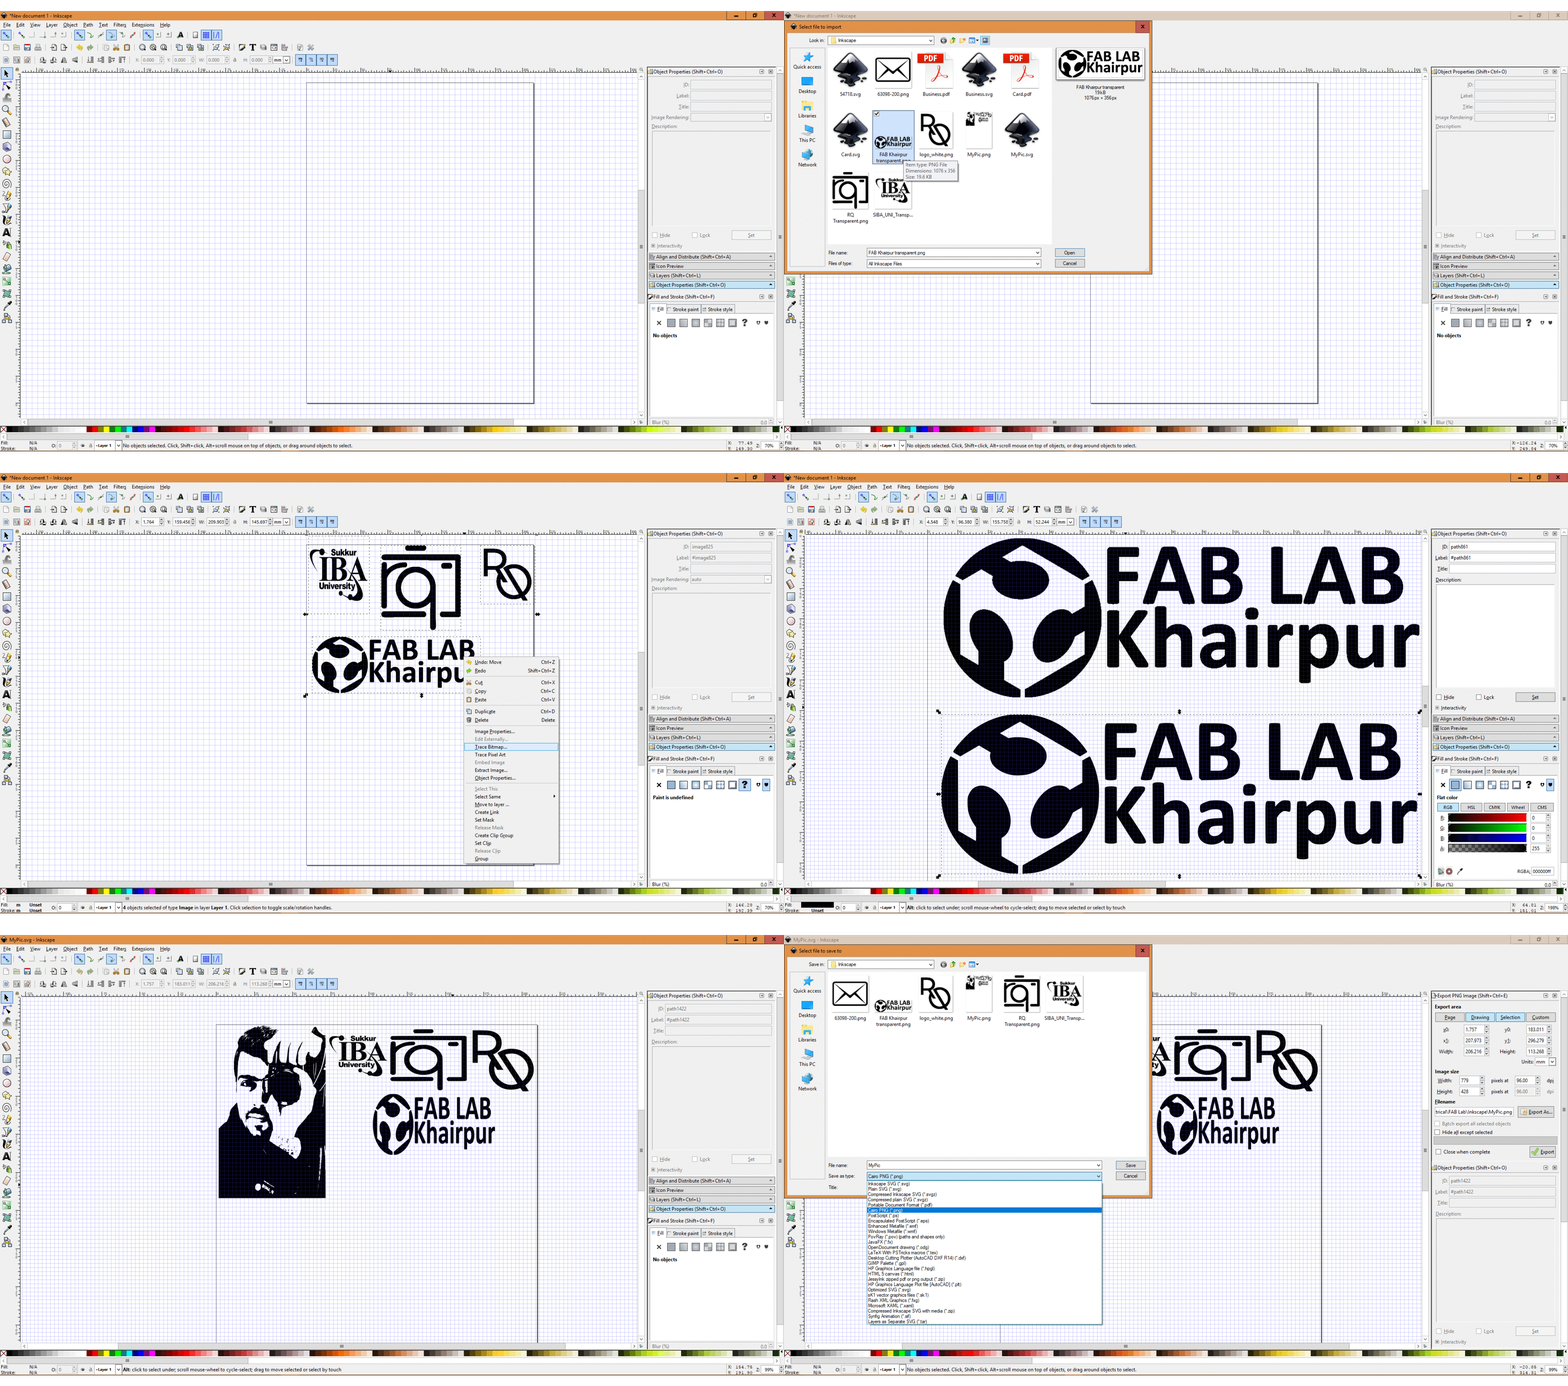
After looking at how vinyl cutting works, I was very much excited to use this and make customizable stickers for my laptop.
Before using Cut Studio one must be aware to correctly insert the vinyl sheet in vinyl cutter, for that follow the below mentioned steps
- Press back the lock to release the sheet holders.
- Insert vinyl sheet and align the sheet with any of the white markers on the machine.
- Align the sheet holders(wheel like) with the white markers as well.
- After aligning these, press forward the sheet holder and lock the sheet at that place.
- From the operating panel of machine, choose the type of vinyl sheet whether it is "Roll" or a "Piece".
- I was using a Piece so i choose that and press "Enter" button.
- The cutting head moved over the piece and gave the dimensions on the screen, now i can go to Cut Studio and continue the cutting process
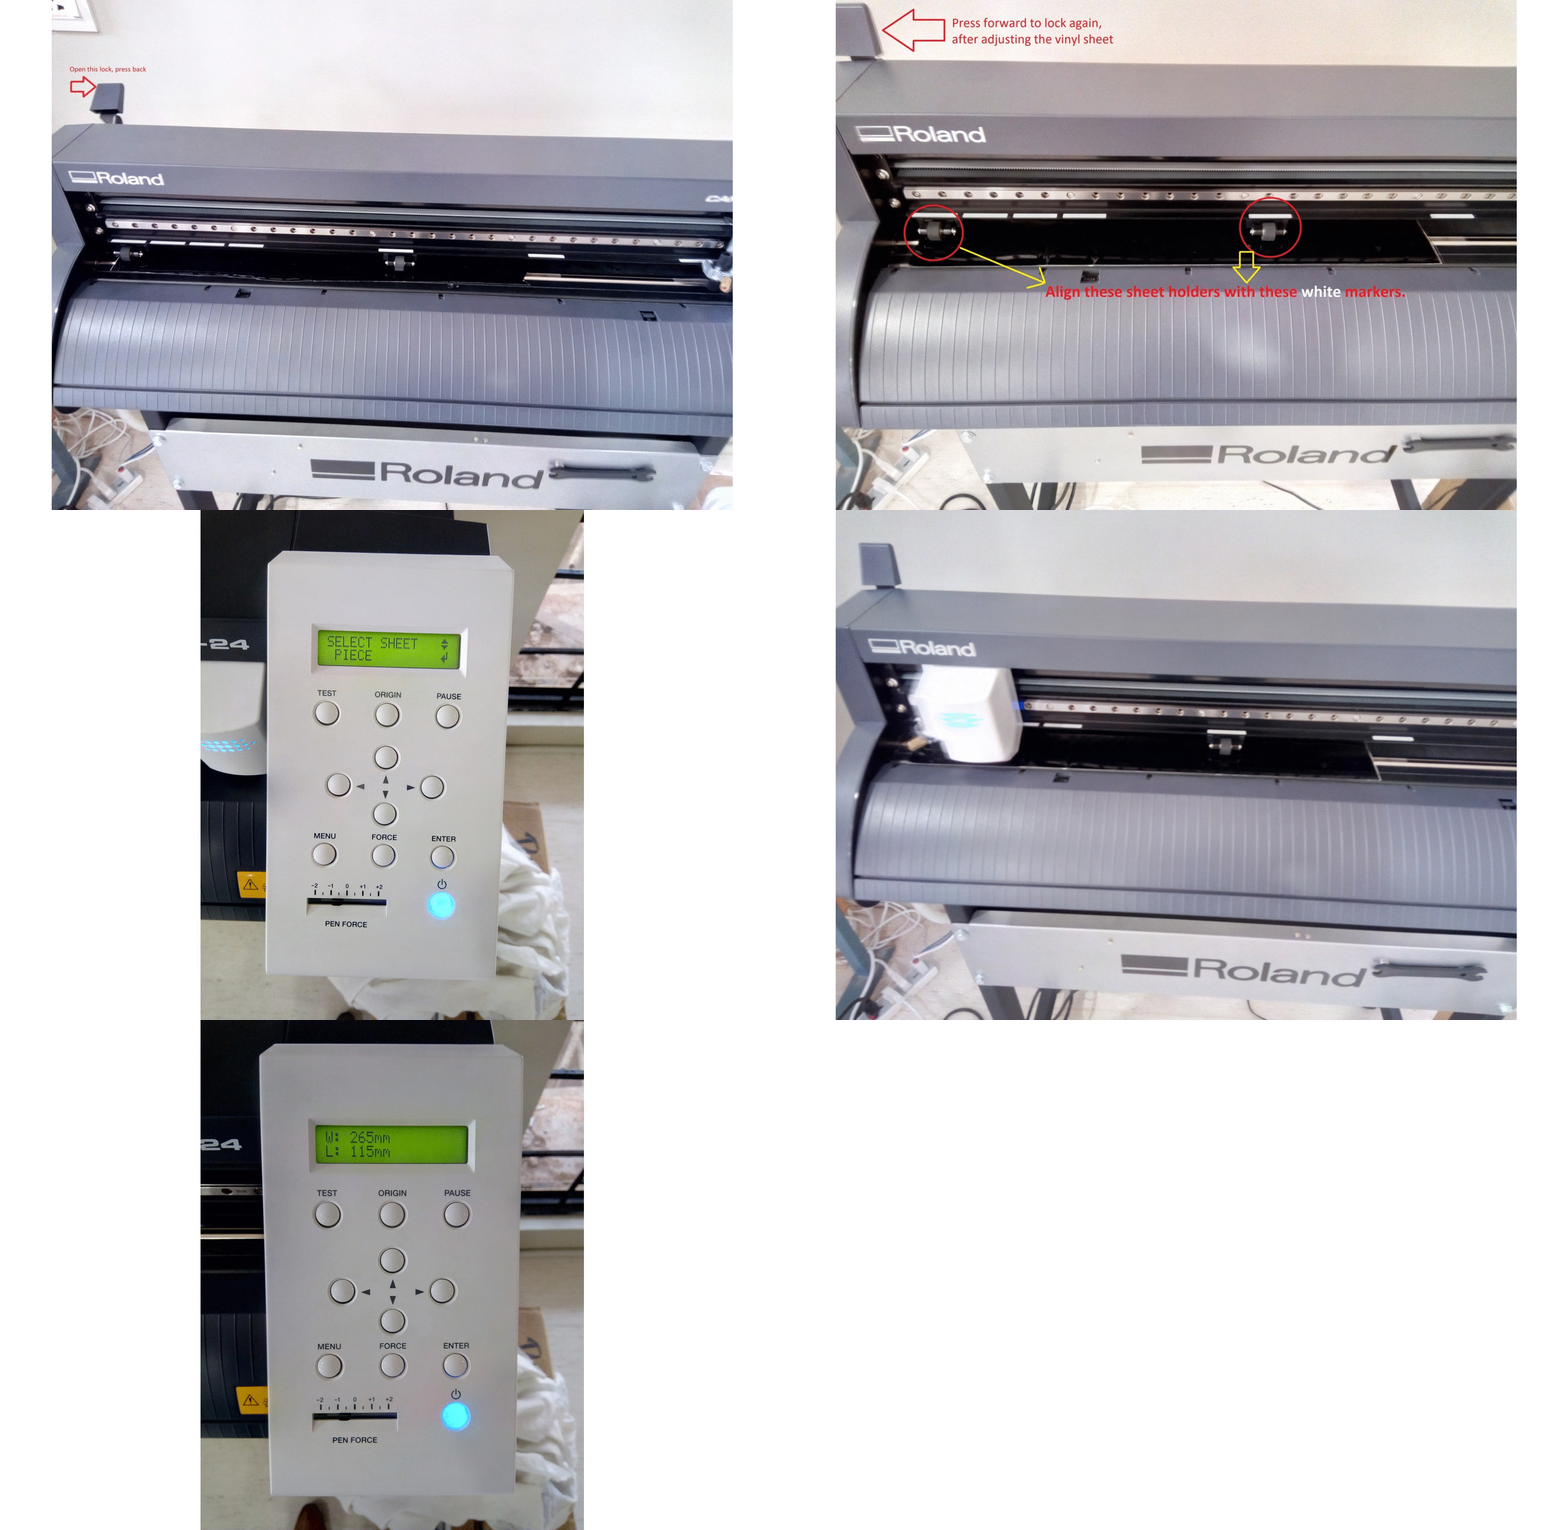 GIF image showing the steps performed over the vinyl cutter machine
To understand how Cut Studio works, go through the following steps:
- After that, open the Cut Studio software from desktop.
- Import your PNG file that you made in Inkscape.
- Set the dimensions of your image from right side panel.
- right click on the image and click on "Image Outline" option.
- From that window click on the "Extract Contour" button and press "OK".
- Now you will have the contour of the picture which is the data required to vinyl cutter. So you can remove the image you imported.
- Once completing these steps, you can press the "Cutting" button next to the import button and it will start cutting the vinyl accordingly.
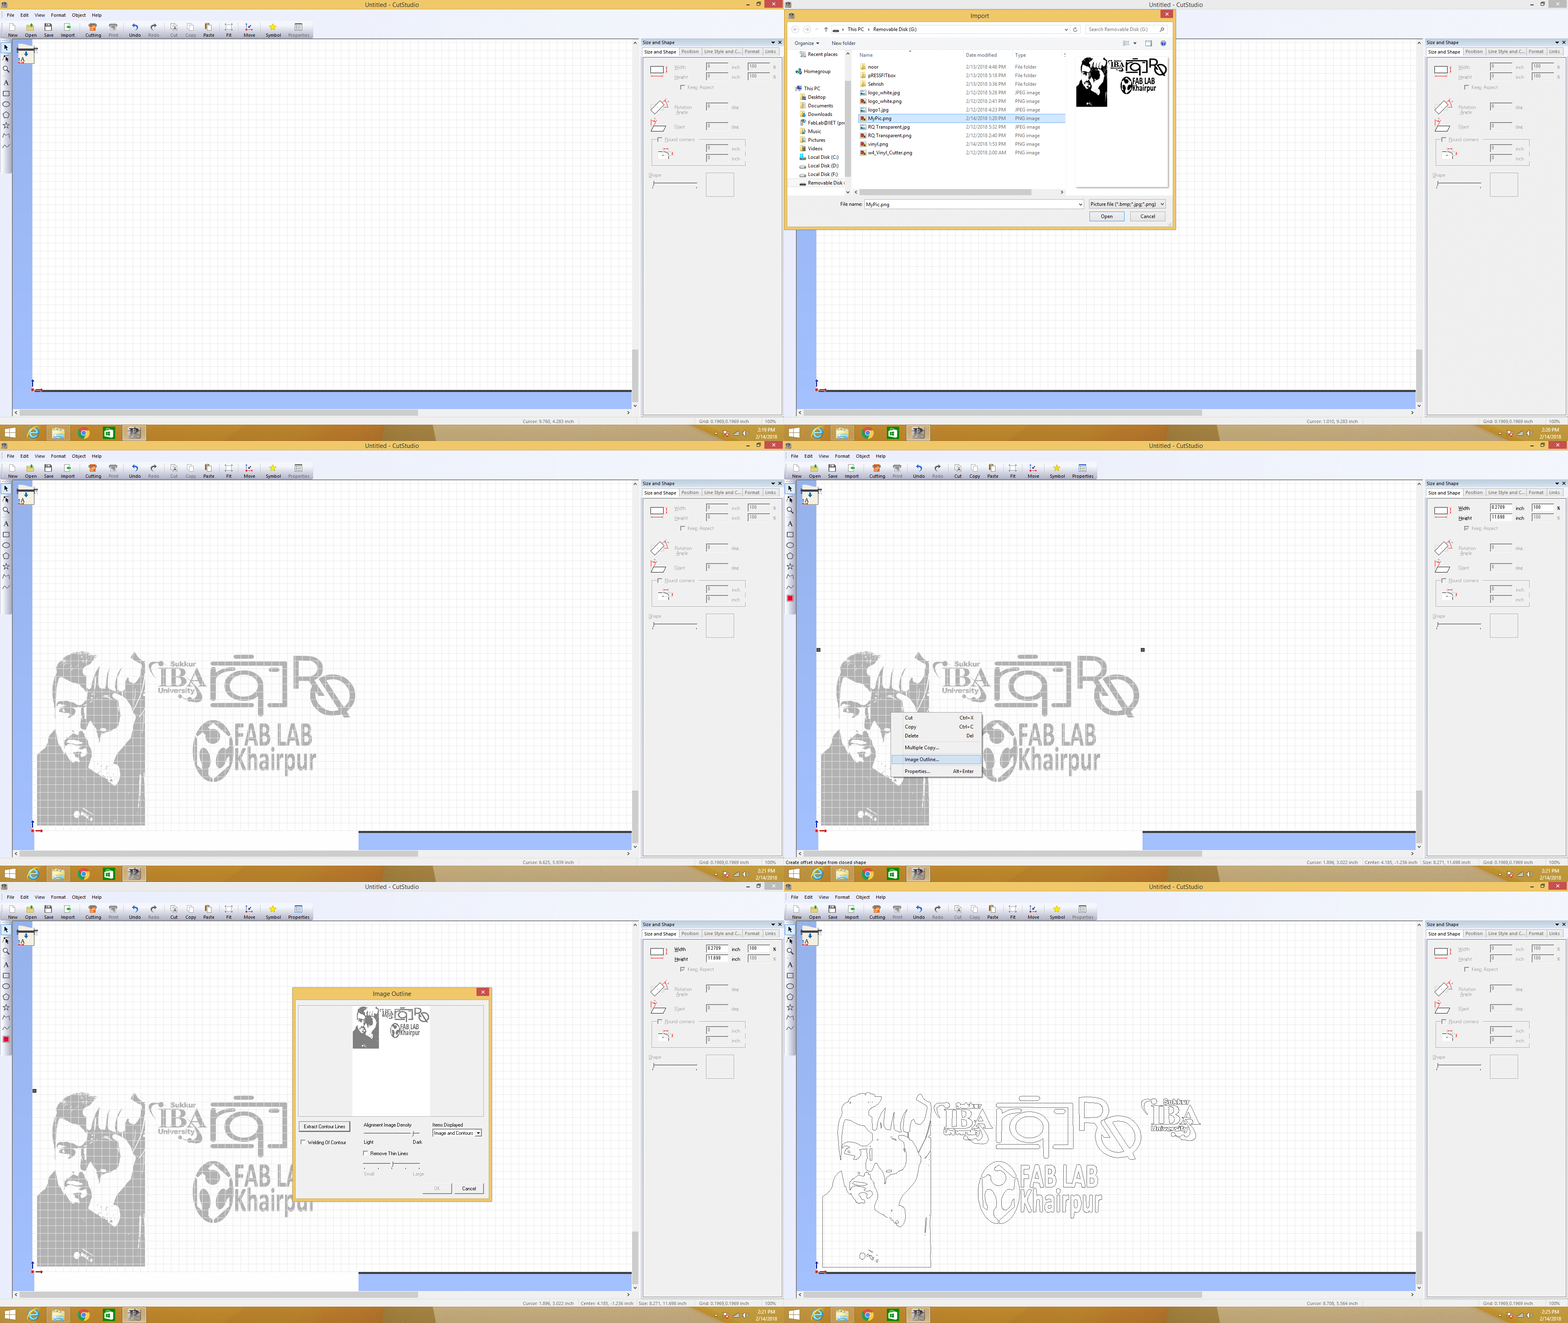 GIF image showing the steps performed in Cut Studio
- When the cutting was done, I seperated the logos accordingly.
- Then i used the "Transfer Paper" to carefully place the stickers on the lid of my laptop.
- And finally thanks to vinyl cutter my laptop looks much better on the outside now :D
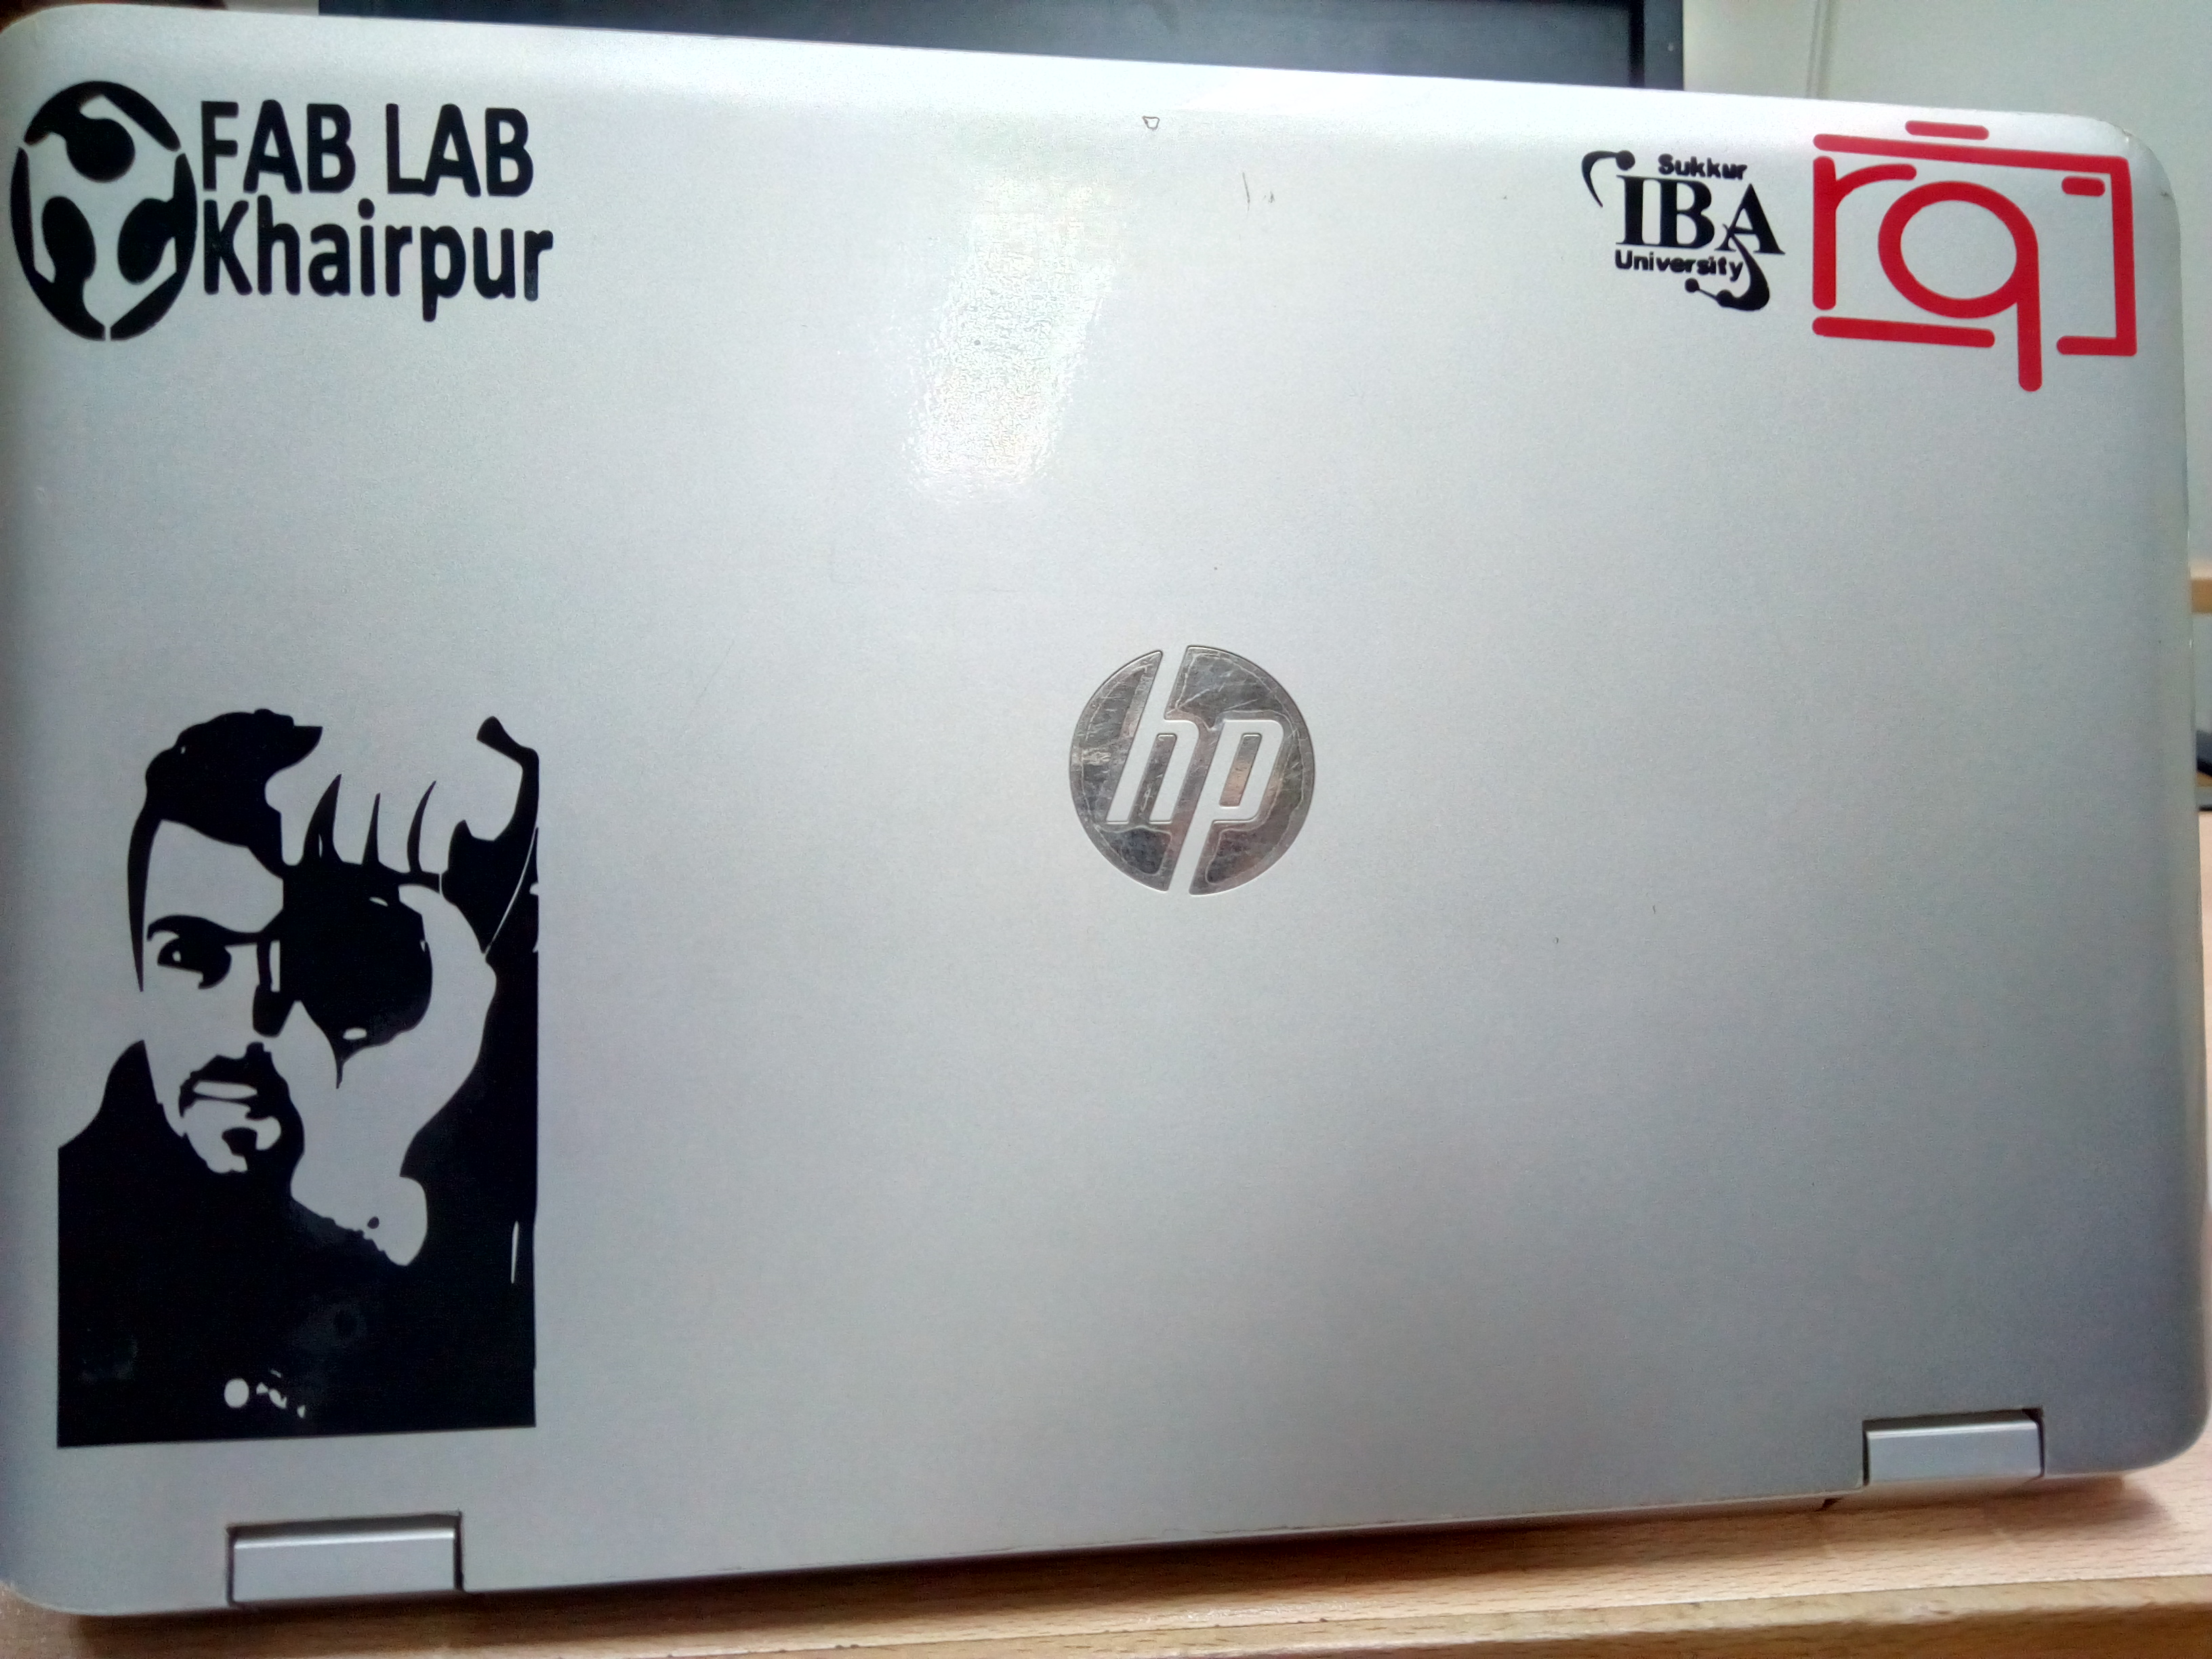 My laptop lid after applying Stickers.
2. Laser Cut Group Assignment
It is our first time to work on American brand laser cutting machine. This is 75 Watt CO2 laser cutting machine with a bed size of 32x20 inches. I am very much satisfied with the quality assurance and safety measures taken by Epilog (especially limit switches which prevent machine if someone opens the top cover while machine is in function). I already work on chineese brand 80 Watt 40x60 cm laser cutting machine. They are cheap in prices, work bit same but no safety measures.
For group assignment, we are using a material test card which we found from Material Test Card for Laser Cutting and Engraving. This card is helpful to document the machine performance on any material. We are using 4mm cardboard to test machine parameters. In this test we are checking its engraving power, engraving performance on different font sizes, cutting accuracy by cutting different size shapes and, parabolic and straight line flexes by varying line spacing.
Steps for Laser Cutting:
As per instructions we set cutting line strokes to 0.001 inches. Other vectors except 0.001 inches set to engrave with respect to their greyscale color. Then we convert our SVG file into PDF while setting page size to 32x20 inches from document properties and selecting 600 dpi as resolution for rasterization
 setting up file in svg and convert into pdf
After that we open PDF file and press Ctrl+P to open printing properties, we select "Epilog Engraver WinX64 Fusion" in Printer box and click "Properties"
 Epilog file properties menu to set Raster/Vector power and speed settings
We click on Combined in "Job Type" tab, then we set cutting power and speed to 30% and 10% respectively. We set raster power and speed both to 100% to judge full engraving power on engraving test. After setting up parameters for the job click "OK" and the job transfer to Epilog Job Manager.
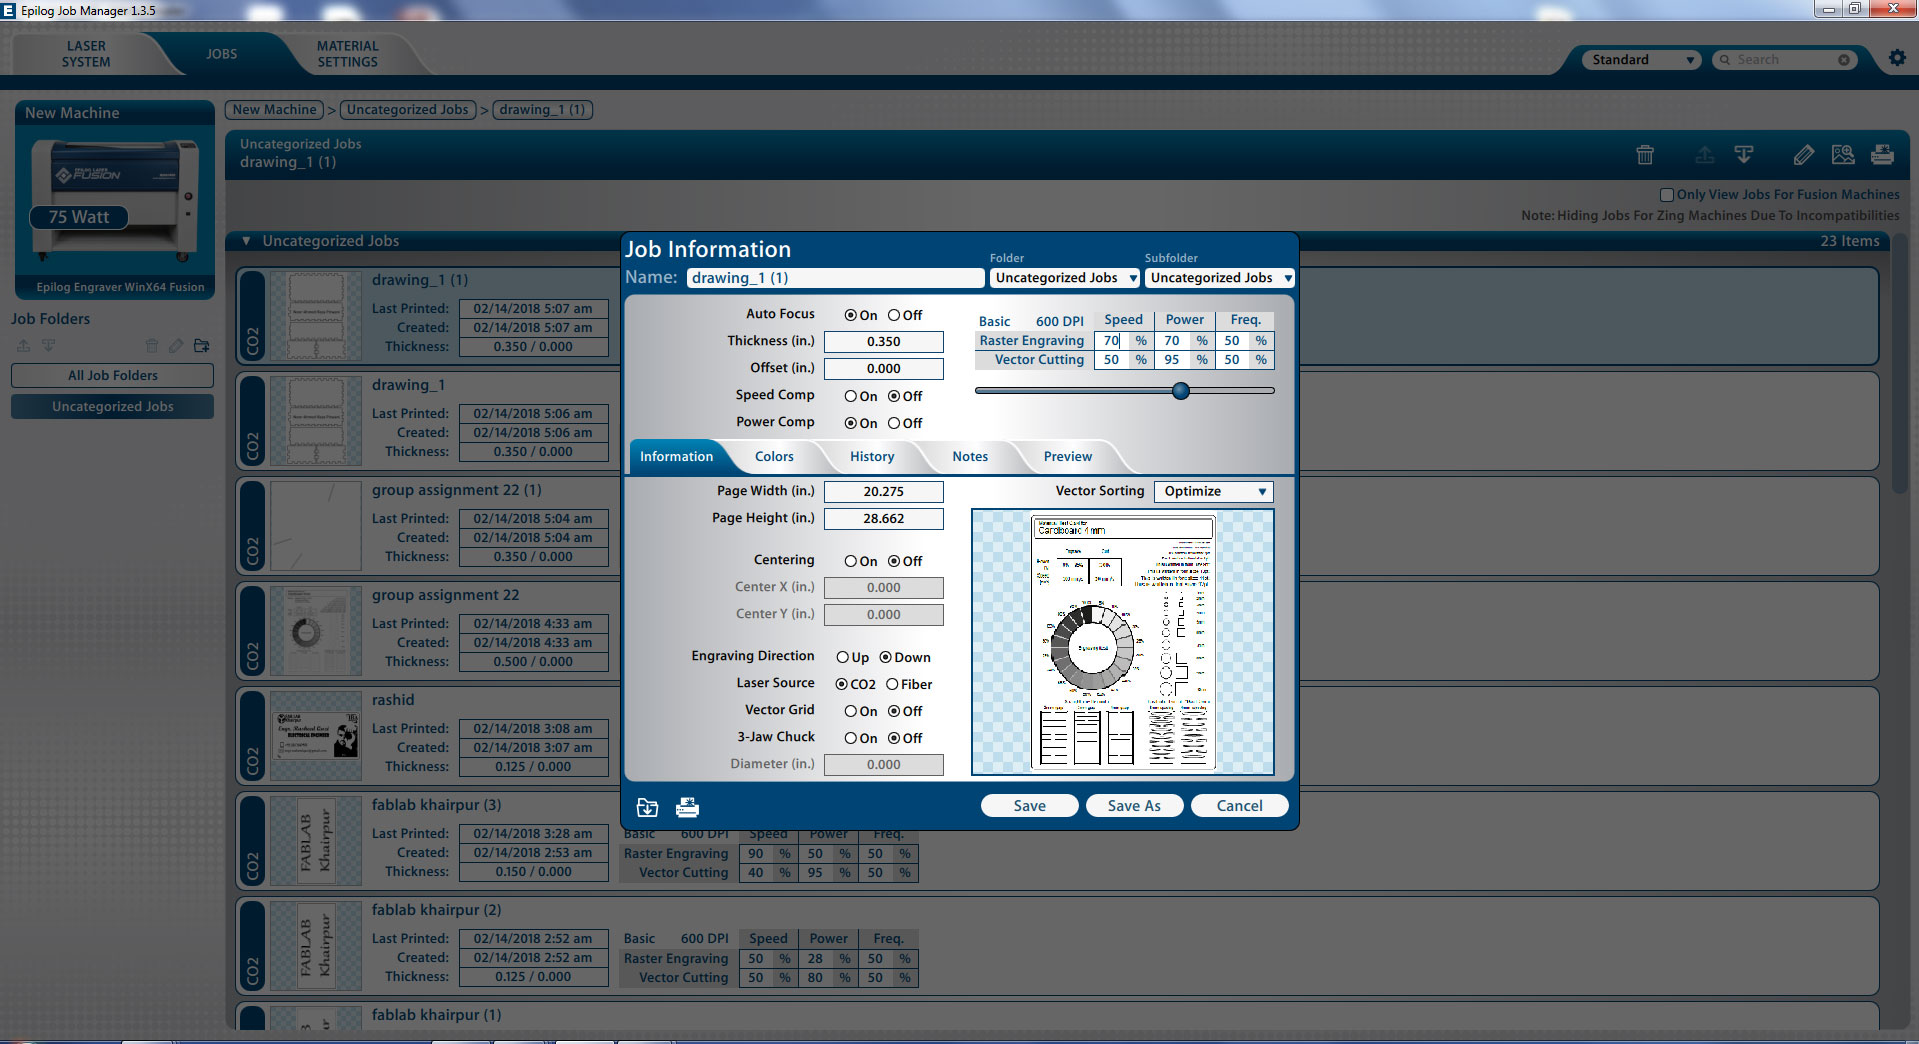 Job information in Epilog Job Manager
For setting up our given job on machine bed, we clicked on "preview" and change the location of the job by dragging the image in preview menu and set where we need it on Laser machine bed.
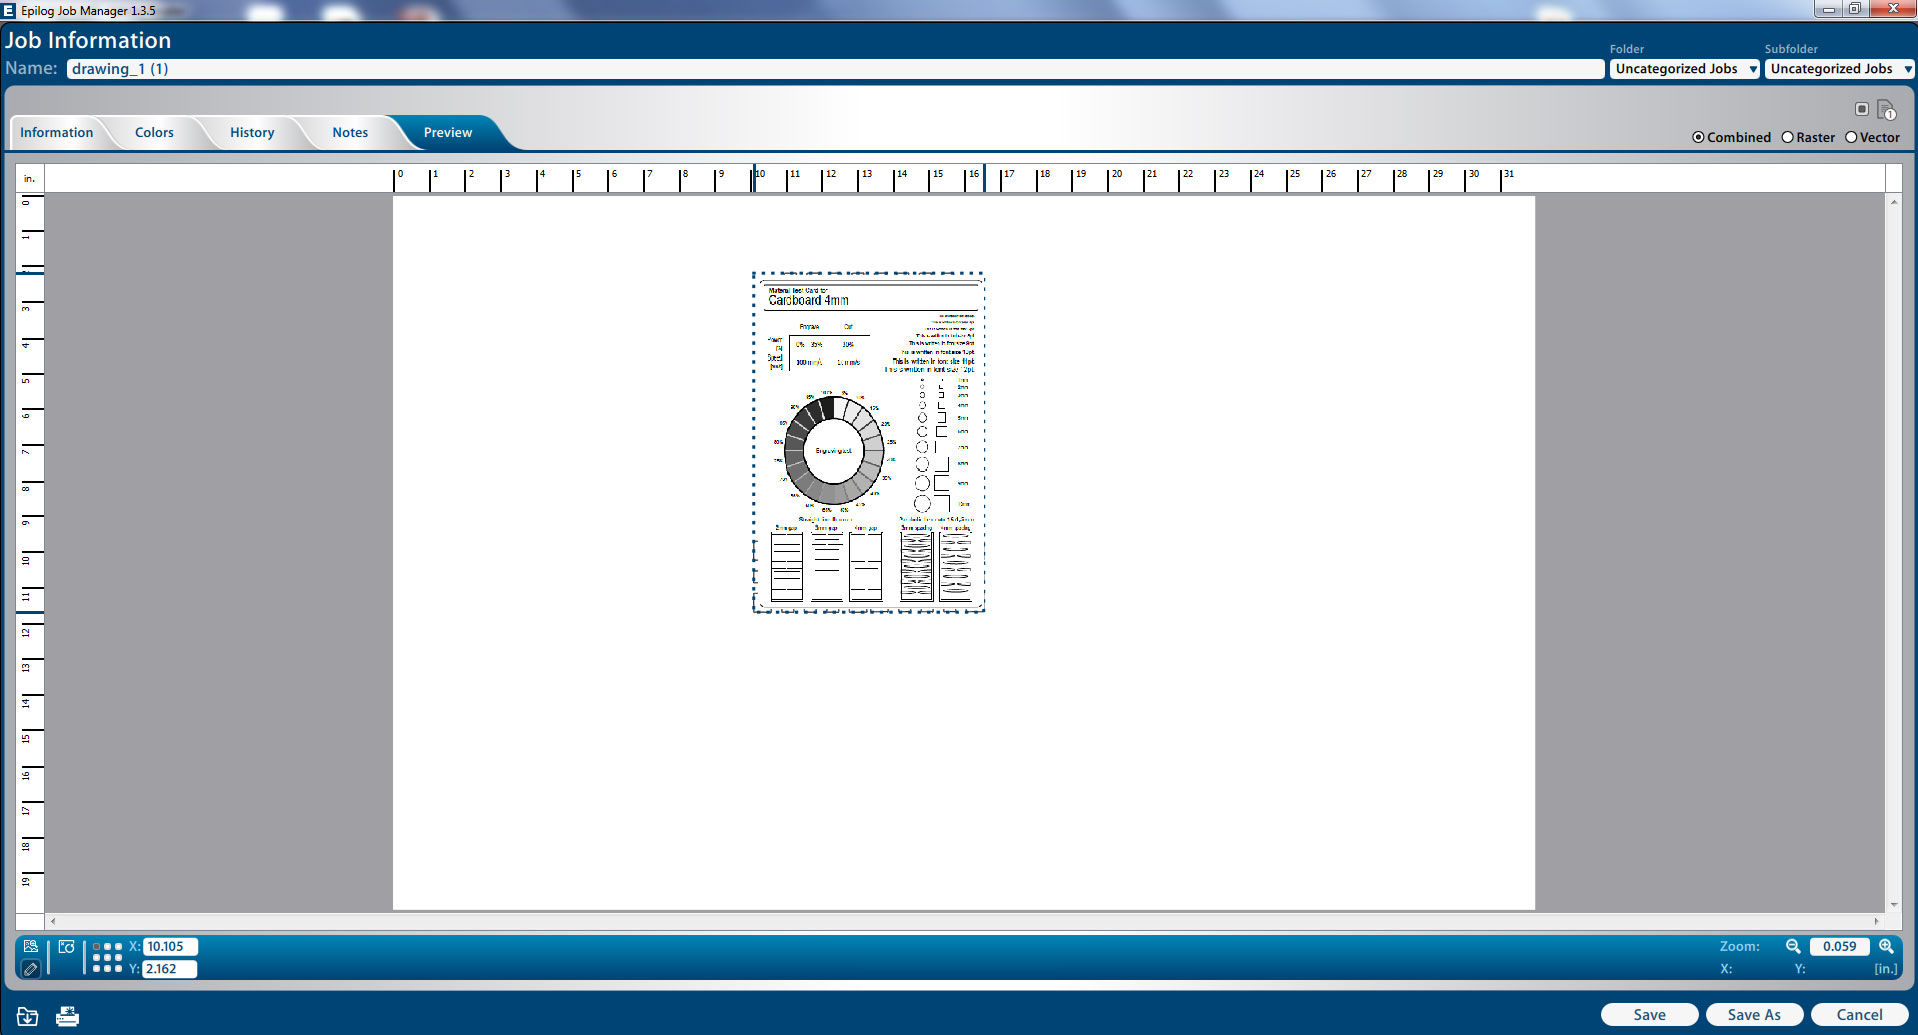 Job Preview Window
After selecting the location click "Save" the new information will save in job, click on "print" (top left corner in Epilog Job Manager) to transfer job to laser cutting machine.
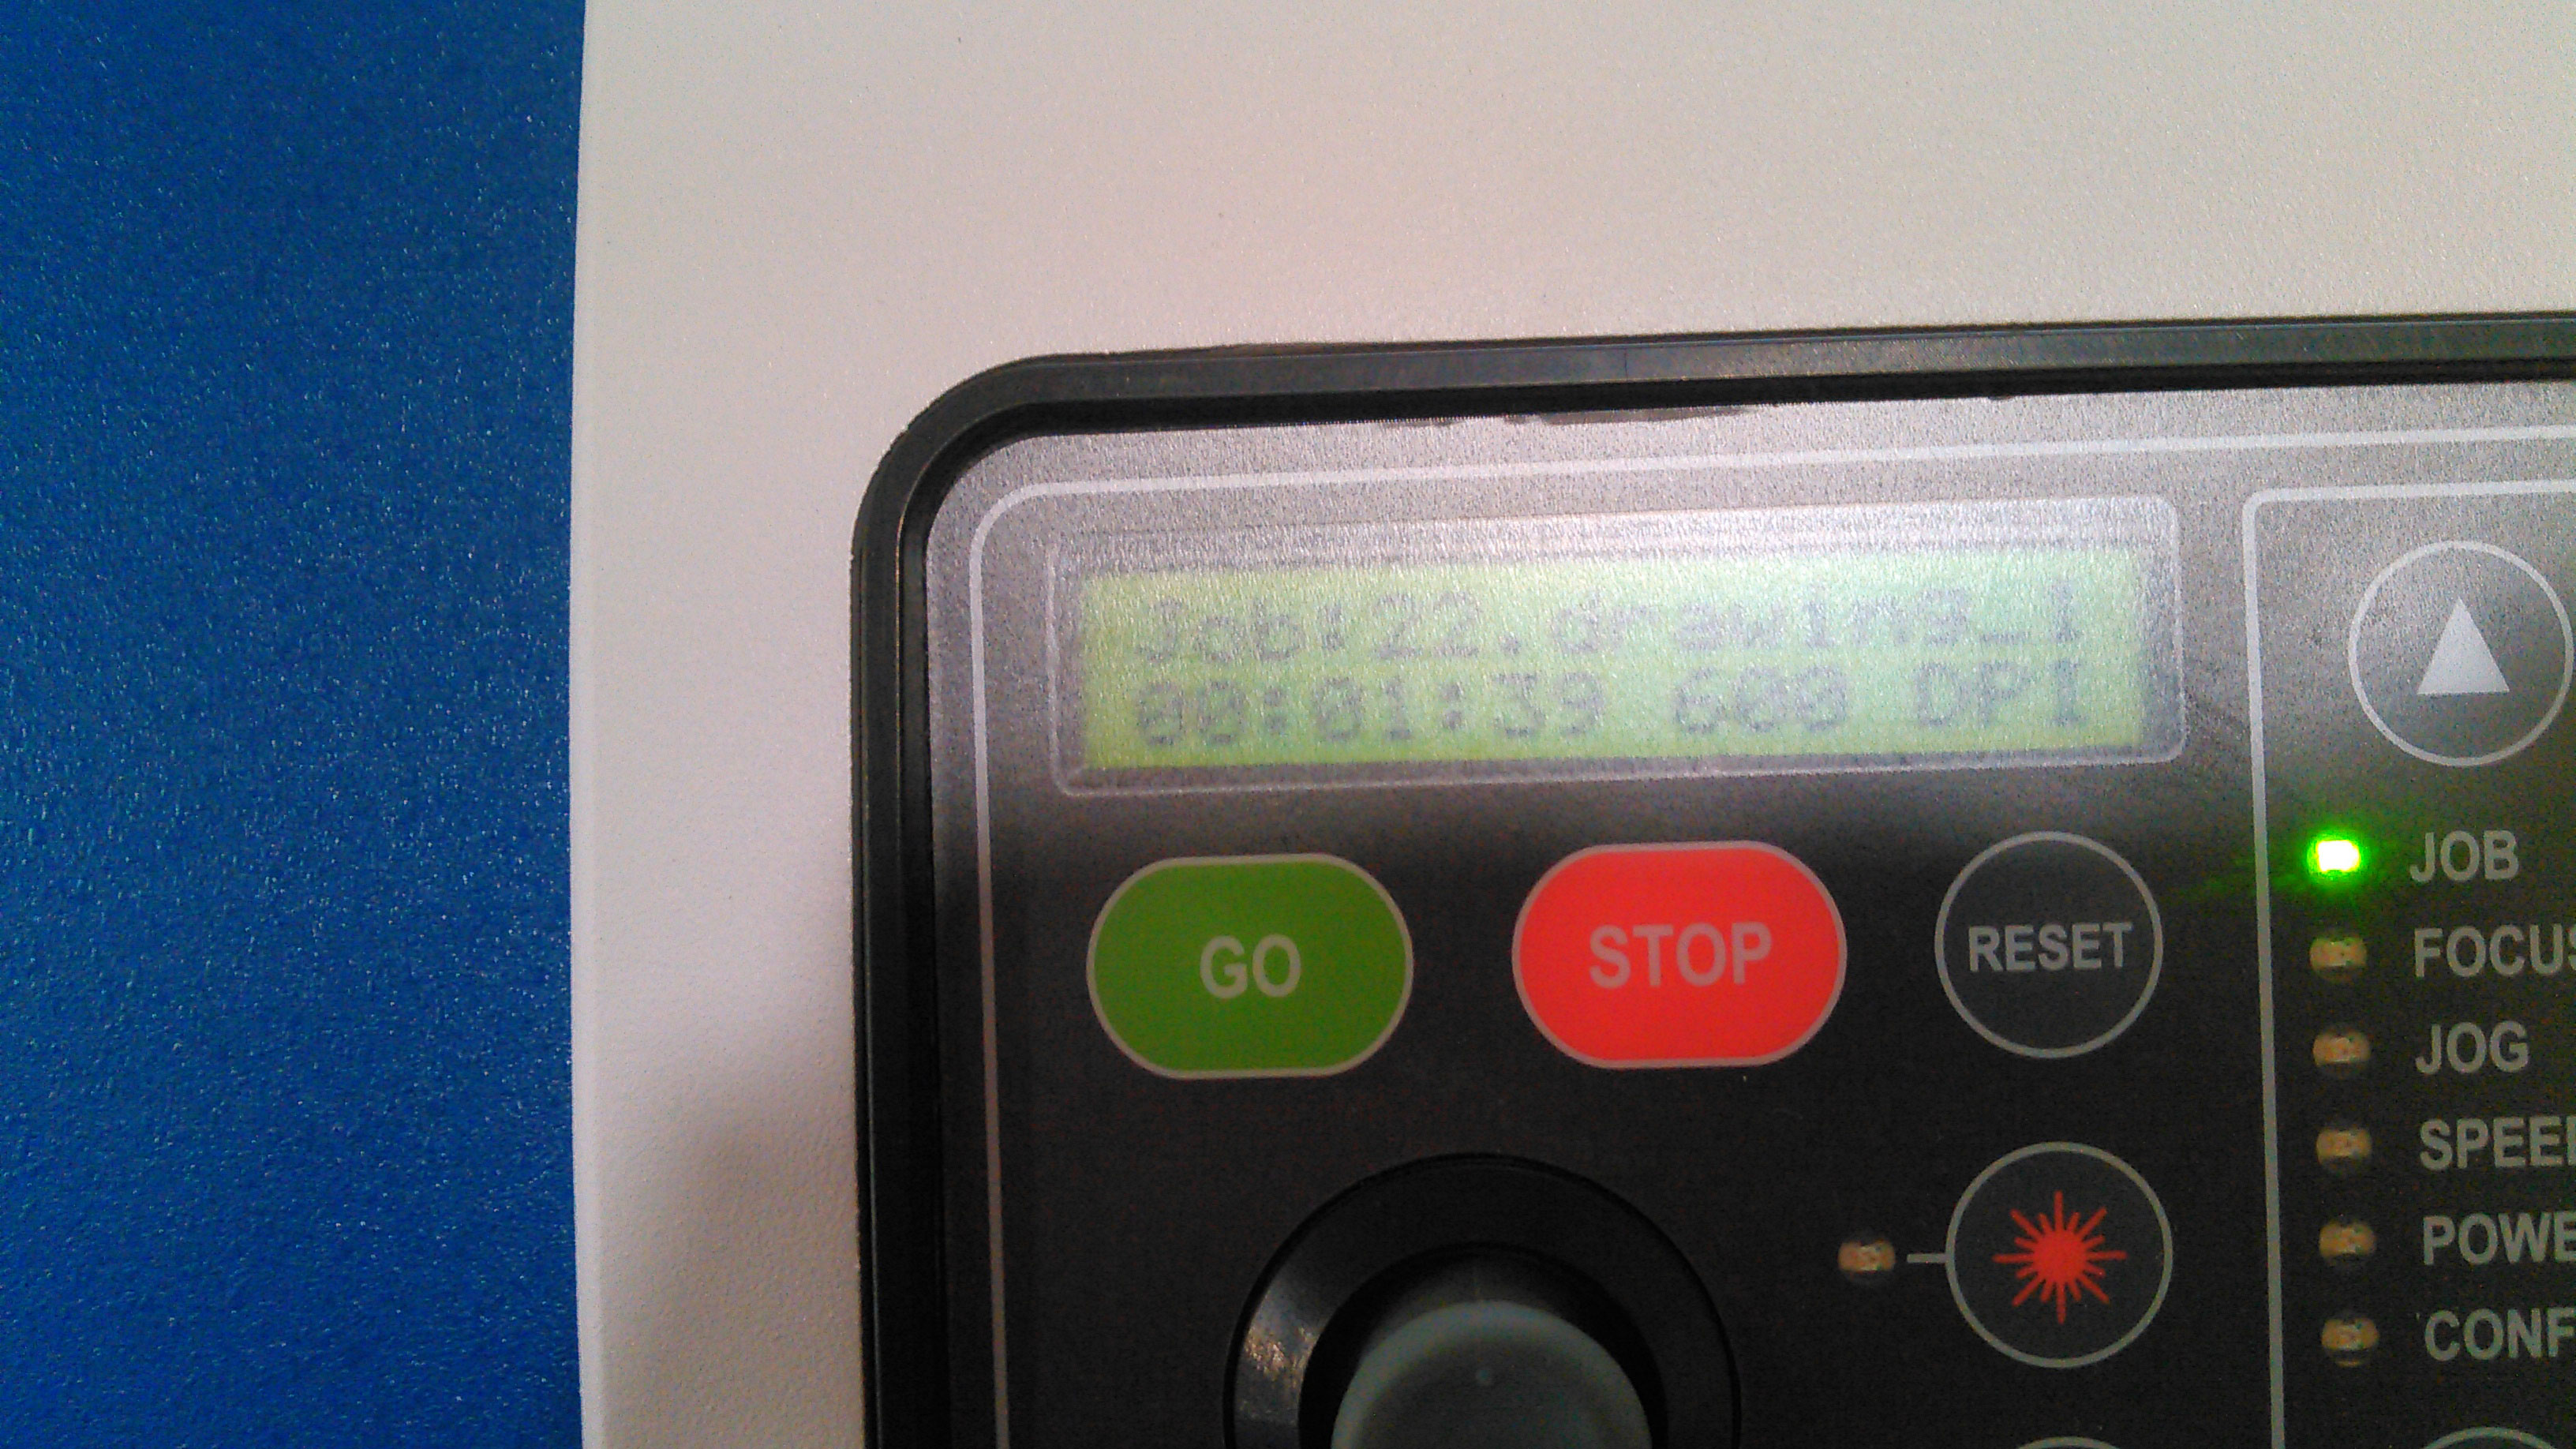 Display of job information on Laser Cutting Machine panel
Press "GO" on machine panel and leave rest of the work on machine.
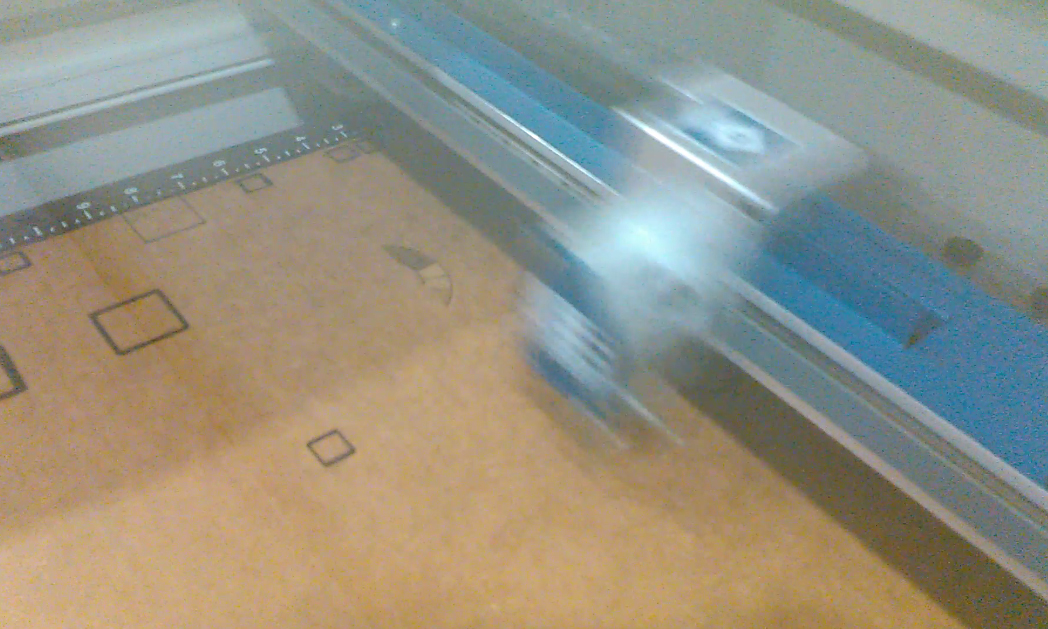 Laser Cutting Machine while working on Job
The perfect End Result.
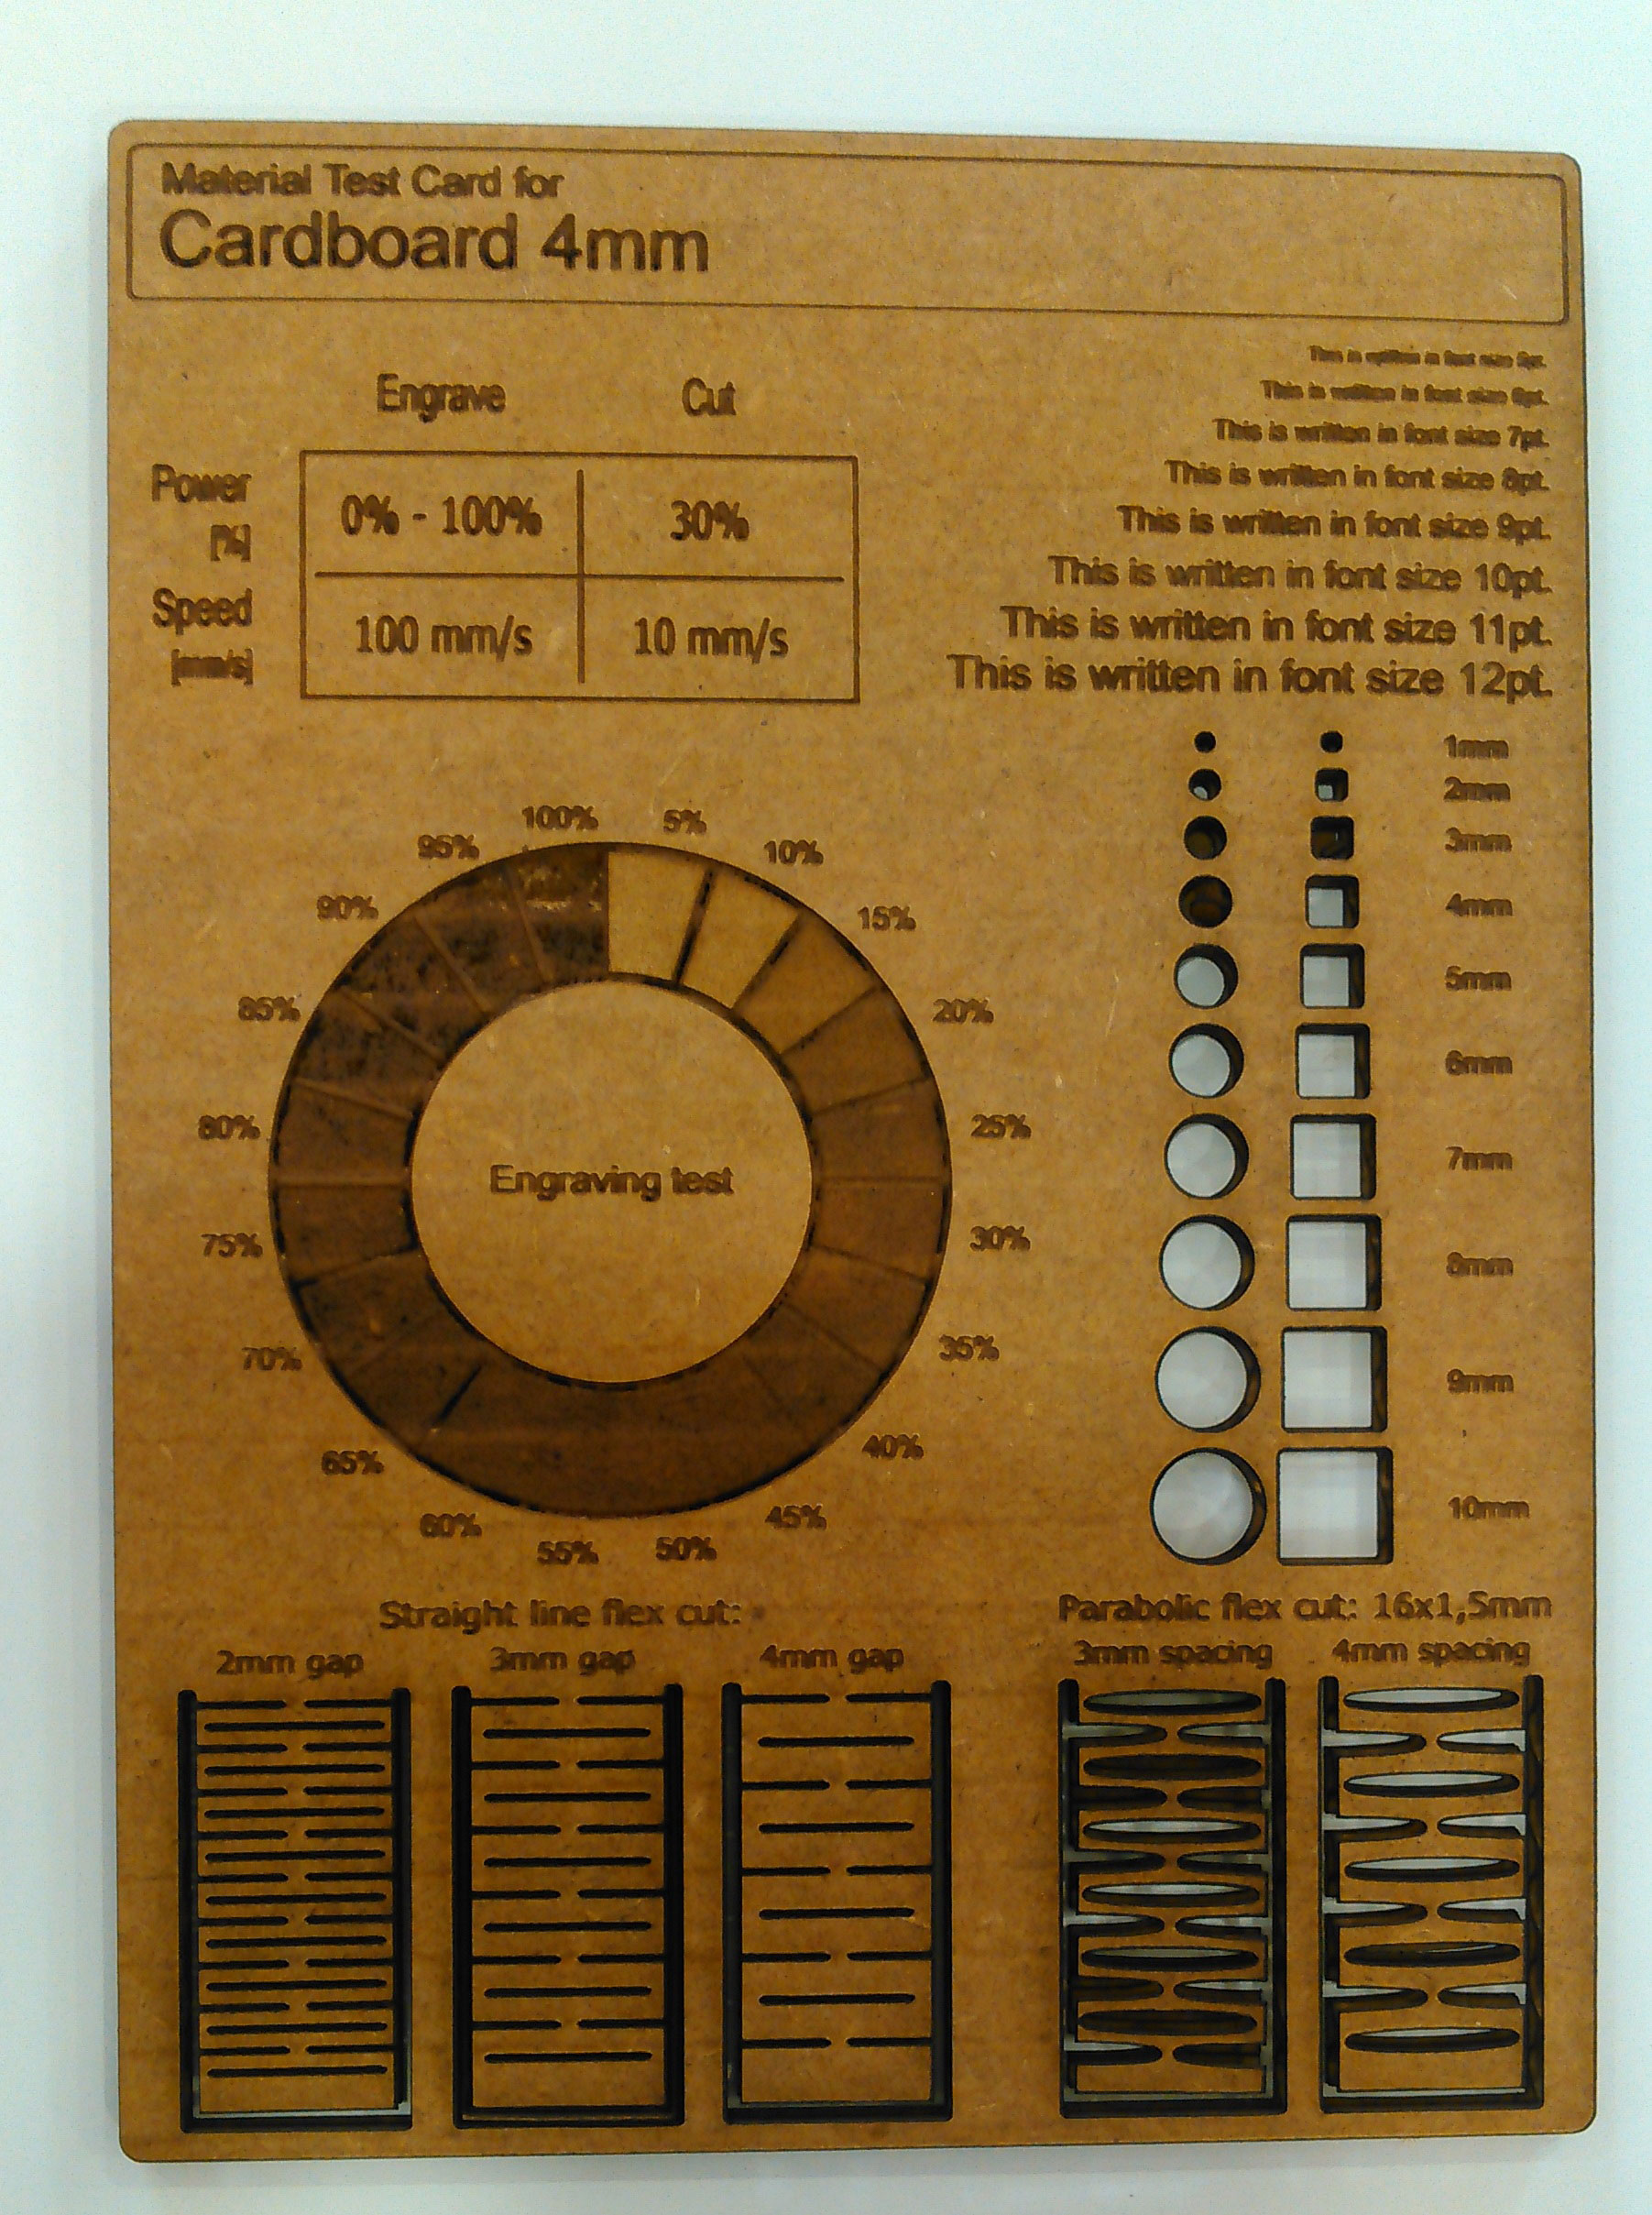 Final Product
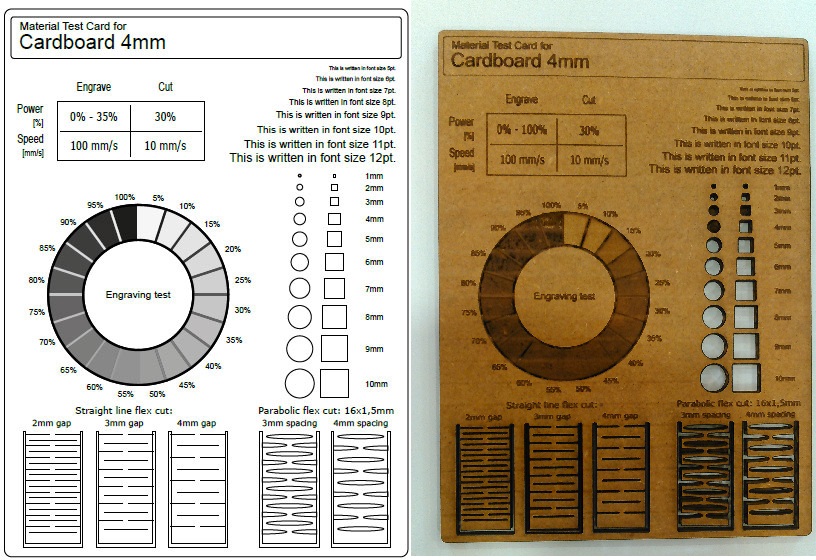 Looks Identical.
From this group project we learn that after all process and operation laser cutting machine is based on 2 things laser power and speed. We have to set the exact ratio of power and speed for engrave and cut which is based on material thickness and material type. More power with slow speed can burn the material and fast speed with low power can engrave but it maybe lighter enough to do job again.
3. Laser Cut.
- For this week assignment I thought to make a laser cut Dice. For that I first designed the individual faces of dice in Solidworks for which the steps are mentioned below:
First I created a set of Global Variables that define a certain parameters of my design, a snap of them can be seen below:
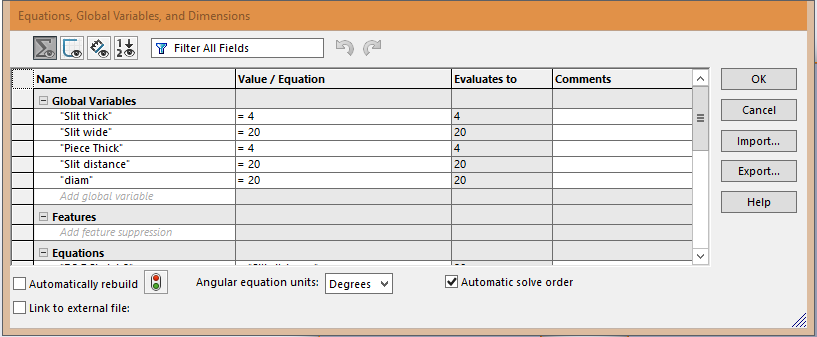
Global Variables for the design
- Then using these parameters I started creating the faces of Dice, Each dice has a dimension of 100x100 mm. Then i made the slits that will be used to pressfit the faces together. All the faces with dimensions are shown below:
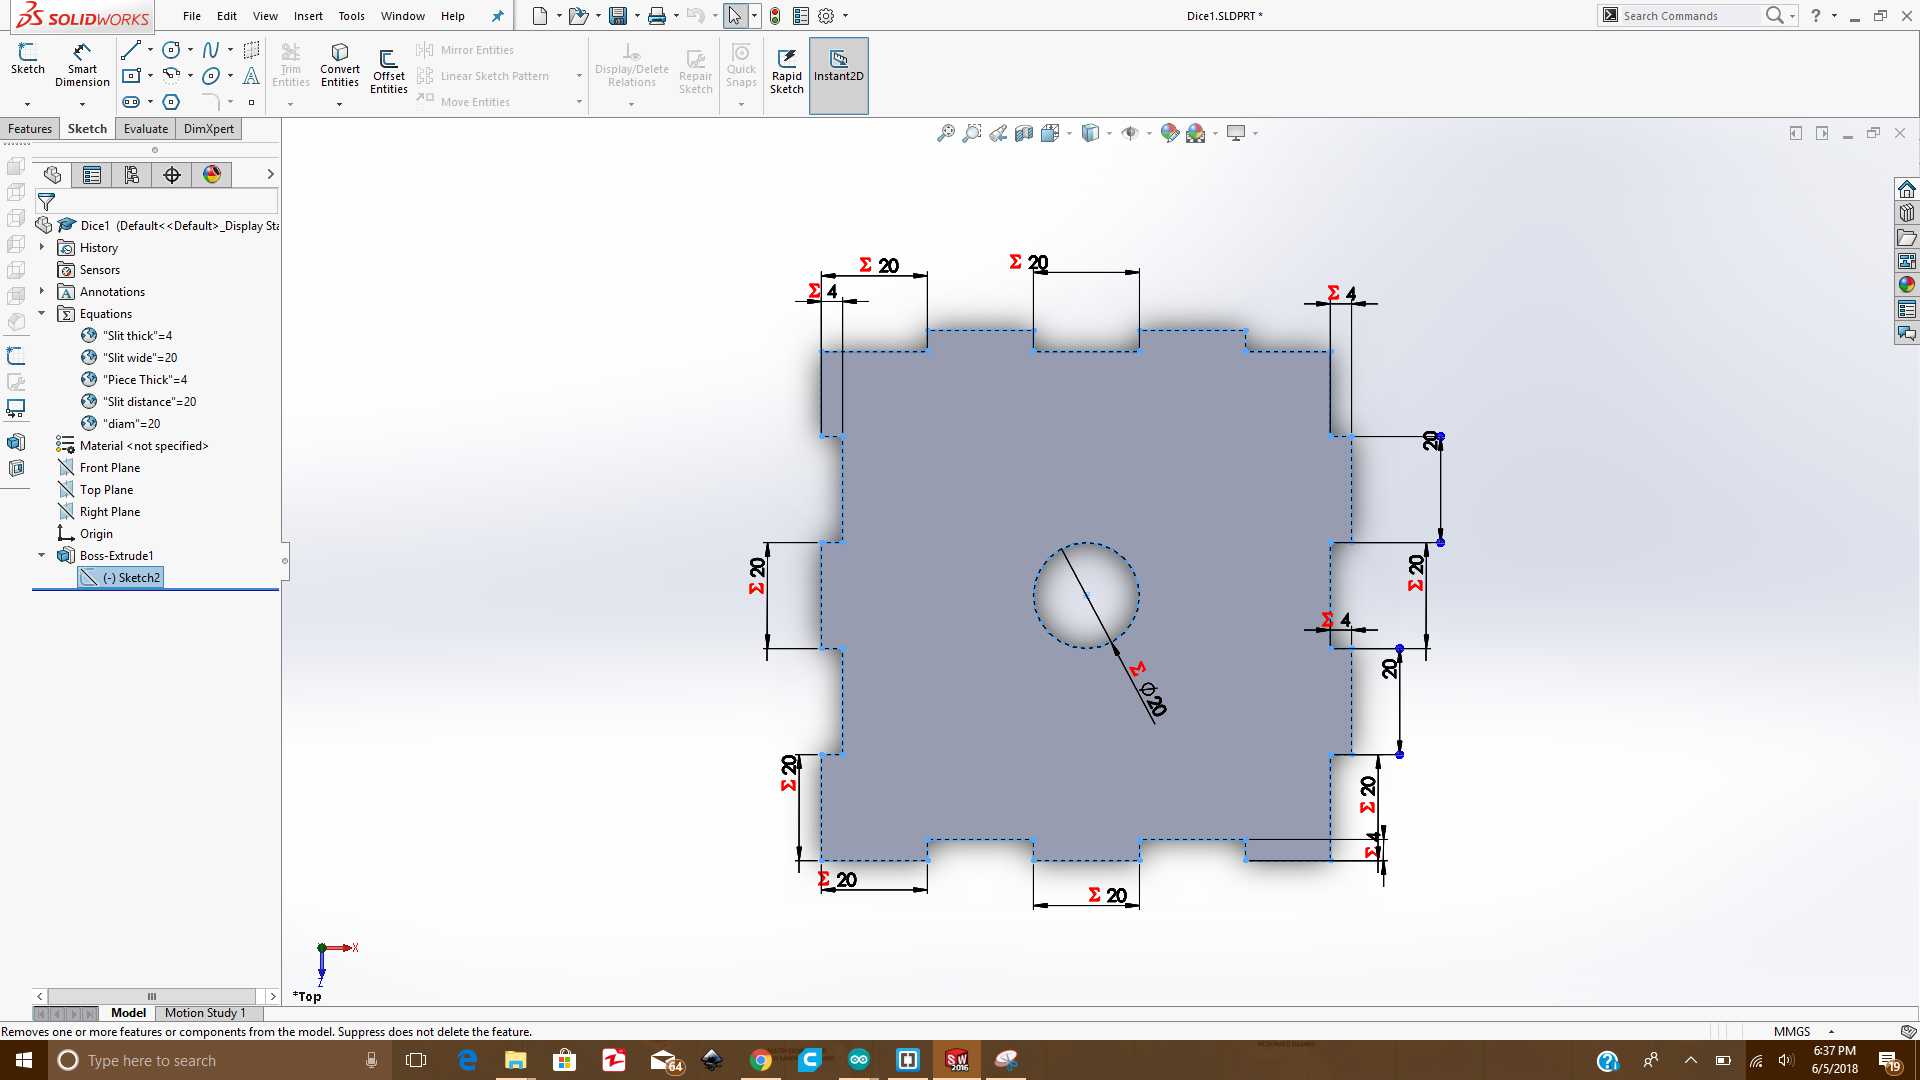
Face1 of Dice
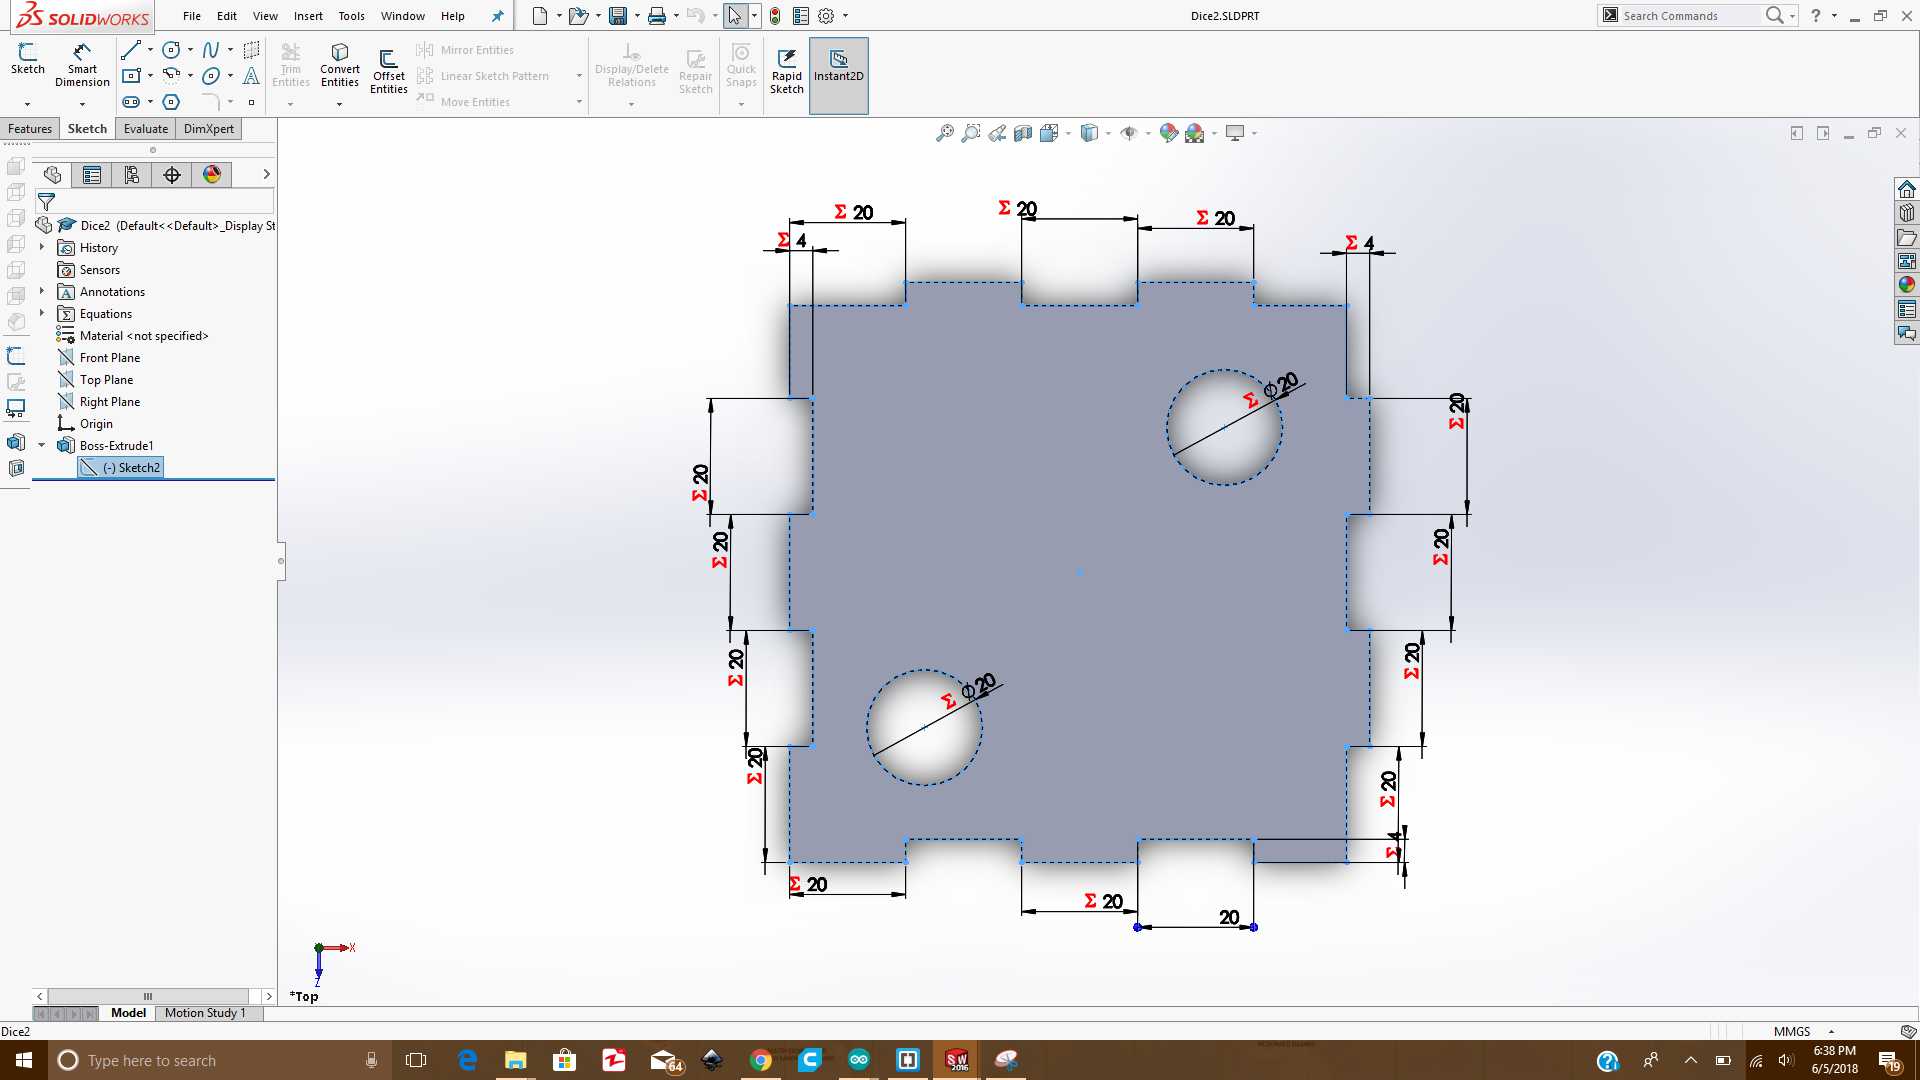 Face2 of Dice
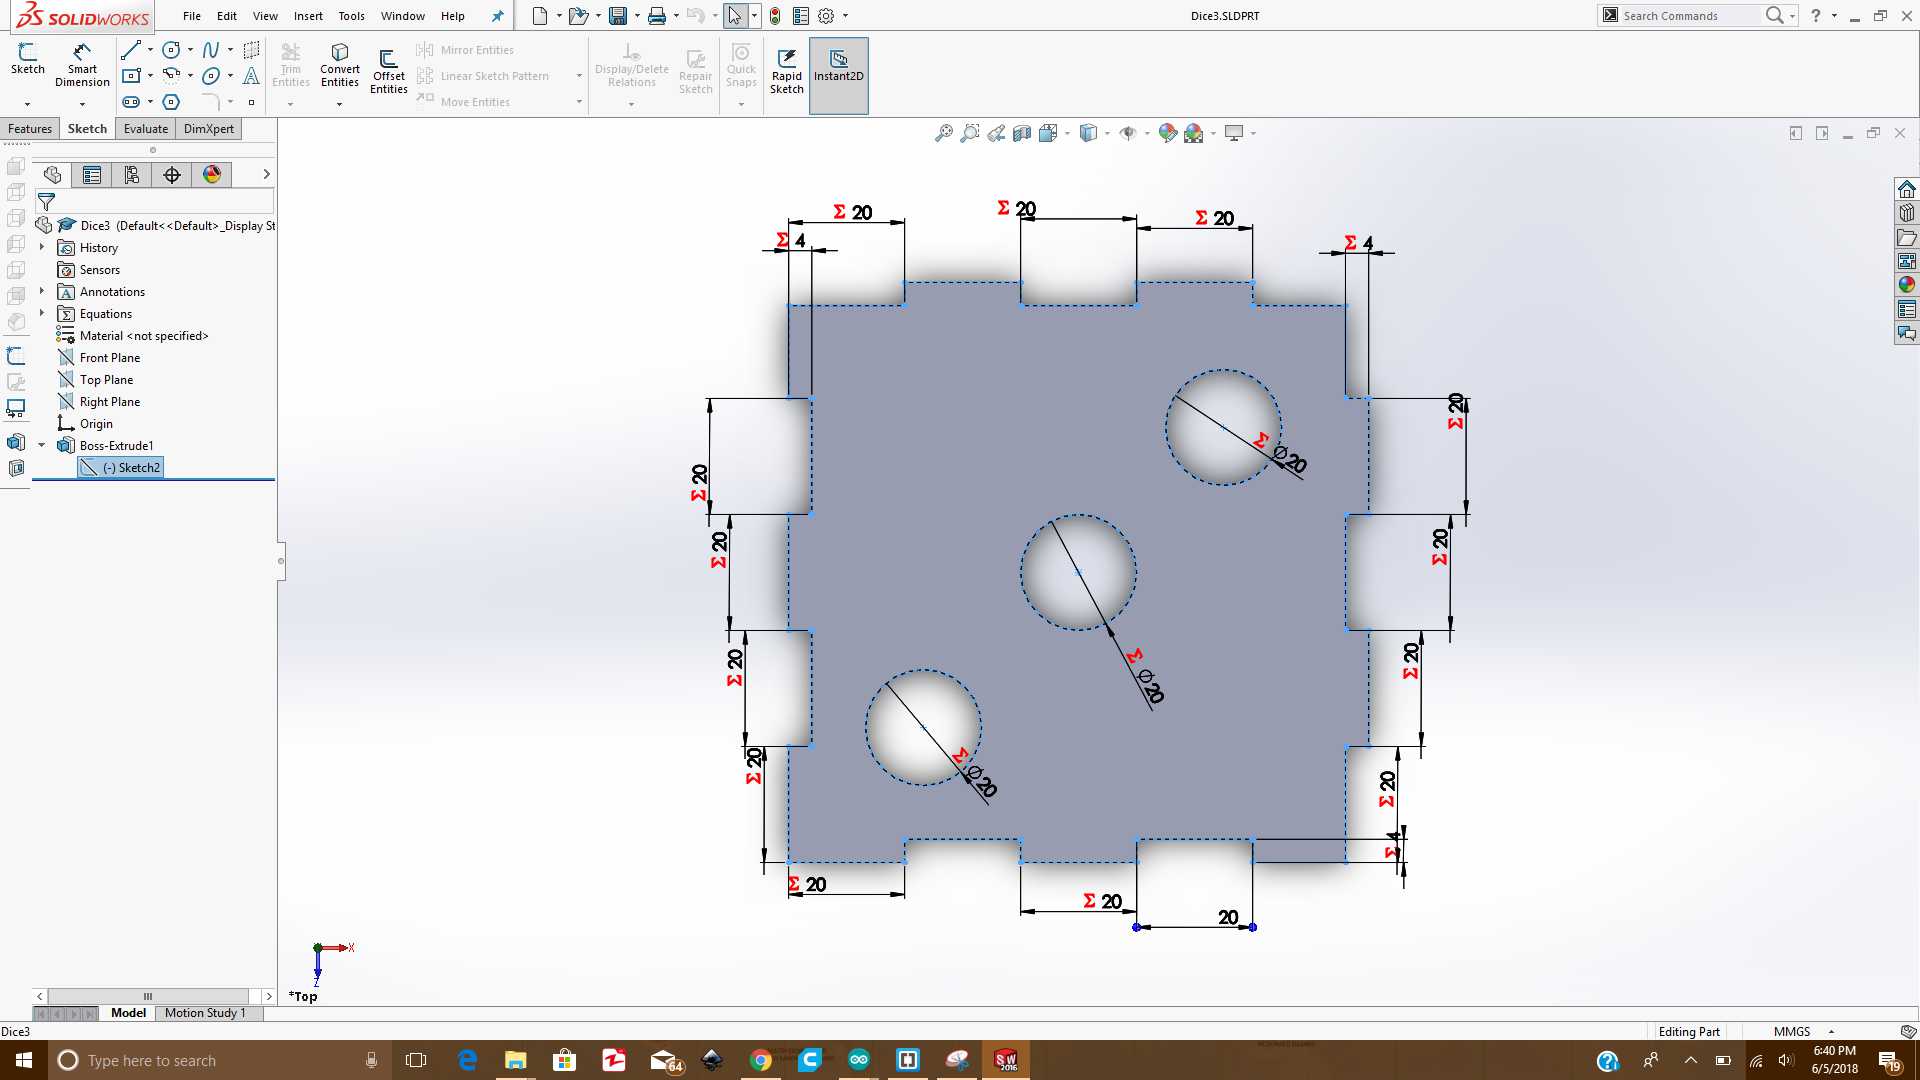 Face3 of Dice
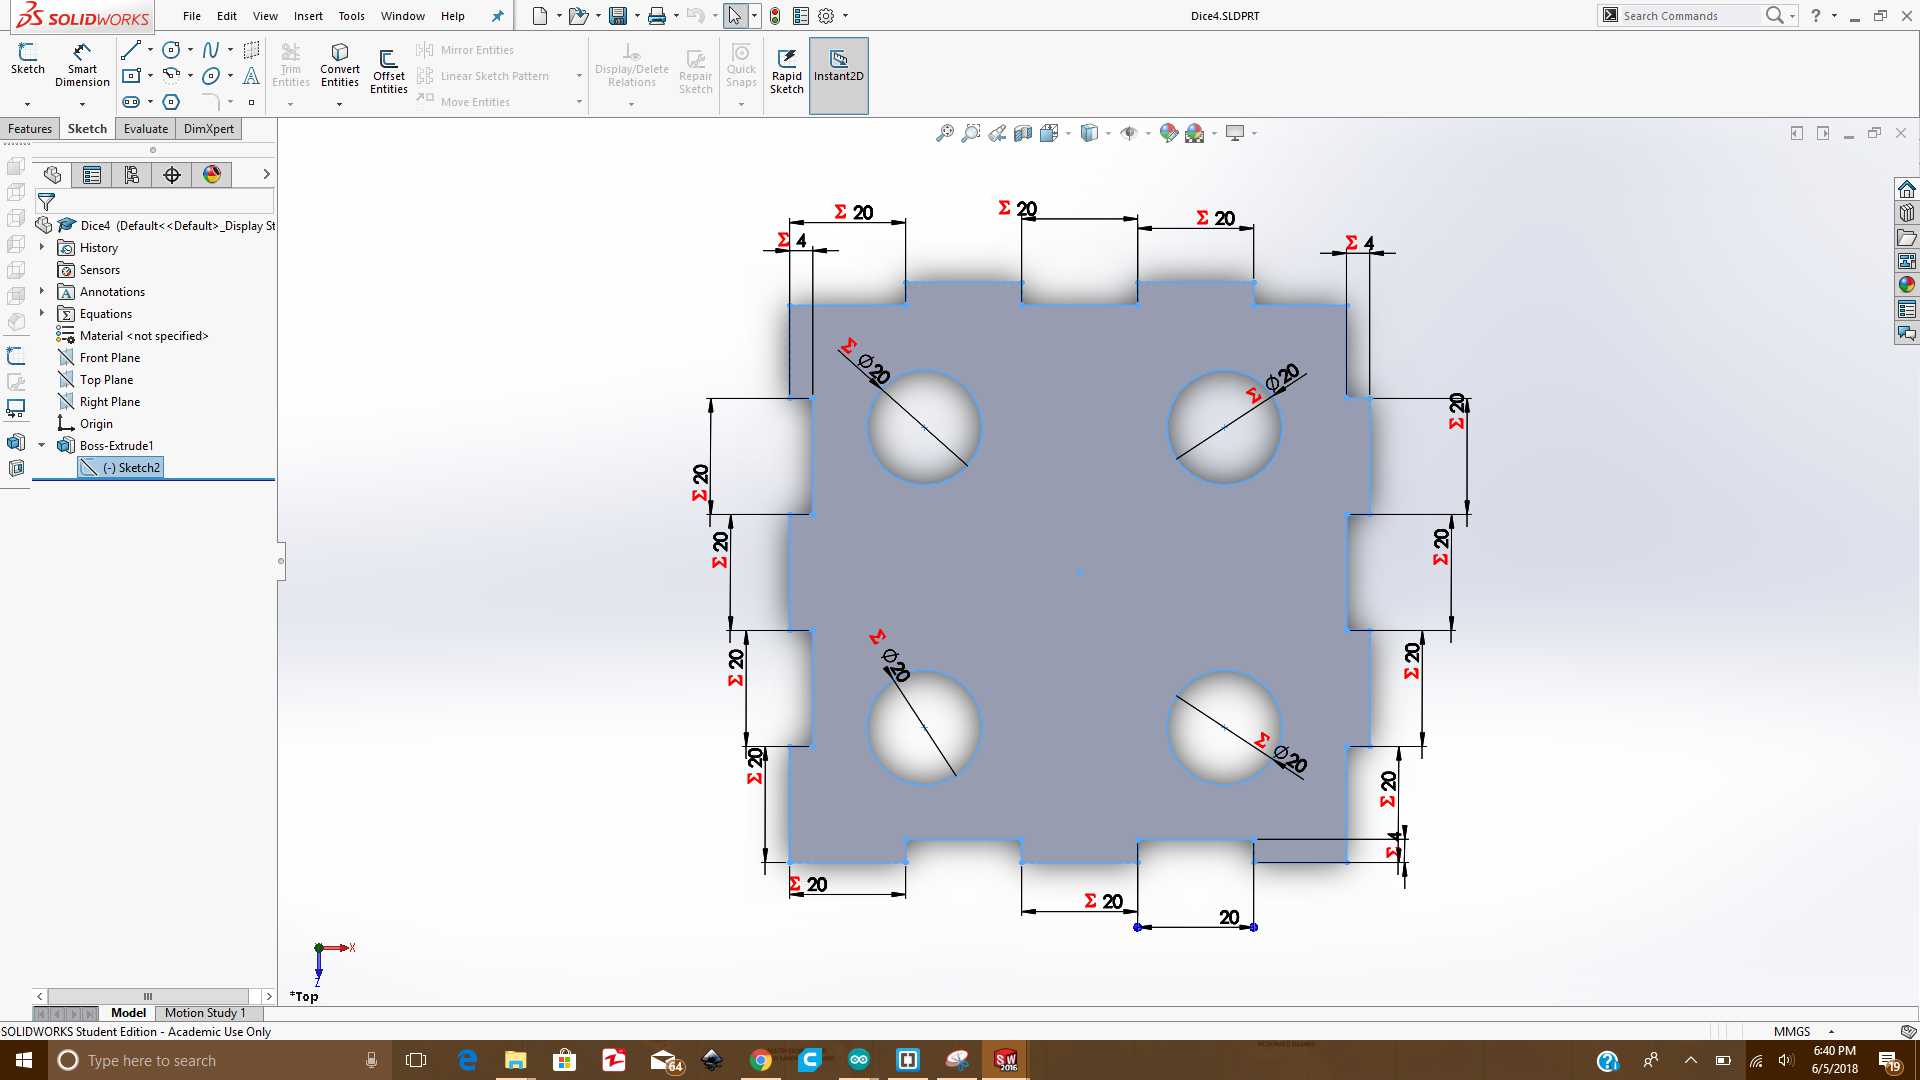 Face4 of Dice
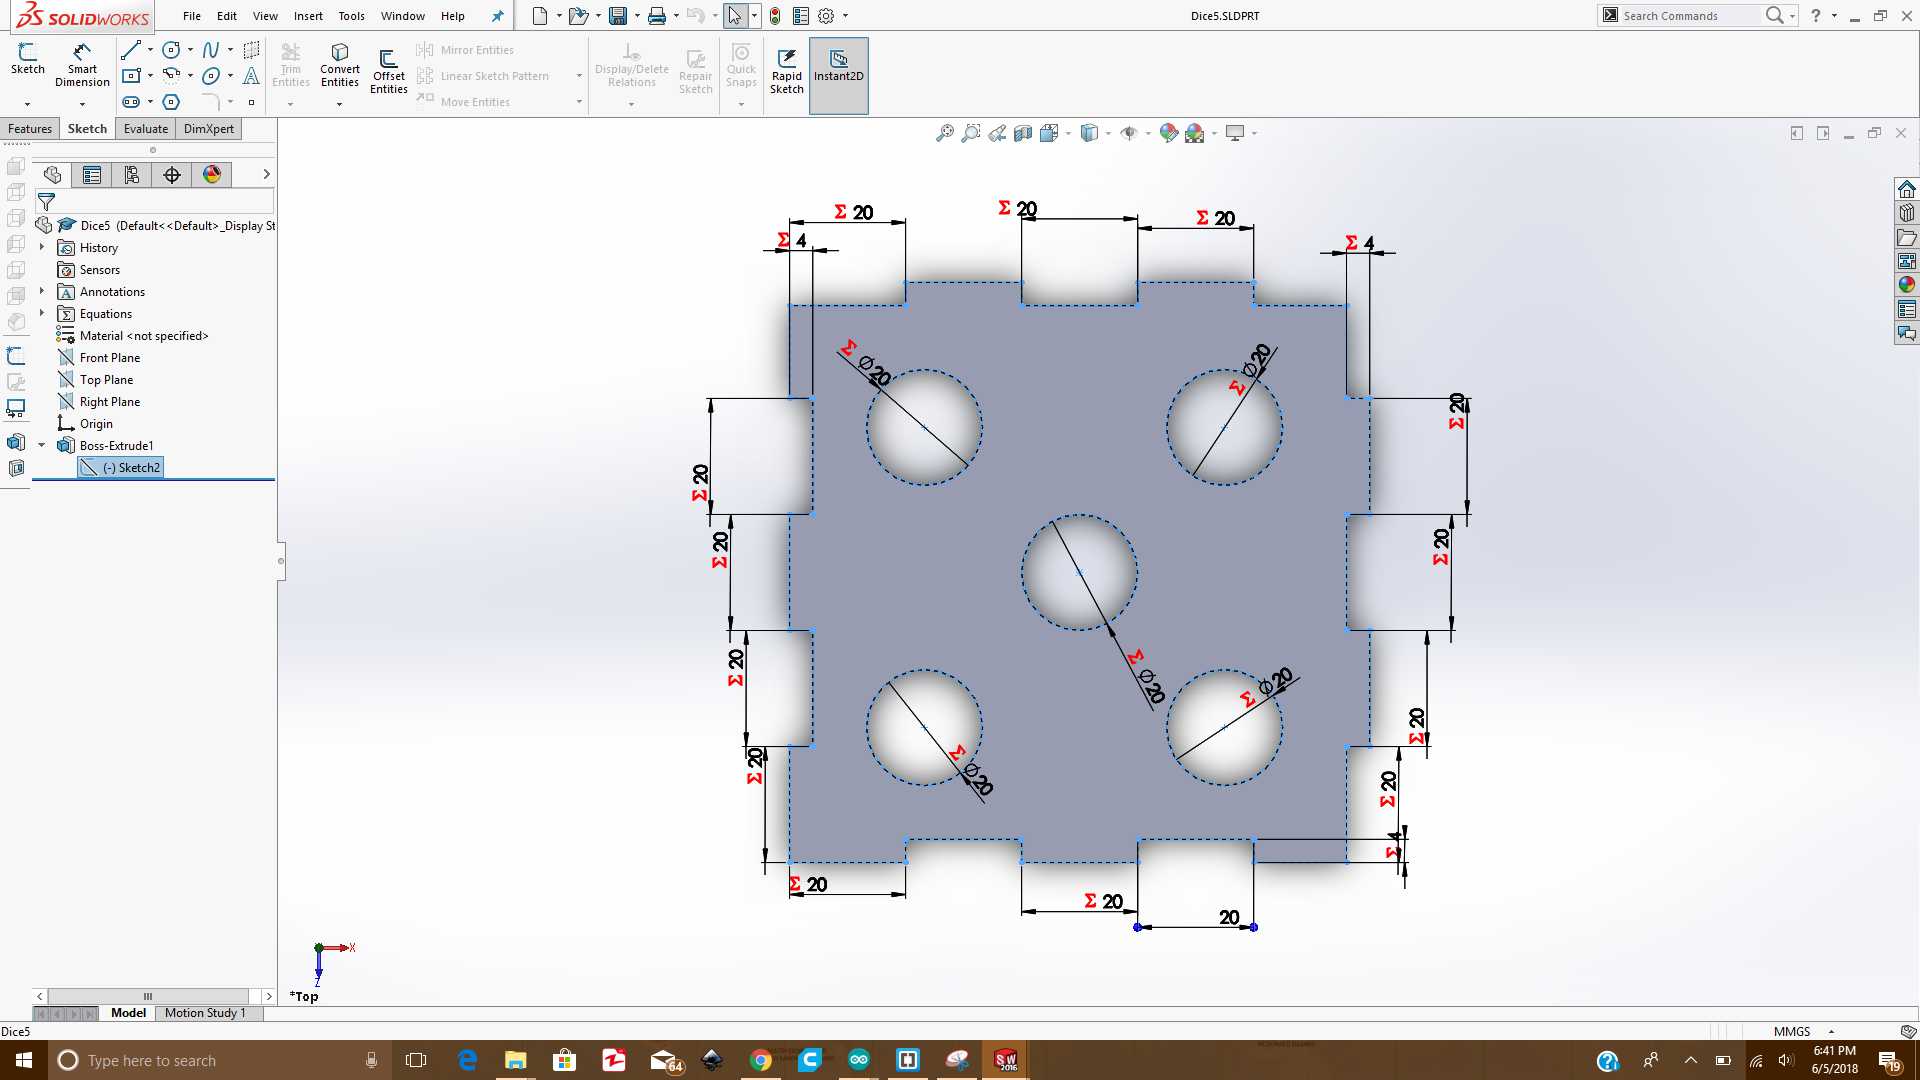 Face5 of Dice
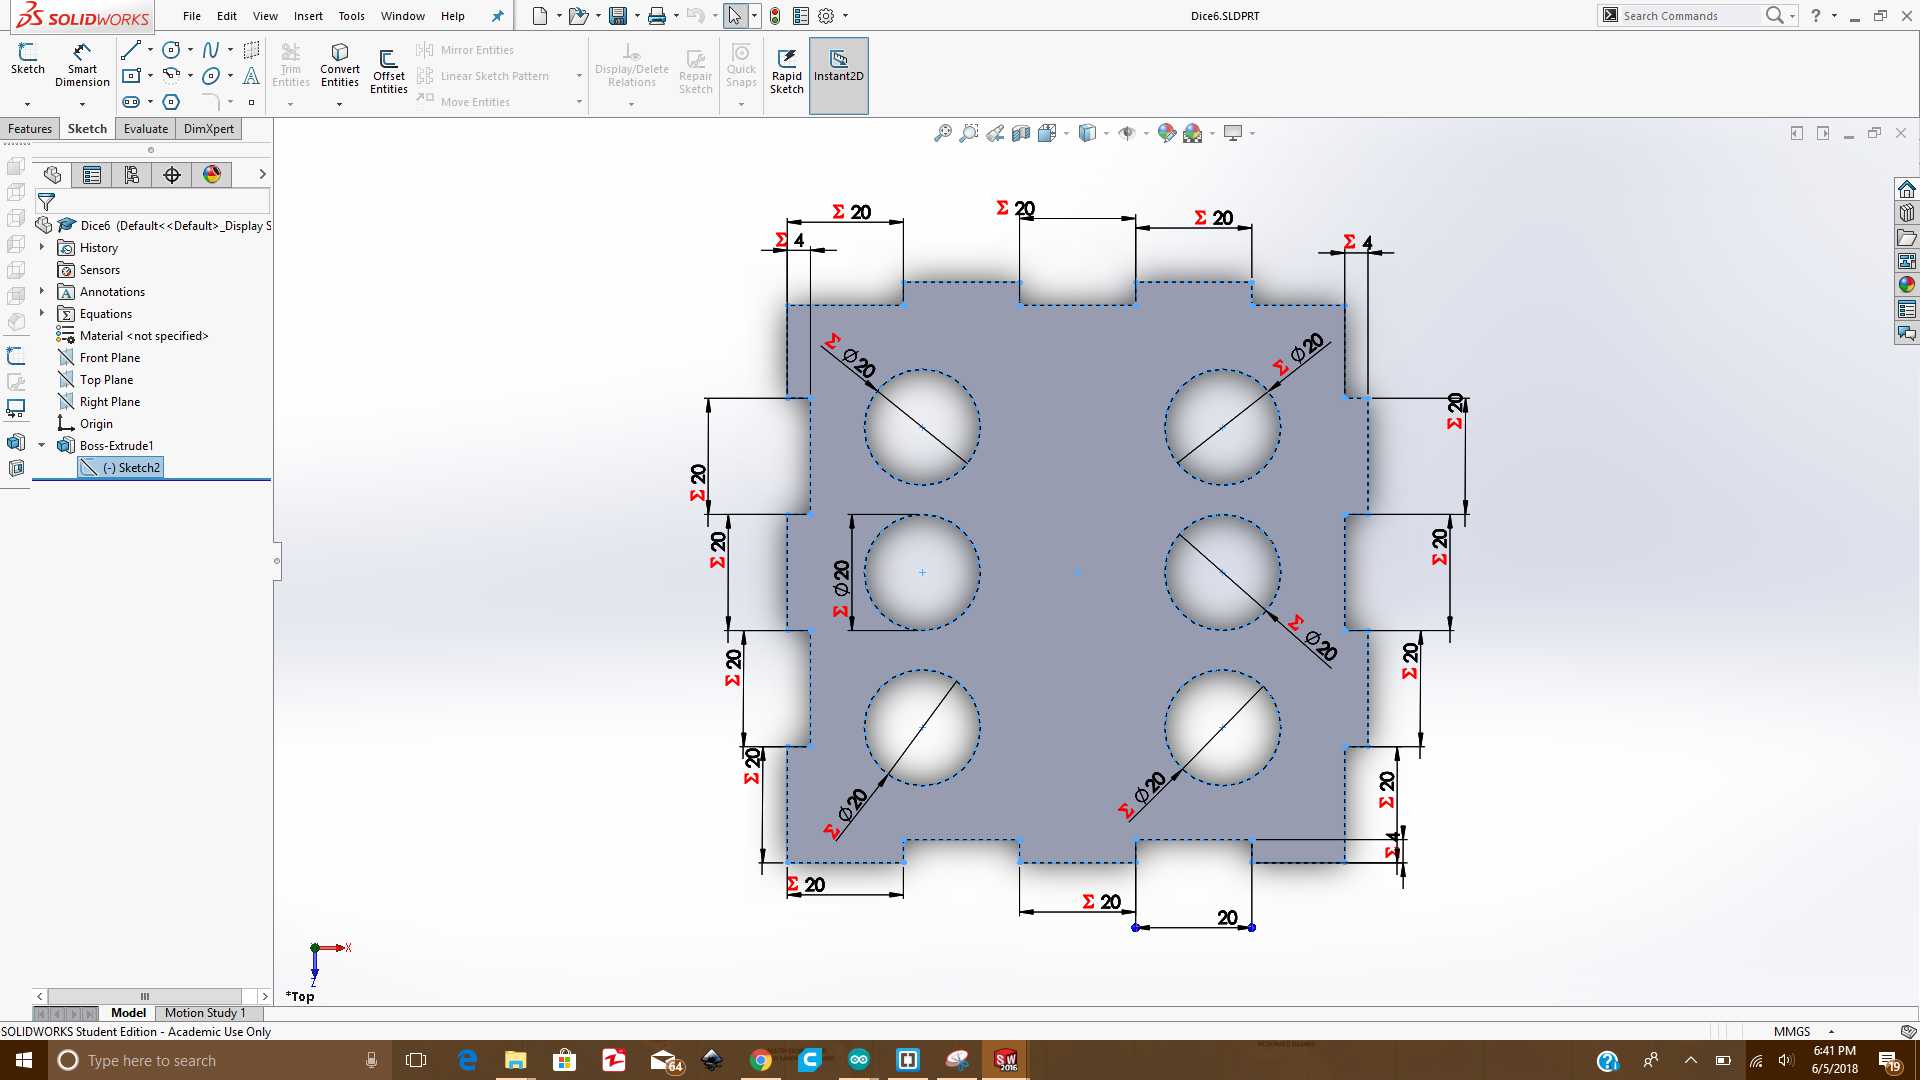 Face6 of Dice
- After making the faces, I checked whether they will fit with eachother properly or not, So I created a new Assembly file in Solidworks, then imported the parts in that Assembly and used the Mate command to combine them. The results of Assembly were satisfactory which are as under:
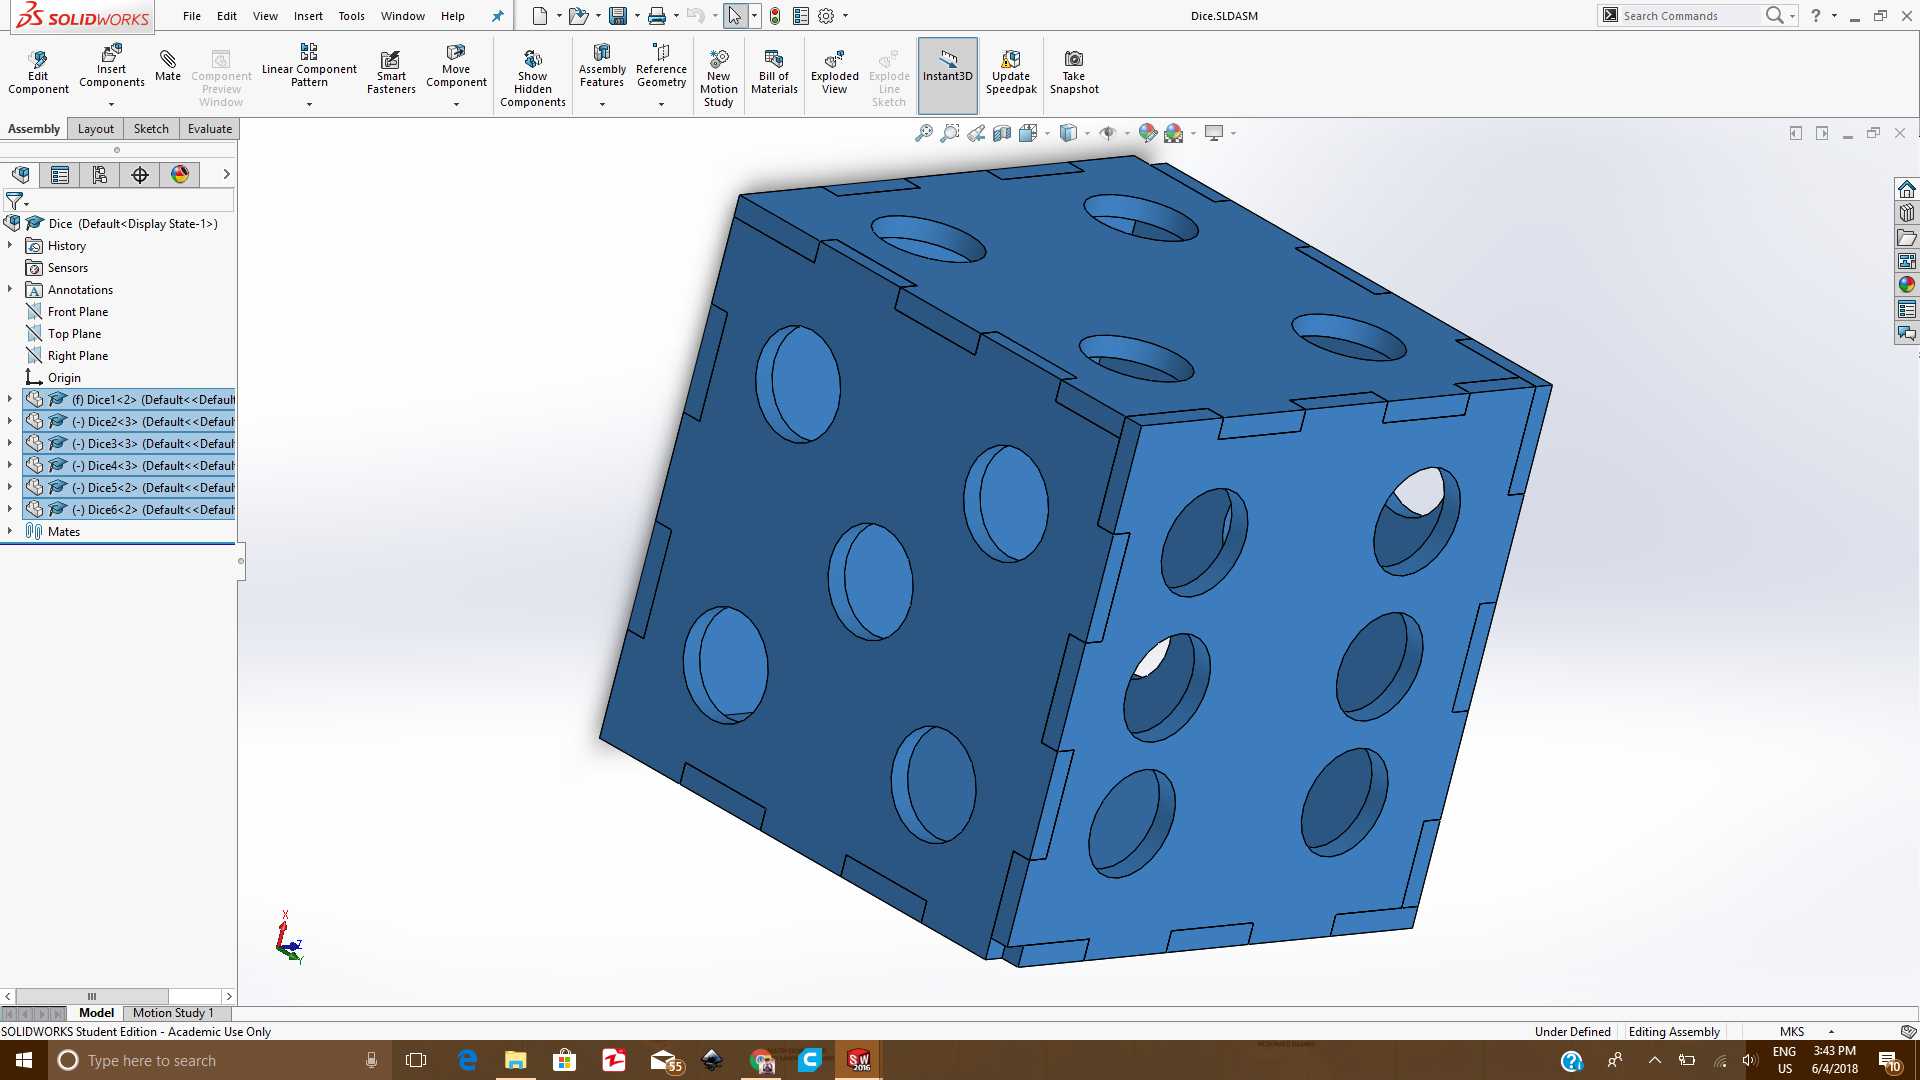 Assembled Dice in Solidworks
- To make the .dxf file which will be used in Inkscape, I placed all the faces in Top Plane:
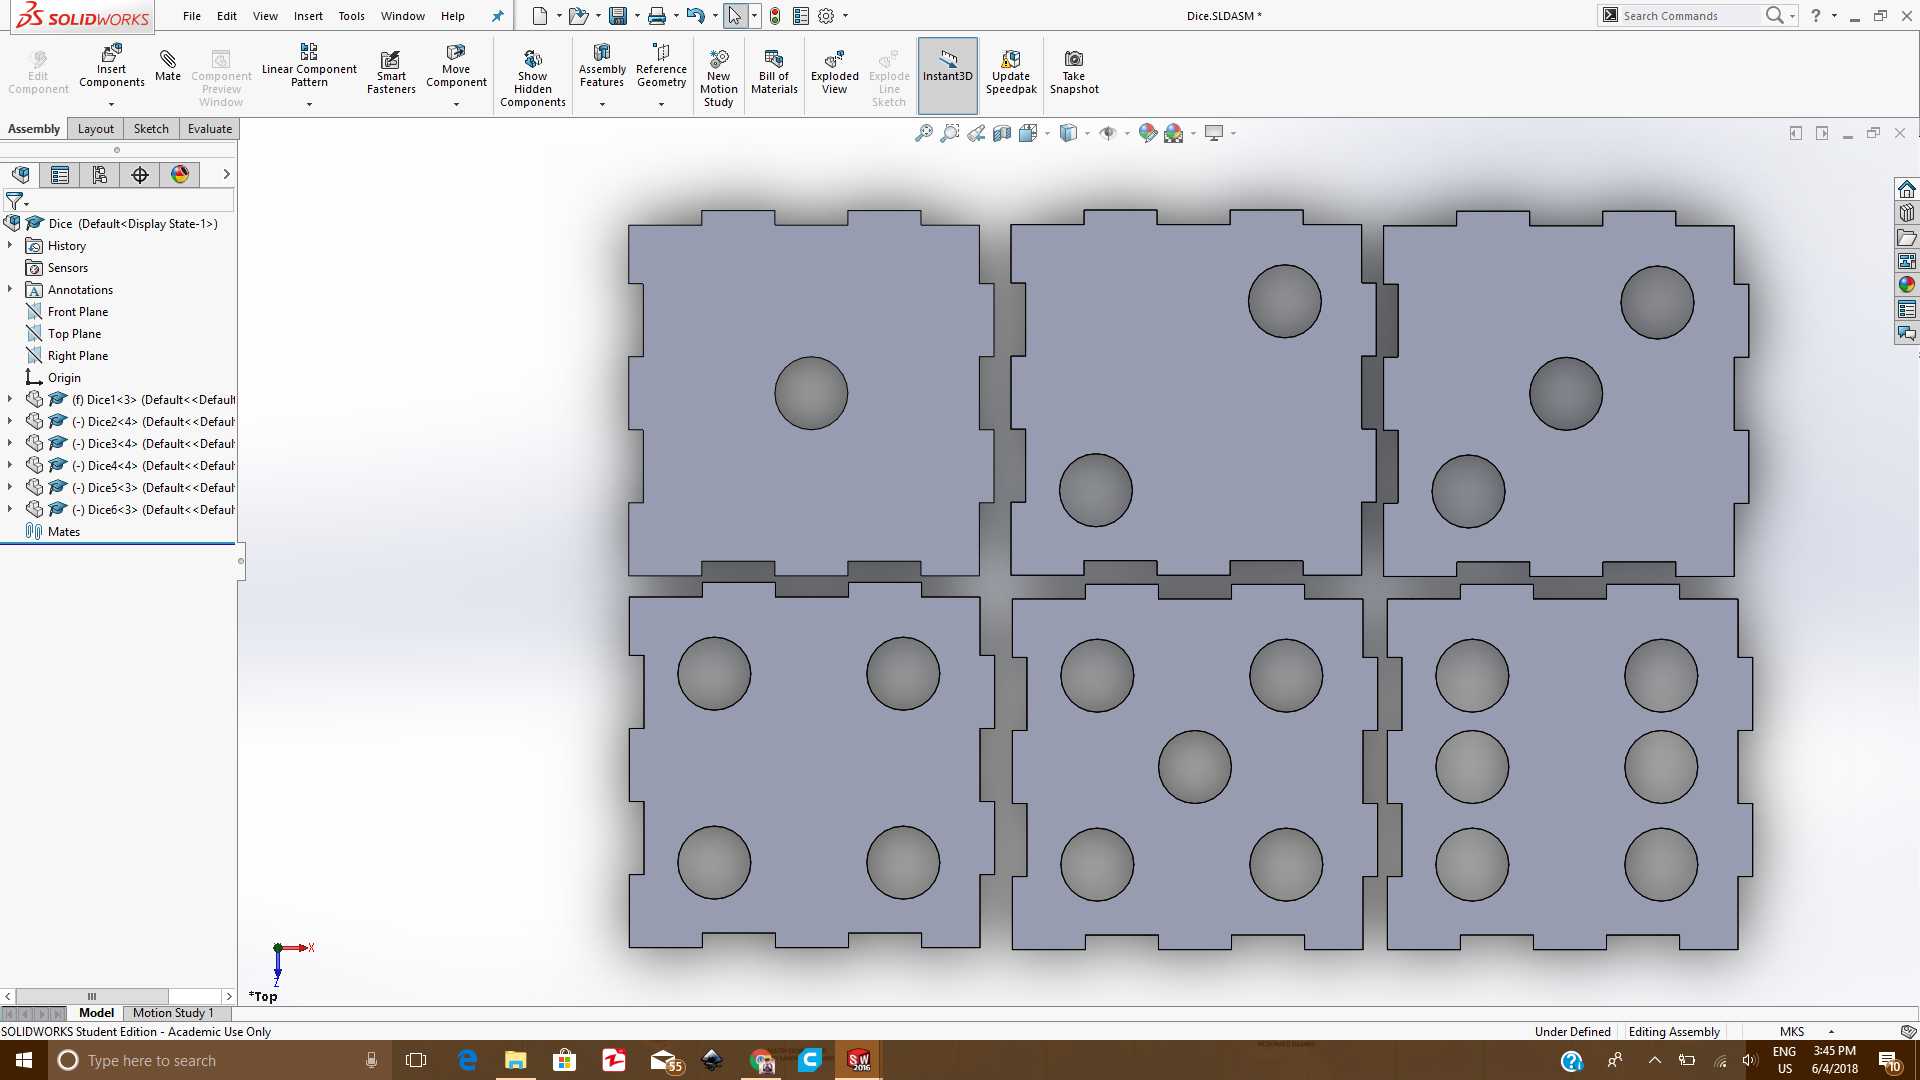 Faces in Top Plane
- From the File menu, I selected the option "Make Drawing from Assembly" to create a .dxf file and there I selected the Top view from right side and placed them on the sheet. Then I saved it as .dxf file
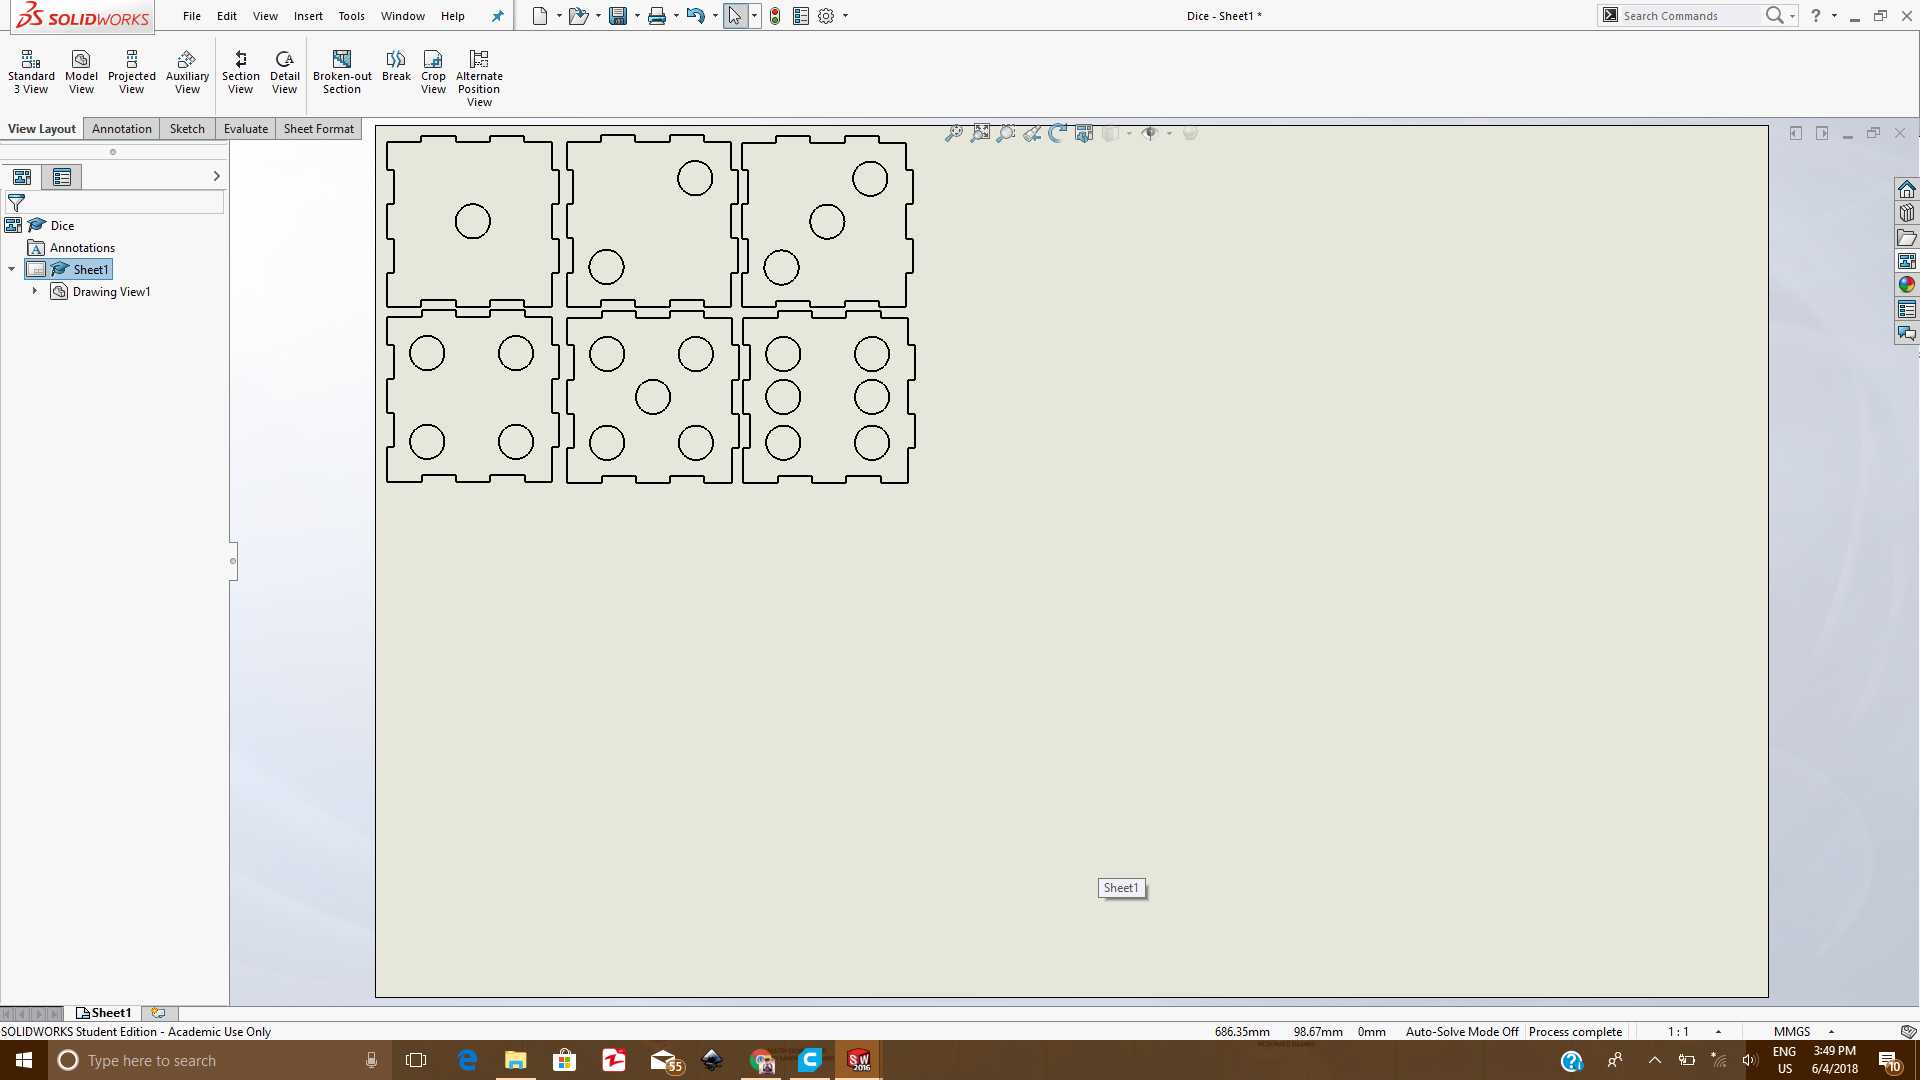 Design before making DXF
- While making it ready for cutting the .dxf file from Solidworks was imported in Inkscape and following steps were performed:
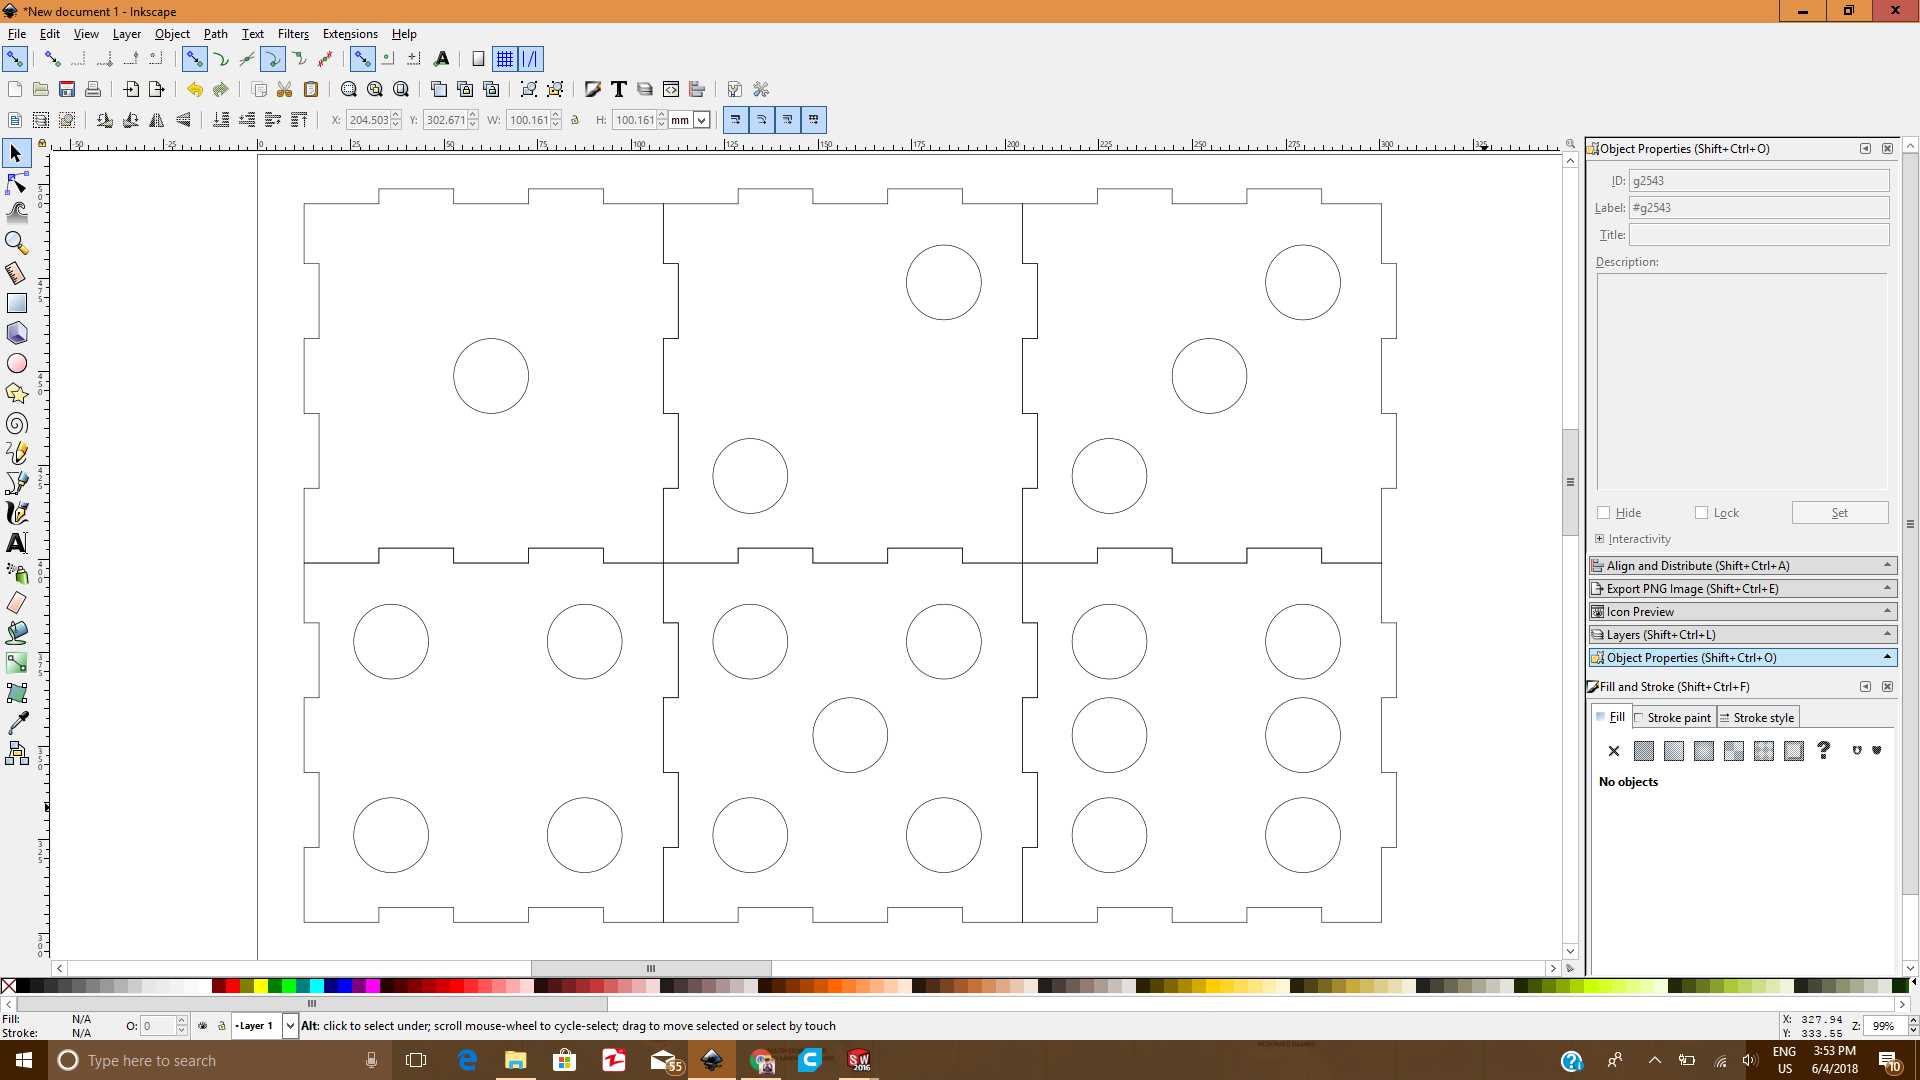 Design in Inkscape
- Go to File, Document Properties.
- Select Units from mm to inches.
- Replace the values of height and width with the dimensions of your laser bed size.
- Save the file as PDF and Make sure to set the resolution to 600 DPI.
- Now open the PDF
- Once the PDF is created, the next thing is to print that PDF using the Laser cutter which can be done through following steps:
- Open the PDF
- Select Print
- Select the Laser Cutter from the list of printers Installed
- Go to the properties and set the "Power" and "Speed" for both Raster Setting and Vector Setting
- Select "Combined" from the Job Type section if your file contains both raster and vector in it.
- Press "OK" button and then press "Print" button.
- Open the "Epilog Job Manager" from desktop, Go to "Jobs" tab and select your respective job.
- Go to "Preview" tab and adjust the position according to the available spcae on the wood, then press save and click on print button.
- On your Epilog Machine, press the "Go" button to start cutting of your file
- Make Sure to place your hand on "Stop" button so that you can shut it down in case of any unwanted situation.
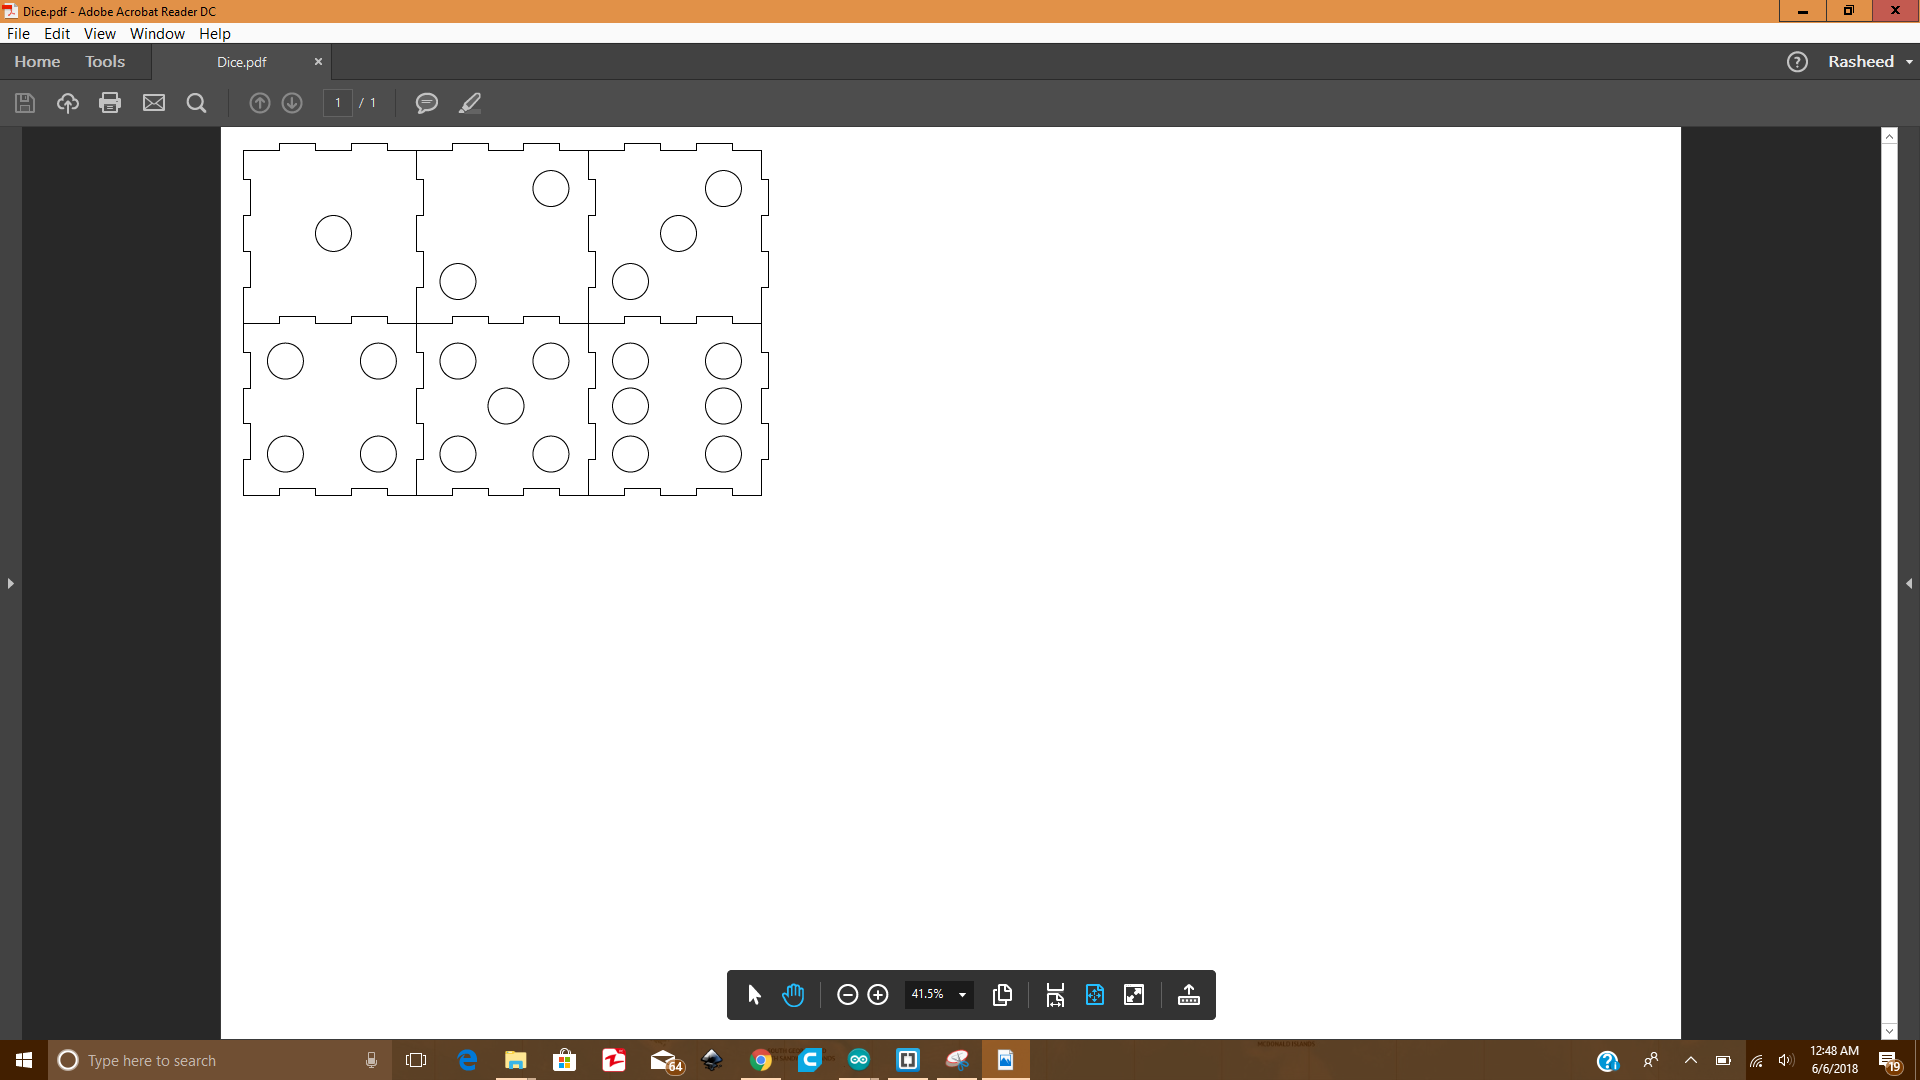 PDF file opened to give Printing job to Laser Cutter
Once the job was done, and it was still inside the Laser Cutter, it looked like this:
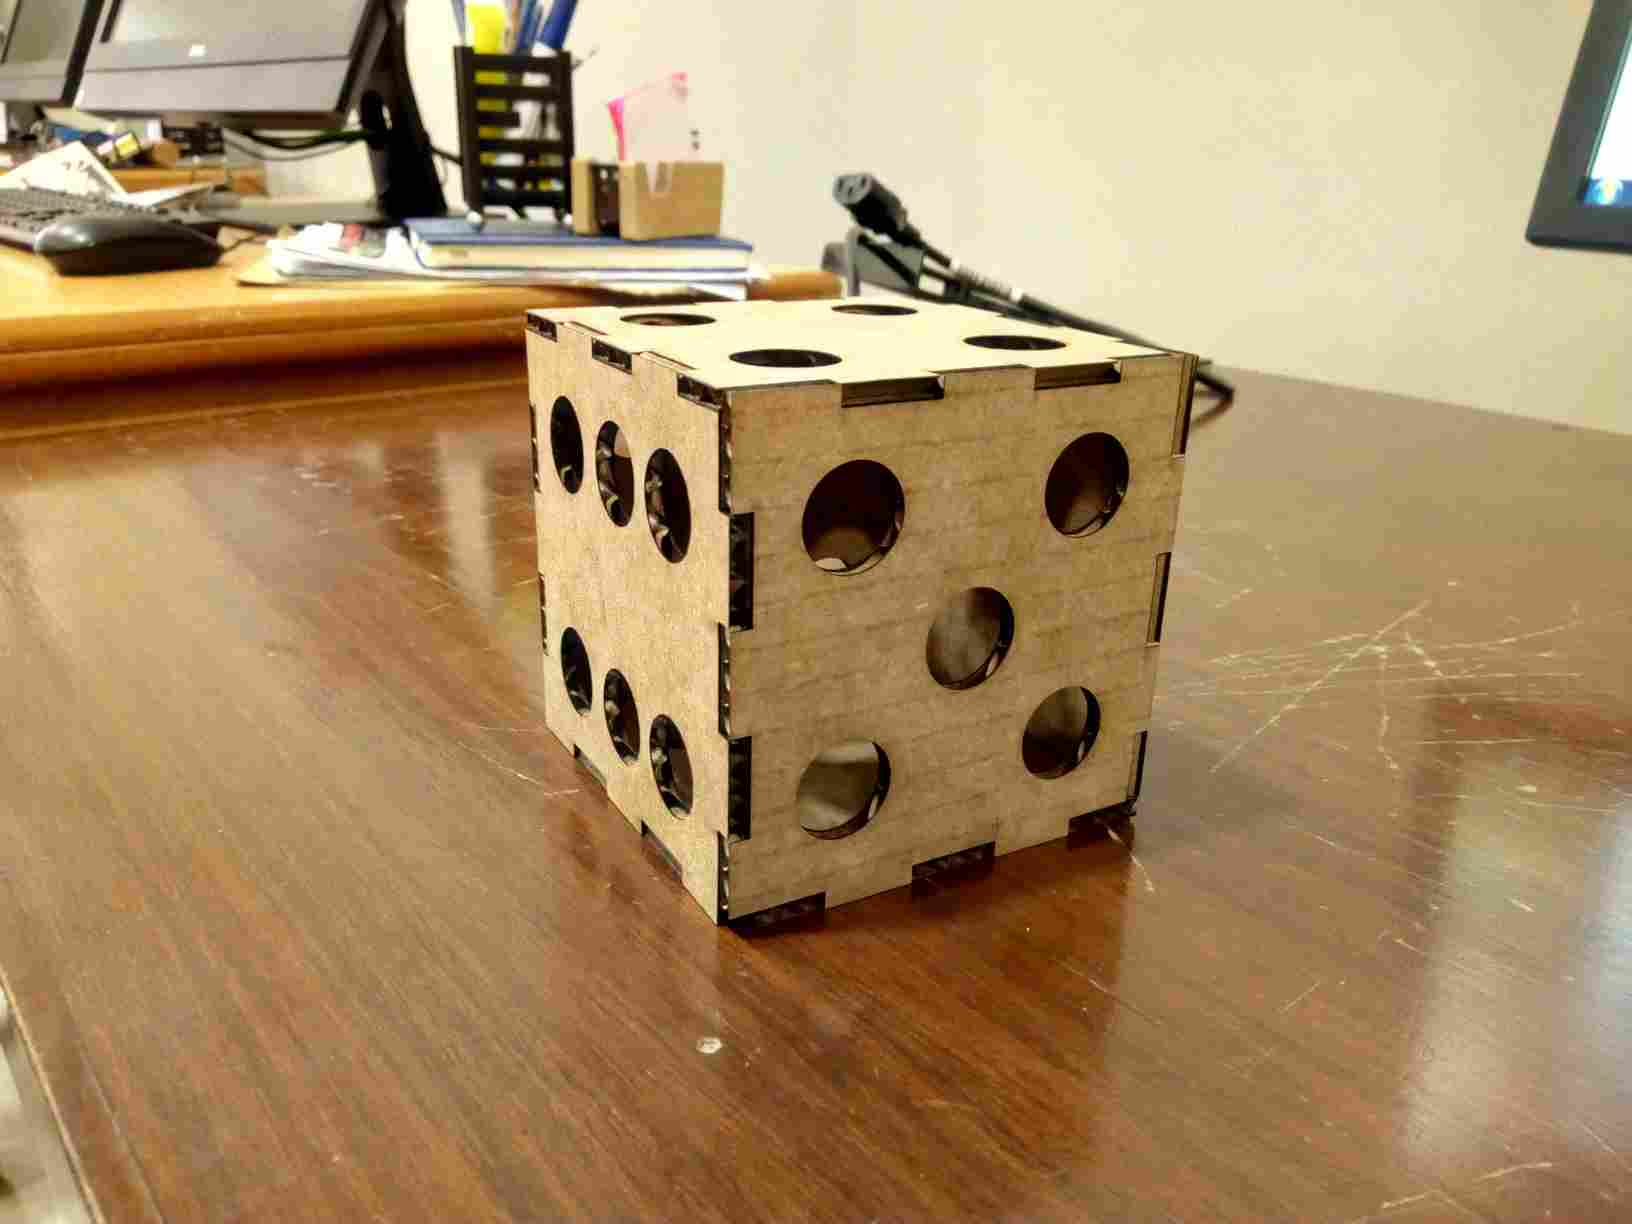
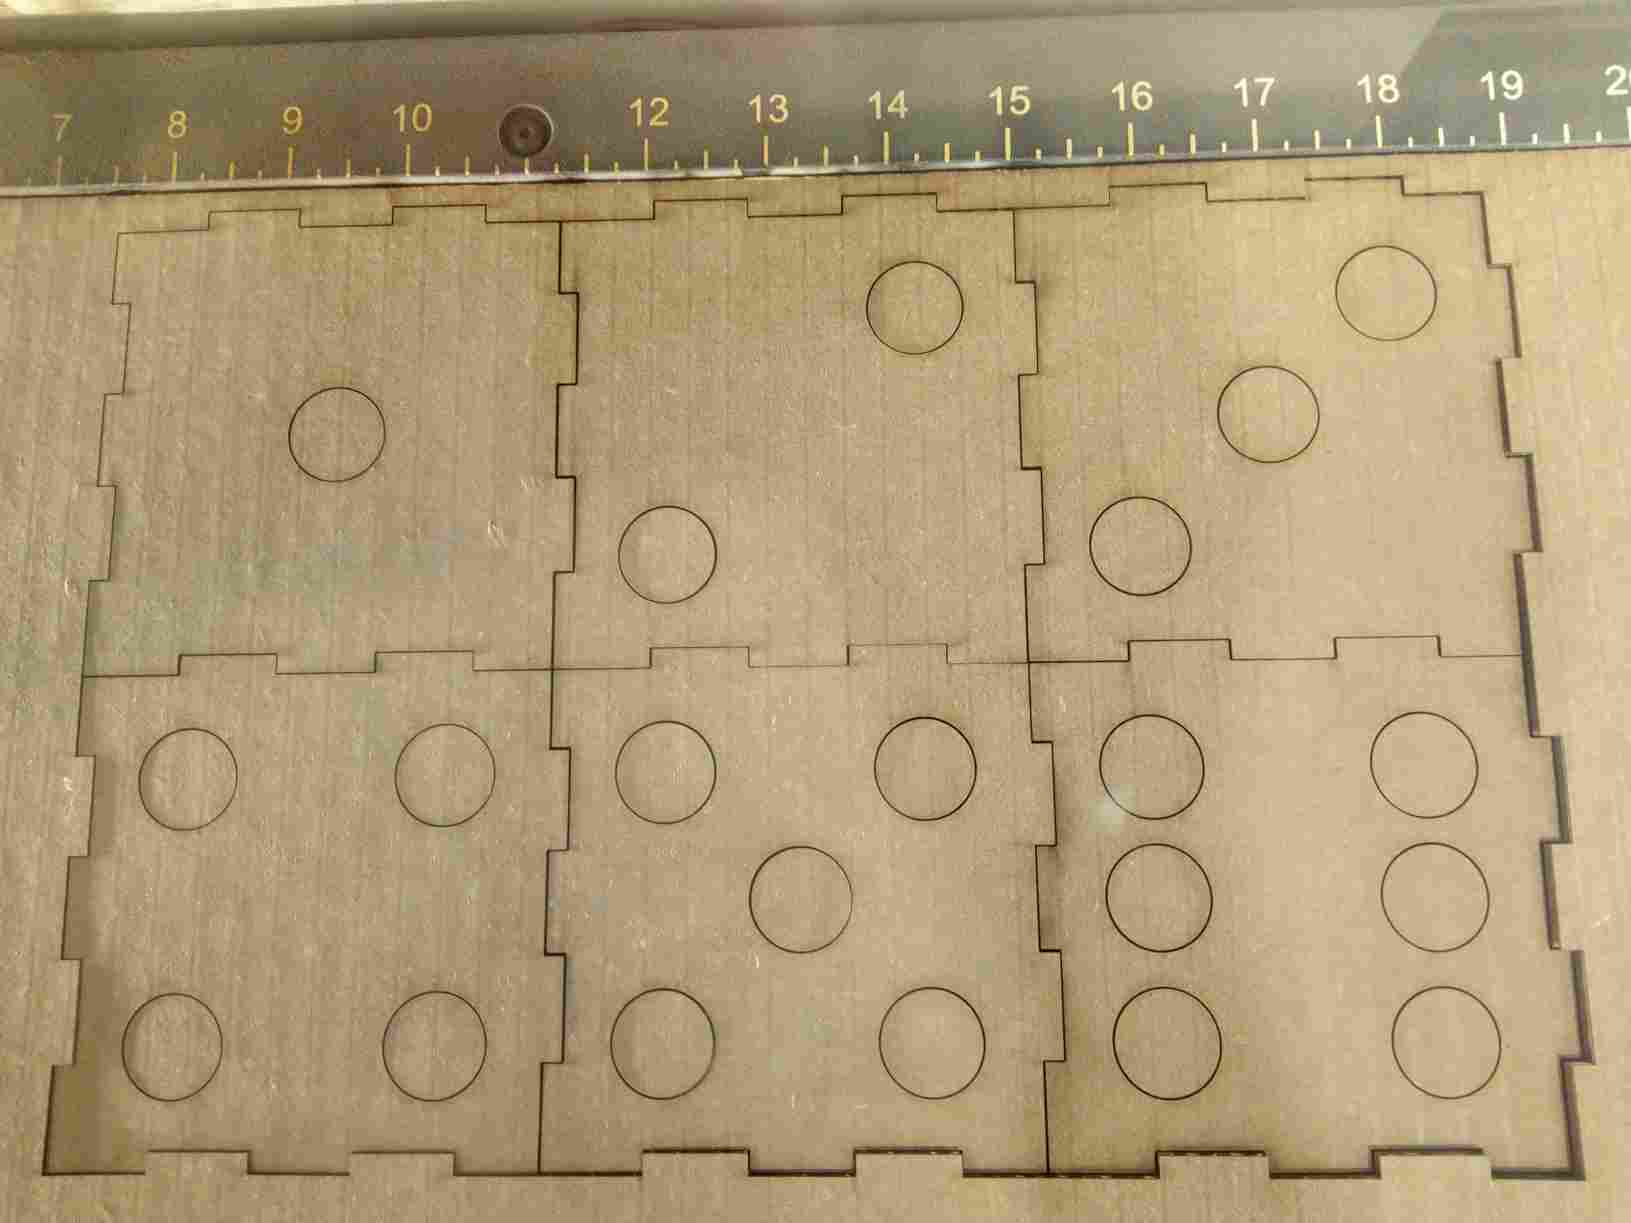 and When I joined the pieces together it became as shown in below GIF image:
 Contact
Final Project
Assignments
My Lab
About Me


