Week 5
3D Scanning and Printing

assignment
Group Assignment
- test the design rules for your 3D printer(s)
Individual Assignment
- design and 3D print an object (small, few cm) that could not be made subtractively
- 3D scan an object (and optionally print it)


A hard to make file in OBJ format Download
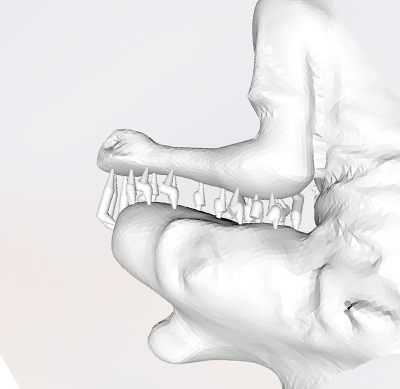
3D scanning a person
Our lab has a 3D Systems "Sense 1" scanner that we got to use to scan objects and try to generate a 3D file with it.
The software was very intuitive with almost no parameters. It asks whether you are scanning a small, medium or large object and then you can begin scanning the item you want to create a model of. You have to carefuly map the entire surface of the object, almost as if you were painting it with a digital brush. Once you are successful the program generates a model that you can rotate and asks you how you would like to save it.
As the object/person rotates, the program generates a 3D model. The model can be saved as a stereolithography file, which you can use in printing software.
After exporting the file to a .STL, I opened the file with a free software called B9 Creator. It is made to work with a different model 3D printer. I like using it because it allows you to manually generate supports for tricky areas and export the file in several formats.
Printing a scanned file
On our computer connected to the MakerBot Printer, I opened the MakerBot software. Inside the program I opened the .STL file and it generated the model for me to rotate, resize or move. It also let me select or modify the layer height I wanted to print at, which would give a smoother finish/quality but could take much longer to print.
I opted to print a quick, low-quality file. The software offers pre-set printing values for PLA, so I used an
infill of 15%
nozzle temp of 215 degrees
layer height of 0.3mm.
I clicked print and the MakerBot began heating the extruder head to 215 degrees. Once it was heated it began printing the model layer by layer.
After the printer was finished, I removed the tray and gently pulled my model off. I removed the supports and was very happy with the results!
I wanted to try to make a file that would cause complications during printing. I designed this model with several interlocked geometric faces.
This first model didn't print because the inner circle didn't have enough supports
In B9 Creator, I was able to add point supports for areas that were not printing correctly.
This attempt at printing did not work, we believe because of a loose cable that operates the PLA feeder.
Rather than point suports, I attempted walls to see if these would create enough support for the structure.
I was unable to get this object to print unless I added additional interior supports.
Print #3: Final Project Flask Insert
During the Academy course I decided to also 3D print a flask insert as a prototype for increasing surface area for seed germination. I used Maya to build a tree structure that had a base for cups to rest ontop of.
While the trees were printing, there was a second 3D printer available so I opened the Dremel DigiSlice software and imported my model. This software has the exact same commands to modify an imported .STL: resize, rotate and move. I adjusted the values for my model and clicked print. I made sure to put glue on the base surface so that the first layer of plastic would stick to it.
When I tried to place the insert into the jar, it would not sit flush with the bottom. The bottom was flat, so I would have to add a curve to the base of the design and not print a solid flat surface.
Printing a flask insert
One important consideration about this technology is that if you have a product that you know you can sell, you could potentially set up 10 machines printing at the same time and have an entire factory/team of workers. The time saved on manual production is tenfold and even allows you to continue working while the printer spends hours creating the file you programmed it to make.
That being said, there are many tweaks and issues that must be overcome to have a 3D printer calibrated, such as:
- a level, heated, or sticky enough printbed
- properly stored print material
- a stable table able to resist motion and shaking
- properly connected cables and thermocouplers
- test the design rules for your 3D printer(s)
Individual Assignment
- design and 3D print an object (small, few cm) that could not be made subtractively
- 3D scan an object (and optionally print it)
Software Used
Fusion, Meshmixer, Makerbot, B9 Creator, Pre-Form, Maya, Adobe Illustrator, Google Chrome, Sublime Text, Photoshop, Git, Tutorial Used
Fab Academy Week 5 - 3D Scanning and PrintingFiles used:
A 3D scan of myself in STL format DownloadA hard to make file in OBJ format Download
Walkthrough
Group Assignment
 We downloaded and printed a Printer Overhang test file. |
 Our MakerBot Replicator 2 was able to bridge and print overhangs. |
3D scanning a person
Our lab has a 3D Systems "Sense 1" scanner that we got to use to scan objects and try to generate a 3D file with it.
We downloaded and installed the Sense software for our 3D scanner |
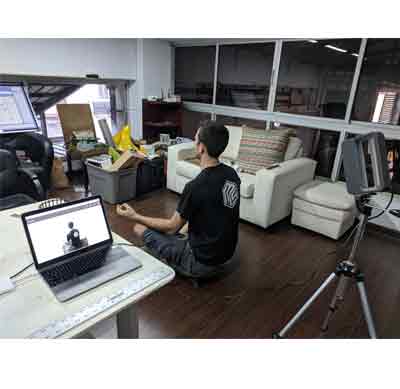
Using a rotating platform we took turns using the scanner |
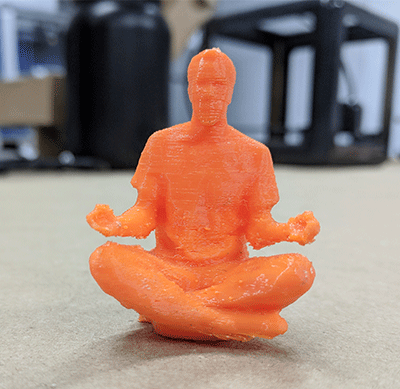
The software was very intuitive with almost no parameters. It asks whether you are scanning a small, medium or large object and then you can begin scanning the item you want to create a model of. You have to carefuly map the entire surface of the object, almost as if you were painting it with a digital brush. Once you are successful the program generates a model that you can rotate and asks you how you would like to save it.
As the object/person rotates, the program generates a 3D model. The model can be saved as a stereolithography file, which you can use in printing software.
After exporting the file to a .STL, I opened the file with a free software called B9 Creator. It is made to work with a different model 3D printer. I like using it because it allows you to manually generate supports for tricky areas and export the file in several formats.
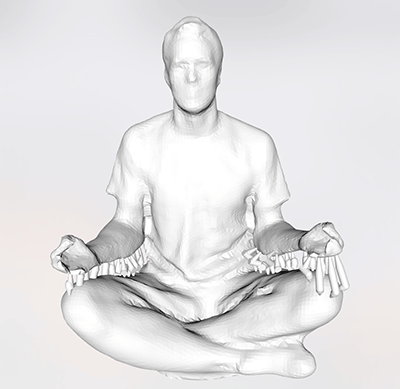 I added supports under my arms so that they could print correctly. |
 They make it easier for the printer to bridge gaps and these break off easy. |
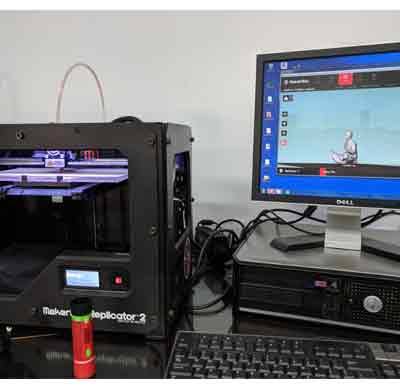
Printing a scanned file
On our computer connected to the MakerBot Printer, I opened the MakerBot software. Inside the program I opened the .STL file and it generated the model for me to rotate, resize or move. It also let me select or modify the layer height I wanted to print at, which would give a smoother finish/quality but could take much longer to print.
I opted to print a quick, low-quality file. The software offers pre-set printing values for PLA, so I used an
infill of 15%
nozzle temp of 215 degrees
layer height of 0.3mm.
I clicked print and the MakerBot began heating the extruder head to 215 degrees. Once it was heated it began printing the model layer by layer.
After the printer was finished, I removed the tray and gently pulled my model off. I removed the supports and was very happy with the results!
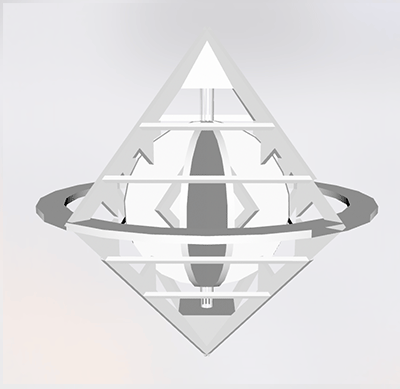
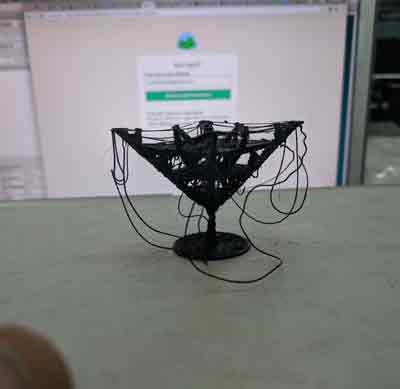
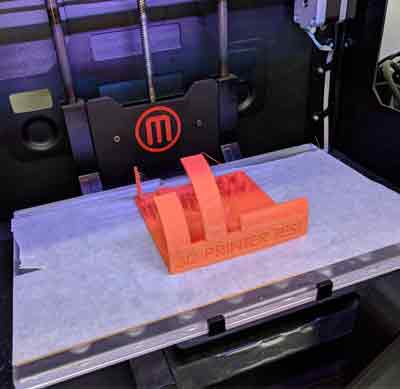
Print #2: Designing a hard-to-print object
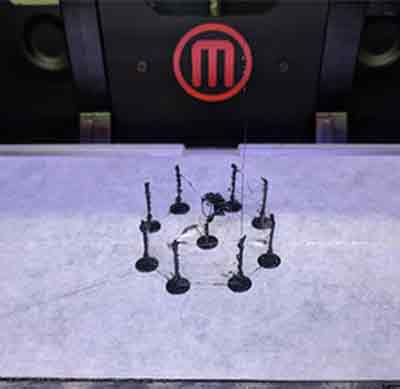
I wanted to try to make a file that would cause complications during printing. I designed this model with several interlocked geometric faces.
This first model didn't print because the inner circle didn't have enough supports
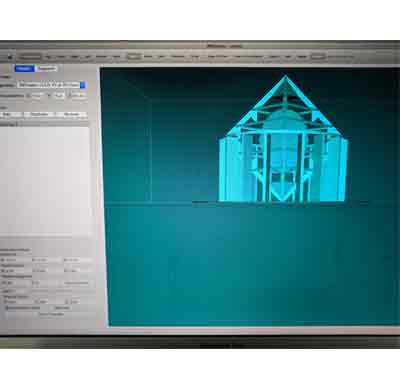
In B9 Creator, I was able to add point supports for areas that were not printing correctly.
This attempt at printing did not work, we believe because of a loose cable that operates the PLA feeder.
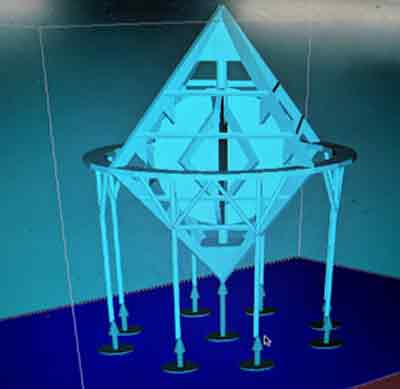
Rather than point suports, I attempted walls to see if these would create enough support for the structure.
I was unable to get this object to print unless I added additional interior supports.
Print #3: Final Project Flask Insert
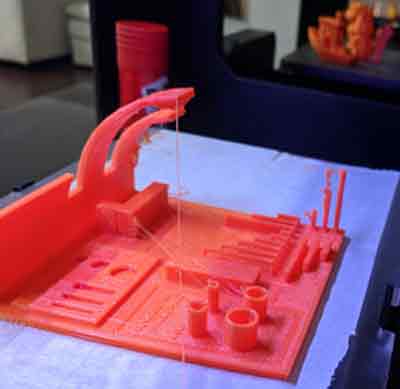
During the Academy course I decided to also 3D print a flask insert as a prototype for increasing surface area for seed germination. I used Maya to build a tree structure that had a base for cups to rest ontop of.
I exported the cups in one file and the tree in a separate file. These files did not require any supports so I opened them in the MakerBot software and selected the settings for PLA plastic. The cups were small so I was able to print them in about 30 minutes.
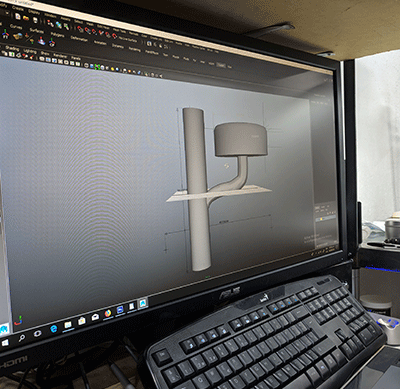 Extruding shapes in Maya |
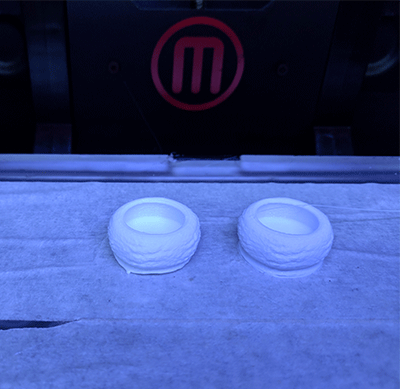 Creating insert trays for agar medium. |
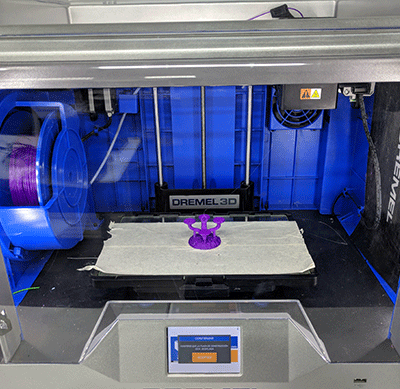 Printing the flask insert on the Dremel 40D. |
 Both pieces printed and assembled. |
When I tried to place the insert into the jar, it would not sit flush with the bottom. The bottom was flat, so I would have to add a curve to the base of the design and not print a solid flat surface.
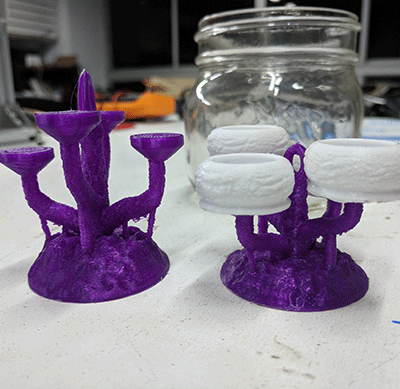 Original print with flat bottom and new one with wider curved base. |
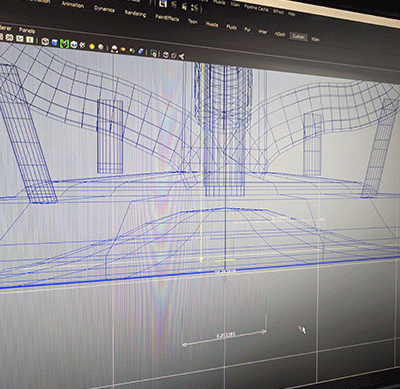 Modifying height and bottom curve of the insert |
Printing a flask insert
Conclusion
When it comes to creating a prototype of an idea, the additive creation process is an extremely efficient way to produce them. We have five different 3D printers in our shop, ranging from MakerBots that can print at 100 microns all the way to the Form 1+, which can print down to 25 microns. Depending on the result of the final prototype or object to be printed, anybody can print with materials ranging from PLA and ABS to resins, which can have more specific desired material qualities like hardness, flexibility and even castability (for metal foundry).One important consideration about this technology is that if you have a product that you know you can sell, you could potentially set up 10 machines printing at the same time and have an entire factory/team of workers. The time saved on manual production is tenfold and even allows you to continue working while the printer spends hours creating the file you programmed it to make.
That being said, there are many tweaks and issues that must be overcome to have a 3D printer calibrated, such as:
- a level, heated, or sticky enough printbed
- properly stored print material
- a stable table able to resist motion and shaking
- properly connected cables and thermocouplers