

Week 6
3d Printing and Scanning
Assignment
Group assignment:
- Test the design rules for your 3D printer(s)
Individual Assignment:
- Design and 3D print an object (small, few cm)
that could not be made subtractively
- 3D scan an object (And optionally print it)
Work done in this week
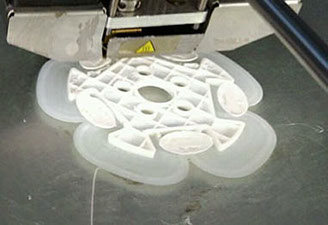
1 Designing omni wheel in fusion 360 and editing in
Mesh-mixer and gcode generation in Cura and printing
with ultmaker 2+ Printer
2 Scanning body using skanect software with microsoft
kinect scanner and editing into mesh-mixer
file for this Week
About 3d printing and Machine
3d printing is additive manufacturing technique in which material is joined or solidified under computer control to create a three-dimensional object, with material being added together3D printing is used in both rapid prototyping and additive manufacturing (AM). Objects can be of almost any shape or geometry and typically are produced using digital model data from a 3D model Refer wiki for more
there are many technologies for 3d printing FDM, SLA, DLP, SLS, DMLS, SLM, EBM, Material Jetting, DOD, and Binder Jetting they are simply explained on link refer
We have two 3d printer one is Ultimaker 2+ and another is Flashforge Dreamer
Get the link About for ultimaker 2+ from here and manual here from my personal experience it is very good printer as earlier i used shaperjet , falshforge , indie etc as comparing maintenance of it , print quality with other i recommend this , it has very good community support , all the errors you will find in their community page and debugging is also easy.
Machine Specification Ultimaker 2+
1 Build volume
Ultimaker 2+223 x 223 x 205 mm
2 Materials
Filament system:Open filament system
Optimized for: PLA, ABS, CPE, CPE+, PC, Nylon, TPU 95A with 2.85 mm material dia spool
3 Layer resolution
From: 600 micron Up to:20 micron
4 Speed
Build speed:Up to 24 mm³/s
Travel speed: Up to 300 mm/s
for more visit link we did all test varying this parameters in group work refer group work
Machine Specification Flashforge Dreamer
FFF (Fused Filament Fabrication)
1 Build Volume
230 L X 150 W X 140 H mm
2 Extruder Two
3 Layer Resolution
100~500 microns
4 File Type
STL, OBJ
i am not using this printer in this week ,i used this in my final project for which refer my project development page ed
About Software
i use cura ( Download Link ) Ultimaker and flashprint ( Download Link ) for flashforge dreamer link for downloading this software as i used both software one for this week and another for my final project , as comparing both cura is open-source software compatible with most of the printer in market and it's community is also very strong and they are upgrading features day by day , considering flashprint it is for only flashforge 3d printer as this is also good software have good support generation feature as you can manually edit support which is still missing in cura but i like cura most
Group Work
In group work we need to Test the design rules for your 3D printer(s) for this we made , For testing the 3d printer we did the group assignment in which we Learn how to operate 3d printer and about slicing software Cura , we also did test print which is for testing different things which can be printed at different parameters as bridges gap , cylinder etc detail description of this at our group page My Contribution in Group Work is to design a files for printing
About this week
This week we were asked about exploring more about 3d printing and 3d scanning , as i am already aware about 3d printing and used 3d printer before also but don't experiment machine parameters for this i made test file in fusion, details of which are explained in our group work using certain observation from group work and making test files i did this week assignment
Important links for this week
1 fabacadmy 3d printing tutorials in this go to week 5
2 stratasys education material really good stuff to read
3 da vinchi gear system stratasys eduction 3d printing Da-winchi presentation and challange refer by our regional mentor
4 3d hub for 3d printing designs
5 Thingverse for 3d printing design
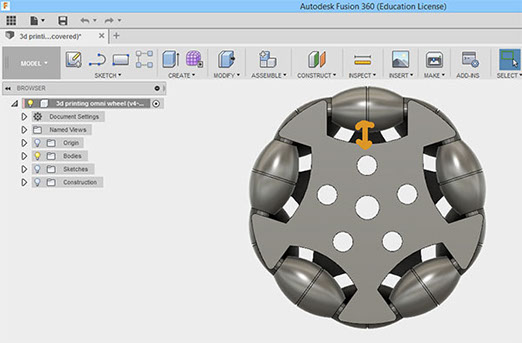
Designing omni wheel and why omni wheel
for exploring more about 3d printing and making something which can not be done by process by any other method ,i decided to make omni wheel in single assembly as by any other process you can not make omni wheel with moving roller in single part as i may also use it for my final project so i take challenge to print it but before that i need to design one such as i have to set tolerance in design which allow it to move.
Process involved in designing
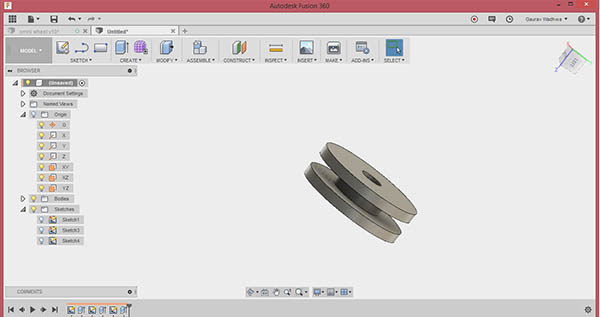
1 Designing single unit wheel assembly for testing roller movement
the major challenge in designing is to consider tolerance of 3d printing so roller of omni wheel will rotate ,i am doubted about the roller rotation so i made test file of roller with support keeping difference between outer dia of rod and inner dia of roller
Design 1 it has 1 mm difference between inner dia of roller and outer dia of rod
Design 2 ir has 2 mm difference between inner dia of roller and outer dia of rod
i use cura for slicing and generate gcode for printing for design 1 i give support so rod got stuck with roller and no motion
in design 2 i print without support i get better result as roller is moving but its rotation is restrictricted t0 270 only due to bulging in one side
Design 1
i tried the same model without support than finally roller but it is moving upto 270 degree due to bulging in one side as shown Video of design 2 testing
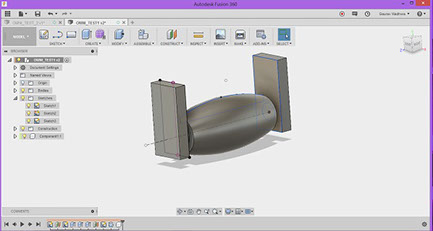
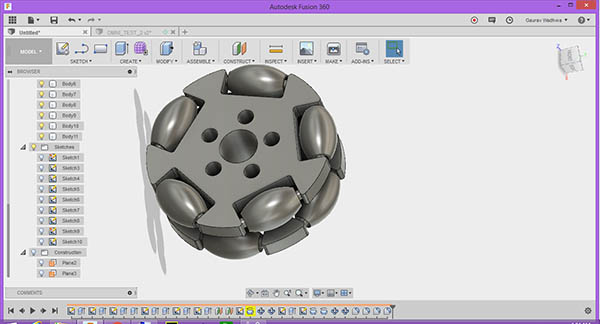
2 Design omni wheel complete assembly
AS in cad designing week i made omni wheel design but that design is for making omni wheel in assembly of different parts but for this week i need single unit to print so i redesign also did some improvement in my design
design 1 is failed as i have given o.5 mm thickness gap between roller and rod so the material support don't allow it to rotate now for this design 2 i gave 1mm thickness gap between roller and experiment with support desnity of 15 percent , 10 percent in both the case with line type support structure , it does not work as roller is not moving
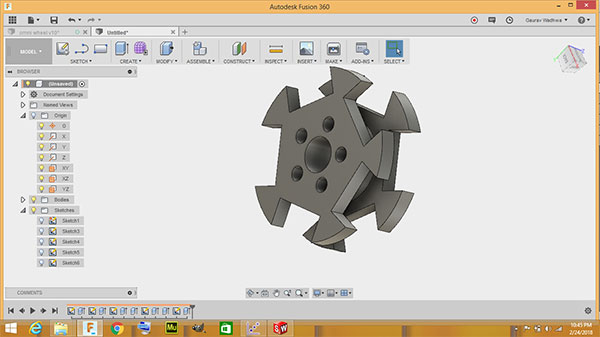

designi hub for omni wheel
cut slots for inserting roller
designing side roller keeping 1 mm thickness gap
complete asssembly is made as single unit
2 - 4
<
>
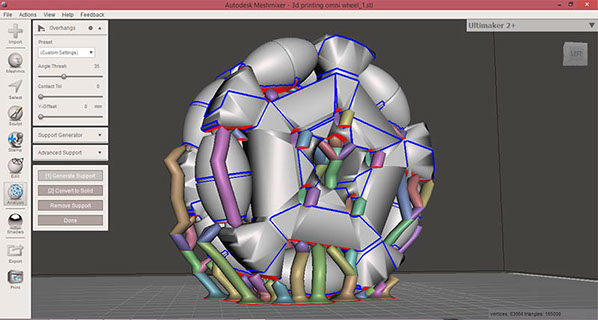
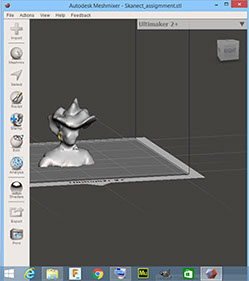
Editing in Meshmixer
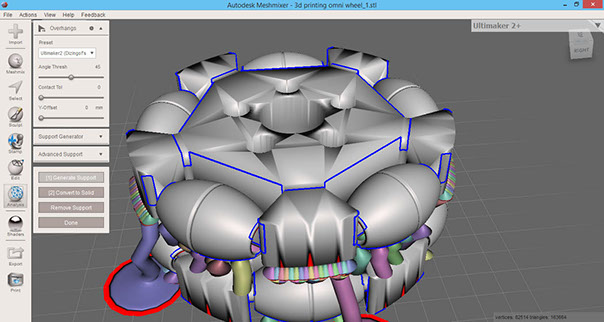
i generated .stl file for this , for printing i want minimum support inside roller and good support outside portion for stable printing
I first generate mesh, by pressing space-bar you will find option to select mesh i choose last option of smooth mesh as it give nice look to my geometry and also space optimized automatically
.jpg)
The support generation feature in Meshmixer is good as it only generate support at relevant positions and pointed nose at support point
i save .stl file with support
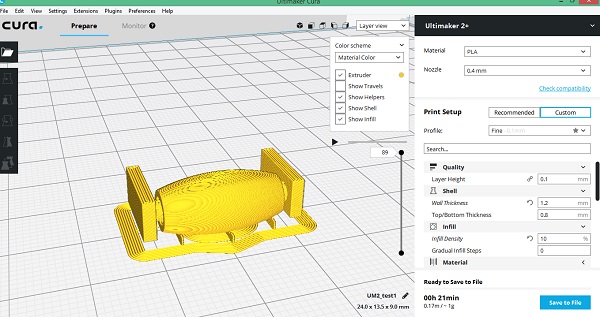
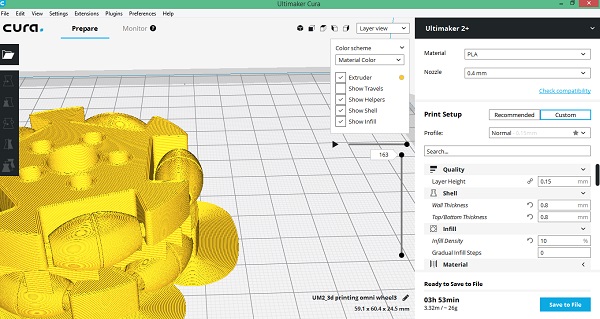
i import this fiie in cura i use custom setting as
layer height -0.15mm
Infill-10%
Wall thickness-1.2mm
Nozzle- 0.4mm
Material-PLA
Support- no support
Travel speed- 150mm/s
Print speed-60mm/s
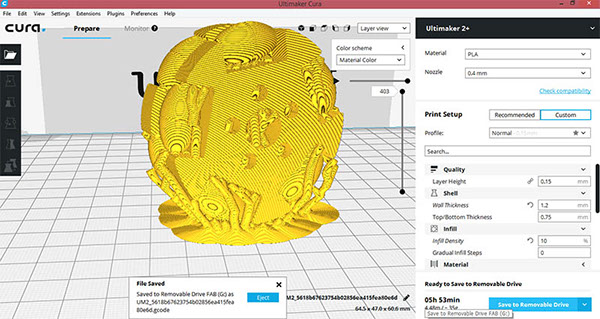
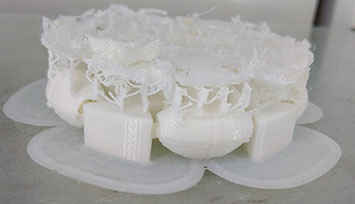
While printing i observe layers are not printed nicely there are gaps in layer so i stop print and take out , on trying to remove support everything broken up
again i generate support and take this model to cura
in cura setting i used
material- PLA
Nozzle -0.4
layer height-0.15mm
print speed 60 mm/s
travel speed-150mm/s
brim-8mm
support -no support
Again i am not getting fine layer so i stop print and directly print my model using cura without any editing in meshmixer
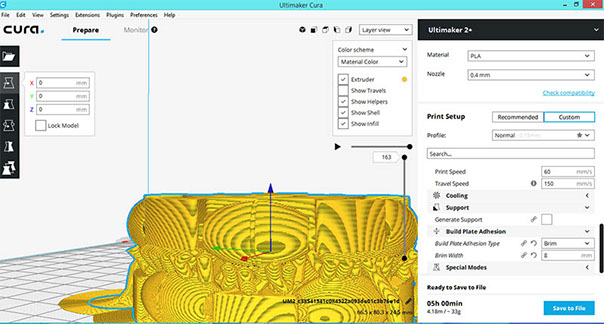
i import .stl file generated by fusion directly into cura
settings i keep at this time
material- PLA
Nozzle -0.4
layer height-0.15mm
print speed 60 mm/s
travel speed-150mm/s
brim-8mm
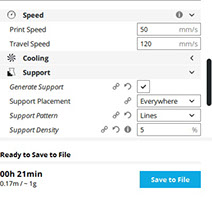
this are support setting parameters i change support type to line support and density to 8% and support placement to everywhere
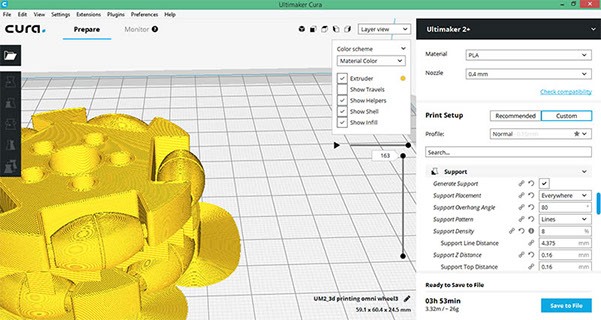
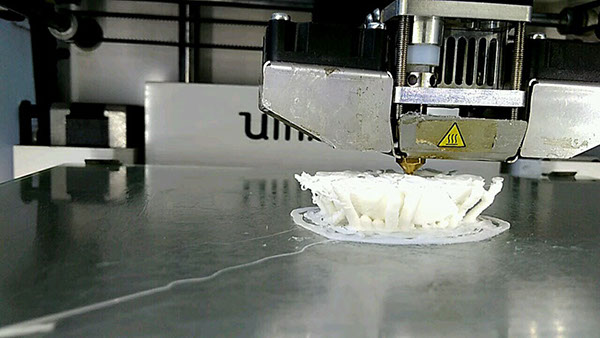
the first layer printed this time is fine in comparison to earlier one
printing is failed at certain height as top layer of roller and and base are not printed
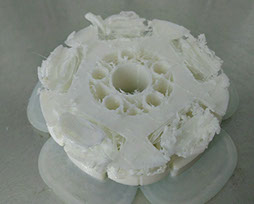
i remove support and check whether my roller are moving or not ,i find roller are moving but upto certain angle because of bulging at one side of roller
video of testing roller movement
this is not final video
Challenges in printing and measure taken
1 As failing print again and again - it may be because of problem in machine and later on confirming from other batch mates, i come to know that they also face such problem so above print fail because of material blockage in printer nozzle so i cleaned the nozzle for next time for getting the correct print and i am successful in that
2 rollers are not moving - on rotating the top roller which are printed nicely i come to know there is error in design i need to increase the gap between the roller and touching side so i did this mortification in next printing
3 bottom surface of roller shake on printing -thus printing is done layer by layer so bottom part of roller shakes on printing a base ,it create bulging in roller for it i give raft in printing the final model but it destroy somewhat surface finish on removing
Changes in design
i increased the distance between the roller and wheel so in any case my roller will not touch the wheel on moving and i also get satisfactory result after doing this
Setting the parameters in cura for printing final one
the cura setting keep for printing final model for this i take help of my instructor and tanveer my batch-mate

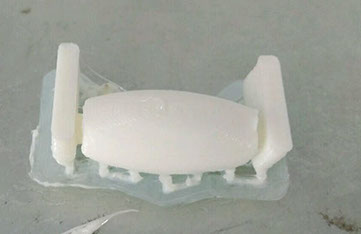
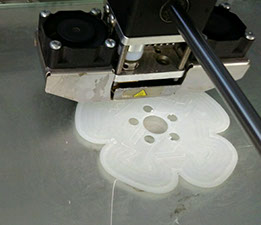
Hero shot of final print
Printing process
Process for removing print and support
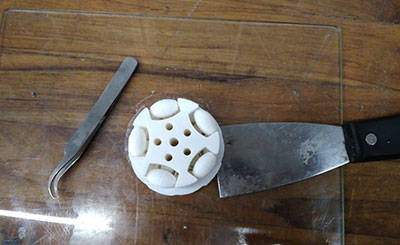
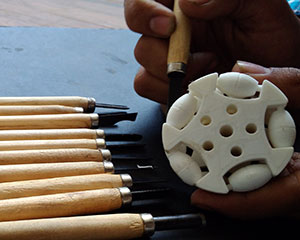
for removing print let the printer cool down than Take a built plate out and use spectula and twiser for removing the print out of bed as shown above and for removing support material use wood knife or twiser to remove extra support structure
3d scanning
3d scanning is really interesting thing I use kanect
About Skanect
it is free version licensed software and really good for body scanning even scanning process is very easy and after scanning you can export your files in obj , stl formats which you can edit and 3d print , we have Microsoft kinect 360in our lab so i used this for scanning body of our wood workshop technician mr juned
Requirement for scanning
Hardware - scaning device microsoft kinnect 360 , usb data cable,
software requirement - Kinect windows SDK v1.8 and which you can download from here and skanect 1.9 software pakage which you will get from here
install all this software and connect your scanner with your laptop and open skanect software
Steps for scanning with skanect
when you open software check on top right that is your scanner is connected or not if not than check usb connection or your scanner installation
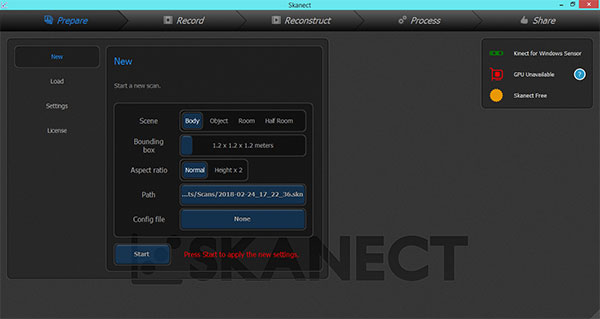
now click on new to start scanning here select bounding box of 1.2 as this works fine for body scanning
bounding box will give you volume which you scan as shown
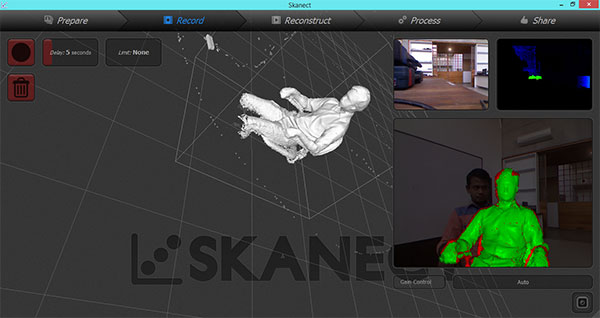
see i keep delay of 5 seconds means scanning will start after 5 seconds when i press start and limit none means i can stop scanning manually when i am done with scanning
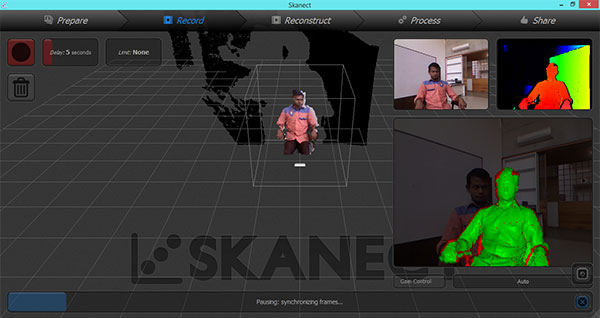
in this video you will; find the scanning technique for scanning body as it is better if you scan at three positions one at top , middle and bottom and ask
person sitting on chair to rotate 360 in all three case
its is good if FPS value on your screen from 12-16 as from observation it is giving better scanning
click on top left button to stop scanning ( a red circular button )
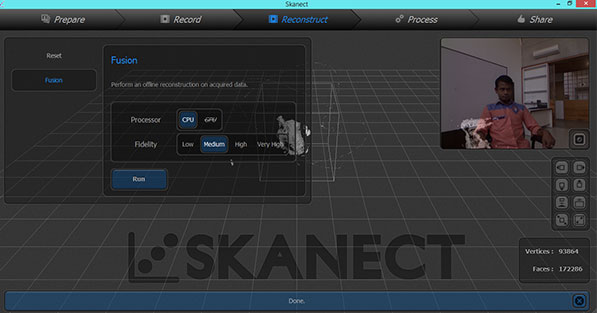
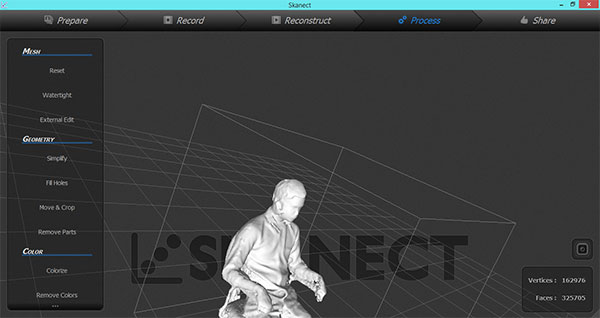
click on reconstruct this option will again regenerate your geometry using different frames you captured
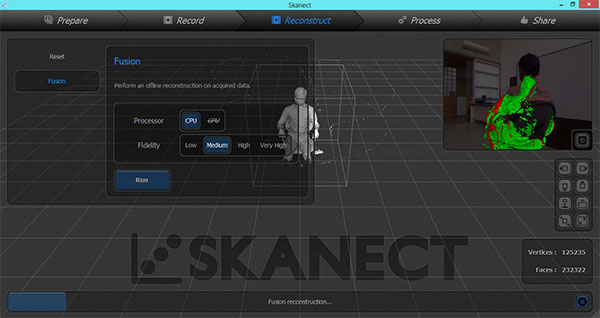
i click this it is showing me an error that average different between recorded frames is large still i continued
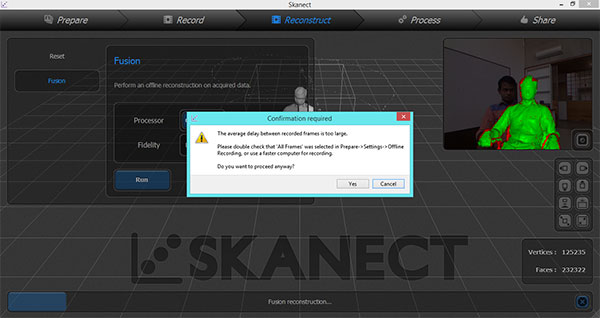
My geometry get more destroyed by this option so reset this , it may be usefull in those circumstances where you need to fuse frames captured to make model
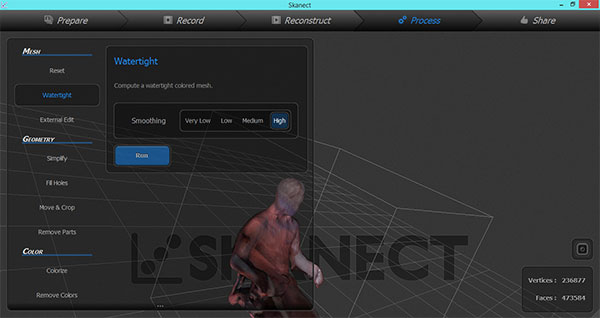
Than i click on watertiight
(watertight mesh files typically the STL file will have no holes, voids, or non-conforming triangle structures)
i skip this option here for which i again click on reset
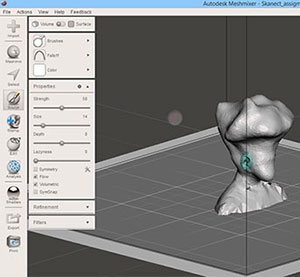
Fill hole this is really good tool to fill the open spaces in your file here in this file
there is gap below ear
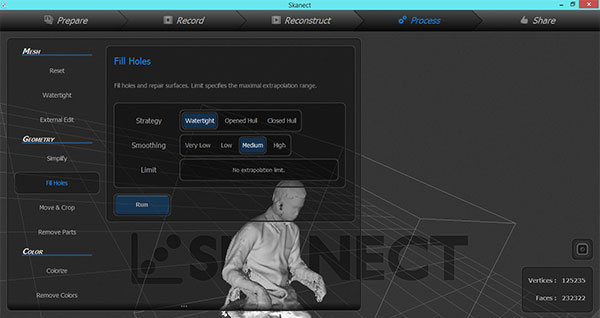
Here gap is filled by using this tool
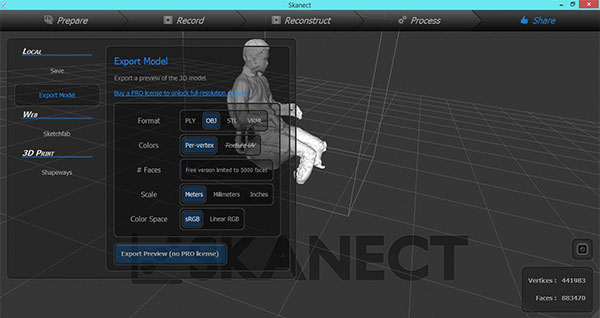
Now go to the share option where you find to export this file in stl,ob,ply,vrml
formats
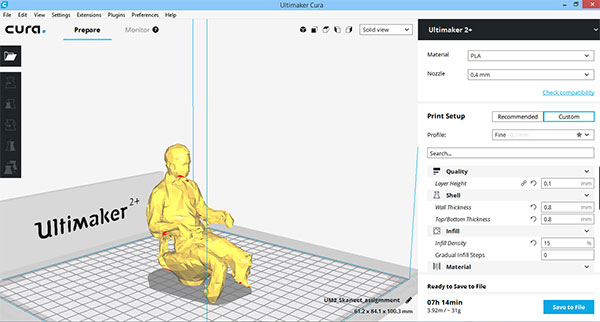
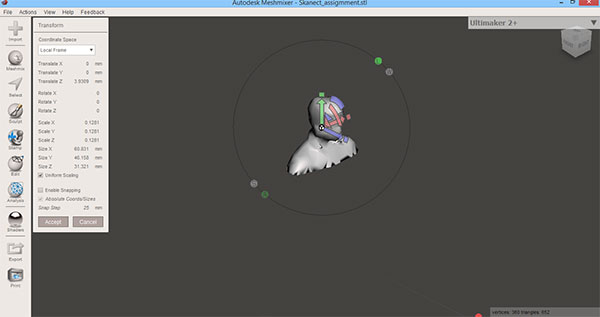
This is how design open in cura but this model is too big so i need to scale down this
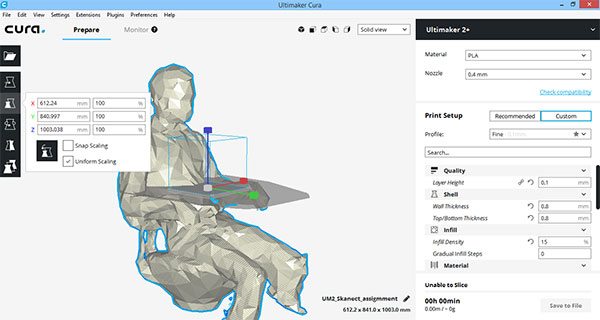
i scale to 10% so to see in cura
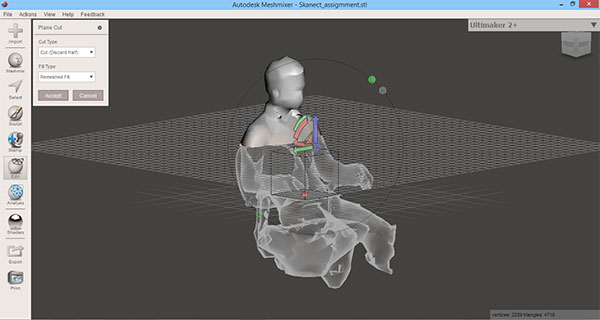
I taken same model to mesh-mixer as i want to do some editing in this ,
here first i use cut plane option for cutting it
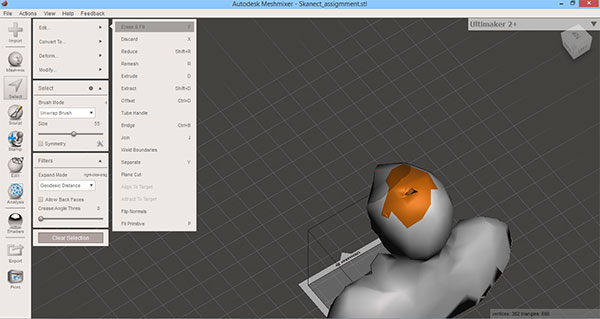
i found there is hole on top of head so i go to select tool -> extrude & fill
this hole on top
Press t for translation option this will allow you to move/rotate your geometry
Now go to meshmix option in top right and now select the ears to set ear on your scanned model
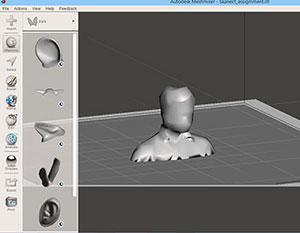
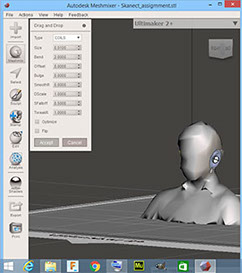
There are some other tools also there in brush which allow you to edit
Problem i face in scanning and correction i did
1 i am scanning the human body and i have to capture 360 degree view to generate scanned model as in first or second scan ,the speed of rotation of person sitting on chair changes very abruptly as he moves fast in half rotation and very slow in second half rotation thus this thing destroy the whole scanned view on scanning , i did this 2-3 times and making movement of chair close to contant speed i get correct scaned model
2 surrounding object in frame - as initially i did the same scanning experiment in messy background i.e lots of things placed in background than i found this surrounding things are also coming in my frame than i shifted to plane background where there is white board in back of person sitting in this frame , i get correct scan
3d Printing wheels for final project
I printed omni wheel for my final project , description and design for that i updated in project development week you can visit my Project development page for 3d printed wheels.
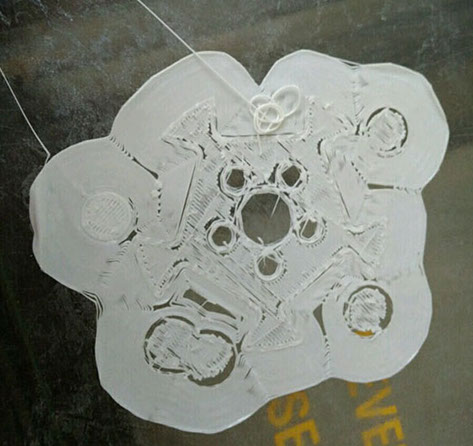
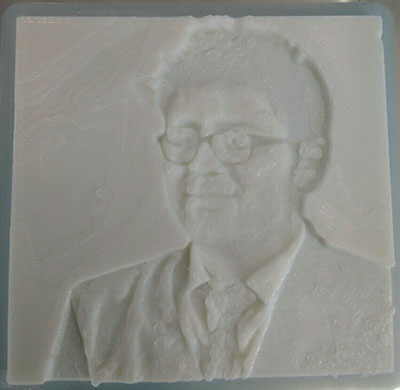
Making lithophanes
Making lithophanes i.e 3d print 2d image file ,this is really cool thing as i first started this by following one reference from instructable here refer this you will
Steps for Making it
Making lithophane is very easy there lot more ways of making it which you will find in instrcutable link above , i am making it using cura
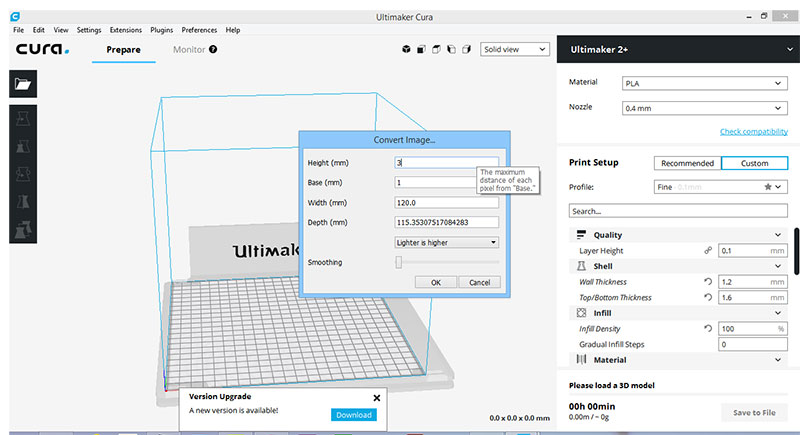
Step 1 -drag the image( .jpg) file in cura software simply it will ask you for setting some values of some parameters there as shown below , drag your mouse over them for understanding its meaning
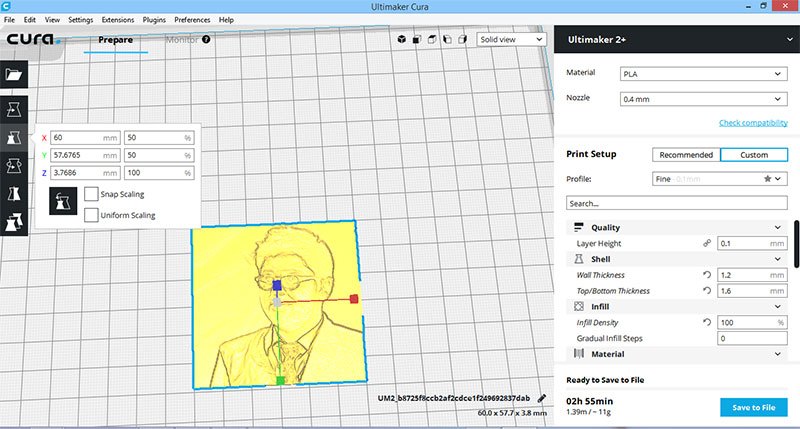
Step 2 After setting all this parameters you can set normal settings in cura which are as given here i scale its size but does not reduce size in z axis as it should be of 2-3 mm for proper detailing
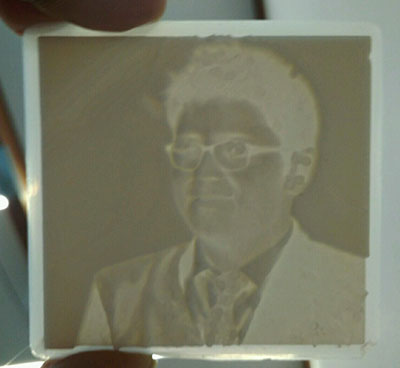
Hero shorts
Exploring Autodesk Recap software
Use ReCap™ Pro to create 3D models from photographs or laser scans. The final product is a point cloud or mesh ready for CAD , you can download this software from here , i used this software for scanning week with aim of just exploration , as it is software from autodesk , i read its review that it is good for generating 3d view cad geometry from patching large number of photos taken from different angle i tried talking photos of different object available in lab ,but as i tried this thing 2-3 times but the results are not that much satisfactory that i am expecting
Note things to care while taking photos
1 When you are taking photos , take large number of photos approx 50 -70
2 Take photos from all angles in sequential order as starting from one side and finishing on another side
3 your photos should not be blur
4 while taking photos keep white background i.e if you are taking photos of object keep white sheet in bottom of it as it will help
software to subtract background from image or if you have white object keep black background preferable.
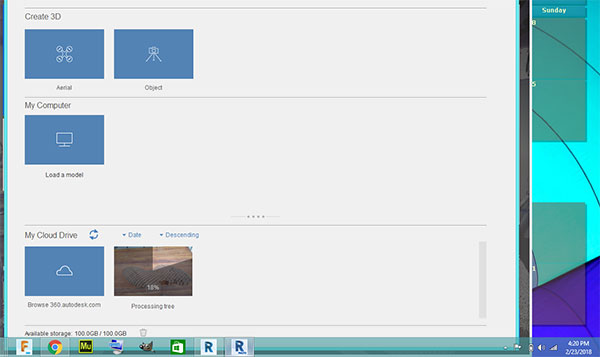
Steps for using this software
for stating with this software you first need to download this software and you need autodesk account for this or you can also use it with trial version , i have account so i login with that now
1 this will be the first window
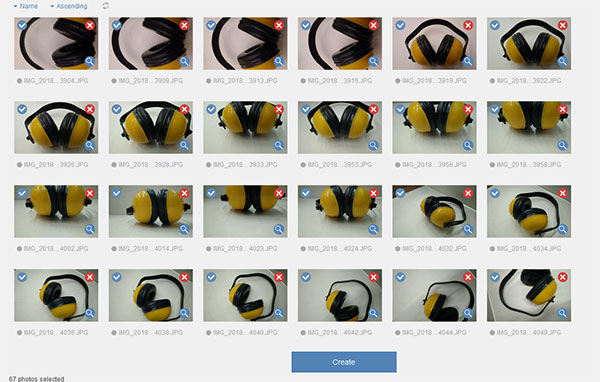
for stating with this you first need to capture photos as and in top menu bar create 3d object and and uplaod photos
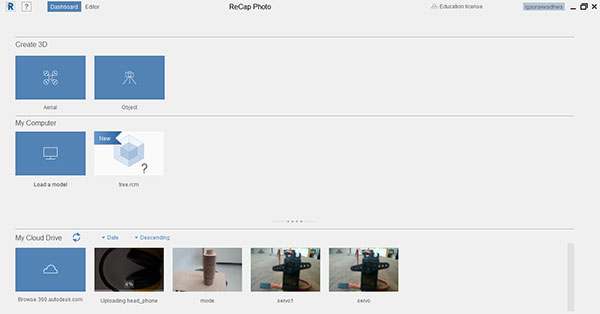
on uploading photos it ask you to create so click on create button
it will create 3d model and upload it to cloud wait for some time and click on your obeject in my cloud to see and later on you can also save it or download it

This work by Gaurav wadhwa is licensed under a Creative Commons Attribution-NonCommercial 4.0 International License.