01
03
18
19
Underwater CNC-Plasma cutting
Yes.Plasma cutting. The topic for this week was to produce something with a digital fabrication process, which is not covered by other assignments.
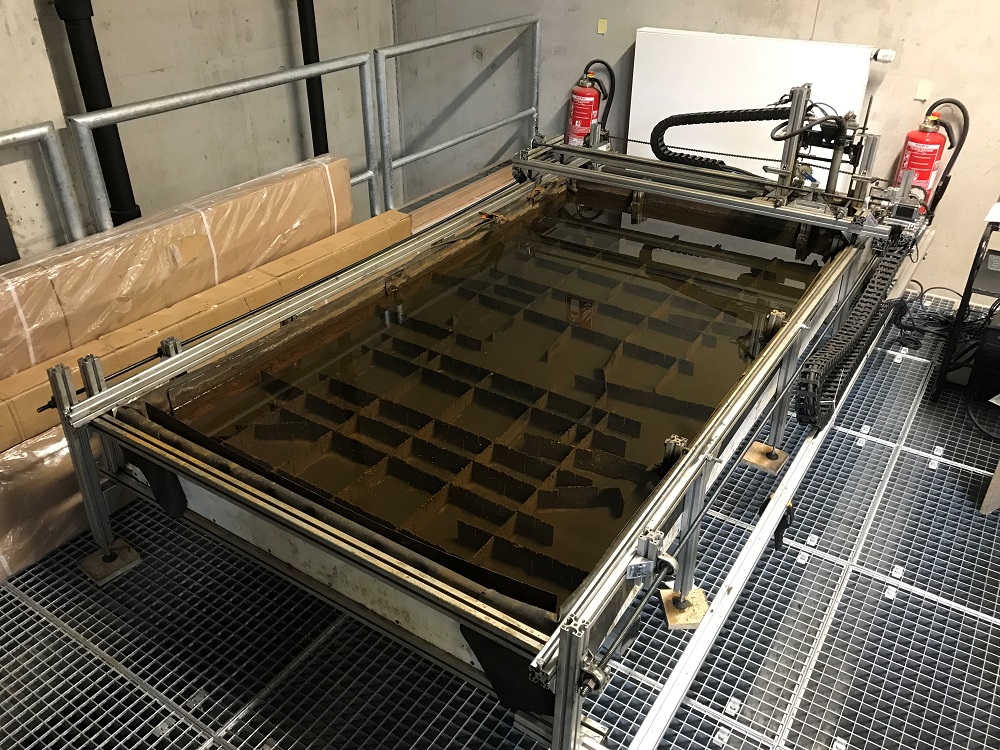
This was the right chance to use our good old CNC-Plasma cutter, which is fairly old but, looks horrible but works like a charm. This machine helped us a lot in our research projects to cut heavy steel plates, after being the workhorse for cutting cyclones and machine parts at Blackballs Technologies for a long time. The special feature on this machine is the underwater cutting instead of cutting under normal air atmosphere. This helps to reduce the expositions of dust, ozone and UV a lot. Neat side effect: the water cools the parts, which helps to get much cleaner and better cuts.
The process to use this machine is not that tricky, as there is a reliable toolchain which we use for years. The recommend file format to use the CAM is DXF. This is a so-called standard for interchanging 2D CAD drawings.
I tried to combine the wildcard plasma-cutting week with the moulding & casting week, to produce a more considerable product.
20
The first step was to create the CAD data. For this step, I used the sheet metal module in Inventor. This is the - really - only way to create sheet metal parts in Inventor, where you're able to get the real world values for length etc. which where calculated including the thickness of the material. The process itself is like drawing a normal sketch in Inventor. The only different part is the way to connect the different sides. Normally, you'll extrude the different sides. But in sheet metal, you set the thickness of your sheet and design a folded part (as sheet metal parts are, normally). This is done with the 'flange' feature, which is controlled via the 'bend angle' and 'distance'. These two values allow you to control all necessary settings.
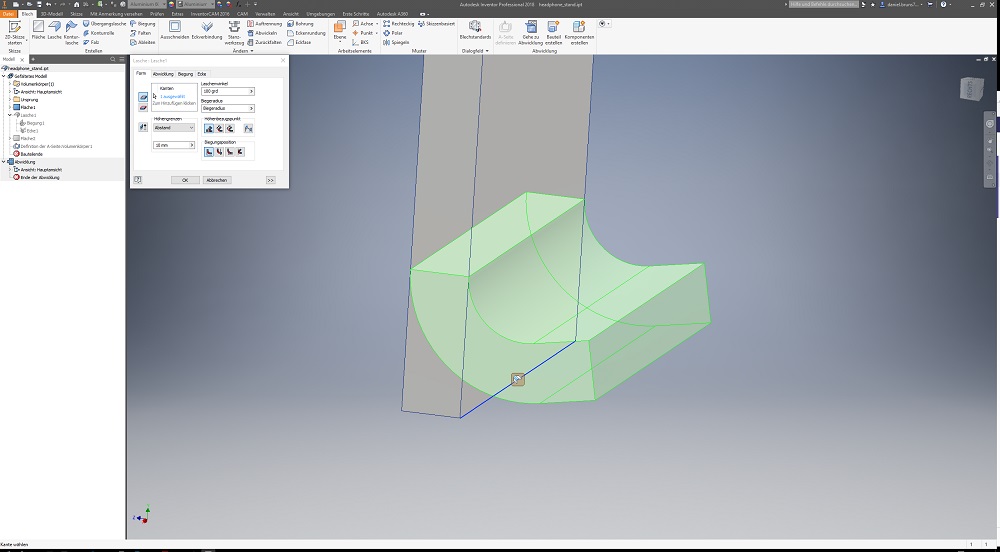
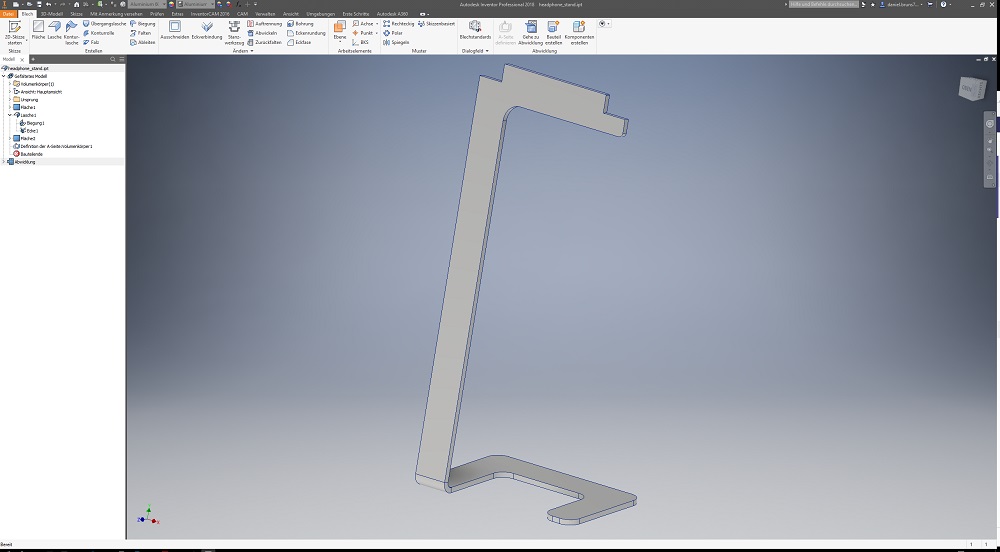
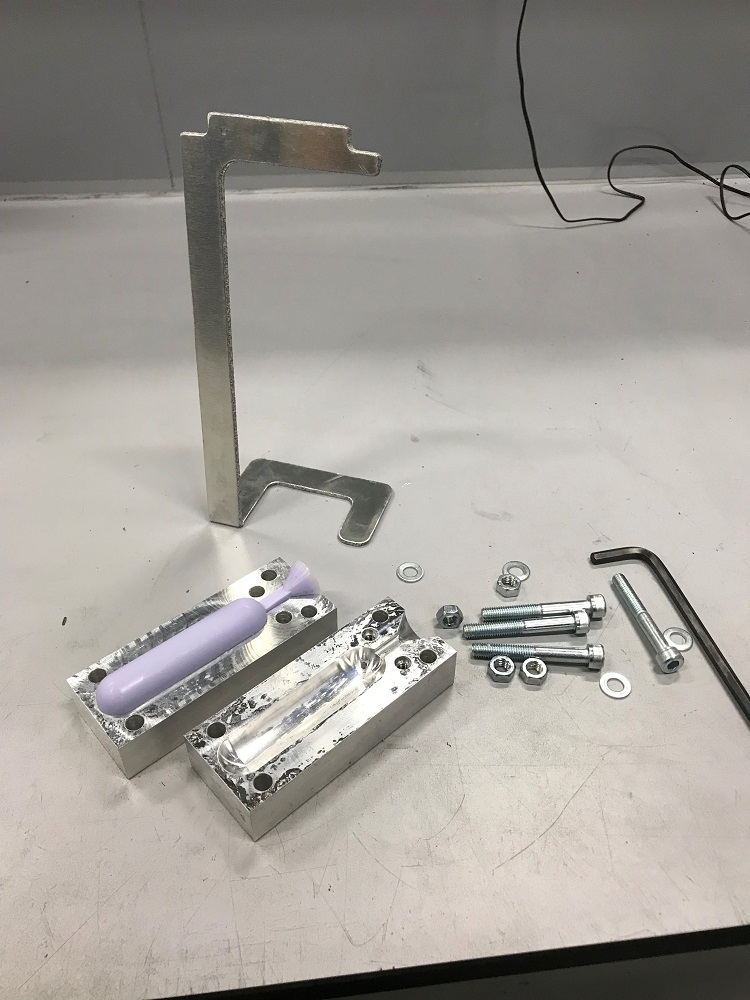
After drawing the first face, setting the needed flange type and values, you're able to connect the second face etc. . This is not tricky, as the steps: sketch, face and flange will repeat all the time. My idea was to produce a headphone stand, as my headphones are laying around all the time. I've done a simple but effective construction, where the center of gravity is nearly in the middle of my part. To avoid damage on my headphones, I made a rubber protector out of food-safe silicone, back in the moulding & casting week. This is my nasty aluminium stand...
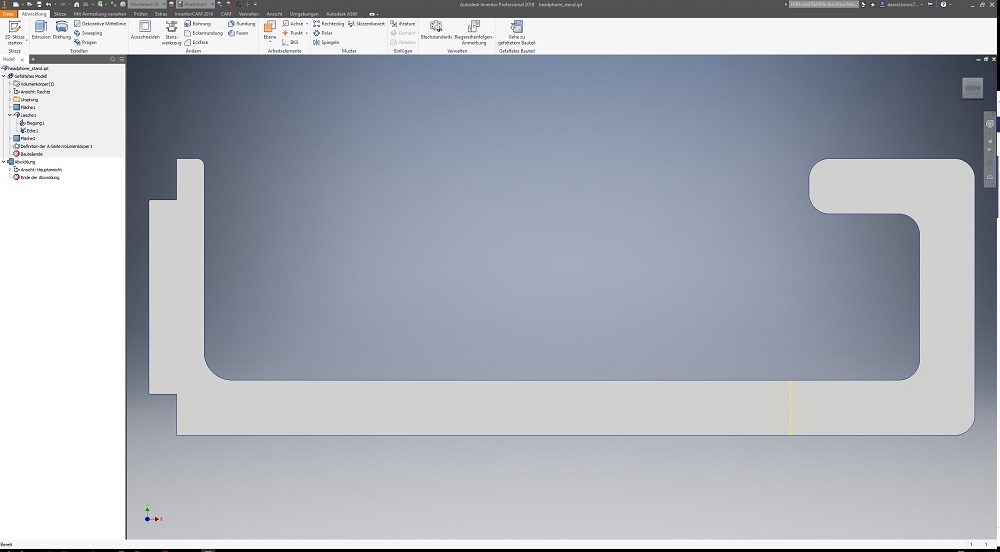
The next step was to export the file as DXF for the plasma. To get a foldable part with a proper a-side (upper side of your folding part), you have to change the model to the 'flat pattern' view. This view unfolds the whole parts, with included bending loss at the flanges. The small yellow line is showing the bending area.
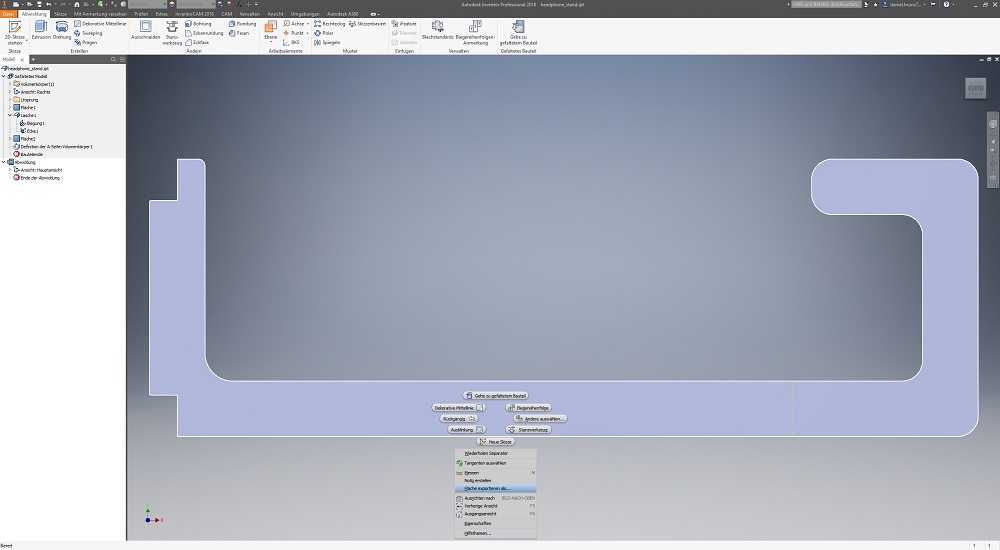
To export the file correctly, you have to export the face of the unfolded model as DXF. Inventor offers a really nice feature for this. Just do a right click on the a-side and select 'Export Face as..'. Before searching the way to export the drawing as DXF without effort, just try this way.
21
milling cutting the parts
This is our CNC-Plasma cutter, made out of a Hypertherm Powermax 45 and some Item profiles. The plasma cutter is equipped with a self made torch heigth controller and other neat features.
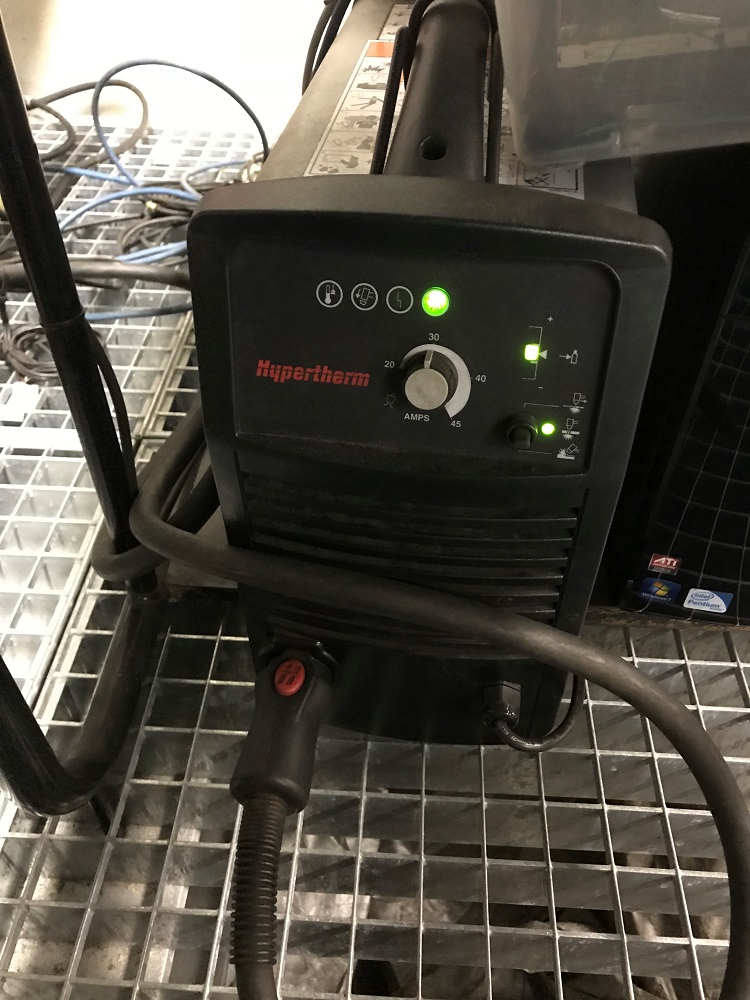
Starting the plasma, following the checklist:
-Start PC
-Switch on Hypertherm
-Switch on CNC Controller
-Switch on Torch automatic
-Start MACH3 CNC program
-Start SheetCAM CAM program
-Start Torch Height Control
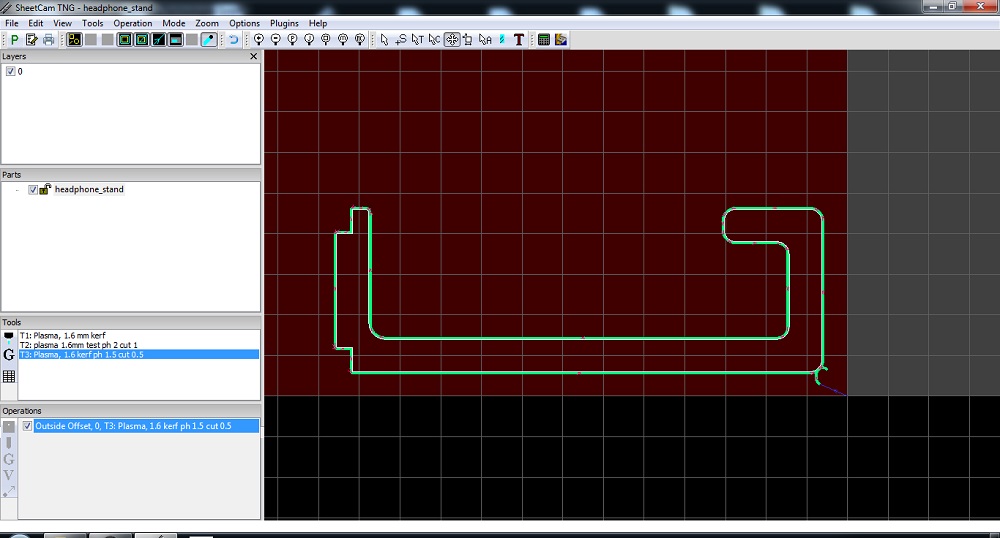
The first step is to generate the G-Code for the machine. The program is called SheetCAM, which is a very old but reliable program. The code generation for a plasma is not very difficult, as there are only 3-axis to control. Two of them are fixed with the G-Code, the 'Z' is also fixed but will be affected while cutting burning through the Torch Height Control.
SheetCAM is easy to use. First, load your DXF drawing.

You have to align your object on the cutting plane, where it should be. The last step is to use the outer and/or inner offset operation, to cut your parts properly. As my part does only have outline and no cuts inside, I just had to select 'outer offset'. Click on the postprocessor button and you'll get an overview of your toolpath. This file is ready for Mach3.
This is a picture of Mach3, a CNC controller program. Very old, but it works. You have to load the G-Code in Mach3 and press 'Reset' to turn off the energy saving state.
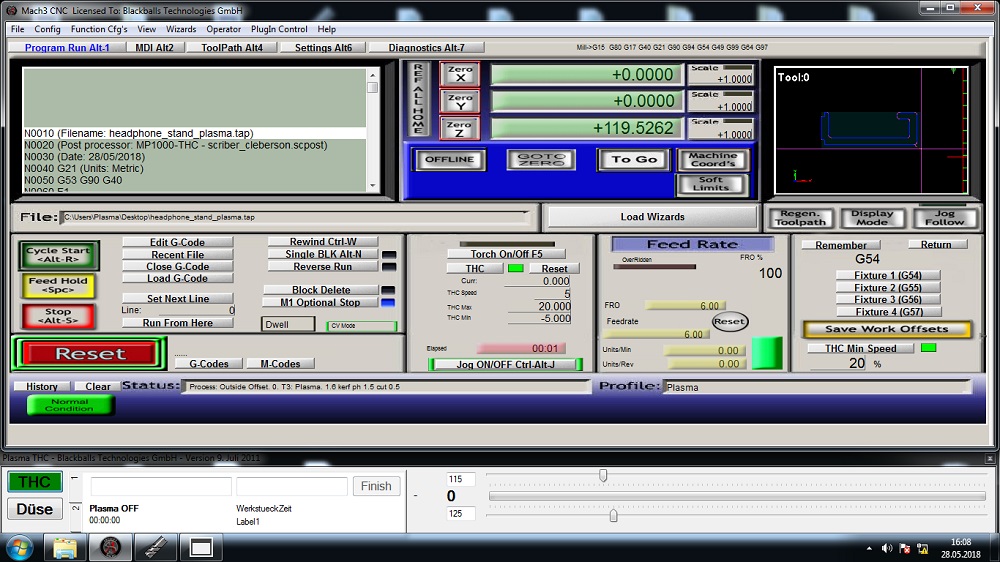
The next step is to put the sheet into the plasma, connect it to the ground and align the sheet to the spacers. The last step befor cutting is leveling the 'Z' axis. Move the 'Z' axis down via keyboard and set 'Z' to zero.
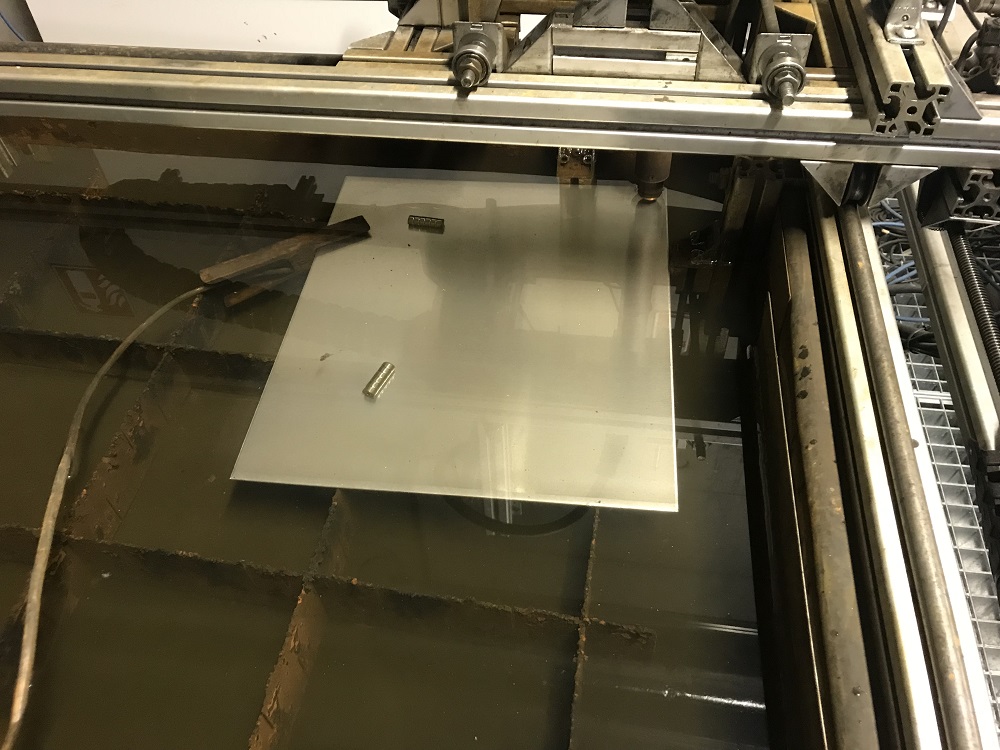
After aligning the sheet, it's cutting sizzling time.
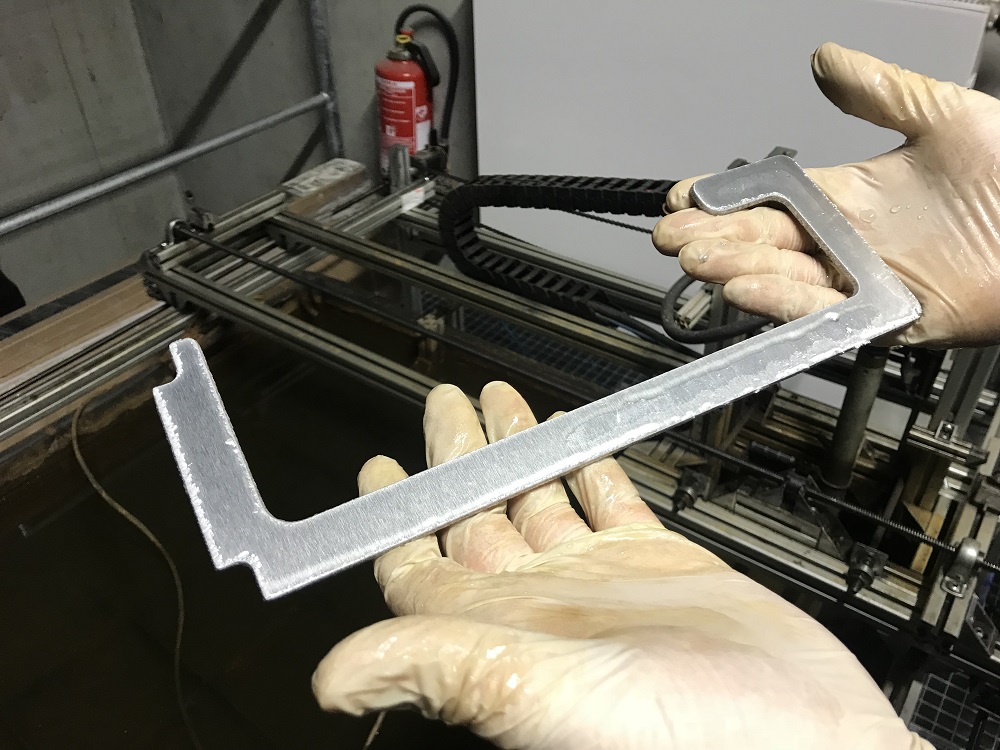
This is the cutted molten part, directly out of the machine.
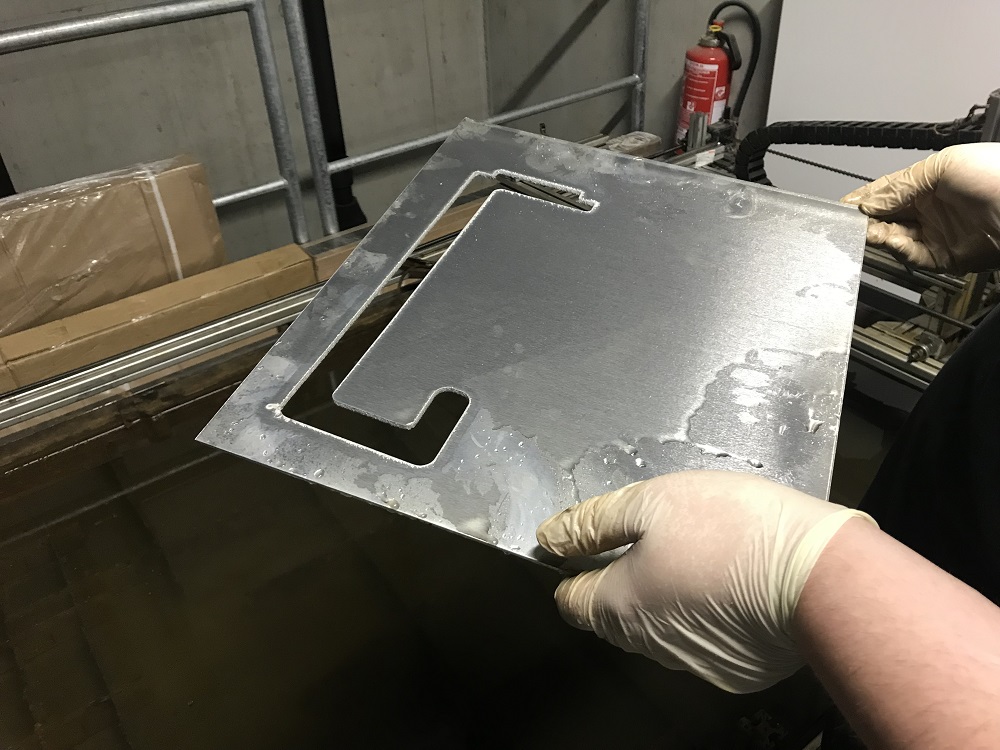
The rest of the aluminium sheet after cutting.
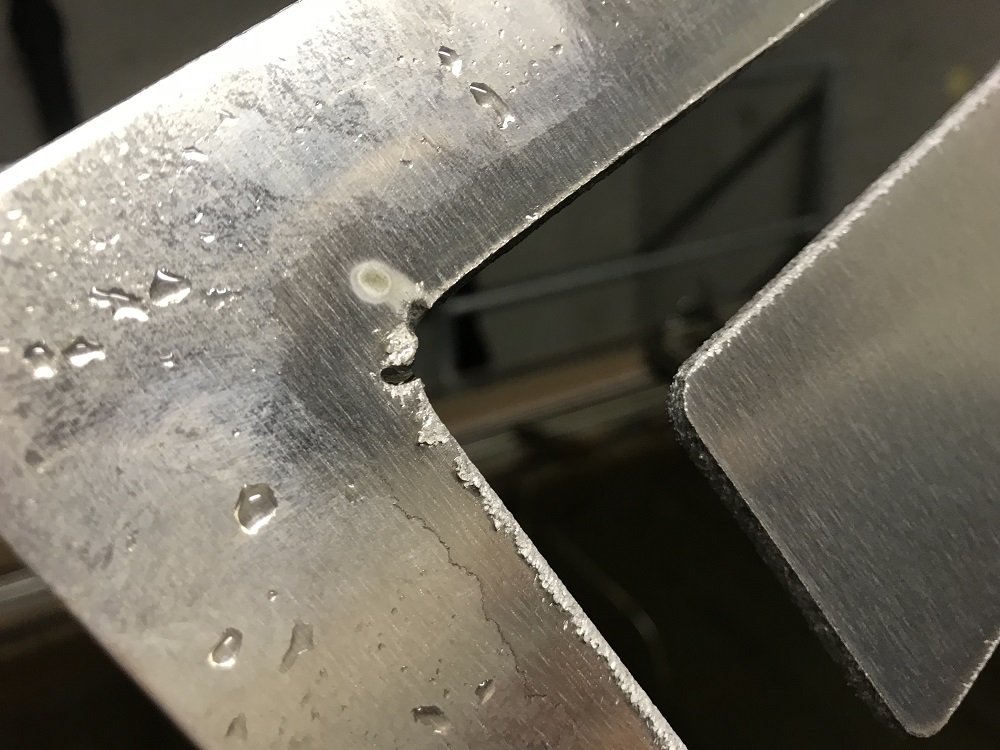
This is a very interesting photo. This is is the lead-in and lead-out of the outer-offset cut. The torch will be started some millimeters away from the outline and move tangential into the outline and after finishing the cut, tangential out of the outline, to achieve a clean cut.
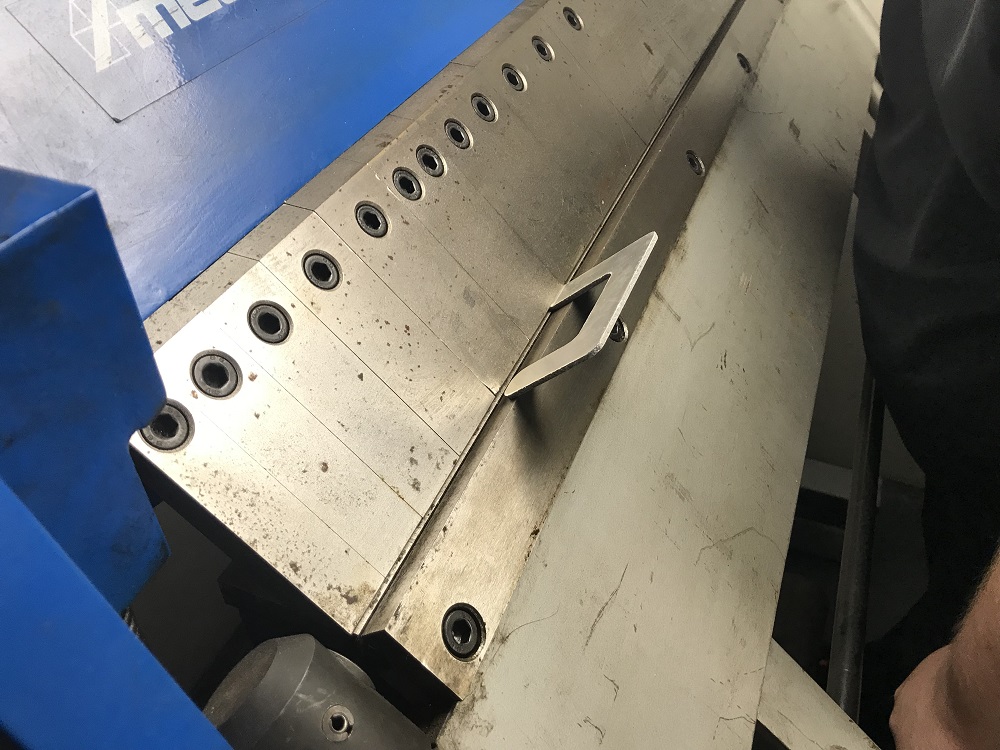
After deburring the stand, I had to bend the part in the bending bench, to adjust the center of gravity. My model has an flange angle of 100°. I clamped the part into the bench and bended it, until I reached the 100°.
22
Assembly
The assembly was quite simple, release the part out of the mould, cut the downsprue with an knife and put it on the headphone stand.
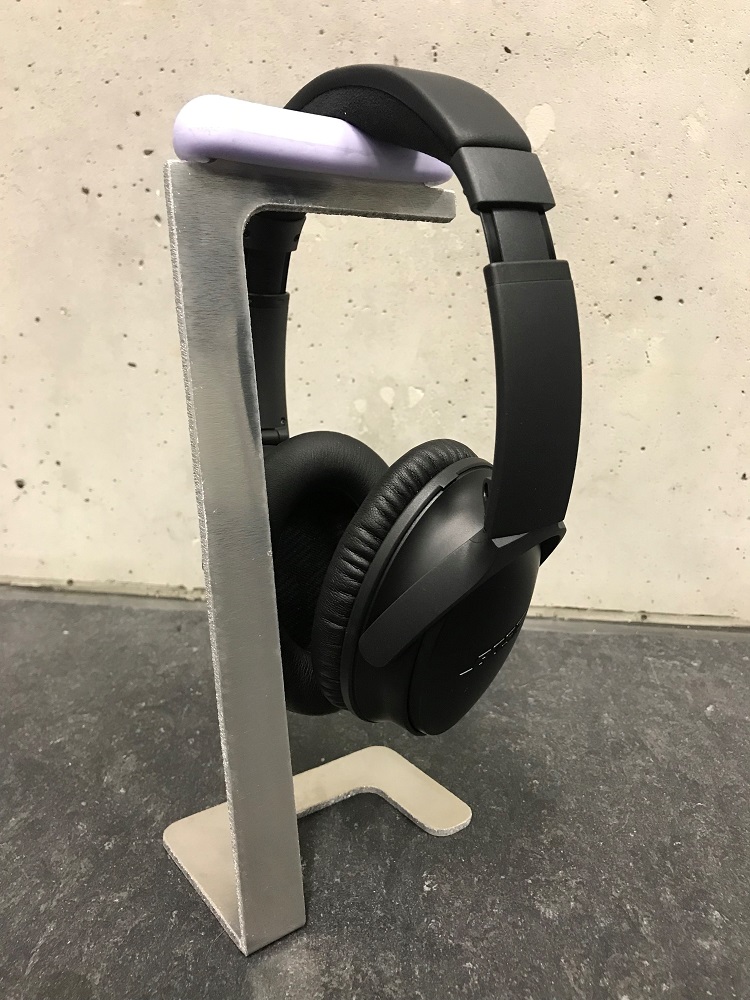
The hero shot of my headphone stand with proof of work. :)
23
Downloads
Headphone stand as .ipt
Headphone stand as .dxf
Plasma cutter job as .job
Plasma cutter G-Code as .tap

This work by Daniel Bruns is licensed under a Creative Commons Attribution-NonCommercial-ShareAlike 4.0 International License.