Portable Thermoelectric Generator
Have you ever been in a wild environment, with the need to contact someone, with radio or other communication device with dead battery and any chance to charge it?
My idea is to create a tool easy to handle, rasonably cheap, compact and usefull when traveling outdoor for charging, via USB, any electronic device.
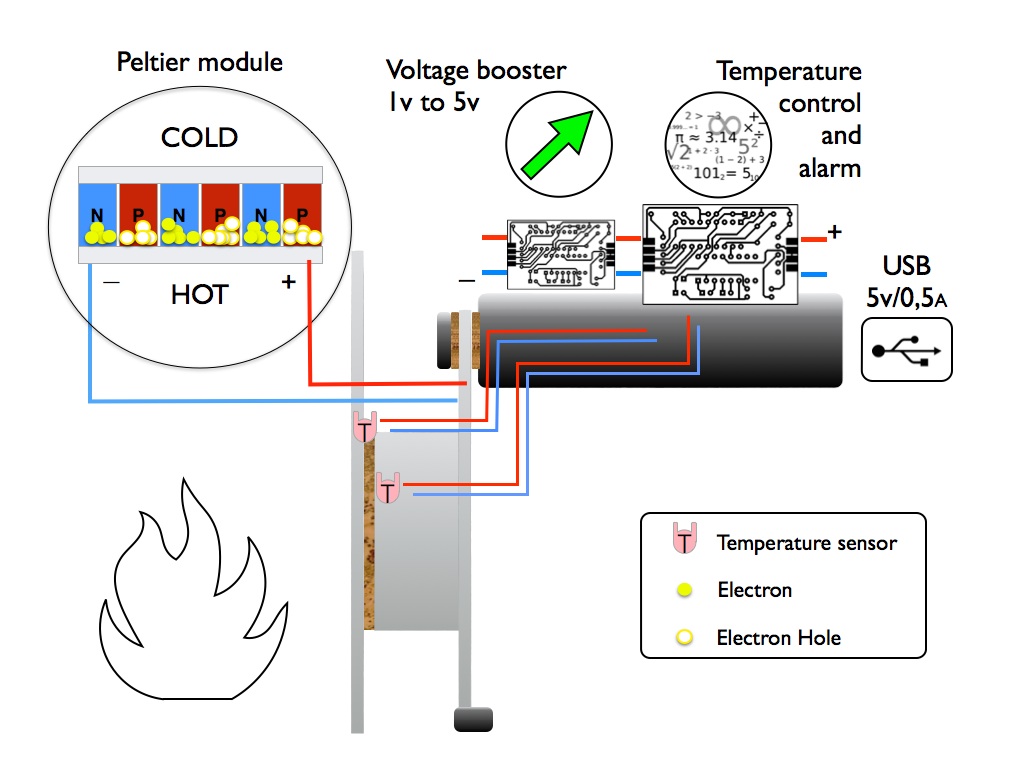
The power is generated with a Peltier cell. When a heat source is applyed to one of its sides and the other is kept cooled, this temperature difference genarates electricity.
 At the moment the price of TEG modules on market is pretty high so, for this exercise, I'm going to use a low level cell, with a lot less power then a 50$ cost medium one.
Components
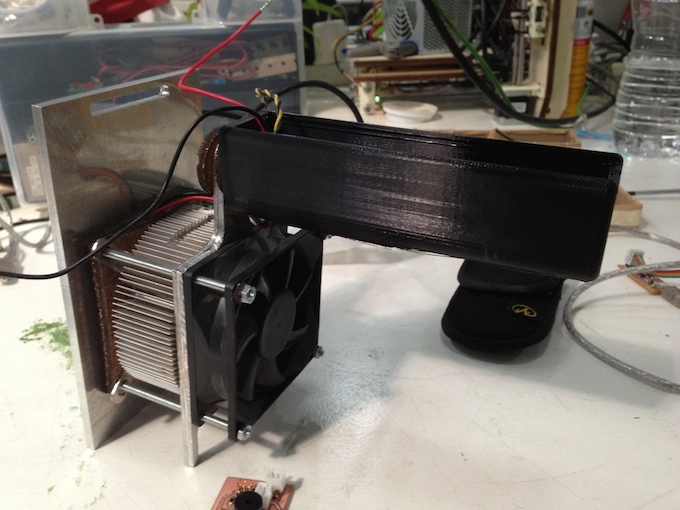
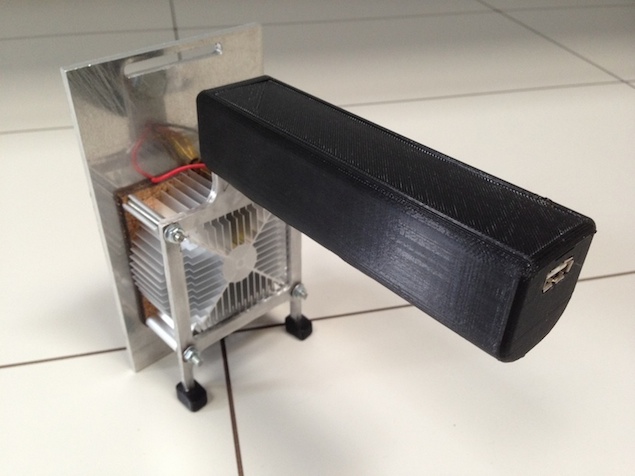
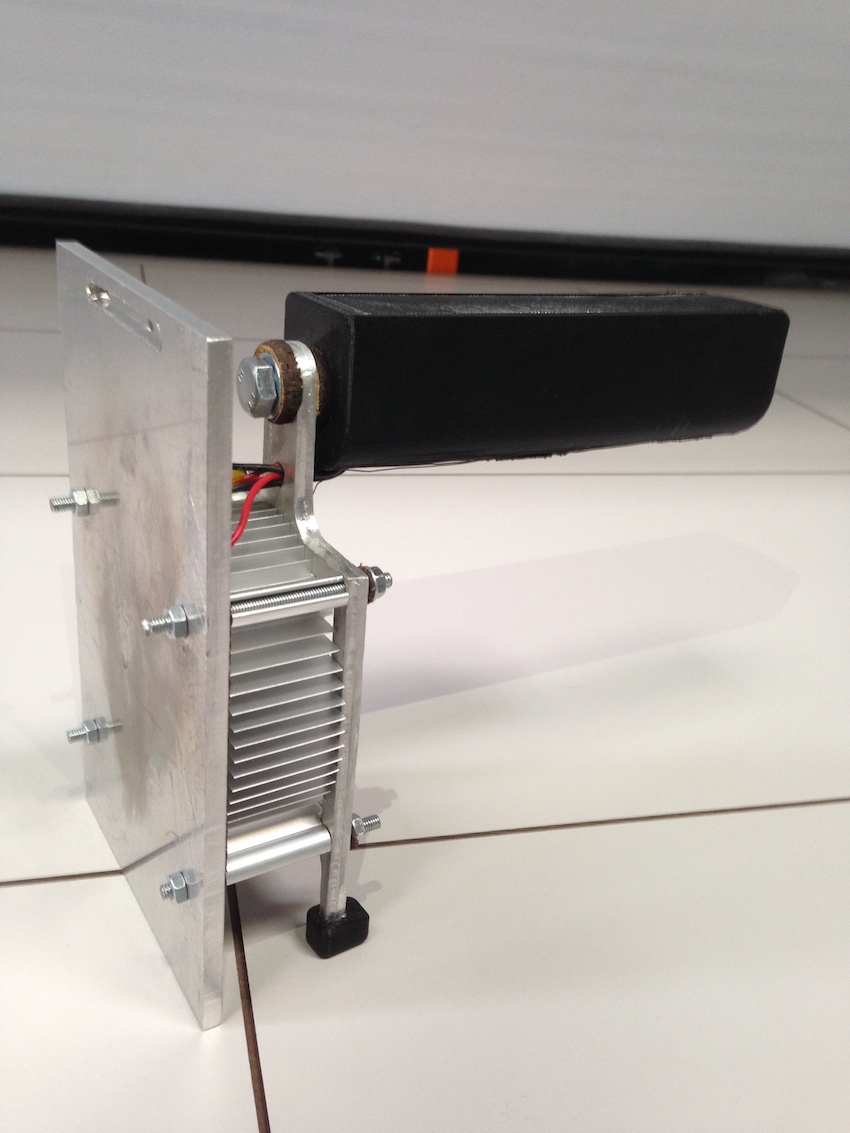
In order to properly work, the cell needs a metal plate facing the heat source (a protection against direct flames) and a dissipator on the other side. In between the two sides (and around the cell), it is mandatory to put a thermal insulator: I decided for a cork frame which is natural and cheap.
I used a recicled CPU heatsink for the cold side of the cell, relating all the design on the standard cpu cooling system of 80X80mm.
From an Aluminum plate I created both the front protective plate and the frame to be attached after the heatsink.
My goal is to make something easy to build.
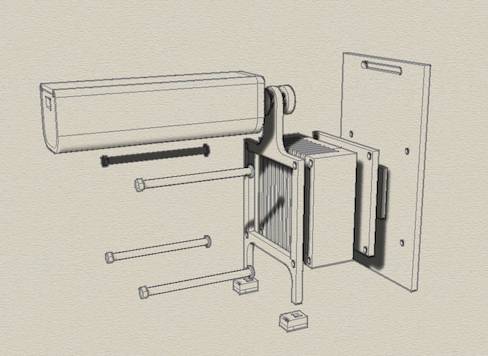 All the components infact, except the cell, will be assembled with just 4 screws at the frame which is on the opposite side, far from the hot source. On the top of the frame, also far from the heat, I designed an handle which hosts the electronic circuits and the USB Output socket (in future maybe also rechargable batteries).
Working on hardware
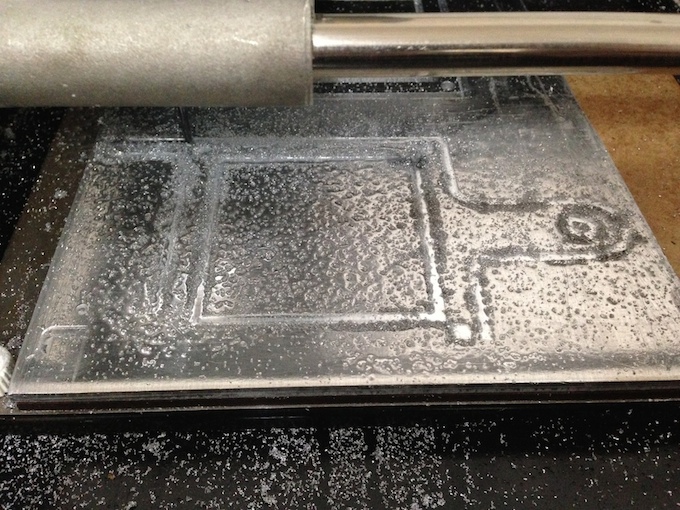
The 5mm tick aluminum plate is to be cutted using the Modela milling machine with a 1/8 tool with the 1/32 cut function. It is very slow (12 hours for each piece!!), but works fine.
Better if sprying some silicon based lubrificant when milling.
In order to prevent from excess effort, I setted the cut-dept variable at just 0.02mm. This is why it is so slow.
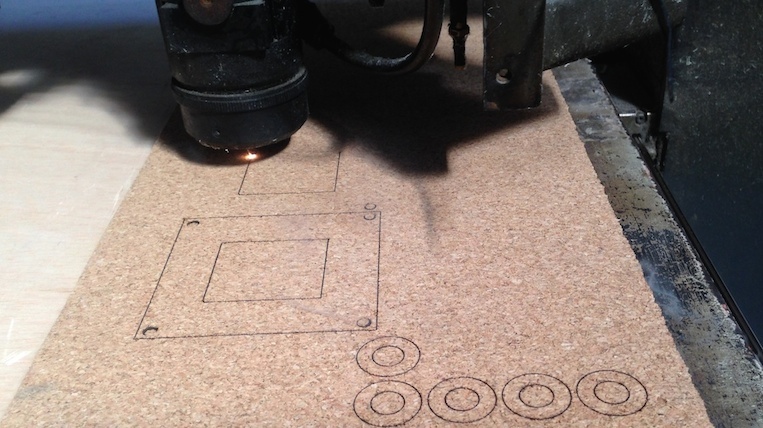
 For cutting the cork insulator frame and the rings for the screws, I used the laser cutter, which has to travel at 45% of speed and with a 165/400 of power. You can eventually smell why.
 The handle is to be printed in PLA plastic with 30% infill in order to face without any problem even 100°C temperature (just in case..)
Better to set some clearance between the body of the handle and its cap in order to let the second slide into the other gently.
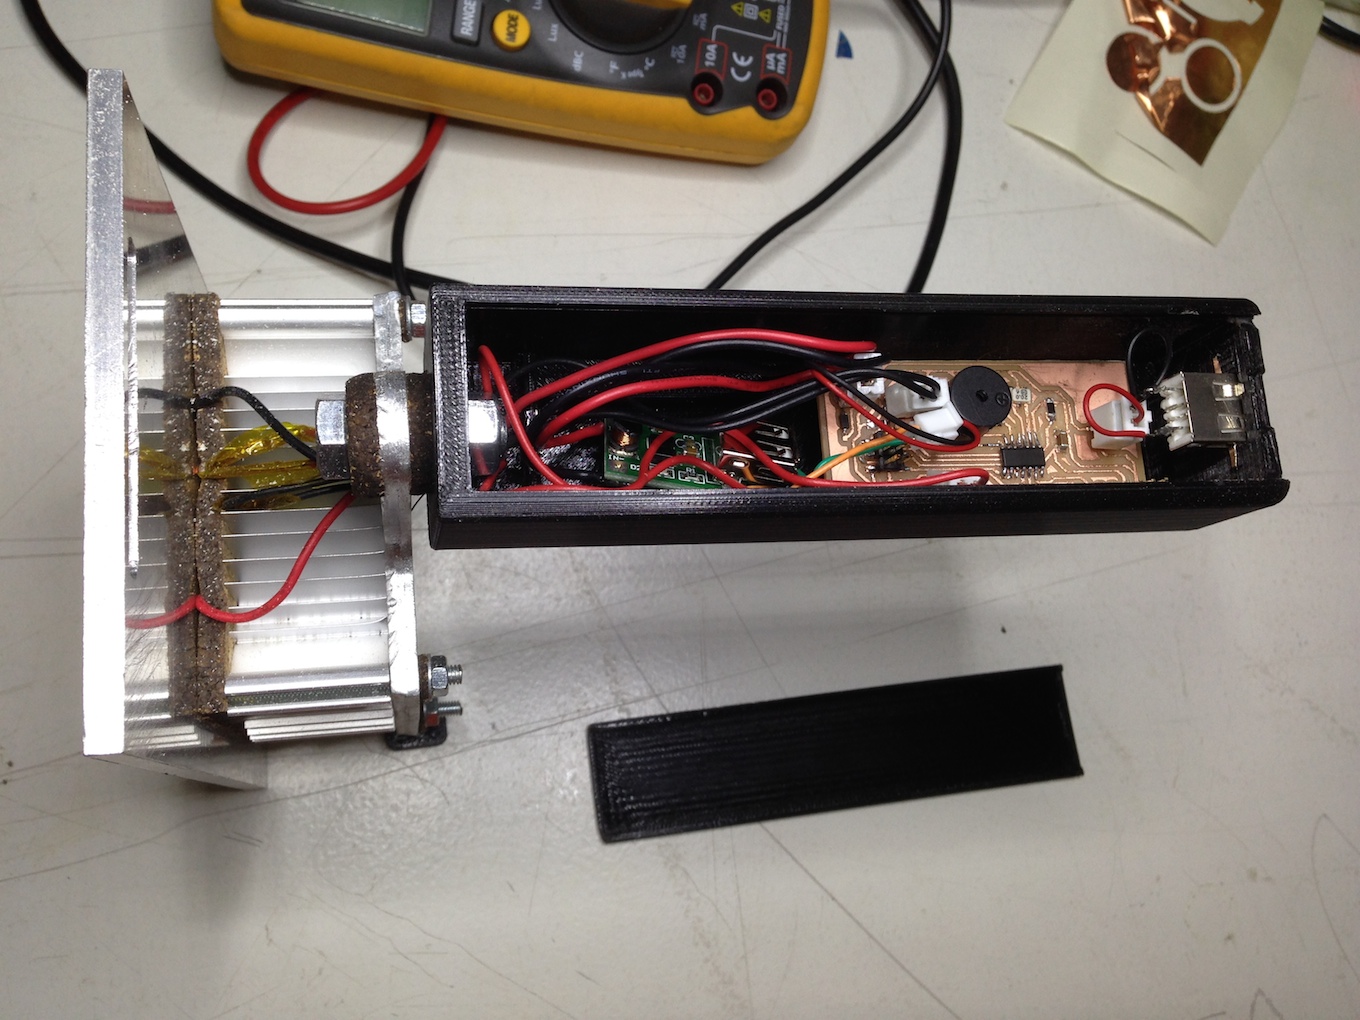
The hole on the bottom of the handle serves for the wires coming from the thermistors and the cell. In this way everything is compacted, ordinated and protected.
Electronics
Coming to electronics, my original plan was to provide the Generator with 2 temperature sensors (hot side and cold side of the cell), a piezo buzzer as alarm and a fan to boost the cooling job. As Output, a USB socket and 2 AA type NiMH batteries hidden in the handle.
As the Peltier cell at my disposition was going to generate no more then 2-3 watts, I decided to cut off the fan (usually its load at 7 volts is around 400mA) and for sure the battery recharging system with its proper circuit.
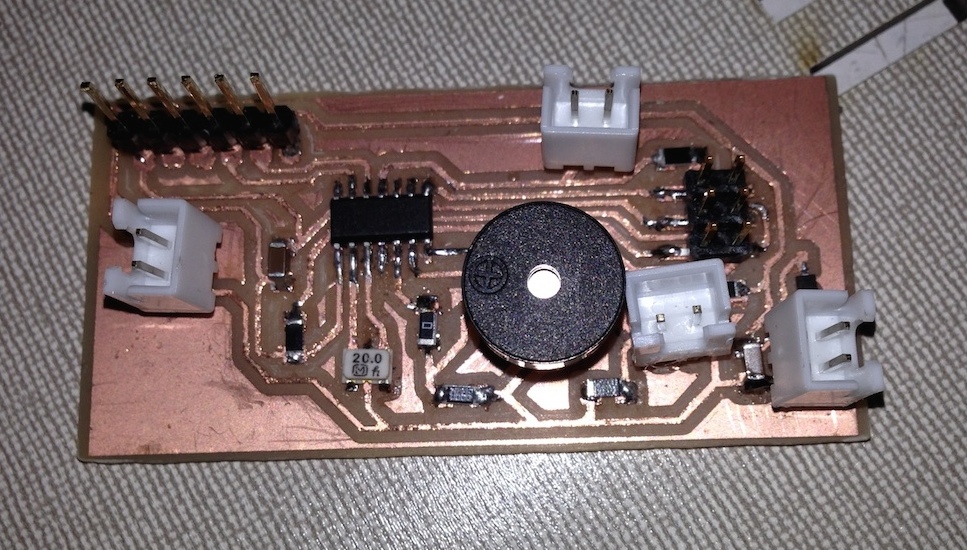
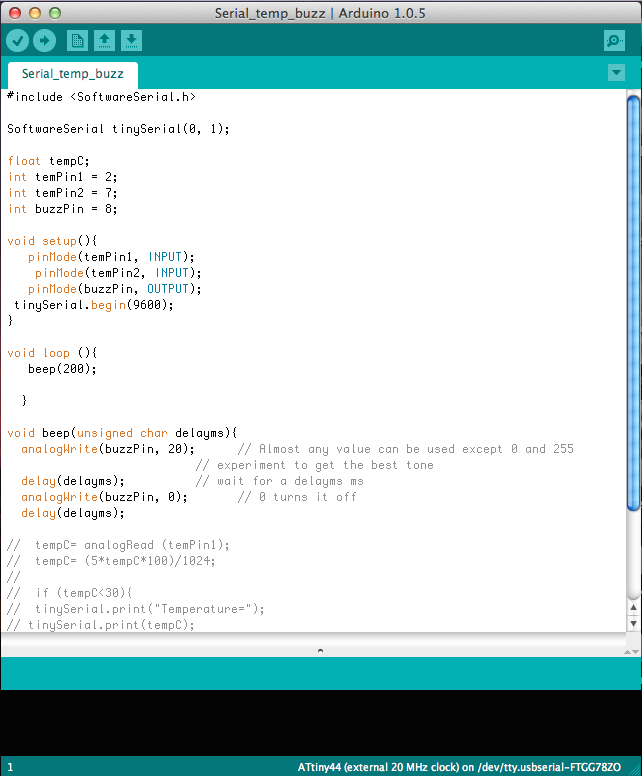
At the end the electronic equipment is made of a dc/dc booster 1 to 5v output and an echo hello-world Attiny 44 derived board connected with 2 NTC 10k glass resistors guaranteed @300°C.
First I designed the board with the Attiny44. On Eagle I also had to take care of the sizes in order to be coherent with the size of the handle.
As long as both this board and the USB socket work with 5v, the most important thing is to regulate the voltage IN which comes with a very variable 0,7 to 4v. To do that I have spent a lot of time searching for circuit schematics to do with processors provided from Fab Lab.
I have to say that nothing was going to be enough efficient for this job so I decided for a small and cheap commercial 1 to 5v converter.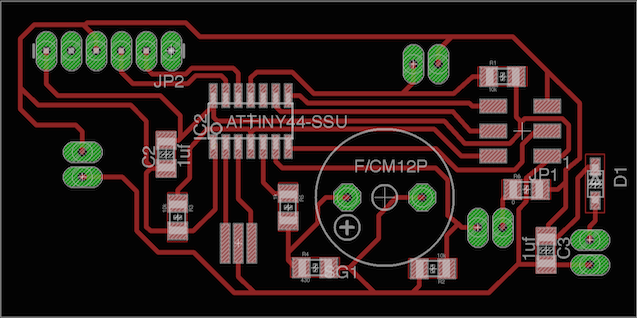
So I used 3 of the 4 pins of the Attiny44 available to connect the 2 thermistor with respective 10k resistor and the piezo buzzer. The thermistors are inserted through the cork around the cell and connected with clip terminals on the board. The piezo instead is normally placed on the board.
Arduino coding
Thanks to the enormous library on the web concerning thermistor usage, it has not been so difficult to set the 2 thermistor in relation with the piezo: the concept is that if the hot sensor reaches 150°C (safe limit for this type of cell), the piezo produces a beep alarm. If the other sensor, on the cold side, reaches 35°C, the piezo will produce a slower beeping.
The only triky thing is to convert the voltage signal coming from the sensor into Celsius degrees.
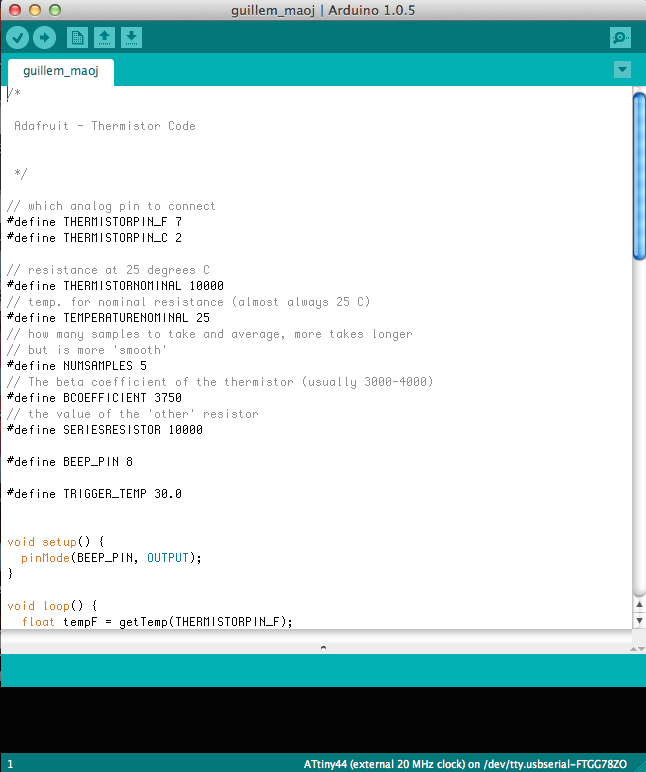
I've been helped from my electronic specialized tutor Guillem to achieve that.
In the biginning I've used the serial communication to read the datas from the board. Unfortunately the 44 cpu has not enough memory inside to host the tiny serial library so, once setted the logic among input and output, I erased the serial functions and loaded the code on the board. Next time I'll use an Attiny84.
Costs
As I said, I've been trying to recycle the most of the thing as a direction I want to follow in my personal production.
For this reason the only expensive component is the Peltier cell.
Corck: 2 euro;
P Corck: 2 euro;
Peltier cell: 17,99 euro;
Pla (0,60 euro x 57cmq @ infill 30%): 13,77 euro;
screws: 1,5 euro;
Attiny44: 2,75 euro;
resistor 10k x3: 0,30 euro;
resistor 1k: 0,10 euro;
resistor 430 Homs: 0,10 euro;
resistor 0 Homs: 0,10 euro;
diode: 0,40 euro;
terminal x4: 4,80 euro;
capacito 1uf x2: 0,2 euro;
6 pin male header: 0,40 euro;
bolt: 0,5 euro;
resonator 20mHz: 0,20 euro;
thermistor ntc 10k x2: 2,22 euro;
dc/dc booster: 4,99 euro;
Total (with tax21%) 63,30 euro
Future upgrades
I'm planning to improve the features of the generator providing it first of all with a 20 watts TEG module. this higher power allows other easy and efficient upgrades as a liquid cooled heatsink in order to maximize the Delta T. As I've been watching, I'll provide it with a thicker insulation frame hopefully always with cork. The boards will have 2 voltage outputs, at 5v for cpu and USb, a 12v for the fan and the batteries, maybe Lithium ones. Mechanically, I'll think about a folding handle to make it more compact.
Test
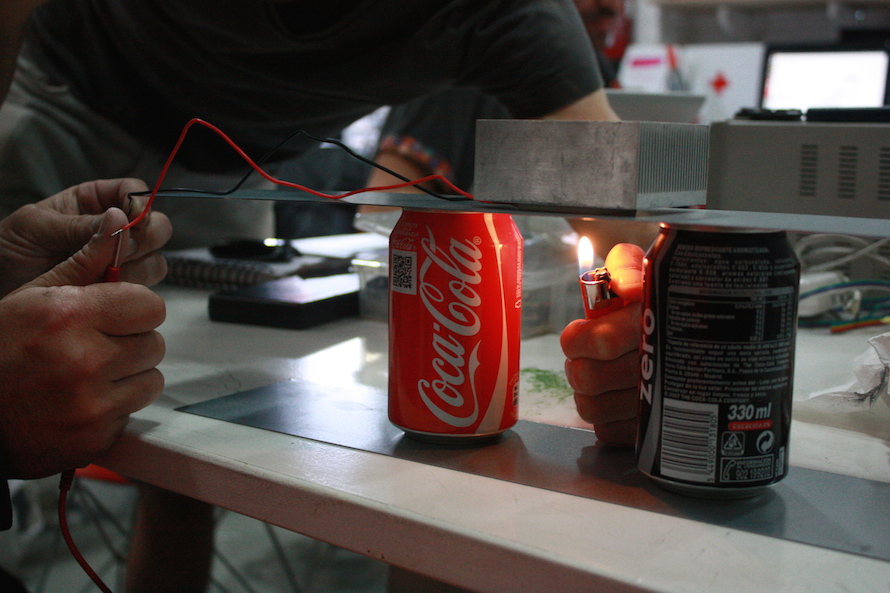
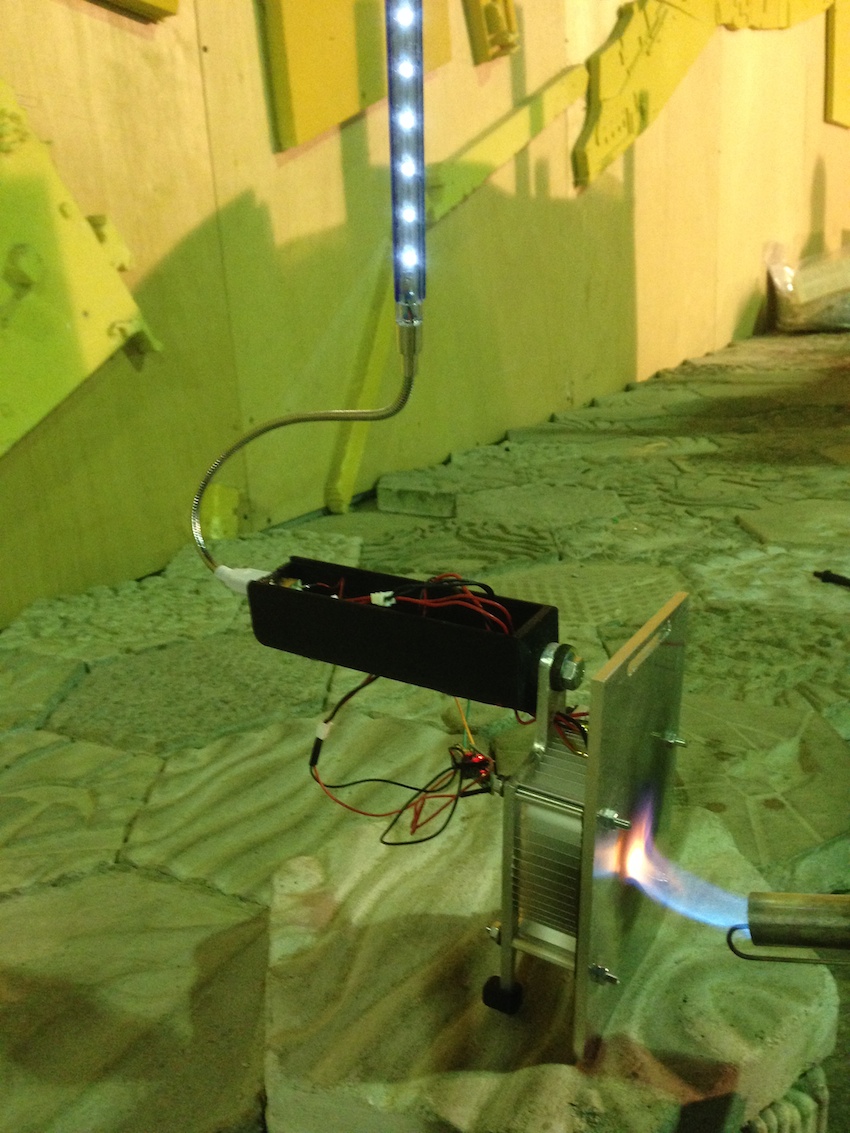
I made a test using a hand held gas torch and immediately the USB multi LED light switched on. The experiment did go ahead for few minutes and as you can see in this
VIDEO, all the cables, sensors, were disconnected at the moment.
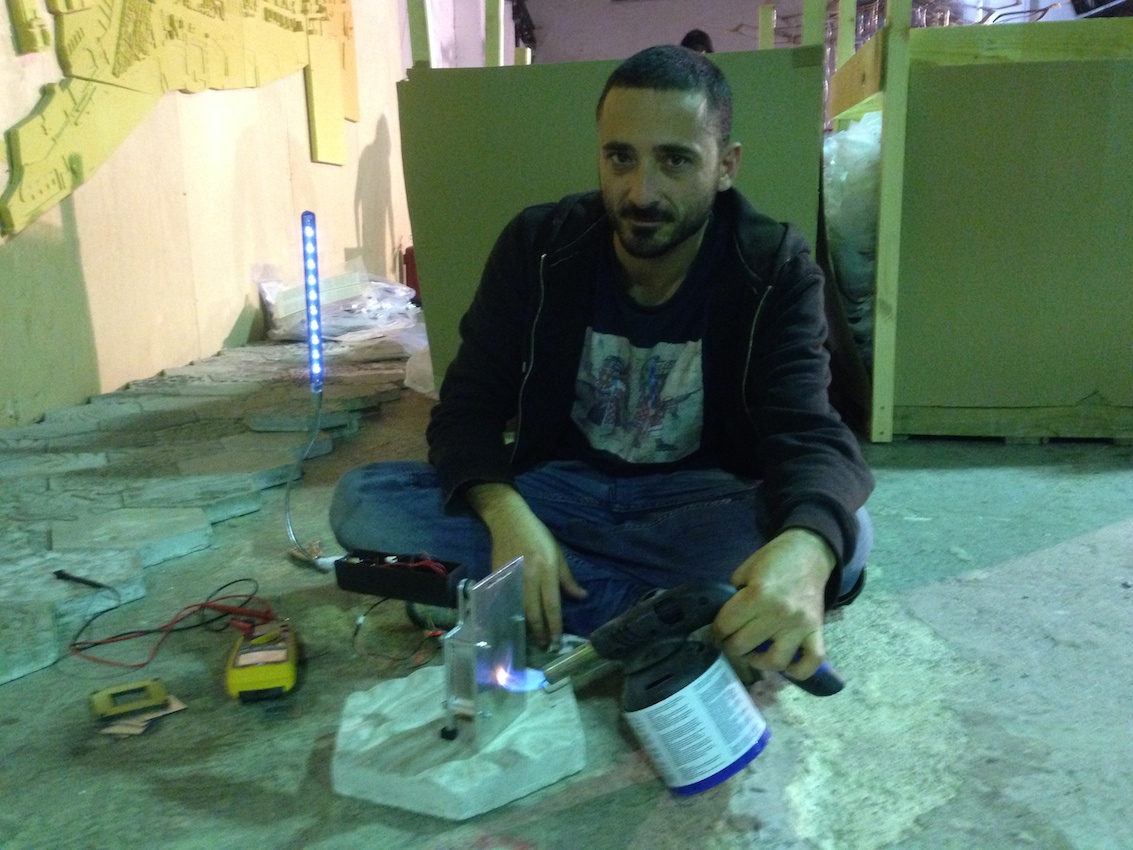 As I were in a closed space, also quite hot, after a while the heatsink side started to heat up too much, erasing a lot of power which is due to the temperature difference.
The day after I discovered that the Peltier cell had been damaged from the test. Fortunately the electronics work fine.
Next test with another module.