
About the targeted mold
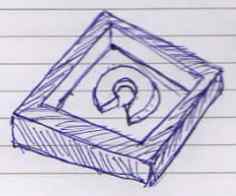 |
A positive mold. A positive mold has an extruded part, exactly looking like the object being aimed at for casting. But the real sized extruded object, is just a subset of this mold. |
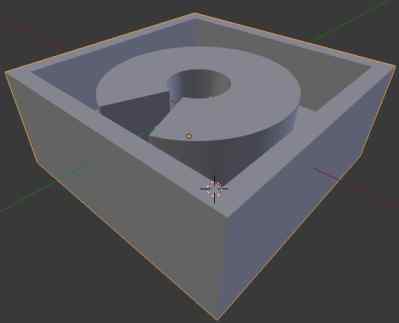 |
Final output using blender, in reference with imagined mold, above. |
The first diagram above shows the mold being taken as example. The digram below that is final ouput from blender, which is 3D Printable
as well as "ready to be milled" Model.
The outer and deep space in the targetted mold, allows an extra space to the fabricator to take out the molding material,
hence the negative mold at the end of Molding Process.
In this note we are aiming to make a 3D model for this
mold, eventually looking like the second image above.
It is clear from the image that this mold (hence its 3D Model) is going to have atleast 2 distincts parts.
1) The aimed Object
2) The Deep Platform
Interesting question is how to create the Object? However, let me start with the platform with depth, as acc/to my experience this
was the crucial part.
After adding in the the plane, it is time to extrude it, in order to make it thick enough to get realised. That makes us talk about dimensions!
By default blender is set for "No Dimensions". Meaning, one can design the models, thick or thin, but can not say precisely, how much thick
or thin. And it is desired that talks in terms of real time dimensions (mm, cm, m, inch etc..)
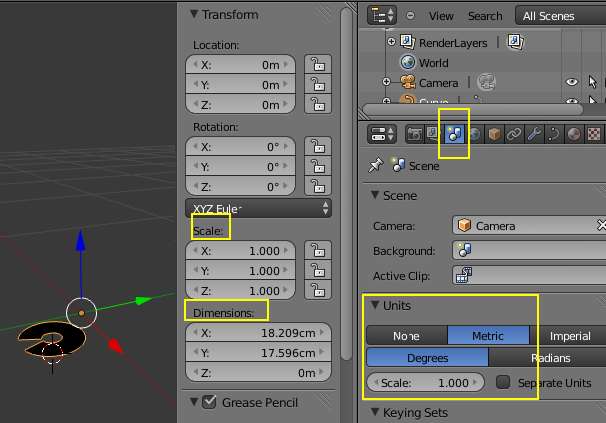
| Set blender environment As the task here is to design an object that is going to take shape in real life, Blender now has to talk in terms of realisable Units. By default blender is set for Blender units (BU). 1 BU = 1 M. This can be verified by changing the Unit settings, as shown in the image. Scene -> Units -> Metric. To change this to mm, the scale will have to be changed to 0.001 as 1 corresponds to Meter. At this point it is also logical to set the scale to 1. To do this press ctrl A ans click on scale. Note* Let us ignore the black roundish plane in the image. |
 |
Let us prepare the Deep Platform now, step by step.
Move on to Blender Basics - Part 1 Part 2 Part 4 Part 5