Embedded Programming
Assignment
read a microcontroller data sheet
program your board to do something, with as many different programming languages and programming environments as possible
Arduino: Program Button + LED Board
The first thing I did was download the Arduino software (version 1.0.4) to edit the firmware and upload it to the Button + Led Board. This board I made during the Electronics Design.
Here are the Arduino installation instructions.
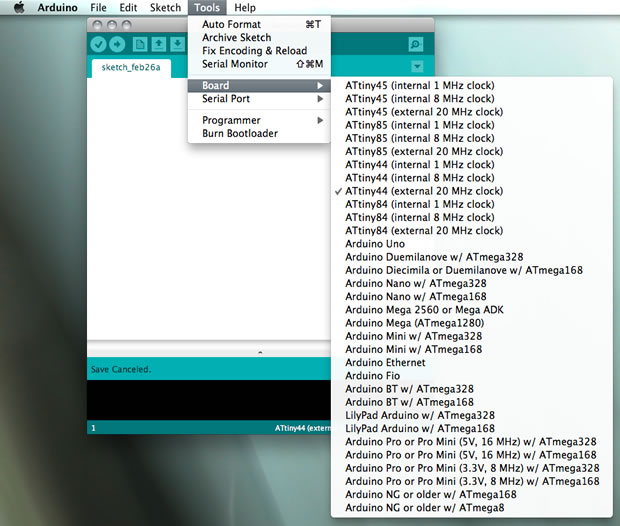
I need to Install the Attiny.zip extra support in Arduino. Steps to configure this:
- Unzip.
- Locate your Arduino sketchbook folder:
- In the Arduino software > "Arduino" menu > preferences
- Navigate to your sketchbook folder.
- Create a new sub-folder called "hardware" in the sketchbook folder.
- Copy the attiny folder extracted from the zip archive to the hardware folder.
- Restart the Arduino IDE.
- You should see ATtiny entries in the Tools > Board menu.
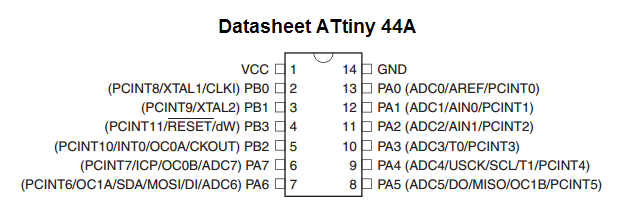
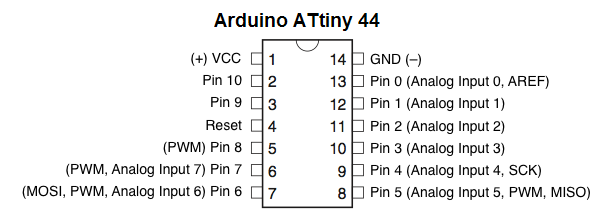
ATtiny 44A Microcontroller Pin-Out
The first problem I found was that I didn't know identify from the Arduino software the pin number to edit the mode of config, input,output,pwm,analog,etc. The pin numbers of the microcontroller are labeled in the Arduino code.
ATtiny 44A vs. Arduino Pin-Out Numbering
ATtiny 44A
Pin NumberCorresponding Arduino
Pin NumberDetails 1 No number, no access? VCC (+) 2 Pin 10 3 Pin 9 4 No number, no access? Reset 5 Pin 8 PWM 6 Pin 7 PWM, Analog Input 7 7 Pin 6 MOSI, PWM, Analog Input 6 8 Pin 5 Analog Input 5, PWM, MISO 9 Pin 4 Analog Input 4, SCK 10 Pin 3 Analog Input 3 11 Pin 2 Analog Input 2 12 Pin 1 Analog Input 1 13 Pin 0 Analog Input 0, AREF 14 No number, no access? GND (-)
Here is the link to the full ATtiny 44A datasheet
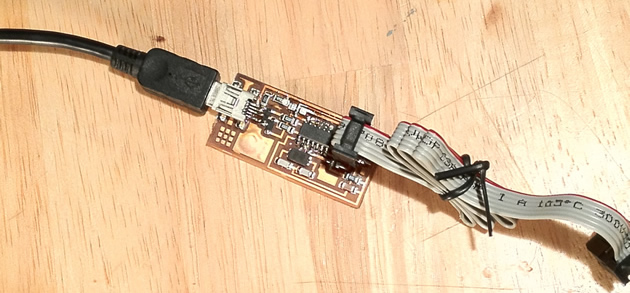
I need a programmer to upload the firmware to the Button+Led Board, the FabISP ,we made in last class.
Power and Connect the Boards
- I'll need to provide power to the ATtiny and connect it to your programmer (FabISP).
- That is, connecting MISO, MOSI, SCK, RESET, VCC, and GND of the programmer to the corresponding pins on the ATtiny.
- Connect the programmer to the ISP header on the LED + Button board
- You will also need to power the LED + Button board with an FTDI cable.
- Configuring the ATtiny to run at 20 MHz
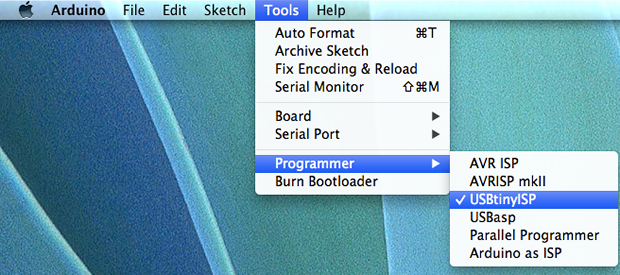
- Select the programmerUSBtinyISP
- Select the appropriate item from the Tools > Board menu (leave the serial port set to that of your Arduino board).
- Select the appropriate item from the Tools > Programmer menu > USBtinyISP.
Program the ATtiny
- Power your boards .Make sure your board is plugged into the computer via the FTDI cable and that your FabISP is connected to the 6 pin programming header on the Hello Button + LED board.
- To upload the sketch to your code board - select the arrow button in the Arduino IDE (shown below) You should see "Done uploading." in the Arduino software and no error messages.
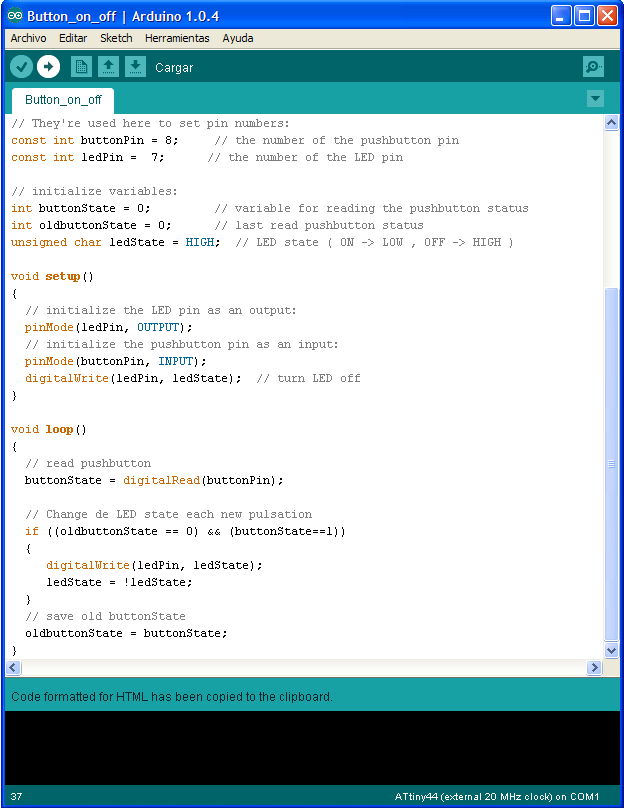
Code Example
Here is a code example with lots of comments for explanation of what is happening in the code. Download the code example. (or just cut and paste the code below)/* // Change de LED state each new pulsation of pushbutton The circuit: * LED attached from pin 7 to VCC * Pushbutton attached to pin 8 from +5V Created 2013 By Rubén Saguar */ // constants won't change. // They're used here to set pin numbers: const int buttonPin = 8; // the number of the pushbutton pin const int ledPin = 7; // the number of the LED pin // initialize variables: int buttonState = 0; // variable for reading the pushbutton status int oldbuttonState = 0; // last read pushbutton status unsigned char ledState = HIGH; // LED state ( ON -> LOW , OFF -> HIGH ) void setup() { // initialize the LED pin as an output: pinMode(ledPin, OUTPUT); // initialize the pushbutton pin as an input: pinMode(buttonPin, INPUT); digitalWrite(ledPin, ledState); // turn LED off } void loop() { // read pushbutton buttonState = digitalRead(buttonPin); // Change de LED state each new pulsation if ((oldbuttonState == 0) && (buttonState==1)) { digitalWrite(ledPin, ledState); ledState = !ledState; } // save old buttonState oldbuttonState = buttonState; }Initially the LED is off. When I press the button , the LED turn on. Pressing the button a second time, the LED turn off.