WEEK 8
08. Computer-Controlled Machining
I was waiting for this week since the beginning of the Academy. I love to design furnitures but I never dealt with a CNC based project. I started watching this inspirational video, which I find beautiful, posted in the class' email by our classmate Prof. Patricio Ortiz Silva.
Design
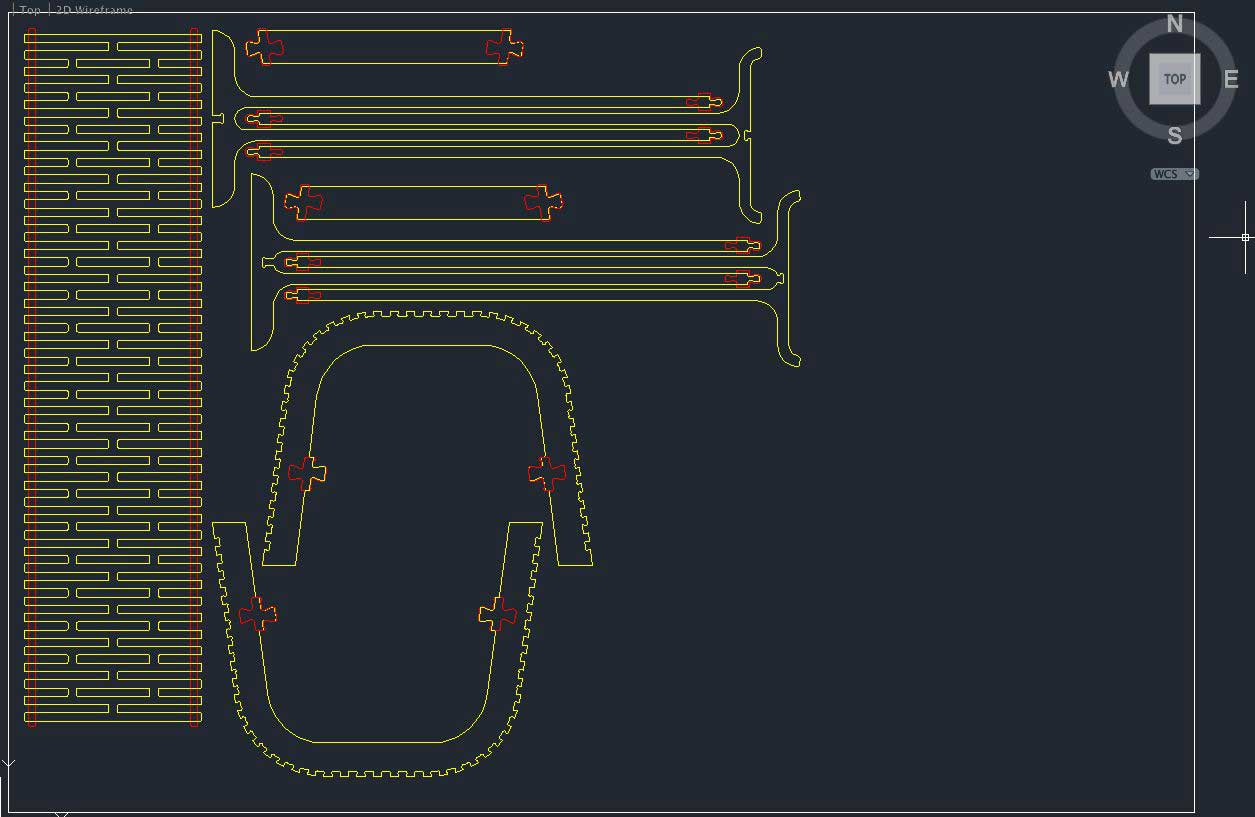
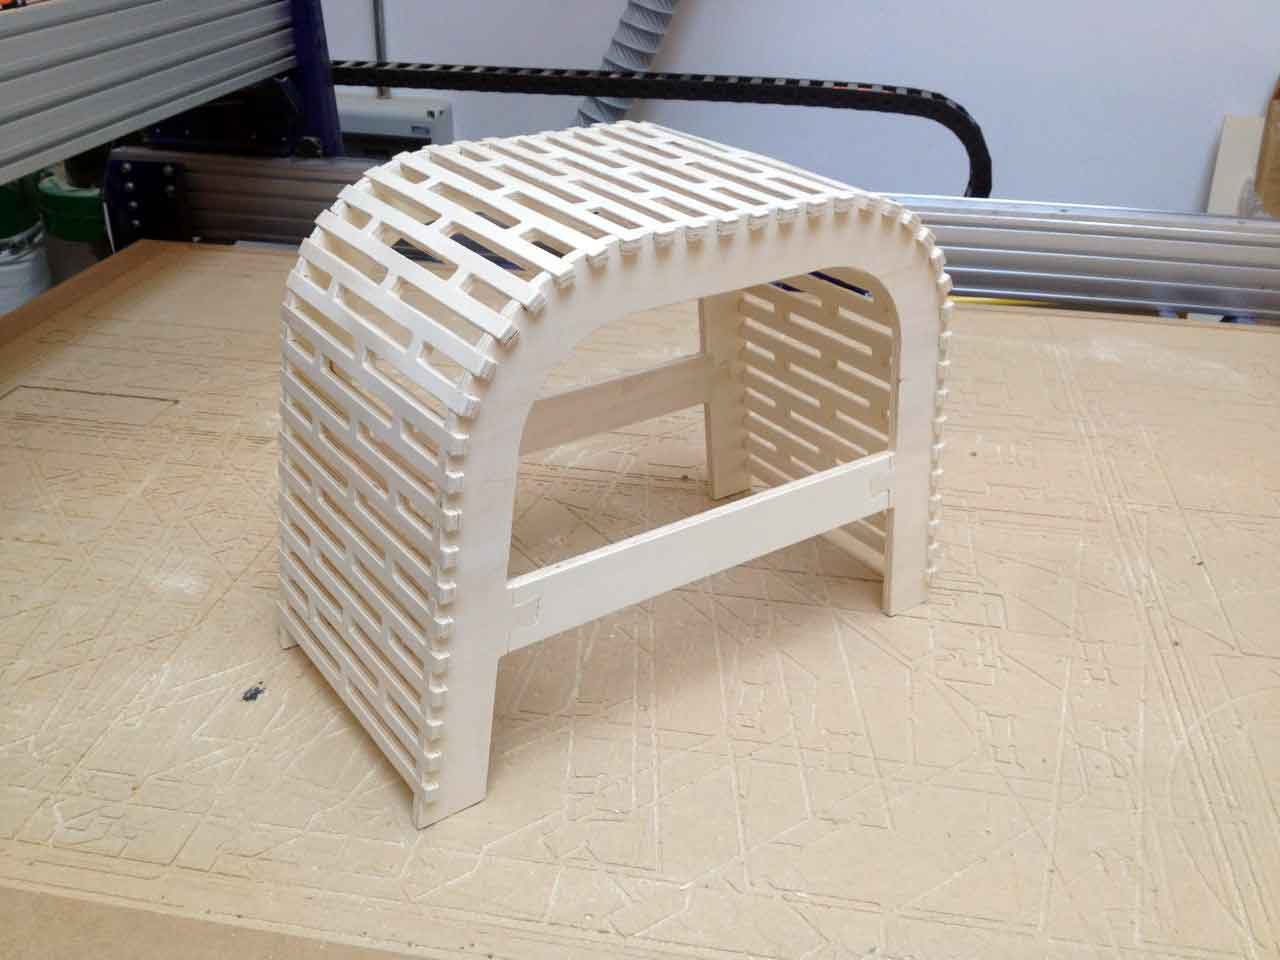
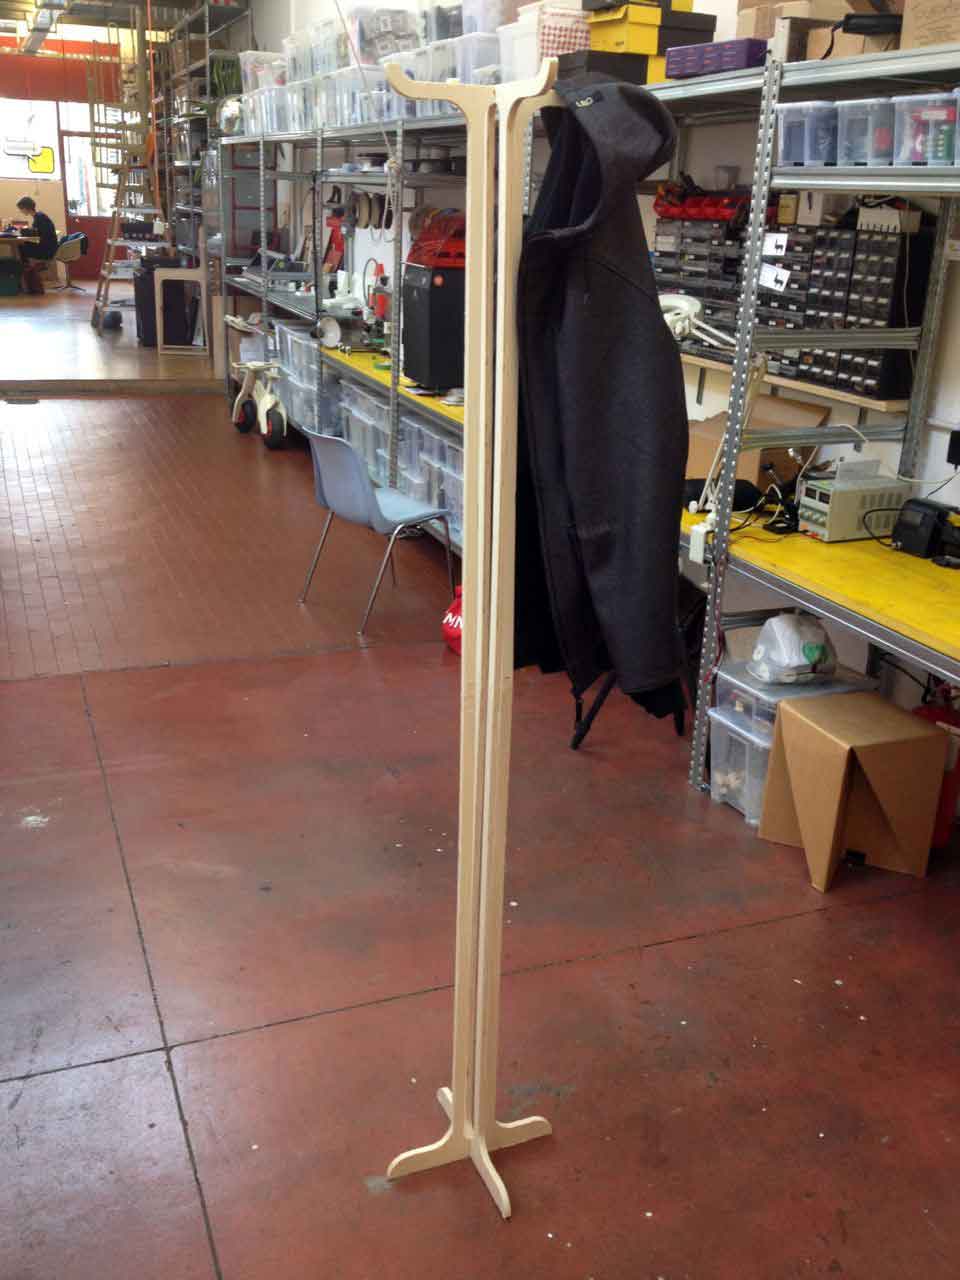
To begin the design process I examined the material we had available: a 2100 by 1450 by 12 mm board of cheap poplar plywood, low quality. I then had to find a need I had to fulfill, and noticed that in my apartment in Milan I had nothing to sit on in the bathroom, neither do I had something to hang a coat in the living room. One bathroom stool and a coat hanger please!
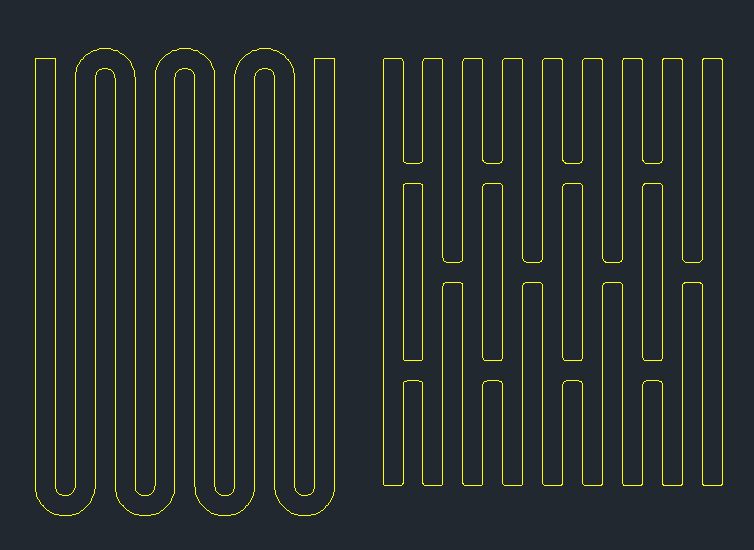
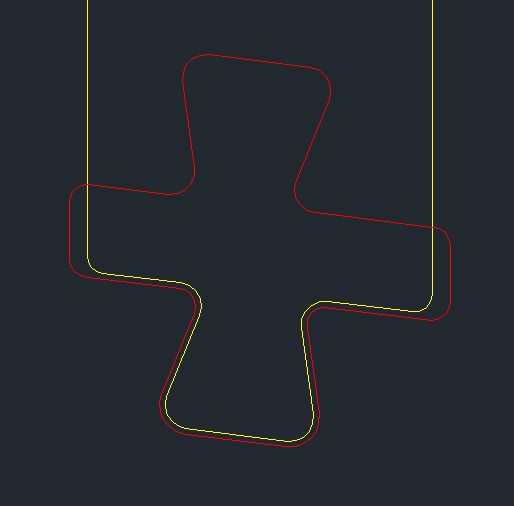
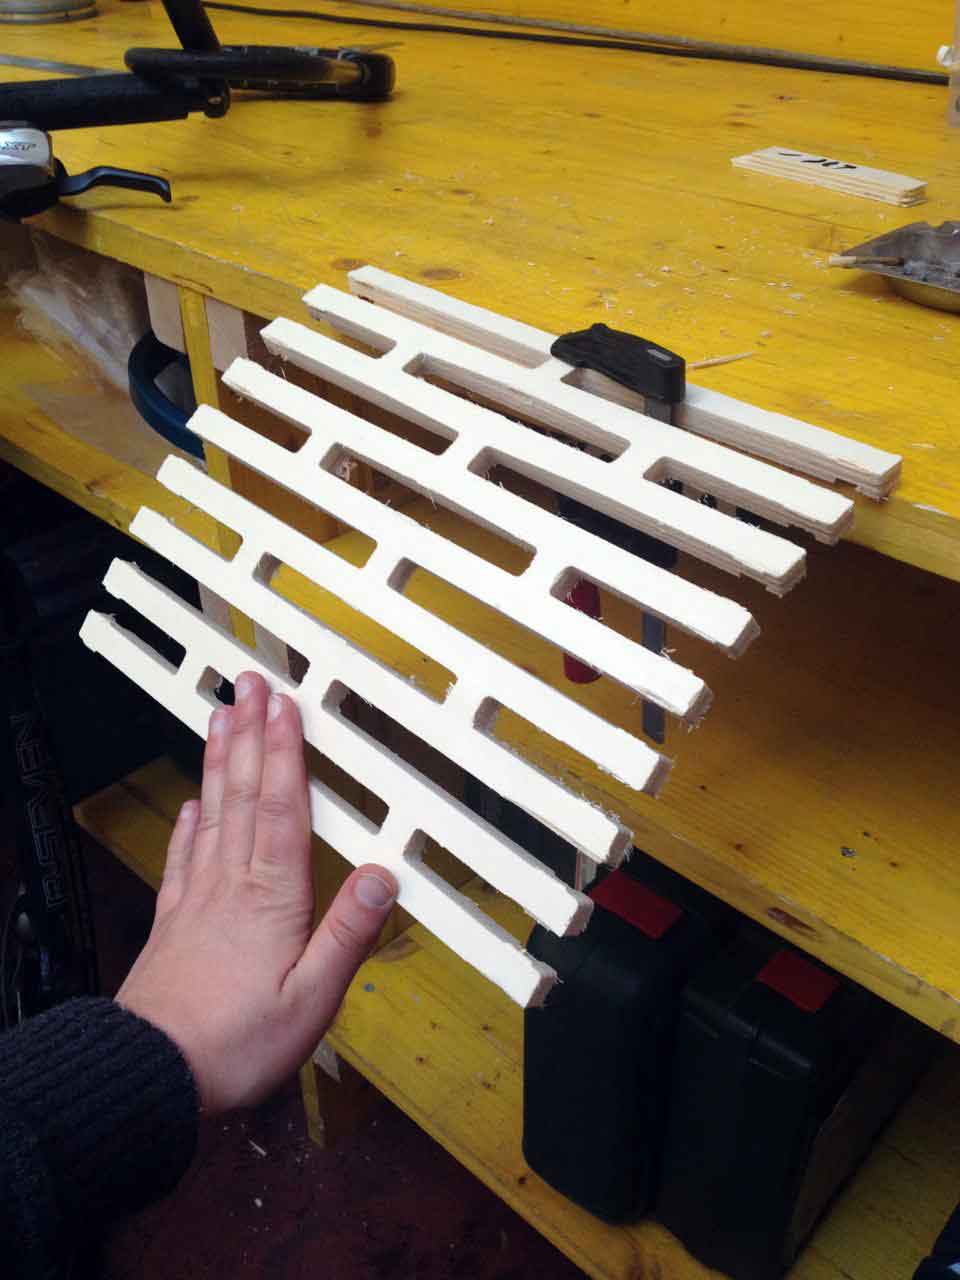
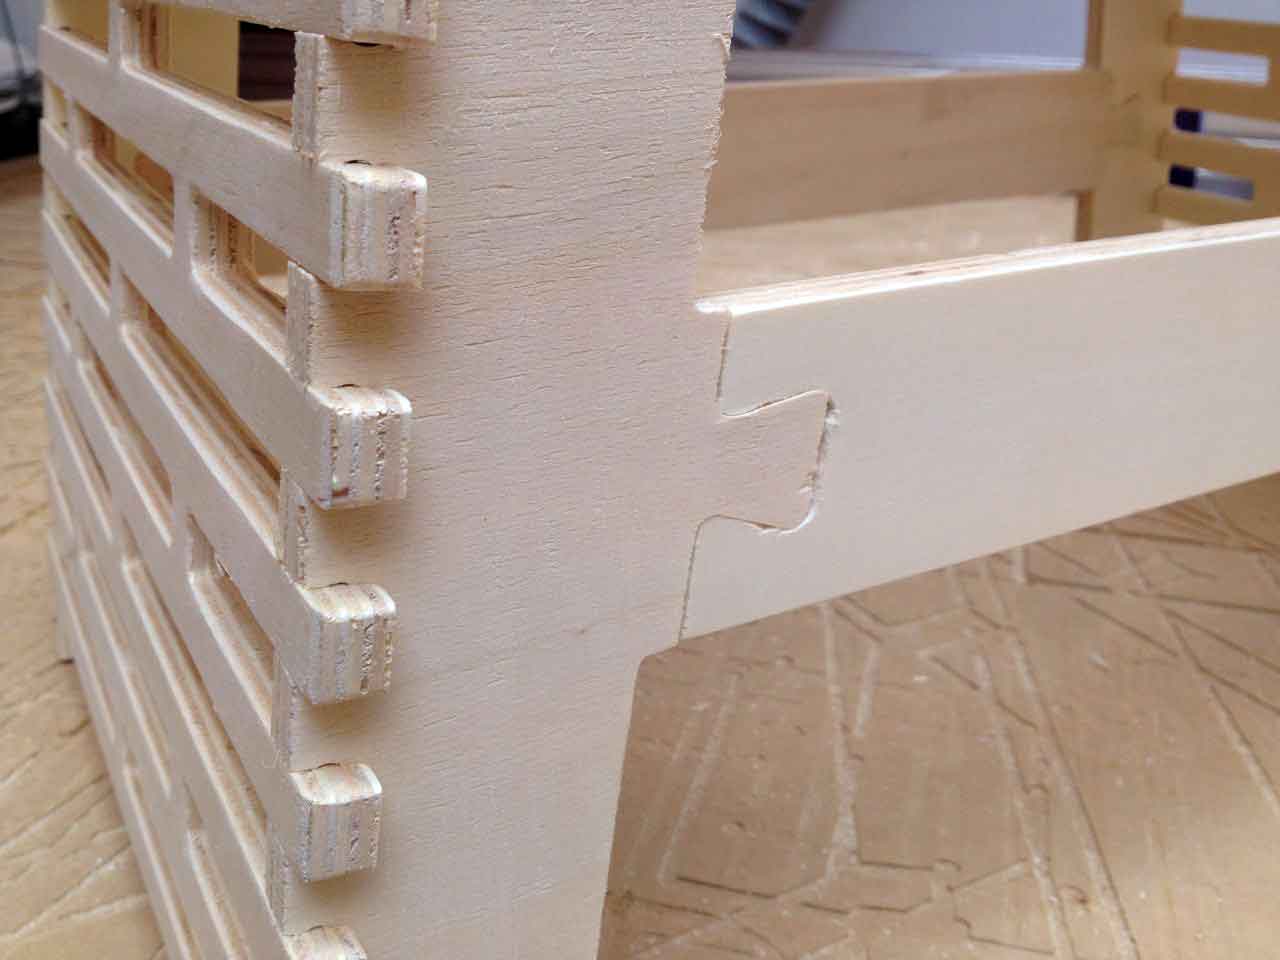
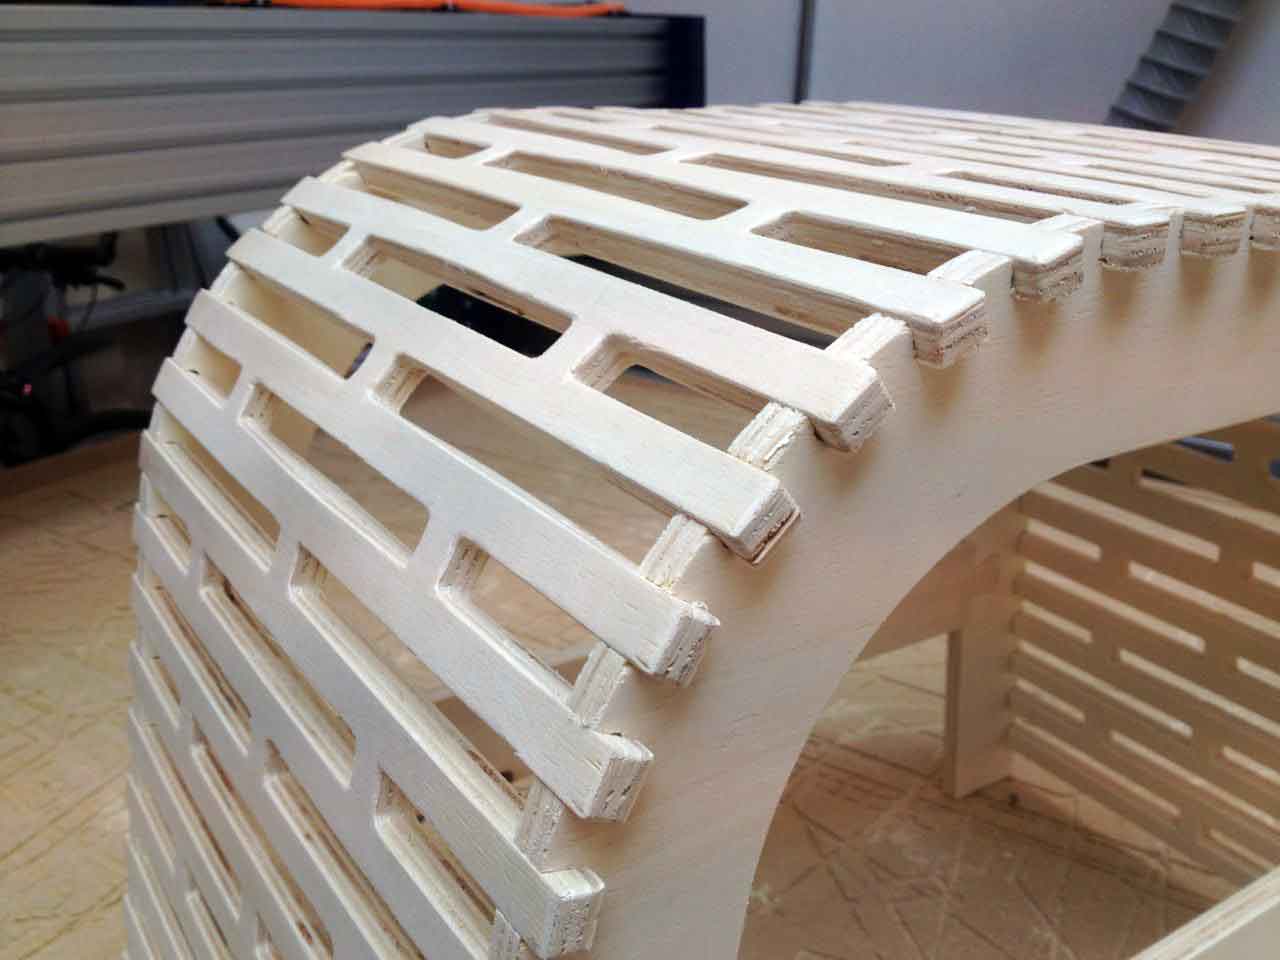
I knew I wanted to try a curved shape with a living hinge sistem. At first I designed a pattern made of one long snake-like line, then a standard pattern which later were both machined and tested. I also included in the design this joint system which I found on this useful collection. It is a Symmetrical Double Dovetail based on the Japanese "Ryo-men-ari-tsugi"
Stress tests
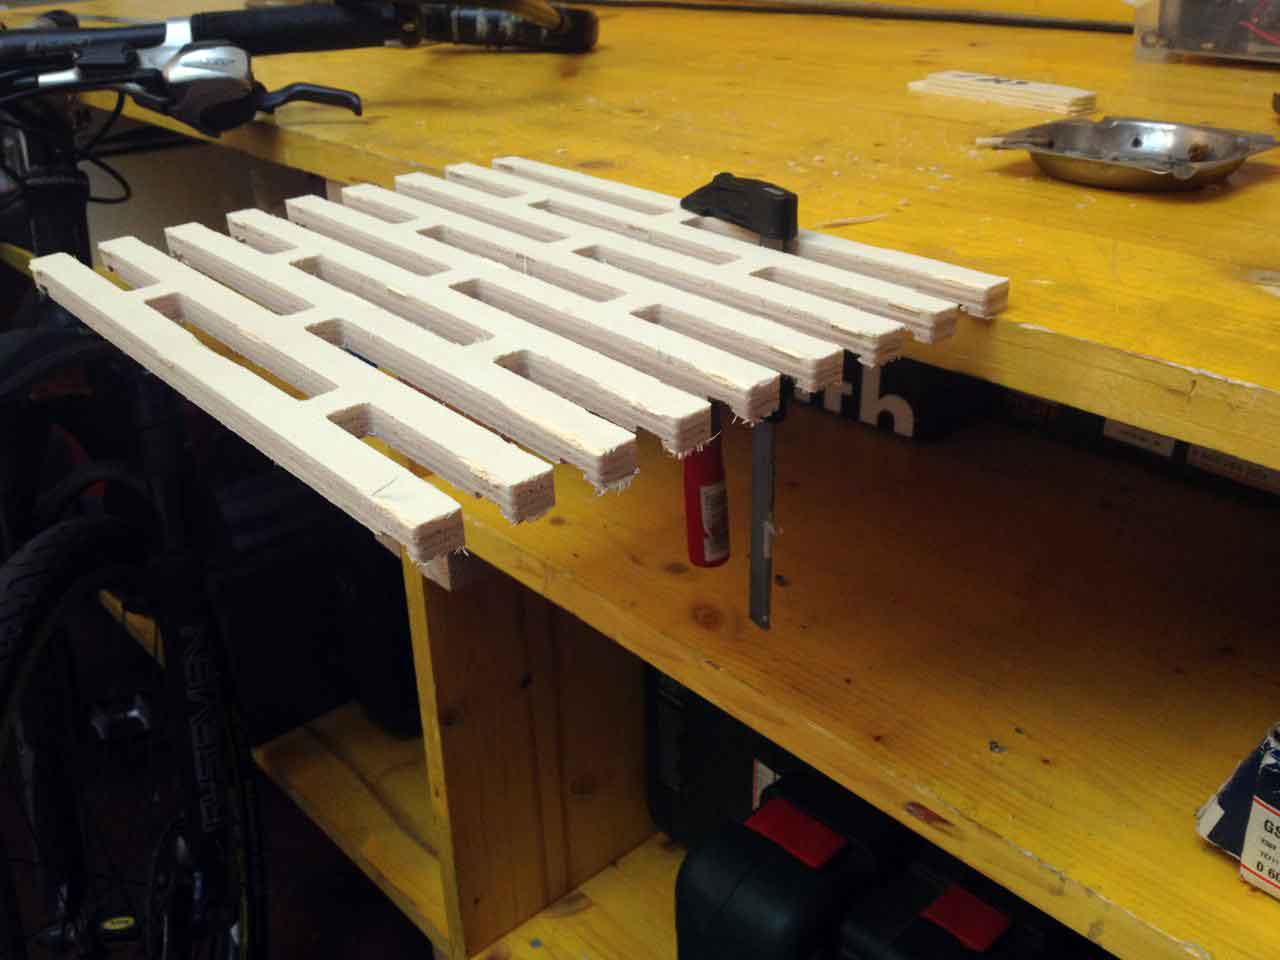
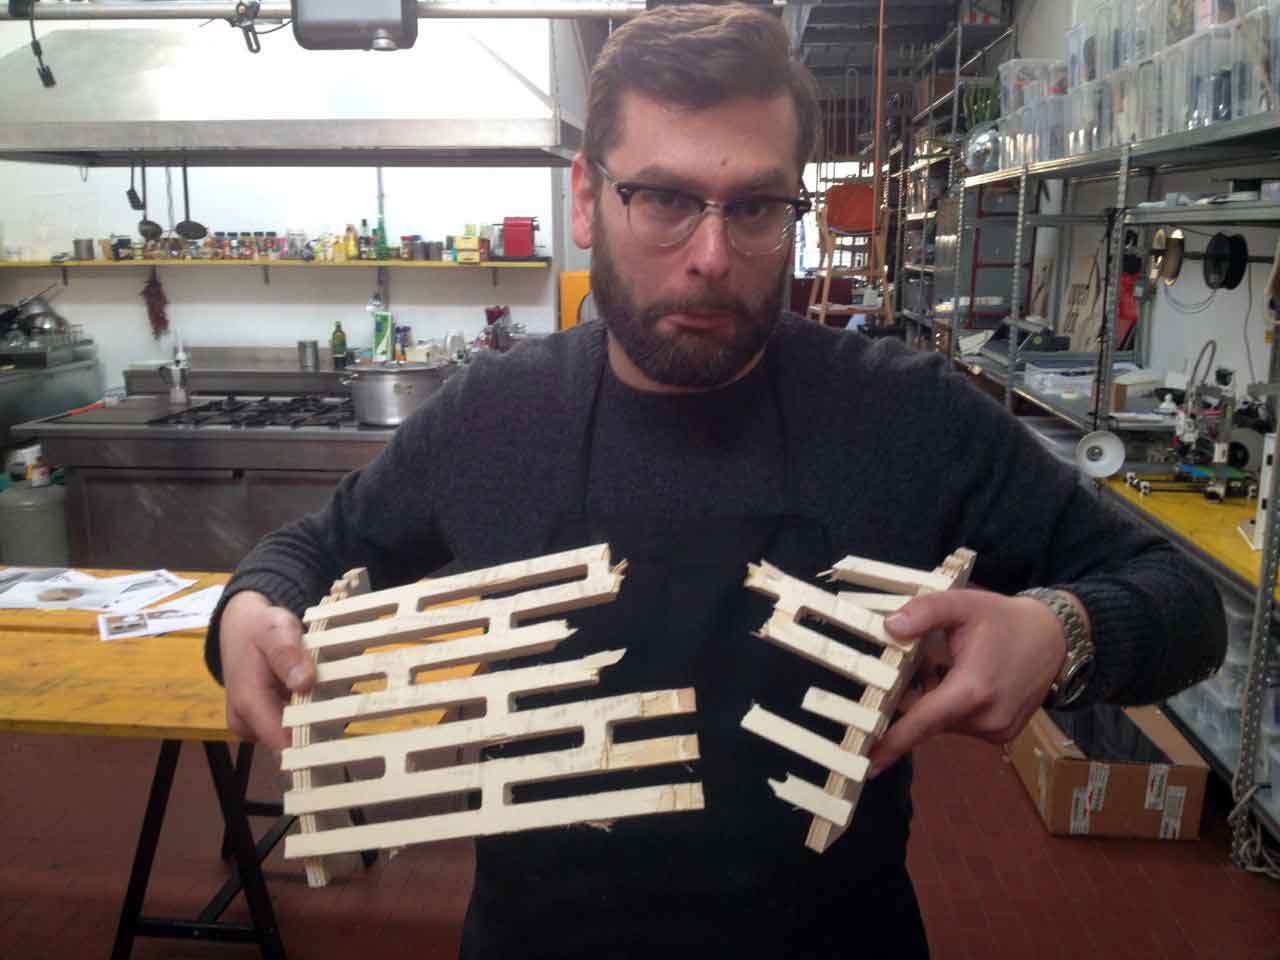
Then I made some tests on the resistance of both living hinge systems. As you can see it bends very much and at the end it doesn't brake in one point only. That's the best feature of plywood. One important thing is how yu put your design on the board you have available: you should lay according to the direction of the fibers, meaning that you have to count the layers of your plywood and see how many layers have the same veneer direction. Than rotate your parts along the veneers.
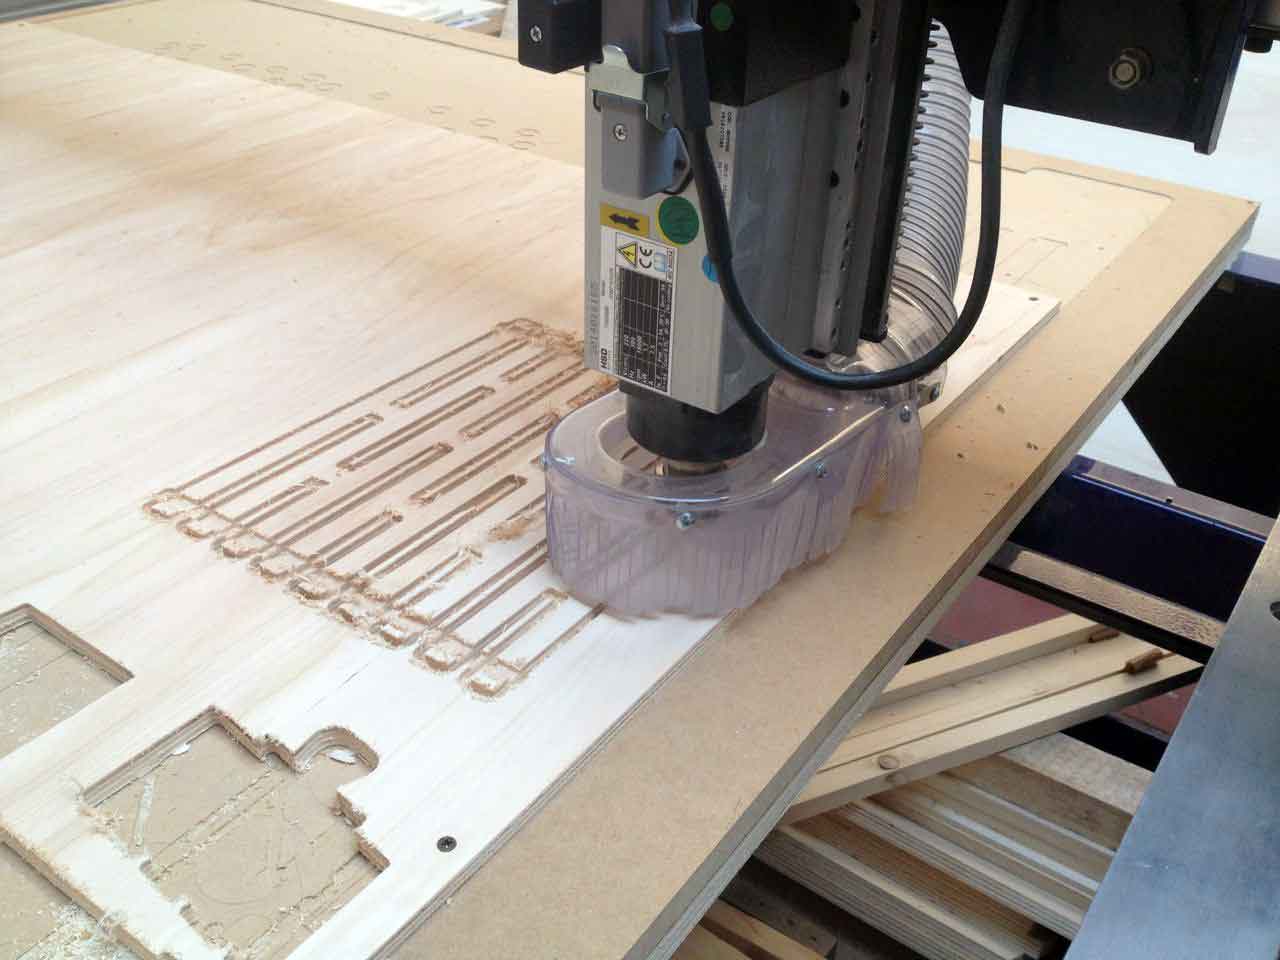
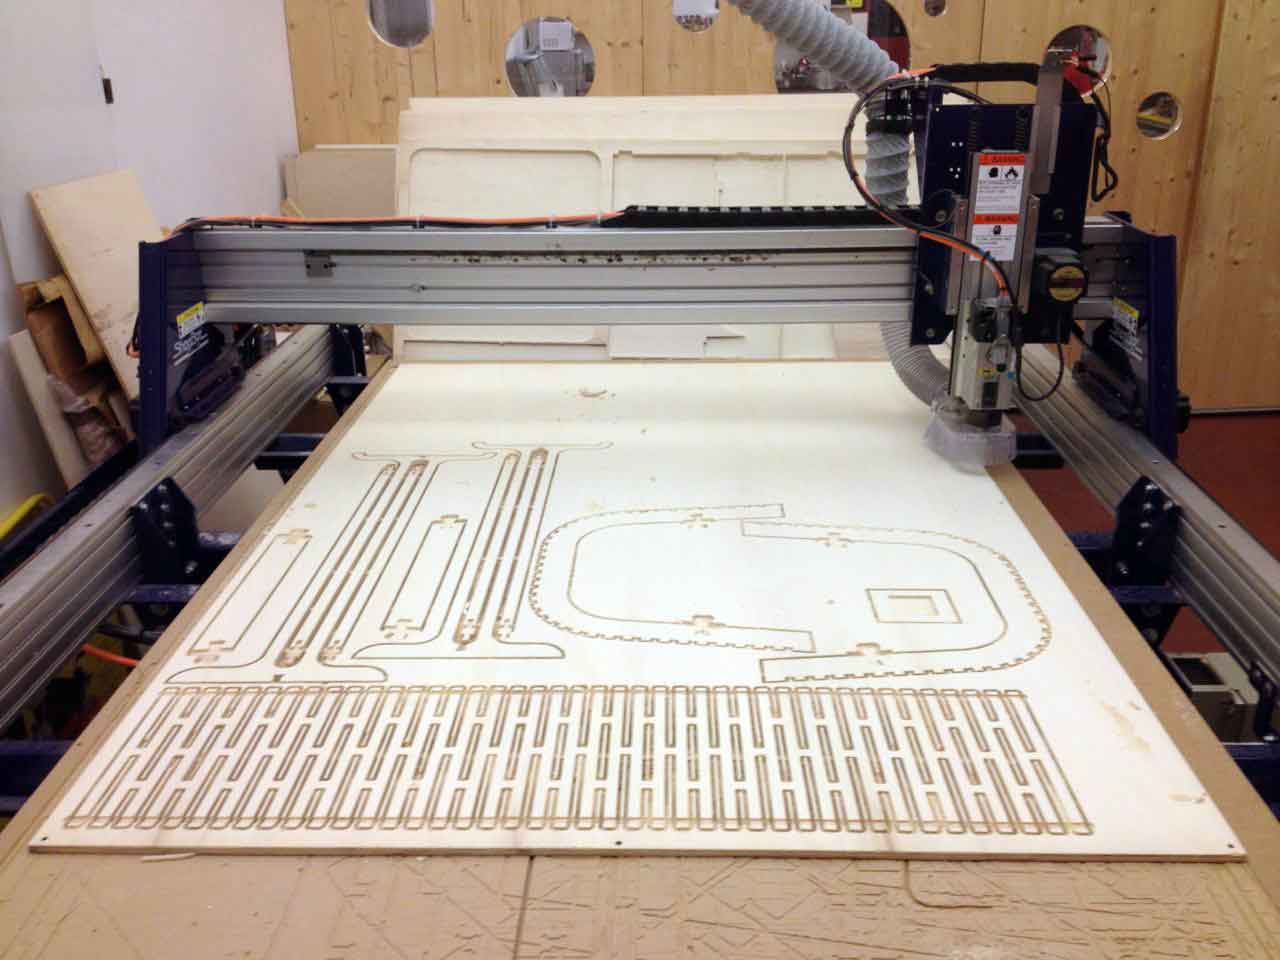
CNC milling
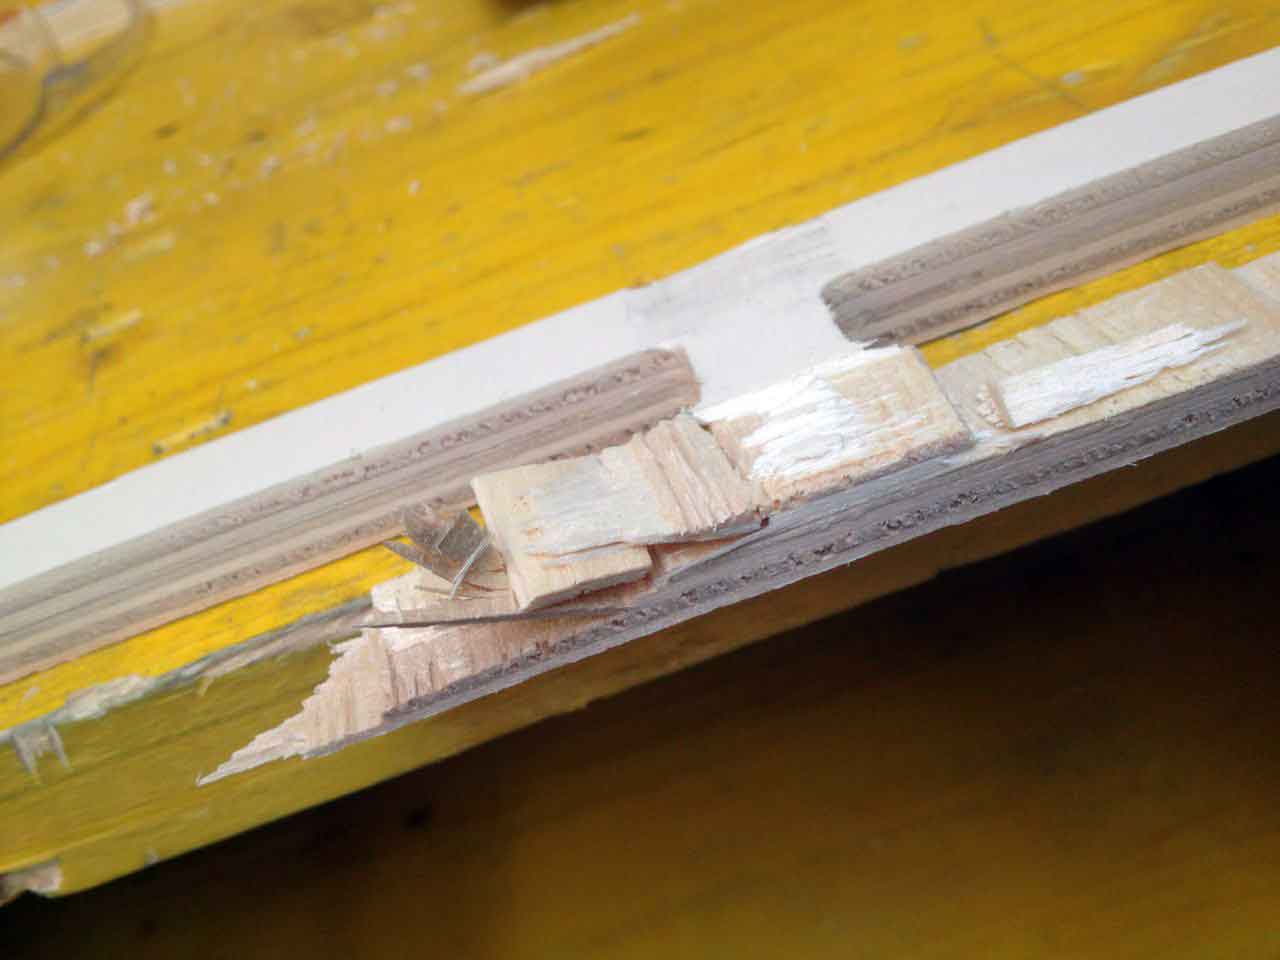
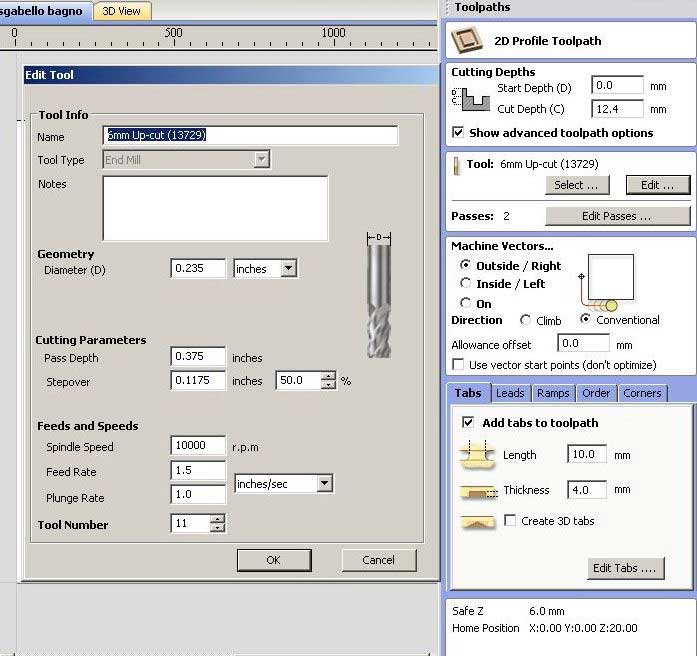
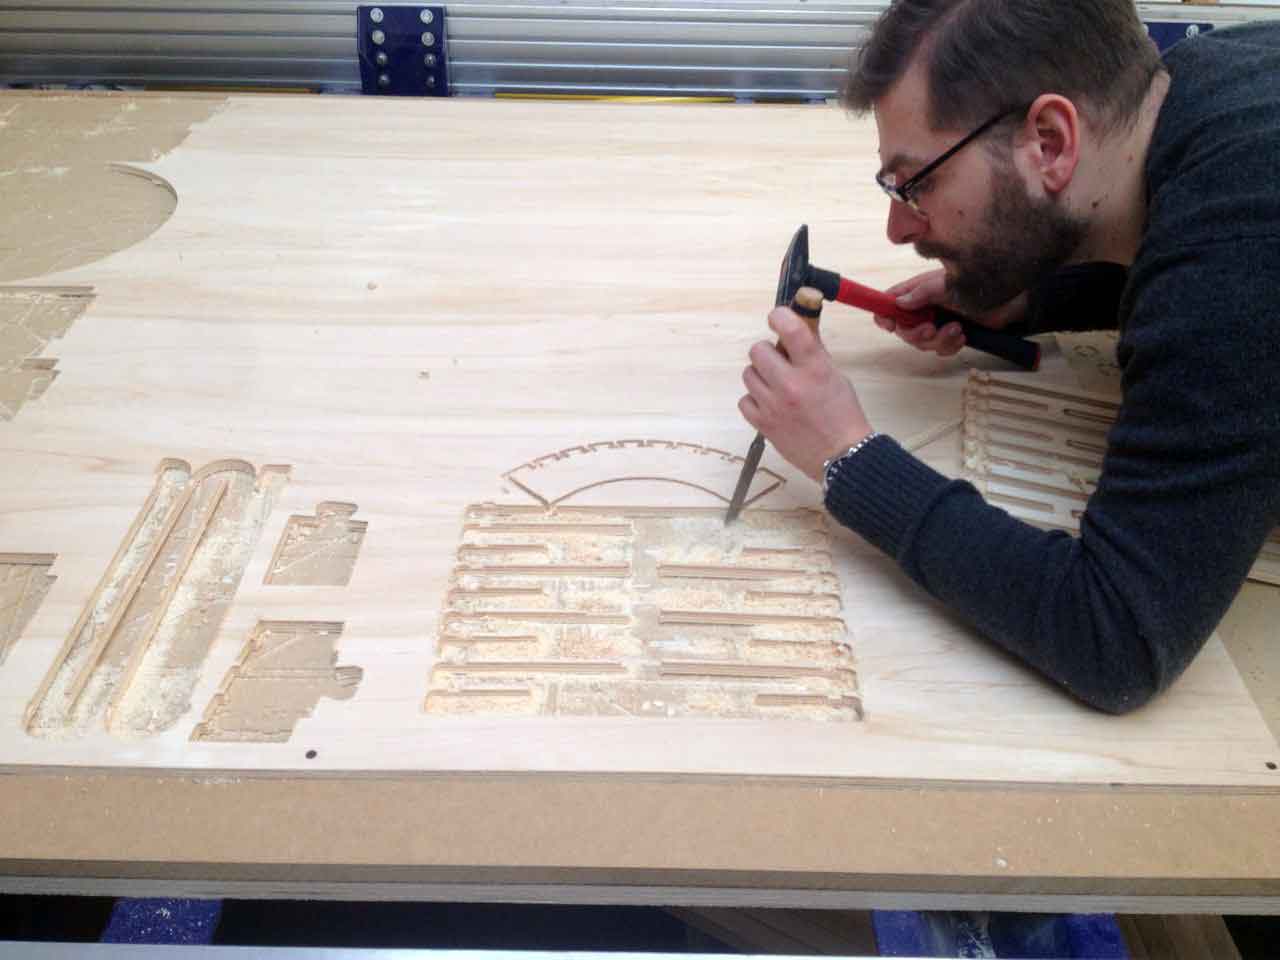
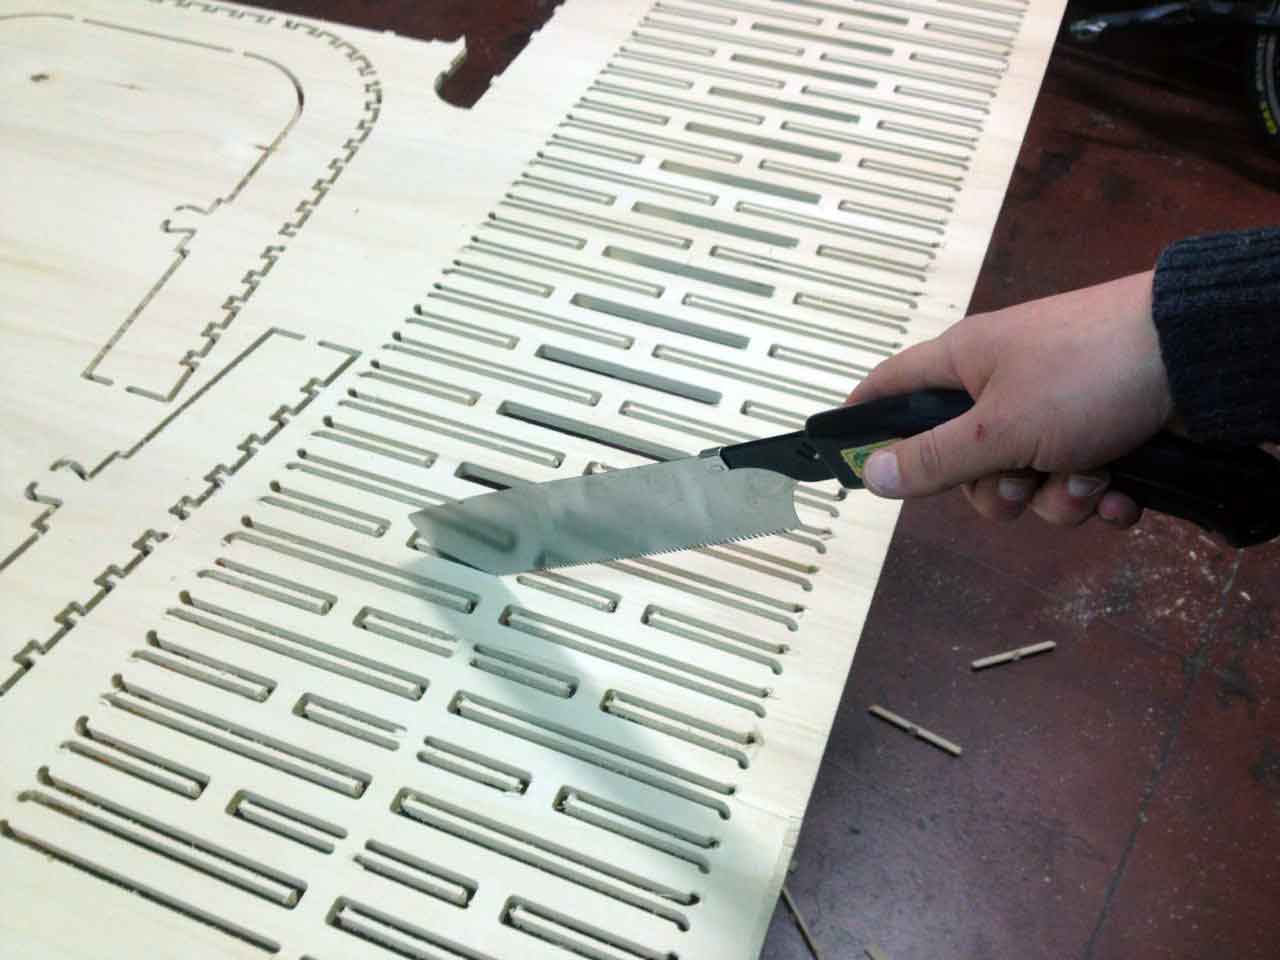
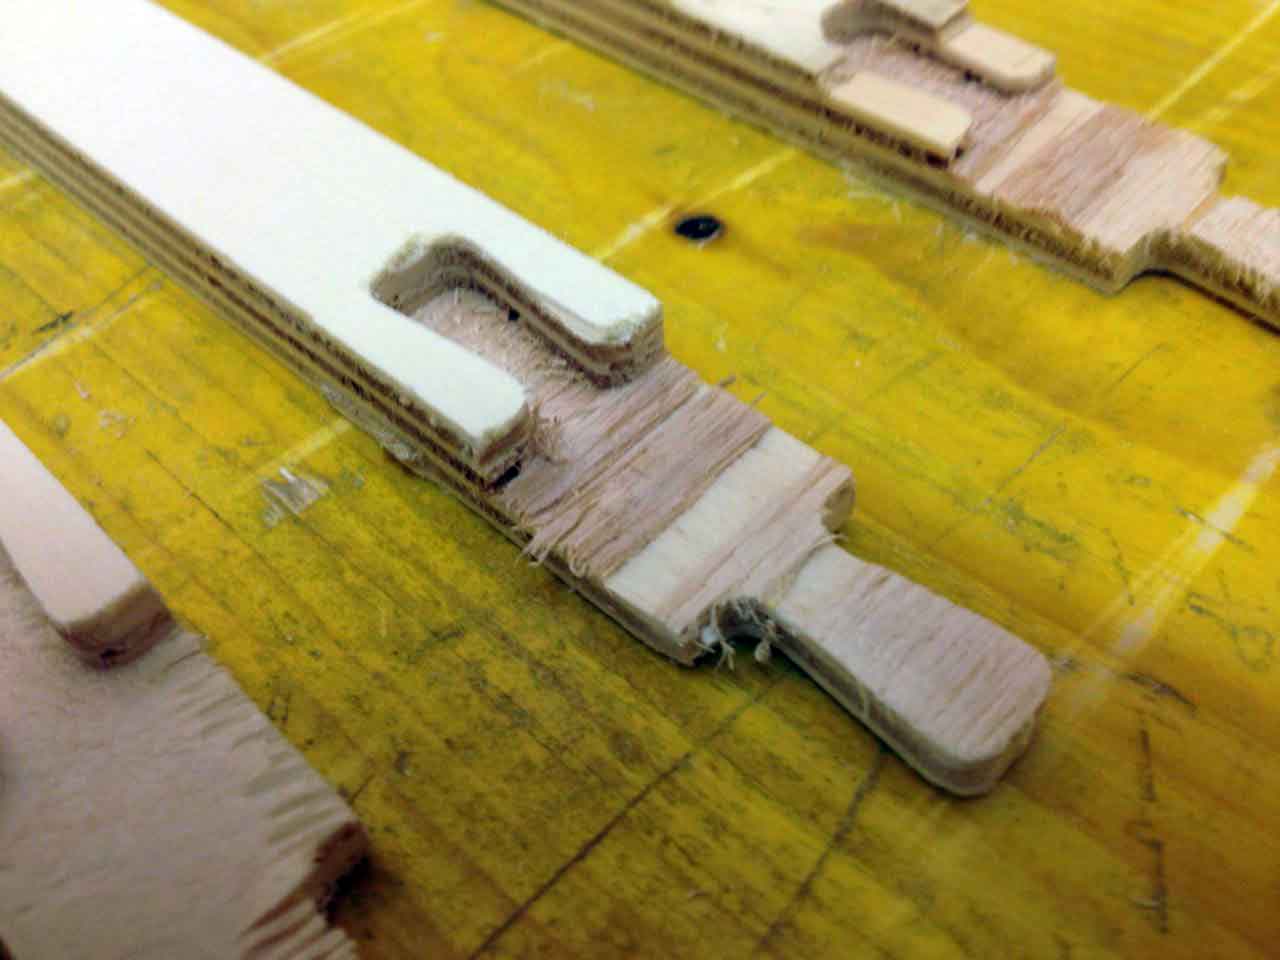
I put many tabs along the toolpaths to be sure the parts didn't move, so after the machining was done, I had to remove them. I used a chisel first and then I used a saw.
Results
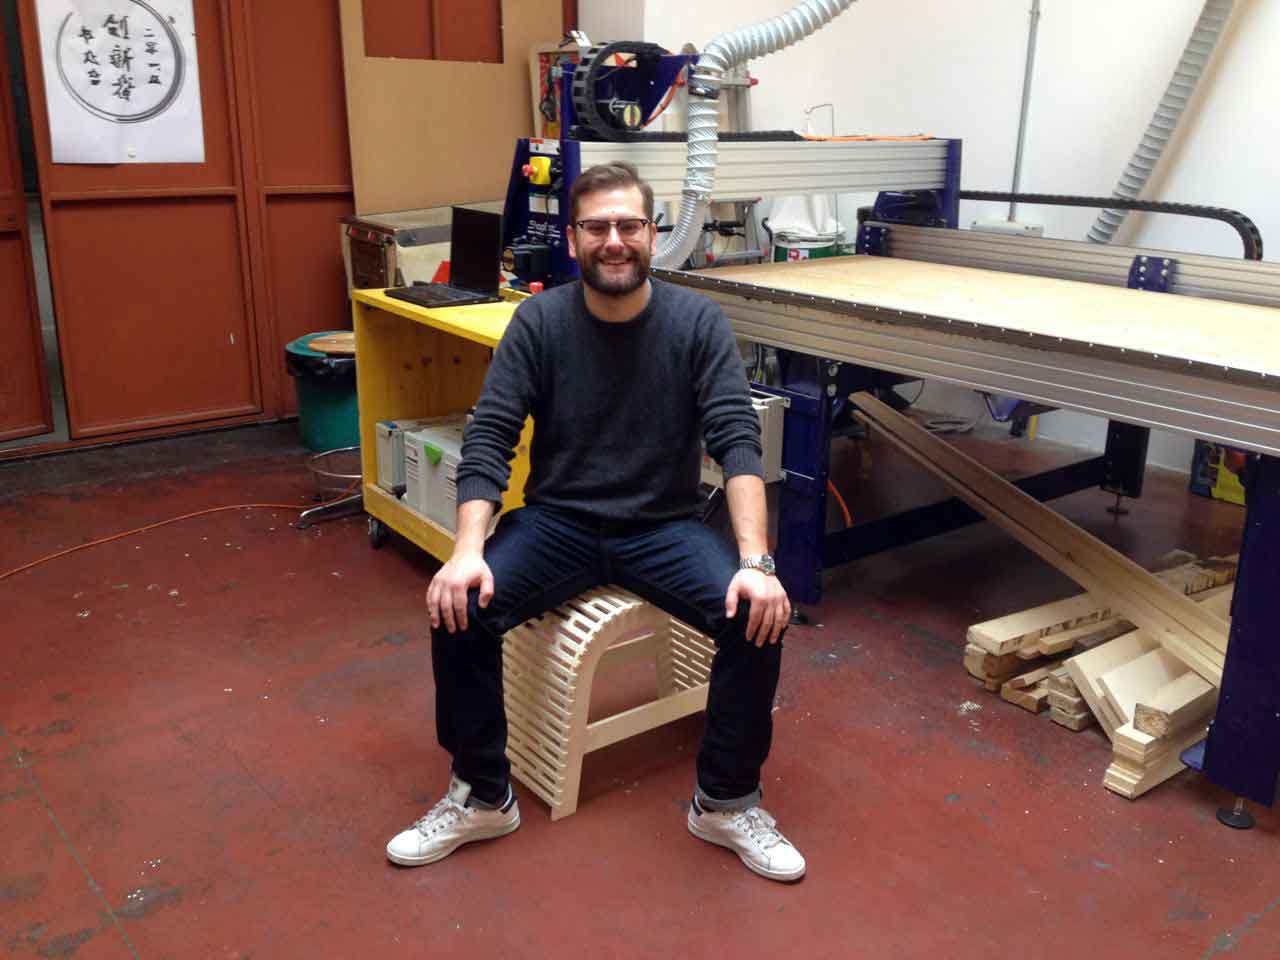
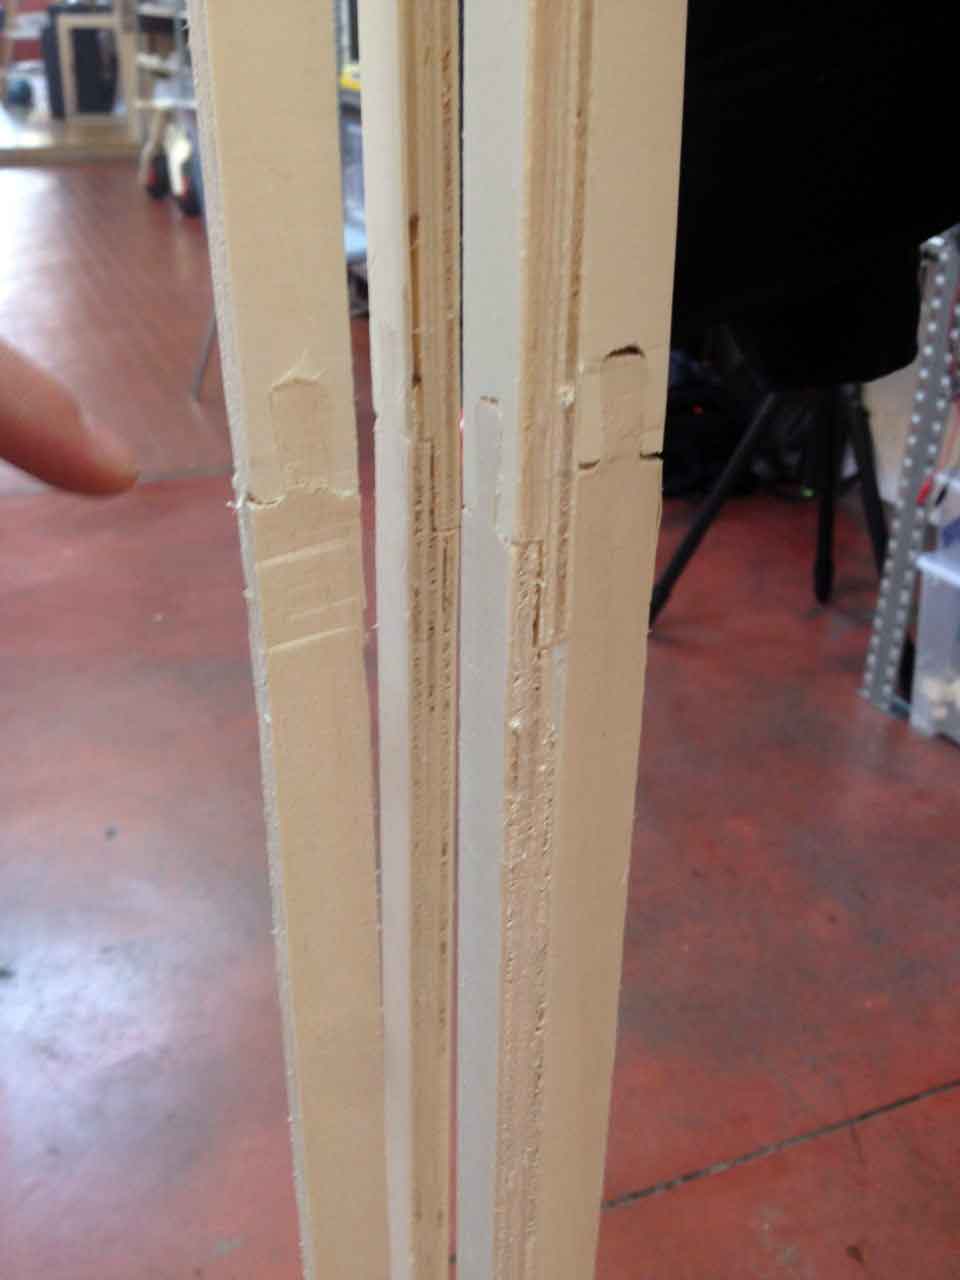
This is the final stool and coat hanger I design ad made. I'm very happy with the results, both design works properly, but the coat hanger surely need some stabilization at the base. The wood joints where so precise that I had to hammer them in, and I broke some of them doing so. Next time I will leave a play of some decimal to ensure an easy fit.
Dxf file is available here: