Mechanical Design, Machine Design
The assigment for this week was to design a machine, and this time we could working in groups. So this was an excellent opportunity to improve and learn about our organizational skills. It was a nice challenge to practice and learn how to organize a group with a lot of differents tasks, with differents knowledges, skills, and not enough time!
We receive from MIT the Modular Machines that Make: Cardboard CNC kit, to make our own machine. It's a kit that allows make machines with different uses, such as foam typical cutter. But we decide to make something different, bigger and more challenging, such as Pizza Cutter Machine!

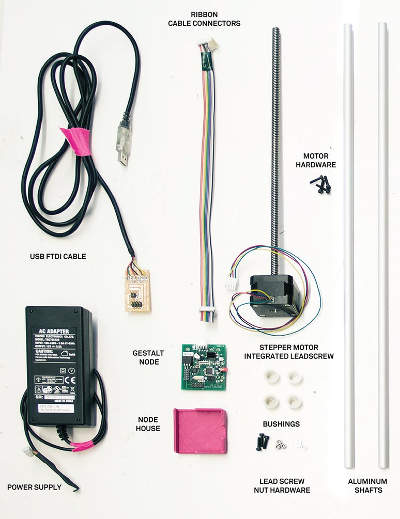
The original kit has the following components:
- Stepper motor integrated leadscrew (2x)
- Gestalt node
- USB FTDI cable
- Resistors (4x)
- Alluminum shafts
- Bushings
- Lead screw nut hardware
- Motor hardware
The Fab Lab give us these components:
- Cardboard to make the machine structure
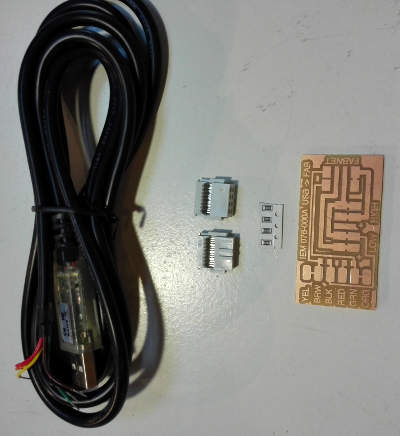
- Ribbon cabble connectors
- PCB to make the FabNet board
- 5x2 pin header
- 2x2 pin header
- Materials needed to assembly the cardboard structure (glue, tape, etc.)
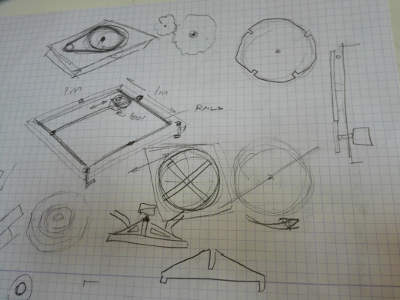
Once we have clear the kit pieces and the machine that we wanted to make, we meet to think between all the design, for which we made several drawings.
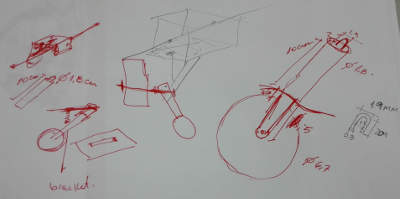
Once we had the idea and the first sketches, we organize the work by task. We work and collaborate in almost all the process, even that, we had assigned some tasks and as work progressed, we were assuming others, and participating in different task. I was really happy with my group, because we share knowledge and worked very well.
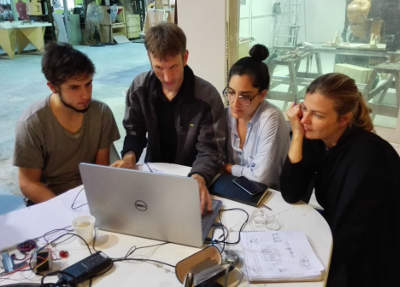
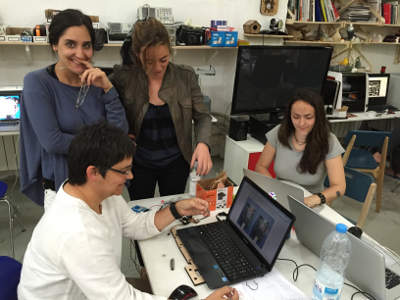
Working session of one part of the group: From left to the right, Kalil, our instructor Ferdi, Pam, and Alessandra.
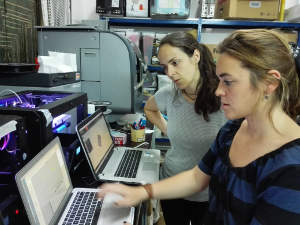
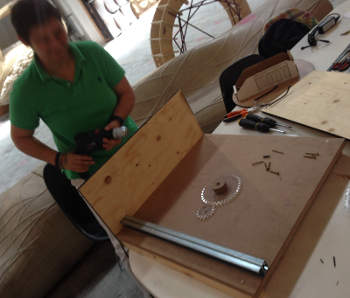
Mariona and Josefina working with the 3D printing parts (I was the photographer!).
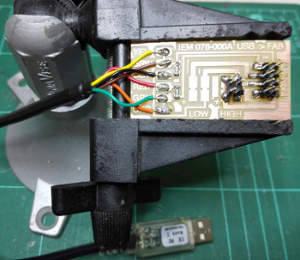
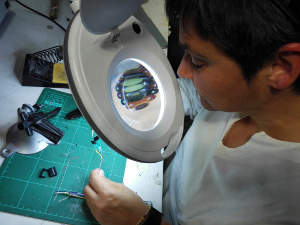
The first task that I took for the team in the first days, besides taking some pictures and buy some parts, as the angles for the structure or the pizza cutter blade, was to take charge of the electronic part, so I milled and soldering all components of FabNet with FTDI USB cable and make the cables to connect the power supply and FabNet to Gestalt. You can download the png files to mill it: traces and outline.
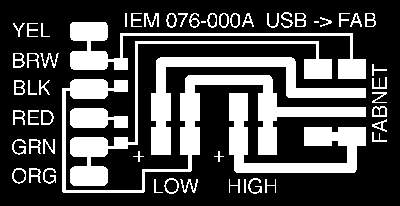
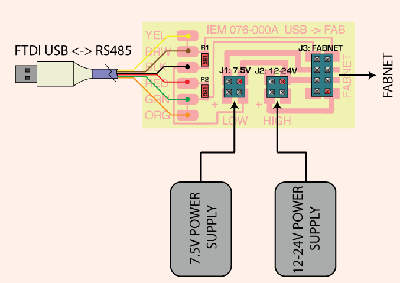
This is the the FabNet. We will use the 12v power supply so we don't need to solder another 2x2 pin header (we just solder the right one).
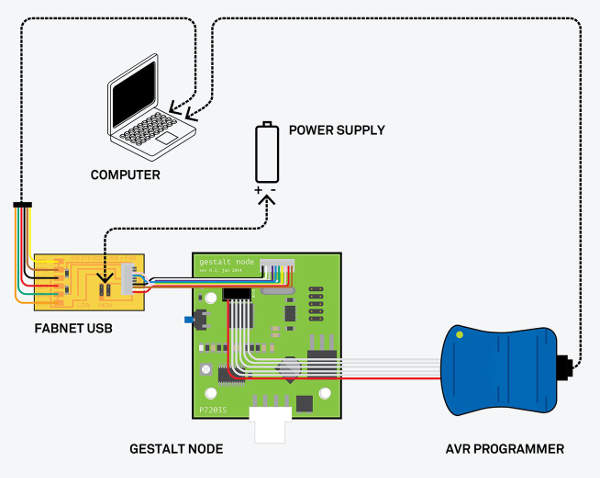
Diagram of the Gestalt system that we had to make and program to use with our machine. To program Gestalt, we use our FabISP board.
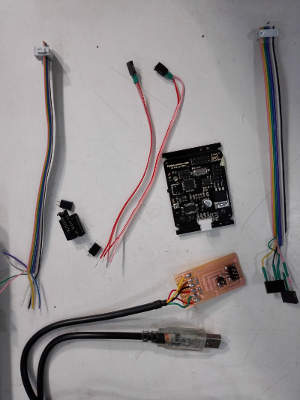
We found some problems making the cables to connect the Gestalt to the FabNet, because the pins connectors that we have here are differents so we need to adapt it.
Always working with a great group, even with so many setbacks, we were very collaborative, supportive and there was a lot of companionship.
As we decided to do a bigger machine, we do not use the cardboard, but use recycled material from our Fab Lab, like wood for the structure or acrylic for gears. Same with the motors, because it was a larger machine, the motors form the MIT kits do not serve us, so we adapt recycling one.
To make the different parts of our pizza cutter with the recycled materials, we use multiple machines, as the CNC router to cut the wood platform and make the the holes for the motor and gears; the laser cut, to cut the lateral wood parts and the gears in acrylic, and 3D printer.
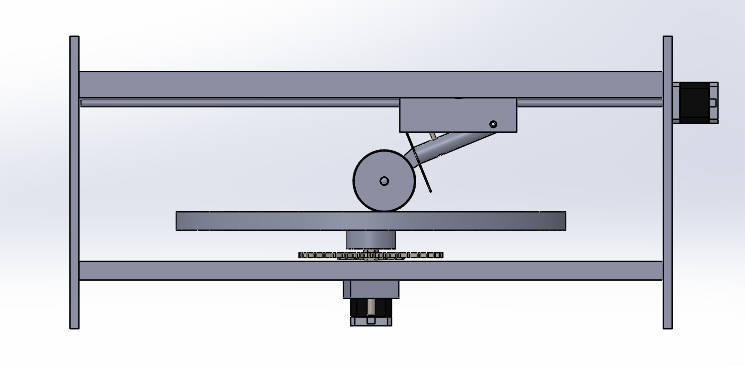
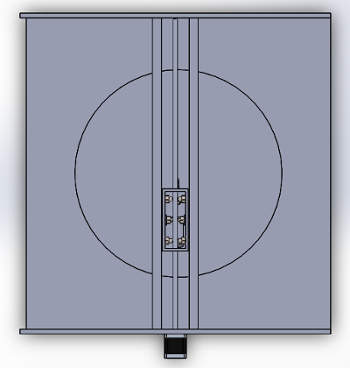
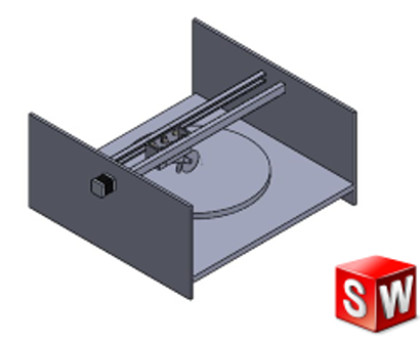
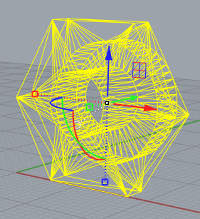
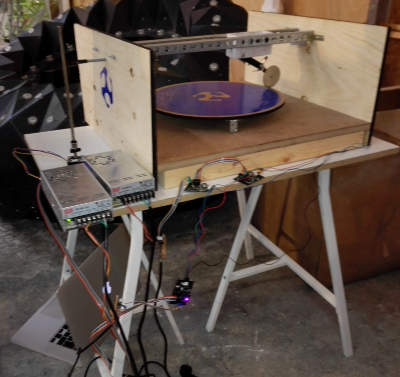
The assembled design of the Pizza Cutter Machine. You can download the Solid Work files here, if you want to amaze your friends on your pizza parties!
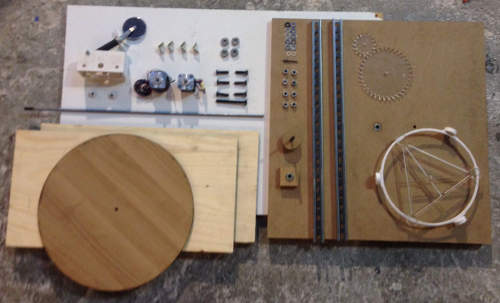
These are all the parts of the pizza cutter. We didn't concern with the cardboard structure, neither with the original size. So we decide to make our own structure, using some recycled materials we found on our Fab Lab.
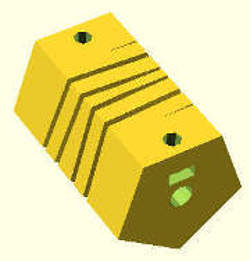
This is the coupler piece, to adapt the servo motor to a longer threaded rod. Originally, the kit cames with servo motors with threaded rod coupled, but we needed longer one. And to compensate for alignment of the stepper motor axis and the aligment with the motor and the structure, we need to use a flexible piece. Therefore the piece has those spaces, to allow compensate the movement while rotating. We download the file from Thingiverse, and used OpenScad to adapt to the diameter of our parts and 3D printer withg PLA. You can download our version file, and adapt it, depending on the diameters of your parts.
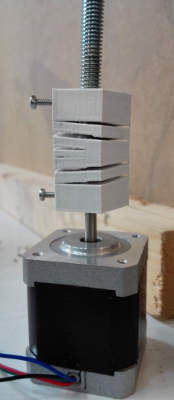
Before our instructor Ferdi tell us the existence of this kind of piece, we tried to replace the original threaded rod, so we dismounted the motor and replace the rod... but you can't do that! The rod is assembled with pressure and and heat within special ovens. Although we were able to disassemble the motor and replace the rod, we could not have set it again, even we thought of using some type of expoxy for it, but our instructor told us it would not be possible, and explain us how the motors are assembled.

Some parts 3D printed. You can download 3DP stl files.
Once we have all the parts, it's time to assemble all the pieces. This are the list of the main parts we use, besides the components from MIT:
- Recycled stepper motors (2x)
- Threaded rod (700 mm long)
- Gears (2x, acrylic)
- Z flexible coupler (3DP)
- Metal angle (4x)
- Metal riel (2x)
- Wood sides (2x 600x300mm)
- Wood platform(600x600mm)
- Wood base (2x 45x45x565mm)
- Spring
- Bearings
- Screws, nuts and washers (diferents sizes)
Finally, he must make the machine cuts the pizza, so let's programm it! We use the phyton file from Neil, with our routines. We had some problems with the code, because we has trying to program each motor separately. The servo began to rotate but reached a point starting to run abnormally (turned slightly and stopped and so ending the routine). We seek to solve the problem in several ways: obviously changing the code manipulating the tensiometer changing the gestalt, shifting cables, changing the FabNet until our mate Taichi charge the code of his machine, and check that everything worked properly. So the problem was not in the hardware but in software and Santi, our tutor, discovered the problem. So do not try to program the motors as if they were independent.
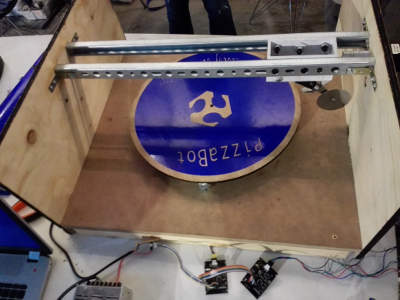
The routine that we needed to program was to make the plate turns 90º and then makes the pizza blade go and comeback to the home position (outside the circular plate to permit it turn without scratch it), and then turns again another 90º to make another cut, to have a 4 slices of pizza. You can program tu cut more pieces! Downoload the phyton file here.
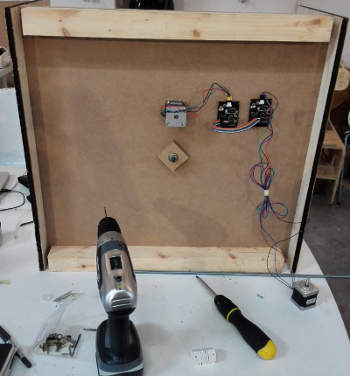
But how it works!? Well, we install one stepper motor on the bottom of the platform of the structure, on top the motor were conected to a small acrylic gear, that works with another bigger one (download the gears files here), that makes rotate a big wood plate were we sets the pizza to be cut.
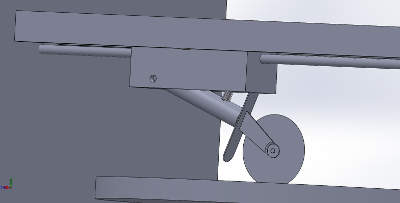
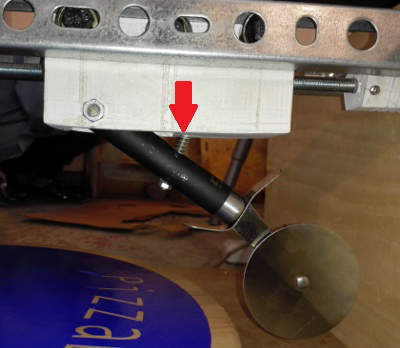
The cutter system structure works with an horizontal rails where is a box with a system holding the blade and through a threaded rod which is fixed to the motor through the flexible coupler piece. So when the motor turns, makes the blade box moves through the threaded rod. You must fix the box on the threaded rod with nuts for the system moving!
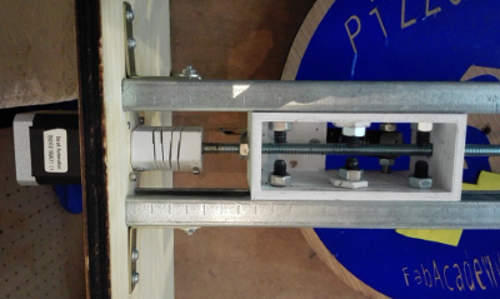
Then, we assembly the pizza cutter on the 3D printed box with some inclination and fixed with screws and nots and to make pression to cut, we also fixed a spring with a crew. To assemble this part on the rails with we use bearings.
And the moment to make work the machine has arrived, but there was another problem... As the pizza plate motor system was working correctly, the cutter system was moving very very slow. That's the result of change the original threaded rod of the MIT's stepper motor... The pitch and the inclination of the threads of the bar were really differents, which it resulted in a truly slow movement of the cutting system.
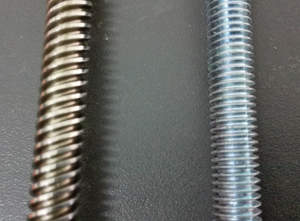
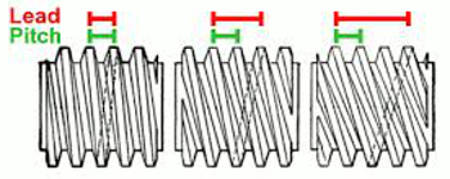
In the left image, we can compare both threaded rod: at left the original that cames with the MIT motors, and at right, the one that we use. You can see clearly the difference of pitch and lead. At right, the relationship between pitch and lead on a threaded rod. Maybe using a rod with a triple thread (right), instead of a single thread (left), we would have achieved good results in terms of speed.
To solve the problem we have many options: try to search the same threaded rod of the original stepper motor, that that surely it would be neither easy nor cheap; try to make our own threaded rod, which also would not be easy, but maybe a good solution if you have enough time (3D printed maybe?); use the original stepper motors threaded rod, which would imply rescale the structure to the original part; or finally, design another system, suchs as belts used on some 3D printers, so take note if you want to make a faster pizza cutter! So maybe we can cut instead of pizzas, some spanish tortilla de patatas or some french crepes. Or simply, you may be slow food lover!
Alessandra made some nice designs to decorate our machine, so with Roland vinyl cutter machine we cut the adhesives. Another nice practice with the vinyl cutter which allowed me to learn more about the machine and software settings (png file).
Even if we have this this unexpected inconvenient, we design and make a machine, and made it work. And the most important thing, we learn a lot, which it was the objective.
You can find more about the Fab Pizza Cutter Machine on the websites of all team members: Alessandra, Pam, Josefina, Mariona, and Kalil.

Fab Academy 2015 website by Milena Orlandini is licensed under a Creative Commons Attribution-NonCommercial-ShareAlike 4.0 International License.
