Week 08 |
Computer - Controlled Machine (Make Something Big) - March, 18th 2015
Dreaming |
I've been waiting this week, due to its huge amount of work, lots of issues to solve in few days and incredible fun that could arise from the assignment! My first inspiration was regarding to my final project, the chaise. Looking for something that could solve it not only technically, but also in terms of design, japanese art Kirigami seemed to me the ideal of beauty, lightness and flexibility. Inspiration
|
Put Things In A Humble Perspective |
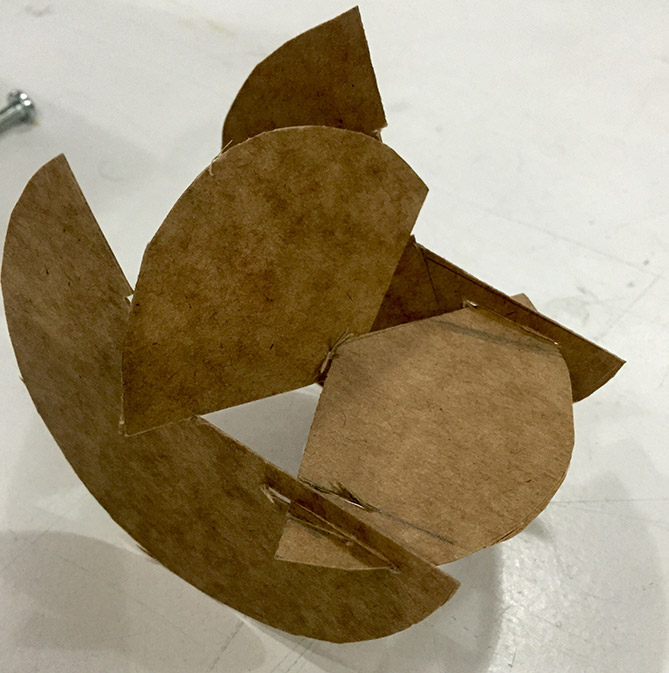
But once again I was struggling with time, and after many problems on my computer, I had to find another way to move on. And fast! I had to have a practical point of view and the concept had changed completely: the material was not conducive to the work I chose to do. OSB wood is not homogeneous, it is heavy and obviously an inappropriate choice for something as delicate as what I already proposed me to do. However I would not want to do something common and after doing some sketches, I've prepared a small model of what could prove to be "something big" Quick Model
|
Drawing |
After basically defining what was my line of thought, I tried for the first time to work using Rhinoceros. I found that although it is very related to simplicity, I realized in a short time that my choice of a structure on curves instead of simple right angles brought many important/complex issues. Even though, it was really good finally achieving at least a bit of what the software can do. Rhinoceros
|
Adjustments |
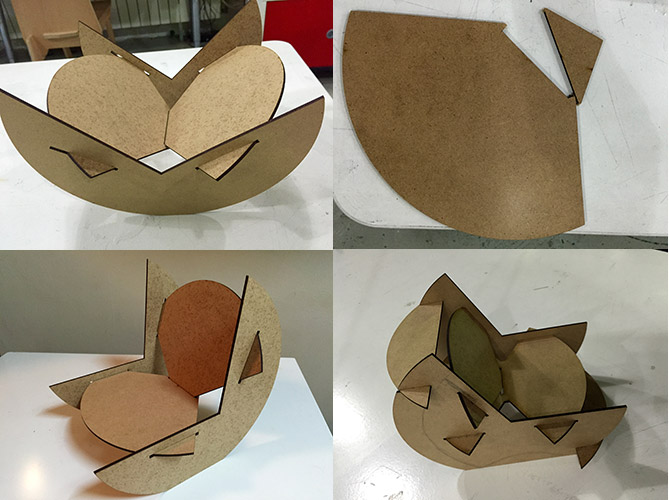
After completing the design, it was necessary to test before cutting the seat in OSB. Then I went for laser cutting where I did 4 tests. At first I've seen some problems of which I had previously suspected and then confirmed such as insufficient space between the overture and the end of the board not allowing to fit the seat and the back of the chair without breaking it and some instability which needed other adjustments to become more stable, for instance, cutting the bottom leaving behind the idea of having a rocking chair. After making the third test I realized that even making those changes, I needed to fix the joints and maybe give a try to make my design lighter. And I went back to Rhino. Some Tests
|
Waiting in Line |
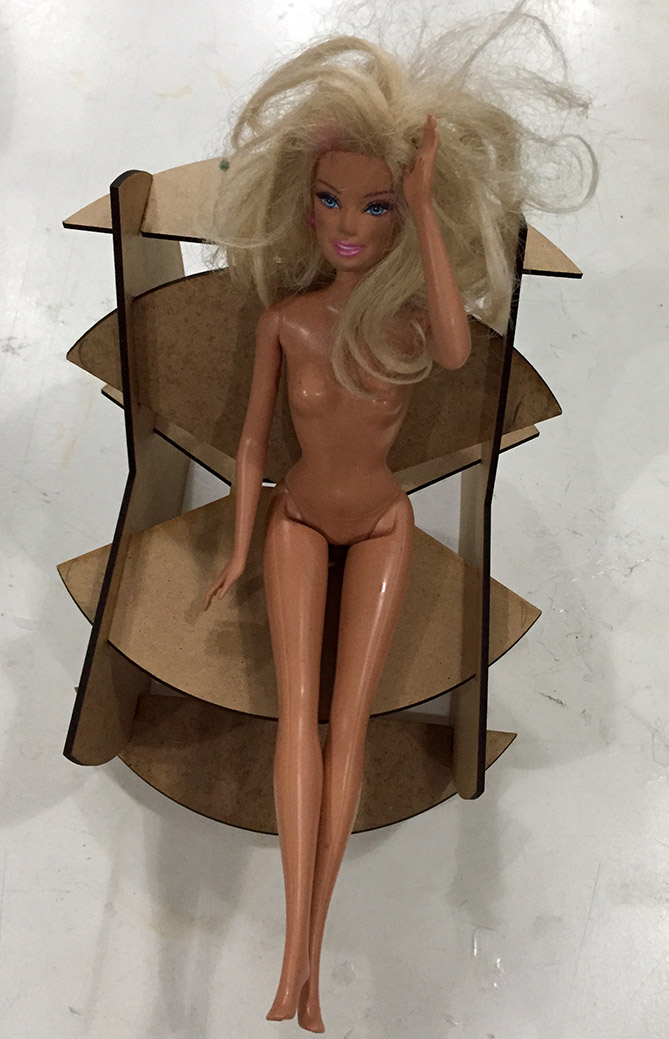
One more test now to fix all the changes that I made hoping that everything will be fine with the "Pizza Chair" I'm waiting for my turn to finally have a chance to fabricate it, and in few more days not only Barbie can enjoy it, but also someone real and preferentially dressed properly... Waiting
|
Last Test |
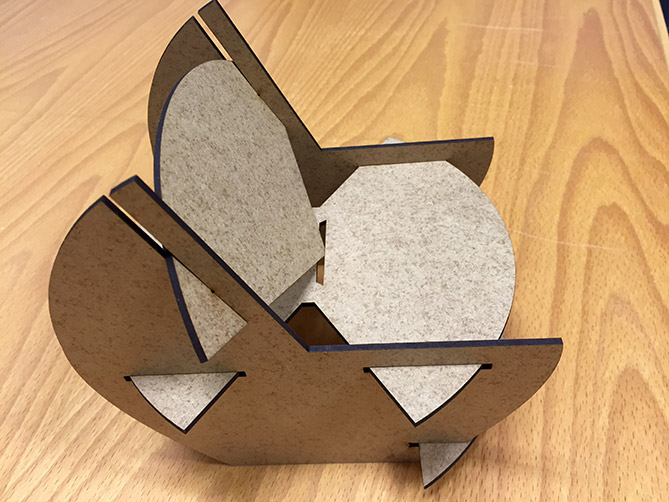
Again I had to make last minute changes. My OSB board was 2.50 mts x 1.25 mts and after so many attempts to put them all together as a very simple design, it became a huge chair, I could even say, that looked like a throne full of sharp notches. Trying to avoid total failure of my design, I was once again playing with my new best friend Rhino. I scaled, removed one of its parts providing more lightness to the shape, and I made necessary adjustments at the joints, although in the end I realized I should have left them narrower to be more stable. The Final Shape
|
Hands On |
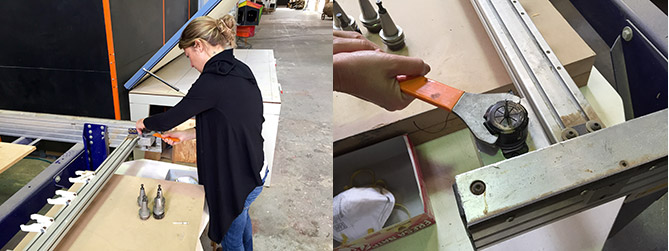
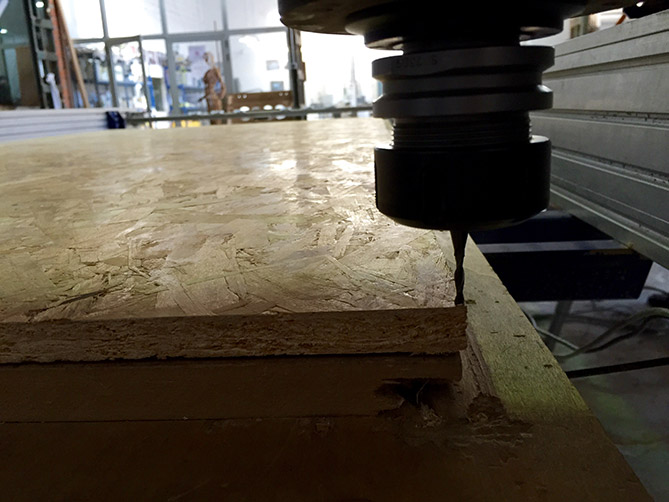
Design ready, time to generate the G code in RhinoCAM. Following the steps was the faster and easier part of the job. But before returning to the computer, I arranged the tools that would be used to cut and engrave my wooden sheet. Following The Script
|
Strategies |
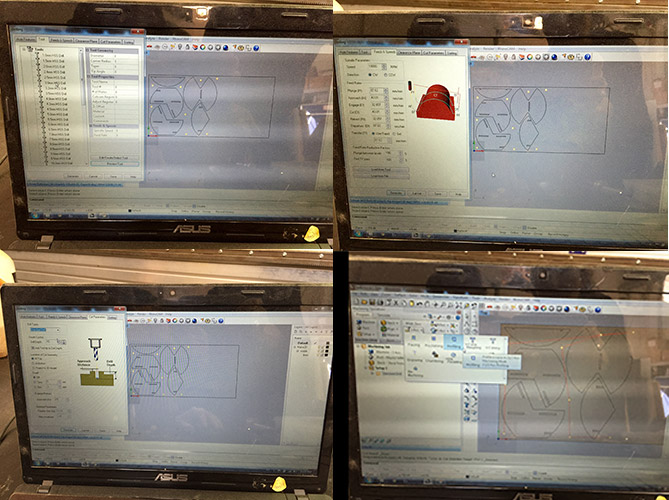
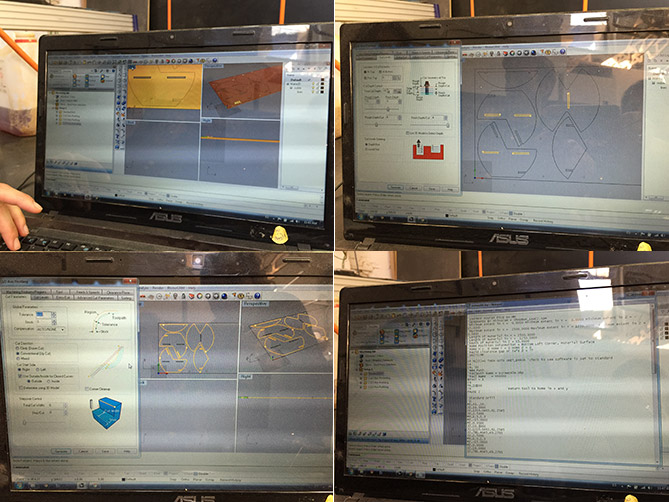
To generate Gcode I to define and follow some strategies. A basic pattern was repeated in the three stages of manufacture of the chair and the changes were related to the intended result. First I should place the screws to maintain the stability of the wooden sheet, then define the tool (in this case a drill 3mm to screws and engrave and 6mm to cut) and the number of layers necessary to bore into wood, forming a path that can be evaluated in the preview. You must also set the speed and adjust the axes x, y, z every time that strategy changes.
|
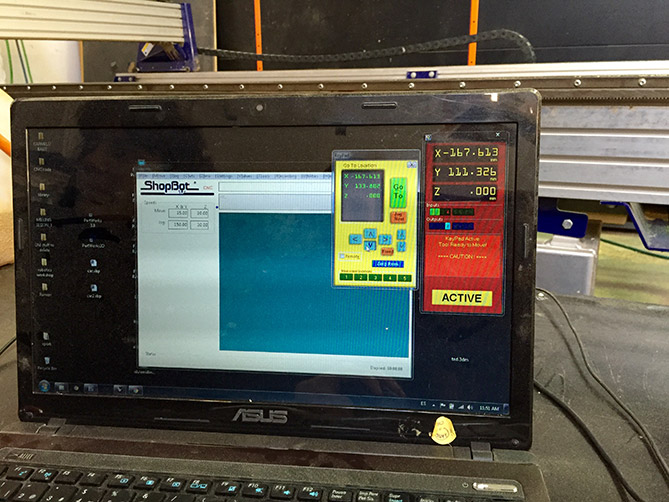
The ShopBot PR 144 |
I've defined drills, strategies, priorities and speed, starting the machine to work. Robust and very strong, it really deserves to be treated respectfully. Any slide in front of a machine like this can be disastrous and eventually fatal. Loose hair are definitely prohibited, also loose clothing, scarves or anything that can curl up on the engine and cause an accident. Zero x Zero
|
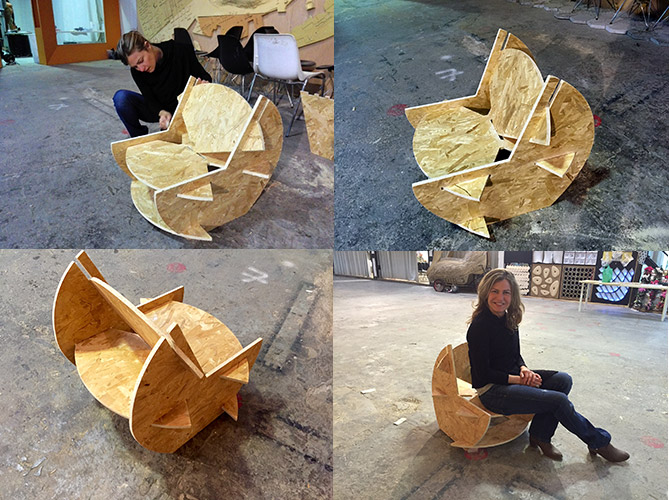
Pizza Chair |
Cutting wood, parts becoming ready. Now it is only missing sanding, assembling and enjoying "something big"!!
|
|