Week 03 |
Computer Controlled Cutting - February, 11th 2015
I Wish I have More Time!!! |
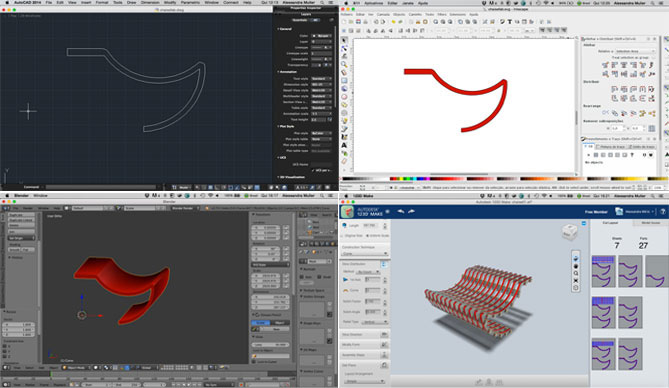
This week has been quite difficult. I had to figure out how some of the tools really work. What seemed to be somehow simple took me several hours trying, trying and trying! Our task was to produce some pieces that should fit together building something bigger. To make these parts I should, of course, have a pre defined project. My first step was to make some sketches and decide what should look like my final shape for the week, remembering that if I could do something on a small scale, eventually I 'll be able to do something bigger ... It was difficult to build my piece in the software I was introduced. Among them all, I chose between what I thought was the best (I mean, the easiest at the time to put into practice). Design Tools
|
Back and Forth |
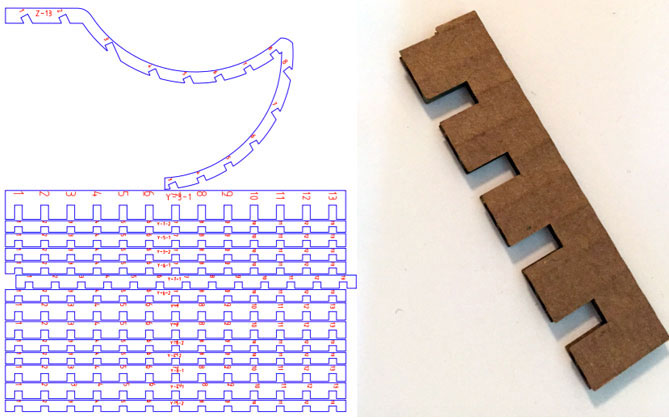
Probably it was not the best option, but for me it was the only one! I was thinking of how to find a shortcut, but the fact is that I had to jump from tool to tool to succeed in processing what was initially lines that should connect into parts of something real. The challenge was to save the correct formats for each tool and be able to edit my design to send to the Lasercut. In fact, when I thought that everything was perfect, I had to start all over again. The thickness of cardboard came out wrong, different from what I have done before. That was my first test among many others. PDF and the "Real Thing"
|
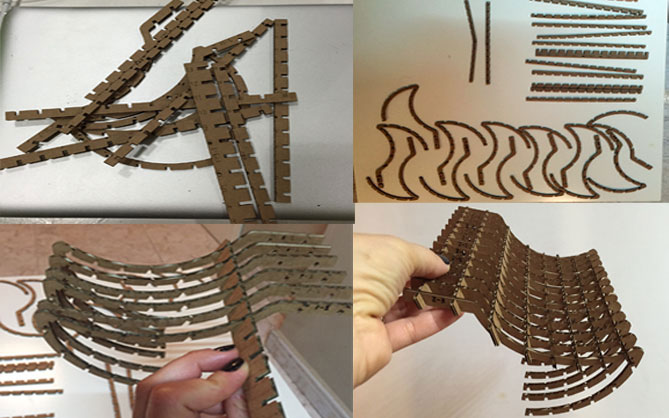
Solving Problems |
I spent too much time trying to convert the files to compatible formats between different tools that I decided to use. At some point I given up trying to discover why I was not achieving my goal, but I was pretty convict that it was something silly. And it really was... Discovered the "click" - Export 123Make file to PDF with a good help (if I may say), open the file in Inkscape and make the necessary corrections became something incredibly simple. And voilà ! At the LaserCut
|
|