Project finished. The final project documentation can be found in the final project page.
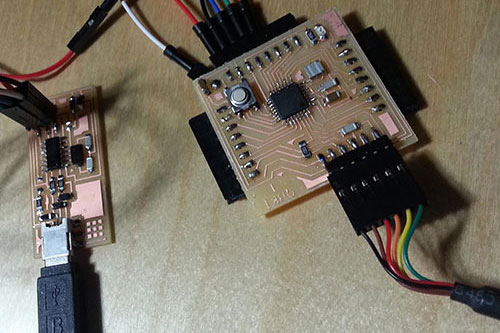
Almost the whole circuitry is working. It allows the user to change and view the constants of the device using the control panel circuit or the Android App (bluetooth). The temperature control circuit can measure temperature, humidity and activate the relays and fans. I still have to check the performance of the Peltier module.
Time to design the circuits. The first prototype will consist of three circuits:
- Brain: this is the controller of the incubator. It receives the information from other circuits, analyzes it and generates a response. It can communicate with other circuits using an I2C protocol and using Bluetooth.
- Control panel: small circuit that act as an interface between the incubator and the medical staff. It is provided with an LCD display, a reset button, an RGB led and a rotary switch.
- Temperature controller: this circuit has the ability to measure temperature and humidity. Despite it is designed to have a water pump connected, the first prototype won't have that feature.
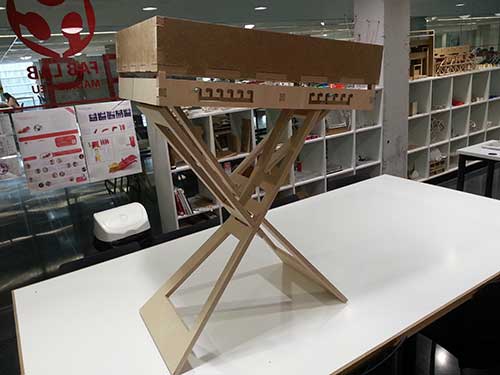
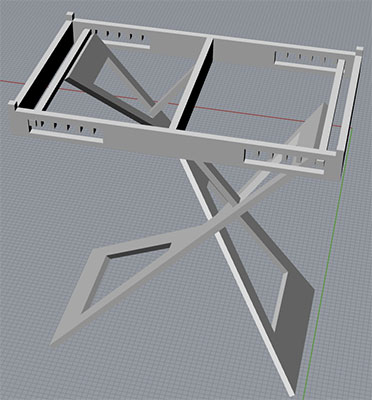
Third iteration of the legs. Its improved design increases the stability and decreases the momentum. Despite that, I want to do them a little bit stronger, preventing unexpected situations.
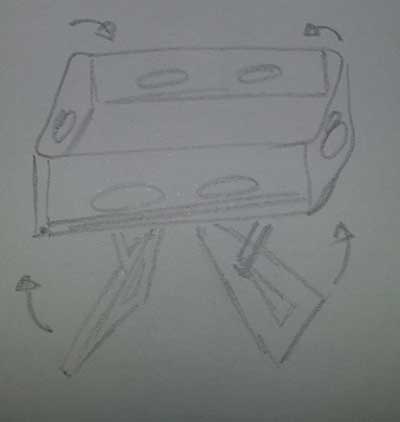
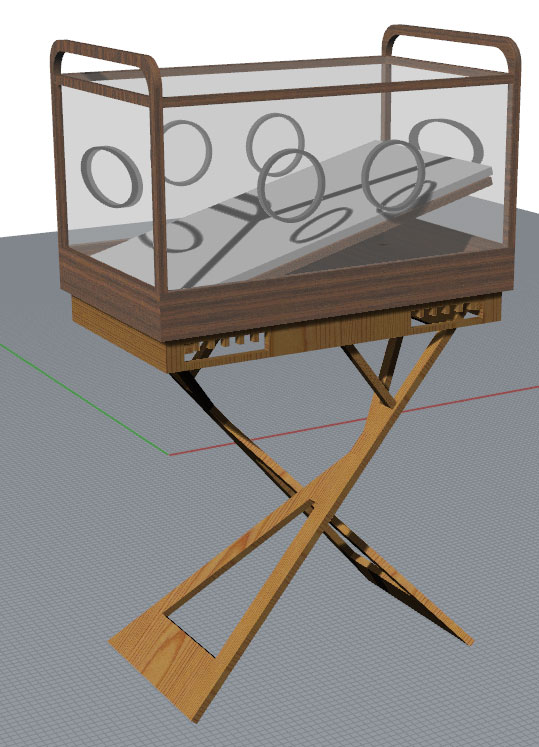
This new design integrates the incubator box and the tilting legs on one device. The incubator box is assembled using a press-fit design.
The legs designed on March 25th were not as stable as they are supposed to be. So I redesigned them from scratch. The notches have different sizes. The joint between the legs and the incubator holder have been completely redesigned to avoid using hinges.
I realized that this leg design is stronger and easier to build than the previous one. Unfortunately, it still has a big momentum when applying load. After some research, I realized that the M8 rod I am using is bending. I will have to change it to a stiffer one.
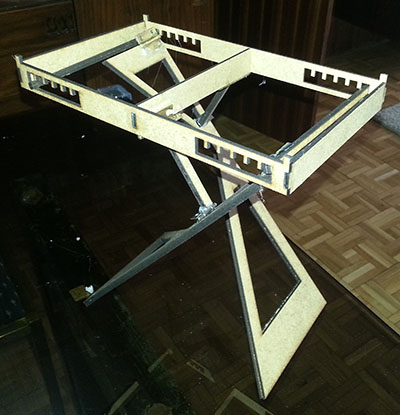
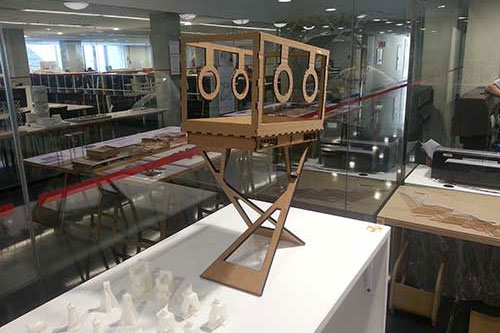
The first real scale prototypes of the legs and the incubator box have been built.
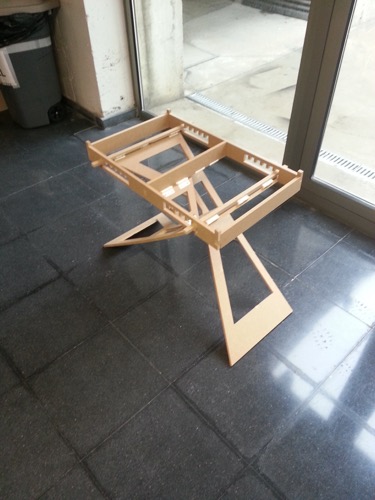
I like the design of the box and the new mechanism for the tilting bed, using gears and a rod instead of a piston. Unfortunately the legs of the incubator need to be redesigned. The load distribution can be improved, giving to the structure more stability and being more robust.
The incubator will need to interact with various sensors simultaneously and perform calculations to adjust the conditions inside it. Therefore, I decided to build an Arduino board. It will be powerful enough to control all the characteristics of the incubator. Anyway, at this point of the semester, I didn't selected all the components that are going to be needed while building the prototype. Eventually we will need a more (or less) powerful microprocessor, or even to design specific controllers for some modules.
The legs I designed a couple weeks ago are very versatile. I am still working on a more robust and lightweight design. Those legs need to have moving joints. That's why I decided to design a 3D printed hinge. the first design I came out with was a hinge with 5 pieces that could be printed separately, but I didn't like it, so I designed a new one using both, Rhino and Antimony, that can be printed as a single piece.
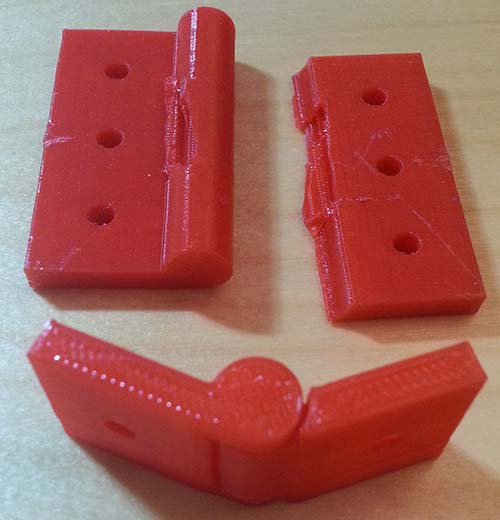
The picture above shows the first and unsuccessful attempt followed by the second iteration and working hinge.
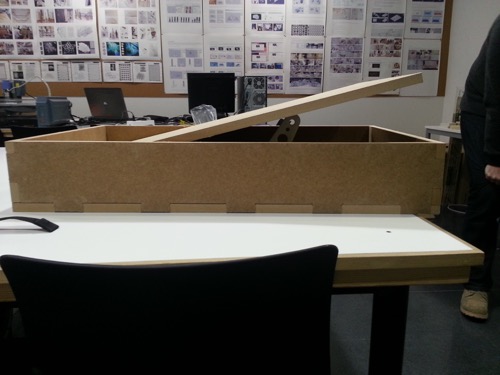
Based on the first 3D model I built a cardboard prototype using press-fit joints.
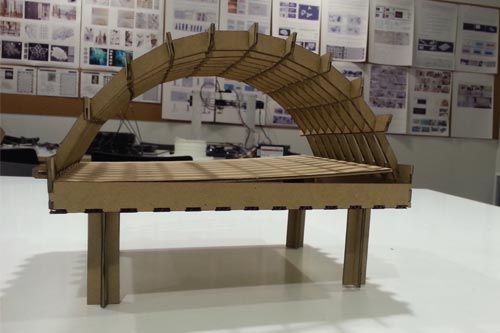
This prototype let me see the errors it made:
- There were not enough room for the nurses to work with the baby.
- The dome didn't allow to the bed to tilt correctly.
- The fulcrum of the bed were on a side instead of in the middle.
- The design is not portable.
I also built the tilting legs, which seem fine. Also, this legs allow a modular design.
Taking these errors into consideration and the legs shape, some other designs of the incubator box came out.
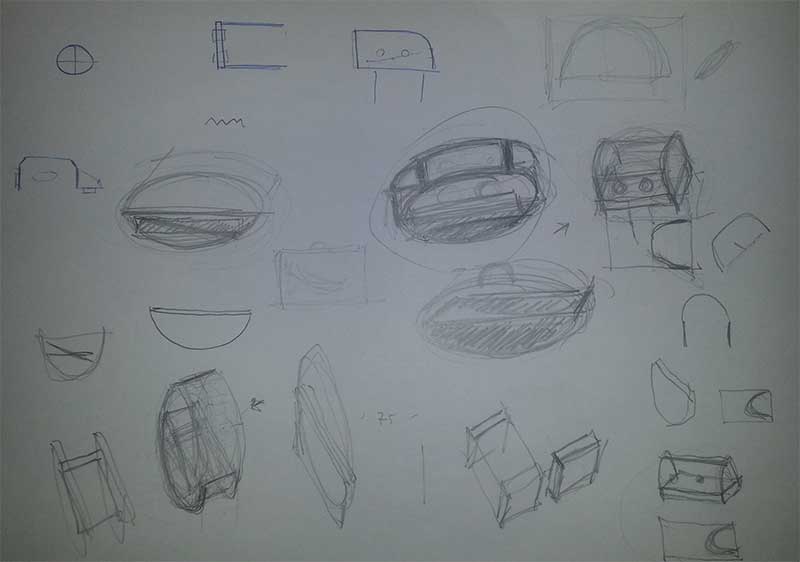
After talking to medical personnel, I decided to continue with a design that is easily transportable and roomy. In order to do that the size of the incubator should be between a typical incubator (136x100cm) and a travel cradle (50x30cm).
Finally I came out with a size of about 70x40cm, this will allow the nurses and the doctors interact with the child while it is easy to transport, put on a bed and lightweight.
Another important thing are the materials to be used. Recent studies warn that premature babies are being exposed to high levels of dangerous chemicals contained in plastics.
A first 3D design came up. I took the sketch and made a 3D model based on that drawing. This model defines 3 different materials to build de incubator: wood for the structure, plastic for the hand hole perimeter and plexiglas for the transparent walls and the arc.
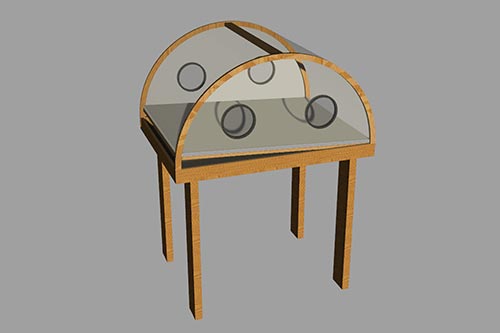
Additionally a pair of legs have been proposed to give the incubator more stability and the ability to tilt the bed.
At this point I want to build a scaled version of the legs to check if the design meet the requirements. If not, they must be redesigned.
This semester I aim to build a [fully?] functional low cost incubator for third world countries. The final prototype of the incubator might not have all the features that a modern incubator have, but it should have the basic ones to maintain the environment conditions that a newborn child needs. It should also be cheap and easily repairable.
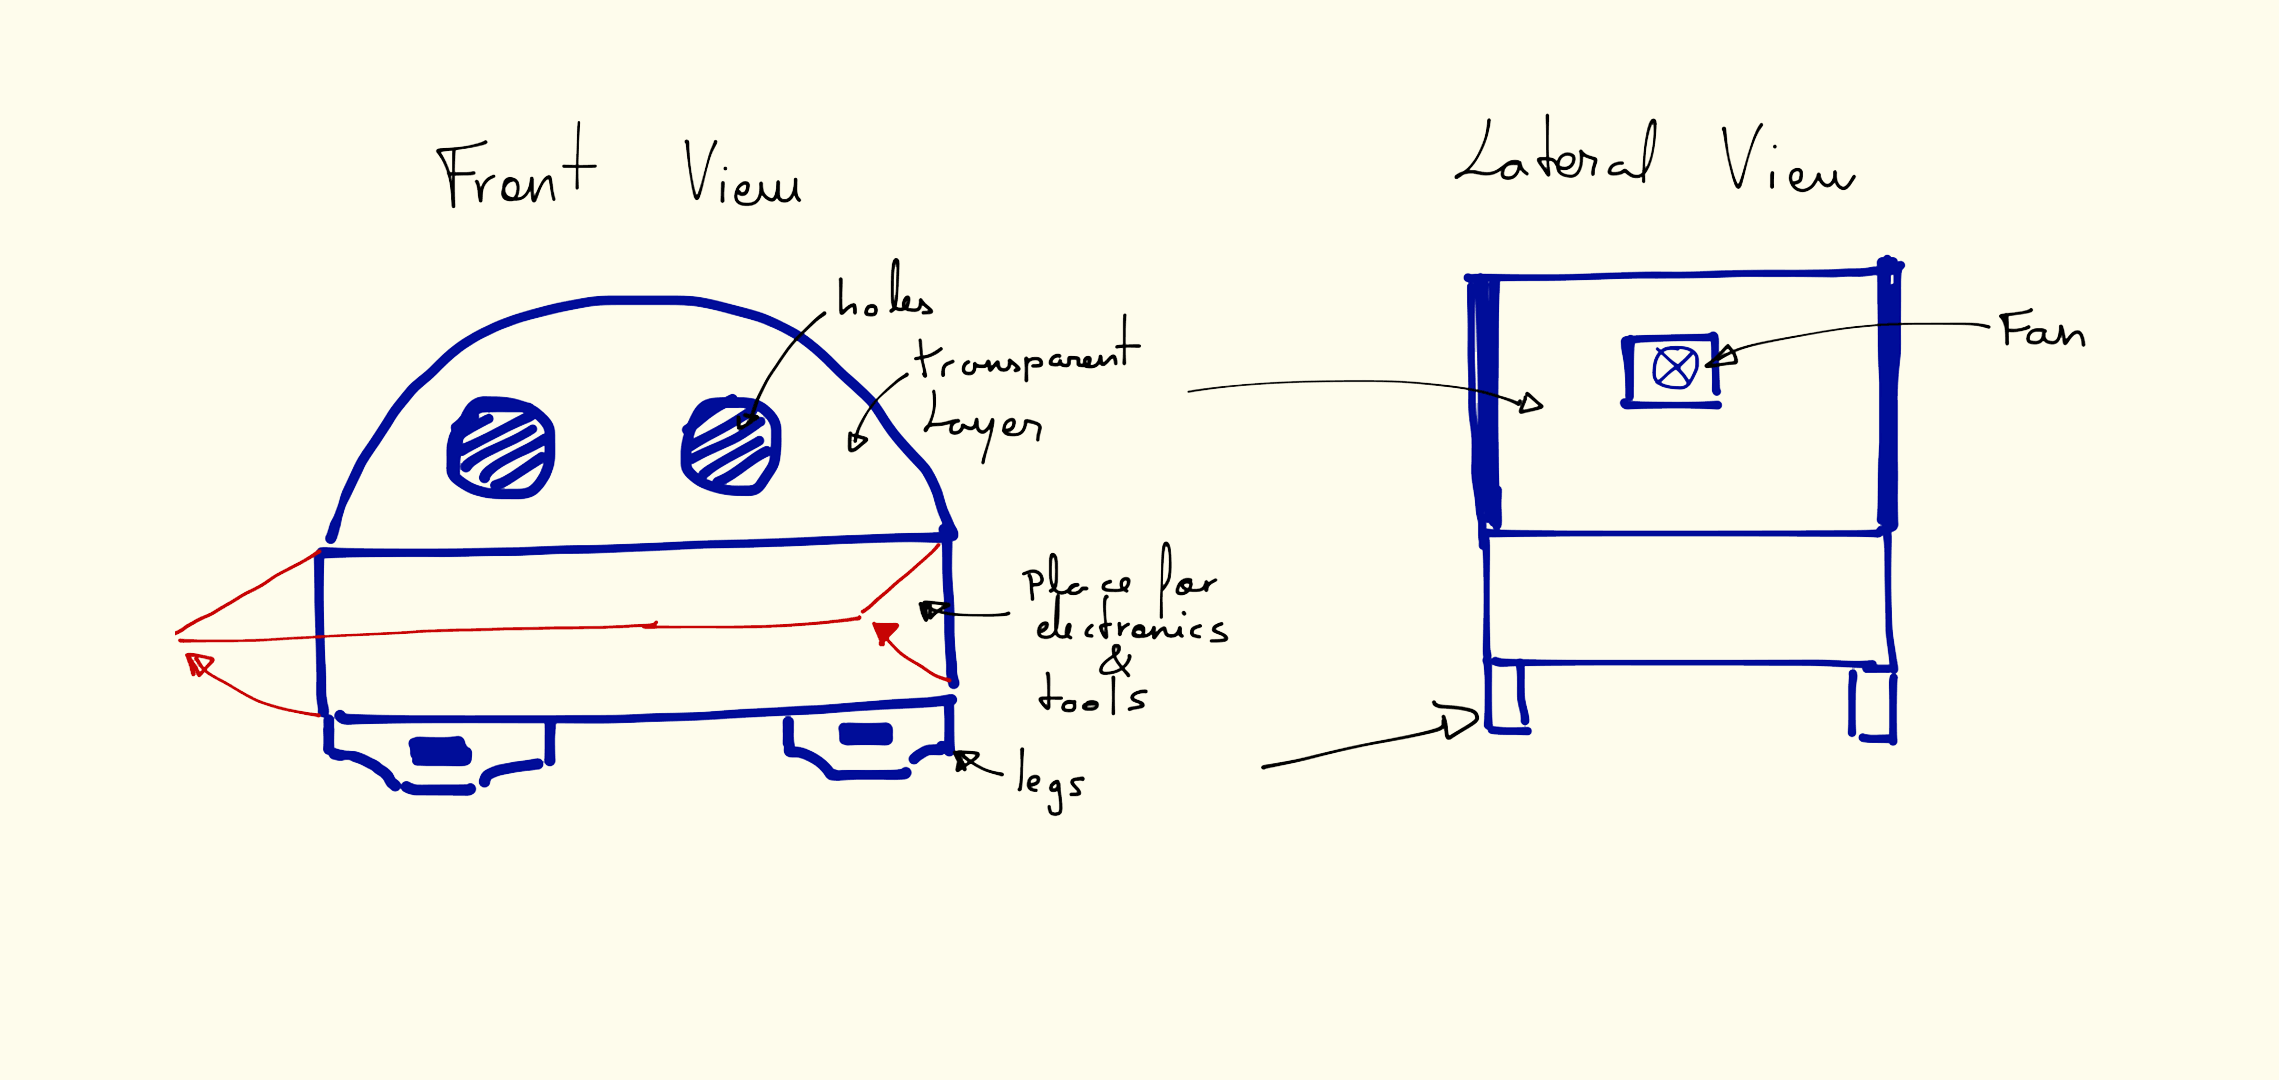
The incubator name is In3 and the structure might be something like the picture below.