Chrome App
Some time ago, during the Input devices assignment, I decided to learn how to read the information the microcontroller sends through the serial port. So instead of using a third party serial console, such us the Arduino Serial Monitor, I started coding a Google Chrome App. Doing this I could read the information received through the serial port and send information to the AVR using a simple HTML form.
If the 4 first bytes received are [1, 2, 3, 4], the fifth byte will be read as the number of bytes to be read from then on that contains the sent value. Once the information has been reconstructed, it will be displayed in the progress bar right below the dropdown list.
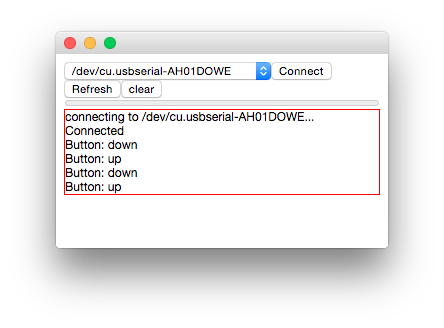
As seen, the serial port to talk to can be selected in the dropdownlist of the upper left corner.
The received information will be displayed in the textbox below the dropdownlist. Therefore, if the received information is a char sequence it will be readable using this console.
In order to install this plugin, you have to download the file chrome_app.crx using google chrome. Moreover, you can import the sources from the Extension menu.
In3 Android app
Going a step further, I decided to create an Android native app to control de Incubator. At this moment I don't have all the final peripherals configured, but I know, for sure, that the temperature must be controlled.
Simulating the temperature
At first I designed the "incubator console" for Android using the "control panel shield".
This Android Application has built in a Bluetooth controller (Enable/disable bluetooth, connect to paired devices and pair with new devices). Once the connection is stablished with the HC-05 module, it will start receiving floats. Depending on the "Header information" that float will represent the measured temperature or the target temperature. This information will be potted on a graph in real time.
While the measurements are plotted, the user of the App can change the target temperature using the slicer.
This shield does not have a thermistor, so I started simulating the temperature with an algorithm that is running in the AVR. The current "temperature" and the target temperature will be displayed in the LCD display and the led will change its color if the temperature is below, equals or above the target temperature.
Reading an NTC
The Android App is the same than before (I just changed some colors to make it a little bit more attractive). But this time, instead of simulating the temperature, the readings to be plotted are real.
Also, if the target temperature is over the real temperature, the red led of the FabKit will be turned on.
Architecture
Coding an Android (or iOS) App is quite different than doing so for a computer. For example, accessing the bluetooth module is not immediate, you must ask for permission to the owner of the phone.
That permission should be asked in the file "AndroidManifest.xml" (lines 5, 6 & 7)
This application consists of one activity that holds two fragments:
Main Activity Fragment
This fragments allows to the user to enable/disable the bluetooth device and connect with new "in range" devices or already paired devices.
In order to do that, a Fragment and its layout must be created. In the MainActivityFragment.java file, the logic of this "window" will be programmed.
And in the fragment_main.xml file, the layout is coded.
Once the user connects to a device, the second fragment pops up. It will display a graph that represents, in real time the temperature received by the bluetooth module.
To plot the received information, I am using a library called AndroidPlot
Bluetooth console
Finally, in order to create a Universal tool for bluetooth debugging, I started coding a bluetooth console app. This application displays (currently) the received bytes (in hexadecimal and as a character) in a scrollable textview.
Each line contains 8 bytes of information. On the left we can find the hexadecimal representation of the received information and, on the right, the characters. If the received byte does not have visual representation, a '.' will be displayed instead.
Right at the bottom of the screen a small form can be found. It can be used to send information through the serial port (Bluetooth). It will send the written string unless it is has the following structure:
0x 01 ab 43
That is to say: it must start with 0x and continue with pairs of bytes written on its hexadecimal form. Between each byte or the 0x flag and the first byte MUST be a space (' ') character.
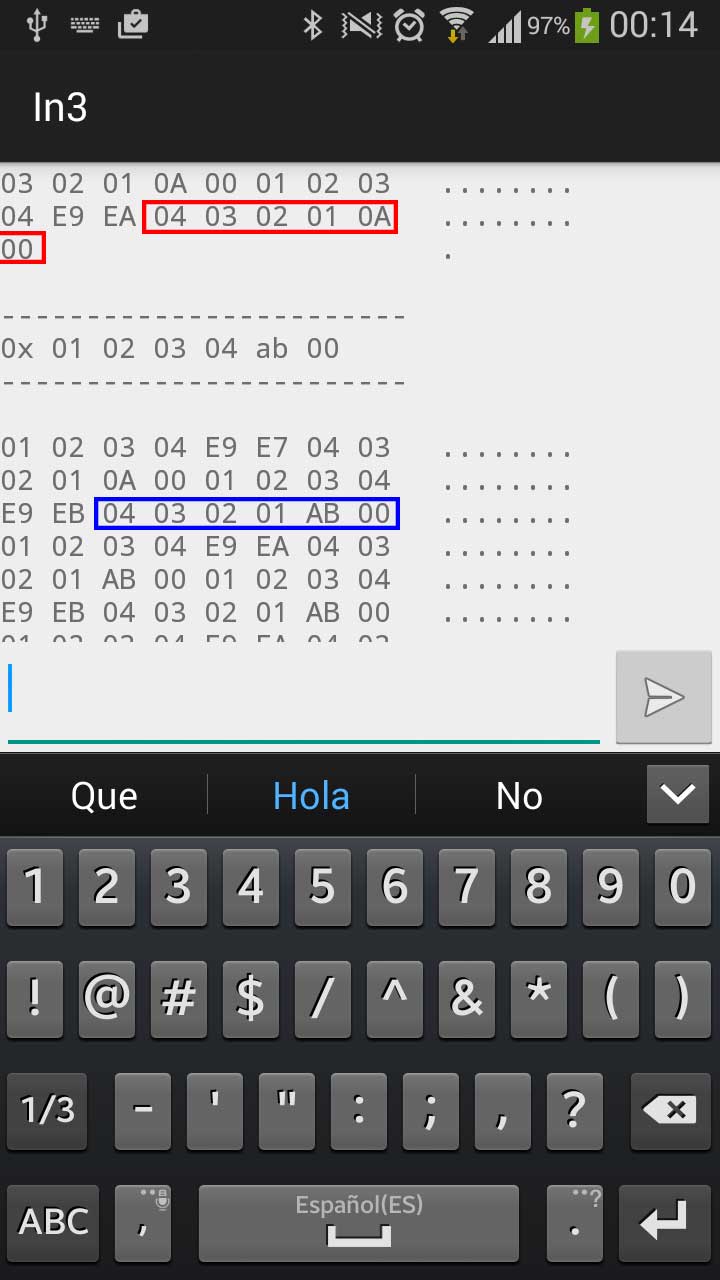
As seen above, before sending the command 0x 01 02 03 04 ab 00 the target temperature was 0A. After sending the command (once it is interpreted by the AVR), that value changes to AB.
Files
Chrome App
In3 Android App
Bluetooth Console
The icon and the name of the app is the same than in the In3 Android App. I will continue developing this tool and publish it on GitHub + google play.