Week 7Assignment: make something big
Programs/Machines:Rhinoceros, Shopbot, VCarve Pro, Partworks
Lessons Learned: Pay attention to the interior strength of your board, sometimes the inside of boards are not as uniform as the exterior would have you believe.
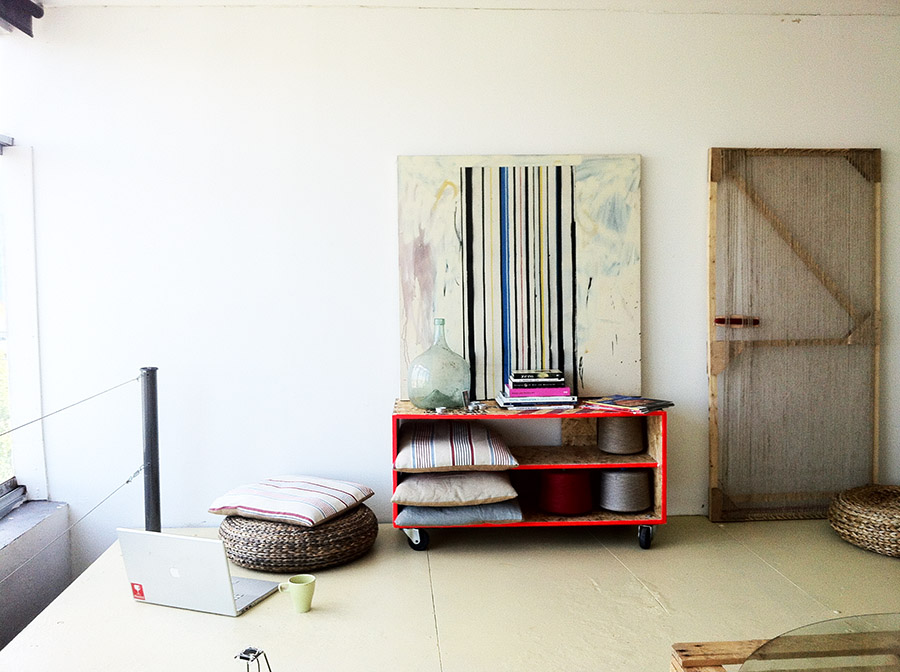
Recently I moved into a semi-furnished atelier in the industrial neighborhood of Barcelona with my girlfriend. The home that we moved into is simply amazing and has huge space because it was an old factory for cars. Slowly but surely we have started to obtain furniture from markets, but I was excited to fabricate my own shelf and design it in a way for it to fit into the style of an old factory industrial space.
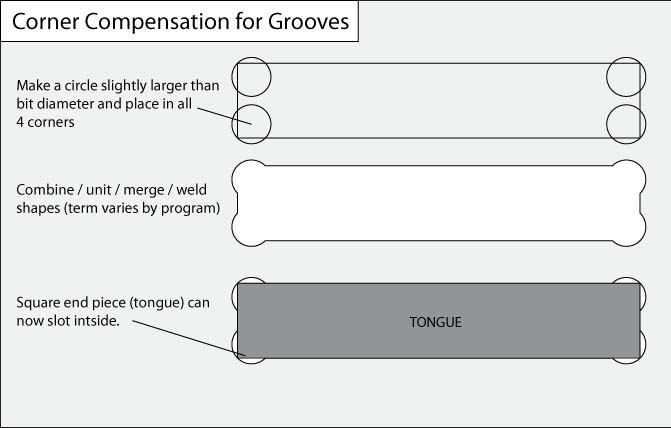
I knew what I wanted to build with the OSB, however while its interior density can be uncertain at times, the wood has a distinctive industrial characteristic that I enjoyed. Working within the material parameters of the OSB I wanted to create a fairly simplistic piece and add paint and details to it after construction. I looked through open source furniture files at websites such as OpenDesk to understand what was necessary to design into cut files. One important detail that I found was designing the bit kerf into the pocket joints through corner compensation.
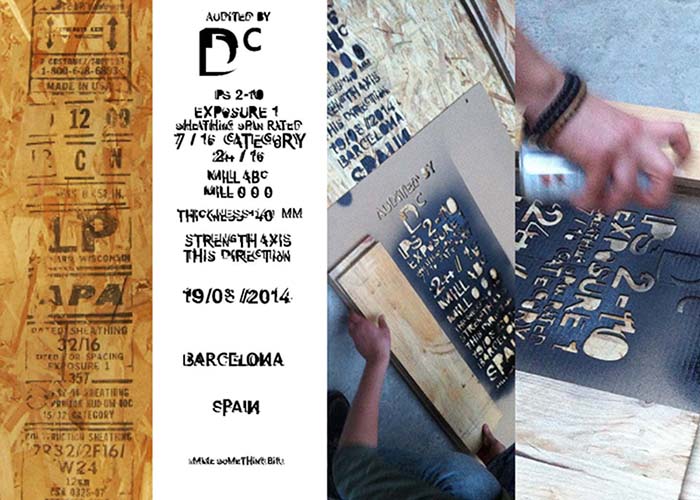
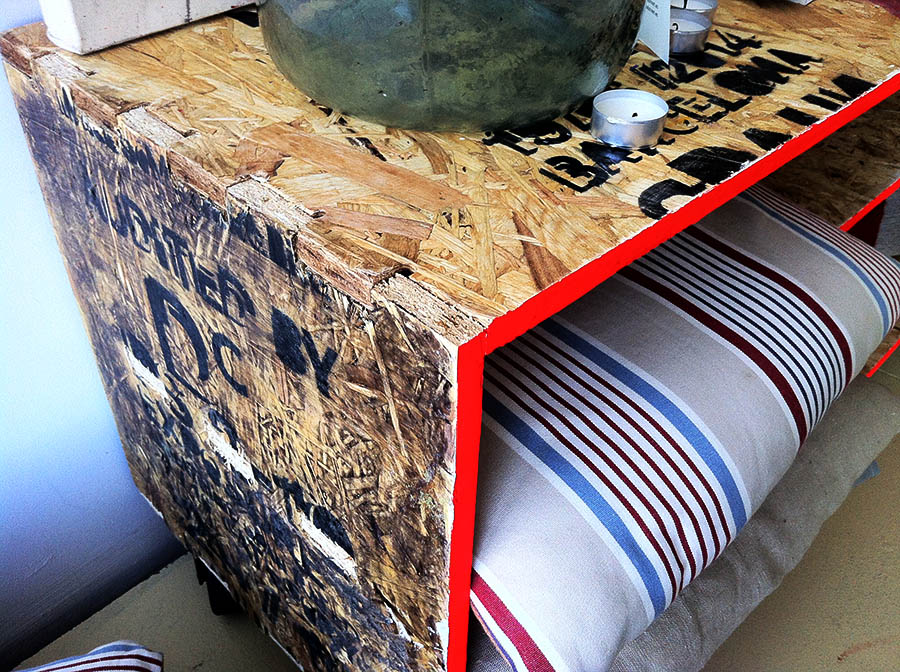
The wood that we received was oriented strand board (OSB), I enjoyed the rough feel of it, but wanted to add a true industrial flavor to it by inventing my own APA industry stamp. (from left: Original stamp for the APA / My invented stamp / The stencil painting process)
I used Rhino 3d for the design process as I am proficient in creating files. Once I was done with a general sketch I made sure that the 3d digital pieces fit together.
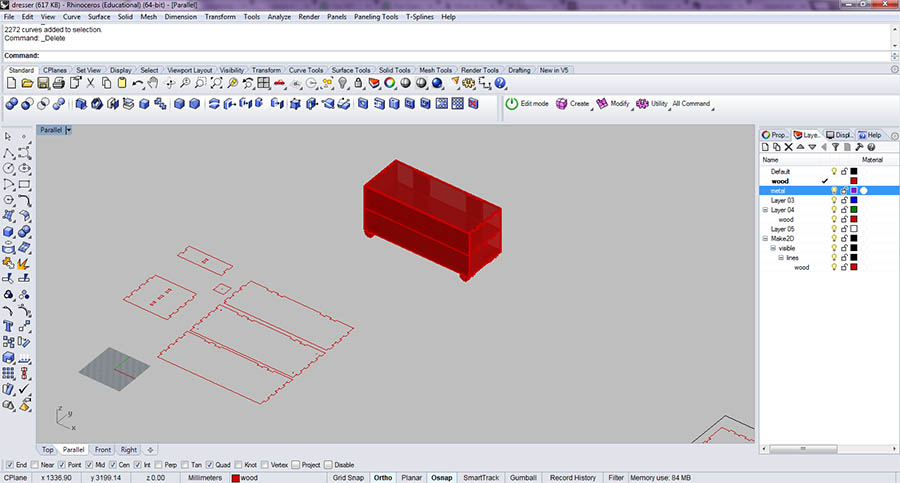
Here we see that the digital pieces fit perfectly, so I am able to proceed with exporting my job.
When your file is ready to be exported, turn off all layers that aren't needed, move your work so that it is located at the 0,0,0, and proceed with exporting the file by selecting your parts. It is important with the ShopBot to include a "board extents" layer the size of your physical board as Partworks creates a "best-fit" window around your pieces you export. Save your work on a usb in order to move it to the computer that the machine is connected to.
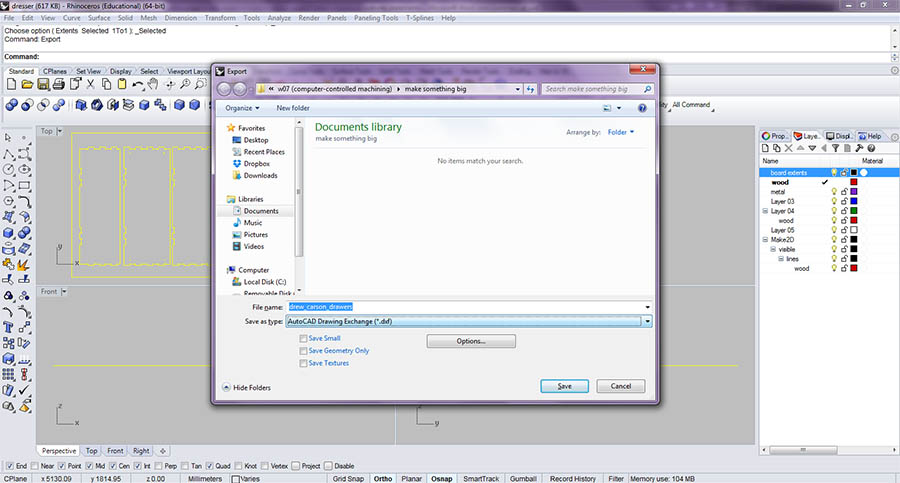
Now you are ready for Partworks
1. Import your file.
2. Make sure that your physical material and digital board size are the same.
3. Check thickness of your physical material and your digital board thickness (interior pockets, etc.)
4. Check "Use XY origin offset"
5. Configure units to "millimeters (mm)"
Toolpath Strategies within Partworks
1. Profile cutting; allows the bit to follow outside of line (inside or on-line options are available).
2. Pocketing will remove material fully from a given area within a closed line.
3. Cutting depth: make sure you allow at least 1mm more than your material thickness to ensure your cuts pass through completely.
4. Be sure to add tabs if you have large or intricate pieces to insure stability throughout the cutting process.
5. Save the job as a ShopBot Part file (.sbp) to run on the ShopBot.
This is the extents of my job. The red dots are plunges that are sent first in order to hold the work down with screws. The green lines are inside profiles that enable other pieces within the cabinet to be held up. Finally the blue lines cut out the individual pieces within the board and the job is finished. (if you are patient you will see the ghost of the stencil I placed on the OSB originally before cutting)
The CNC machining process
Once I finished cutting I made sure to remove any tabs that were still attached to my material. I added some varnish and paint on a few of the cabinet panels. I bolted repurposed wheels to the bottom of it so that it could easily move and add to the industrial vibe.

Downloads