
Fabacademy2015 work by Loes Bogers is licensed under a Creative Commons Attribution-NonCommercial-ShareAlike 4.0 International License.

Assignment: create a mold and create a composite out of it of +- 30 cm
The plan is to make two lightweight curved wings made of textile and epoxy. The benefit of composites that is useful for my project (potentially) is that I can make pretty large objects that are still very light (that hopefully I can control even with less powerful motors). I will use the lay-up technique using vacuum bagging.
I started by designing the basic wing shape, then went into Rhino and used the ExtrudeCrvTapered command before bending the shape. I'd done it the other way around but then I got naked edges when extruding. Changing the order fixed that. I made bends in different directions to create a 3D object of the wingshape.
Then I mirrored the shape (to get a left and right wing), and made a mold by creating a box halfway around it and consequentially using the BooleanDifference command. I gave about 5mm thickness to the object which is probably quite a lot, but it should be fine because I'm vacuumbagging onesided (I can always trim this later). I had some troubles with the FilletEdge command (it gave me naked edges), so instead I gave a chamfer to the edges.
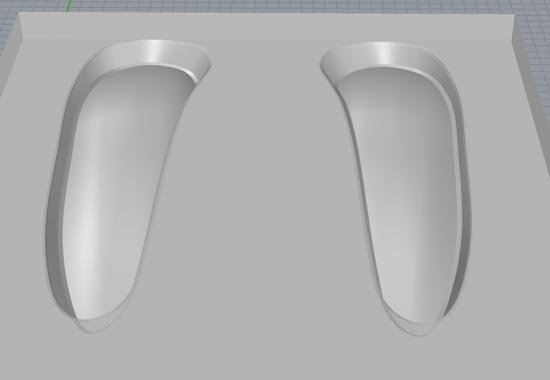
Then as I went on I thought, this is actually not smart. I just need the curved surface to put the textile on so it becomes a wave. I don't need to do that in a cavity. In fact, I'll probably get better results just layering them on top of a surface and then vacuumbagging it. That way the bag can maintain more pressure on the textile because it has full contact with it. So I made a second version of the mold.
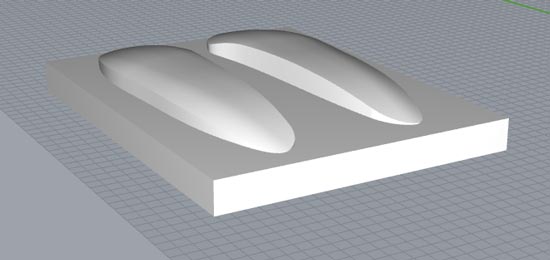
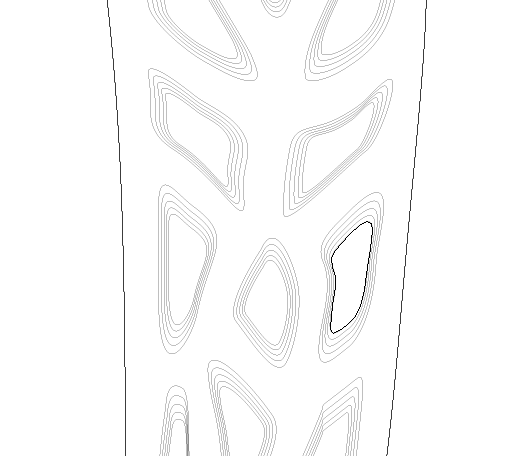
The next step was to ExtractSrf to extract the bottom surface of the object, so I could pre-cut my textiles in the lasercutter. This command gave me troubles because the object is doubly curved.

So I followed orders coming with the error: first I smashed both shapes (Smash command), and then executed the UnrollSrf command with a higher tolerance of 0.1. That gave me two flat surfaces I could work with on the laser cutter. I first exported and got very skewed results, then found out that I have to export with the TOP view active, when you have eg. the perspective viewport active it exports the surface as you see it in perspective... Weird detail but good to know.
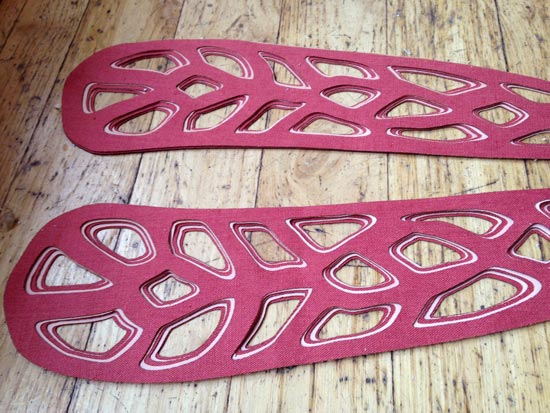
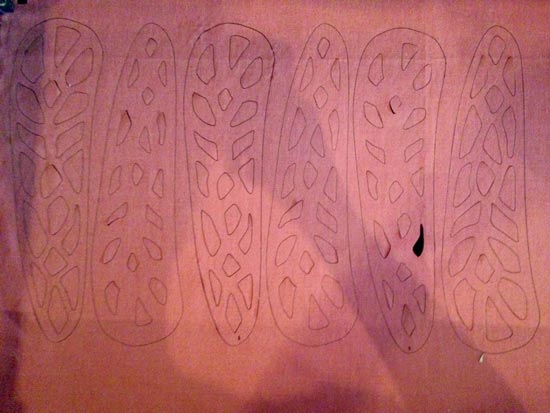
I cleaned the 2D shapes in illustrator to make them fit for the machine. But then saw that the measurements were really off. The bounding box of one wing is 92 x 290 mm in rhino, but only 11 x 41 mm in illustrator. Really odd. I fixed it by scaling the 2D shapes up to what they are in rhino. I made a drawing for each layer of fabric, with a -10% offset, so that the layers become more visible in the cutouts. I will use two different textiles for contrast, I have some small samples of beautiful cotton lying around that I really like to use for something.
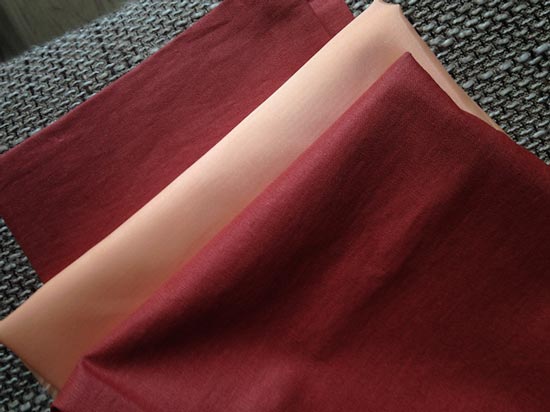
The textiles are cotton (dark) and polyester (light)
I chose a 0.5inch flat end two flute milling bit for the roughing and finishing of the mold. I used a stepover of 20% instead of 40% to get a finer finish with the same milling because my model. Other settings in summary:
the roughing job came out so rough however that I changed the milling bit to a new and very sharp 4 flute flatend for the finishing. I did a lower stepover hoping that the finishing would smooth things over. Still looks pretty rough though. The roughing job gave really deep ridges for some reason. Like it trying to push the material away rather than cutting it. Perhaps the end mill was blunt.
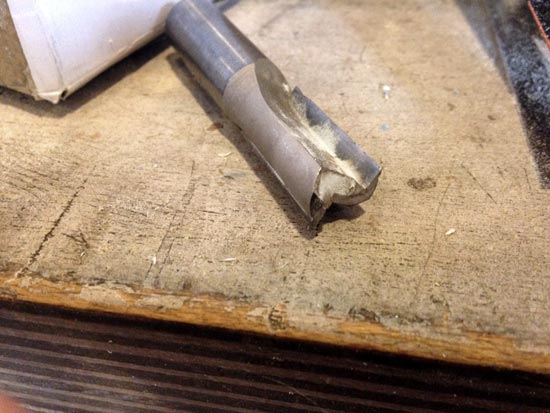
This guy wasn't doing a great job
The roughing job really damaged the material and the finishing job didn't fix it. So I stopped the job. Set the Z-axis manually to -2mm relative to the previous finishing job and ran it again. This gave a much better smooth result.
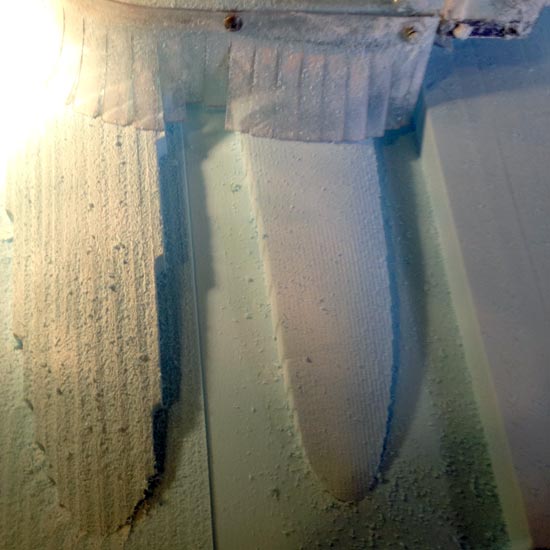
Here you see the difference between the two jobs
So I had to fiddle a bit with the settings in the end. The roughing settings weren't great, but these finishing parameters worked well for me. For finer detail decreasing the stepover makes a big difference (and a longer job) and add the extra pass at 90 degrees relative to first, but if you have details that's worth it.
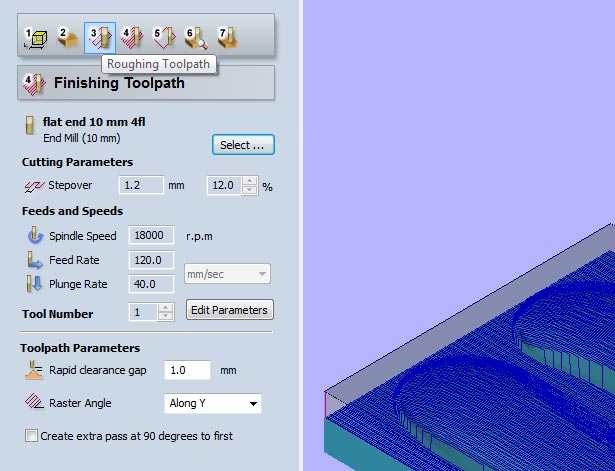
Settings for blue foam that worked for me
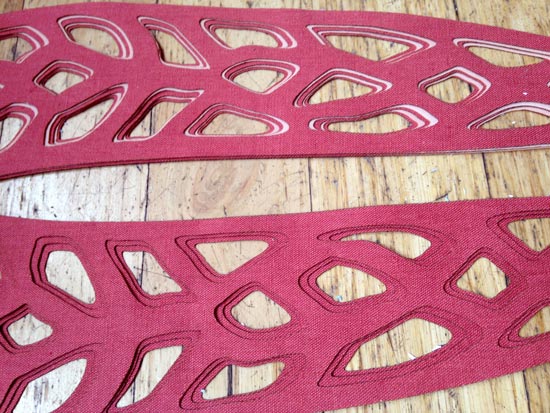
I lasered the textiles with the cutouts and lasered some baking paper to size. I will use alternating layers of light and dark pink, and I rotated the grain of the textile by 90 degrees for the light layers, to get a stronger result. The wings will be very thin, but that's the point. I'm giving 5 plies.
Settings:power 100: speed 1.0 for dark pink cotton, power 100: speed 2.0 for light pink polyester (it burned at speed 1.0
Then I layered everything up, and actually liked it better with only the dark textile because it's more subtle. But because the epoxy will be a bit amber colored and doesn't always come out clear, which could mean that the effect of the offset cutouts gets lost. I'll start with the contrast one. Maybe I'll try doing another pair only with the dark one if I'm not entirely happy.
Decisions decisions......
OK this is the winner! Ready to rumble.
I prepared the mold with 3 layers of gesso. I let it dry and sanded off some dirt that got stuck with very find sanding paper. Then I rubbed it with vaseline to protect the edges from leaking epoxy. I'd cut the wing shape out of baking paper too: the exact size as a bottom layer that I punches holes into with a pin, and one with a 2 cm offset for the top layer (no holes). I made the top baking paper bigger so that there's fewer risk of any epoxy at the edges of the layer sticking to the vacuum bag later.
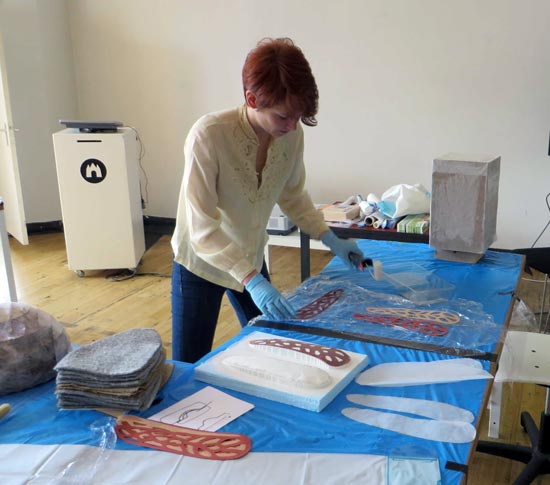
I dry tested the mold in the vacuum bag, which was pretty straightforward with my object. The bag creates a bridge between the two wings, but because there's nothing between the to that needs to be pressed down this is actually not a problem. I could prioritize getting the vacuum bag smoothly over the actual shape (see below). The bag sometimes didn't want to create a good vacuum so I had to take care to really close all sides of the bag properly, but hey, so far so good. I'll keep an eye on it the first few hours.

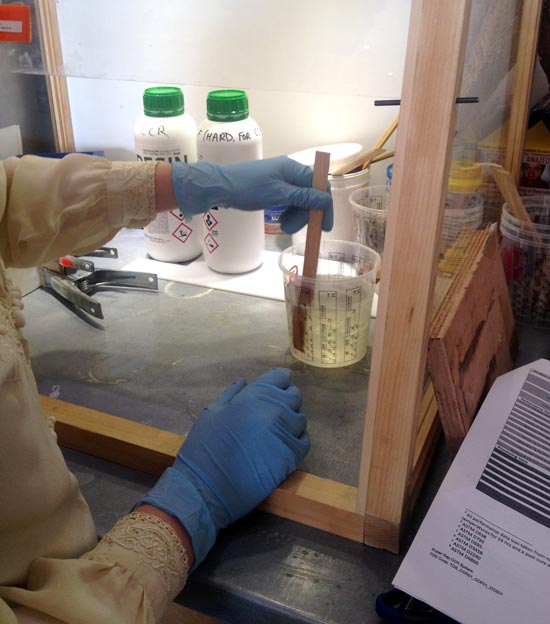
I expect there to be some epoxy in the cutouts that I'll have to remove when finishing the object. The vacuuming proces pressed the epoxy out of the layers a bit. I'll have to wait until tomorrow. I used the Super Sap clear epoxy with 90 mins pot life (I didn't know how much time it would take) and a minimum curing time of 24 hrs.
One day later I demolded the composites from the vacuumbag. What is noticable is that some of the holes in the baking paper on top gave some residu on the resin (tiny white dots). But it demolded easily. The two textiles got a bit darker so unfortunately a lot of the contrast is lost, which is a shame. But the surface is smooth. It didn't cure entirely yet. Because I have used only a small volume of epoxy (probably less than 100ml for everything together) it takes a bit longer to cure. It's still flexible right now, so I'll have to be more patient. Franks' kaleidoscope lens which was also small also took longer to cure than stated on the data sheet.
The next day I postcured the shapes in the oven for an hour at 150 degrees fahrenheit (without the mold because it melted when I tested some heat by using the heatgun on it). They kept their shape but now they're nice and hard!
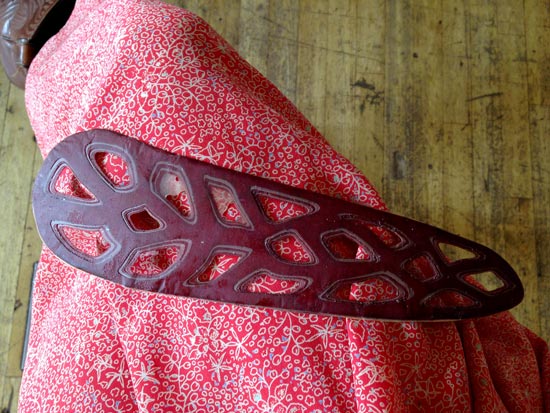
Some epoxy partially closed some cutouts but I think I can fix it with some finishing. They're not as light as I expected, I would be interested in trying it with less or thinner layers even to make it super lightweight. But I'm quite happy that the lay-up with the offset cutuouts came out so neatly and enjoyed doing the assignment and learning this technique.
Composite materials are materials made from two or more constituent materials with significantly different physical or chemical properties, that when combined, produce a material with characteristics different from the individual components.
It*s light and thin but strong (tensile strength and compression). You work with skins, layers.
Matrice (eg resin) + reinforcement (often a fibre).
A. Boeken Stoffen & Fournituren (Nieuwe Hoogstraat 31) is great for textiles and is closeby.
You can get these bags at HEMA or Blokker
Gives light positive shape around which you lay the composites.
If you're unsure what materials to use, make sample. Make a minimold, or take a tray and vacuumbag and try out some materials. You have to go through the entire process so now we have only 3 days to do everything...maybe not. But it's good practice.