Assignment: Design a 3D mold, machine it, cast parts from it (use soft tooling: make mold of a mold, cast the mold, cast the object.)
The idea: a modular counterweight to attach onto an axis
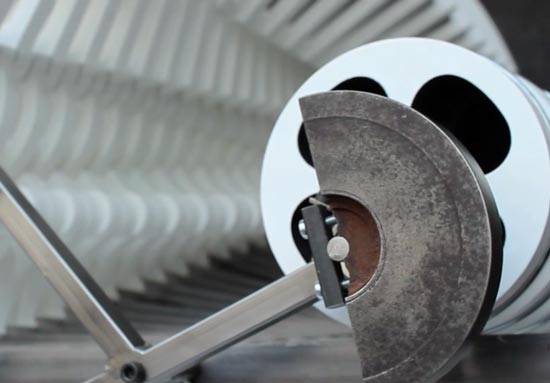
My plan for the week is to make a weight that you can screw on to an axis, that can act as a counterbalance for moving structures. I saw this thing below on another project with big moving structures. I want to make a few of these to experiment with the weight of materials.
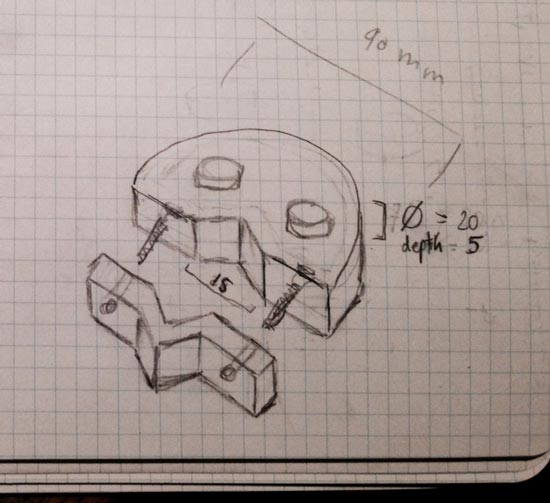
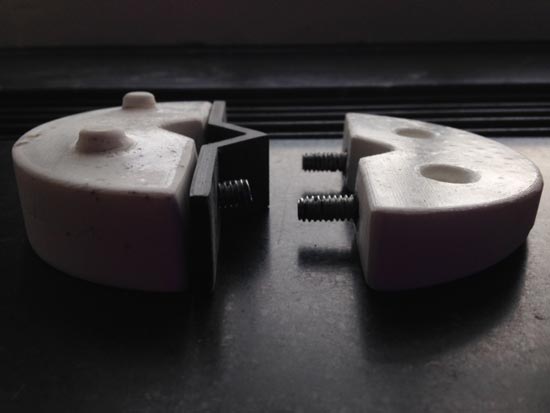
Because I don't know yet how many I'll need, I wanted to make it slightly modular: to make a weight that can pair with the next weight like lego (not snapfit, that's not necessary), and that can sit at a different angle but still stick together with the one next to it. Whoa sounds vague. I will insert two bolts inside the mold so I can screw it on. I left the notch for the axis half open so I can attach it to any size square axis later. This is the idea
Designing the object - mold - mold of mold
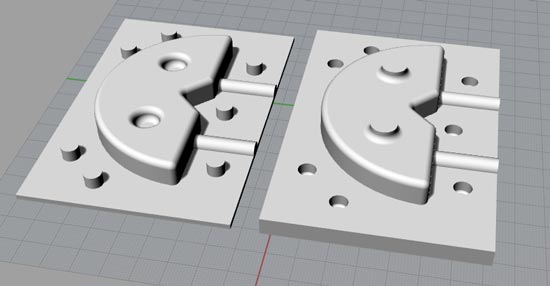
I started by modelling the object. When that was done I copied it to a new file, and made two boxes around the object for a two piece mold. An did a Boolean difference of the object for each. Then I added the pouring hole (truncated cone), and an airing hole as well as the holes for the inserts (bolts). Then I added keys to the object to make sure the two parts of the mold are sitting in the right place. I did a BooleanDifference for the females with part 1 of the object, and a BooleanUnion to get the males, using the same cylinder shapes (just unticking the "delete input" box the first time around so I could reuse them.
Fits and sizing & making the mold of the mold
I had to change some sizing around to make sure everything would sink in smoothly later:
I made the round notch that make the object modular slightly different: the male has a diameter of 19 mm, the female 20mm. They don't have to be snapfit, but they have to slide into one another easily.
I changed the sizing of all the keys and the bolts inserts to 7mm because the only milling bit that could go deep enough was the 1/4 inch milling bit.
I gave the keys fillets with the FilletEdge command, so they slide into one another easily.
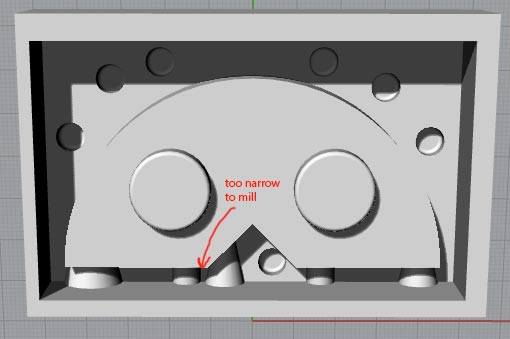
I was all hopeful but then when I came back the next day I realized that the model was unmillable. The keys were 7mm to fit the 1/4 inch milling bit, but the spacing between the elements of the design was too narrow in a few places. I had to respace everything, but then ran into limit of the size of a wax block. Eventually I changed the mold and the vents and pouring hole around...Looking back now I can see that I got confused between the three steps a few times and overcompensated when I tried to fix my design: the two big male notches on top of the object would be really hard to cast with this design and it's not a very efficient design in the end. I modelled funnels on top at first but they too would be unmillable so I lost them again and did them provisionally with flexible plastic sheet and duct tape (see below). It would have been better to take a step back, take a blank canvas and start over with the new information and insights in mind rather than fixing and pushing to put everything in. But I was already too invested, and just wanted to move on I guess. Remember for next time.
Then the final step was to make a mold of the mold. I did a Boolean differance of the two mold pieces, giving them a thin surface. Then I exported both to .STL format. I also added two 6 mm bolts for the inserts. I measured a standard block of machineable wax we have. It's 154 x 92 x 38 mm and my model only just fits, but it fits.
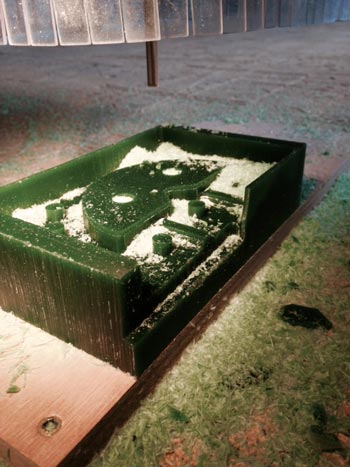
Milling the mold of the mold with the shopbot
I chose the 1/4 inch flat head, 4 flute milling bit for my job because it gives me the depth range I need. Also I found out that the machine has a warm up routine: insert C5 into the yellow command box in the shopbot console. It lets the spindle run a 9000RPM for 3 mins, then 10000 and finaly 12000 to warm it up nicely :). I used the hardest type of wax available (the only one available at the moment).
Then total failings! The machine milled right into the wax piece, going from the middle to the outside, past the walls on the first run. That's no good. My model shouldn't be telling the machine to go outside the pocket at any time, breaking the walls of the negative mold. What happened? The orientation of the path was set to center rather than the x,y 0,0 corner. My mistake. I changed it, reset the job and made the new job go 7mm below surface rather than 5, problem solved.
But this must have pissed off the shopbot and she came back to bite me in the ass. She did the rough job fine. Then I went for the finishing job. Mylady decided to go WAY too deep, and taking a wrong position on the Y axis. AND IT WENT THROUGH THE WALL! I'm happy the wax is soft enough to break immediately and I could still save the negative mould with some clay and a gluegun. But I couldn't figure out why it did this. We checked the milling bit and it's likely I didn't tighten the collet enough and it started to move. Would explain the error on the Z, but not on the Y. Weird. A classmate was haing a similar problem with the bot this week.
shopbot broke down the wall....
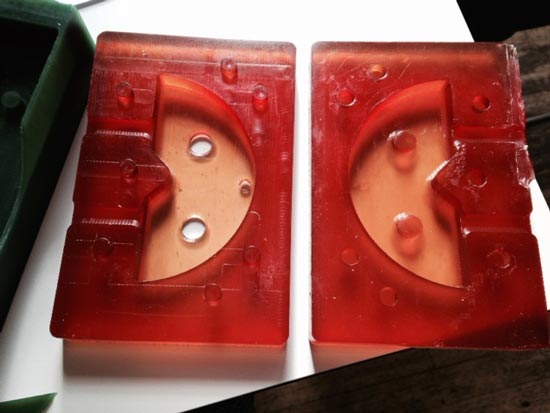
Casting the mold of the mold
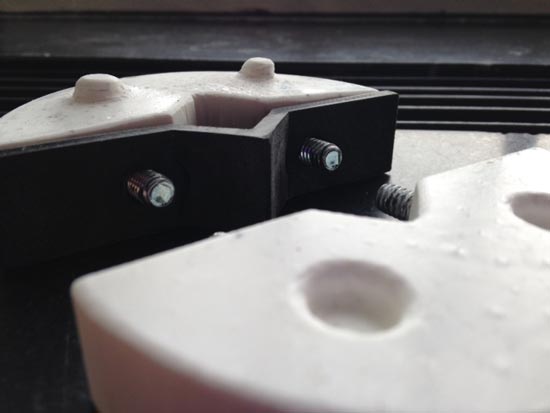
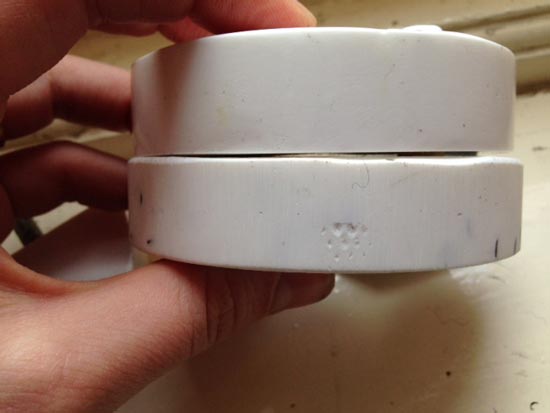
I used PMC 121/30 dry Smooth-on liquid rubber to cast my mold. It came out beautifully after 21 hours but was a bit sticky so I did an hour of post-curing at 65 degrees Celcius (150F) in the convection oven. Unfortunaly I broke two more walls of the mold on the way murrr. They were realllllly thin. The halves fit together really smoothly, but perhaps I could have given the tops of the keys an even bigger fillet next time. But the fit is pretty tight! WIN!
this is how I fixed the broken wall, what a win: this looks amazing!
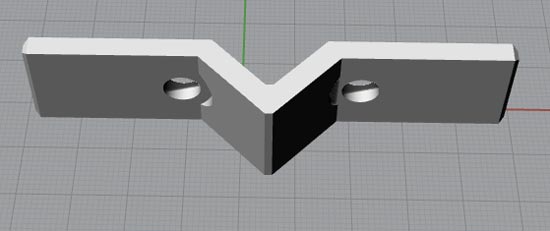
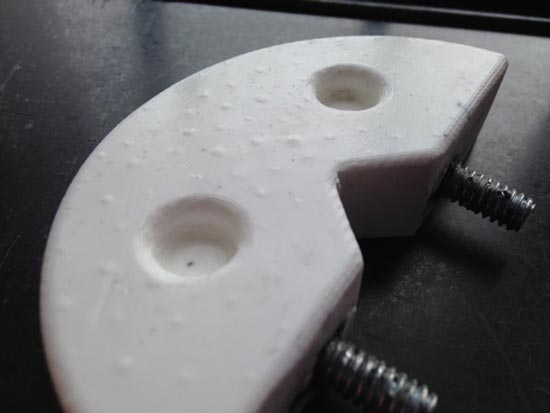
Printing an attachment to finish the product
To attach the weigh to an axis, I needed another part. Which I designed and printed to fit to the weight. You can attach it to any size rectangular axis now. Grrreaaattt.
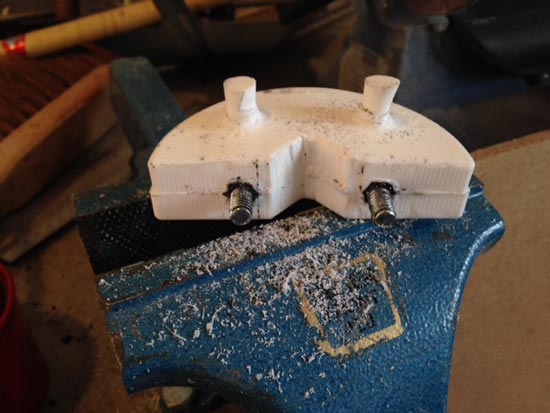
Casting the product: first attempt
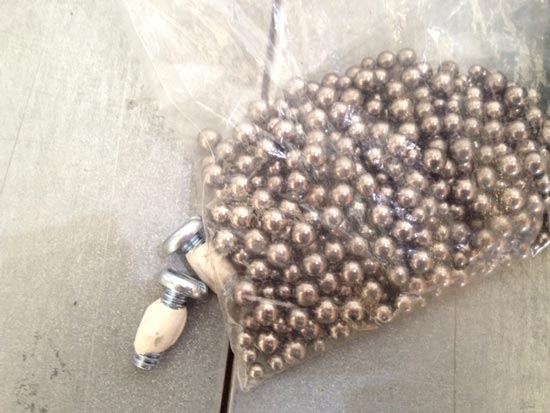
The final stage! I went to an amazing old ironmongery in Haarlem - stumbled upon it by accident. I got a sheet of lead from the guy, weighs a kilo. The shop owner suggested I melt it and just cast with that. Unfortunately the melting point is 327 degrees Celcius. And what I gather from the data sheet of the liquid rubber is that it's flashpoint is 132 degrees Celcius. DEFINITELY A NO GO. I looked into metal cold-casting i.e. fill the mold with metal parts without metlting them and then adding eg. resin to cast.
So plan two is to find some sand filled with metal particles that can be found around people doing sandblasting jobs on metal...But they won't give me their waste material because they have to dispose of it properly. What a shame. Buying it from a mold/cast specialist costs like 40euros per tub. Nooooo not going to happen for experimentation. I'll find something more lowkey.
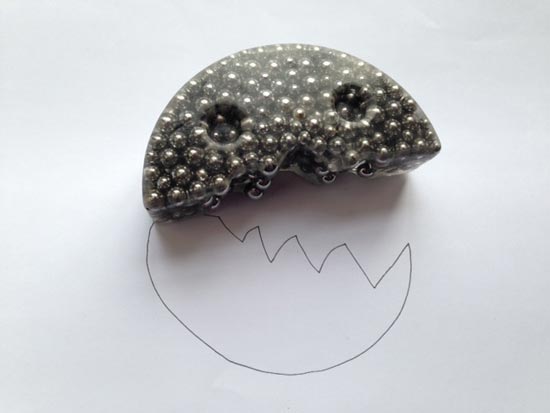
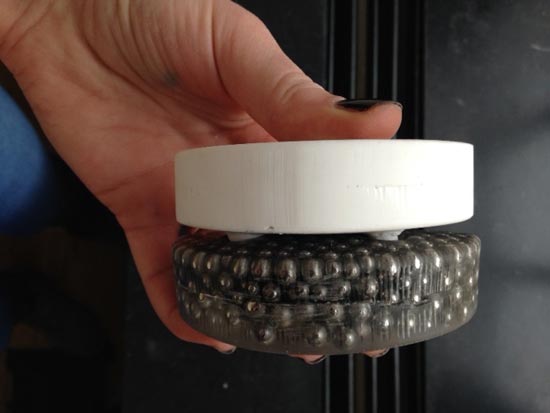
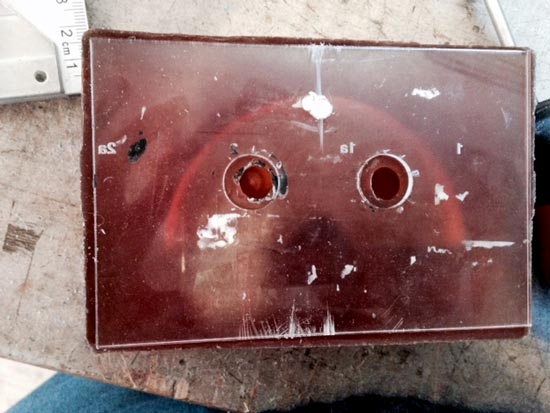
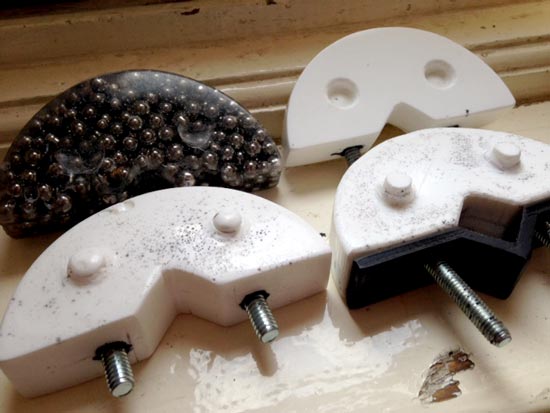
What I did find were these round roll bearing bullets (pic above) from my neighbour the bicycle repair man. I cast the the first object with clear resin. It was quite a bit of a gamble becuase it was past its expiry date but luckily turned out fine! Its a really solid piece of 300 grams, its dimensions are 9x4.5x1.5cm or so. Here's what could be better:
The resin did pour out a lot. I should stuff the holes where the bolt inserts are with clay more.
What I already suspected was true, the two males on top of the object wouldn't pour with this mold as is. But I can try to tweak it.
There's some bubbles, I should play with the angle a little when I do the pouring again.
both bolts broke off really easily during finishing. I'm hoping this is will be better in a cast that isn't packed with metal balls.
the weight of the metal balls caused the mold to bulge. The walls were alreay really thin, and with the weight it's really showing on the final piece.
Now I have a crazy pacman monster paper weight, also cool.
Second casting: getting inserts right
I didn't have anymore balls so the next castings I focused on fixing some of the other faults like the bolts and the leaking. This one I did with a smoothcast fast setting liquid plastic. This would cure a lot faster so I can make a few more iterations in a short time. What I learned:
The chemical process went SO FAST! Pot time should be 3 mins, but with the volume I was using, this time seemed to fly by even faster! In fact, I didn't even finish pouring when I saw the liquid turn white and hard before my eyes in mid air. I wish I had it on camera
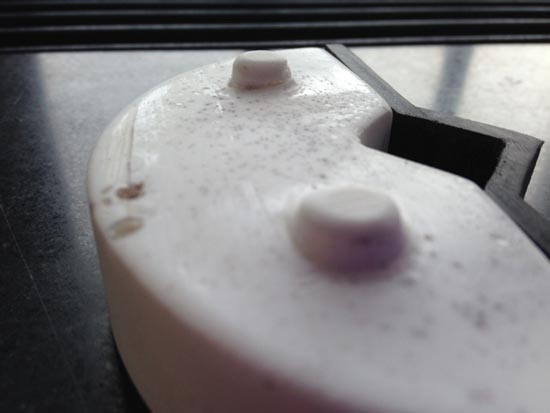
What came out was an unfishished shape, it's not level ofcourse, and not entirely filled. But the inserts are really strong this time! And hardly any leaking
The first casting seems to have left an imprint in the mold, so this white guy now has pimples.
No bubbles! But that's nothing to be proud of with a half full mold haha. Staying positive.
And the attachment fits really well
The one on the right is the second casting, you can see how it's a lot thinner
Third casting: getting the males on top
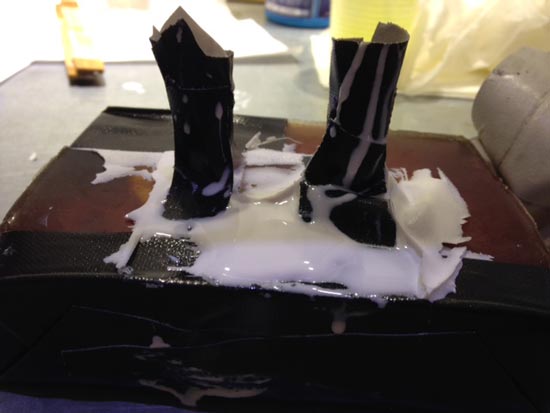
The third round I tried getting the males on top of the mold (where the pouring hole and vent are). I made two funnels of a strong flexible sheet of plastic and inserted them into the holes and taped everything down well. What I learned now:
This time I was trying to work fast! I was gonna get that plastic in before it would set. Well, it went in alright, and out everywhere. I didn't tape it down quite enough I think.
I think I was a little too fast because I have two bubbles at the top and small bubbles around the surface now. It looks really nice but let's find the soft spot in the middle of these two extremes
I got my males! Win!! :) I polished everything off and have to sand it. But I have males now. There not as symmetrical as the would have been with a better mold system though. I would not make it again like this for sure
The insert fits again! Less neatly, I didn't put the bolts entirely straight, but they fit into the attachment.
Also this casting is bulging pretty badly. I'm not sure if the weight of the plastic is enough to make the mold bulge, or maybe it's damaged from the first casting. Two objects won't fit snugly next to each other on an axis now. But ok.
Fourth casting: getting rid of the bulge
Keep the funnels to make males, but weigh down the rest of the mold: I did this by lasercutting a sheet of acrylic based on the 3D model of the mold with the airing hole and pouring hole cut out in the same place. I taped it down and added weights on top. I filled it with nails to make it heavier because I couldn't get my hands on more roll bearings. Win! The model is totally flat now.
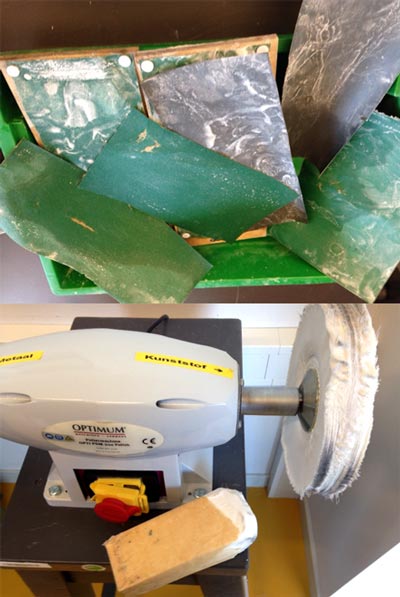
Finishing: sanding manually, wet and with paste on a machine
I spent some time finishing the first 3 objects with sandpaper ranging from 80 to 600. I sanded wet because it dissolves the waste material so that the sandpaper doesn't get saturated with it. Then I polished it up with a special polishing machine and past. If your object has really straight edges (which mine hardly do) you can get a really nice high shine finish.
Lessons learned
make thick mold walls! The mold needs to carry quite some weight
use a flat surface for pouring holes and vent
work fast if you need, to but don't rush, you'll get bubbles for sure
decide before hand, plan ahead, don't change your mind unless you're very adventurous and experimental (I was just very happy I didn't damage my mold and had to start, few.
there's a lot you can do with a mold that's imperfect, but if you want to mass produce it's probably a better idea to improve the mold. Because all the machines were so busy with all our students this wasn't an option anyway this week so I made do and it was an interesting experience as well.
the small bubbles are really hard to get rid of...
I used Pathworks 3D to prepare the paths for the shopbot.
top surface, sides to machine 1 - Top
depth of model below surface - 5 mm should be more, like 8 (thin mold walls is no good!
Roughing toolpath:
tool: 1/4 inch milling bit, 4 flutes
pass depth: 2.0 mm
stepover: 40%
spindle speed: 18K, Feed Rate: 75
plunge rate: 10
Finishing toolpath:
tool: 1/4 inch milling bit, 4 flutes
stepover: 10%
spindle speed: 18K, feed rate: 75
plunge rate: 10
raster angle: along Y (more efficient and light for machine
tick box: create extra pass at 90 degrees to first
Cutout toolpath:
> None
A short introduction to molding and casting (summary of Mickael's instruction)
Why molding & casting?
To duplicate something
to do a part that you couldn't do otherwise, eg. in a non-machineable material like rubber, foams, concrete, plaster, ceramics (need plaster molds), metal.
To make objects with inserts like a USB key, a screwdriver etc
Mindset
Perfect the mold, not the object
3 ways
traditional: make a tangible model, cast mould pt 1, cast mould pt 2, cast final piece
digital fabrication soft: mill part mould 1 & 2, cast 1 & 2, cast final piece
digital fabrication hard: mill mould part 1 & 2, cast piece (use tapers on vertical walls!)
Workflow
design piece
design its mold
machine mold of the mold
cast mold positive
cast pieces
finish pieces
Design
what properties should piece have? Opaque/transparent, watertight, how hard (on Shore hardness scale), how heavy
define materials for 2 molds, lubricant etc
design 3D model, export to .STL format
piece geometry: if it has a flat surface > make it a pouring channel
should it be hollow? Should it have inserts? Design how to hold the inserts steady
where will the mold seam be (try to put it on a straight edge
add tapers if you have vertical lines and are making a hard mold (you can cheat with rubber)
be generous with keys! Make cylinders and be sure that their height is less than the diameter. You can make the males slightly thinner than the females, to give better fit. Give males a filet edge
give mold of mold an outside margin of at least 5 mm or your mold will be very thin.
make a pouring hole of 10-20mm diameter, make vent hole (can be small). Place them at extremes, visualize how the liquid will flow, and figure out if all the air can escape, if it's trapped you get a bubble
think ahead: take into account the size of your milling bit: diameter and length!
avoid deep molds with a lot of detail
Machining the mold
First rough, then fine. Never skip the first step!