Auto irrigated VERTICAL GARDEN
Firstly I'm working on Monkey repellent but its doesn't include no. of processes within this course. Im doing this parallely but not for Fabacademy submission. Here is my new project 'Auto Irrigated Vertical Garden' fulfills all these so this one is my final and applicable project for Fabacademy 2015.
About:
The term "Vertical farming" was coined by Gilbert Ellis Bailey in 1915 in his book Vertical Farming.He stated inside about soil contents and vertial growth of roots. Peoples explored this knowledge and designed new types of vertical gardens. This project is one of the part and advance version of these designs. Basically this design contains vertical garden design and electronic circuit having soil moisture sensor at input that senses water content inside soil and gives it to control board ; through this it will control Motor and water content.
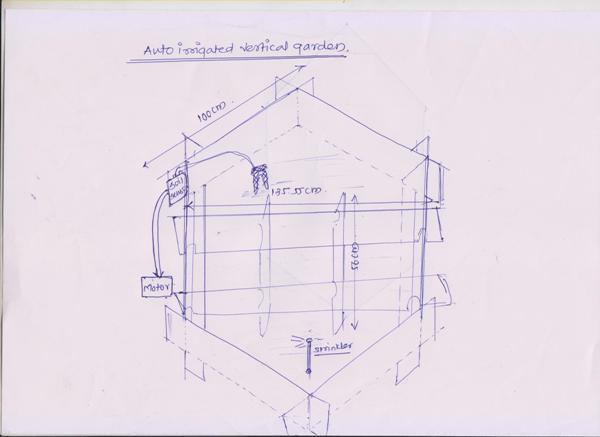
Following is rough design idea:
 |
 |
Need and application area:
Under urbon areas this kit is very useful;as prices of vegetables going up day to day.Also use of pesticides on vegaetables;shortage of land are main problems in city area. To tackle all these this vertiacal garden may useful. Using this anybody can grow their vegetables in oraganic way in parking, Terrace, Gallery etc.Also its auto operation keeps care in our absence. Also for commercial purpose we can grow valuable things inside like Medicinal plants. Also Model 2 can be use in nursaries with proper envirnoment.
Progress:
I'm poor in botonical and plant science but still under surveying I learned water requirnments for different crops, Different types of soil, sufficient area required to grow plants etc. with these design crendentials built this project.
Vertical garden design:
Model No.1:
I seen these design first on AKER site; inspired from them designed new vertical garden kit.
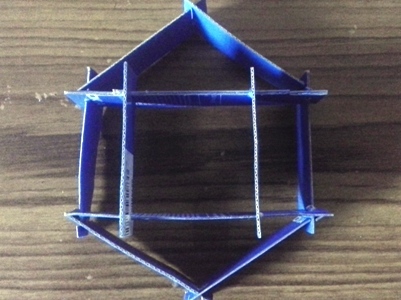
This vertical garden builted in three steps having area 6ft x 6ft x 2ft. Base part is hexagon ;middle and upper one is rectangular. Considering these shape assumptions(For assumptions and geometry made paper model and sketches) object designed in Inkscape and catia design softwares.
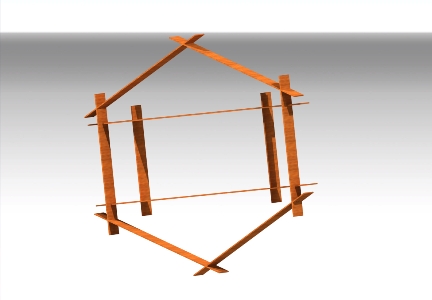
In inkscape design First step is Hexagon of sides having length 80cm and hight 25cm each. To connect two sides in 120 degree angle made slots on each end of side having width 11mm as material thickness is 8mm. There is a space of 3mm to make tilt of 120degree in between sides. Using 'Difference' tool made notches on rectangular plate. Refer design files given at the bottom of this page. For 3D design I refered Catia design software. You will get all dimensions with attached files at bottom of this page.
 |
 |
All these files are cut on shopbot. Please go through 'computer controlled cutting' assignment for shopbot cutting and files. Following are assembling steps:
Step1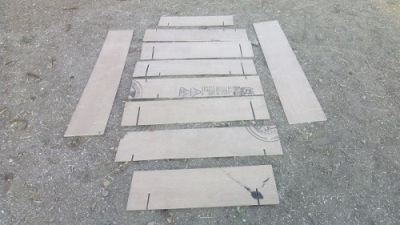 |
Step2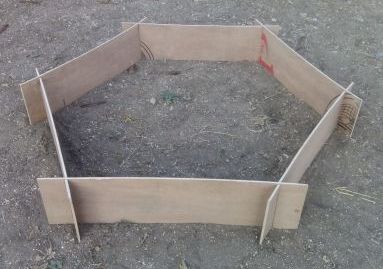 |
Step3 |
Step4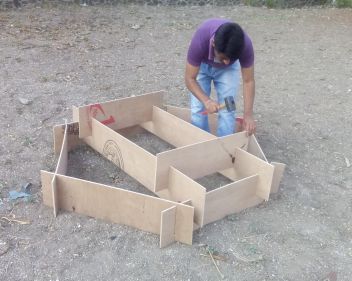 |
Step5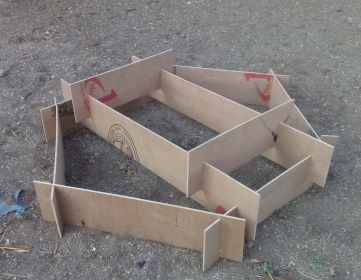 |
Step6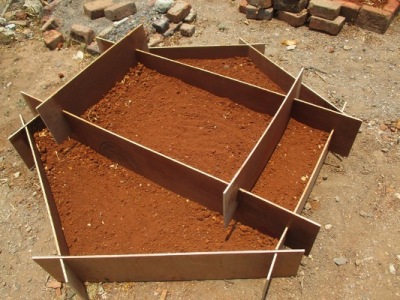 |
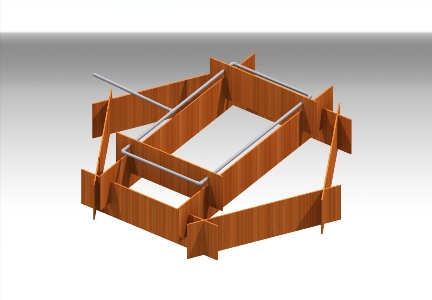
Pipes and assembling part:
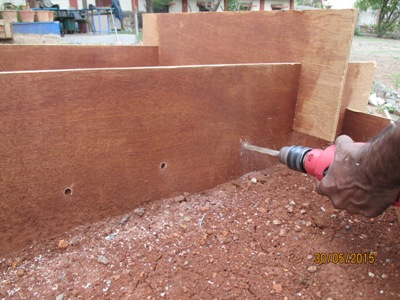
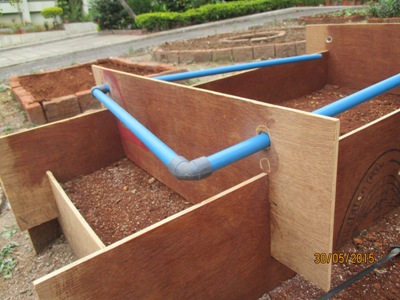
Here I used 1" pvc pipes for irrigation purpose; made rectangular shape using elbows and 'T' joints inserted through holes inside design;drilled them with 1 mm drill bit at a distance of 2cm in between for droplets.Here I forget to keep holes on plates in design to percolate water from there. After this drilled manually and made it. Go through pipe assembling steps.
 |
 |
 |
 |
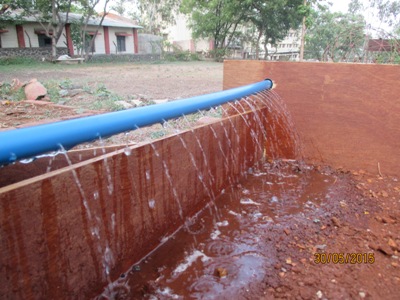
Pipe joints and drilled holes are tested with giving water supply directly.It was working good!!Now put soil media inside with organic waste material and compost in 2:1:1 ratio respectively and made it ready for plantation.
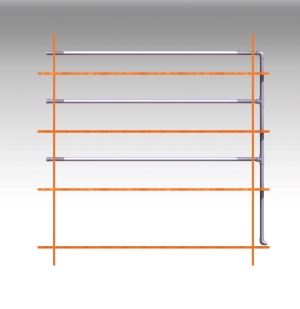
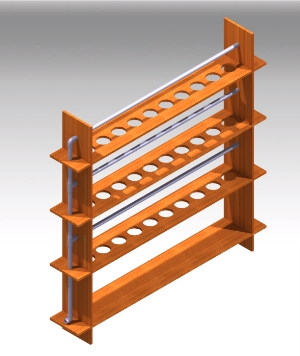
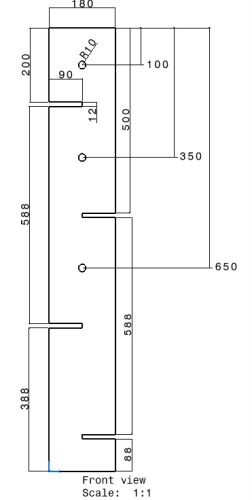
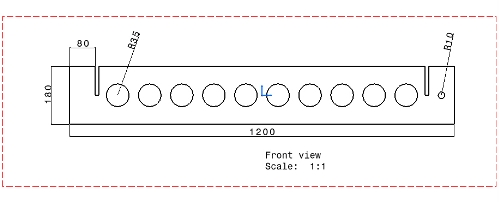
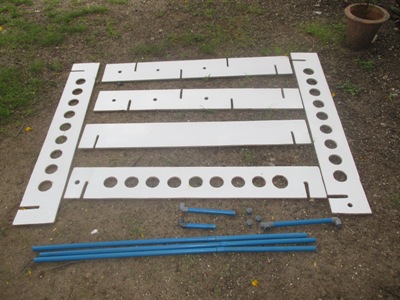
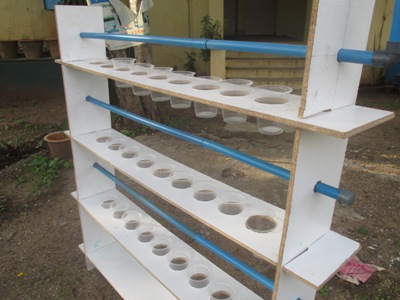
Model 2:
Model 2 is for indoor purpose and can be used inside tissue-culture labs or in nursaries to give proper envirnoment to plants. Design part is mainly devided in two parts; first is support plates that have vertical orientation and slots to fix horizontal plates inside.Horizontal plates are four in numbers and having a holes of diameter 70mm to fix glases inside.Cutting design made in Inkscape . 3D model of actual design made in Catia. Please go through following design files and dimensions.
 |
 |
 |
 |
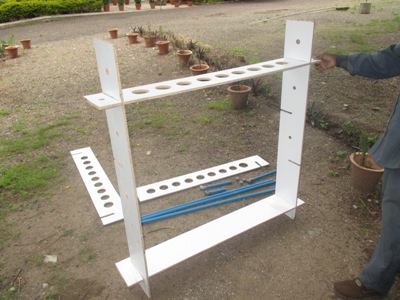
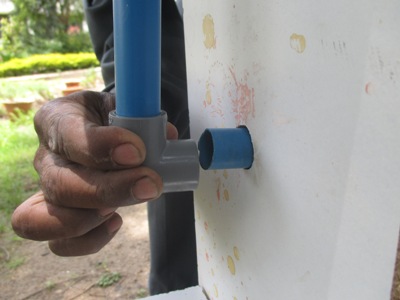
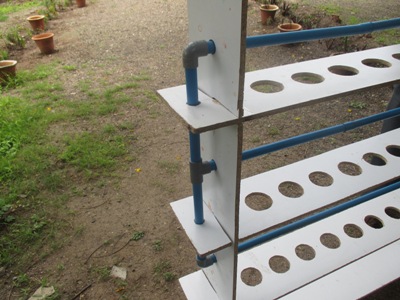
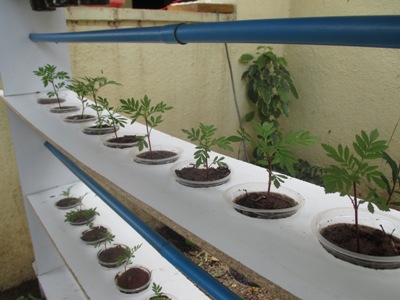
Pipes and parts assembling:
All above designs are cut on shopbot which get available at COEP fablab.Assembled them in vertical orientation with having base support plate of same dimensions. Pipes are fitted as per design ; drilled holes perpendicular to plastic glass bottom for water droplets.Inserted reused plastic glasses inside with media.
 |
 |
 |
 |
 |
 |
Electronics Design:
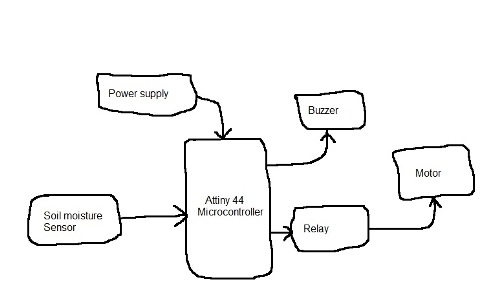
Block diagram and description:
Under electronics part I builted soil moisture sensory system to auto irrigate these models.In this mainly have sensory unit with soil moisture sensor ; controller unit with Attiny 44 microcontroller and output part with relay,motor and alarm system. This circuit mainly controls water content inside soil as per crop and awares user with alarm when motor turns ON. To control this soil moisture sensor senses water content inside soil and gives it to controller unit ;controller unit processes this signal and as per operates output part ;relay,alarm and motor.
 Circuit diagram and operation:
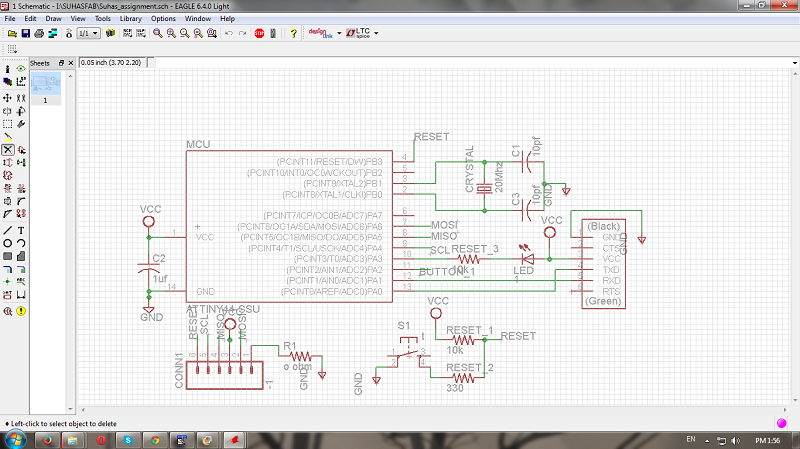
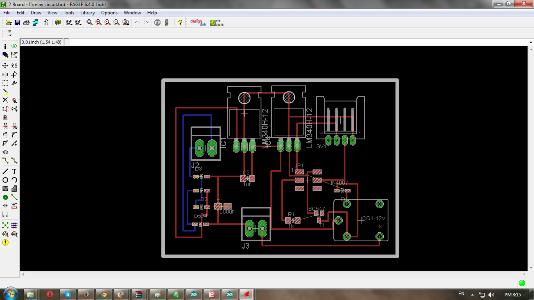
Controller Unit:
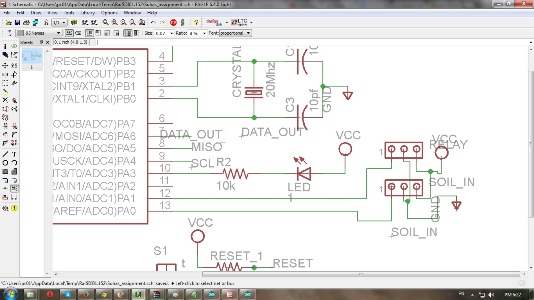
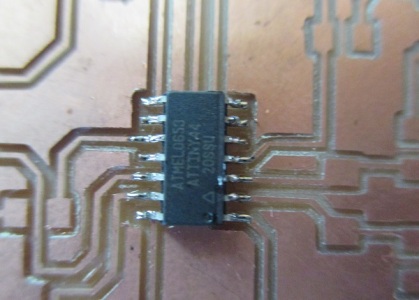
Here I used hello world board for main controlling operation with output board.Both are designed inside Eagle software.Inside hello world circuit board used attiny 44 - 8 bit bidirectional microcontroller which have two I/O ports PortA and PortB. Soil moistue is connected to port A 0 pin defined as input pin. PA1,PA6 and PA3 pins are defined as output pins for relay ,buzzer and LED respectively.Conneced all basic coponents required for microcontroller like crystal oscillator 20Mhz, reset button VCC,GND etc as per shown in didagram. For indication connected red led through 1k resistor to pin PA3. Output board is connected through connector with pins PA6 and PA1.
 |
 |
Download files from here:Hello world board
Soil sensor:
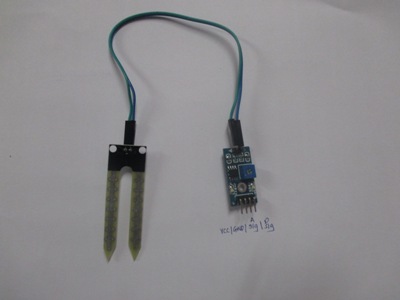
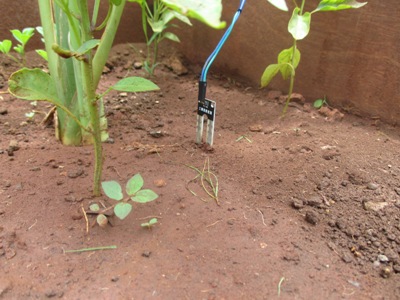
Here I imported YL-38 soil moisture sensor through online. Its having two electrodes that have to fix inside soil which measures conductivity inside soil with variying resistor. Its having small chip which contains voltage divider circuit and amplification circuit. We can set desired intensity with varying this preset but here I set this inside programming.There are four connections VCC, GND, Ananlog read and digital read; here i taken analog input from soil moisture.
 |
 |
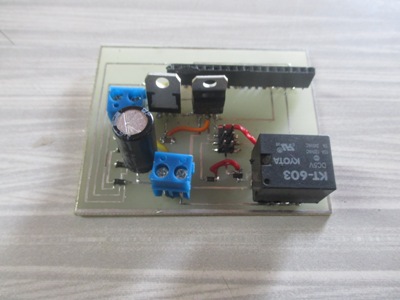
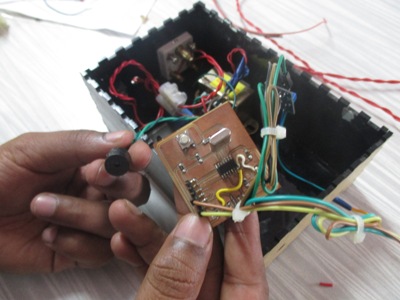
Output Board:
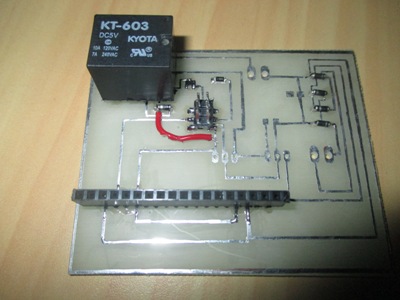
This board is designed to connect ouput devices and communication devices through connector and relay. for this project I connected motor through relay and buzzer at PA1 and data_out pin.I also added power supply unit inside this board which gives 12VDC as well as 5VDC power supply.Relay is connected through BC547 transistor and 1 K resistor ;which will turn on when soil moisture sends high signal to input. Buzzer is connected to PA6 pin of microcontroller through jumper and connector, which turns on for 400ms when motor is ON.
 |
 |
Components and bill of Material:
Go through this link for components and costing details.
Soldering and programming:
Milling and Soldering:
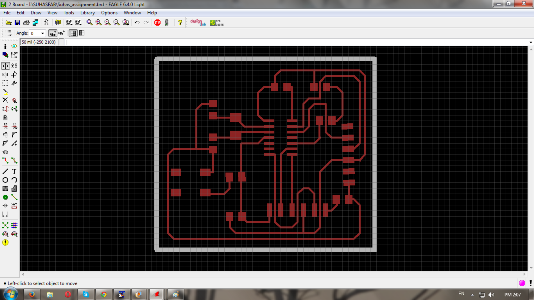
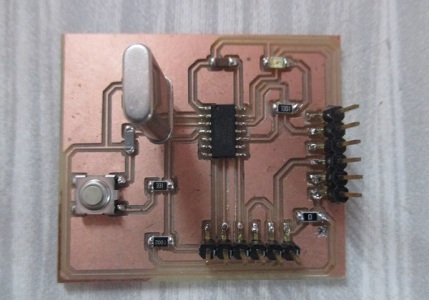
Designed both circuits and boards inside Eagle design software.Hello world board is printed on Modella;refer electronis production assignment for this. For output board 1/64 bits are finished and its not available in local market;so I printed this through chemical process from outside and done soldering.
 |
 |
 |
 |
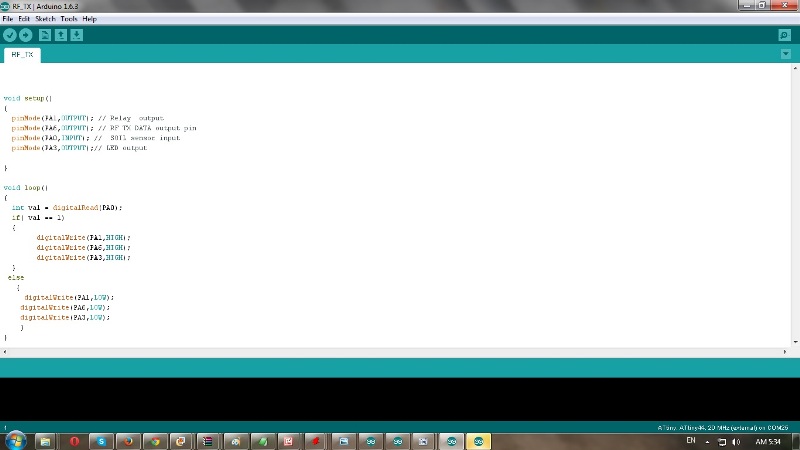
Programming :
I did programming through Arduino IDE; mirocontroller Attiny 44 have two I/O ports port A and Port B . In this I defined PA0 pin as input for soil moisture sensor PA1 pin as output port for relay; and PA6 pin is for LED output. All these pins defined initially as input and output pins. For buzzer operation setted flag bit and delay for 400 ms . When soil moisture input signal exceeds '700' input will goes low to high that gives high output at pins PA3 ,PA1 and PA6. Contrary when soil is sufficiently wet it turns off relay and motor.
 |
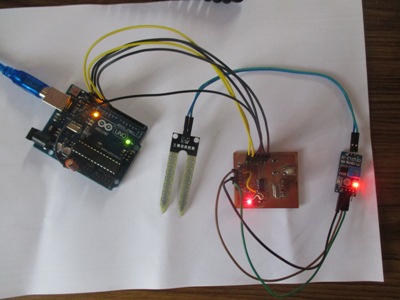 |
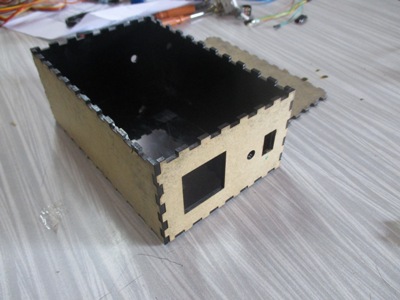
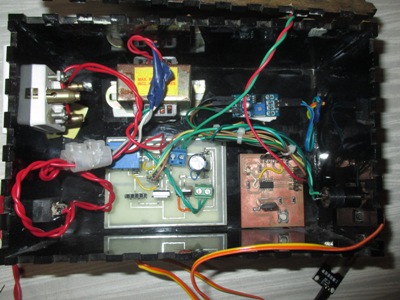
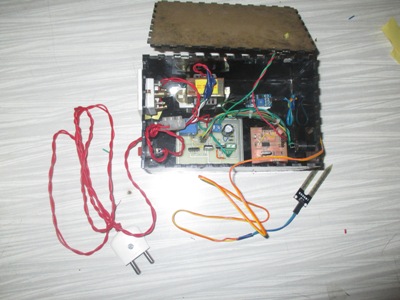
Assembling and Installation:
For casing designed and made acrylic box on laser cutter with keeping space for plug in and sensor input.Joined Hello world board and output board with jumper wires.Connected soilsensor to the input of hello world board at PA0 pin. Given supply through transformer of 0-12V output to output board and connected buzzer at pin PA6 and GND.
Connections :
Jumper wires:
PA0- Soil Input
PA1- Relay output
PA6-Buzzer output
White connector:
AC 230V -Input
Transformer- Output
230 V AC operated motor(through relay)-Output
 |
 |
 |
 |
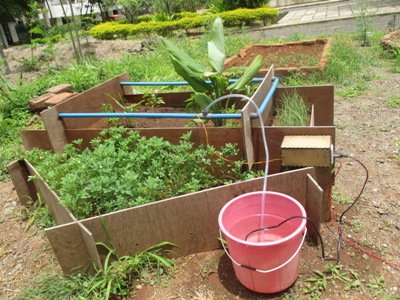
Final setup:
 |
 |
Go through folowing video links for opearation:
Vertiacal garden:Model-1
Vertiacal garden:Model-2
Download all files from here:
Hello world board
Output board
Casing
Source code
Design files
shopbot cutting
Last updated on 26/05/2015 11:00PM ------------------------------------------------------------------------------------------------------------------------------------------------------
Monkey repellent(replaced with Auto irrigated Vertical Garden)
It's a idea which is coming from one of our visitor; which is living in Shimala (India),a hilly region.He have a problem's with Monkeys as they are destroying crops with crossing Fences.So to resolve this problem I want to work on that.
In brief:
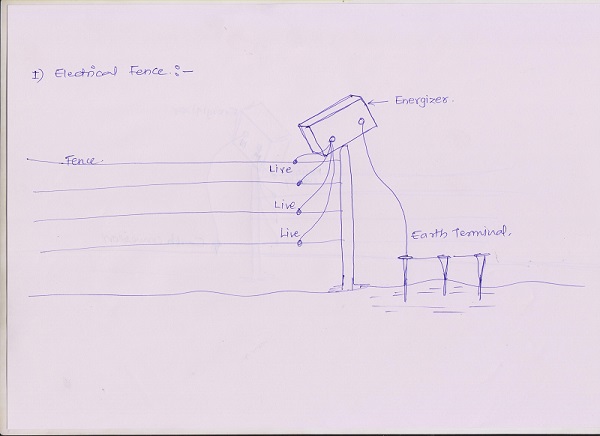
To resolve this problem I have two option either go with Electriacal Fence or Ultrasonic Repellent which will produce ultrasonic frequencies in between 16-25Khz.First I'm trying on electrical fence ,that I need energigizer which will produce high pulse of output voltage,that will not harmful to them.I just started to work on that will upload it in short.
Rough Sketch:
 |
circuit design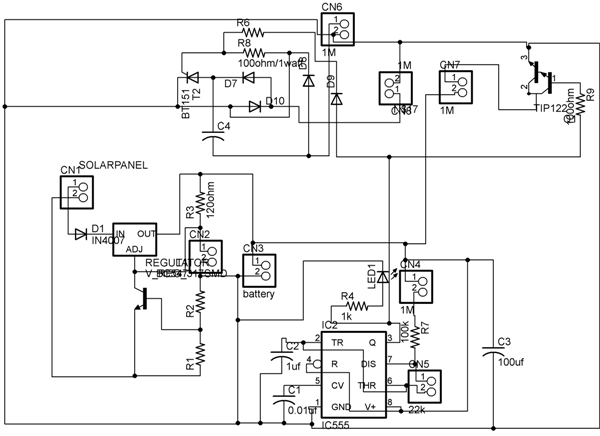 |