WEEK 15 | Applications & Implications
- Place the steel marble at the starting point of the maze,
- Swing the table in order to bring the marble to the center.
Kids will need to communicate and trust each other in order to succeed.
A lighting path will reinforce the interaction. LEDs and sensors will be spread all over the labyrinth. A red light will move over the maze. If the marble rolls over the red light, the LED string will make a special animation and switch off: GAME OVER.
For further information, visit the Final Project page.
Social interaction: a social table that requires to collaborate to be able to eat on it.
Electronic interaction Conductive by Daan Spanjers: a table with conductive threads of copper on the top.
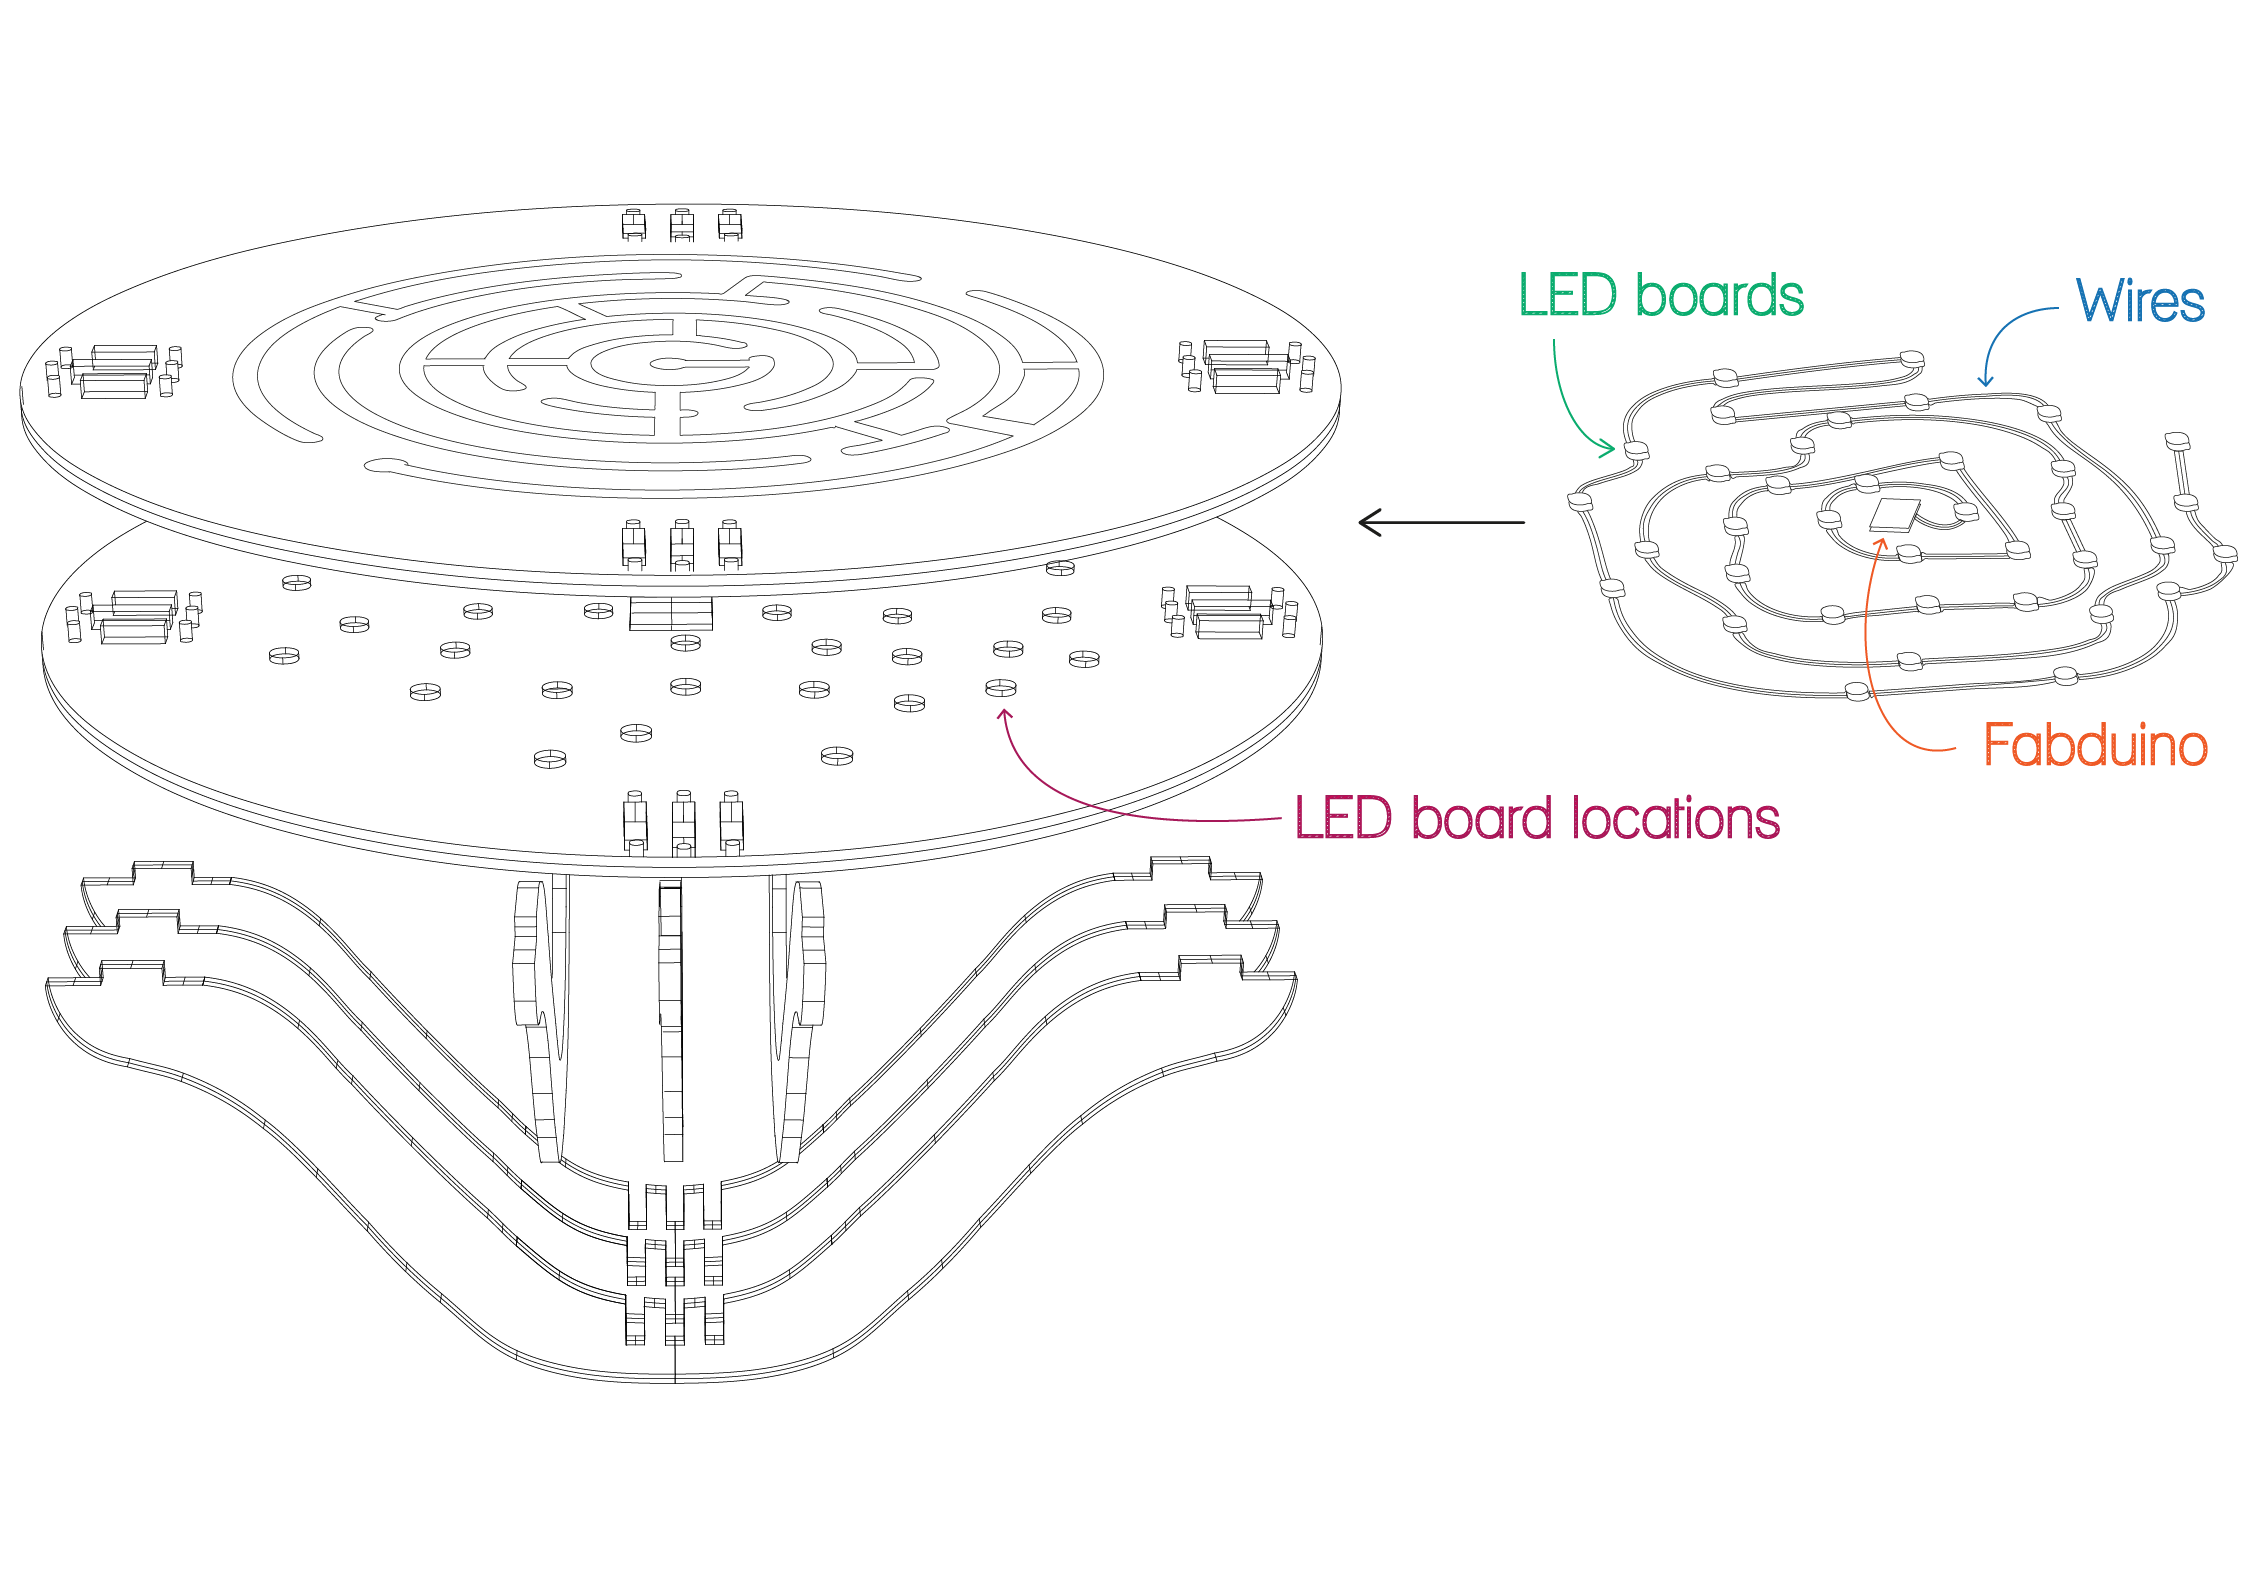
The WS2012 LEDs strip: 36 boards & wiring
The copper switches & the matrix wiring
Babeduino
Acrylic finishing touches
Milling the table on the Shopbot
Electronic design: LEDs strip & Babeduino
Electronic production: switches matrix & LED boards
Electronic programming: the new version of Pacman on Arduino
2D modeling and laser cutting the acrylic finishing pieces
Mill and solder the final version of our Babeduino
Find a way to drill holes (1mm diameter) for the copper switches
Test the LED board press-fits on a piece of wood (try different sizes and depths)
Make light tests
Machine the table
Mill and solder the 36 LED boards
Flatten and cut the copper rod to make the "switches"
Solder the LEDs string wires and the matrix switches wires
Make the "Pacman" program on Arduino
Design and laser cut the acrylic pieces
Are the acrylic pieces in the "LED holes" the best option for the lighting path?
What about the power supply?
Will the soldering on the copper rod be strong enough?
Finish Babeduino
Mill, solder & test two LED boards
Make the last Shopbot tests and the acrylic test
Answer all the questions below!
Week 18: Production week
Mill the table
Make the 36 led boards
Make the 47 switches
Wiring
Week 19: Programming week
Finalize the program: use input and output devices weeks
Laser cut the acrylic
Test the project and take pictures with the HVS Fab Lab Crew
I would also be glad if the electronics work the way I want them to! This is the biggest challenge.