Week 02 — Digital Design Tools
Fab Academy 2026 · Jenny Rojas · Industrial FabLab UCuenca
Introduction
During Week 02 of Fab Academy, the focus is on understanding and applying a wide range of digital design tools that support the complete workflow from ideation to fabrication and documentation. As a student, I explored 2D raster and vector software, parametric and non-parametric 3D modeling tools, AI-assisted design platforms, and video documentation software. Each tool was evaluated based on its role within a possible final project and its relevance to Fab Academy requirements.
Software Overview Table
| Category | Type | Software | Brief Description |
|---|---|---|---|
| 2D | Raster | GIMP | Open-source image manipulation and photo retouching tool. |
| Raster | MyPaint | Fast, distraction-free tool for digital painters and artists. | |
| Vector | Inkscape | Professional vector graphics editor using the SVG format. | |
| Vector | Adobe Illustrator | Industry-standard software for vector art and graphic design. | |
| Vector | CorelDRAW | Robust vector-based design software for layouts and illustration. | |
| 3D | Program | Tinkercad | Simple, browser-based 3D design and modeling tool for beginners. |
| Program | Fusion 360 | Cloud-based CAD/CAM/CAE tool for industrial and mechanical design. | |
| Program | Blender | Free and open-source 3D creation suite for modeling and animation. | |
| AI Software | Text to CAD | AI-powered tool that generates 3D models from text descriptions. | |
| AI Software | DALL·E | AI system generating realistic images and art from natural language. | |
| Audio / Video | Audio | Audacity | Easy-to-use, multi-track audio editor and recorder. |
| Video | DaVinci Resolve | Advanced professional video editing and color correction suite. |
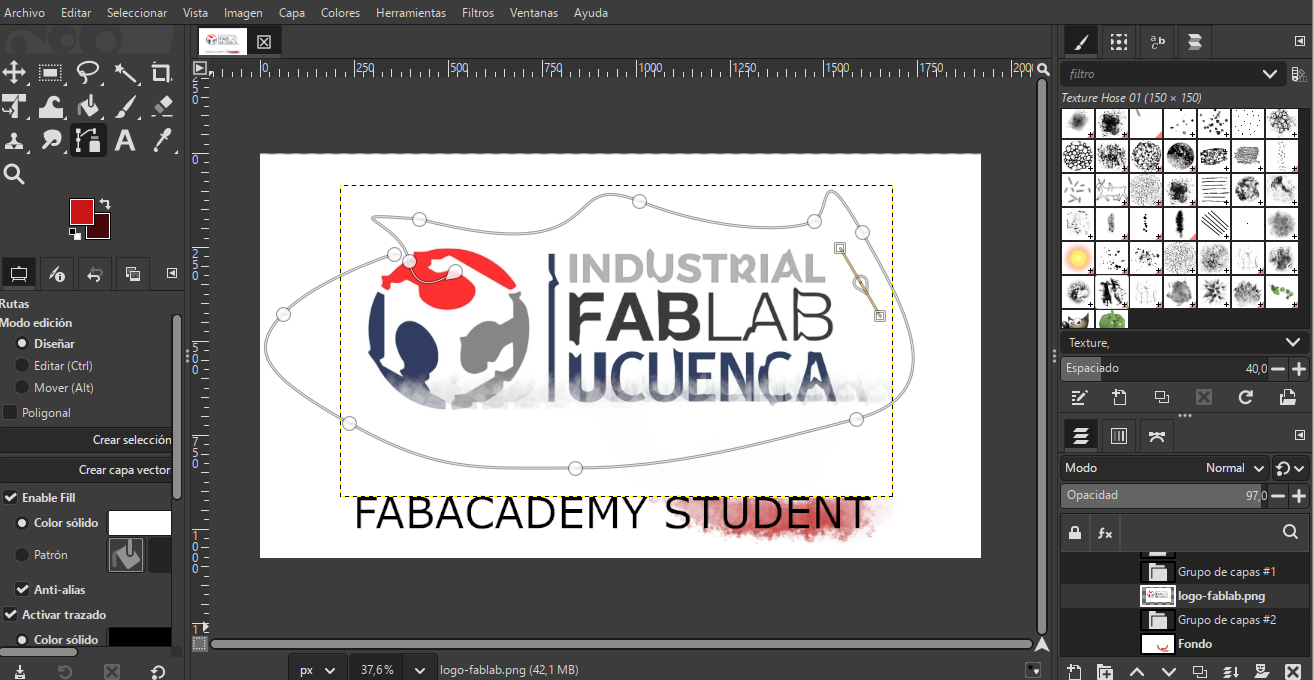
GIMP — 2D Raster Image Editing
GIMP is used extensively for image editing and technical documentation. As a Fab Academy student, I rely on GIMP to process screenshots, annotate fabrication steps, adjust contrast, and compress images for web publication while preserving clarity.
Workflow
- Import raw screenshots from design software.
- Crop unnecessary areas and adjust brightness/contrast.
- Add annotations using text and arrow tools.
- Resize image for web documentation.
- Export as optimized JPG or PNG.
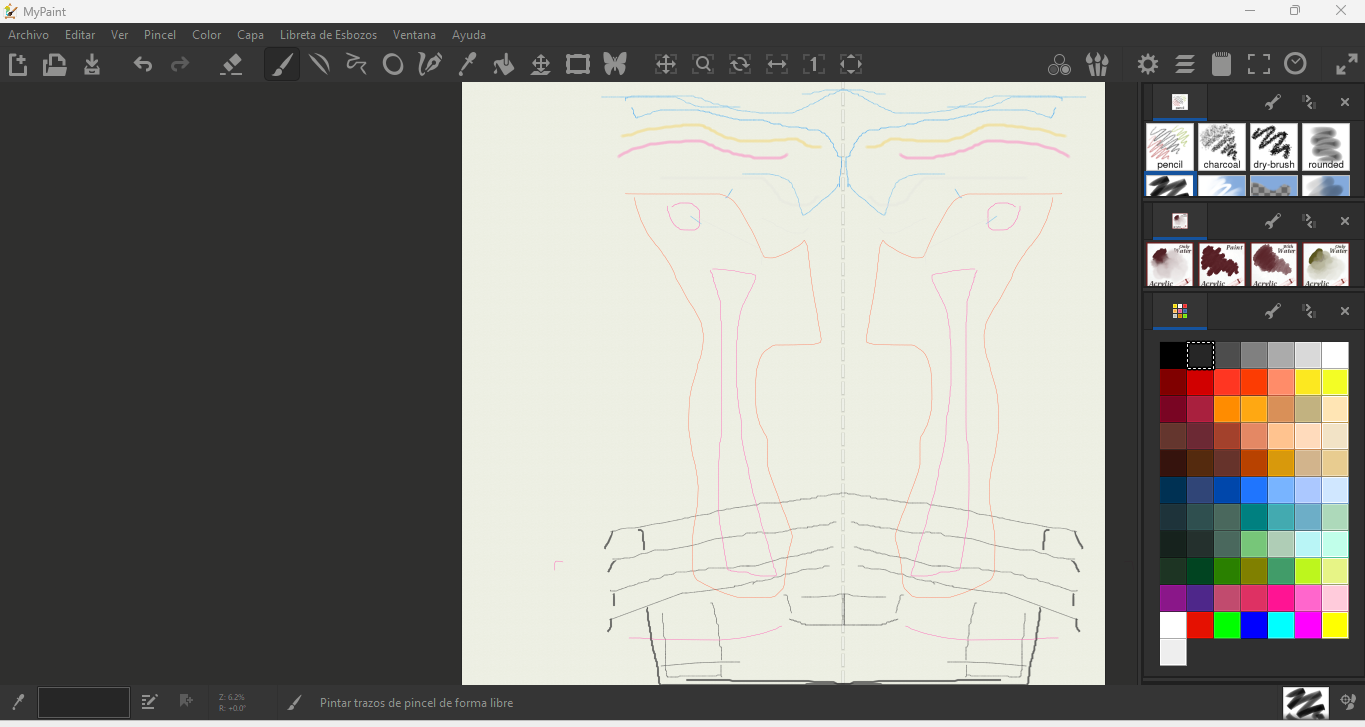
MyPaint — Concept Sketching
MyPaint functions as a digital sketchbook during early ideation. I use it to freely sketch mechanisms, enclosures, and interaction ideas before moving into precise CAD environments.
Workflow
- Create a new canvas with appropriate resolution.
- Select brush type depending on sketch style (pencil, ink, soft brush).
- Draw initial conceptual ideas without dimensional constraints.
- Refine main shapes and interaction elements.
- Export sketch as PNG or JPG for documentation or CAD reference.
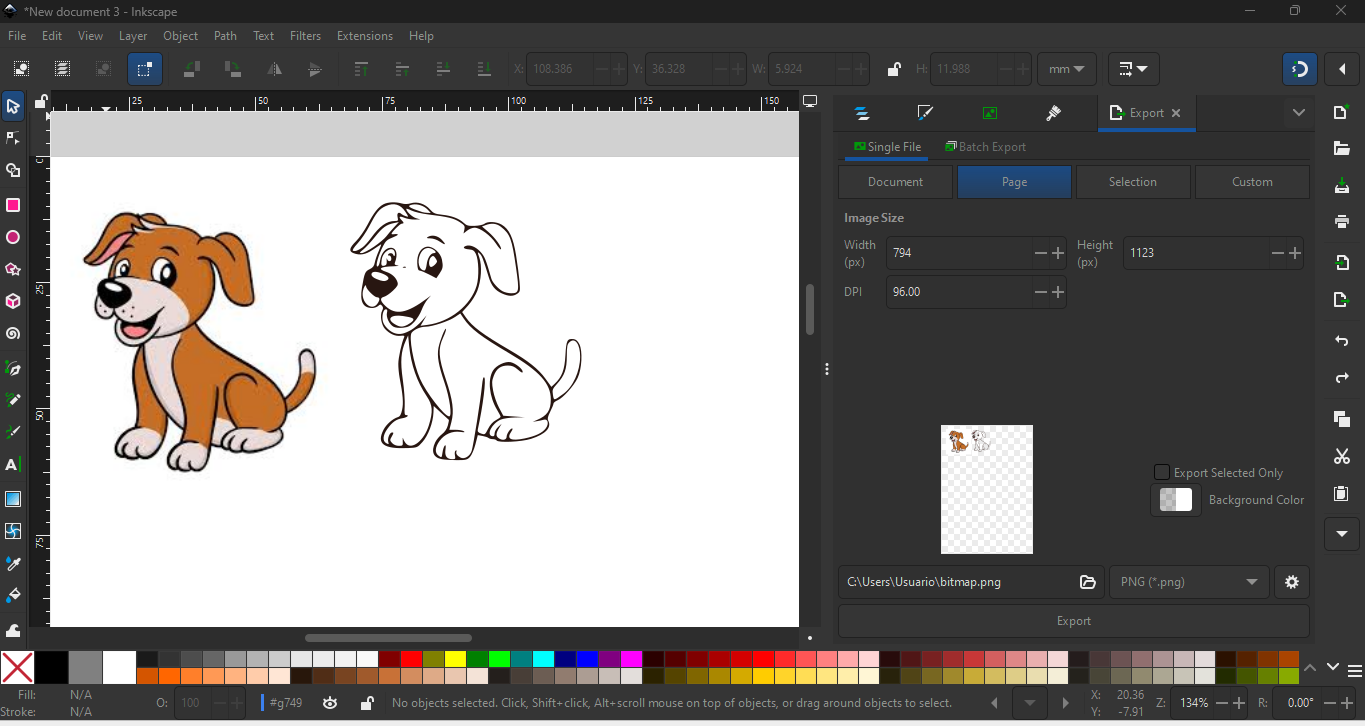
Inkscape — 2D Vector Design
Inkscape is a core Fab Academy tool for producing fabrication-ready vector files for laser cutting and vinyl cutting. I use layers and precise path operations to separate cutting, engraving, and reference geometry.
Workflow
- Create new document with correct dimensions.
- Draw vector geometry using path tools.
- Apply stroke colors for cut/engrave separation.
- Organize layers for fabrication clarity.
- Export as SVG or DXF for CAM use.
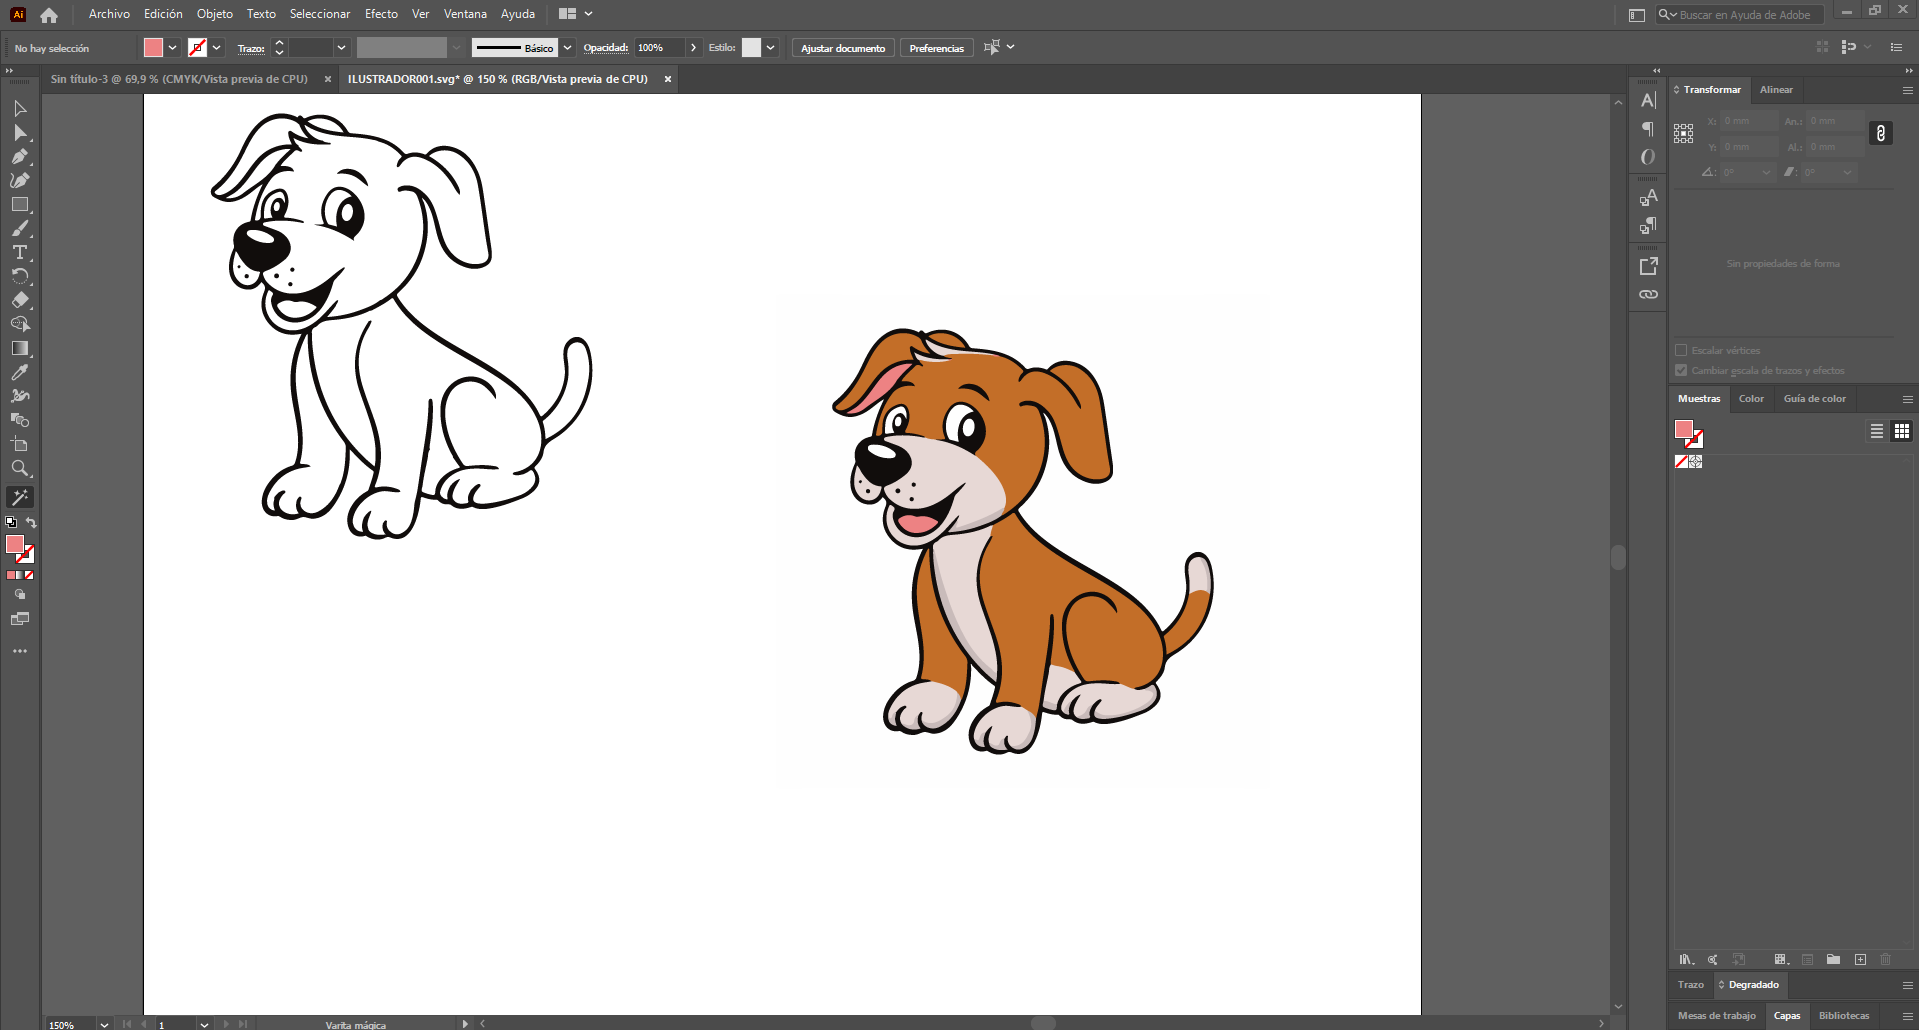
Adobe Illustrator — Visual Communication
Illustrator is mainly used for graphic layout, diagrams, and visual assets that support technical documentation. It enhances clarity and presentation quality.
Workflow
- Create new document with defined artboard size.
- Import vector or raster reference images.
- Use pen tool and shape tools to create diagrams.
- Apply consistent typography and color palette.
- Export final layout as PDF, SVG, or PNG for web.
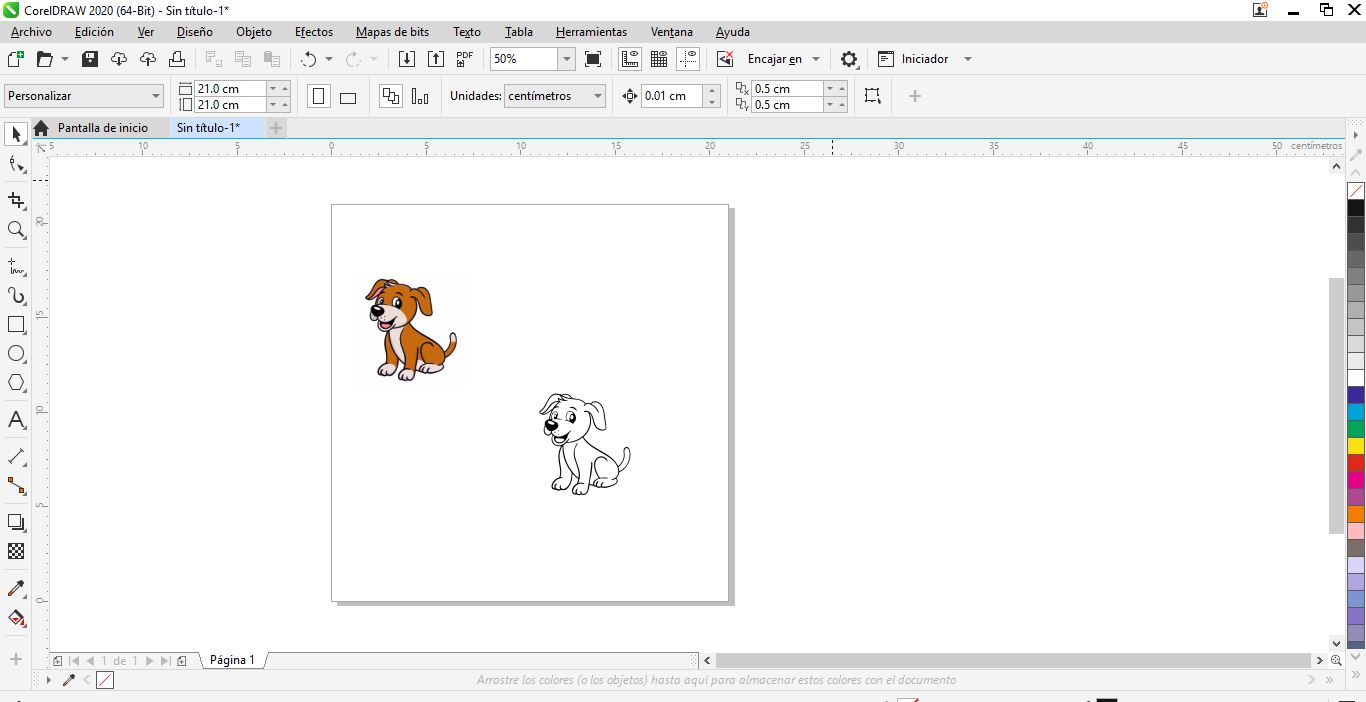
CorelDRAW — CAM Vector Preparation
CorelDRAW is used for preparing CAM-ready files, particularly for laser cutting workflows commonly found in Fab Labs.
Workflow
- Import or create vector design.
- Convert objects to curves.
- Adjust line thickness to hairline (laser requirement).
- Assign color coding for cut and engrave operations.
- Export file in DXF, AI, or directly send to laser software.
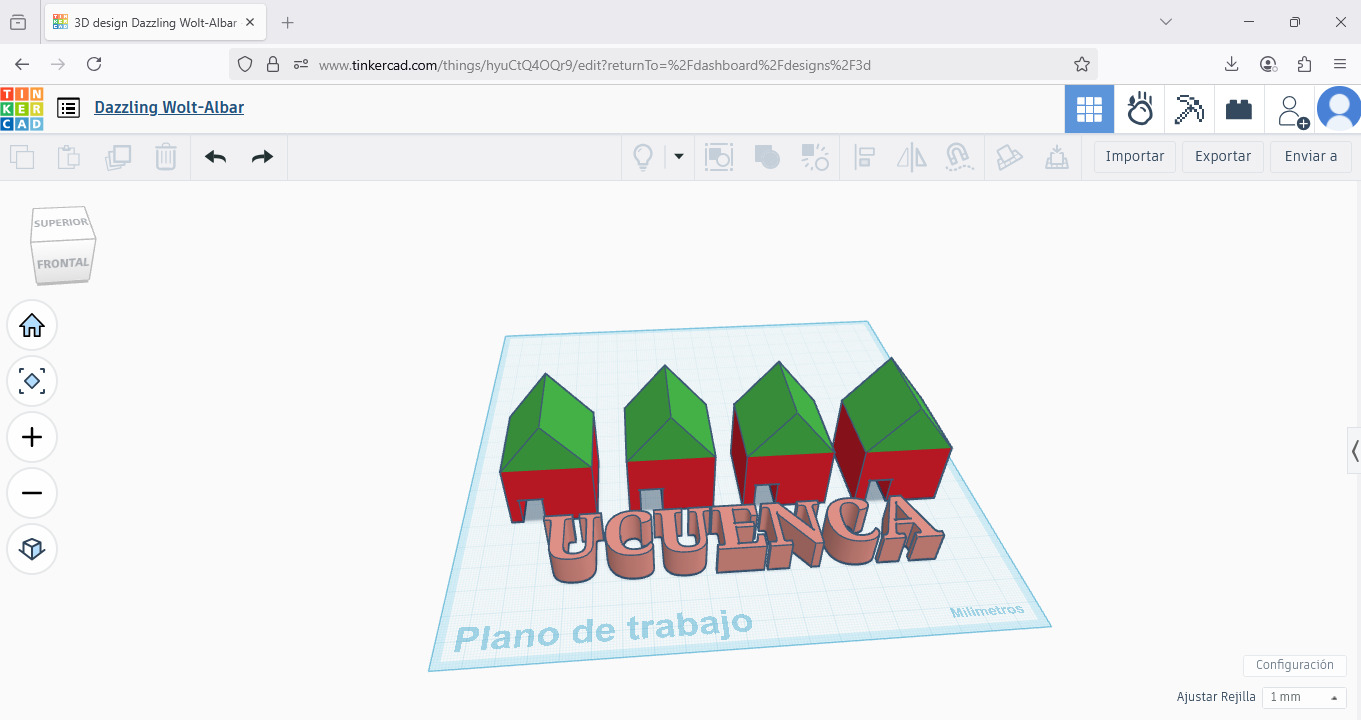
Tinkercad — Introductory 3D Modeling
Tinkercad is used for quick parametric modeling and early prototyping of simple parts such as holders and enclosures.
Workflow
- Create new design project.
- Drag basic shapes into workspace.
- Adjust dimensions numerically.
- Group shapes to form final geometry.
- Export STL file.
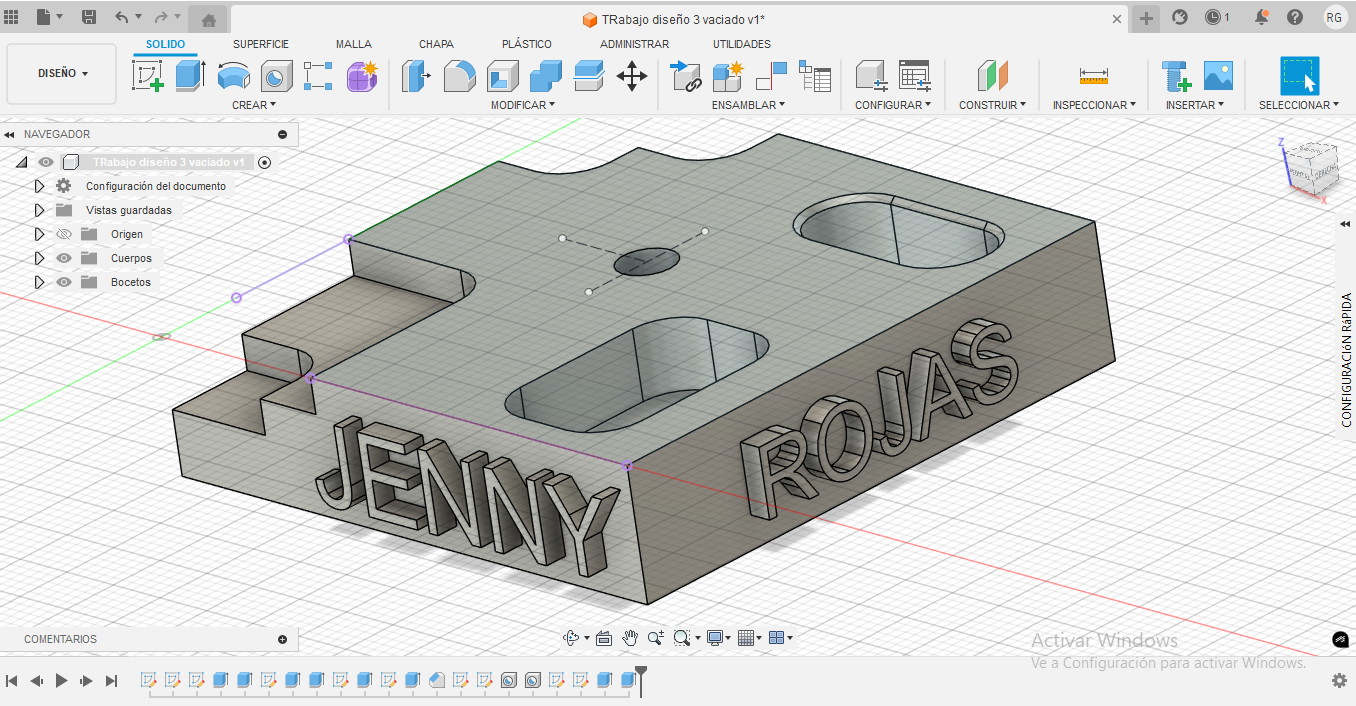
Fusion 360 — Parametric CAD
Fusion 360 is the primary tool for parametric and mechanical design. I document sketches, constraints, and modeling steps to ensure reproducibility.
Workflow
- Create parametric sketch with constraints.
- Define dimensions and relationships.
- Extrude or revolve geometry.
- Apply fillets and chamfers.
- Export STL or STEP file for fabrication.
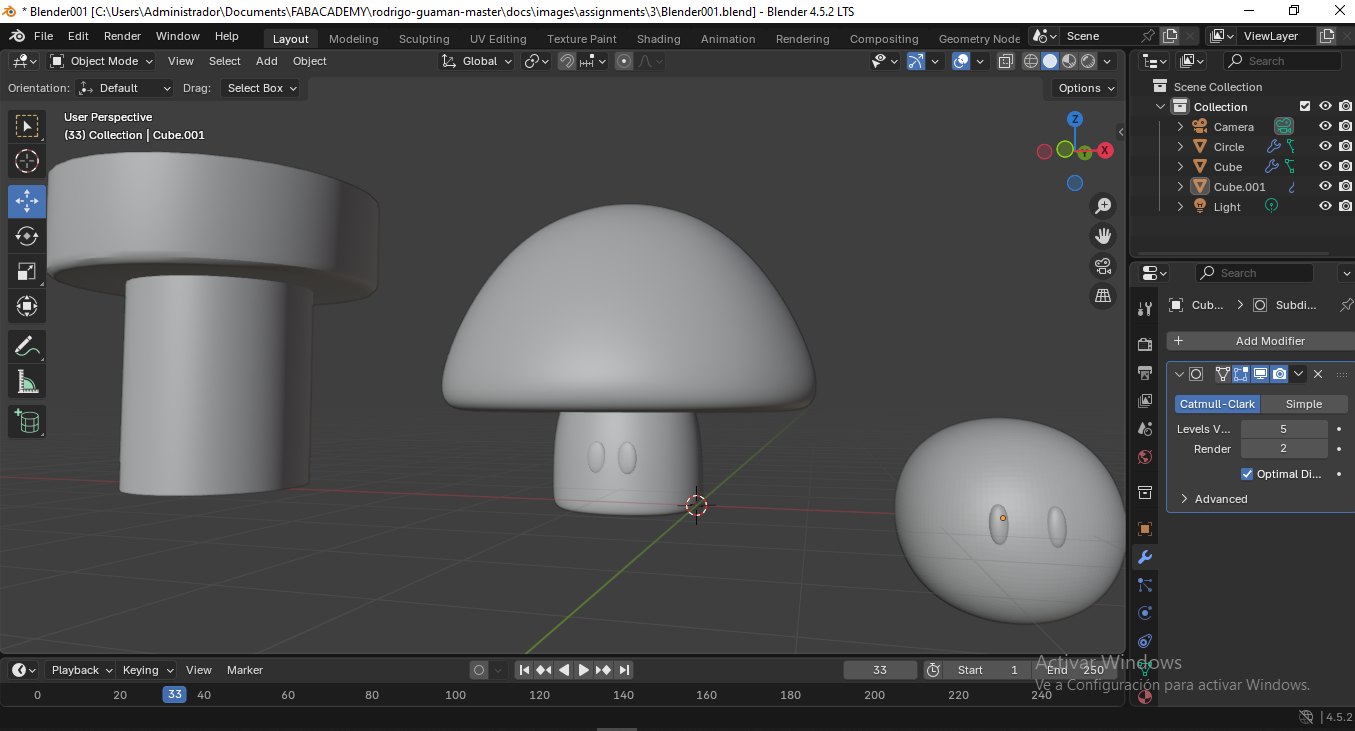
Blender — Organic Modeling
Blender is used for freeform and organic shapes, especially when aesthetic or ergonomic considerations are dominant.
Workflow
- Create base mesh primitive.
- Switch to sculpt mode for organic shaping.
- Refine topology using modifiers.
- Apply materials for visualization.
- Export STL or OBJ file.
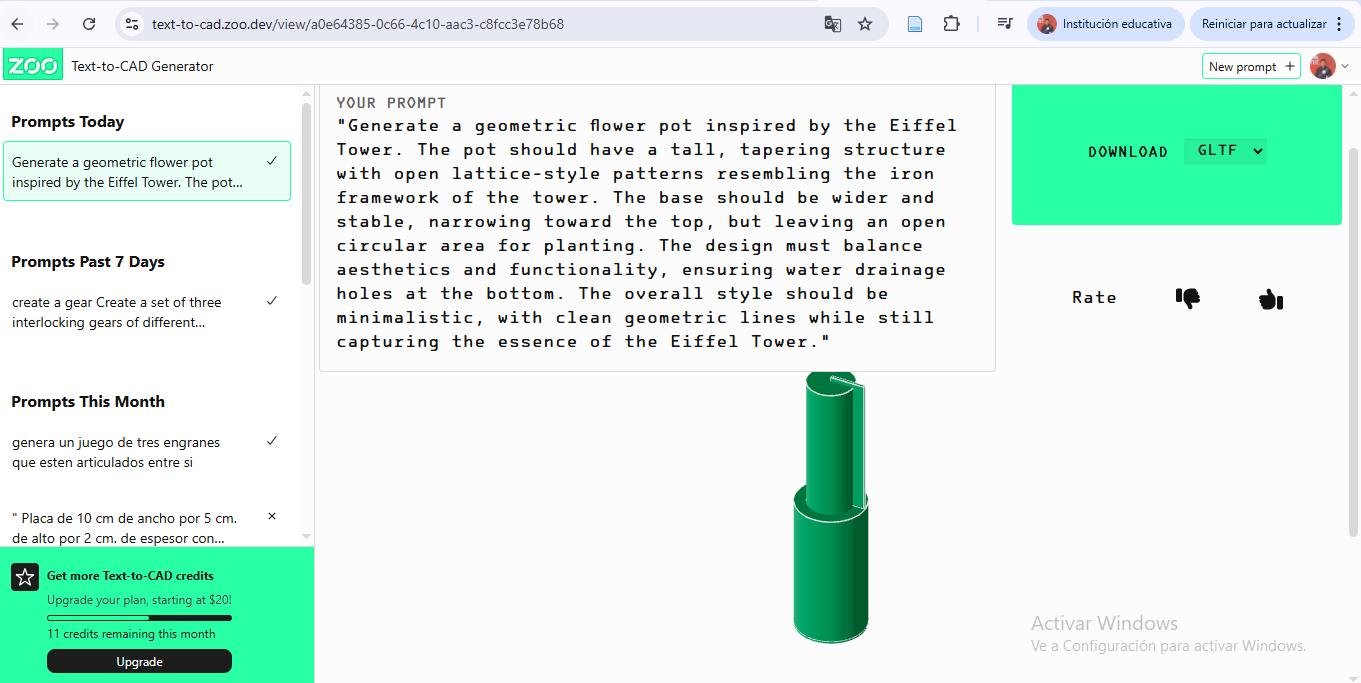
Text to CAD — AI Assisted Modeling
Text to CAD tools are explored for conceptual modeling and rapid idea generation using natural language descriptions.
Workflow
- Write detailed prompt describing object dimensions and purpose.
- Generate CAD proposal automatically.
- Review generated geometry for accuracy.
- Export editable CAD file (STEP or STL).
- Refine model manually in parametric CAD software if needed.
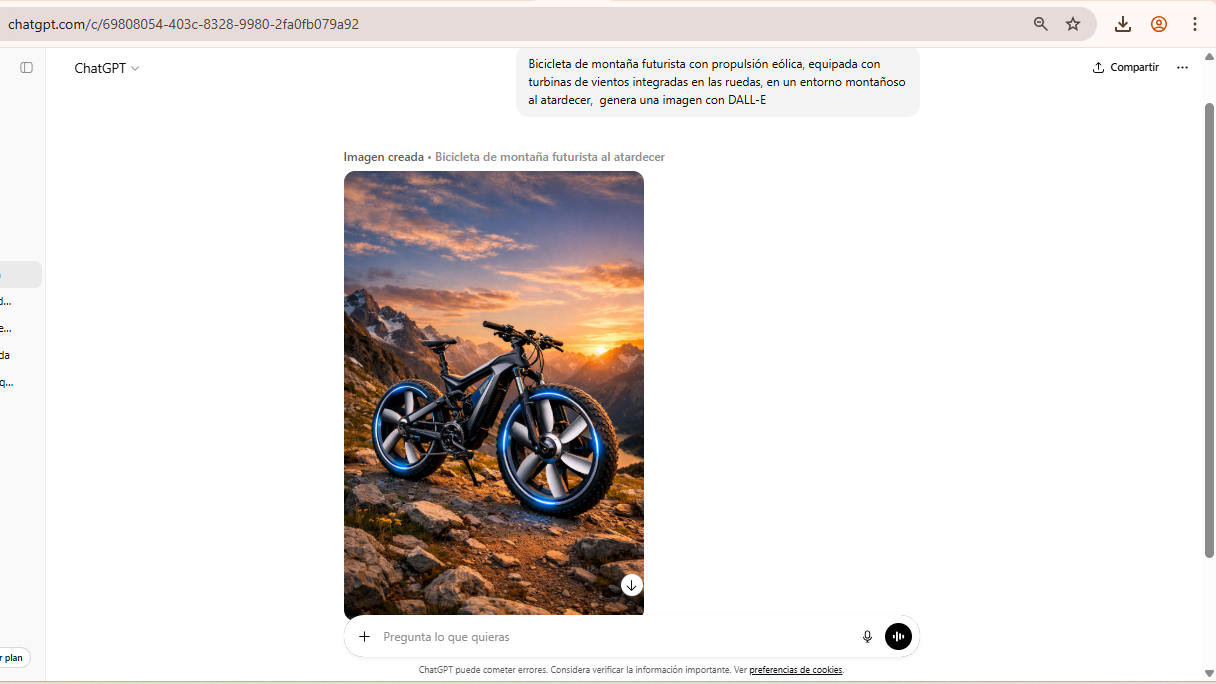
DALL·E — AI Concept Visualization
DALL·E is used to generate conceptual reference images that support early design decisions and aesthetic exploration.
Workflow
- Write detailed prompt describing concept.
- Generate multiple image variations.
- Select best visual direction.
- Refine prompt for improved detail.
- Download final reference image.
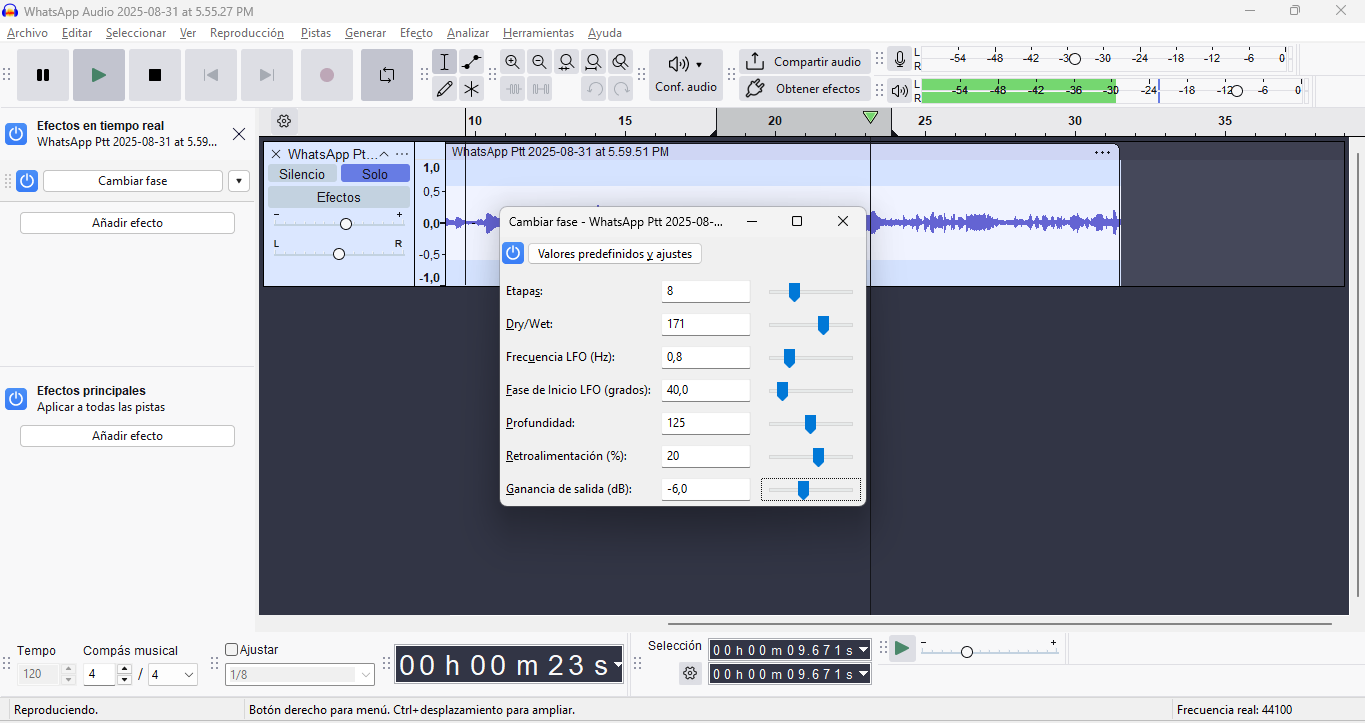
Audacity — Video Documentation
Audacity is the go-to open-source audio editor for recording, refining, and post-producing documentation videos, ensuring compliance with Fab Academy's publishing standards.
Workflow
- Record narration using microphone.
- Remove background noise.
- Trim silence and adjust levels.
- Apply compression and normalization.
- Export as MP3 or WAV.
Comparative Analysis of Digital Design Tools
The following table compares all the software tools explored during this week based on criteria relevant to Fab Academy workflows. The evaluation reflects my experience as a student and focuses on practical usability rather than theoretical capability.
| Software | Ease of Use | Accessibility | Cost (Value) | Compatibility | Collaboration |
|---|---|---|---|---|---|
| GIMP | Medium | High | High | High | Low |
| MyPaint | High | High | High | Medium | Low |
| Inkscape | Medium | High | High | High | Low |
| Adobe Illustrator | Medium | Medium | Low | High | Low |
| CorelDRAW | Medium | Medium | Low | High | Low |
| Tinkercad | High | High | High | Medium | Medium |
| Fusion 360 | Medium | Medium | Medium | High | Medium |
| Blender | Low | High | High | High | Low |
| Text to CAD | High | Medium | Medium | Low | Low |
| DALL·E | High | Medium | Low | Low | Low |
| Audacity | Low | Low | Low | High | Low |
| Feature |
Parametric CAD (NURBS) Fusion 360 / Rhino |
Mesh Modeling (Polygonal) Blender / ZBrush |
|---|---|---|
| Mathematical Basis |
NURBS & B-Rep
Geometry is defined by precise mathematical curves and surfaces. |
Vertices, Edges & Faces
Geometry is defined by a collection of points in 3D space connected by lines. |
| Editing Workflow |
History-Based
You can change a dimension in Step 1 and the entire model updates automatically. |
Direct/Destructive
You push and pull faces manually. Harder to revert changes without modifiers. |
| Precision & Tolerance |
Absolute Precision
Essential for mechanical engineering and 0.001mm manufacturing tolerances. |
Visual Approximation
Curves are made of flat faces. High-poly counts are needed for smoothness. |
| Ideal For |
|
|
| Common Formats | STEP IGES 3DM | OBJ STL FBX |
* Note: While Parametric CAD is king for engineering, Mesh modeling is unbeatable for organic shapes and visual effects. Modern workflows often use both (e.g., modeling in Fusion 360 and rendering in Blender).
Image Compression Workflow
Optimizing image size is crucial for web performance and storage efficiency. This workflow involves reducing file size while maintaining the best possible visual quality. Below is a comparison of the most effective online tools for this task.
| Tool | Key Features | Best For | Format Support |
|---|---|---|---|
| TinyPNG | Smart lossy compression, API available. | Web Optimization | PNG, JPEG, WebP |
| Squoosh.app | Advanced manual control by Google Chrome Labs. | Precision Tuning | All Formats |
| ILoveIMG | Bulk compression and multi-tool suite. | Batch Processing | JPG, PNG, GIF |
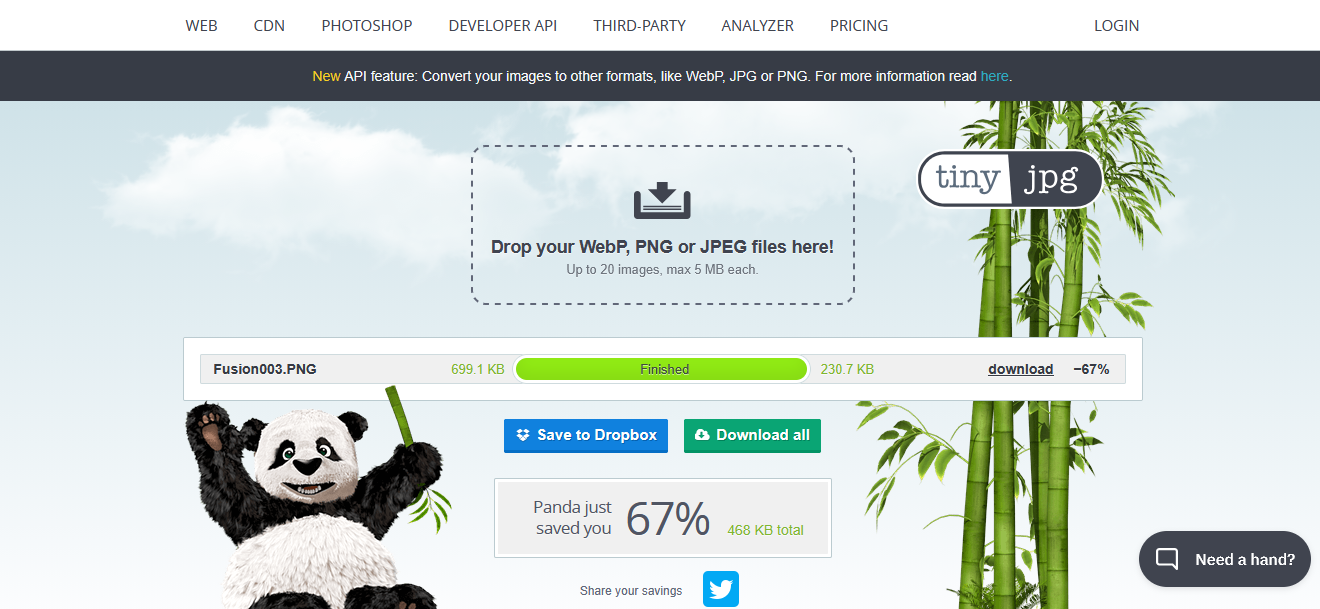
Compression Comparison Example
BEFORE (Original)
Size: 683 kb
AFTER (Compressed)
Size: 226 KB (-60%)
Note: Compression was performed using TinyPNG to achieve high quality with minimum file weight.
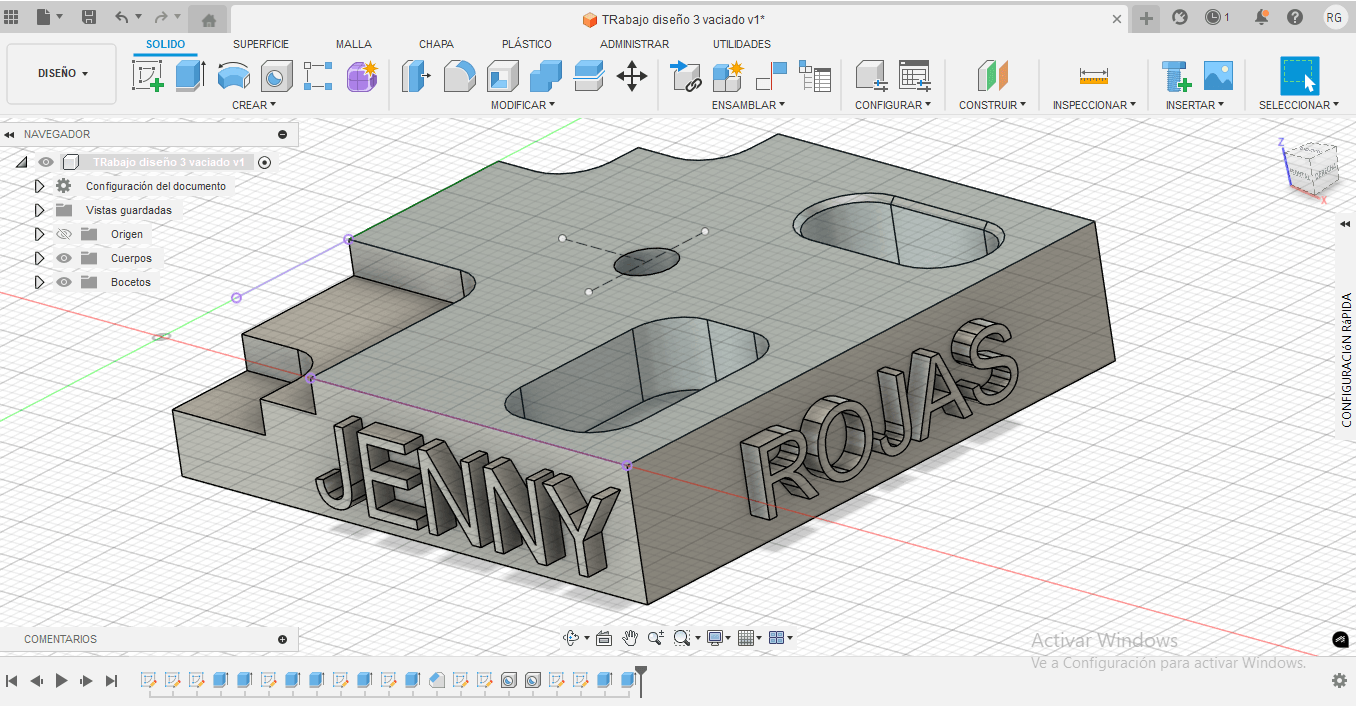
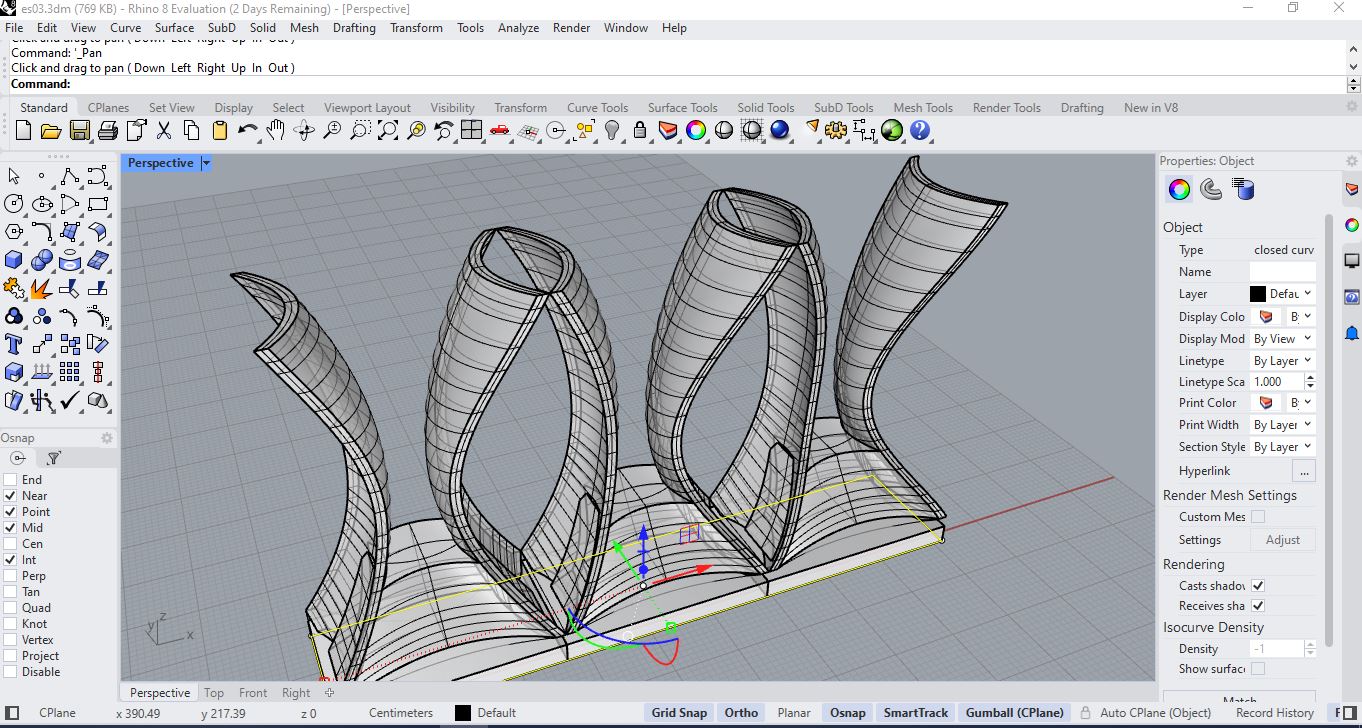
Final Project– Computer-Aided Design (Wall Frame Development)
The structural backbone of the OrquiWall Smart System is the Wall Frame. This component serves as the modular support structure where irrigation channels, electronic modules, and plant holders will be integrated.
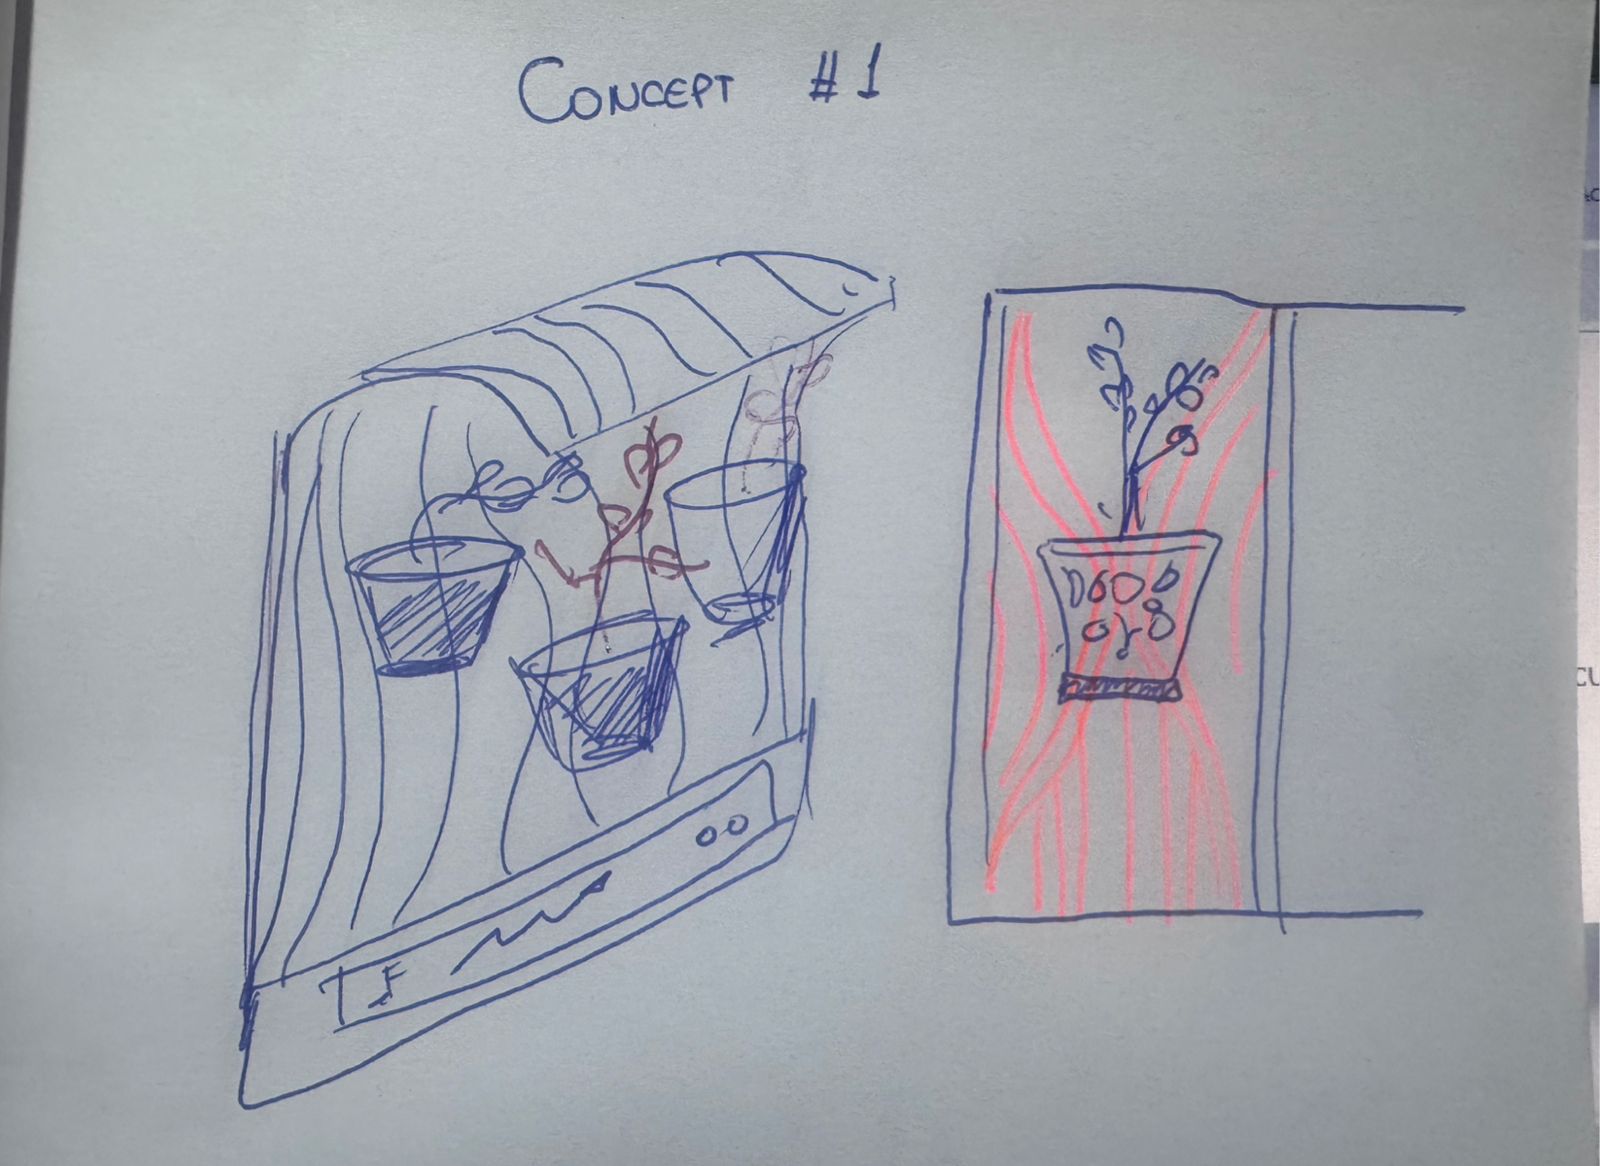
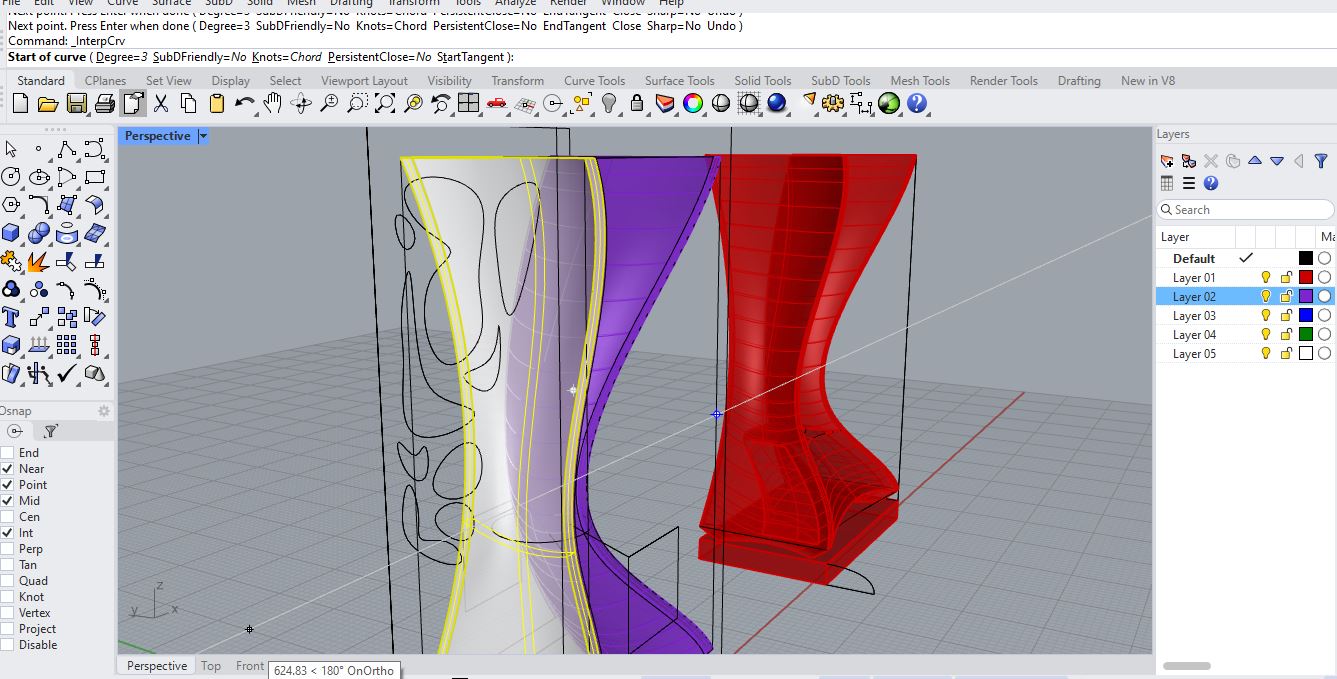
Conceptual Sketch 01
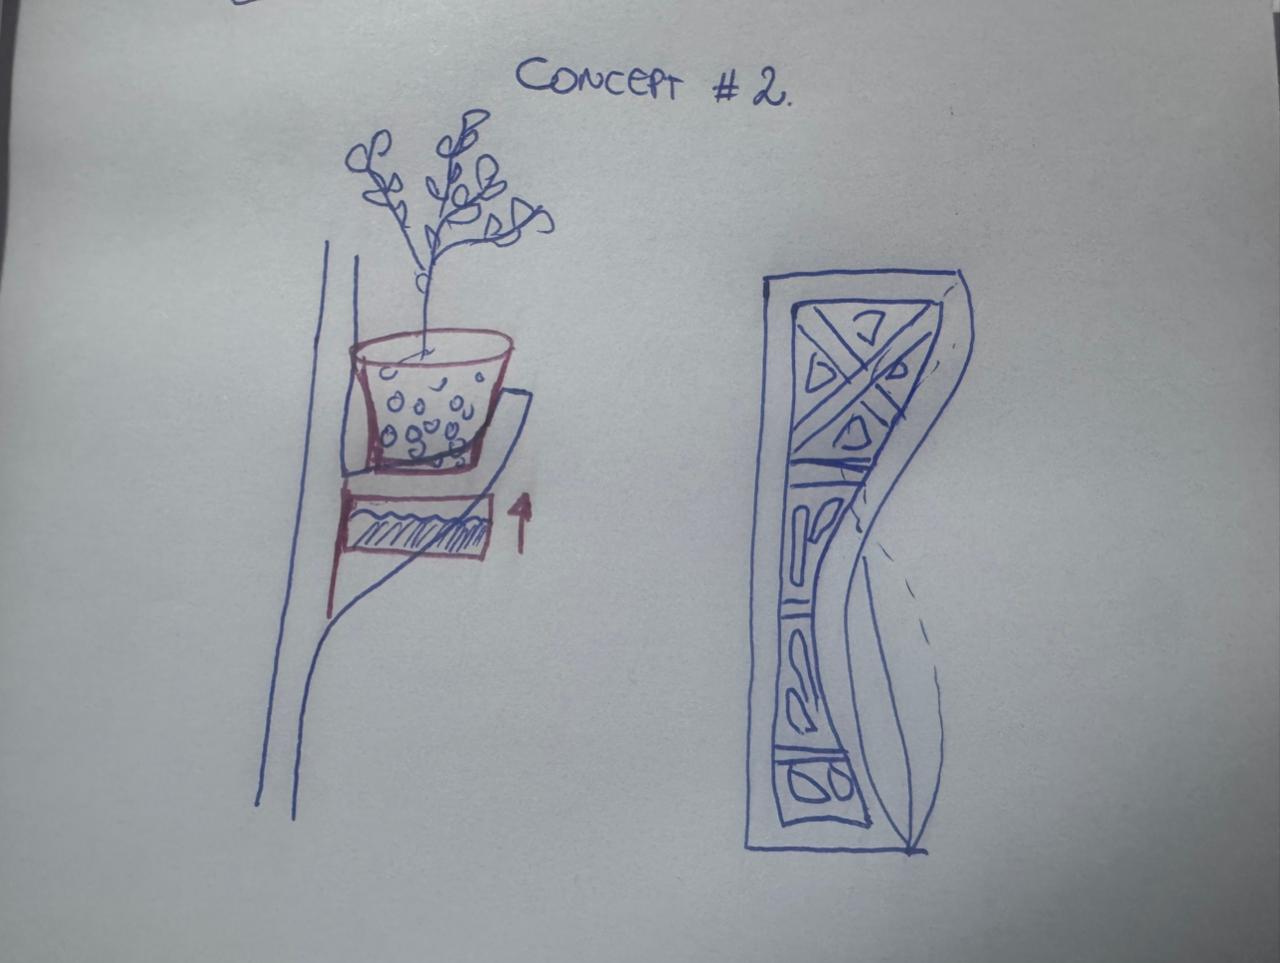
Conceptual Sketch 02
Design Process: Step-by-Step
-
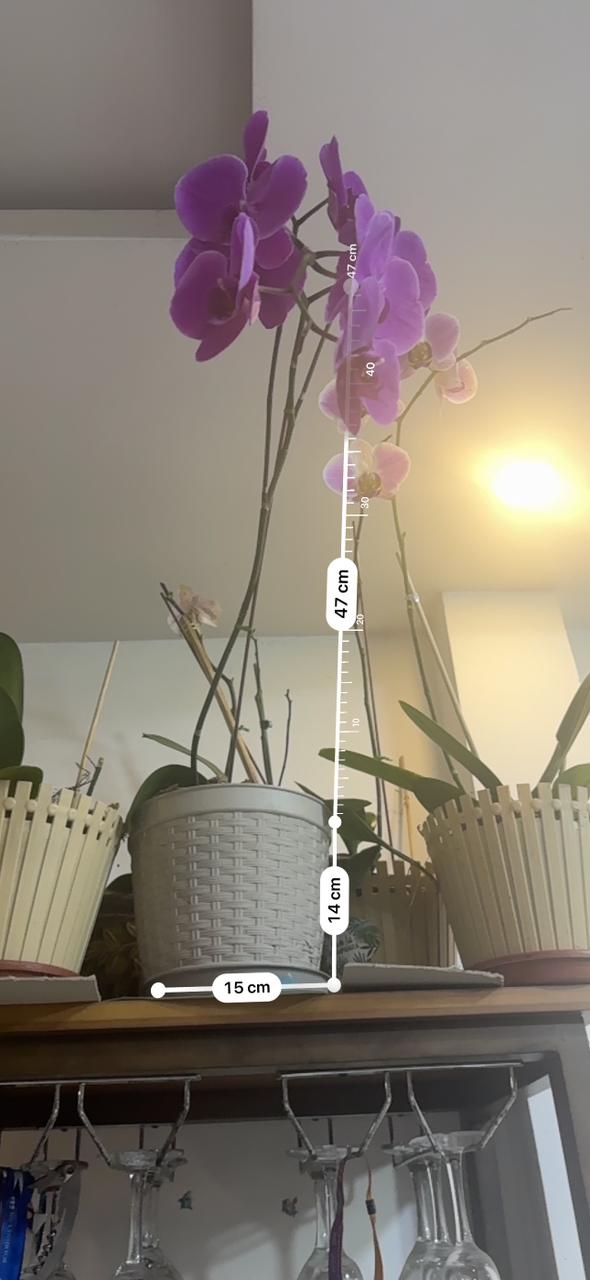
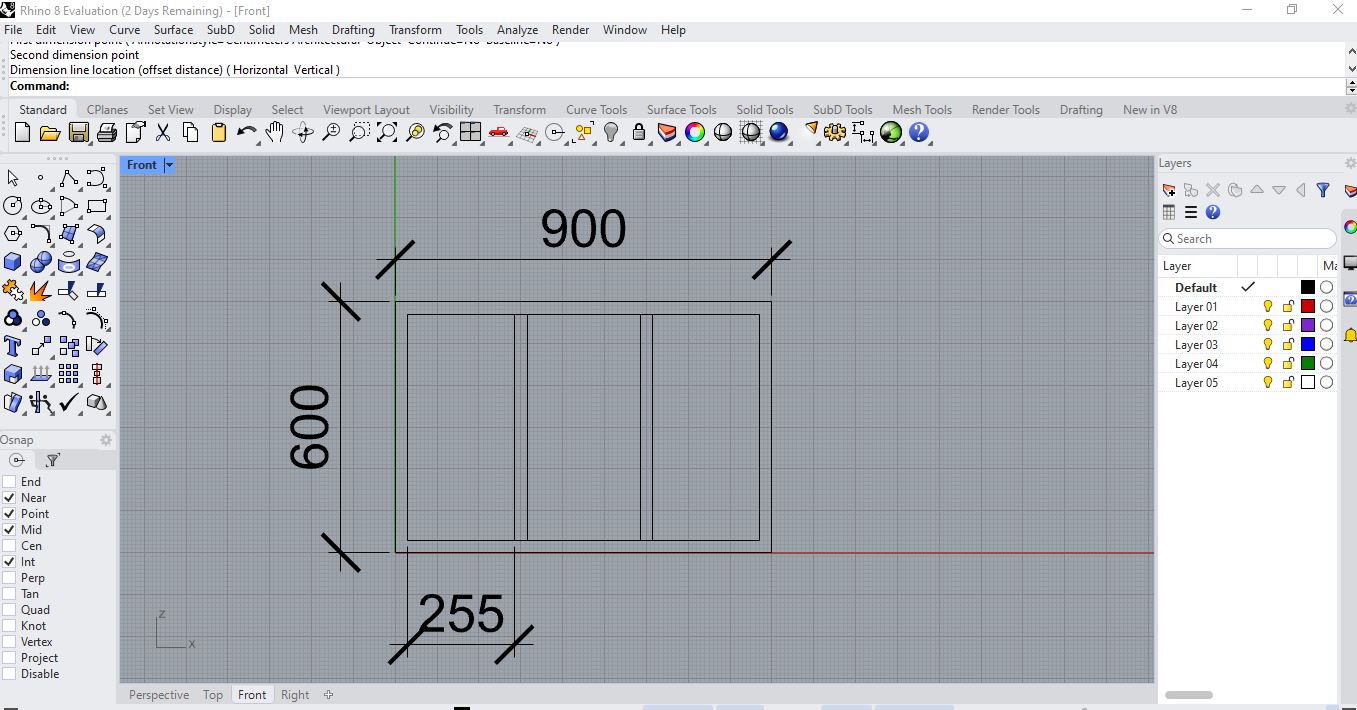
STEP 1 Base Geometry & Units
Set document units to centimeters. Defined a base rectangle of 90 cm x 60 cm representing the total wall panel dimension.

Layout Initialization
Workplane Setup

Dimension Validation
-
STEP 2 Structural Frame & Detailing
Offset the external rectangle 4 cm inward to generate a perimeter structural frame. This adds necessary rigidity for mounting irrigation components.
Front View Orthographic
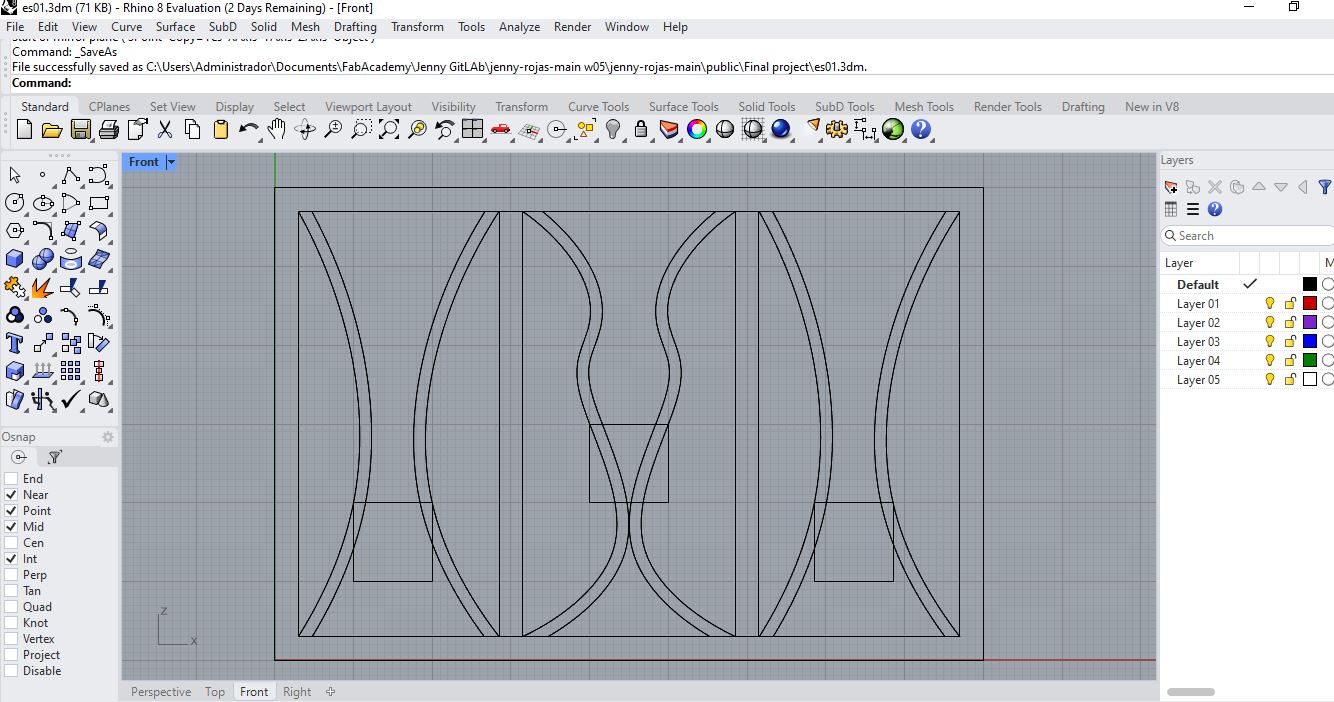
Perimeter Offset
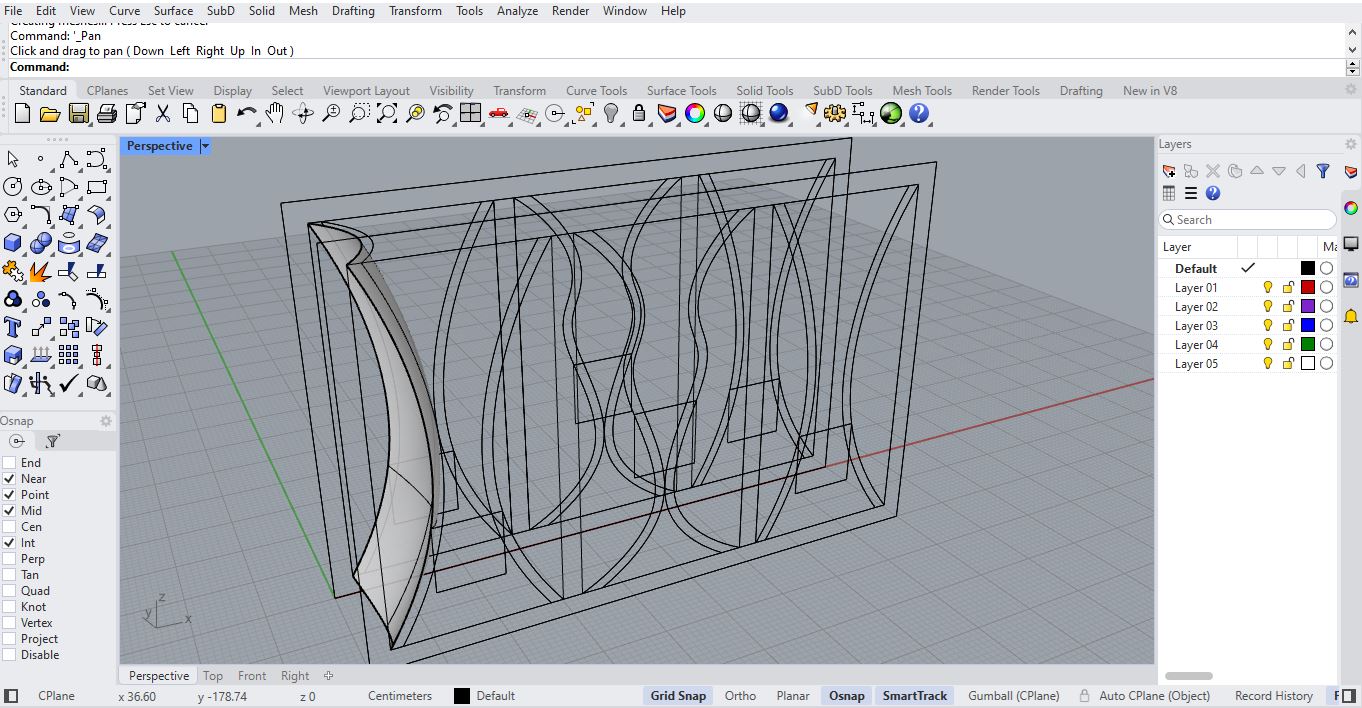
Perspective Detail
Structural Joints
Component Integration
Final Frame Rhino
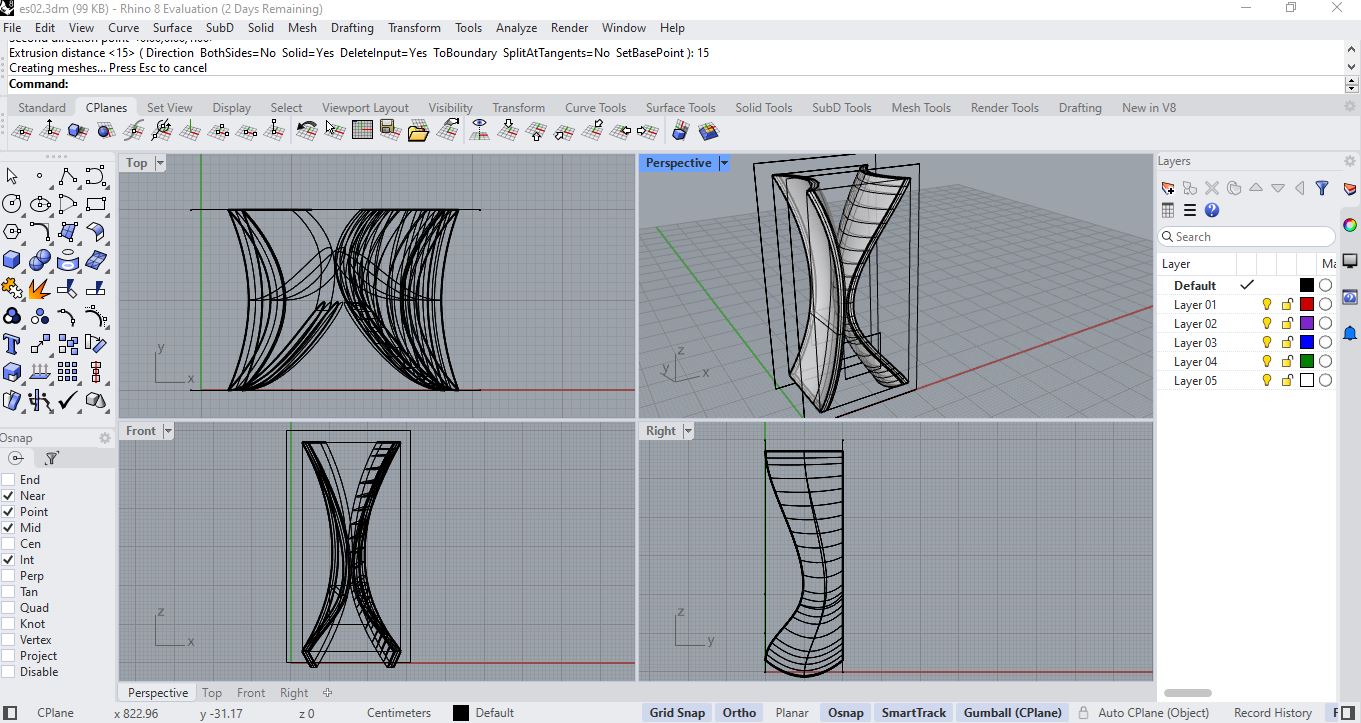
Phase 2 – Assembly & Visualization
Simulation: Structural Assembly Process
Project Files & Source Data
Final Reflection & Self-Assessment
Importance of the Task
This assignment was crucial for establishing a solid foundation in digital fabrication and CAD workflows. Understanding the transition from a 2D concept to a parametric 3D model allows for scalable design and efficient prototyping in the OrquiWall project.
✅ What went well
I successfully managed the parametric constraints in Rhino, ensuring that any future changes in dimensions will automatically update the entire wall frame structure without errors.
⚠️ Challenges Faced
The main difficulty was managing the file size and complexity of the mesh exports, which initially slowed down the rendering process and caused compatibility issues.
💡 How I solved it
I implemented an Image Compression Workflow and optimized the geometry by reducing unnecessary polygons before export, resulting in a 60% faster loading time for the 3D viewers.
Fab Academy Checklist
- ✔ Modelled experimental objects and parts of a possible final project in 2D and 3D
- ✔ Explained the process using text, images, and screenshots
- ✔ Documented image and video compression
- ✔ Included original design source files