The process
Group assignment
As a VujaDé FabLab team, we split the available app-building platforms between us so each student could document one in depth and we'd share findings as a group. The collective comparison is on this Notion page. I picked MIT App Inventor because I already had several years of experience with the platform — that let me focus the week on the new part for me: connecting the app to my own ESP32-C3 Microcontroller over BLE.
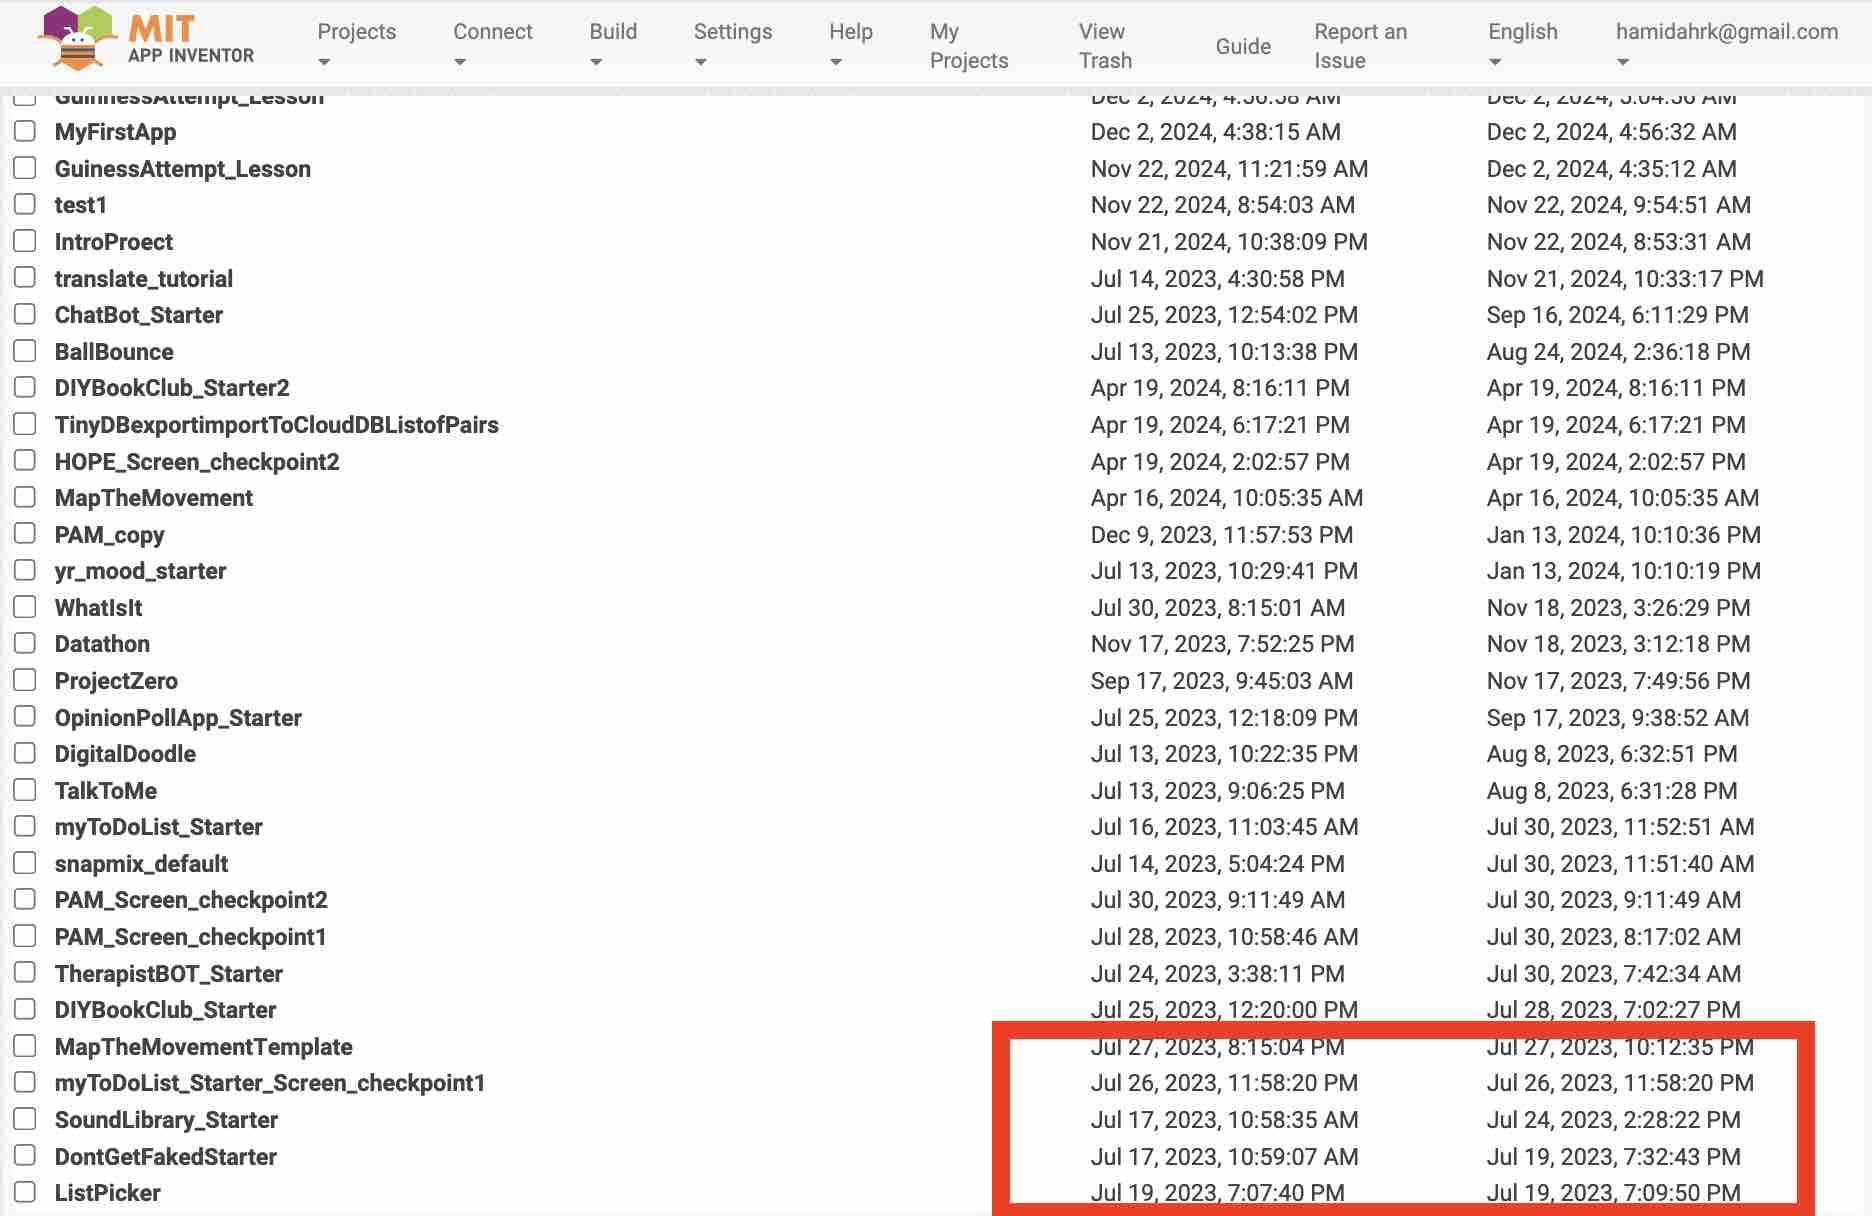
01| As you see, I already have many projects on MIT App inventor from 2023 and I also won first place in adult team category for creating PAM
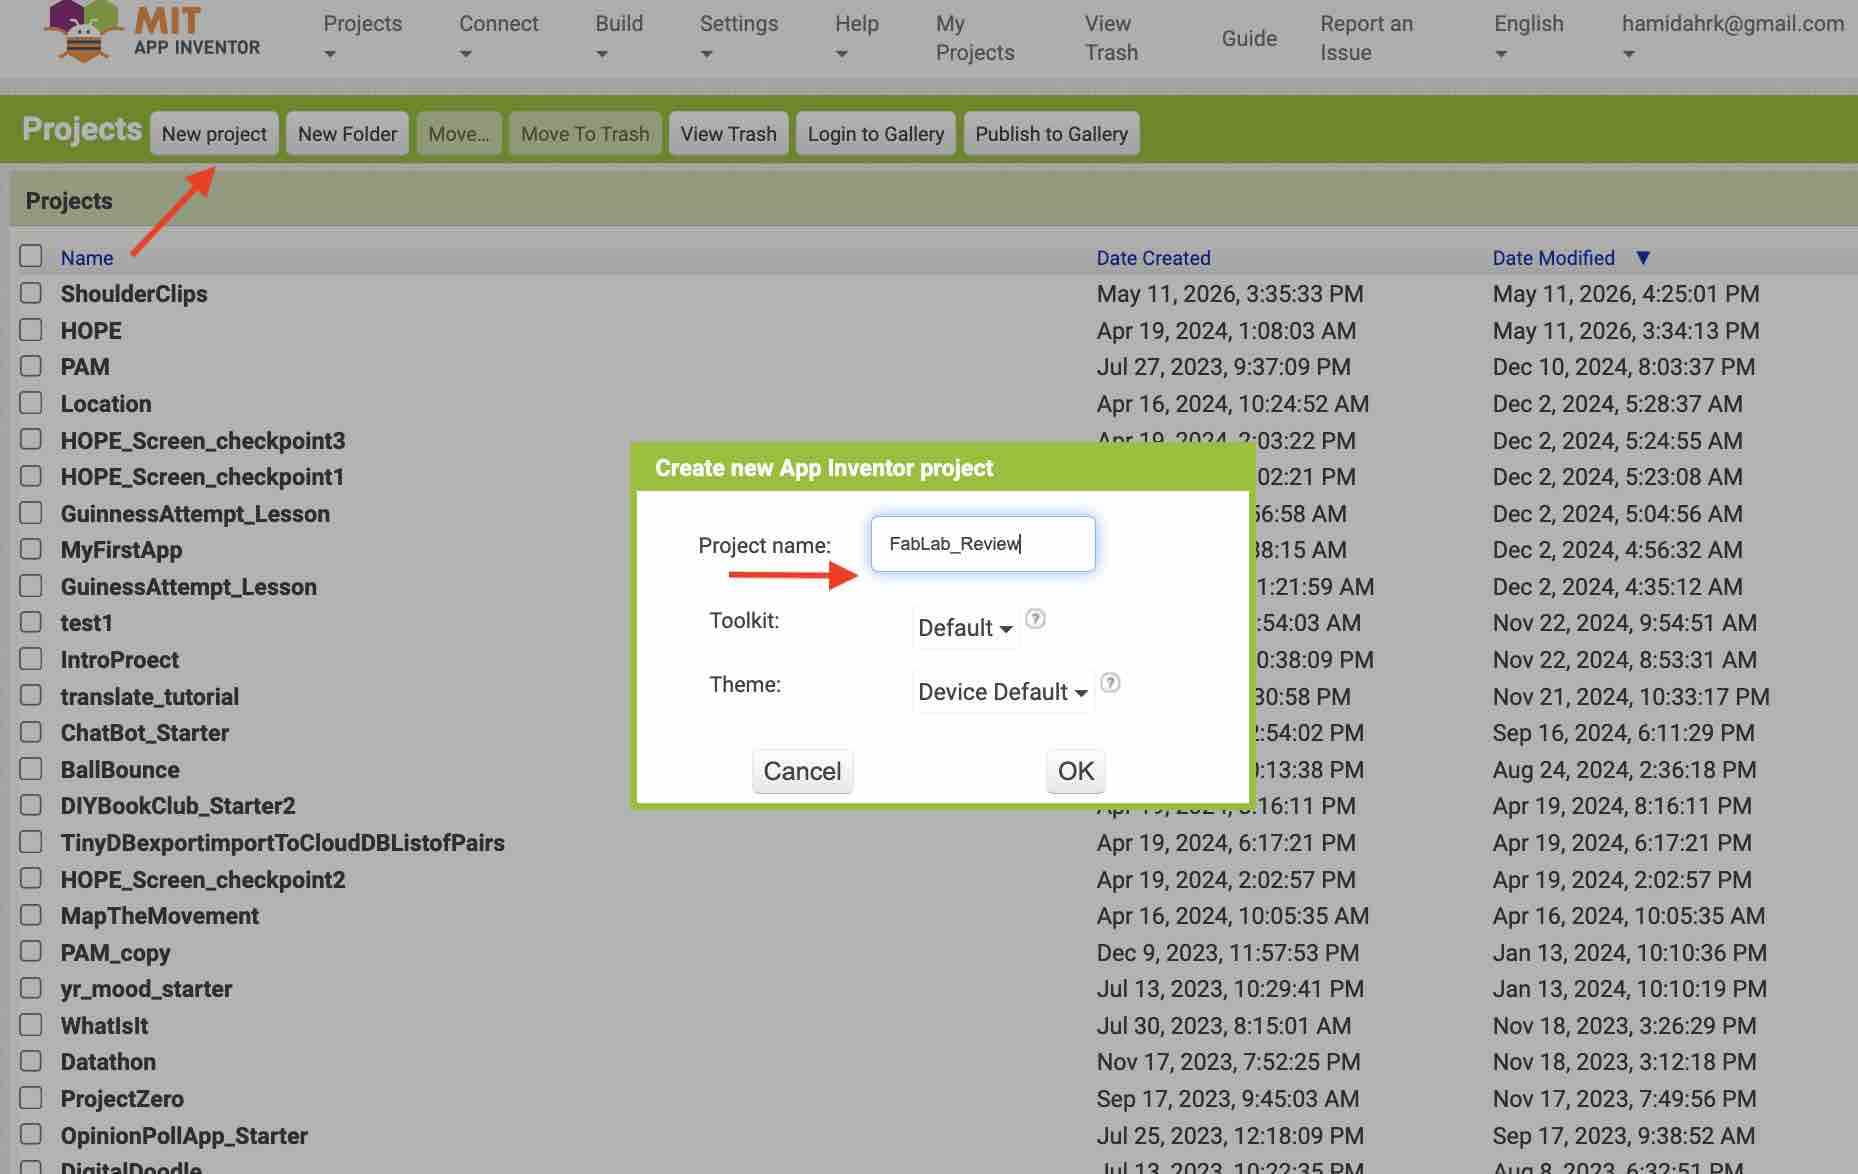
02| I first created a new project for FabLab Review
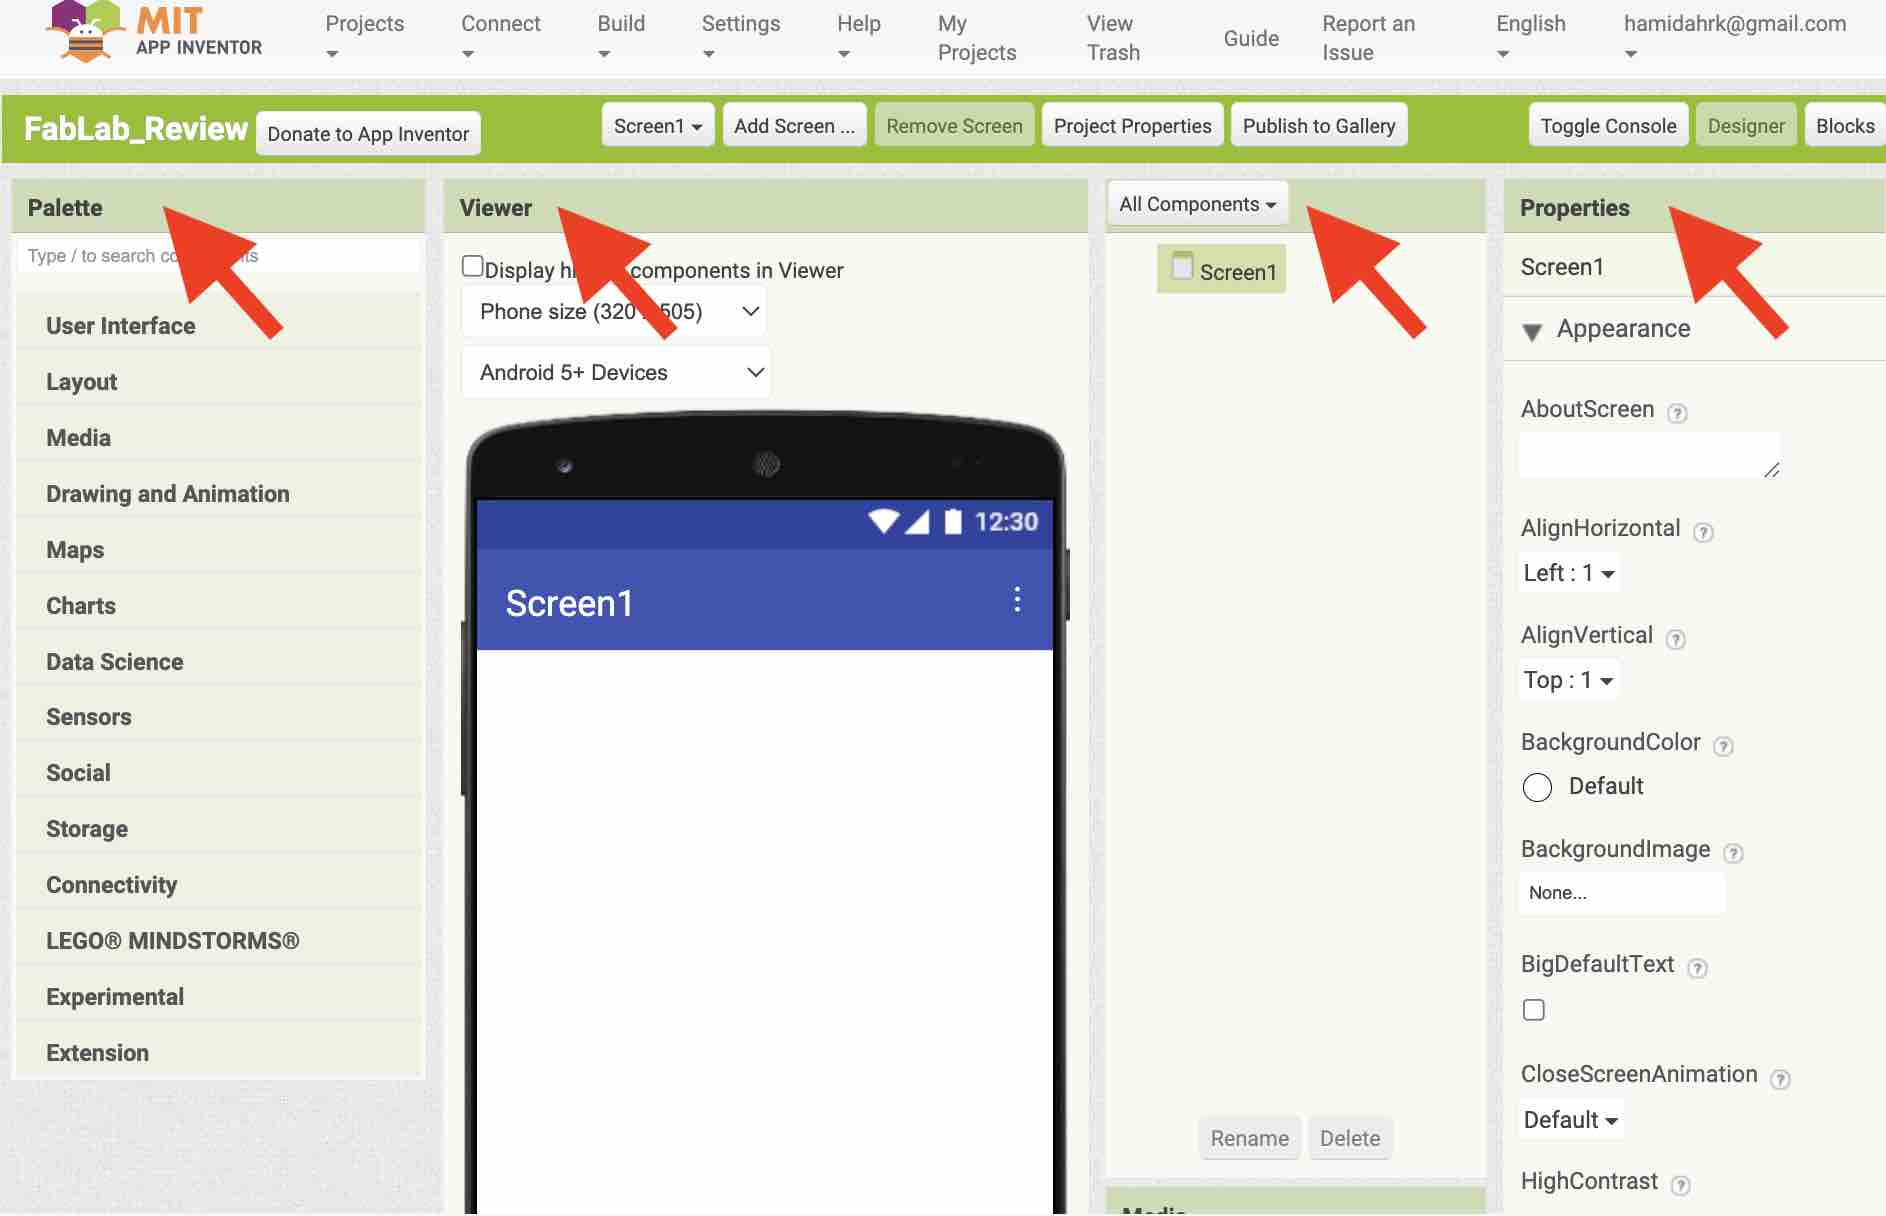
03| These are the main sections of the IDE: the palette (every component you can think of for building an app), the viewer (the design canvas showing your app as you build and align the components), the components panel (layered hierarchy of what you've added), and the properties panel (changes based on whichever component is selected).
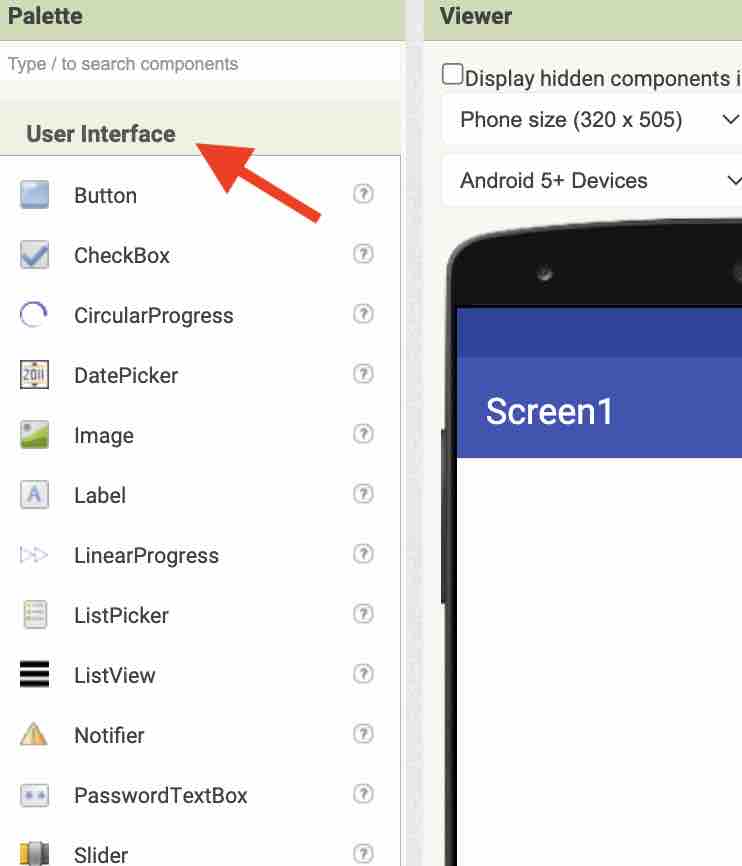
04| The main palettes start with User Interface — buttons, text labels, text input, sliders, images, list picker, and more. The properties of each component appear when it's added to the canvas / phone view.
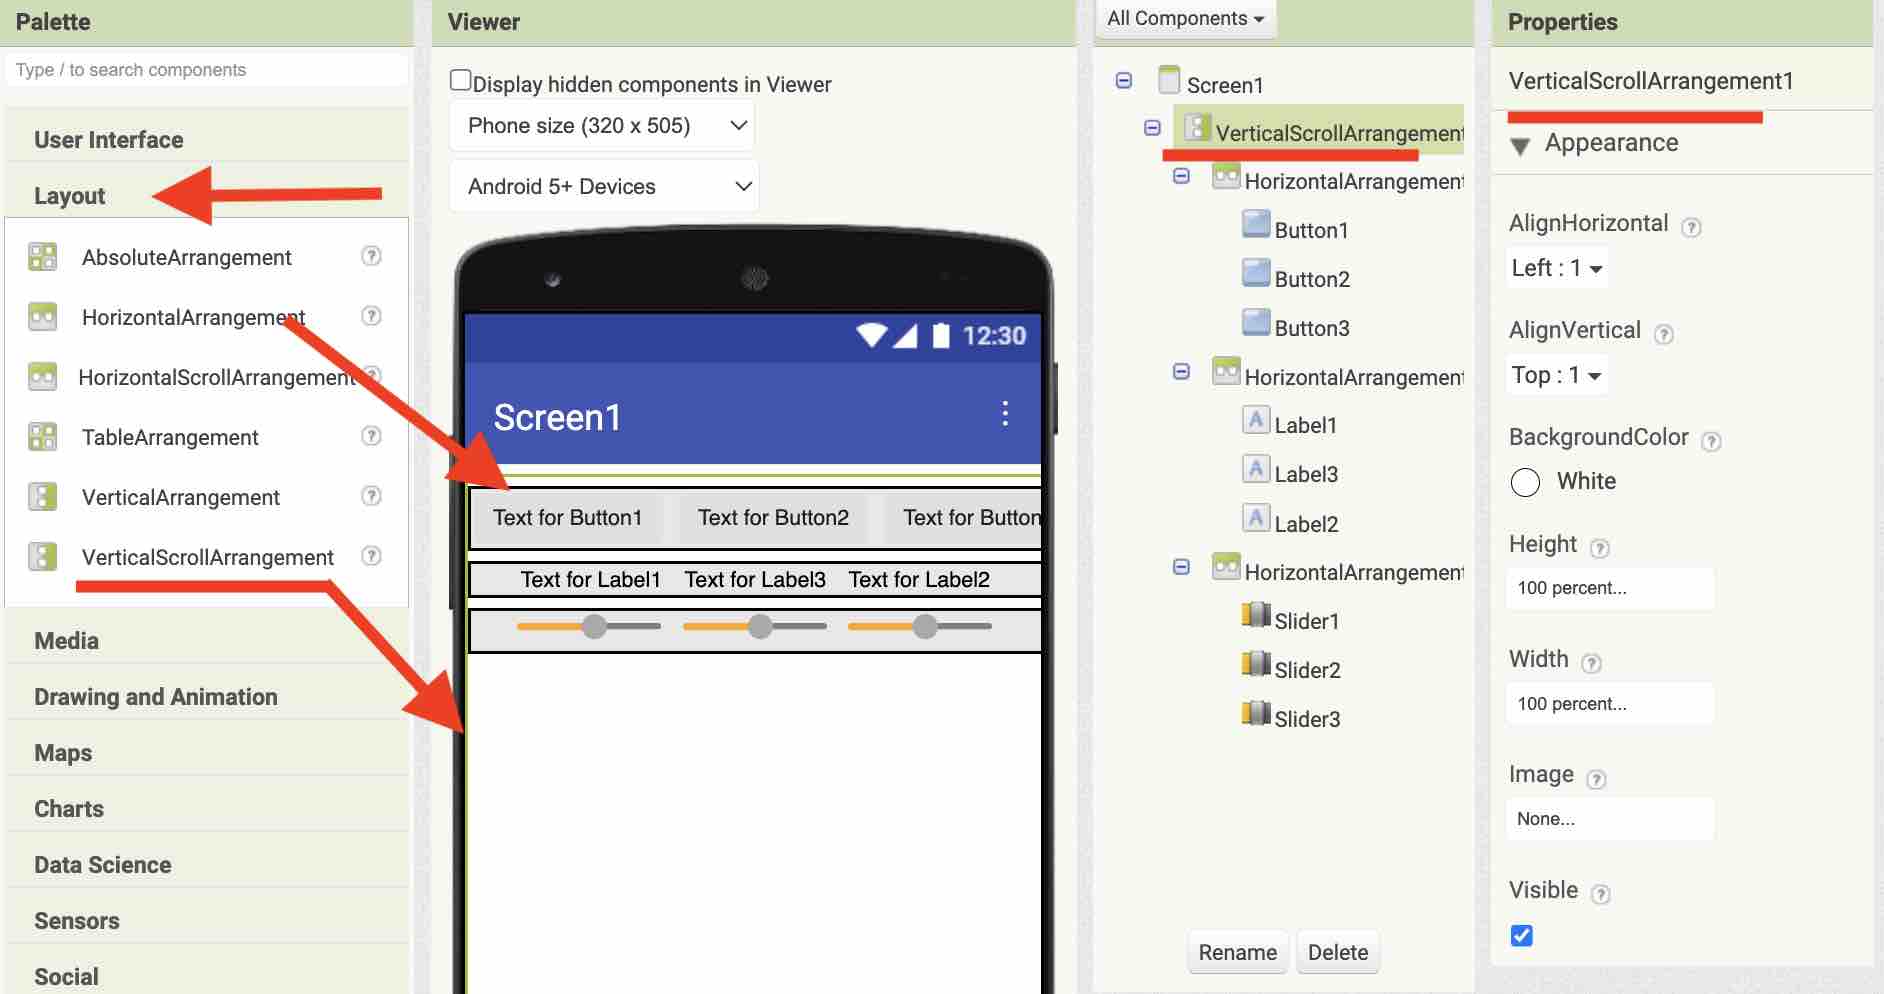
05| The Layout palette is one of the most important things to learn, because how elements arrange on screen depends on the nested layouts you build. The pattern I use most: add a vertical-scroll arrangement at 100% width and height, then add horizontal arrangements inside it to keep selections and buttons aligned in rows.
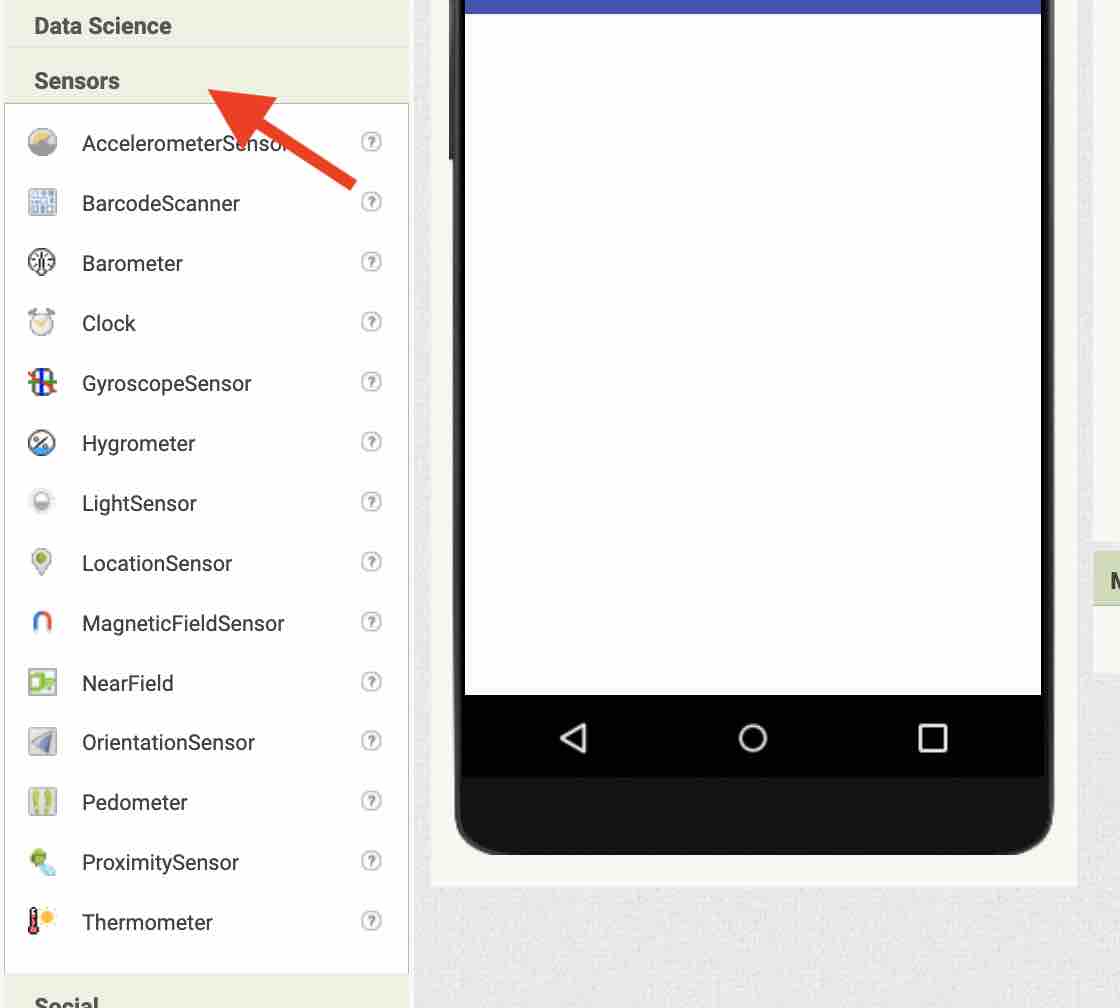
06| The Sensors palette lists the phone's built-in sensors that the app can read — accelerometer, gyroscope, magnetic-field sensor, orientation, location, proximity, barcode scanner, etc.
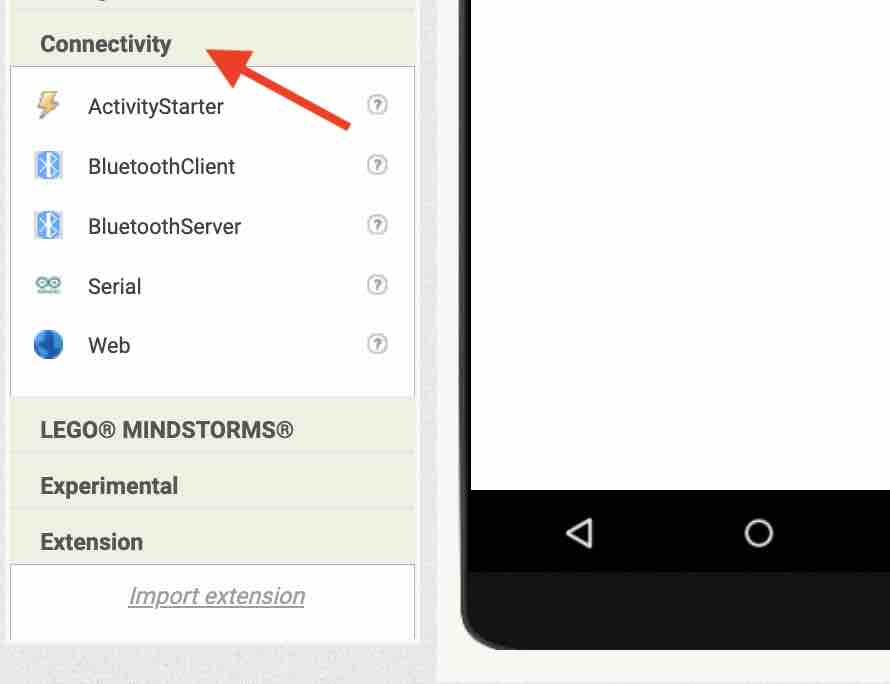
07| The Connectivity palette is where the IoT bridge lives — Bluetooth (classic + BLE via extension), Wi-Fi web connection, and a direct serial connection to Arduino-class boards.
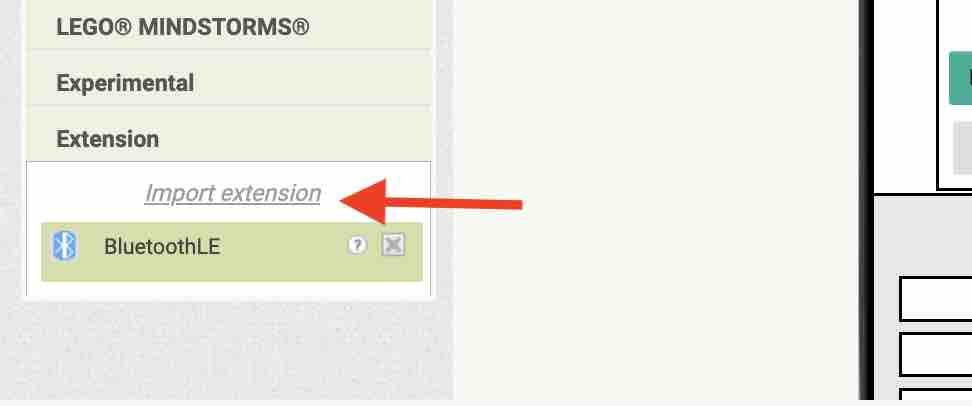
08| Extensions is where we need more extension that can be added for more connectivity options and can be found on MIT App Inventor Extensions
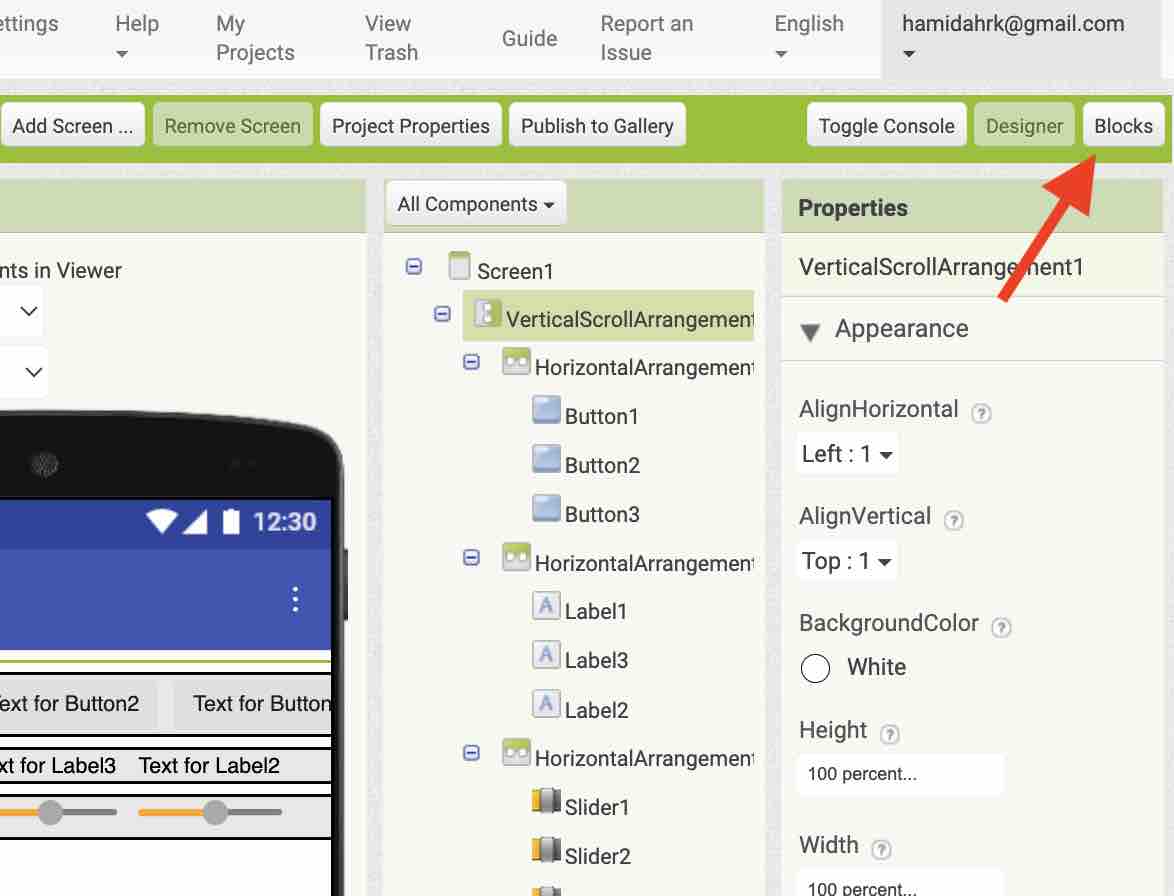
09| After adding the components and adjusting properties and alignment, switch to the Blocks screen to start coding the behaviour.
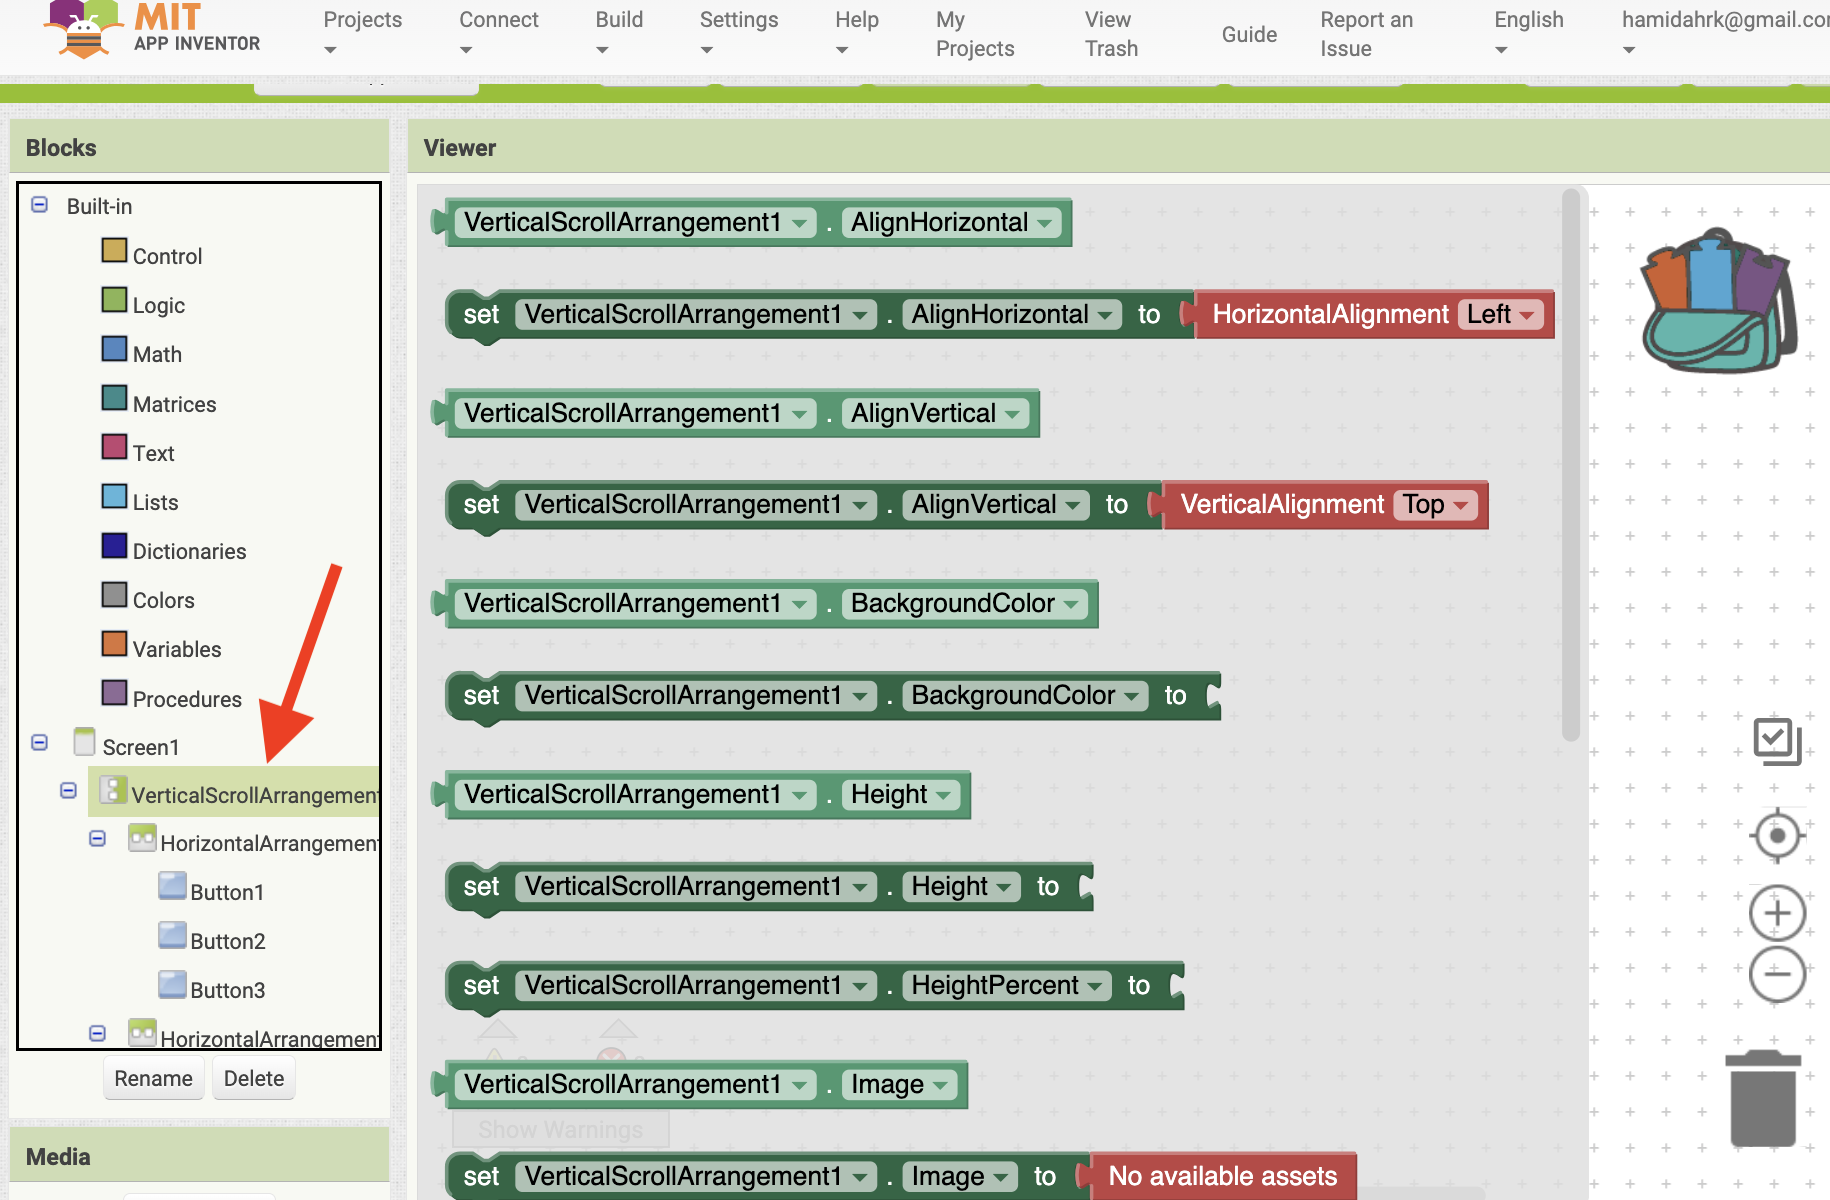
10| Selecting any of the components in the Blocks editor surfaces the list of functions, events, and attributes available for that component.
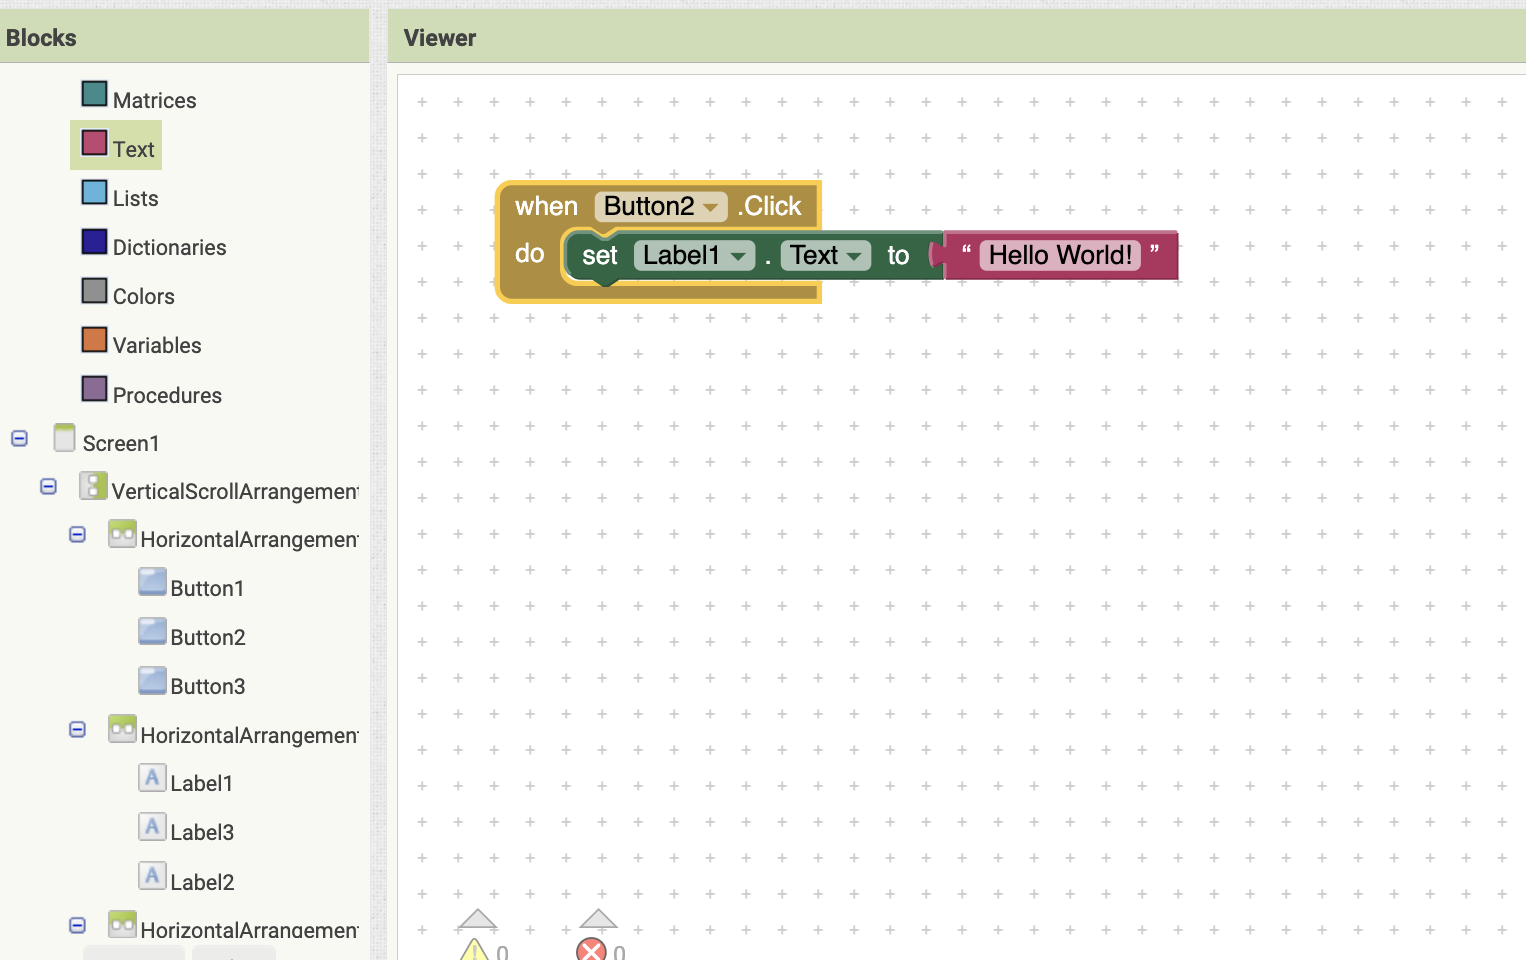
11| This is a simple code to program a button, on Click function of Button1, Label1 text will change to "Hello World!"
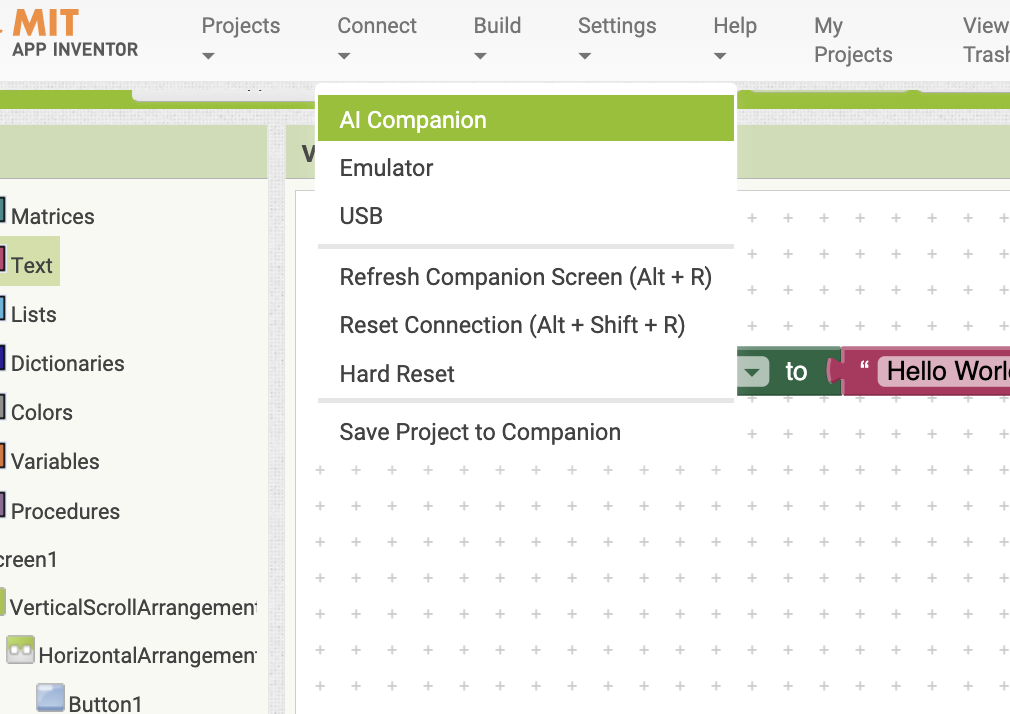
12| Then the AI Companion lets us connect our smartphone and view a real-time simulation of the app — no compile step needed.
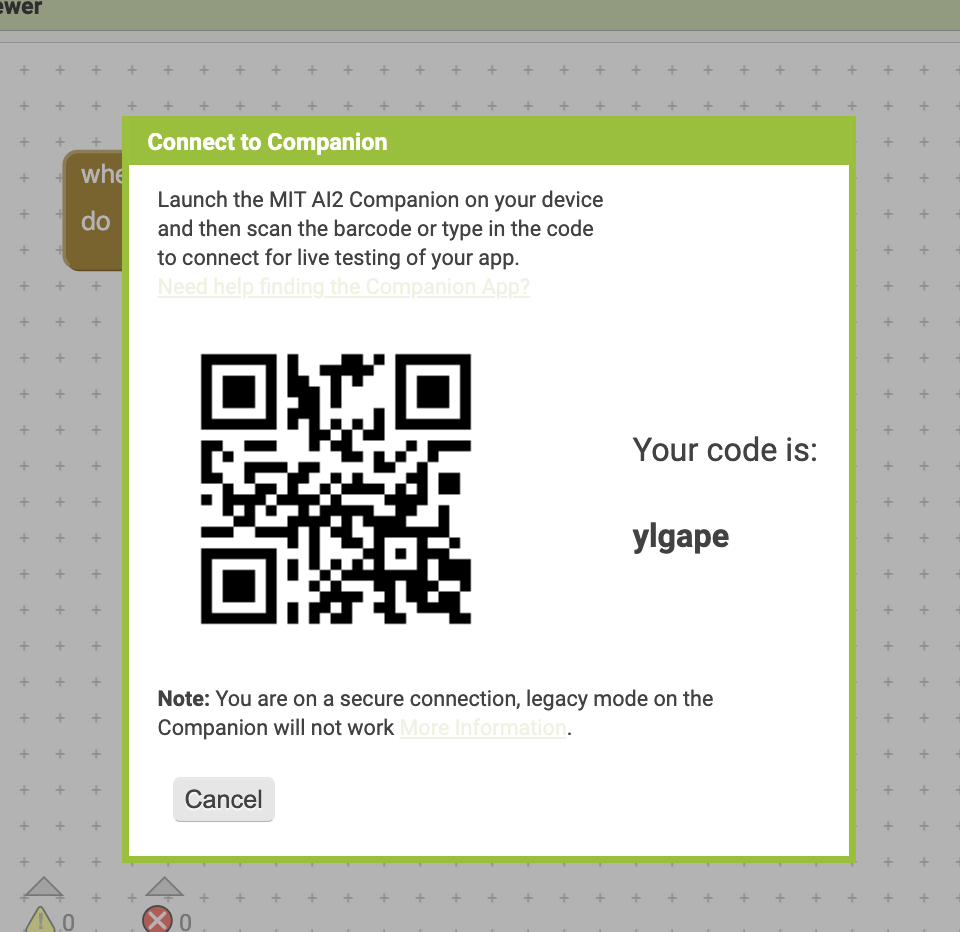
13| By scanning the QR Code real-time simulation will start on your phone
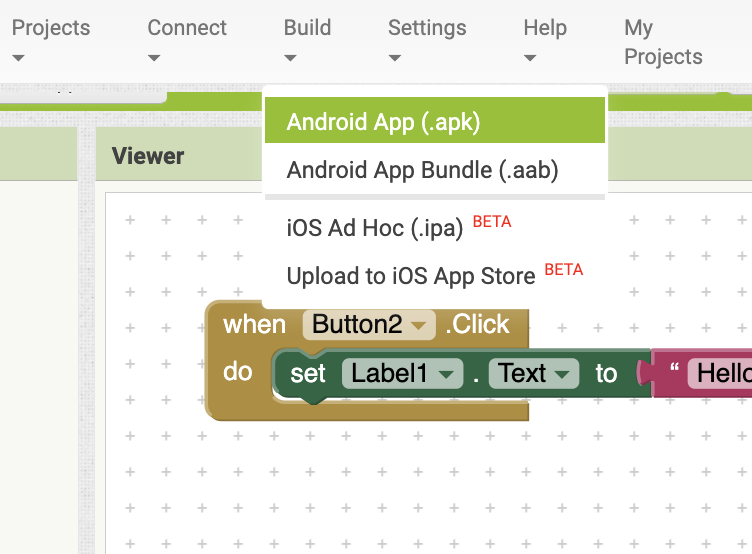
14| the app can also be compiled and share on store
- Feedback: I find it one of the best IDE to create interfaces and Apps
- Challenge: IoT is challenging but im willing to learn
Individual assignment:
01: Testing the App ↔ Microcontroller connection
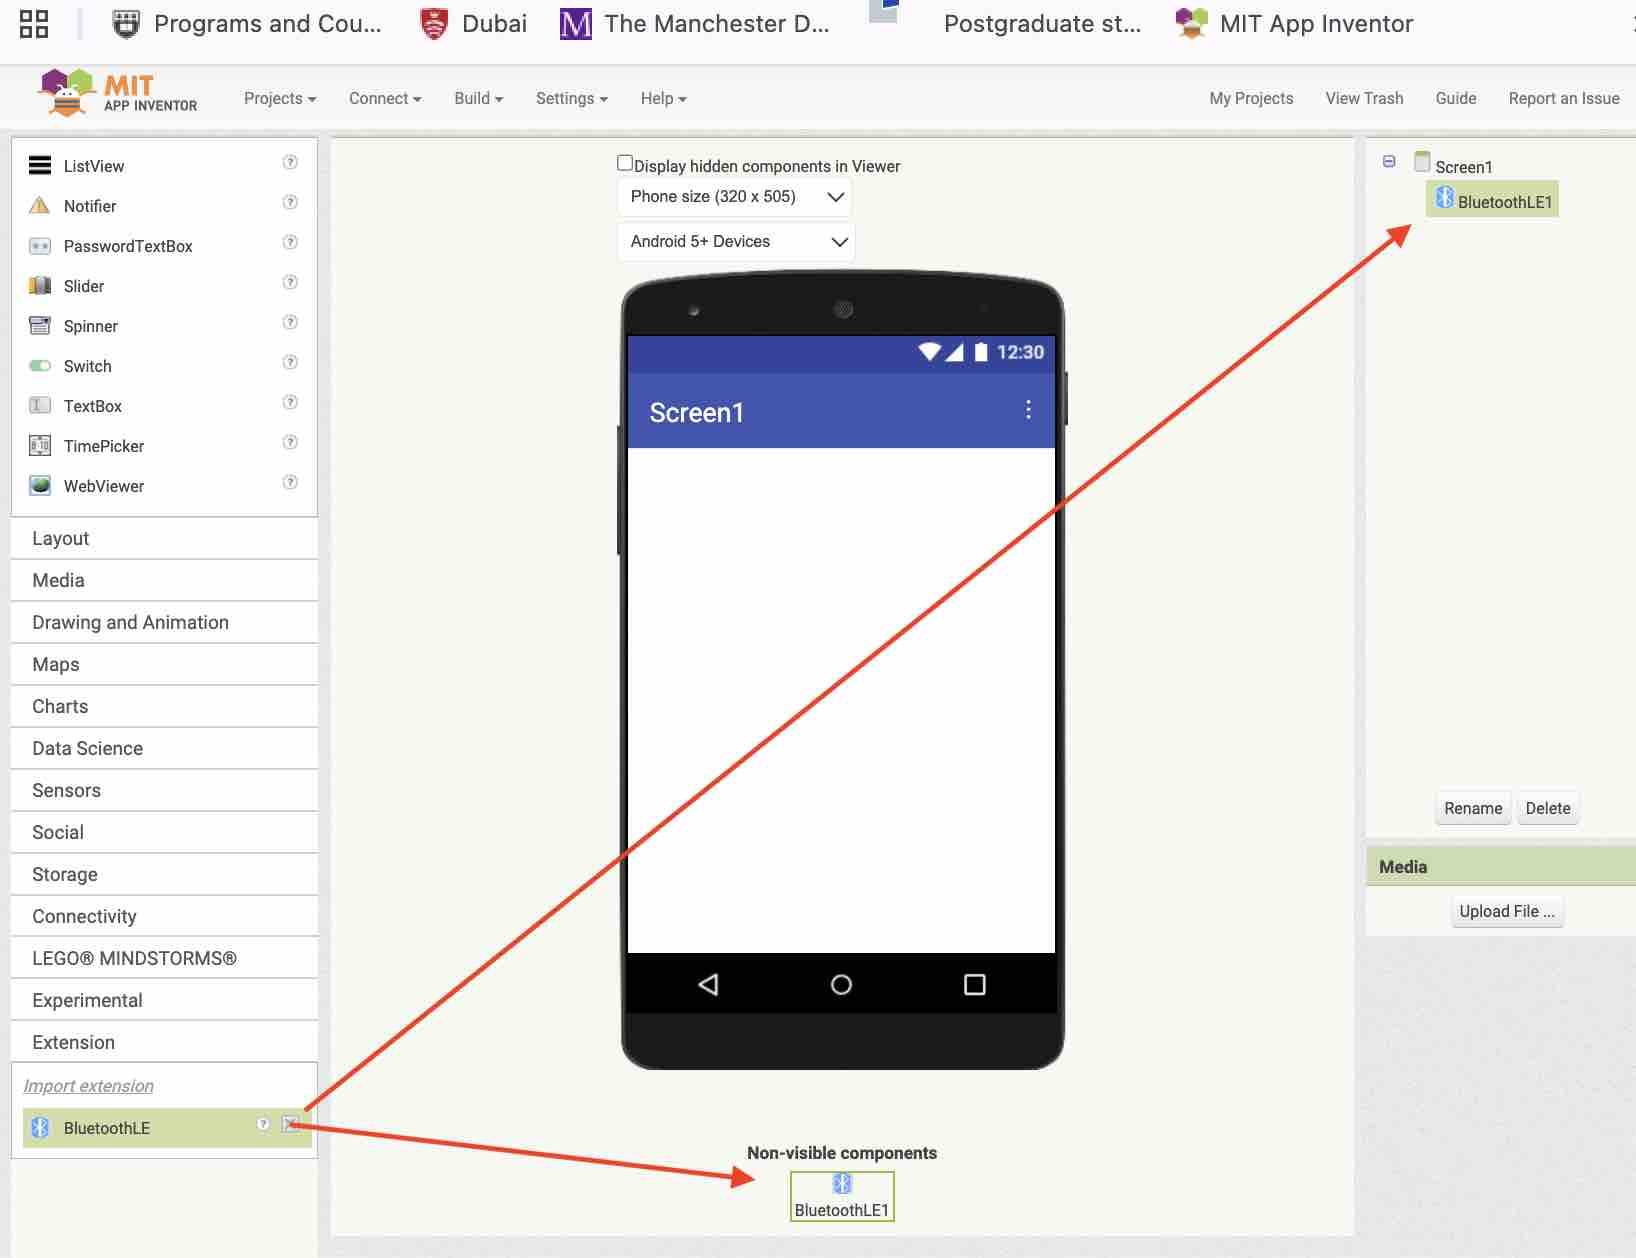
01 | First I had to import the Bluetooth Low Energy extension from the MIT App Inventor IoT reference into the project. Then I dragged the BLE component onto the canvas to activate it — confirmed by its name appearing in the components side panel.
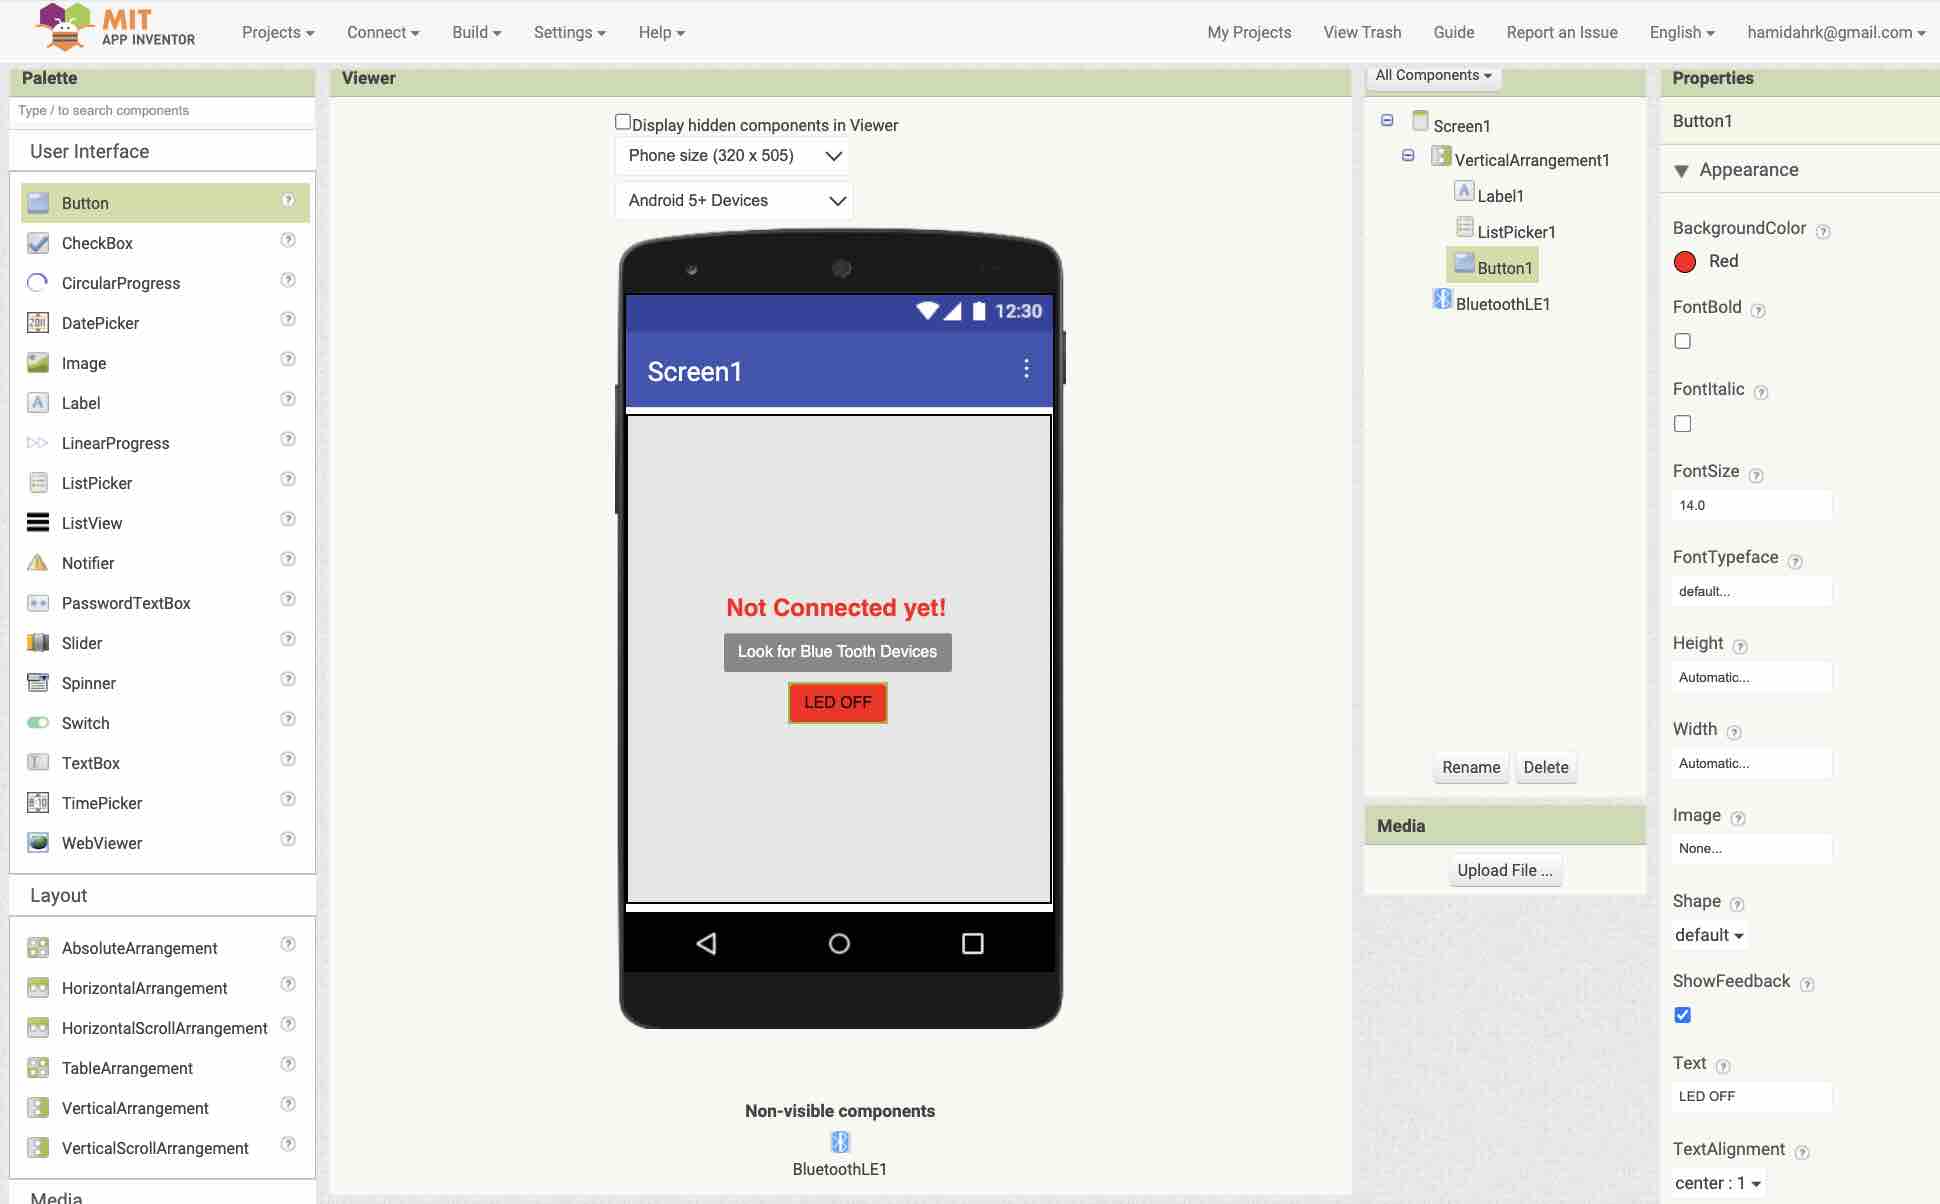
02 | Then in Designer mode, I added a vertical arrangement → set its width and height to fill parent → aligned elements to centre → added a status label that reflects whether the app is connected to a device → added a list picker to list the Bluetooth devices available to connect → added a button to turn the LED on and off.
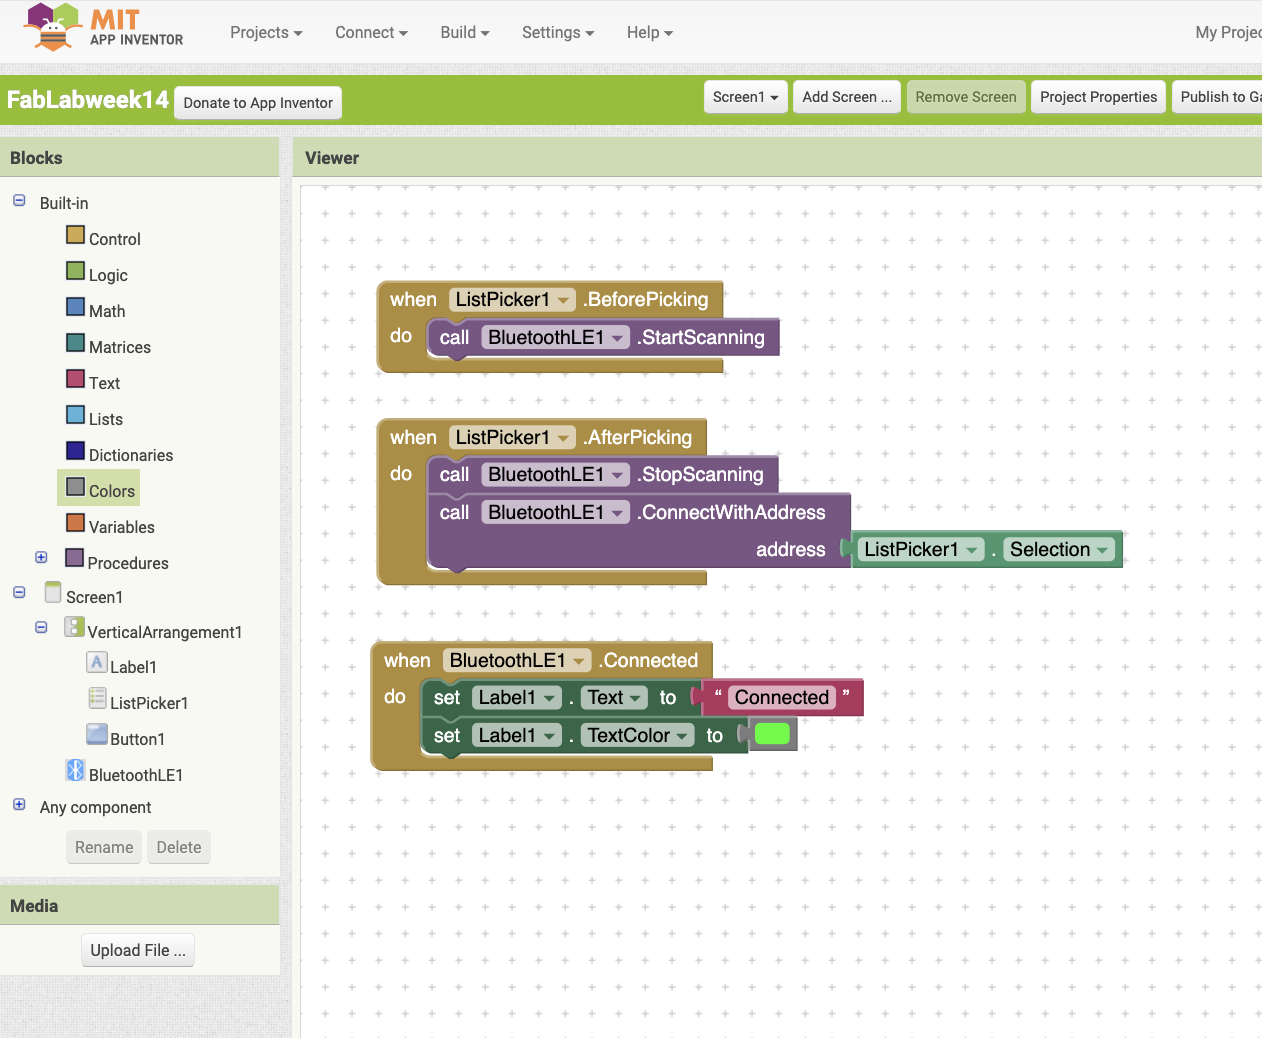
03 | Then in Blocks mode, as shown above: BLE starts scanning for available devices → once a device is selected from the list picker, it connects → the status label changes to green and reads "Connected".
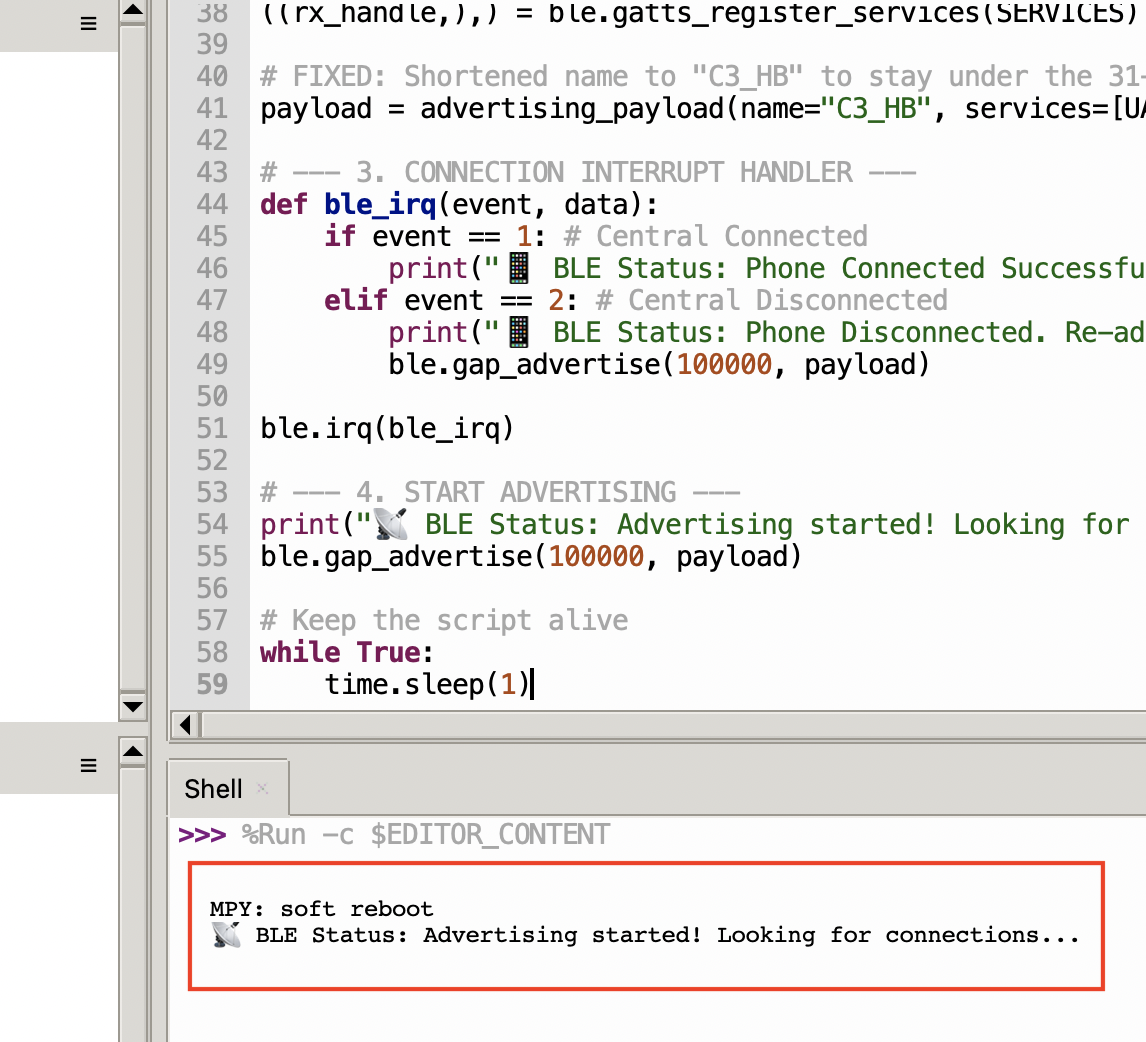
04 | To test this, I asked Gemini to help me write the MicroPython code I'd flash on the Microcontroller via Thonny — it brings up the BLE radio, registers the standard Nordic UART service (the UUID MIT App Inventor recognises out of the box), advertises a short name C3_HB, and reacts to connect / disconnect events.
import bluetooth
import struct
import machine
import time

# --- 1. INLINED BLE ADVERTISING DRIVER ---
def advertising_payload(limited_disc=False, br_edr=False, name=None, services=None, appearance=None):
    payload = bytearray()
    def _append(adv_type, value):
        nonlocal payload
        payload.append(len(value) + 1)
        payload.append(adv_type)
        payload.extend(value)

    _append(0x01, bytes([ (0x01 if limited_disc else 0x02) | (0x00 if br_edr else 0x04) ]))
    if name:
        _append(0x09, name.encode("utf-8"))
    if services:
        for uuid in services:
            b = bytes(uuid)
            if len(b) == 2: _append(0x03, b)
            elif len(b) == 4: _append(0x05, b)
            elif len(b) == 16: _append(0x07, b)
    if appearance:
        _append(0x19, struct.pack("H", appearance))
    return payload

# --- 2. BLE INITIALIZATION ---
ble = bluetooth.BLE()
ble.active(True)

# Standard UART UUIDs that MIT App Inventor recognizes
UART_UUID = bluetooth.UUID("6E400001-B5A3-F393-E0A9-E50E24DCCA9E")
RX_UUID = bluetooth.UUID("6E400002-B5A3-F393-E0A9-E50E24DCCA9E")

# Register the Service
SERVICES = ((UART_UUID, ((RX_UUID, bluetooth.FLAG_WRITE),)),)
((rx_handle,),) = ble.gatts_register_services(SERVICES)

# FIXED: Shortened name to "C3_HB" to stay under the 31-byte BLE limit
payload = advertising_payload(name="C3_HB", services=[UART_UUID])

# --- 3. CONNECTION INTERRUPT HANDLER ---
def ble_irq(event, data):
    if event == 1: # Central Connected
        print("📱 BLE Status: Phone Connected Successfully!")
    elif event == 2: # Central Disconnected
        print("📱 BLE Status: Phone Disconnected. Re-advertising...")
        ble.gap_advertise(100000, payload)

ble.irq(ble_irq)

# --- 4. START ADVERTISING ---
print("📡 BLE Status: Advertising started! Looking for connections...")
ble.gap_advertise(100000, payload)

# Keep the script alive
while True:
    time.sleep(1)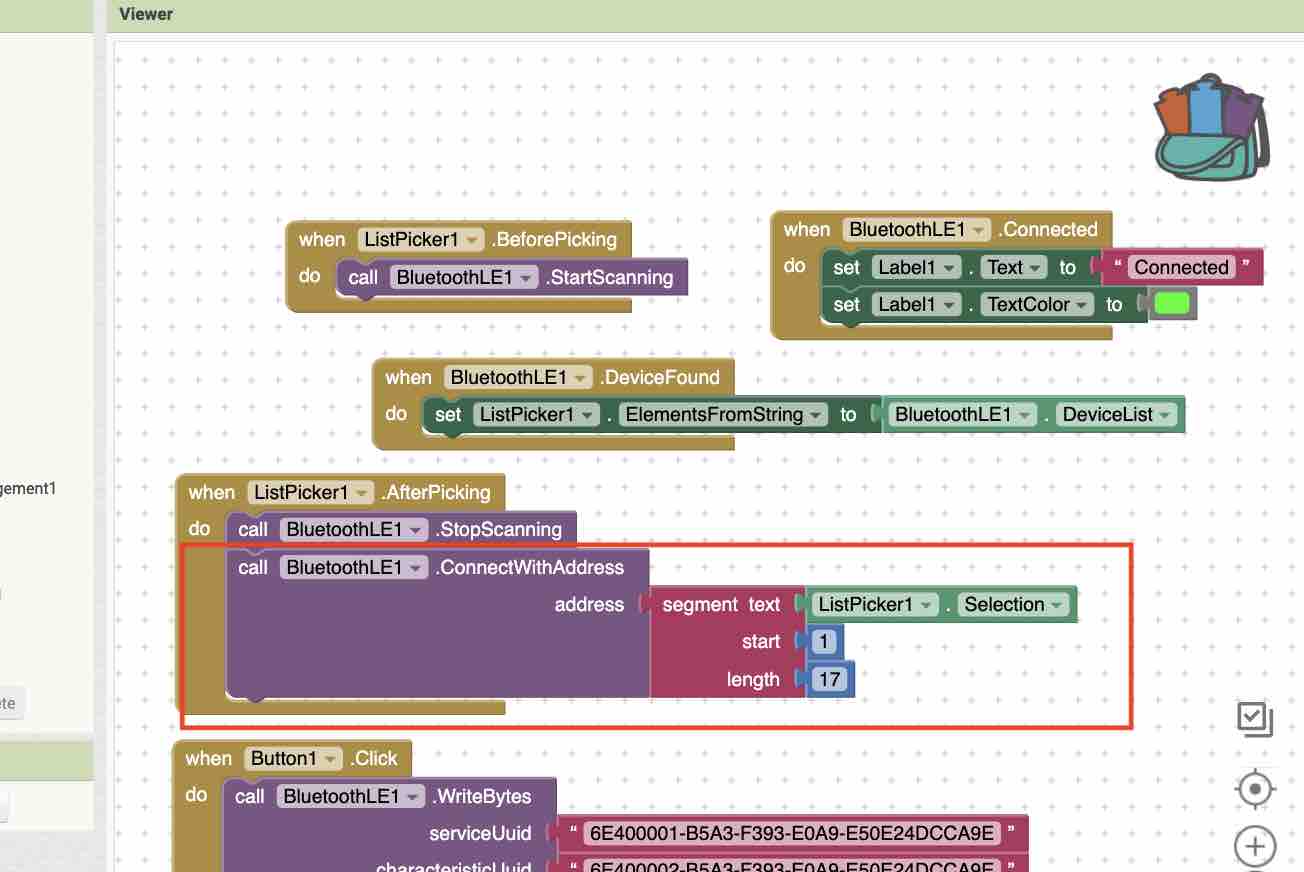
05 | To start testing the app, I first had to set the elements of the list picker to the devices found → in the app I looked for the entry ending in "C3_HB -84" → the first time I selected it the app threw an error. The reason: a MAC address is 17 characters (12 hex digits + 5 colons), but the displayed device entry — "AA:BB:CC:DD:EE:FF C3_HB -84" — appends the advertised name and RSSI after the MAC, so the string is longer than 17 characters → I had to add a segment-text block in App Inventor to extract only the first 17 characters (the actual MAC) before passing it to BLE.Connect.
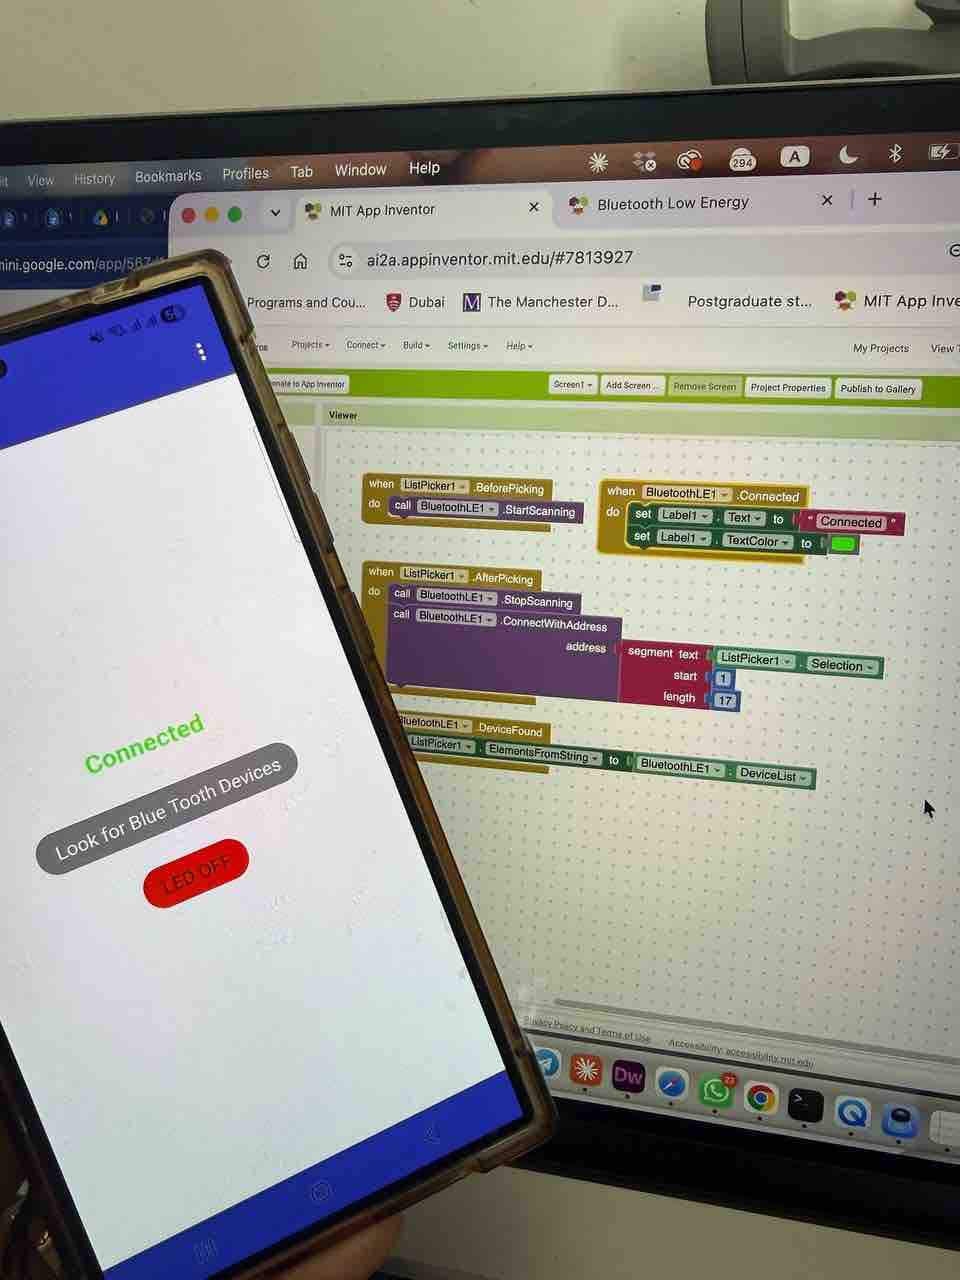
06 | App was successfully connected → label colour and text changed correctly to "Connected" → now it's time to control the LED with the on-button-click event.
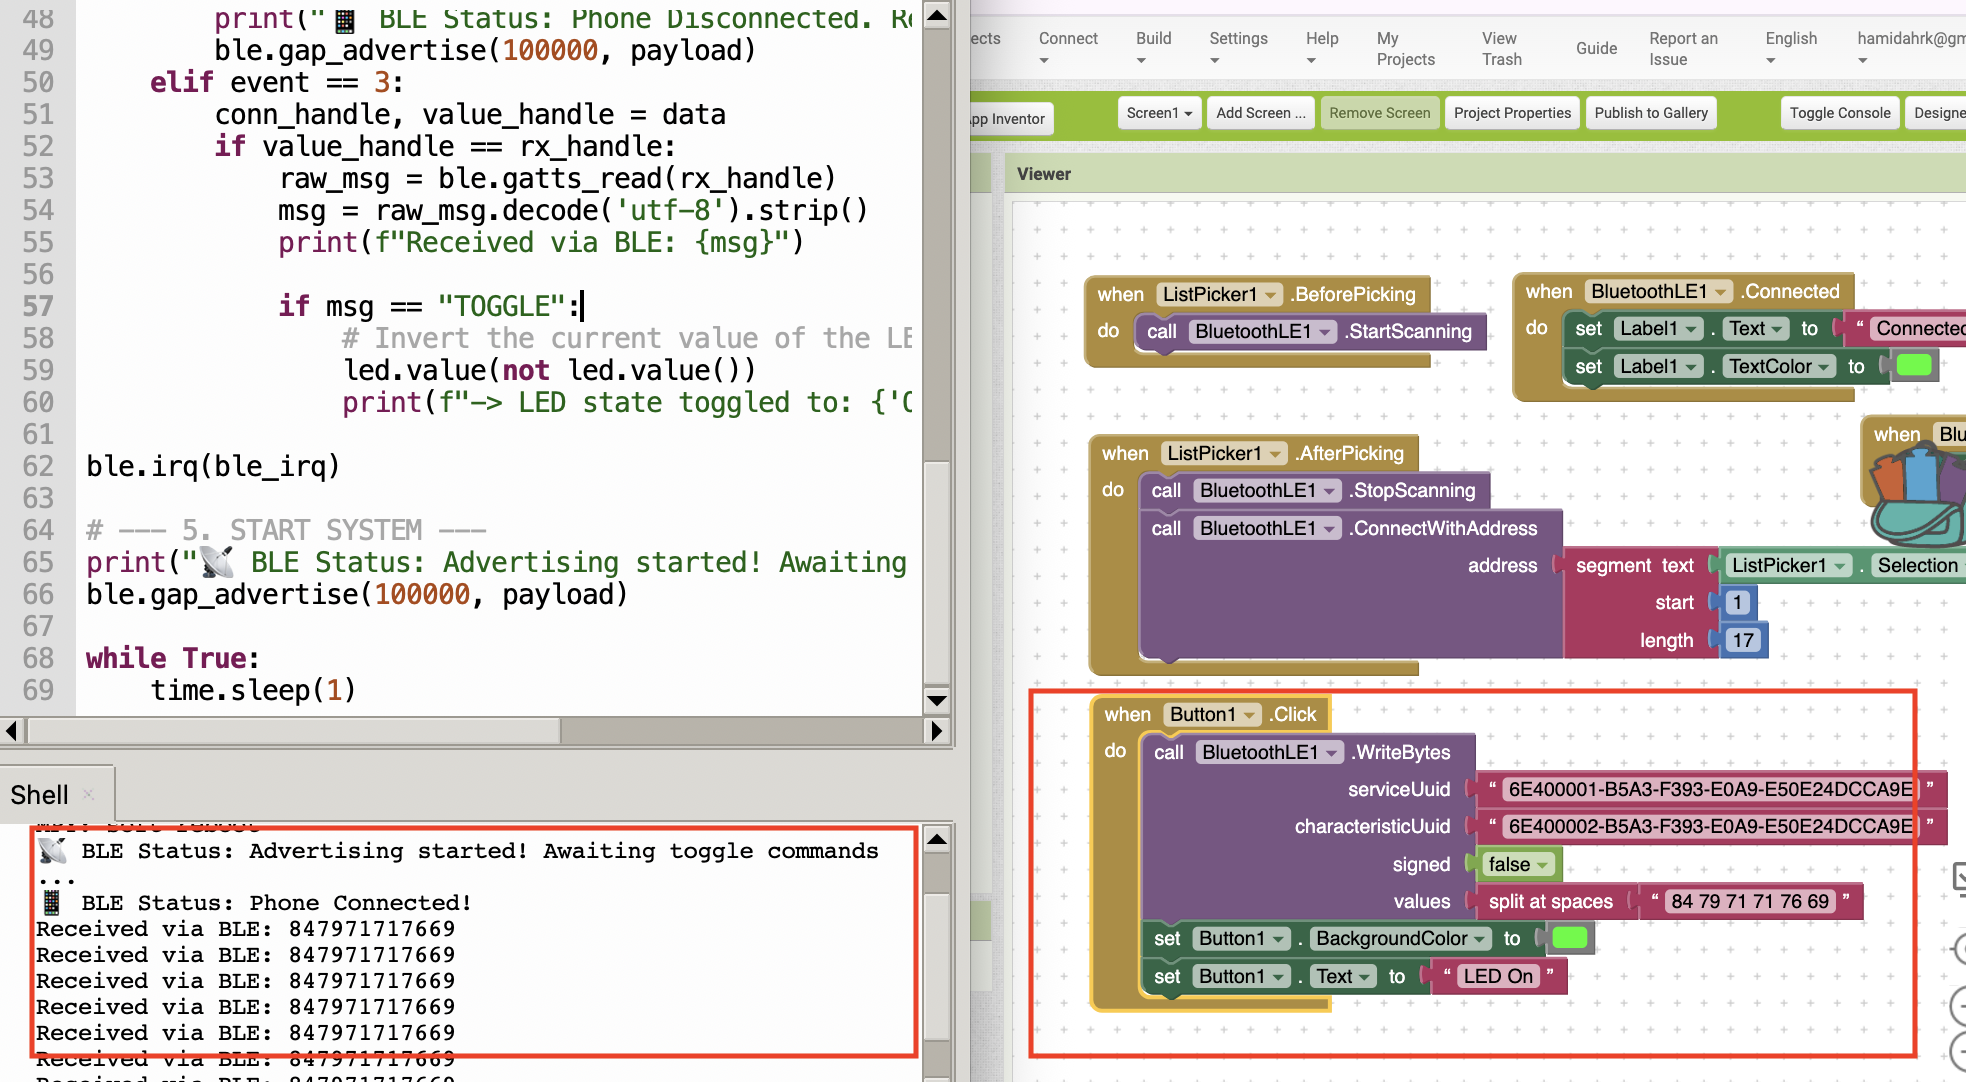
07 | Added an on-button-click event → which writes a payload to the Microcontroller over the BLE UART characteristic → and the button colour briefly changes as it's pressed.
08 | I extended the Microcontroller firmware to drive the RGB LED on the correct pins (D8 = red, D9 = green, D10 = blue, common-anode wiring so 0 = ON), parse the incoming BLE payload as a UART write, and toggle the LED on / off when it receives "TOGGLE" or a message containing the agreed magic value "84".
import bluetooth
import struct
import machine
import time

# --- 1. INLINED BLE ADVERTISING DRIVER ---
def advertising_payload(limited_disc=False, br_edr=False, name=None, services=None, appearance=None):
    payload = bytearray()
    def _append(adv_type, value):
        nonlocal payload
        payload.append(len(value) + 1)
        payload.append(adv_type)
        payload.extend(value)

    _append(0x01, bytes([ (0x01 if limited_disc else 0x02) | (0x00 if br_edr else 0x04) ]))
    if name:
        _append(0x09, name.encode("utf-8"))
    if services:
        for uuid in services:
            b = bytes(uuid)
            if len(b) == 2: _append(0x03, b)
            elif len(b) == 4: _append(0x05, b)
            elif len(b) == 16: _append(0x07, b)
    if appearance:
        _append(0x19, struct.pack("<H", appearance))
    return payload

# --- 2. RGB HARDWARE SETUP ---
led_red = machine.Pin(2, machine.Pin.OUT)   # D8
led_green = machine.Pin(3, machine.Pin.OUT) # D9
led_blue = machine.Pin(10, machine.Pin.OUT) # D10

# Turn all colors OFF immediately (1 = OFF)
led_red.value(1)
led_green.value(1)
led_blue.value(1)

light_is_on = False

# --- 3. BLE INITIALIZATION ---
ble = bluetooth.BLE()
ble.active(True)

UART_UUID = bluetooth.UUID("6E400001-B5A3-F393-E0A9-E50E24DCCA9E")
RX_UUID = bluetooth.UUID("6E400002-B5A3-F393-E0A9-E50E24DCCA9E")

SERVICES = ((UART_UUID, ((RX_UUID, bluetooth.FLAG_WRITE),)),)
((rx_handle,),) = ble.gatts_register_services(SERVICES)
payload = advertising_payload(name="C3_HB", services=[UART_UUID])

# --- 4. BLE INTERRUPT HANDLER (UPDATED MATCHING) ---
def ble_irq(event, data):
    global light_is_on
    if event == 1:
        print("📱 BLE Status: Phone Connected!")
    elif event == 2:
        print("📱 BLE Status: Phone Disconnected. Re-advertising...")
        ble.gap_advertise(100000, payload)
    elif event == 3:
        conn_handle, value_handle = data
        if value_handle == rx_handle:
            raw_msg = ble.gatts_read(rx_handle)

            # Clean up the string to remove any hidden null bytes or spaces
            msg = raw_msg.decode('utf-8').replace('\x00', '').strip()
            print(f"Cleaned incoming string: '{msg}'")

            # Match against your explicit number string pattern or 'TOGGLE'
            if "84" in msg or msg == "TOGGLE":
                light_is_on = not light_is_on

                if light_is_on:
                    led_red.value(0)
                    led_green.value(0)
                    led_blue.value(0)
                    print("-> RGB LED State: ON")
                else:
                    led_red.value(1)
                    led_green.value(1)
                    led_blue.value(1)
                    print("-> RGB LED State: OFF")

ble.irq(ble_irq)

# --- 5. START SYSTEM ---
print("📡 BLE Status: Advertising started! Awaiting toggle commands...")
ble.gap_advertise(100000, payload)

while True:
time.sleep(1)- Feedback: I really need to spend more time on the IoT layer — specifically defining the message logic between how values are sent, received, and read by the user. The "extract first 17 characters of the MAC" workaround for the App-Inventor BLE list was a real eye-opener about how leaky details can become a bug.
- Challenge: Connecting two Connection Nodes to the same app might be challenging — App Inventor's BLE handling is built for one peripheral at a time. I'll need to explore that more, or pivot to a one-BLE-gateway-plus-ESP-NOW-relay architecture instead. (Spoiler — that's exactly the pivot I made in W16.)
02: Creating my App
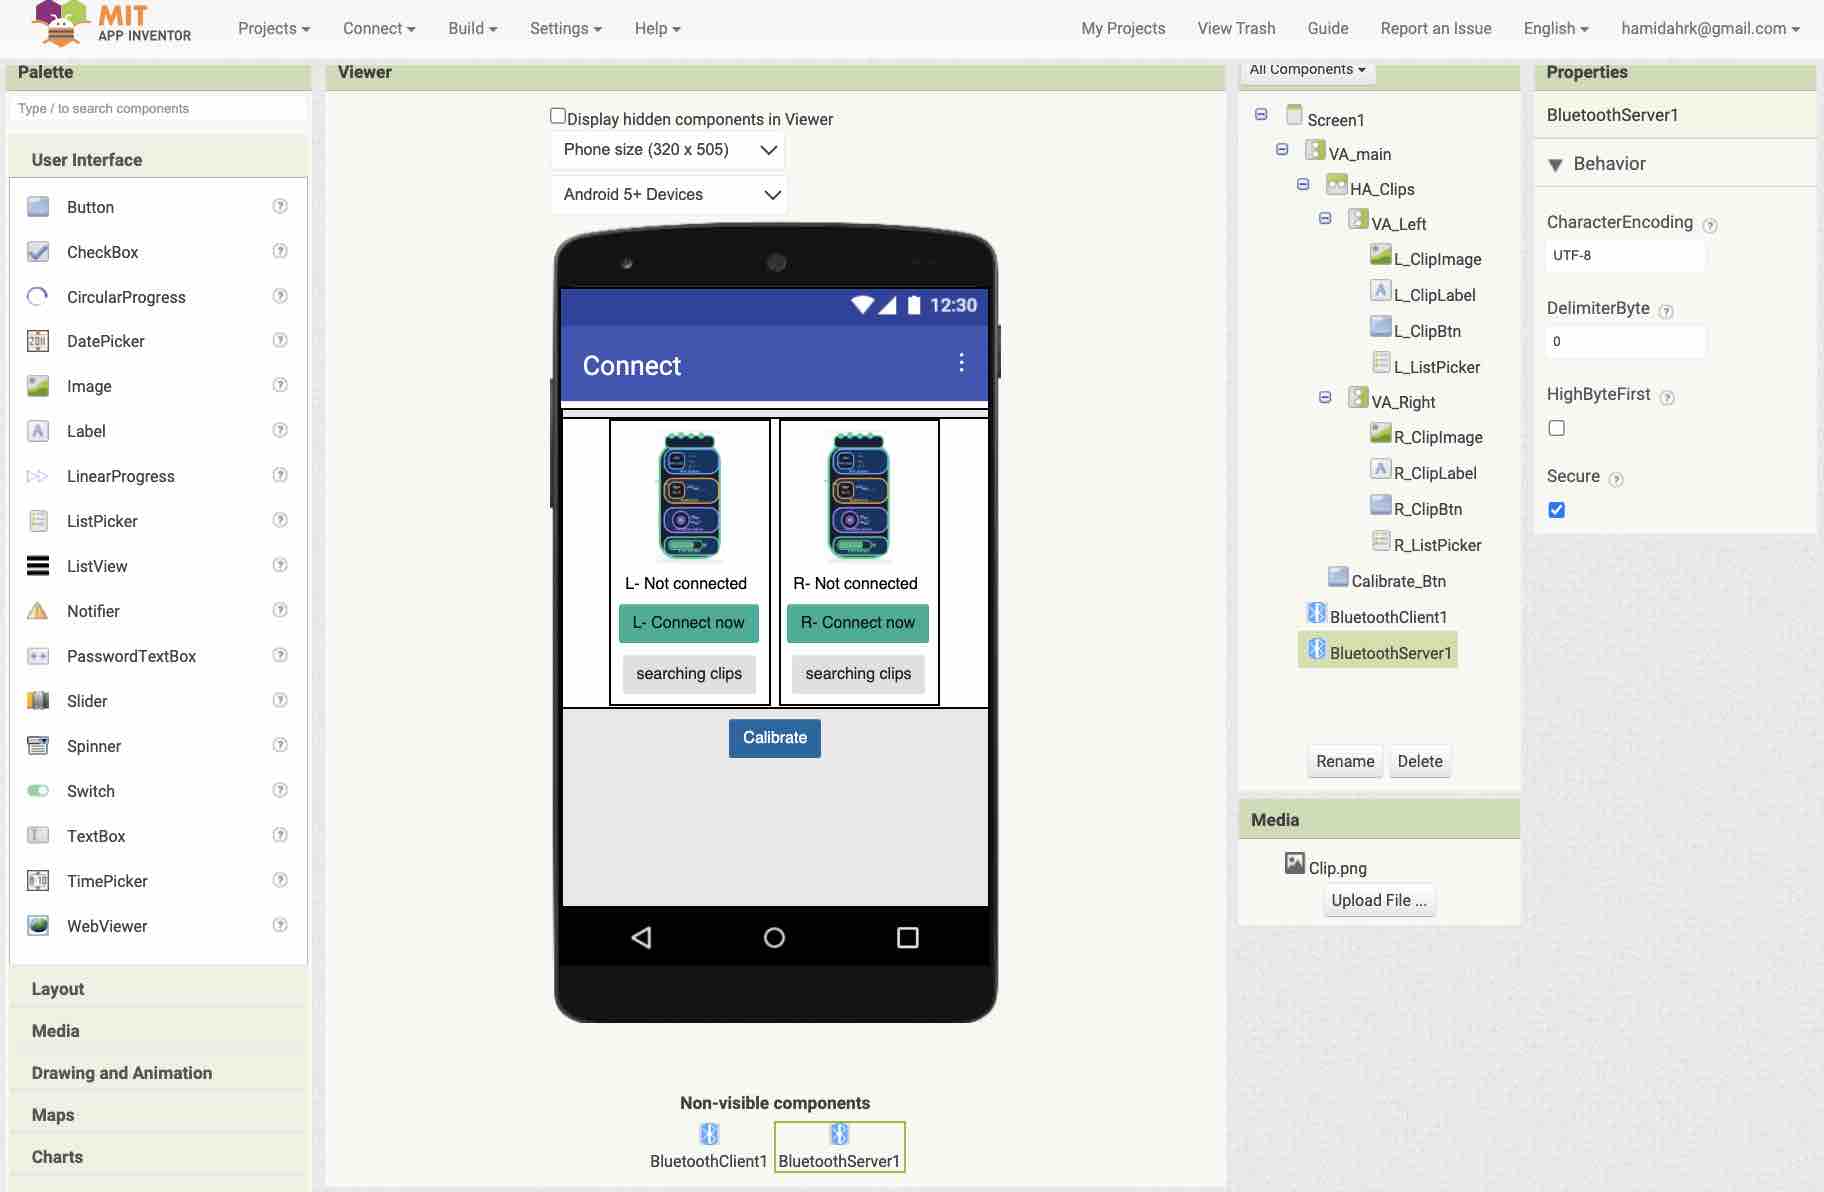
01 | I created my app using the MIT App Inventor platform. I designed the two clips — left and right — added a list view to scan for Bluetooth devices, added text labels that update the connection status, and added a Calibration button that tells the Microcontroller to lock the current orientation as the acceptable-posture baseline.
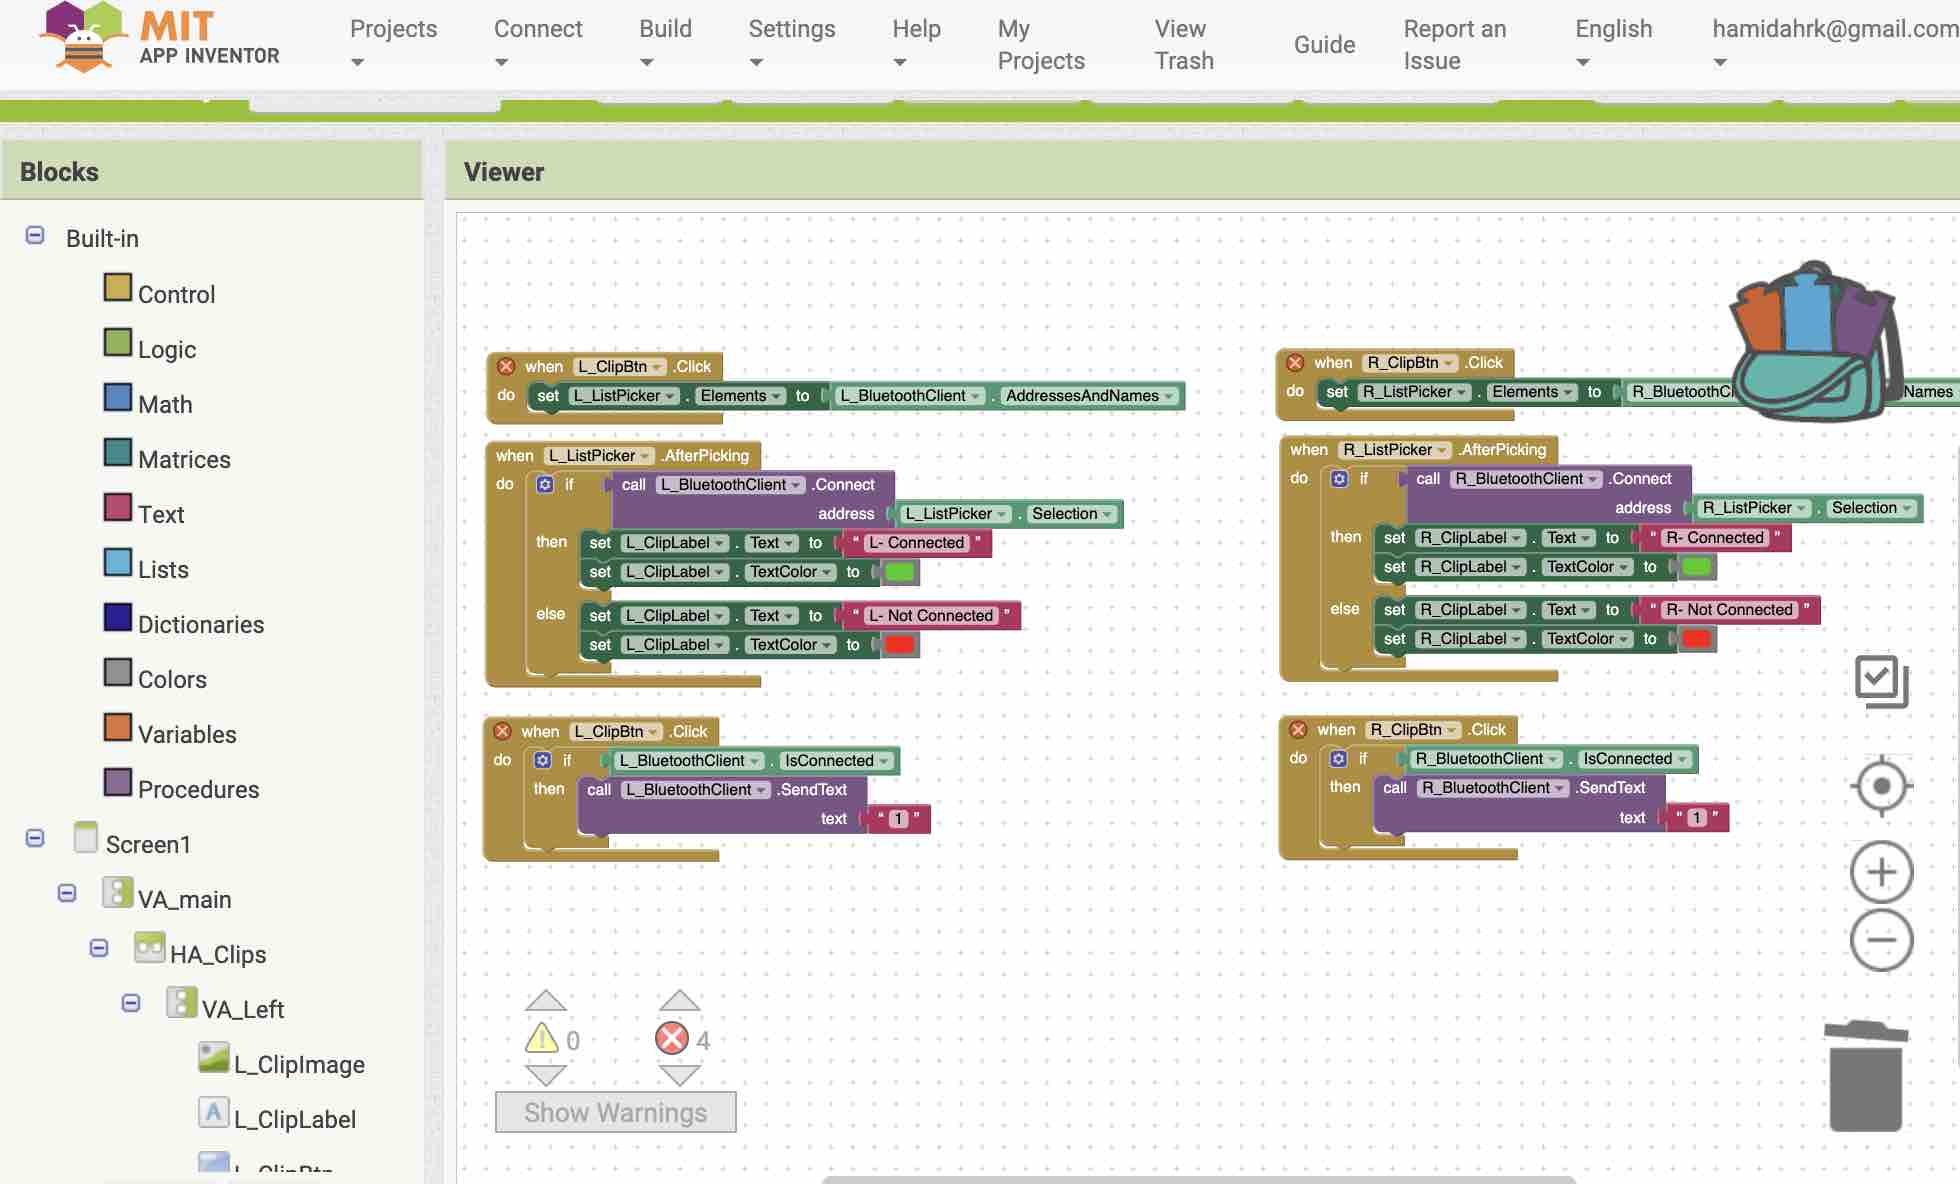
02 | App Inventor's block programming hides most of the syntax overhead. Here I duplicated the same command blocks for the left and right clips — opening the BLE connection and sending parameters to the ESP32-C3 Microcontroller. The duplication itself was a smell that motivated the later W16 pivot to a single gateway clip plus an ESP-NOW relay.
- Feedback: I have previous experience using MIT App Inventor, so the interface itself was not difficult. Connecting it to external devices was a new area for me to explore.
- Challenge: Next I want to pull data from the clips into the app and plot it in a clean chart — that would give more insight into the user's movements and how often they moved without responding to the vibration reminder.