Introduction
This week, I worked with different microcontrollers and completed both group and individual assignments. In our group work, we demonstrated and compared the toolchains and development workflows for various embedded architectures, which helped me understand the differences and similarities between them. For my individual assignment, I studied the datasheet of a microcontroller and wrote a program for an embedded system. I tested the program to make the microcontroller interact with input and output devices, as well as communicate using wired connections. This experience gave me practical knowledge of how embedded systems work and how to develop programs for them.
 |
 |
Individual assignment
Task: browse through the data sheet for a microcontroller.
write and test a program for an embedded system using a microcontroller to interact (with input &/or output devices)
Group assignment
Task:Demonstrate and compare the toolchains and development workflows for available embedded structures.
Comparison of Microcontroller Architectures
| Parameters | Arduino Uno | ESP32-WROOM | ESP32-C3 | XIAO RP2040 |
|---|---|---|---|---|
| Microcontroller | ATmega328P | ESP32 | ESP32-C3 | RP2040 |
| Core | Single core | Dual core | Single core | Dual core |
| Architecture | 8-bit AVR RISC | 32-bit Xtensa LX6 | 32-bit RISC-V | 32-bit ARM Cortex-M0+ |
| Clock Speed | 16 MHz | Up to 240 MHz | Up to 160 MHz | Up to 133 MHz |
| Operating Voltage | 5V | 3.3V | 3.3V | 3.3V |
| GPIO Voltage | 5V | 3.3V | 3.3V | 3.3V |
| Digital Pins | 14 | Up to 34 | Up to 22 | Up to 11 |
| PWM Pins | 6 | Up to 16 | Up to 6 | Up to 11 |
| Analog Pins | 6 | Up to 18 | Up to 6 | Up to 4 |
| Communication | UART, SPI, I2C | UART, SPI, I2C, I2S | UART, SPI, I2C | UART, SPI, I2C |
| WiFi | No | Yes | Yes | No |
| Bluetooth | No | Yes | Yes (BLE) | No |
| Programming Language | C/C++ | C/C++, MicroPython | C/C++, MicroPython | C/C++, MicroPython |
| On-board LED Pin | D13 | GPIO2 | GPIO8 | GPIO25 |
| Flash Memory | 32 KB | 4 MB | 4 MB | 2 MB |
| RAM | 2 KB SRAM | 520 KB SRAM | 400 KB SRAM | 264 KB SRAM |
| USB Interface | USB Type-B | Micro-USB | USB Type-C | USB Type-C |
| Advantages | Best for beginners and simple embedded systems | High performance, WiFi and Bluetooth for IoT | Low power, modern RISC-V, WiFi and BLE support | Fast dual-core processing, reliable for real-time applications |
Toolchain and Development Workflow Comparison
A toolchain is a set of software tools used to write, compile, upload, and debug programs in a microcontroller. In this group assignment, we used Arduino IDE and Thonny IDE to program Arduino Uno, ESP32-WROOM, ESP32C3 XIAO, and XIAO RP2040.
| Toolchain Component | Arduino Uno | ESP32-WROOM | ESP32C3 XIAO | XIAO RP2040 |
|---|---|---|---|---|
| Architecture | AVR 8-bit | Xtensa 32-bit | RISC-V 32-bit | ARM Cortex-M0+ 32-bit |
| Programming Language | C/C++ | C/C++, MicroPython | C/C++, MicroPython | C/C++, MicroPython |
| IDE (Editor) | Arduino IDE | Arduino IDE, Thonny IDE | Arduino IDE, Thonny IDE | Arduino IDE, Thonny IDE |
| Compiler | AVR-GCC | Xtensa-ESP32-GCC | RISC-V GCC | ARM GCC (arm-none-eabi-gcc) |
| Uploader Tool | avrdude | esptool | esptool | UF2 Bootloader / bossac |
| Firmware | Arduino Bootloader | ESP32 Firmware / MicroPython Firmware | ESP32-C3 Firmware / MicroPython Firmware | RP2040 Firmware / MicroPython Firmware |
| Connection Type | USB Type-B | Micro-USB | USB Type-C | USB Type-C |
| Execution Method | Compiled and uploaded | Compiled or Interpreted | Compiled or Interpreted | Compiled or Interpreted |
Development Workflow (Arduino IDE)
- Write program in Arduino IDE
- Select board (Arduino Uno / ESP32-WROOM / ESP32 XIAO/ XIAO ESP32C3 / XIAO RP2040)
- Compile the program
- Upload program using USB
- Microcontroller executes the program
Development Workflow (MicroPython)
- Install MicroPython firmware on ESP32
- Open Thonny IDE
- Write Python program
- Upload program to microcontroller
- Program executes immediately
Comparison Summary
- Arduino Uno uses AVR-GCC compiler and supports C/C++ programming.
- ESP32-WROOM and ESP32 XIAO support both C/C++ and MicroPython.
- Arduino IDE is used for compiling and uploading programs.
- Thonny IDE is used for MicroPython programming.
- MicroPython is easier for beginners and faster for testing.
- C/C++ provides better performance and hardware control.
I used chatgpt to make the above tables.
Conclusion
From this comparison, Arduino Uno is suitable for beginners and basic embedded programming because of its simple architecture and ease of use. ESP32-WROOM and ESP32-C3 provide advanced features such as WiFi, Bluetooth, and higher processing speed, making them ideal for IoT and wireless applications. The ESP32-C3 uses modern RISC-V architecture and offers efficient performance with low power consumption. The XIAO RP2040 provides fast dual-core processing and reliable performance, making it suitable for real-time embedded systems and control applications. MicroPython provides easier development and faster testing, while C/C++ provides better performance, efficiency, and direct hardware control.
Click to view Group Assignment Week 4
Embedded Programming
Embedded programming is writing code for small computers inside devices. These devices are called embedded systems, such as microwaves or smartwatches. The code makes the device perform specific tasks, like turning on lights or reading sensors. It runs directly on the devices microcontroller or processor. Embedded programming is used in everyday electronics, cars, and smart gadgets.
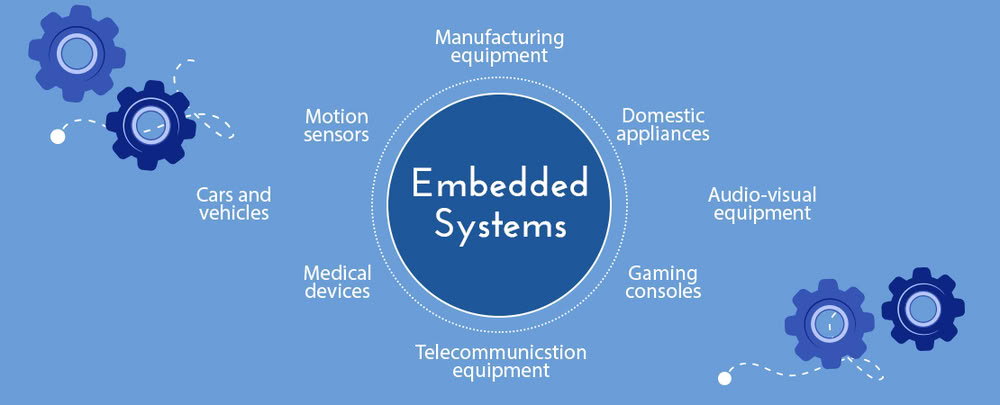
Embedded Systems
Embedded systems are special computers built into devices to perform specific tasks. They are found in everyday items like washing machines, cars, microwaves, and smartwatches. Unlike regular computers, embedded systems focus on one function and work efficiently with limited memory and processing power. They use microcontrollers or processors to read inputs from sensors, control outputs like motors or lights, and sometimes communicate with other devices.
 |
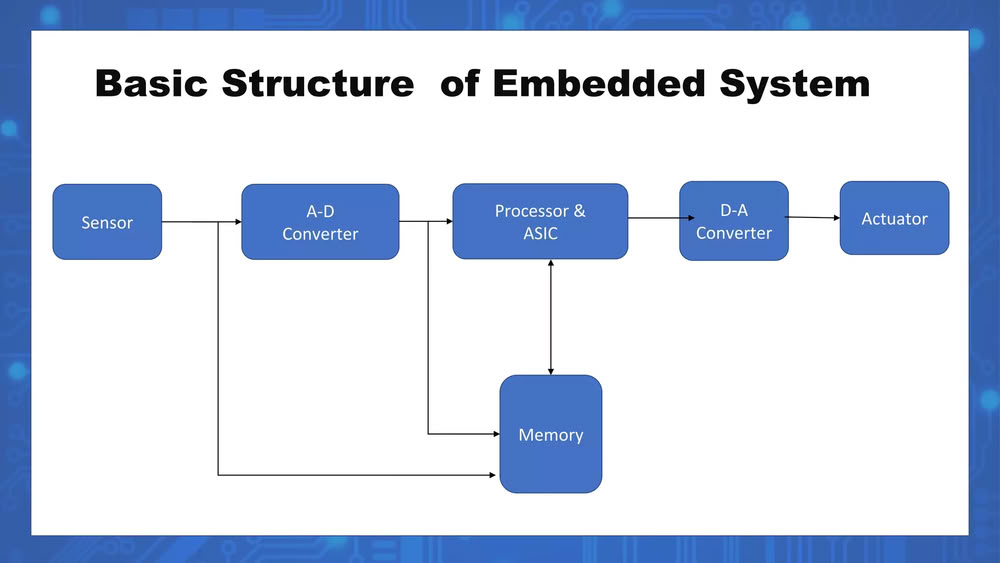 |
An embedded system embeds several key elements that make it work as a small, dedicated computer inside a device.
It has a mix of hardware and software, including a microcontroller or microprocessor that acts as the brain to execute programs, and memory to store programs and data, such as RAM for temporary storage and Flash or ROM for permanent storage.
It also includes input devices or sensors to detect signals from the environment, like temperature sensors, buttons, or light sensors, and output devices or actuators, such as motors, LEDs, or displays, to act on the environment based on program instructions. Software or firmware controls the systems behavior, while communication interfaces allow it to connect with other devices using wired connections like UART, SPI, or I2C, or wireless connections like Bluetooth or Wi-Fi.
Finally, a power supply provides the electricity needed for all the components to function.
In short, an embedded system embeds a processor, memory, input/output devices, software, and power, all working together to perform a specific task.
What is microcontroller
A microcontroller is a small computer built on a single chip. It contains a processor, memory, and input/output ports all in one place. Microcontrollers are used to control devices and perform specific tasks in embedded systems. They are commonly found in everyday electronics like microwaves, cars, and smart gadgets.
What is microprocessor
A microprocessor is the central processing unit (CPU) of a computer on a single chip. It performs calculations, processes data, and executes instructions from programs. Unlike a microcontroller, a microprocessor usually needs external memory and input/output components to work. Microprocessors are used in personal computers, laptops.
Difference between microcontroller and microprocessor
| microcontroller | microprocessor |
|---|---|
| A microcontroller has a processor, memory, and input/output ports all on one chip | A microprocessor only has a CPU and needs external memory and I/O devices. |
| Microcontrollers are used for specific tasks in embedded systems. | Microprocessors are used in general-purpose computers and devices needing high-speed processing. |
| Microprocessors are faster and handle complex tasks. | Microcontrollers are slower but efficient for simple, dedicated tasks. |
| Microcontroller has built-in RAM and ROM/Flash. | Microprocessor requires external memory. |
Microcontrollers and their Datasheets overview
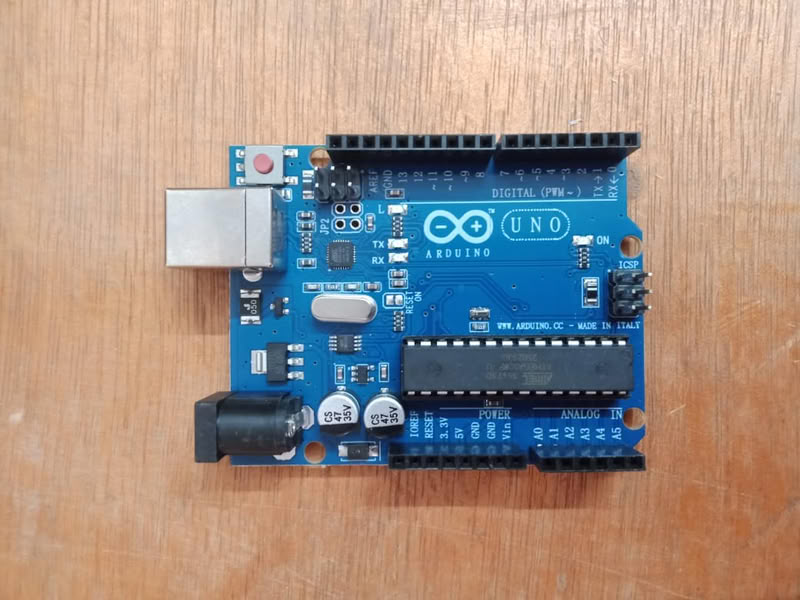
1.Arduino UNO
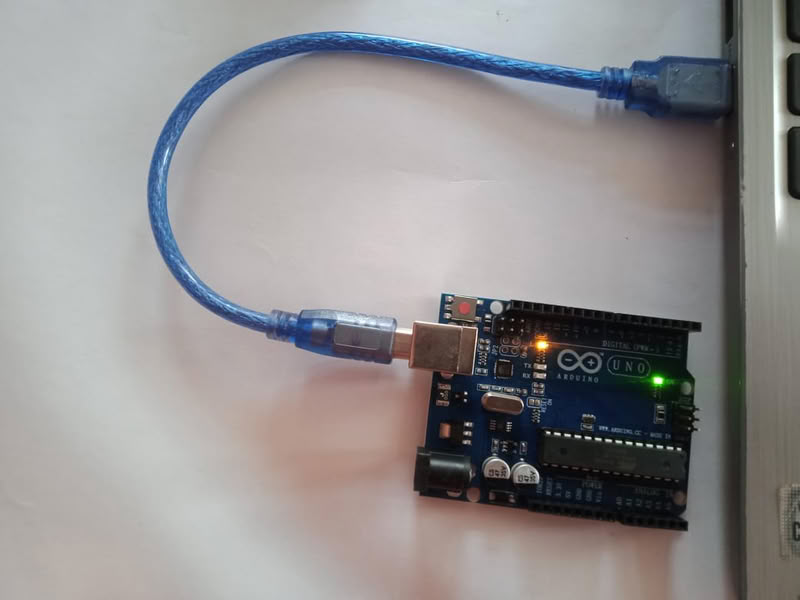
The Arduino Uno is a microcontroller development board based on the ATmega328P microcontroller. It is widely used in embedded systems, rapid prototyping, and educational applications. The board provides digital and analog input/output pins, USB communication interface, and power regulation circuitry, making it suitable for controlling electronic components such as LEDs, sensors, and motors.
Datasheet for Arduino UNO
- Arduino Uno is based on the ATmega328P microcontroller.
- The board operates at 5V operating voltage.
- It has 14 digital input/output pins, out of which 6 support PWM.
- It has 6 analog input pins (A0-A5) with 10-bit resolution.
- The microcontroller runs at a clock speed of 16 MHz.
- It has 32 KB Flash memory, 2 KB SRAM, and 1 KB EEPROM.
- The board includes a USB interface for programming and power supply.
- It has a built-in LED connected to digital pin 13.
Embedded programming with Arduino
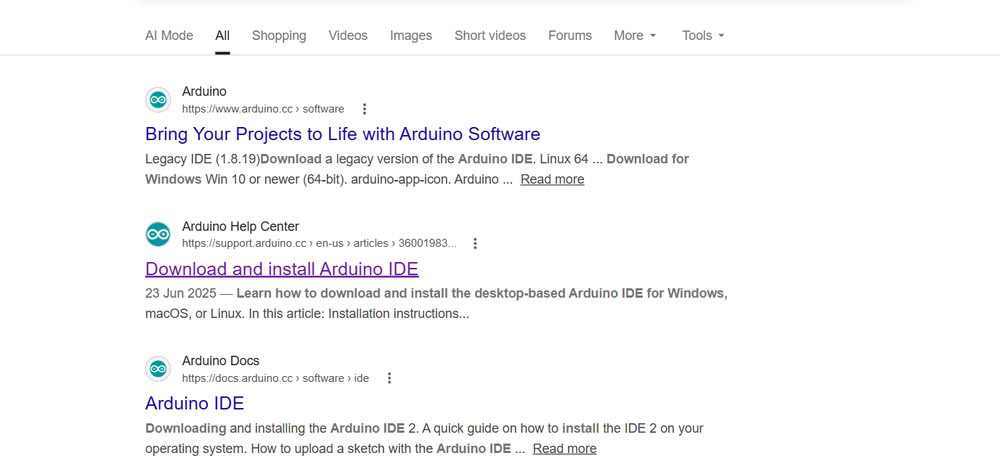 |
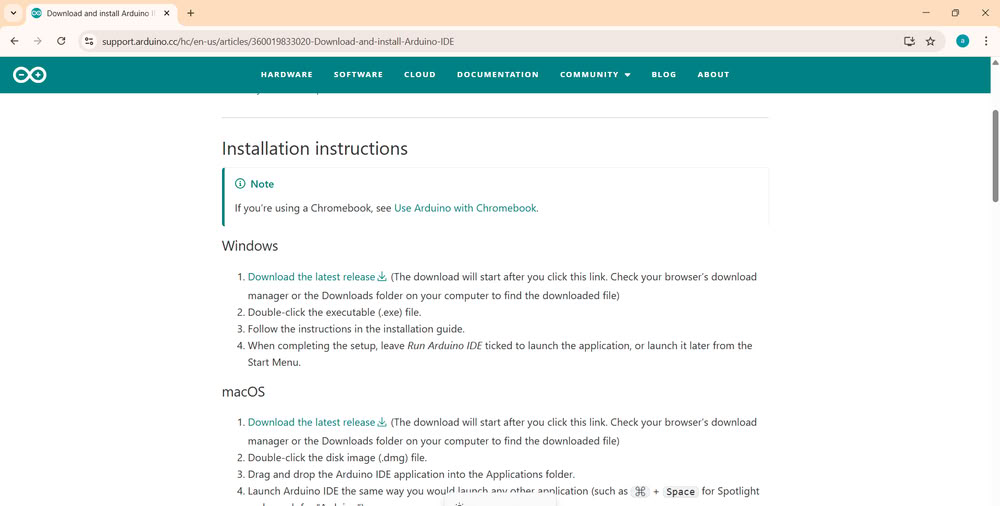 |
| First, I searched for the Arduino IDE for Windows and downloaded it. | I installed the Arduino UNO version. |
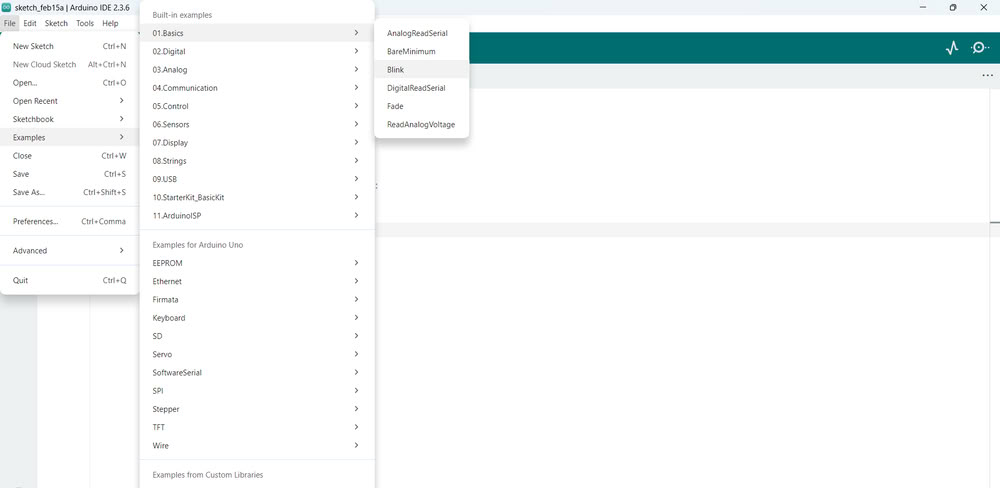 |
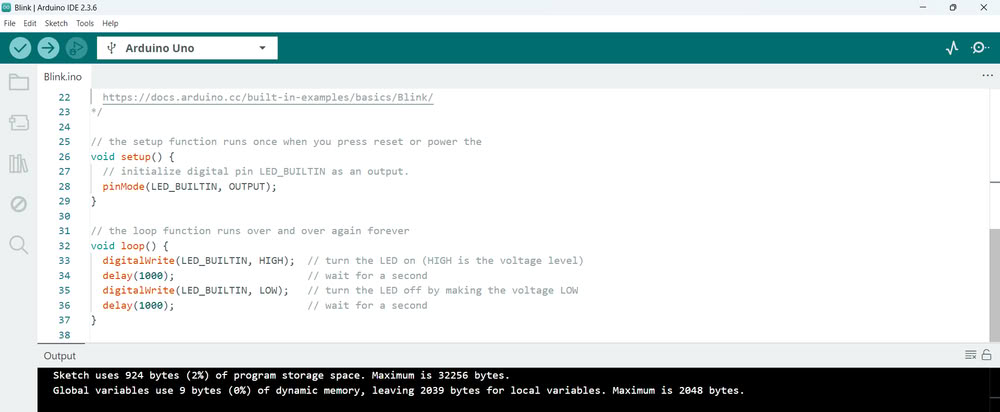 |
| After installing, I opened the software and selected the Arduino Uno as the board and chose the correct port to connect my Arduino. Then I went to the Examples section and opened the built-in LED blink program. | I uploaded this program to the Arduino to test if the board was working properly. |
 |
|
| After uploading, the onboard LED started blinking, which confirmed that the Arduino board was connected correctly and working successfully. |
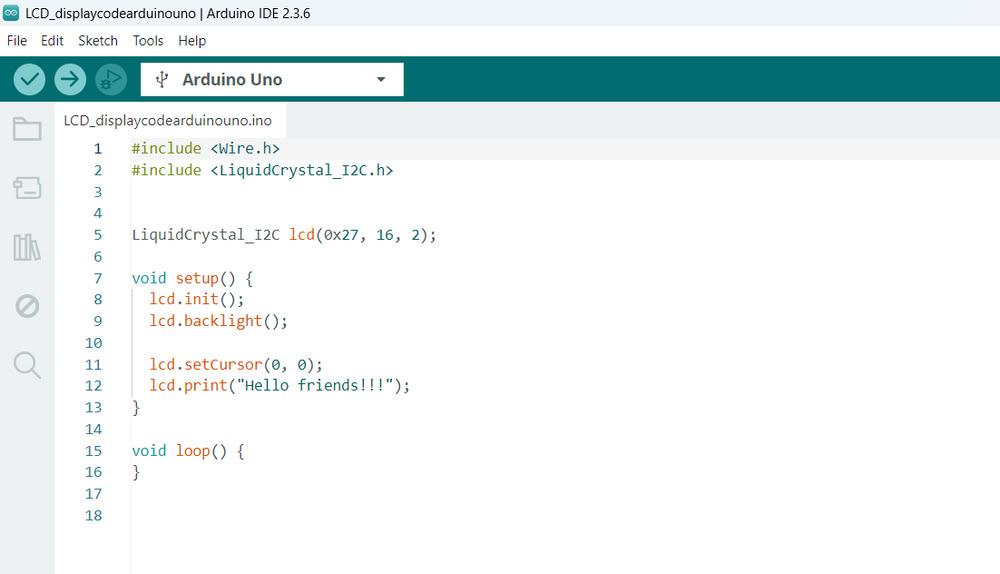
I connected an LCD Display to the Arduino Uno and used a potentiometer to adjust the screen contrast so the text is clearly visible. After setting up the connections, I uploaded the program to the Arduino. Once the code was uploaded, the Arduino controlled the LCD and displayed the message "Hello Friends!!!" on the screen. This shows how we can use Arduino to send text and display messages on an LCD using embedded programming.
 |
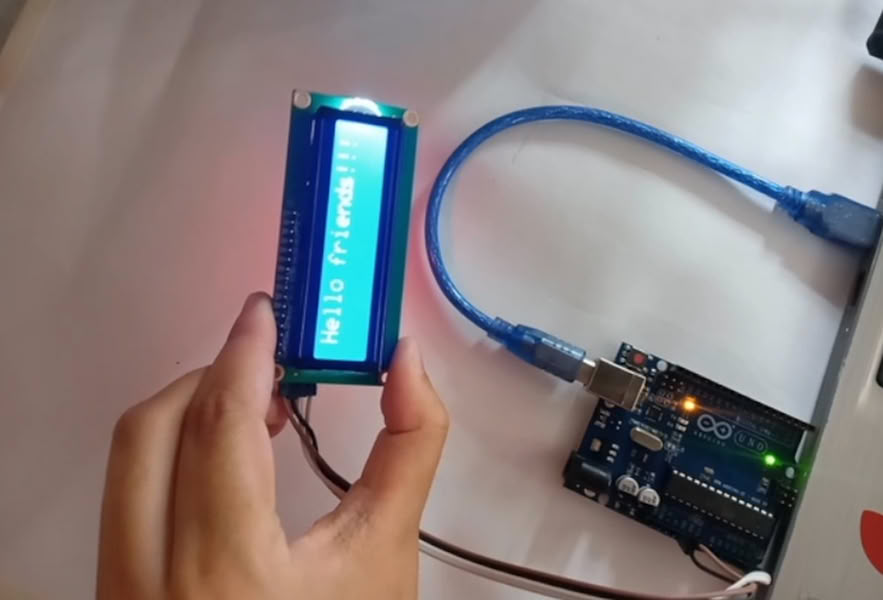 |
| Arduino IDE code | Here is the final output. |
Binary number system
The binary number system is the number system which uses only 2 digits: 0 and 1. computers and microcontrollers from Arduino and Espressif system understand binary system like for HIGH-ON-1, LOW-OFF-0.
binary address
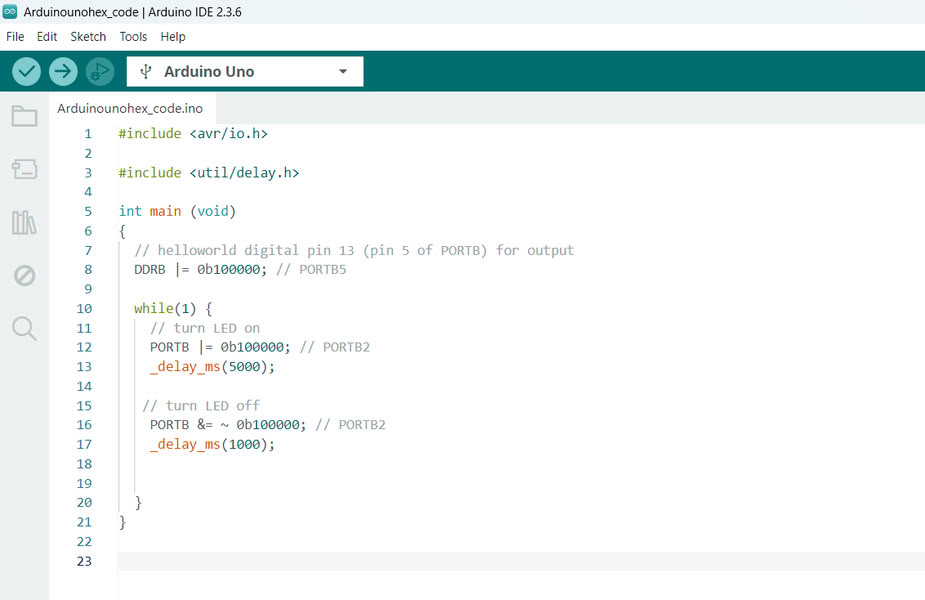
A binary address is like a house address inside the microcontroller. The Arduino Uno has a small brain called the ATmega328P, and it stores information in many small places. Each place has its own address made using only 0 and 1. This is called a binary address. For example, an address can look like 00100101. When we upload code to Arduino, the code is saved in these addresses. The microcontroller then goes to the correct address, reads the code, and does the work like turning an LED ON or OFF. Binary uses only 0 and 1 because the microcontroller understands only these two signals, just like a switch that is either OFF (0) or ON (1).
 |
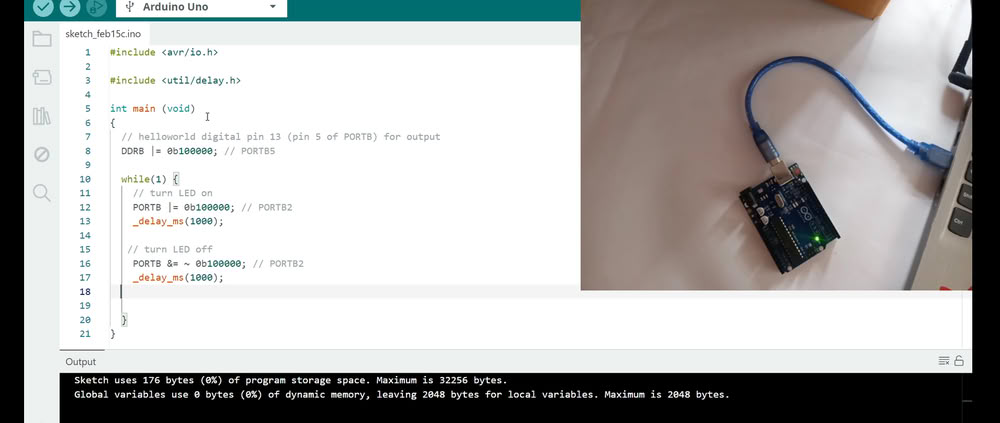 |
| This is the code using binary addresses. | I changed the timing, and I can see that the output changes. the blinking speed changes accordingly. |
Hexadecimal address
A hexadecimal address is the memory location inside the microcontroller written using the hexadecimal number system, which uses numbers from 0 to 9 and letters A to F.The prefix 0x shows that the number is in hexadecimal format. These addresses help the microcontroller find and access the correct register to perform tasks like controlling LEDs, reading sensors, and communicating with other devices.
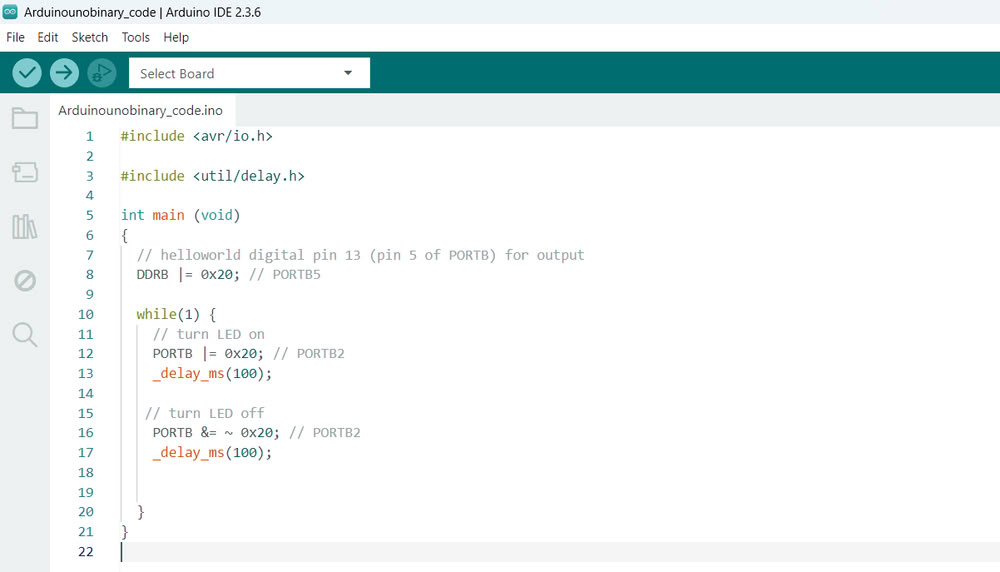 |
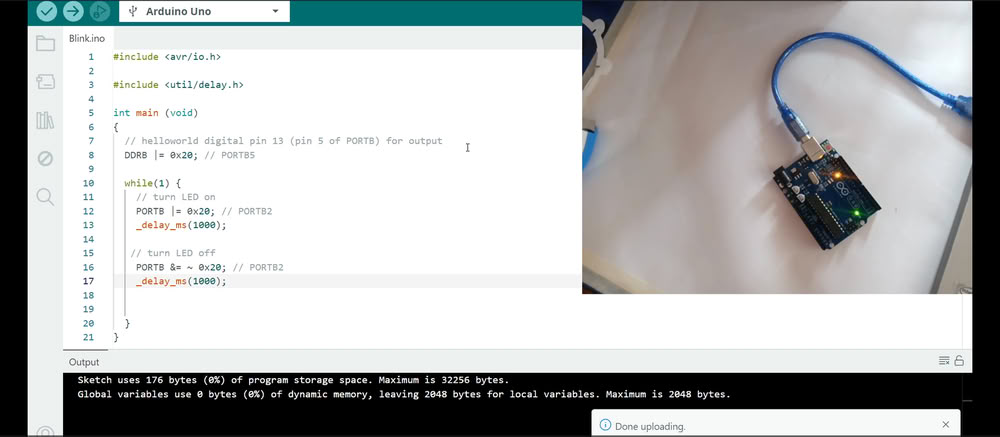 |
| Here is the hexadecimal address code | And the output is as follows. |
2.XIAO RP2040
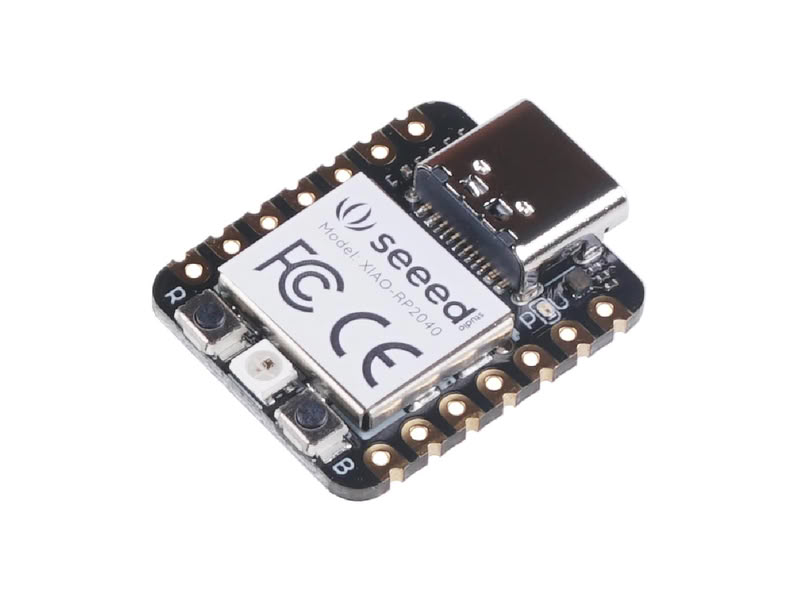
The XIAO RP2040 is a small and powerful microcontroller board developed by Seeed Studio and based on the RP2040 chip designed by the Raspberry Pi Foundation. It is built around a dual-core ARM Cortex-M0+ processor running at up to 133 MHz, which makes it fast and efficient for embedded system projects. Despite its very compact size, it provides multiple input/output pins, including digital pins, analog pins, PWM, I2C, SPI, and UART communication interfaces. It also has 264 KB SRAM and 2 MB onboard flash memory for storing programs and data. The XIAO RP2040 supports programming using Arduino IDE, MicroPython, and CircuitPython, making it easy for beginners and advanced users. Due to its small size, low power consumption, and high performance, it is widely used in robotics, IoT devices, wearable electronics, and automation projects.
Datasheet for XIAO RP2040
- XIAO RP2040 is based on the RP2040 microcontroller designed by the Raspberry Pi Foundation.
- It operates at 3.3V operating voltage.
- It uses a dual-core ARM Cortex-M0+ processor running at up to 133 MHz.
- It includes 264 KB SRAM for fast processing.
- It has 2 MB onboard flash memory for storing programs.
- It includes aUSB Type-C connector for programming and power supply.
- It provides 11 GPIO pins for digital input and output operations.
- It supports ADC, PWM, UART, SPI, and I2C communication interfaces.
- It has a reset button and boot button for control and programming mode.
LED blinking with RP2040
This program is written for the XIAO RP2040 microcontroller to control a NeoPixel RGB LED and communicate through the serial monitor. The code uses the Adafruit NeoPixel library to control one RGB LED connected to pin 12, while pin 11 is used to provide power to the LED. In the setup function, serial communication is initialized and the NeoPixel is started, and the LED power pin is set HIGH to turn it on. In the loop function, the program continuously checks if any character is received from the serial monitor. When a character is received, it is stored in a buffer and printed back to the serial monitor as an echo message. After receiving input, the NeoPixel LED blinks in different colors in sequence: red, green, blue, white, and finally turns off. This code demonstrates serial communication, buffer storage, and RGB LED control using the XIAO RP2040.
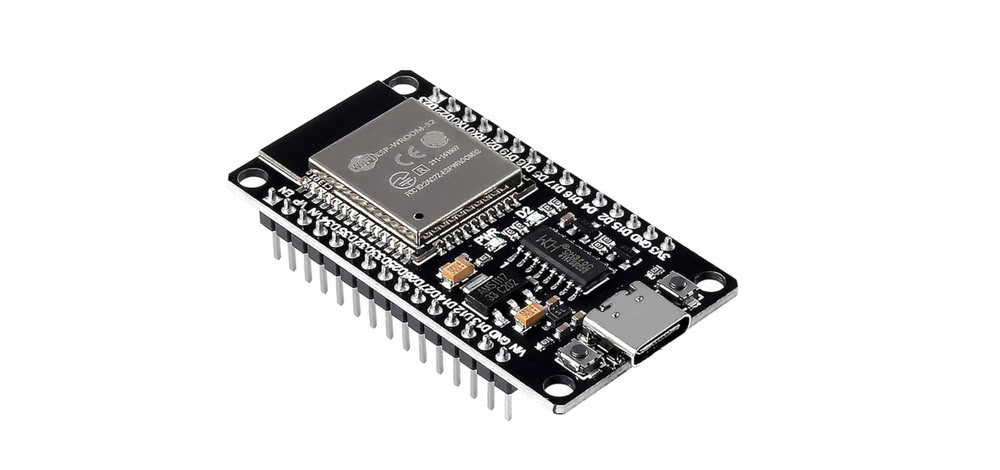
3.Micropython on ESP32
The ESP32-WROOM-32 (C-Type) is a powerful microcontroller development board based on the ESP32 chip, developed by Espressif Systems. This version includes a USB Type-C connector for programming and power supply, making it easier and more reliable to connect to the computer. It has built-in Wi-Fi and Bluetooth, which allows wireless communication with other devices and internet connectivity. The board provides multiple digital and analog input/output pins, which can be used to control LEDs, sensors, motors, displays, and other electronic components. It is widely used in embedded programming, IoT projects, automation systems, and wireless applications.
Datasheet for ESP32-WROOM-32
- ESP32-WROOM-32 is based on the ESP32 microcontroller
- The board operates at 3.3V operating voltage.
- It has built-in Wi-Fi and Bluetooth connectivity.
- It includes a USB Type-C connector for programming and power.
- The microcontroller runs at a clock speed of up to 240 MHz.
- It has multiple GPIO pins for input and output operations.
- It supports ADC, DAC, PWM, UART, SPI, and I2C communication.
MicroPython is a simple and small version of the Python programming language that runs on microcontrollers. It allows us to write programs in Python to control hardware such as LEDs, sensors, and displays. MicroPython makes embedded programming easier because Python is easy to read and understand compared to other languages like C or C++. Boards such as the Raspberry Pi Pico support MicroPython, allowing users to write code, upload it, and control electronic components directly. In MicroPython, we can use simple commands to turn ON or OFF an LED, read sensor values, and control devices. The code is stored inside the microcontroller, and it runs automatically when the board is powered.
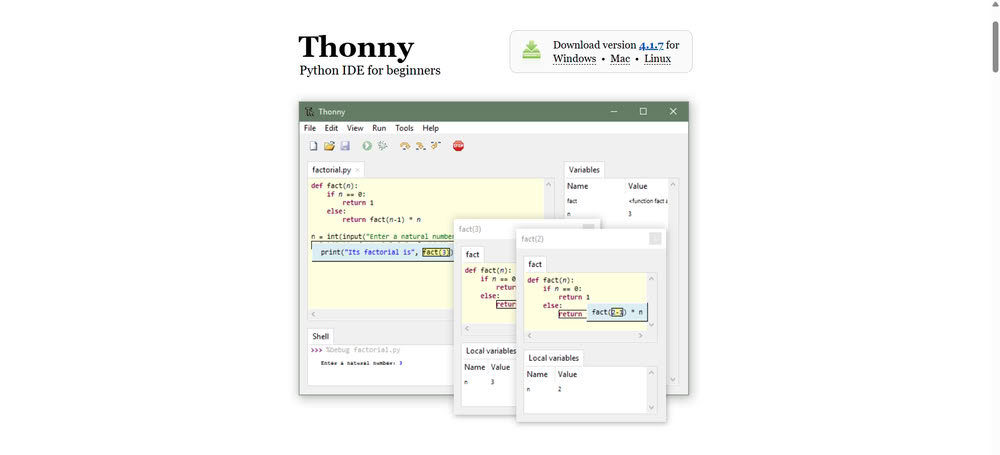
Installation of Thonny:-
Click to install thonny
 |
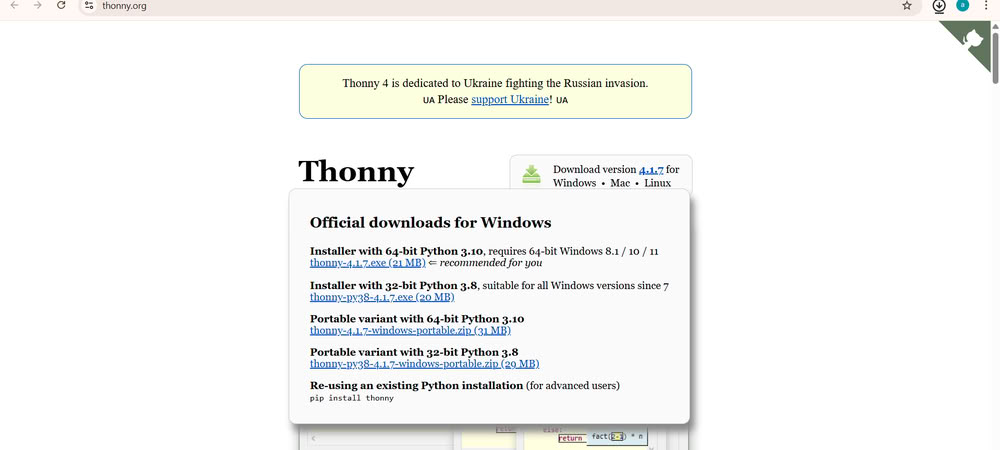 |
| I opened the official Thonny IDE website and downloaded the Thonny software for my operating system. This website provides installers for Windows, Mac, and Linux. | After downloading, I ran the installer and followed the steps to install Thonny on my system. |
 |
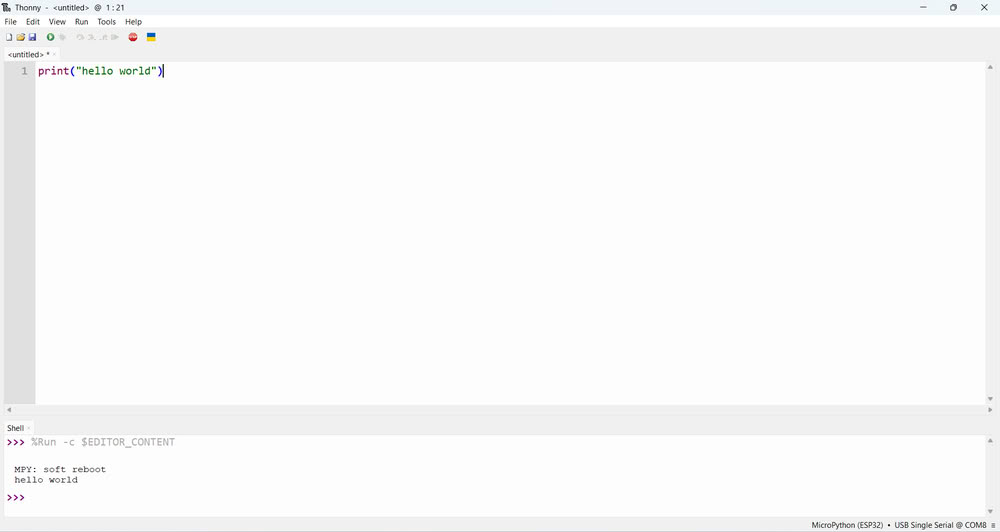 |
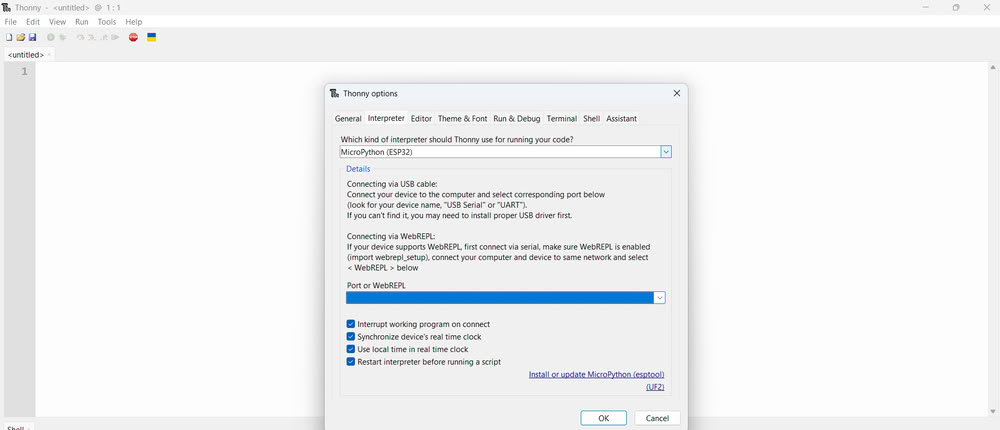
| Then I set the interpreter and port by selecting right options | Once the installation was complete, Thonny was ready to use for writing and uploading MicroPython programs to the microcontroller board. |
Here is how I use esp32 and try onboard LED blinking and external LED blinking using micropython
Onboard LED Blinking
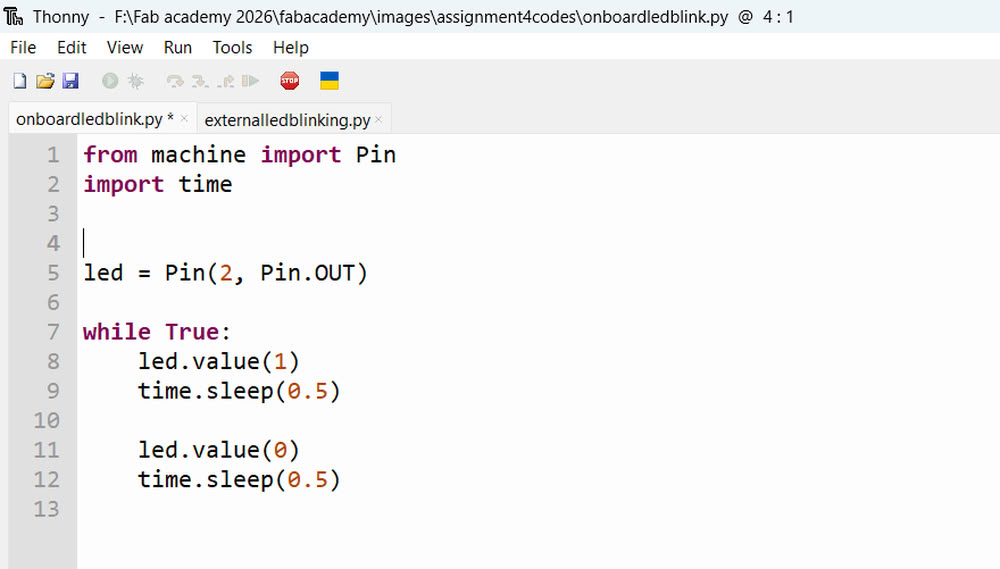 |
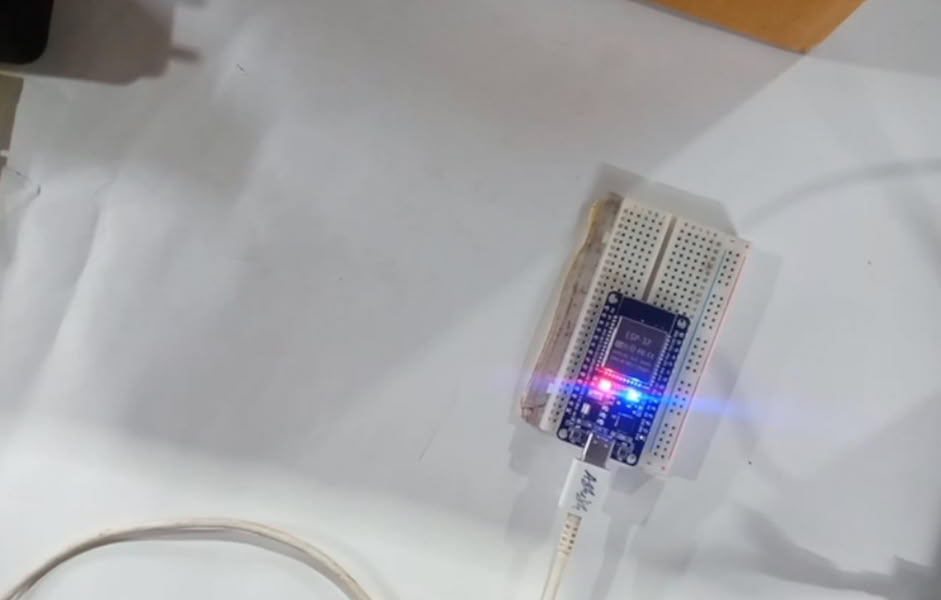 |
| Then I use simple led blinking code. | I press on run and led turn on. |
External LED Blinking
|
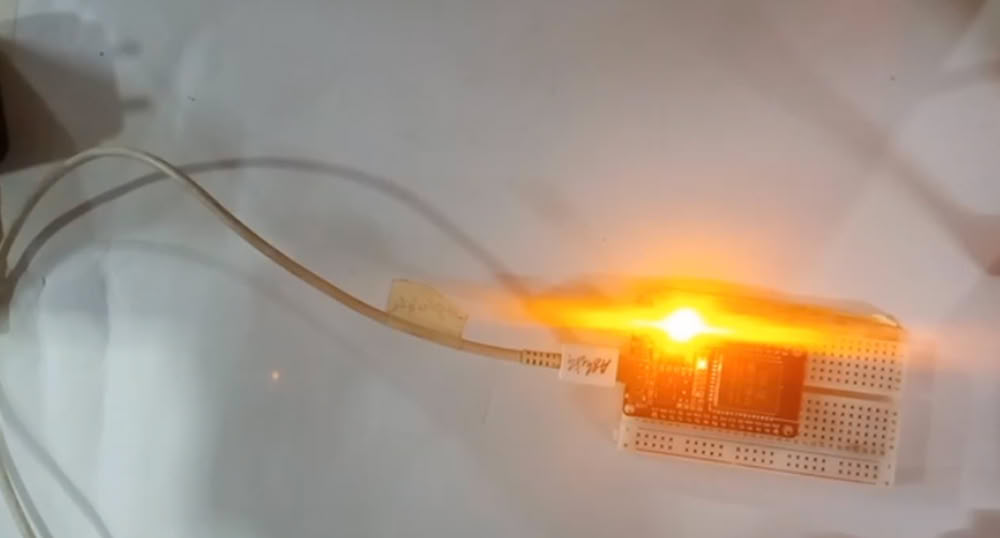 |
| Similarly using breadboard I connect one led to pin 13. | Here it is!!! |
4.XIAO ESP32C3
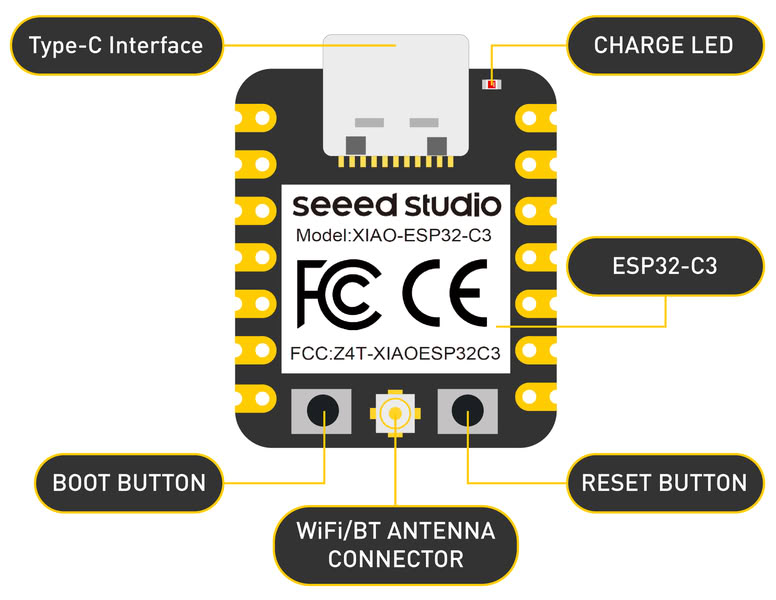
The ESP32-C3 is a low-power microcontroller with built-in Wi-Fi and Bluetooth, developed by Espressif Systems. It is designed for IoT, embedded systems, and wireless communication projects. It uses a modern RISC-V processor, which provides good performance and low power consumption.
Datasheet for ESP32C3
- ESP32-C3 is based on the ESP32-C3 microcontroller developed by Espressif Systems.
- The microcontroller operates at 3.3V operating voltage.
- It has built-in Wi-Fi (2.4 GHz) and Bluetooth Low Energy (BLE) connectivity.
- It includes built-in USB Serial/JTAG support for programming and debugging.
- The microcontroller runs at a clock speed of up to 160 MHz.
- It has multiple GPIO pins for input and output operations.
- It supports PWM for LED control and motor control.
- It supports communication interfaces like UART, SPI, and I2C.
- It includes 400 KB SRAM for data processing.
- It supports external flash memory (commonly 4 MB).
LED blinking with XIAO esp32c3
In this, pin 4 is configured as an output pin so it can control the LED. In the loop function, the LED is turned ON by setting the pin HIGH and remains ON for 1 second using a delay. Then, the LED is turned OFF by setting the pin LOW and remains OFF for 1 second. This process repeats continuously, causing the LED to blink at a 1-second interval. This code demonstrates basic digital output control using the ESP32C3.
Learning Outcomes
- Learned the basics of embedded programming and microcontroller systems.
- Worked with the Arduino Uno microcontroller.
- Worked with the ESP32-WROOM microcontroller.
- Learned to write programs using C++ in Arduino IDE.
- Learned to write programs using MicroPython.
- Understood binary number system and binary addressing.
- Learned hexadecimal number system and its use in embedded programming.
- Learned how to interface external components like LEDs and displays.
- Learned to blink LED using XIAO- ESP32C3.
- Learned pinouts of XIAO RP2040.