Wildcard Week
Overview
For my Wildcard Week assignment, I designed and prototyped a wearable device enclosure and wrist strap using a hybrid digital fabrication workflow that combines embroidery design, 3D printing onto fabric, and multi-material FDM printing. This process is not covered in any of my other assignments because it combines textile-integrated 3D printing with precision embroidery placement. This process sits at the intersection of soft goods fabrication and additive manufacturing. I learned how to do this during this year's Fabricademy course. Here is a link to my work during the 2026 Fabricademy Course.
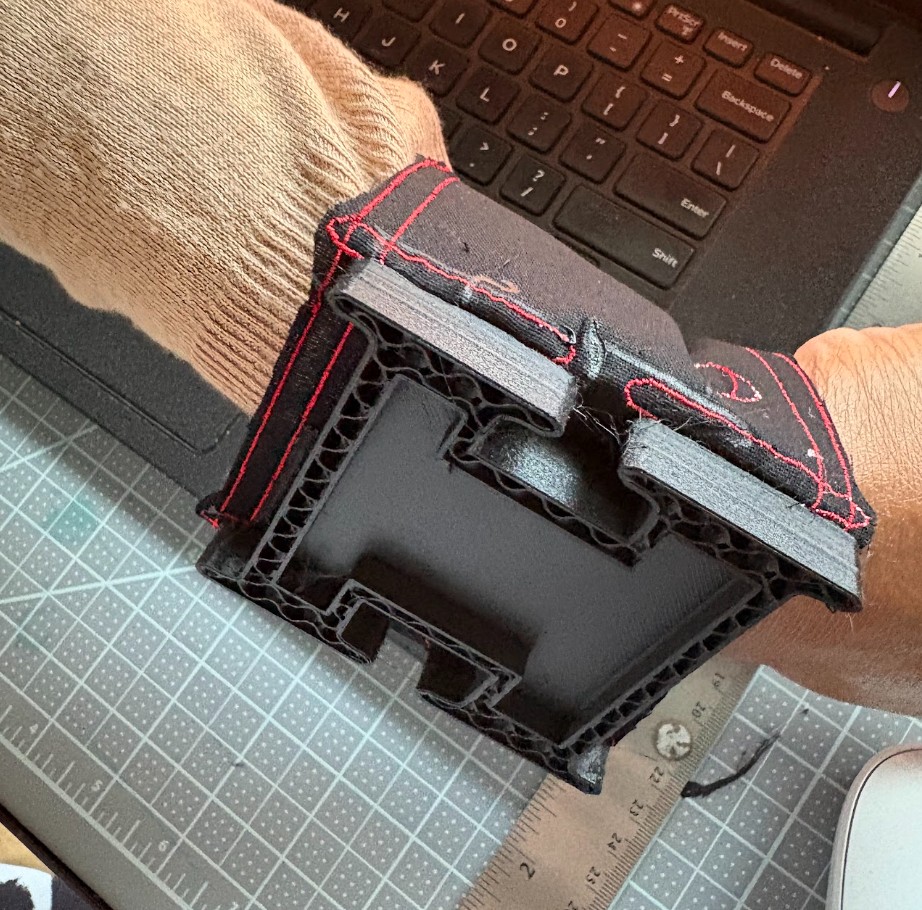
The end goal is a functional wrist-worn device housing: a cotton fabric wrist band with embroidered mounting zones, a PLA watch face printed directly onto the fabric, and a TPU motor pocket that drop-fits a vibration motor. My design is leading towards my final project which will eventually house a custom PCB and small LiPo battery.
Group Assignment
Not Listed for this weekIndividual Assignment
Design and produce something with a digital process (incorporating computer aided design and manufacturing) not covered in another assignment, documenting the requirements that your assignment meets, and including everything necessary to reproduce it.Why This is a Wildcard Assignment
-
This process is distinct from my other assignments because:
- It uses fabric as a print substrate, requiring precise registration between embroidery and 3D printing. This is not a standard FDM workflow
- It integrates multiple materials (cotton, PLA, TPU) in a single wearable object with functional mechanical and electronic housing requirements
- The embroidery design and print registration jig together form a novel digital-to-physical alignment system not covered in electronics, molding, or machining weeks
Research and Inspiration
Tools and Software
| Tool | Purpose |
| Inkscape + Inkstitch | Wrist band pattern design and embroidery placement layout |
| Fusion 360 | 3D modeling of watch face, TPU motor pocket, and registration jig |
| Prusa MK3S+ | Printing PLA watch face directly onto fabric; printing TPU motor drop-in |
| Embroider Machine | Stitching mounting zones and decorative elements onto the cotton band |
Materials
| Material | Role |
| 100% Cotton Fabric | Wrist band substrate - for sensitive skin |
| PLA Filament | Watch face enclosure (rigid, printed directly onto fabric) |
| TPU Filament | Motor pocket insert (flexible, drop-in fit for vibration motor) |
Workflow : CAD/CAM Processes
- The overall band outline sized to fit my wrist, with tab and buckle allowances
- Embroidery placement zones marked as distinct layers
- Registration marks at the band edges to align with the print jig later
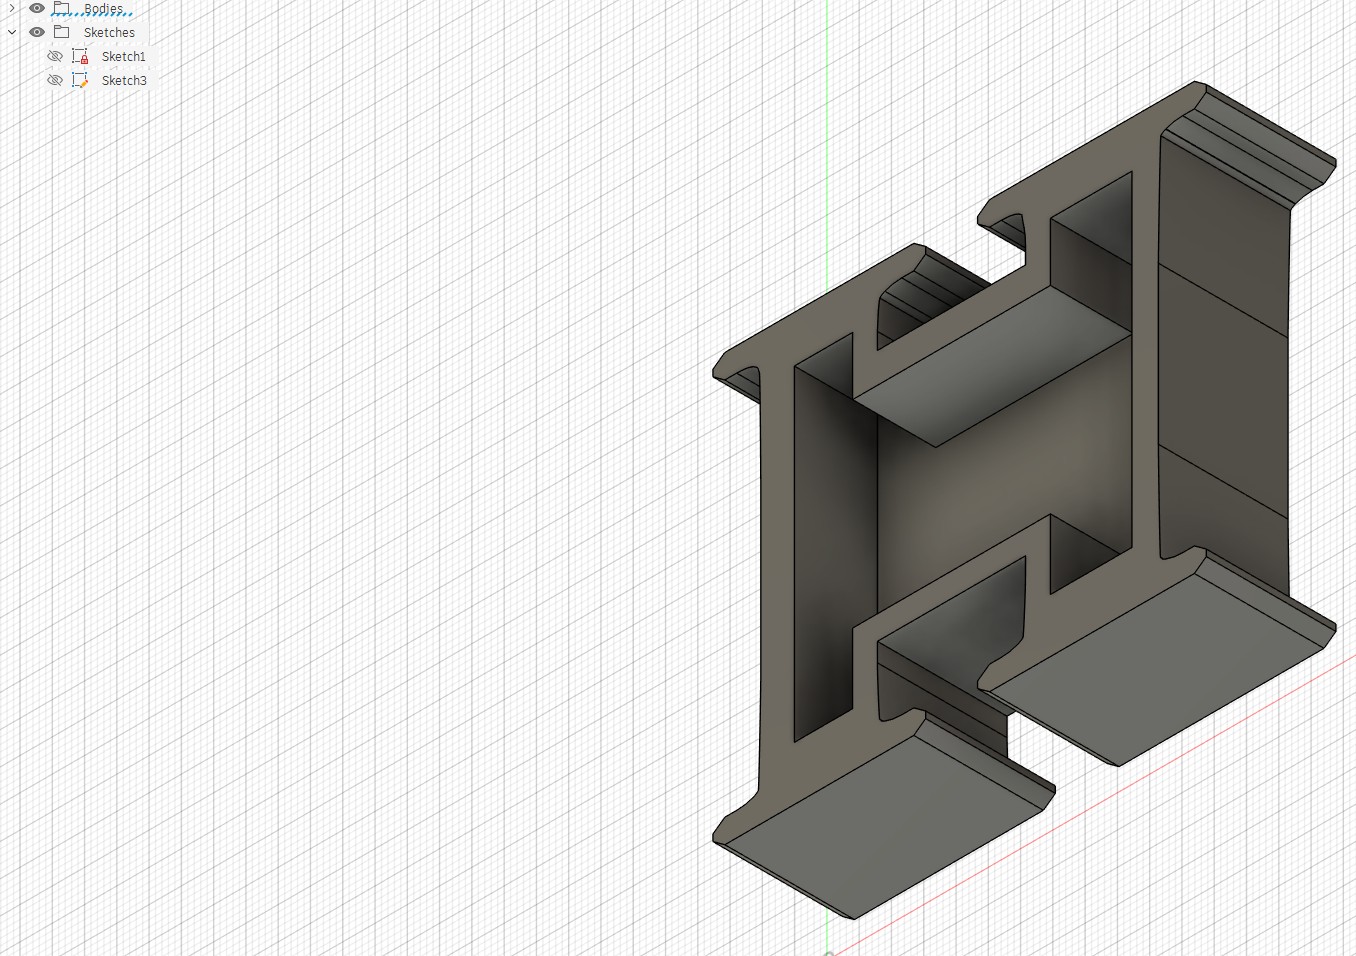
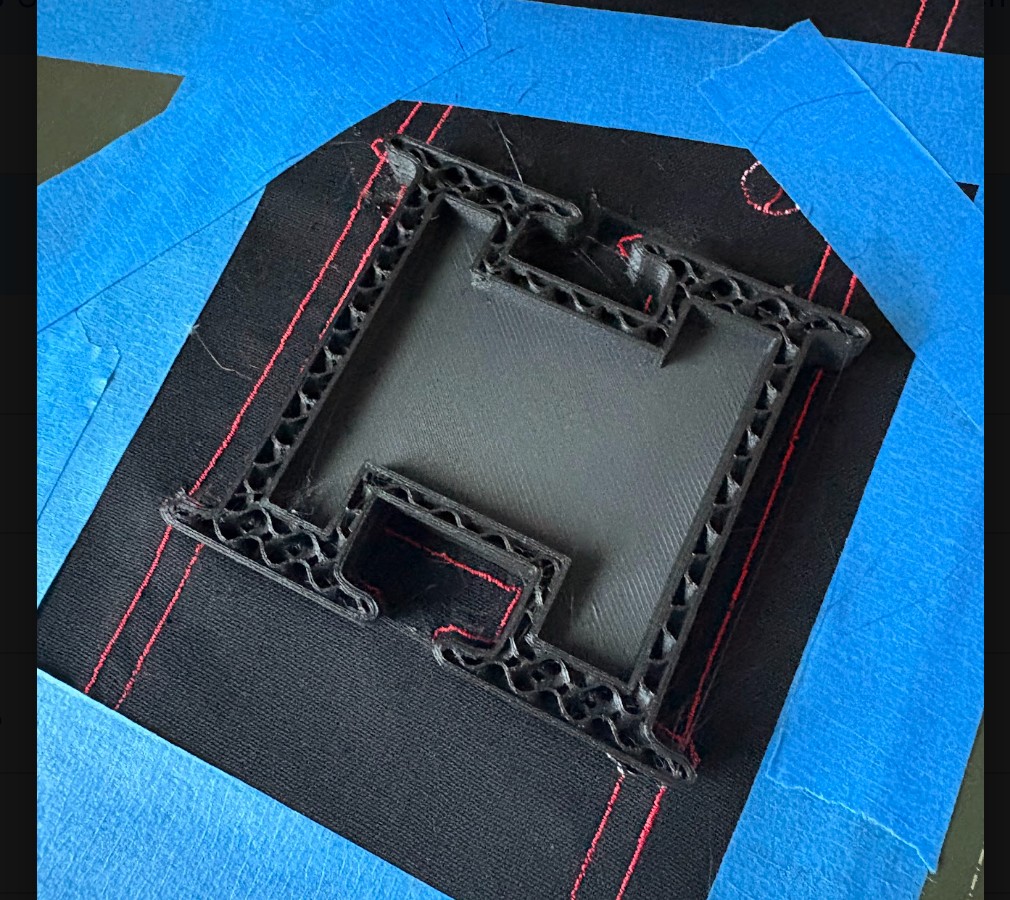
- Watch Face: Modeled as a shallow rectangular shell with interior rails to seat the PCB and LiPo battery
- Motor Pocket: Modeled as a flexible snap-fit pocket sized to the vibration motor's footprint
- Registration Jig: A flat plate with an outline profile of the embroidered wrist band, plus raised pegs at the registration marks. Designed to print before placing fabric on print bed.
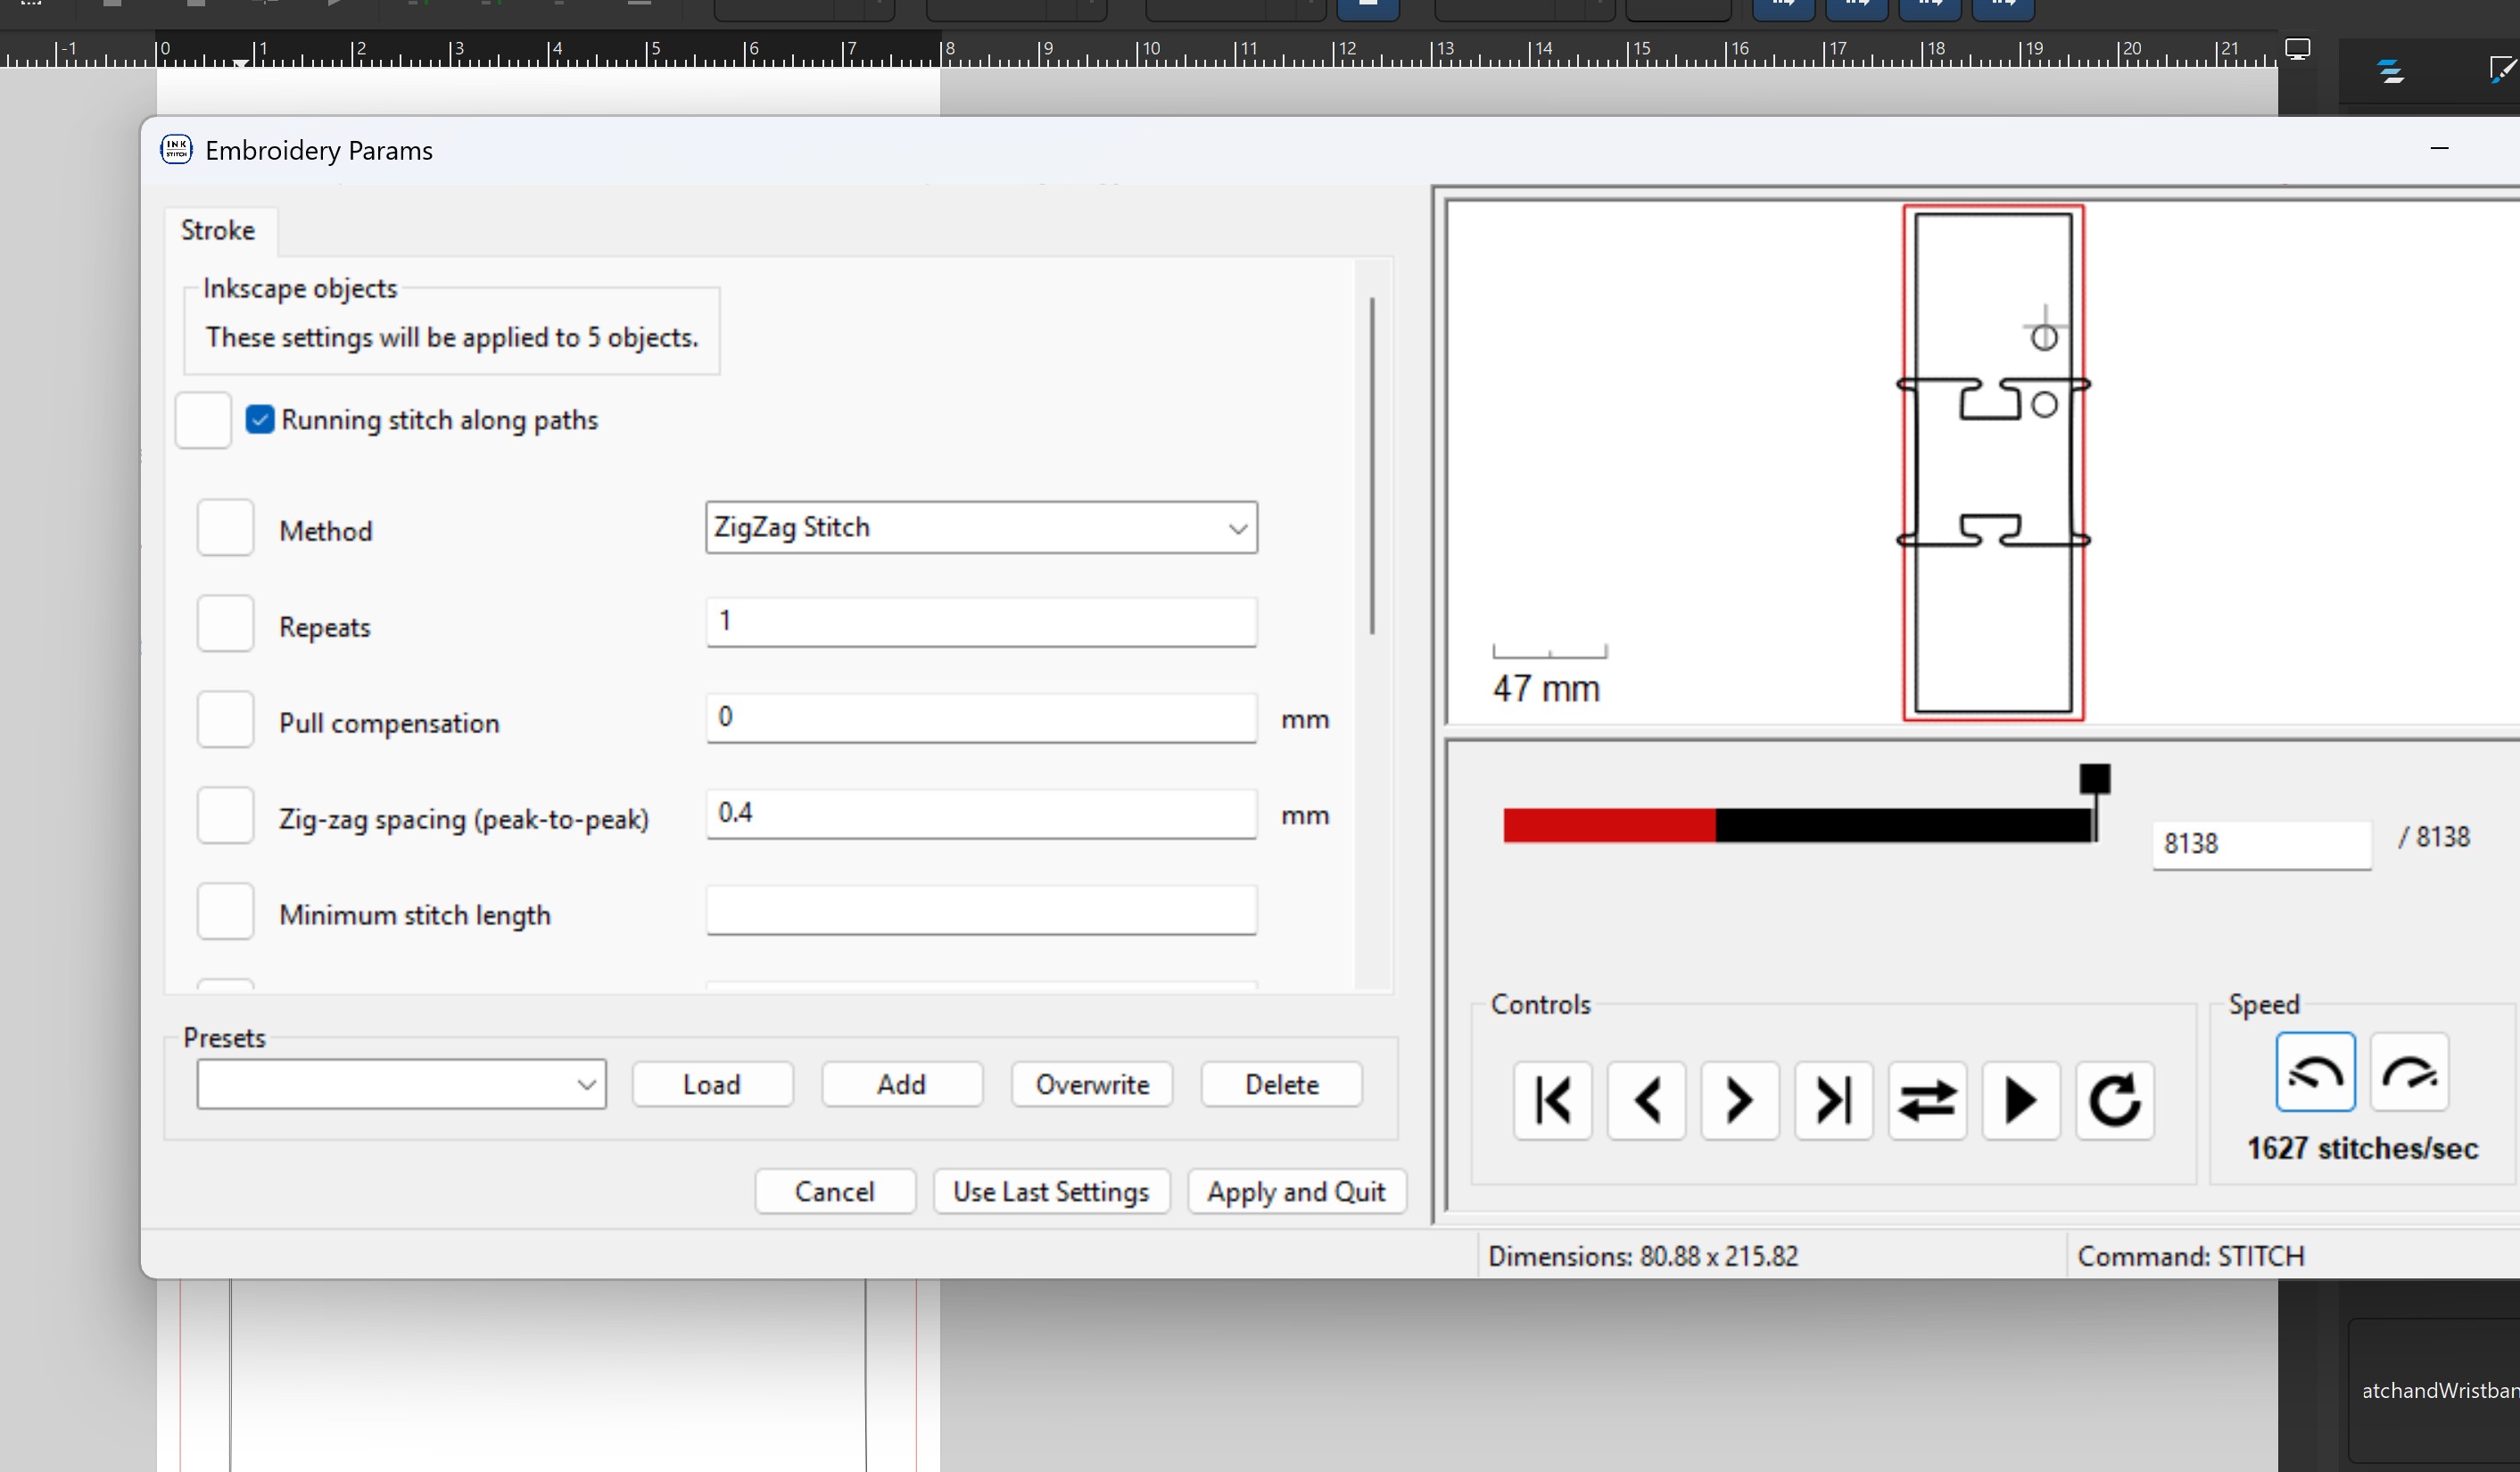
- Convert the placement zone outlines into stitch paths (zigzag borders around each zone)
- Save the emboridery file according to your machine requirements
- Run Jig print First
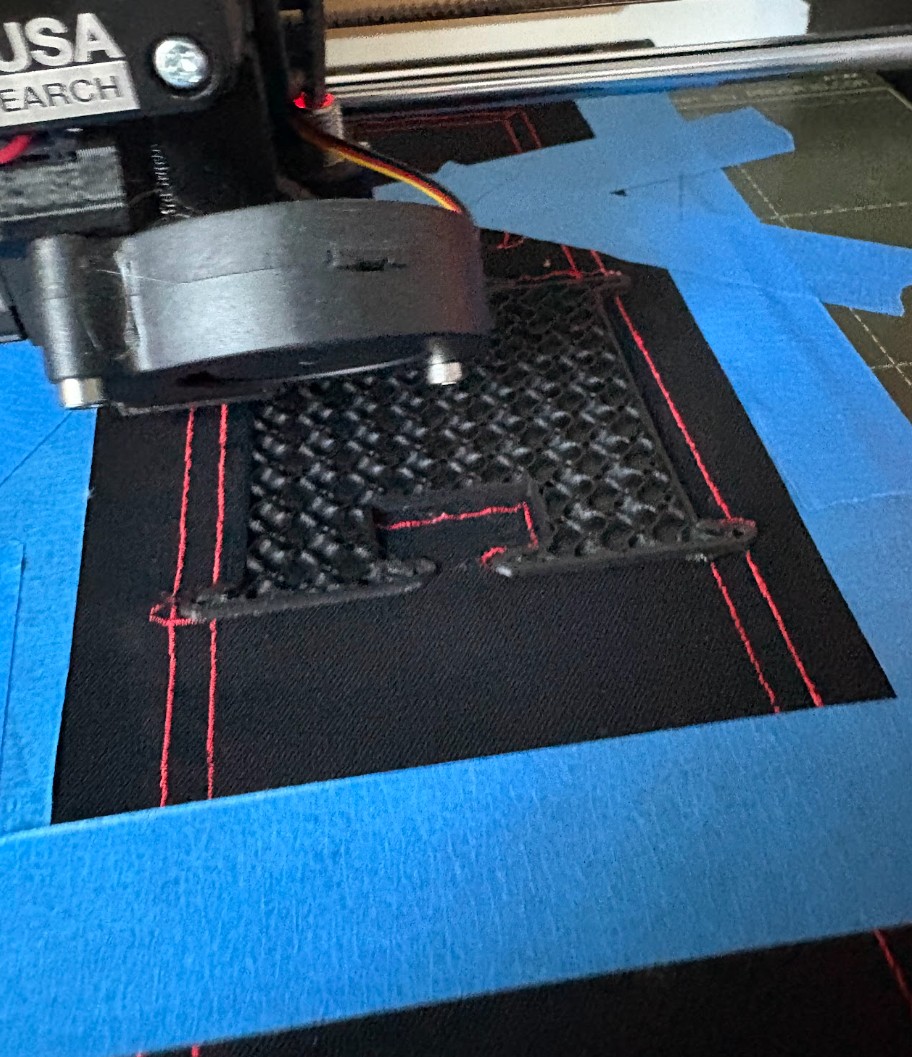
- I placed the embroidered wrist band into the registration jig on the printer bed, aligning the embroidered registration marks to the jig's pegs
- I zeroed the Z height to the fabric surface (not the bed) using a piece of paper to feel the nozzle clearance
- Run complete print of watch face in PLA then switch to TPU for motor housing
Wrist Band Pattern Design in Inkscape
I exported the design as both an SVG (for embroidery machine import) and a DXF (for Fusion 360 reference).
Watch Face & Motor Pocket Modeling in Fusion 360
Embroidery Fabrication
3D Printing the Registration Jig & Directly on Fabric
See 'Workflow: Textiles' section below to understand the creation of the wristband before continuing if you do not plan to use an embroidery machine
Workflow : Textiles
- Measure your arm or the arm of the user. Measurements you will need are: circumference, and wristband width. the wristband width will be based on how wide you want your wristband to be. My design is 6cm wide. I chose 6mm based on the design measurements of my watch face. The design measurements of the watch face are based on the sizes of the components that will be housed within.
- Cut your fabric based on your width and circumference requirements. The length of the fabric should equal your wrist circumference + 10 - 16 cm excess for use as tightneing or loosning of thee wristband. The width is 6cm; however, I added 1cm excess for seam allowances (.5cm on each side).
Creating a Wristband
Problems
Problem 1:Fabric Shifting During Printing
Issue: On my first (of MANY) attempt, the fabric shifted a LOT then, just a bit, then slightly mid-print, causing layer misalignment. This was possibly the most frustrating portion as I could not figure out the proper layer height to sandwich the cotton well.
Fix: I added a LOT of various types of tapes in addition to the registration jig pegs, and I reduced print speed for the first three layers, then placed the fabric, then continued printing and added...MORE tape.
Problem 2: Z Height Calibration on Fabric Surface
Issue: Fabric is compressible and uneven. My normal Z calibration method gave inconsistent first layers.
Fix: I calibrated Z on the actual fabric (not the jig plate) at multiple points across the band and used the average, then added a small positive Z offset to avoid nozzle dragging into the weave.
Problem 2: Z Height Calibration on Fabric Surface
Issue: The piece is THICK and not very comfortable against the wrist.
Fix: I will work towards adding a first few layers of TPU before switching to the thicker PLA
Results
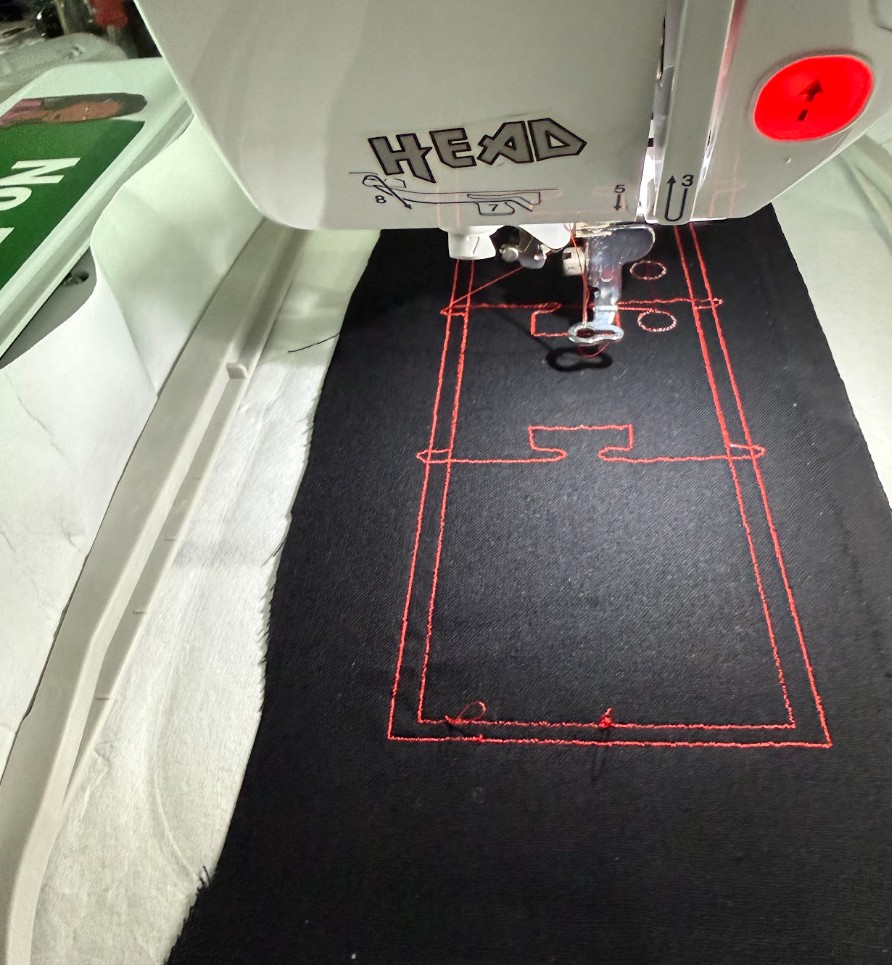
Hooped 100% Cotton Fabric
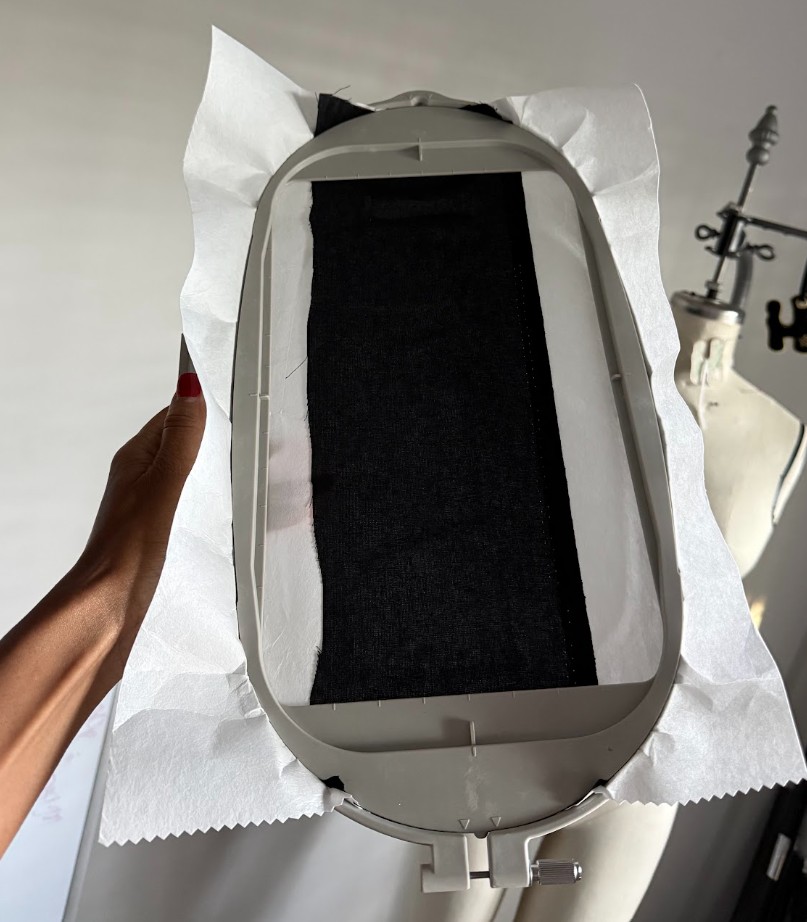
Jig Embroidery Placement
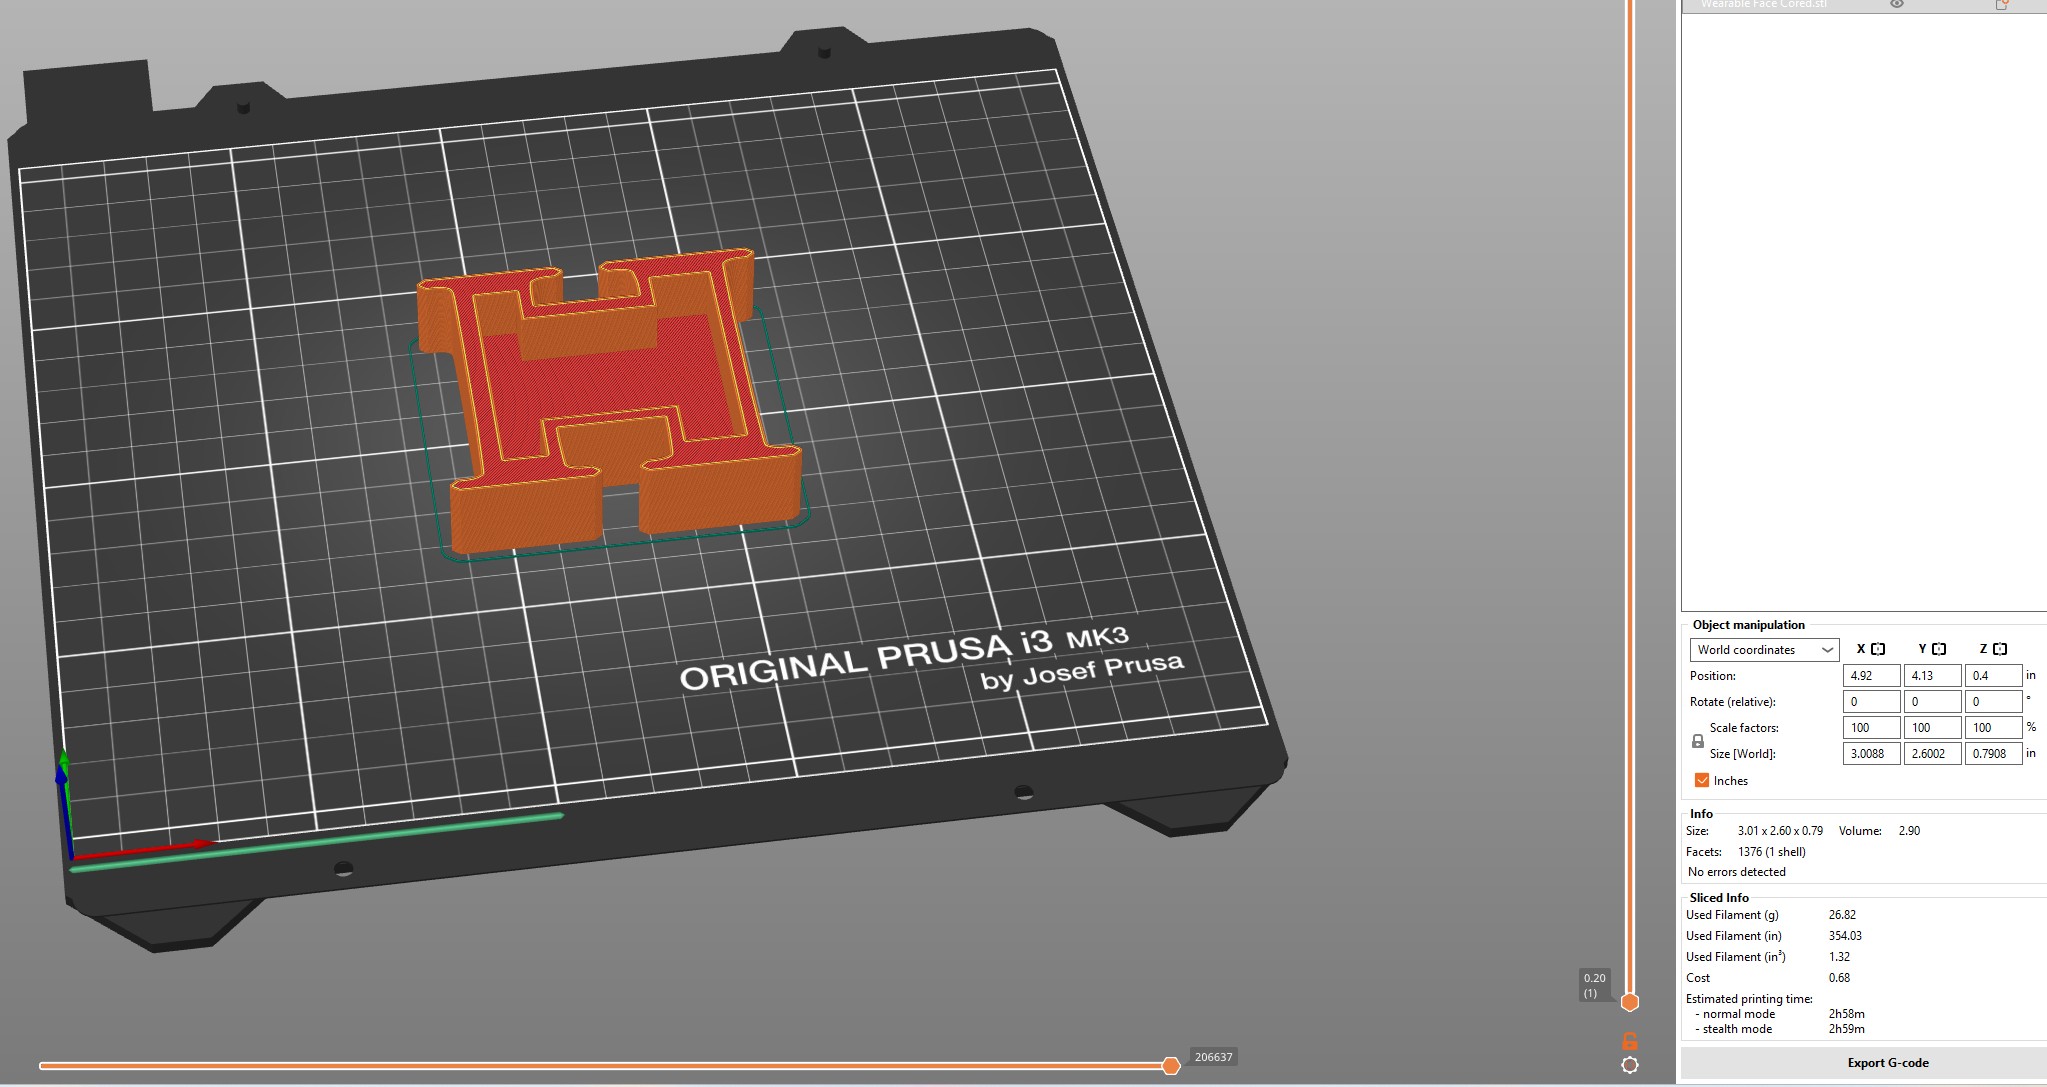
3D Print Working
3D Print Finished
3D Print Wearable with 100% Cotton
Files
Reproduction Guide
-
To reproduce this project you will need:
- An embroidery machine capable of importing SVG or DST files
- An 3D printer with a bed large enough for the registration jig dimesions
- PLA filament, TPU filament, and 100% cotton fabric
- Inkscape (free), Inkstitch (extension) and Fusion 360 (or equivalent CAD tool)
-
Steps in brief:
- Cut cotton fabric to band dimensions (slightly oversized)
- Import your wristband pattern SVG into your embroidery machine, hoop fabric, and embroider
- Print your registration Jig in PLA
- Place embroidered band in jig on printer bed; calibrate Z to fabric surface
- Print your watch face gcode in PLA directly onto the fabric
- Print the vibrator placement holder in TPU as a separate part
- Press-fit the vibration motor into the TPU pocket; install PCB and LiPo into the watch face enclosure
Learning Outcomes
- Demonstrated workflows: I documented each stage from Inkscape pattern design through embroidery, jig fabrication, and fabric-integrated 3D printing
- Selected and applied suitable processes and materials: I chose cotton for comfort/embroidery compatibility, PLA for rigid structure, and TPU for flexible motor retention. I made sure to match material properties to each functional requirement
- Documented problems and fixes: Z calibration on fabric and fabric shift during printing, both described above with solutions
- Included original design files: All source files listed above
- Included hero shot: See Results section