Assignments
Week 1 – Principles and Practices / Project Management
Principles and Practices – Checklist
- Plan and sketch a potential final project
- Sign and upload the student agreement
Project Management – Checklist
- Complete a Git tutorial.
- Build a personal website describing myself and my final project.
- Upload all the process and materials to the class archive.
Building My Personal Website
Web Design
Before this week, I had only very basic knowledge of how to create a website. My first experience was a simple "Hello World" page that appeared when clicking a button. However, building a complete personal website was a very different challenge. At the beginning, I felt excited because I was finally creating my own personal page where I would document my progress. At the same time, I was also a bit scared, since many times when I made changes, the result was not what I expected, and I was worried about breaking the layout.
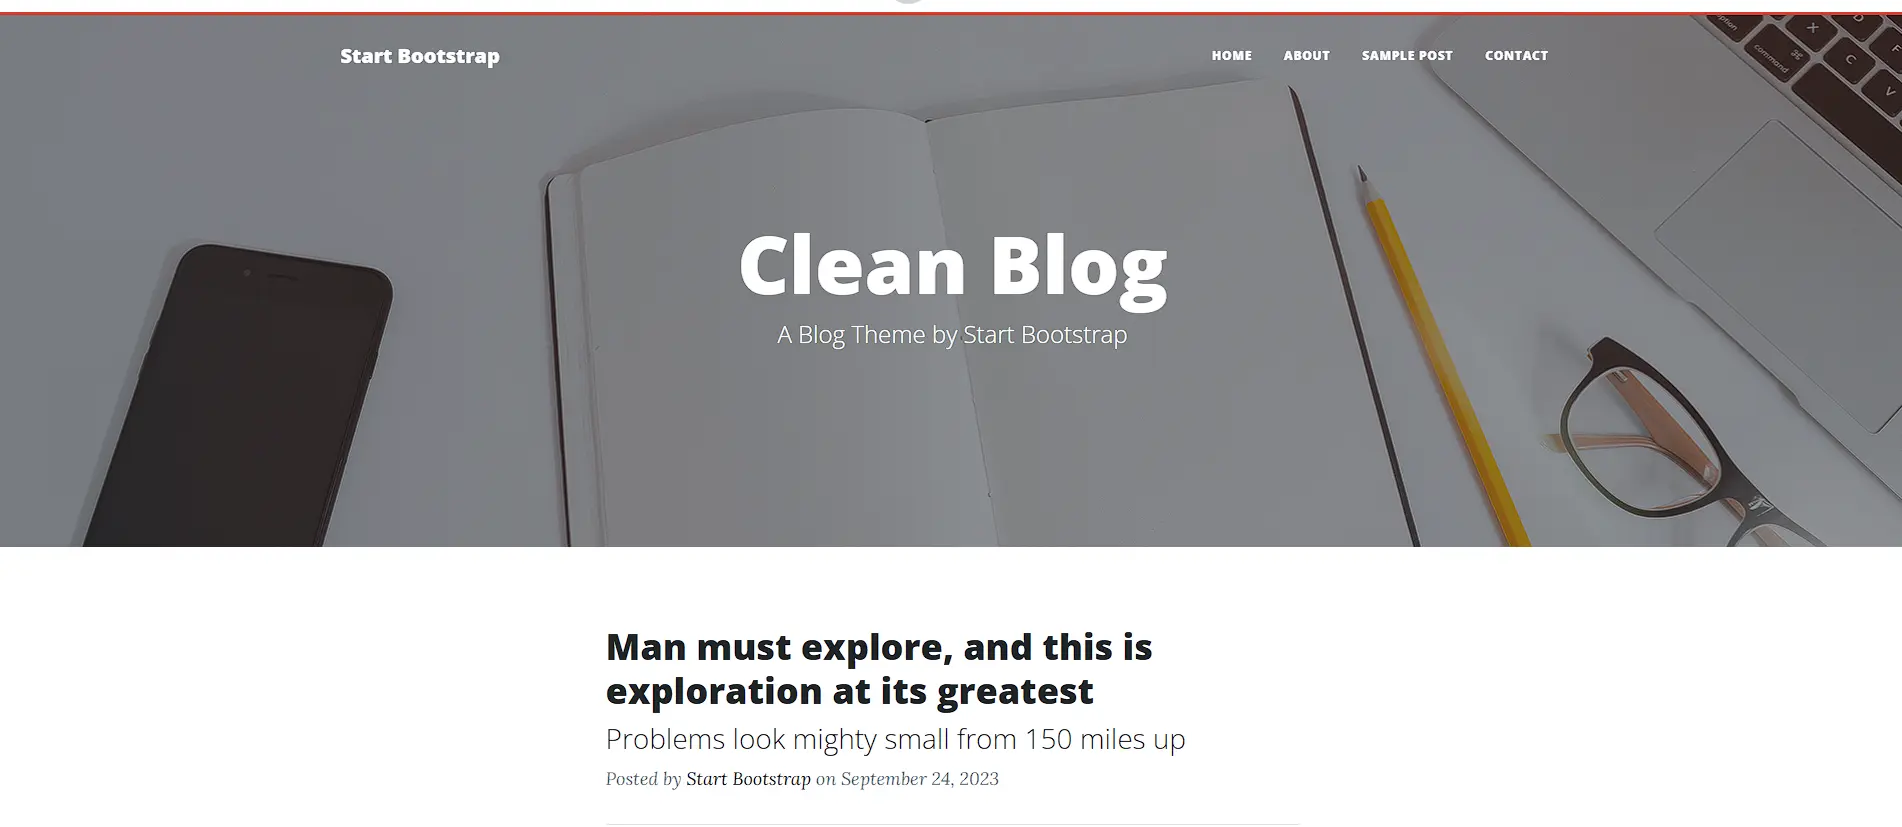
When choosing a code editor, I wanted to try something new. Although I had previously worked with Visual Studio Code, my instructors recommended using Brackets, mainly because of its live preview feature, which allowed me to see changes in real time while coding. For the design of my website, the first thing I did was search for reference pages and templates to have a starting point. I chose a Bootstrap template, which helped me understand the structure and layout of a professional website. From there, I started making small changes step by step to see how each modification affected the page.
During this process, ChatGPT was a very helpful tool, as it allowed me to learn, experiment, and understand the code more easily while solving problems as they appeared.
Template source:
https://startbootstrap.com/PAGE LAYOUT
DRAFT
Draft – Web Template (Desktop View)
Editing the HTML
For editing the website, I used the Brackets code editor, which allowed me to easily visualize and modify the structure of the HTML files.
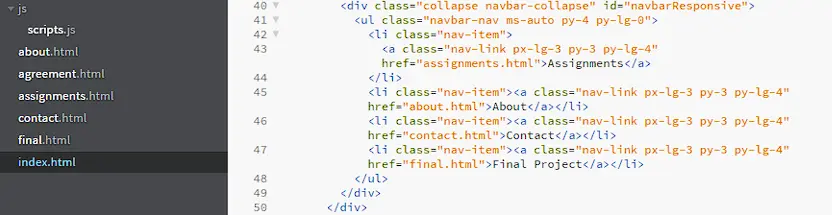
The first change consisted of defining navigation links so that each button redirects the user to a
specific HTML page. This was done by modifying the href attribute inside the navigation
bar (navbar), allowing navigation between pages such as Assignments, About, Contact, and Final
Project. By doing this, each time a button is clicked, the user is redirected to the corresponding
HTML file, improving the organization and usability of the website.
Making the Navigation Bar Fixed on Scroll
In addition to navigation, I wanted the navigation bar to remain visible while scrolling down the page. This improves the user experience, especially on long documentation pages.
To achieve this, the navigation bar was defined with a unique ID (mainNav) in the HTML
file:
<nav class="navbar navbar-expand-lg navbar-light" id="mainNav">This ID allows the navigation bar to be controlled later using CSS.
CSS Modifications for a Fixed Navbar
To make the navigation bar stay fixed at the top of the page, changes were applied in the CSS file.
The position: fixed property ensures that the navbar remains visible even when the user
scrolls down.
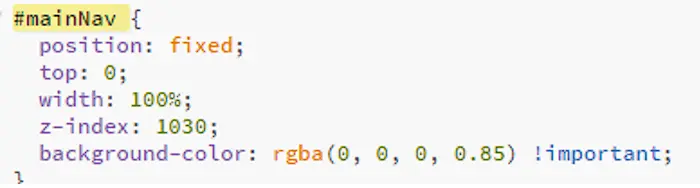
position: fixedkeeps the navbar fixed on the screentop: 0places it at the top of the pagewidth: 100%makes it span the full widthz-indexensures it stays above other elementsbackground-colorimproves visibility over the content
Linking Week 1 Between index.html and assignments.html
To connect the Week 1 card on index.html with the Week 1 accordion section on
assignments.html, an anchor-based navigation system was implemented.
In index.html, the Week 1 card is wrapped inside a link that points to
assignments.html#week1. This link redirects the user to the assignments page and includes
a hash (#week1) that identifies the section to be opened.
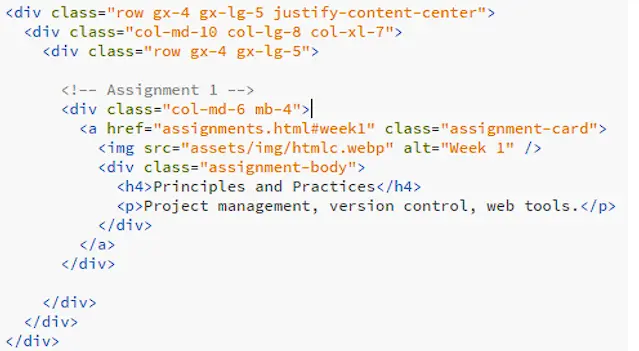
<a href="assignments.html#week1" class="assignment-card">
On assignments.html, the accordion section for Week 1 uses the same identifier
(id="week1"). This allows the browser and JavaScript to detect the correct section.
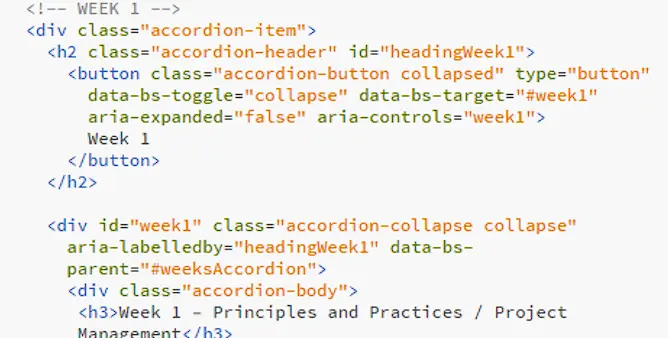
<div id="week1" class="accordion-collapse collapse"
     aria-labelledby="headingWeek1"
     data-bs-parent="#weeksAccordion">
When the page loads, a JavaScript function reads the hash from the URL and automatically opens the corresponding accordion section using Bootstrap’s Collapse component. As a result, clicking on the Week 1 card redirects the user to the assignments page and expands the Week 1 content automatically.
Squoosh (Image Optimization)
Squoosh is a web-based tool that I use to optimize images for my website due to its efficiency and ease of use. It reduces file size without significantly affecting visual quality.
One of the main reasons I use Squoosh is its ability to convert images to the WebP format, which greatly reduces the original file size while maintaining good quality. This improves loading times and overall website performance.
.webp)
GitLab
GitLab is an online platform where we store and manage project files using Git. In Fab Academy, GitLab is used to upload our documentation website and keep track of changes over time (version control). This makes it easier to update files, recover older versions, and collaborate when needed.
Step-by-step: What I did
1) Configure my Git identity
First, I configured my global Git username and email. This information is used to identify who made each commit.
git config --global user.name "andre-mamani"
git config --global user.email "andre.nico2121@gmail.com"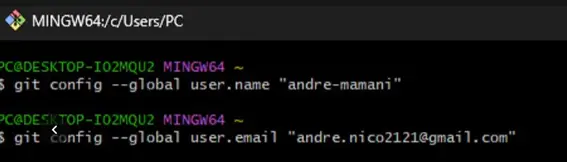
2) Check if an SSH key already existed
Then, I tried to display my public SSH key using:
cat ~/.ssh/id_rsa.pubAt first, I got the message "No such file or directory". This simply meant that I did not have an SSH key created yet.

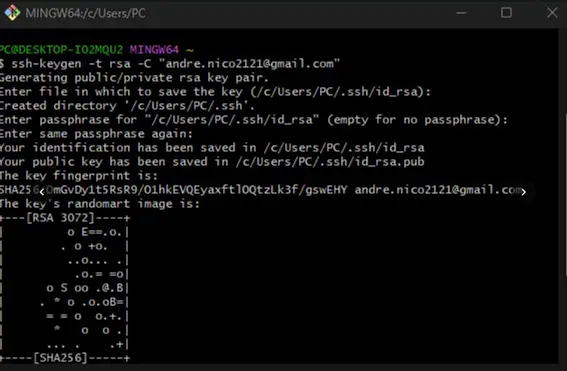
3) Generate a new SSH key pair
Since the key did not exist, I created a new SSH key pair (private + public). The private key stays on my computer and the public key is uploaded to GitLab.
ssh-keygen -t rsa -C "andre.nico2121@gmail.com"During this step:
- I pressed Enter to save the key in the default location:
~/.ssh/id_rsa - I left the passphrase empty (optional) for easier access
- Git Bash confirmed that the key was saved successfully
4) Display and copy the public SSH key
After generating the key, I displayed the public key again:
cat ~/.ssh/id_rsa.pub
This time, the key appeared (a long text starting with ssh-rsa). I copied this entire line
to paste it into GitLab.

5) Add the SSH key to my GitLab account
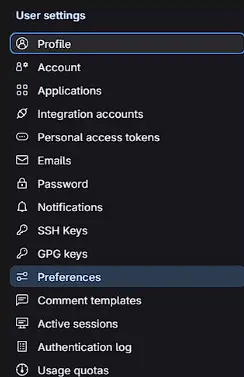
Next, I opened GitLab and navigated to my account settings:
- Click on my profile icon (top right)
- Go to Preferences / User Settings
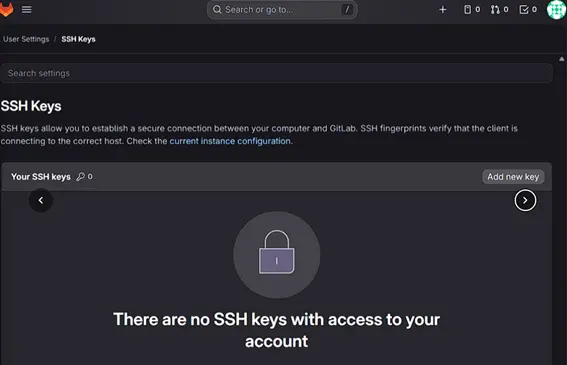
- Open the SSH Keys section
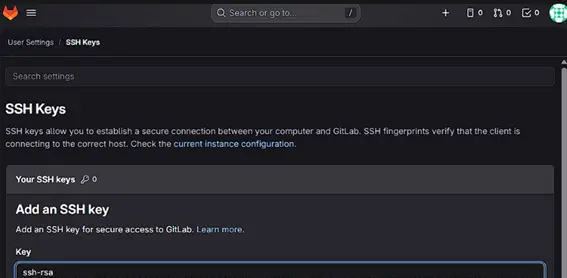
Inside the SSH Keys page, I clicked Add new key and pasted the SSH public key. Then I added a title (my email) and kept the usage type as Authentication & Signing. Finally, I clicked Add key.
Why this step is important
Adding an SSH key to GitLab allows my computer to authenticate securely with the Fab Academy repository. This makes it possible to clone the repository and push updates without typing my password every time. It is an essential setup step for managing and publishing my documentation.
The expiration date was left empty to avoid the SSH key expiring. Setting a date would require generating and adding a new key once it expires.
Cloning the Repository and Uploading Changes (Git Workflow)
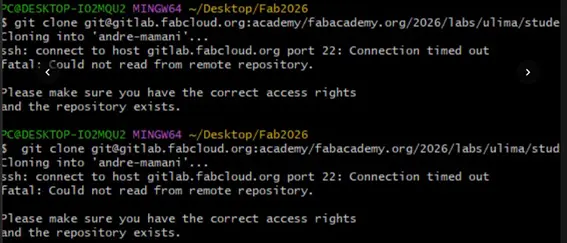
Step 1 — First attempt to clone (connection error)
I first tried to clone my Fab Academy repository using the SSH URL. However, the cloning process failed with the message: "ssh: connect to host gitlab.fabcloud.org port 22: Connection timed out".
This error happened because I was using the university Wi-Fi, which restricts SSH connections on port 22. After changing to another network, the cloning process worked correctly.
Step 2 — Verify the SSH public key
To make sure SSH authentication was correctly configured, I checked my public SSH key using:
cat ~/.ssh/id_rsa.pubThis command prints the public key so it can be copied and added to GitLab (if needed).

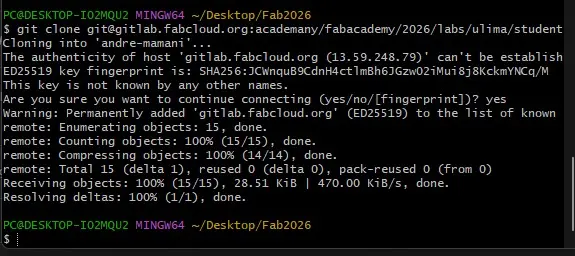
Step 3 — Successful clone (first connection trust)
After fixing the connection issue, I ran the clone command again. This time, Git asked me to confirm the host authenticity:
"The authenticity of host 'gitlab.fabcloud.org' can't be established… Are you sure you want to continue connecting?"
I typed yes, which adds GitLab to the list of known hosts. After that, the repository was cloned successfully and all files were downloaded.
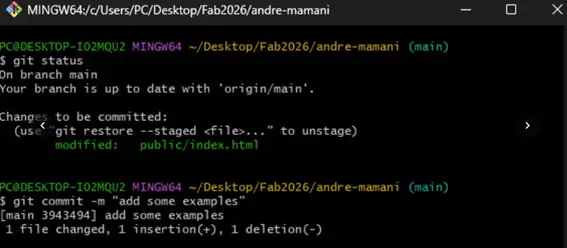
Step 4 — Check repository status
Once inside the cloned folder, I checked the repository status to see if any files were modified:
git status
Git showed that public/index.html had been modified. This confirms that there are local
changes that have not been staged yet.
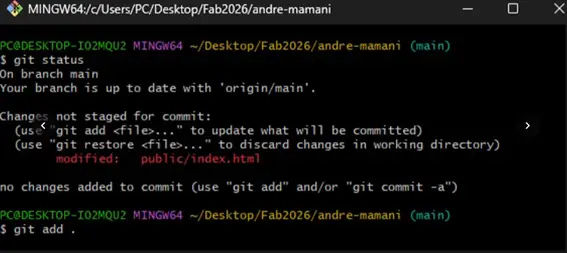
Step 5 — Stage the changes
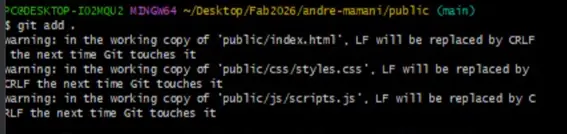
To prepare the changes to be committed, I staged the updated file(s) using:
git add .This command adds all changed files in the current repository to the staging area.
Step 6 — Commit changes
Then I created a commit to save the changes as a new version in the local repository:
git commit -m "add some examples"A commit message is important because it helps track what was changed and why.
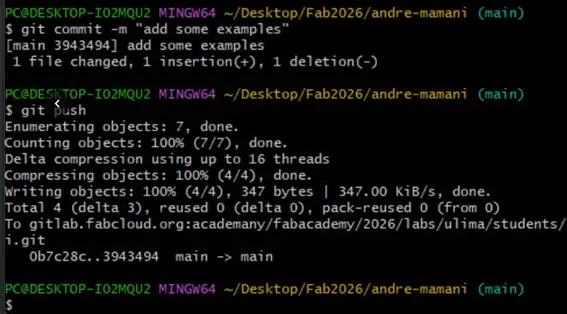
Step 7 — Push changes to GitLab
Finally, I uploaded my commit to the remote GitLab repository using:
git pushAfter this command, Git displayed the upload process (counting objects, compressing, writing objects), and the push finished successfully. This means my website changes were now updated on the Fab Academy server.
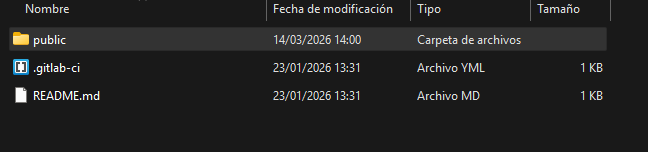
Problem During Website Deployment
At the beginning, I had a problem when trying to publish my website using GitLab. My files were inside a folder named Fab Academy, but GitLab Pages requires the website files to be inside a folder called public.

Because of this, the page was not deploying correctly. After renaming the folder to public, the repository was able to deploy the website successfully.
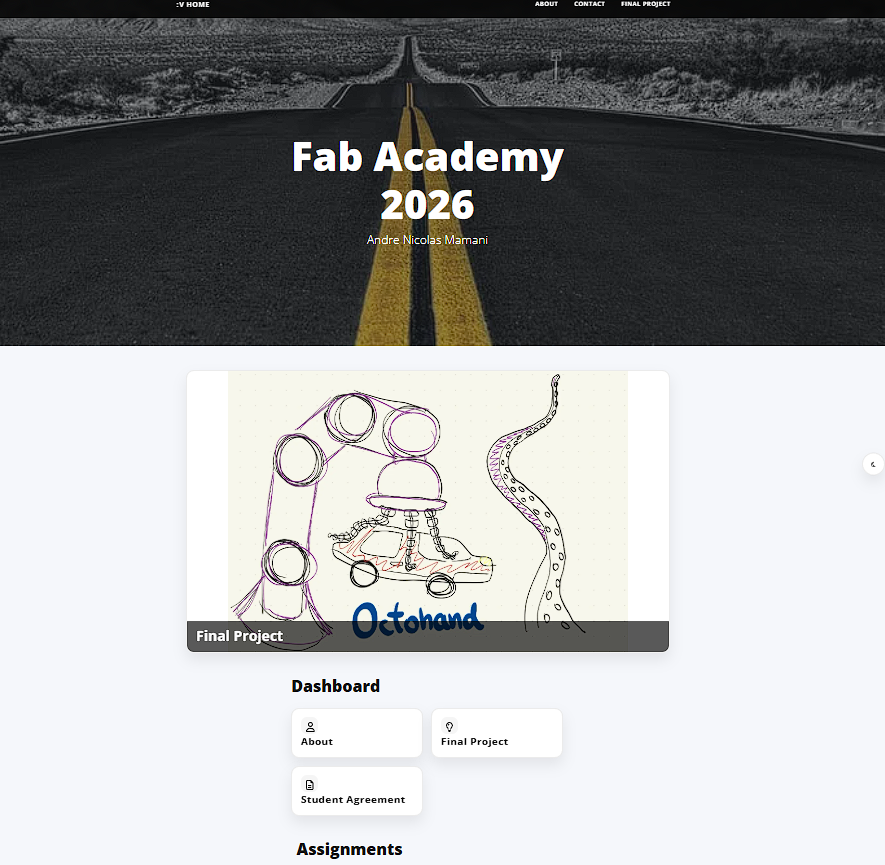
Website Structure
My Fab Academy website is organized into three main sections: the Home page, the About section, and the Final Project page. This structure helps users navigate easily and understand the different parts of the documentation.
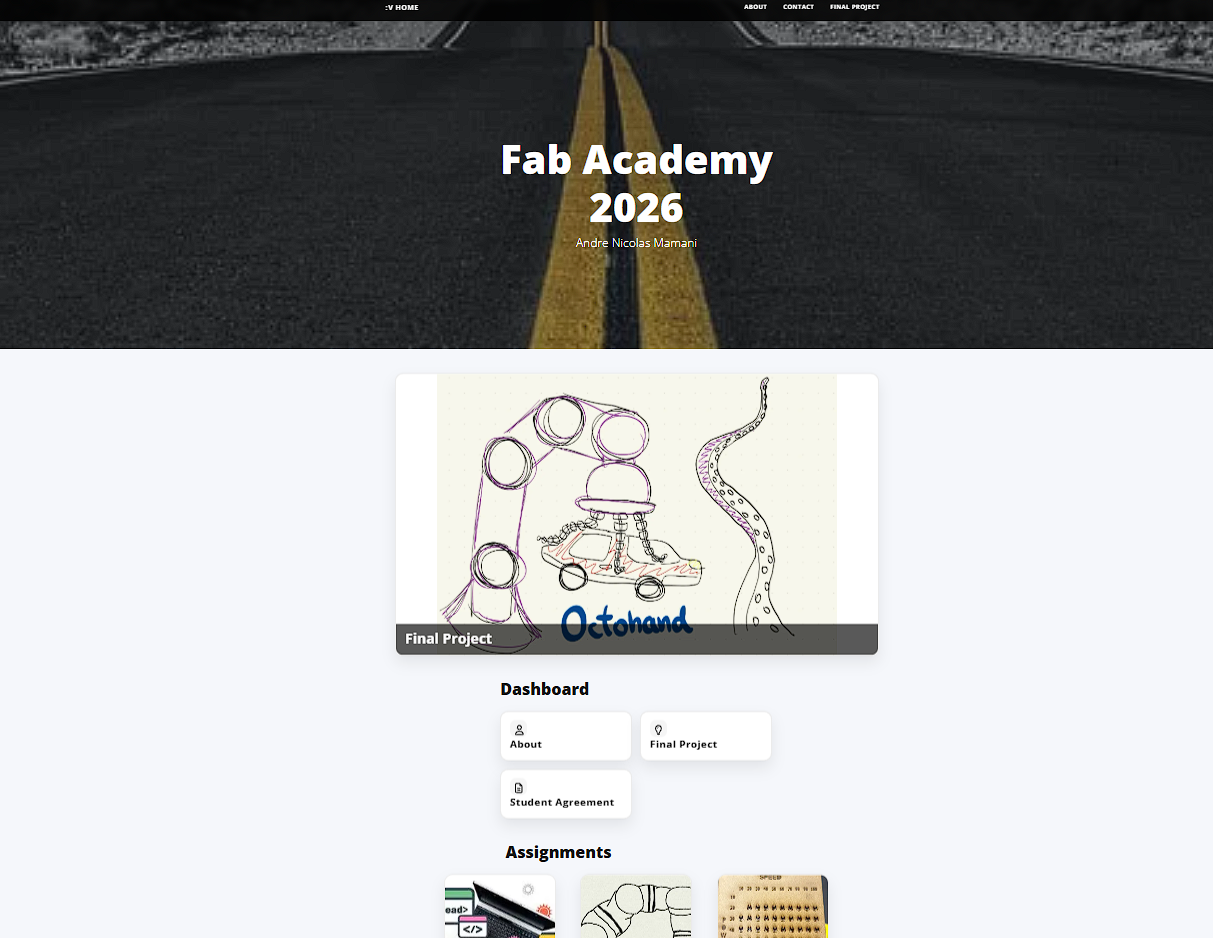
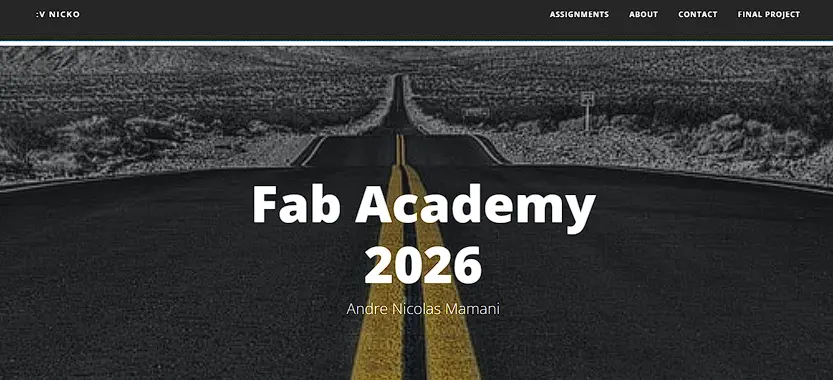
Home Page
The Home page acts as the main dashboard. When the Fab Academy mode is activated, it shows the main banner and quick access to sections like About, Final Project, and Assignments.
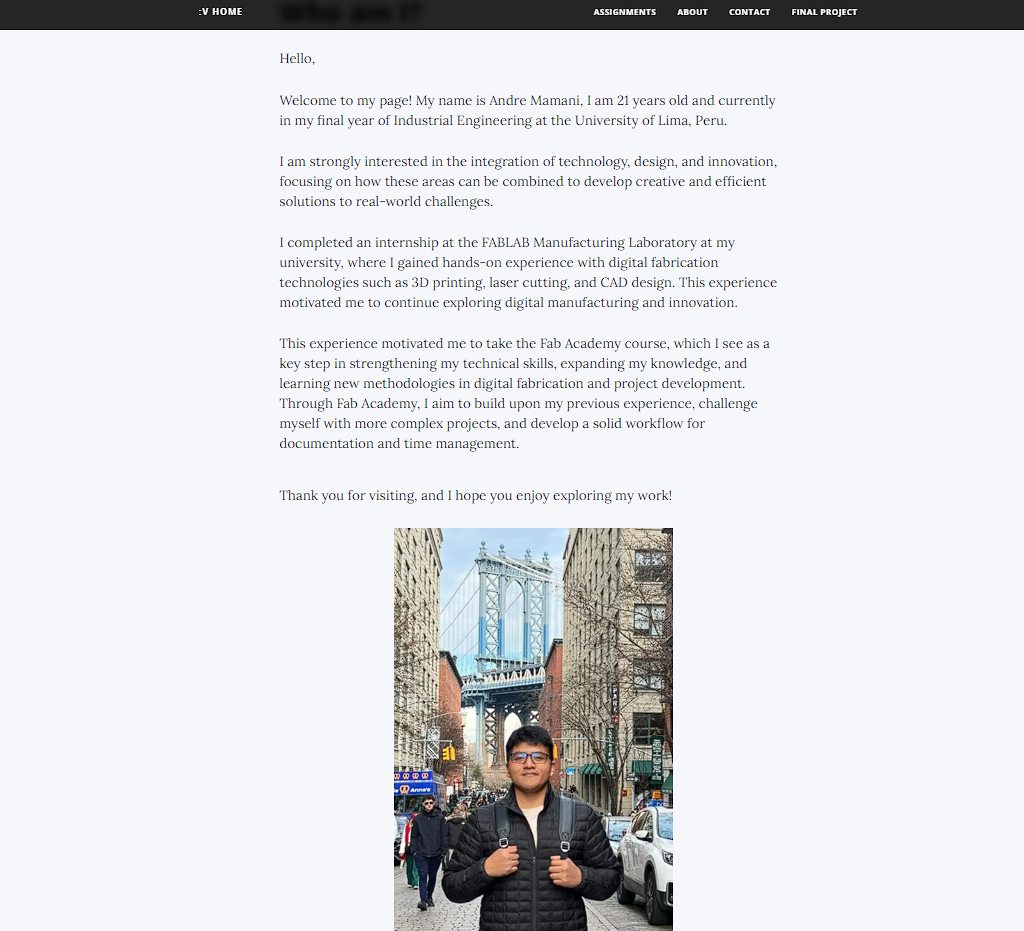
About
This section introduces my background, interests in digital fabrication, and my motivation for joining Fab Academy.
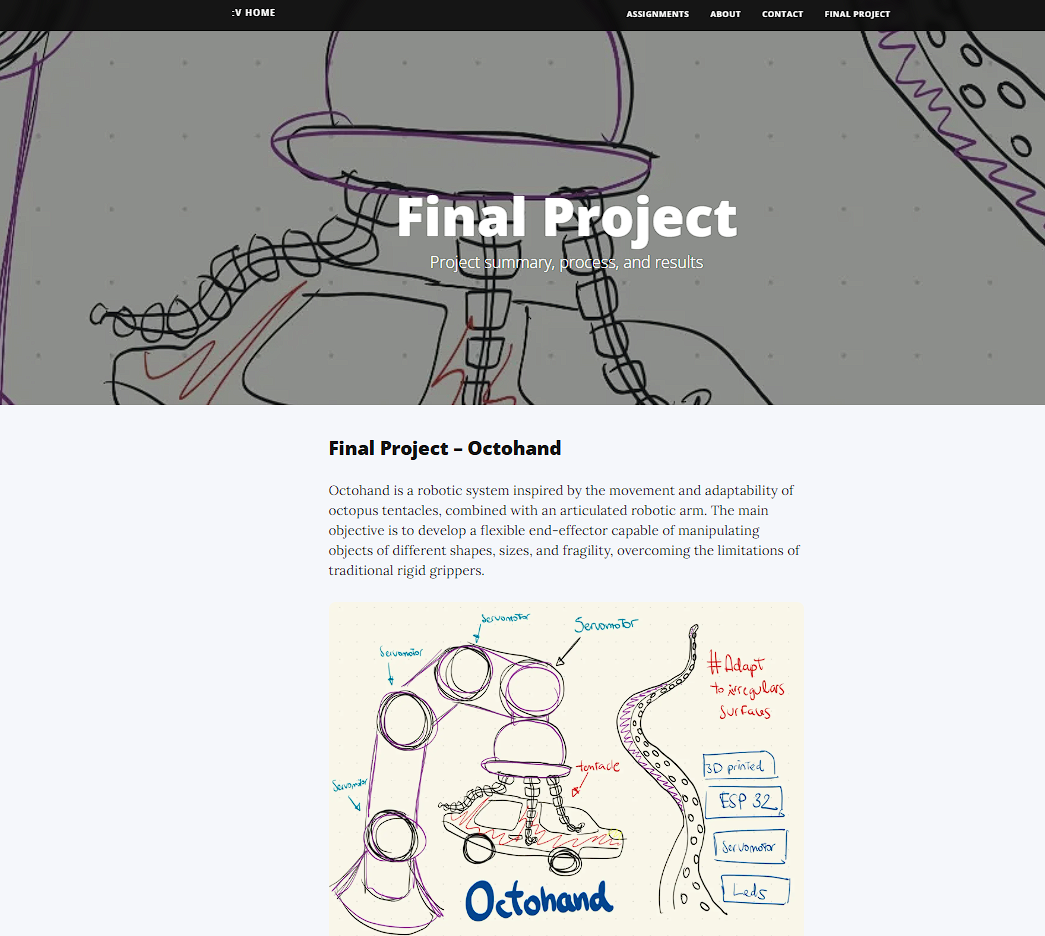
Final Project
The Final Project page presents my project "Octohand", a robotic system inspired by octopus tentacles designed to manipulate objects with flexible movement.
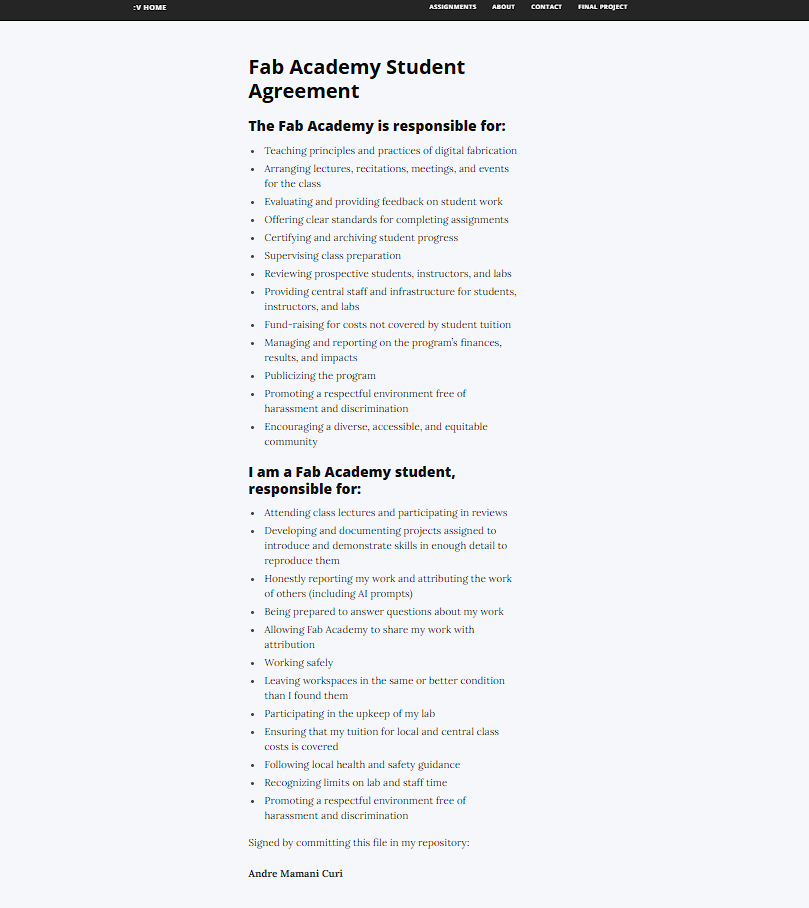
Student Agreement
This page presents the Fab Academy Student Agreement, which defines the responsibilities of both the Fab Academy program and the students. By committing this file to my repository, I confirm my participation and agreement with these guidelines.
Website Evolution
During the development of my Fab Academy website, the design improved from a simple layout to a more organized structure with clearer navigation.
Before