Group Page
This was a group assignment. To see the complete project, please visit the group page:
FAB ACADEMY 2026 · WEEK 12
Implementation of a simple mechanical design solution for a CNC platform.
This was a group assignment. To see the complete project, please visit the group page:
For this week, our team designed and developed a CNC-based machine. The original idea was to build a system capable of automating the inoculation of bacteria on a Petri dish using a pipette. The concept required precise 2D movement, controlled dispensing, and a stable platform capable of positioning the tool accurately over the dish.
However, during the design process we identified an important limitation: mechanical vibration. Because the system was intended to work with a pipette and very small volumes, even slight vibration could affect precision and repeatability. Instead of continuing with a concept that could compromise performance, the project direction changed into a more suitable application for the machine structure.
The final concept became a machine capable of generating light-based images using a NeoPixel ring and a camera. In this new approach, the moving system controls the light source and the camera captures the generated pattern. This made much better use of the machine's motion platform without being negatively affected by small vibrations in the same way a pipetting process would be.
My contribution focused on the mechanical design of the structure and motion components, and on the 3D printing of the parts I was responsible for fabricating. Within the team, I helped design most of the mechanical parts, I personally printed a specific set of them, and a few standard elements (the aluminum profiles and the rail) were not designed by me.
An important point about every part I designed: they were not standalone prints. Each one was modeled specifically to integrate with real, off-the-shelf hardware — 20×20 aluminum extrusion profiles, NEMA stepper motors, bearings, and metal rods that act as the linear rails. The dimensions, slots, bores and mounting holes of the printed parts were all dictated by these standard components so the printed geometry would fit the aluminum frame, seat the bearings, bolt to the NEMA motors, and slide along the metal rails.
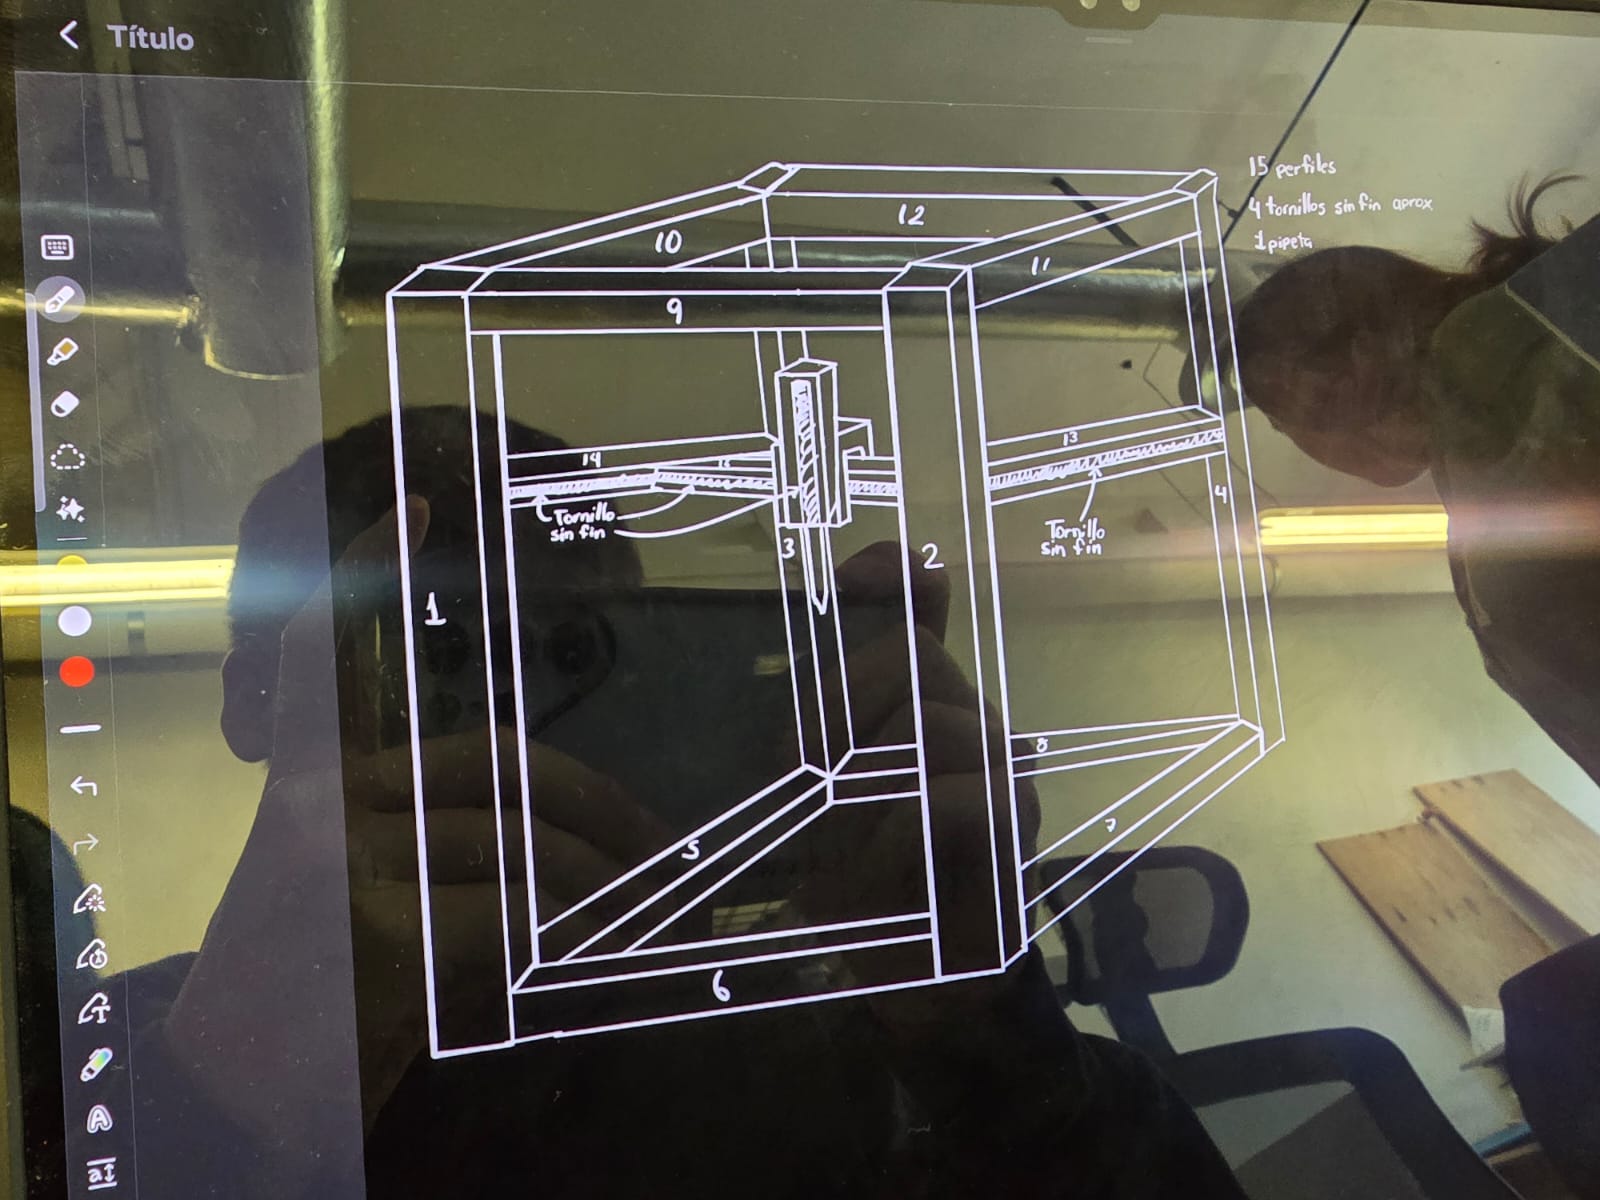
To be precise about my role in this collaborative project, the parts can be grouped into three categories: the parts I 3D printed, the parts I helped design, and the standard components that were not designed by me. All the designed parts were dimensioned around the aluminum profiles, NEMA motors, bearings and metal rod rails they have to connect to.
These are the components I was responsible for fabricating. I prepared each model, sliced it, and printed it for the assembly:
Carrito.SLDPRT — main carriage body (rides on the metal rod rails)Esquinas.SLDPRT — main corner part (joins the aluminum profiles)EsquinasBase.SLDPRT — base corner part (anchors the aluminum frame)EsquinasRodamientos.SLDPRT — corner part with bearing housing (seats the bearings)Moduloservo.SLDPRT — servo support modulemodular.SLDPRT — modular carriage interfaceWithin the team I also contributed to the design of the following mechanical parts:
Pipeta.SLDPRT — pipette element (original concept)SinFin25.SLDPRT — worm/lead screw elementTornillo sin fin.SLDPRT — lead screwTuercaTornillosin fin.SLDPRT — lead screw nutSoporte medio.SLDPRT — mid supportSoporte medio Nema.SLDPRT — NEMA motor mid supportSoporte medio Nema Derecha.SLDPRT — NEMA motor mid support (right side)Union.SLDPRT — structural union/jointUnionmedia.SLDPRT — half unionUnionMediaContraparte.SLDPRT — half union counterpartSome elements are standard components that I did not design; they were included in the assembly as off-the-shelf or pre-existing geometry, and they are exactly the hardware my printed parts were built around:
Perfil 20x300mm.SLDPRT — 20×20 aluminum extrusion profile (300 mm)Perfil 20x400mm.SLDPRT — 20×20 aluminum extrusion profile (400 mm)Riel 300.SLDPRT — linear rail / metal rod (300 mm)Mechanical design was one of the most important parts of this project because the entire CNC system depends on rigidity, alignment, and controlled movement. Even though the final application changed, the machine still needed a stable frame, properly aligned moving axes, and components capable of supporting motors, bearings, and carriage elements.
Every printed part was conceived as an interface part between the standard hardware: it had to bolt onto the aluminum profiles, hold the NEMA motors, house the bearings, and guide the metal rod rails. That constraint drove most of the geometry decisions.
The first design intention was centered on biological automation, which required:
When the project shifted toward light painting with a NeoPixel ring and camera capture, the same motion structure remained useful. This meant the mechanical design still had value, especially in:
This design process demonstrates an important engineering principle: even when a project changes direction, a robust mechanical foundation remains useful if it was designed with modularity and functionality in mind.
All my parts were designed in SolidWorks. I used this software because it allows precise parametric modeling, dimensional control, and easy iteration when parts need to be adjusted to fit shafts, bearings, motors, or printed assemblies.
SolidWorks was especially useful in this project because the parts had to satisfy multiple mechanical requirements at the same time, all driven by the standard hardware they integrate with:
Since these components were part of a larger assembly, designing them parametrically also made it easier to adapt them if the team modified the frame dimensions or changed the motion system.
The corner parts are among the most critical mechanical elements in a CNC system because they connect the structure, support the motors, and maintain alignment between moving elements. In a machine like this, the corners are not just connectors: they act as load-bearing geometry that defines the rigidity of the frame. They were all designed to join the 20×20 aluminum extrusion profiles and, in one case, to house the bearings. I both designed and 3D printed all three corner parts.
This is the main corner element of the structure. Its purpose is to connect the aluminum profiles that form the axes or structural members while also providing a reference geometry for the rest of the assembly.
In a CNC machine, a part like this must be designed carefully because:
A poorly designed corner can introduce misalignment, which would later affect motion smoothness, bearing contact, and repeatability.
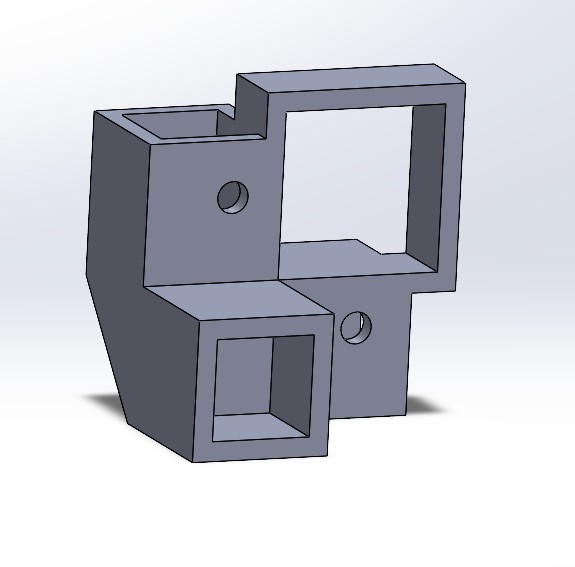
This part corresponds to the base version of the corner. Its role is related to anchoring the machine to the lower aluminum frame and creating the first support plane for the vertical and horizontal members.
A base corner part is important because it usually needs to:
In practical terms, this means the base part must be dimensionally consistent, flat, and robust enough to prevent deformation during machine operation.
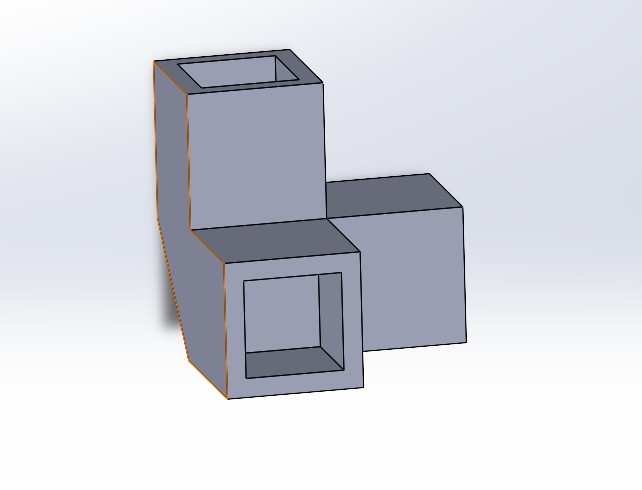
This part was specifically related to the bearing system. Bearings are essential in CNC machines because they reduce friction and guide motion along the metal rod rails in a controlled way. A corner part designed to hold bearings must be accurate, since any misalignment directly affects movement.
The design intent of this component was to:
This type of part is mechanically sensitive because tolerance matters. If the bearing seat is too loose, the motion system loses precision. If it is too tight, it may generate friction or assembly difficulty.
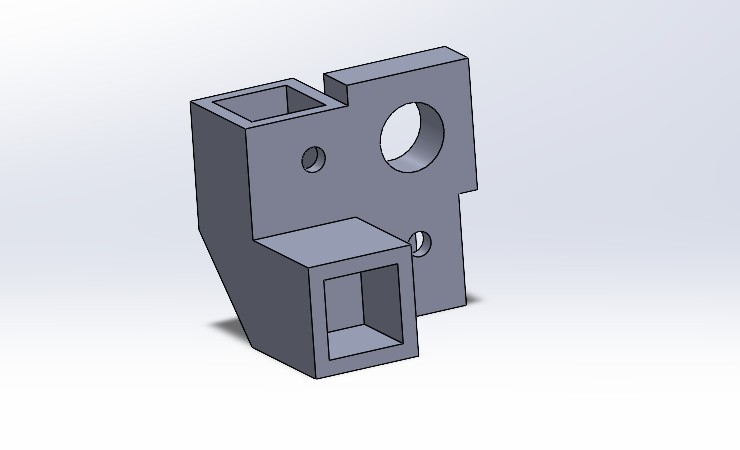
Another major part of my contribution was the carriage system. Originally, the carriage was intended to hold the pipette used for bacterial deposition. Even though that application was later changed, the carriage still represents an important part of the machine's mechanical concept. It was designed to slide along the metal rod rails through its bearings and to be driven by the lead screw turned by the NEMA motor. I designed and 3D printed these parts.
The carriage is the moving body of the system. Its job is to travel along one axis while carrying the active tool or module. In the first concept, that tool was a pipette. In the modified concept, the same motion logic can be adapted to support the light or camera-related module.
This is the main carriage body. It was designed as the platform that would move across the machine — guided by the metal rails and their bearings — while carrying the dispensing or actuation mechanism.
A carriage in a CNC-type mechanism must satisfy several requirements:
Since the original system was intended to manipulate a pipette, stability was especially important. Any vibration or wobble at the carriage level would translate directly into positioning error at the pipette tip.
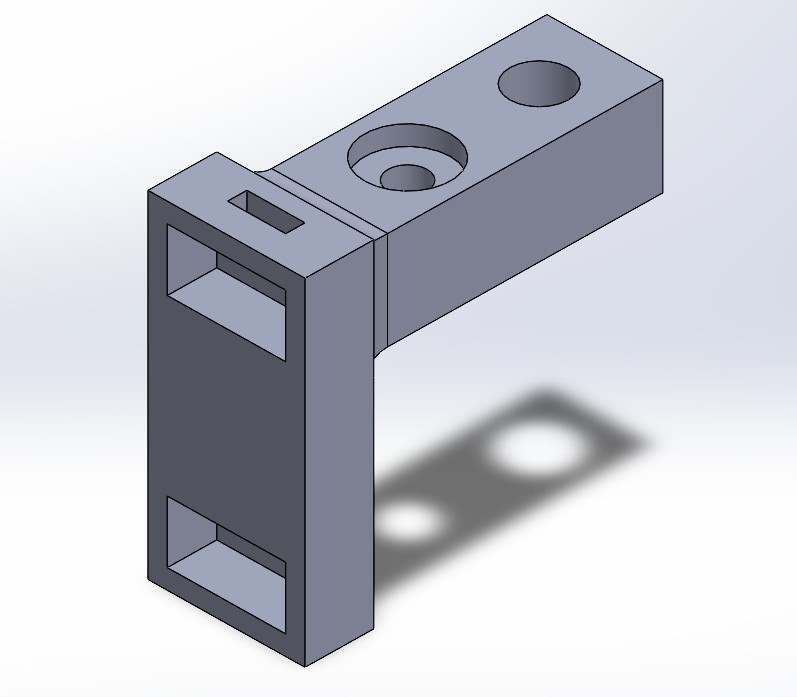
This part follows a modular design approach. The purpose of a modular part is to allow the machine to adapt to different payloads or mounted systems without redesigning the entire carriage.
Designing modularity into the carriage was a valuable decision because the project concept changed during development. If the carriage had been designed only for one fixed tool, the system would have been much harder to repurpose. A modular interface gives flexibility and increases the usefulness of the machine.
In engineering terms, modularity improves:
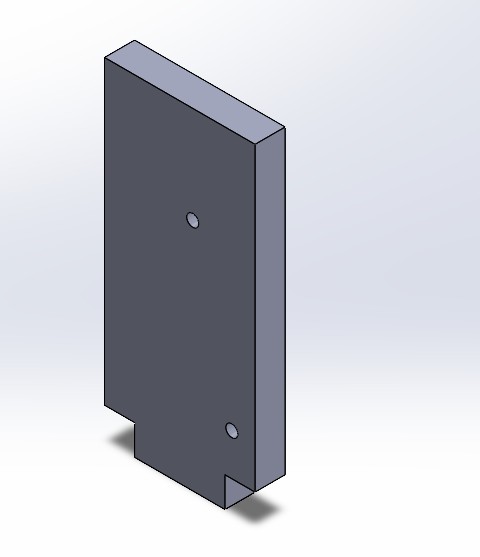
This is the servo-related module. In the original pipette concept, a servo could be used to actuate a small movement such as pressing, lifting, dispensing, or positioning the pipette assembly.
Even if the final application changed, the servo module remains important because it represents the interface between linear movement and local actuation. A machine does not only move in X and Y; often it also needs a local mechanism to actuate a tool.
The design of a servo support module typically requires:
These constraints make servo modules mechanically important, especially when they interact with another functional subsystem.
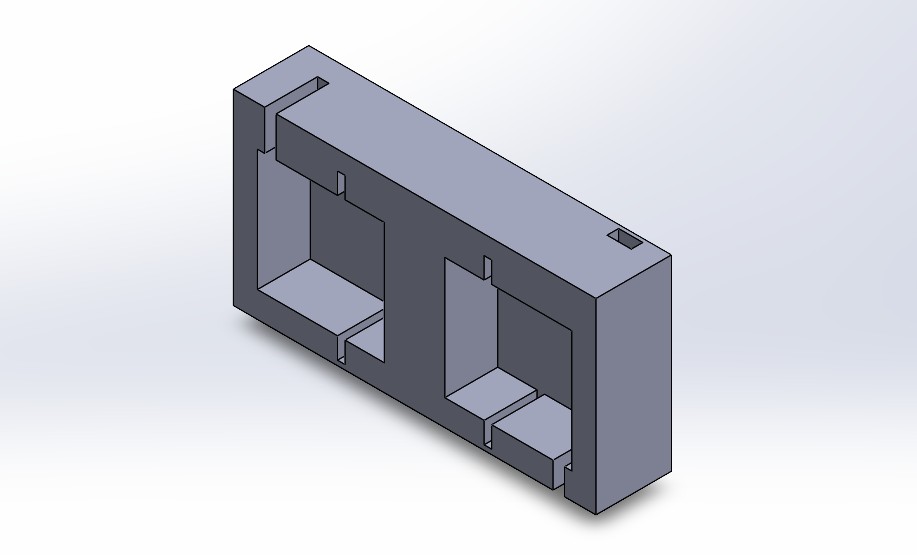
Besides the printed parts, I helped design several components related to motion transmission and structural joints. These parts were not printed by me, but I contributed to their design within the team. Like the rest, they were dimensioned to work together with the NEMA motors, the aluminum profiles, the bearings and the metal rod rails.
The linear motion of the machine relies on a lead screw system. I helped design the
Tornillo sin fin.SLDPRT (lead screw), the TuercaTornillosin fin.SLDPRT
(lead screw nut) and SinFin25.SLDPRT. These parts convert the rotation of the
NEMA motor into precise linear displacement of the carriage along the metal rod
rails, so their thread geometry and fit are critical for smooth, backlash-free movement.
To hold the NEMA stepper motors in place, I helped design Soporte medio.SLDPRT,
Soporte medio Nema.SLDPRT and Soporte medio Nema Derecha.SLDPRT. These
supports use the standard NEMA mounting pattern and keep the motor shaft aligned with the lead
screw, which is essential to avoid binding and uneven motion.
For connecting the structural members of the frame, I helped design Union.SLDPRT,
Unionmedia.SLDPRT and UnionMediaContraparte.SLDPRT. These joints tie
the aluminum profiles together and contribute to the overall rigidity of the structure.
I also helped design Pipeta.SLDPRT, the pipette element from the original biological
concept, which would have been the active tool mounted on the carriage before the project pivoted
to light painting.
For transparency about my contribution, the following parts are standard components that I did not design. They were used as off-the-shelf or pre-existing geometry in the assembly, and they are the hardware that every printed part was designed to integrate with:
Perfil 20x300mm.SLDPRT and Perfil 20x400mm.SLDPRT — standard 20×20 aluminum extrusion profiles that form the frame of the machine.Riel 300.SLDPRT — a standard 300 mm linear rail (metal rod) used together with the bearings to guide the motion of the carriage.These elements are common mechanical standards, so reusing existing geometry instead of redesigning them is good engineering practice: it saves time and guarantees compatibility with real, purchasable hardware — and it gives the exact dimensions my printed parts had to match.
Throughout the design of these parts, several mechanical principles had to be considered, always with respect to the standard hardware the parts connect to:
One of the most important lessons from this project was that a mechanical design is not only about making parts fit together. It is about anticipating motion, load paths, assembly constraints, and how design changes can affect the behavior of the entire system.
A key part of this week was understanding that engineering design is iterative. The original concept of automating bacterial deposition was promising, but once vibrations and stability issues were considered more seriously, it became clear that the system would not perform with the required precision.
Instead of forcing the original concept, the team adapted the machine into a system that draws with light using a NeoPixel ring and a camera. This was an important design decision because it reused the machine platform while aligning the application with what the mechanical structure could do more reliably.
This change also highlights why modular mechanical design is valuable: when the final use changes, the structure and motion system can still remain relevant if they were designed with flexibility in mind.
These photos show the final assembled result: the complete CNC frame built with my printed parts mounted on the real hardware. You can see the 3D-printed corner pieces joining the 20×20 aluminum profiles, the corner blocks housing the bearings that ride on the metal rod rails, the lead screws driven by the NEMA motors, and the carriage parts assembled onto the motion system — exactly the integration the parts were designed for.
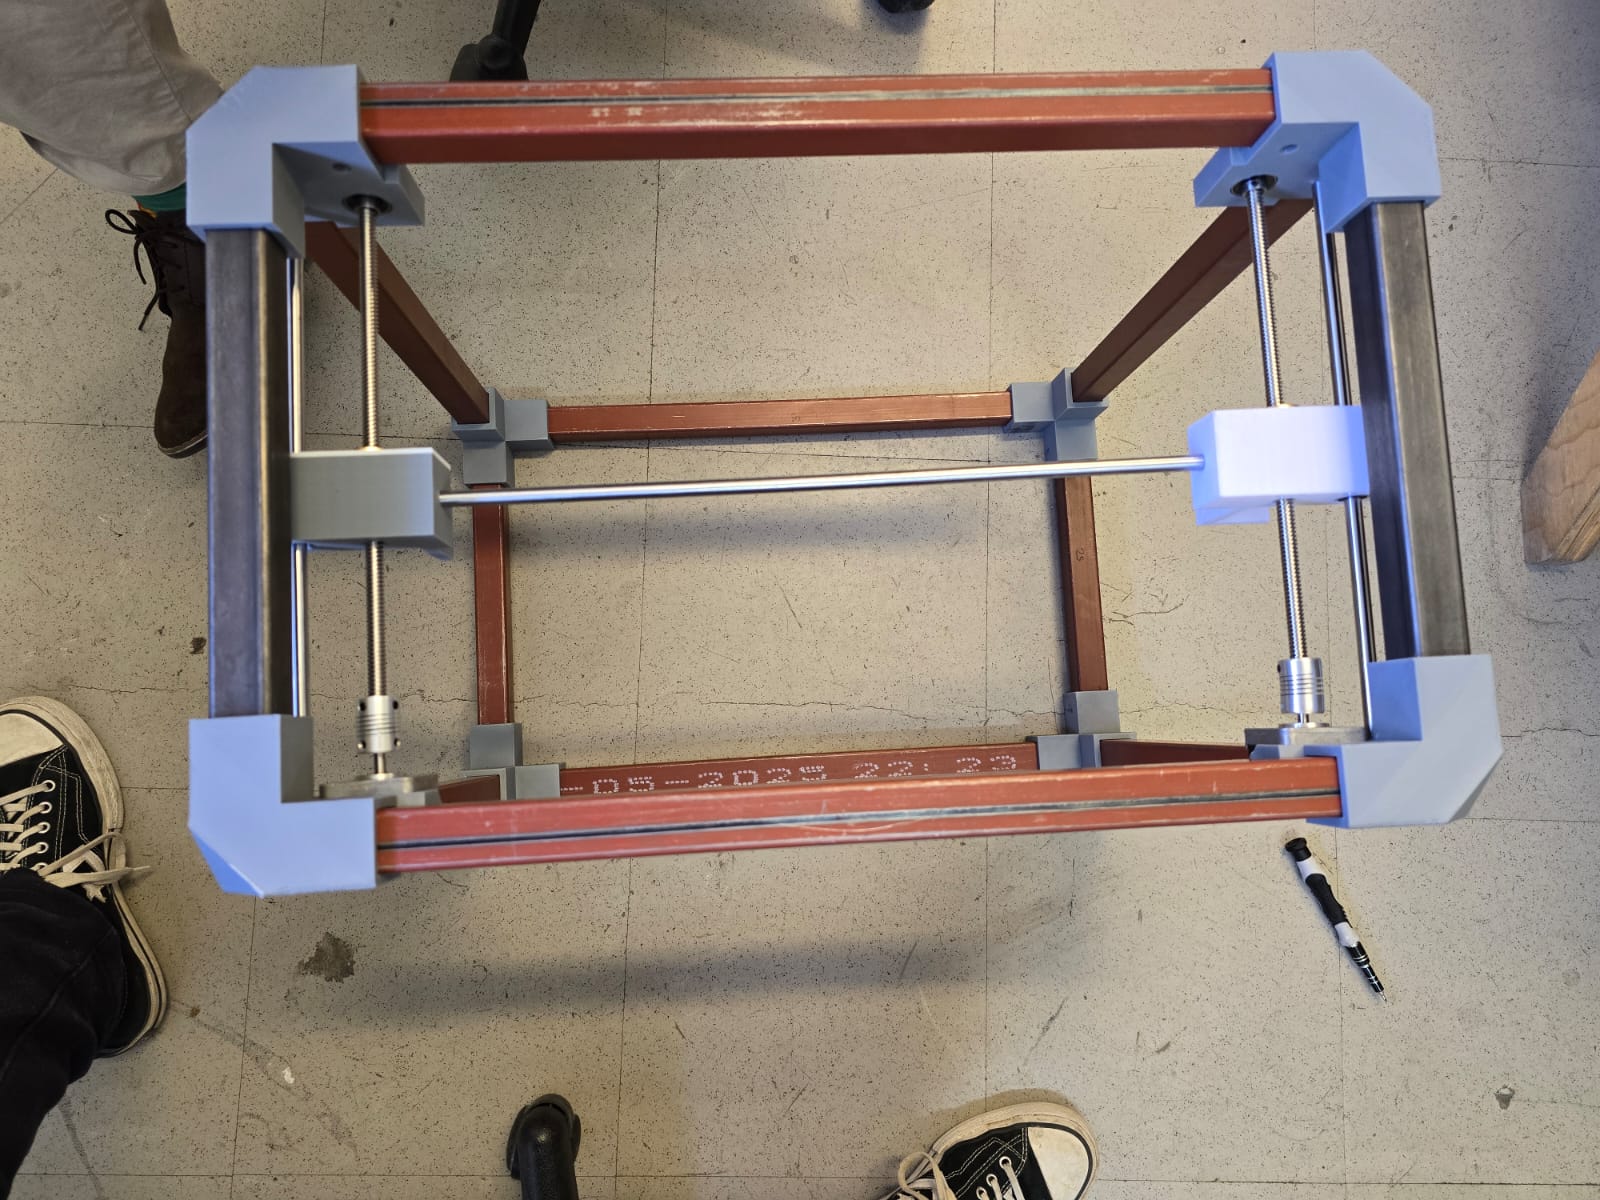
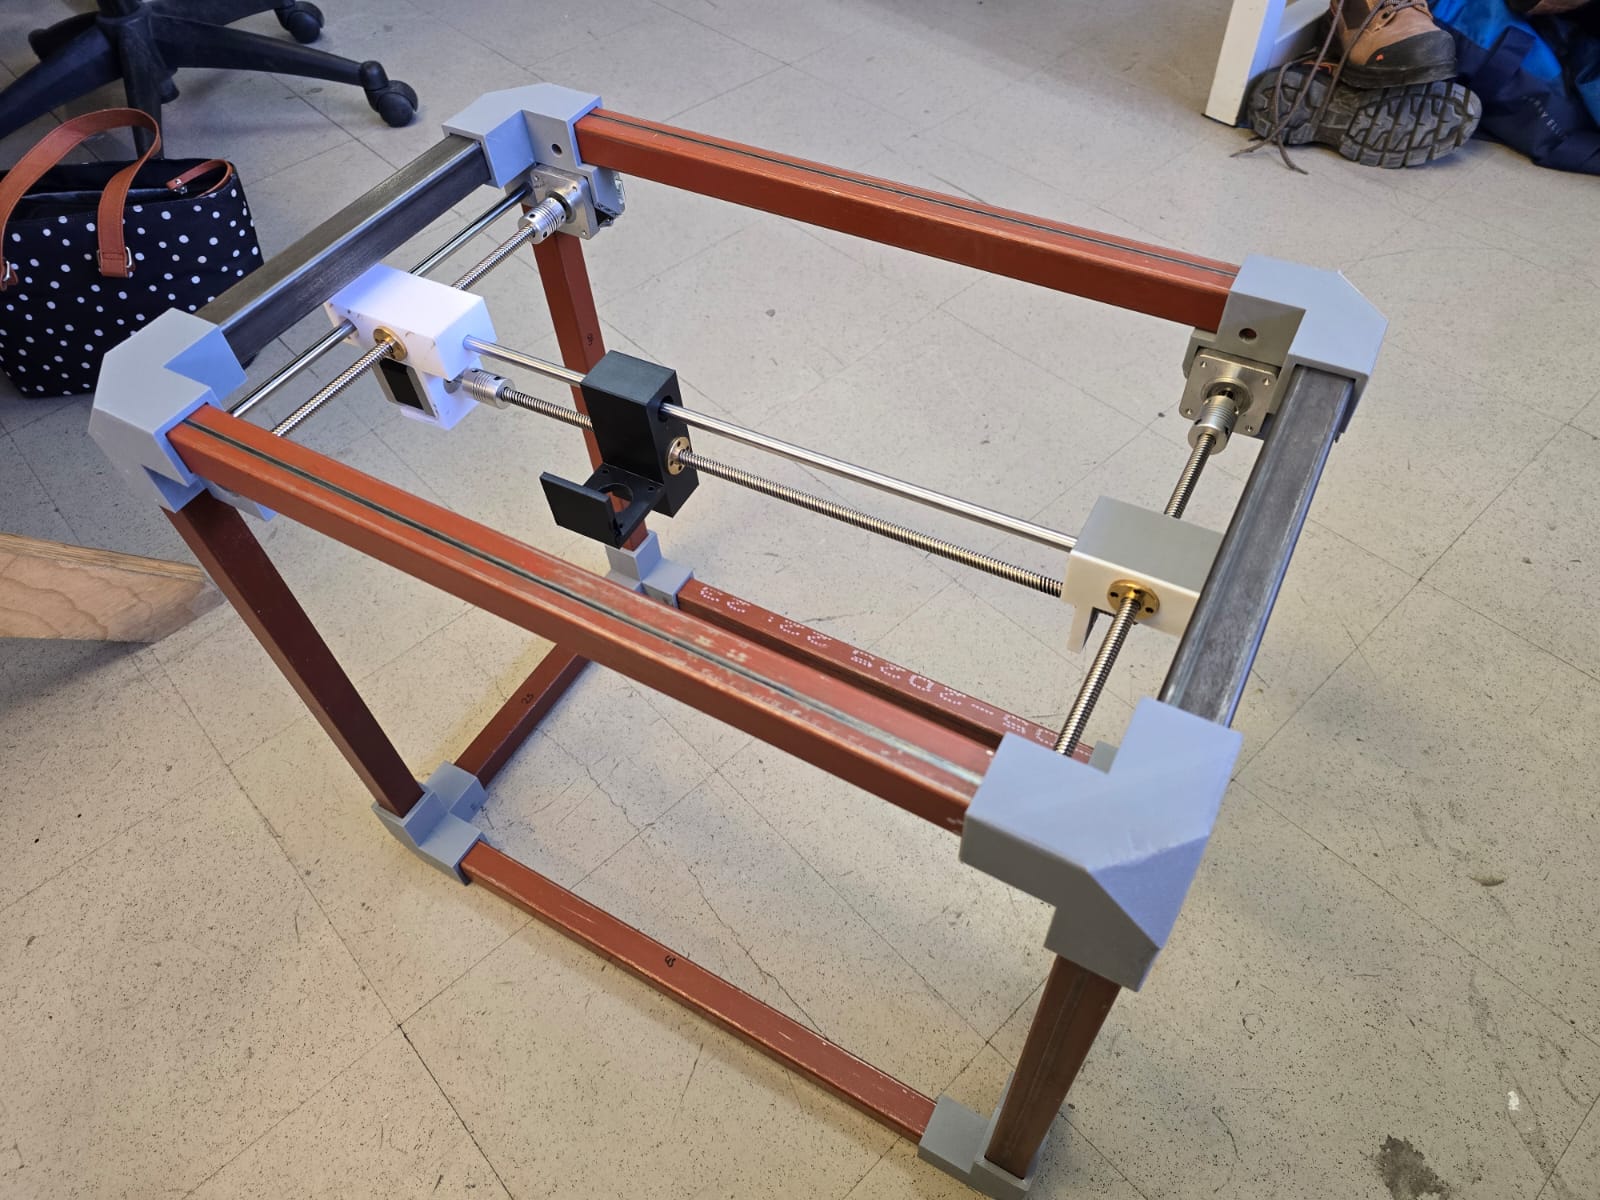
Seeing the printed parts fit the off-the-shelf hardware on the first assembly confirmed that the dimensioning strategy — designing each part around the real profiles, bearings, rails and motors — worked as intended.
My contribution during this week focused on the structural and motion-support components of the CNC system. Designing the corner pieces, bearing supports, and carriage modules — all built around the aluminum profiles, NEMA motors, bearings and metal rod rails — and 3D printing the parts I was responsible for, gave me a deeper understanding of how mechanical design influences the performance of an entire machine.
Even though the project changed direction, the work done on these components remained valuable because they form the mechanical basis of the machine. This week showed me that good mechanical design must be functional, adaptable, and ready to support changes in the overall project.
It also reinforced the importance of designing with real-world behavior in mind: vibration, fit, alignment, and rigidity are not secondary details — they are often the factors that determine whether a machine actually works.
All the SolidWorks parts and STL files for this project are available here: