Principles and Practices - Assignment:
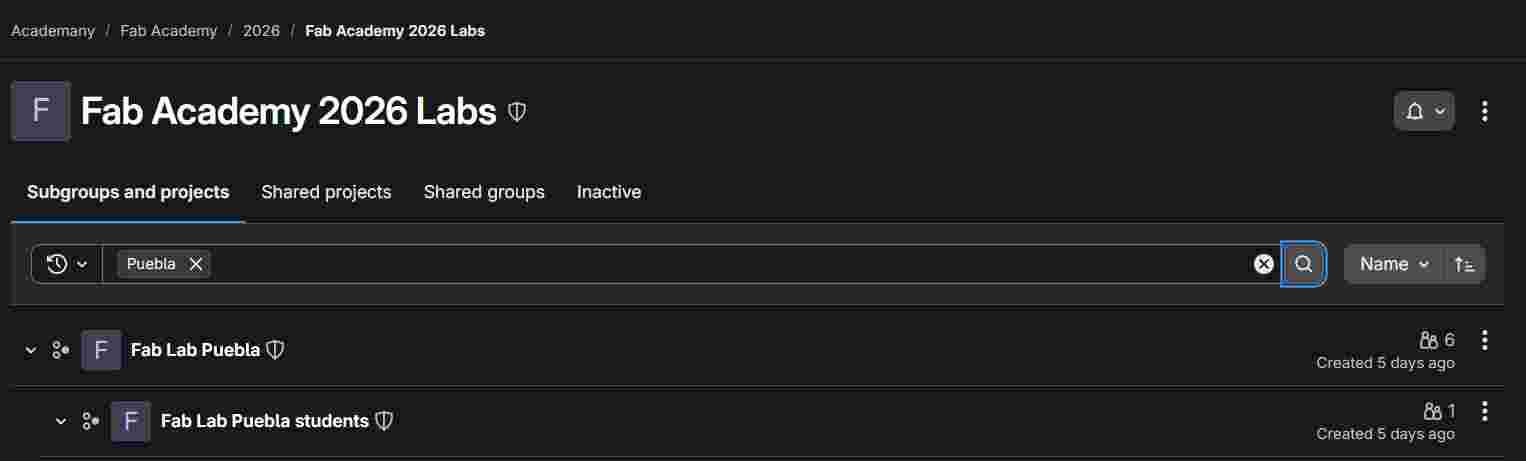
The following section shows the process of creating a web page by using VS code, Git and Gitlab tools. We start by installing the Git and VS code. Once installed both apps we need to go to the following link and search for our Fab headquarters and look for ourselves in the students section.
We Go to code, and choose clone with HTTPS.

We go to our computer terminal and we put the git command, here we can see some of the commands we can use when using Git, then we can enter the command of git clone and the link we copied.

From now on we can work on our web site by working on Vs code.
But before we can state that whenever we want to submit our changes we may use following commands
Git Workflow
To document my progress, I use a standard Git workflow to manage my repository and deploy my site via GitLab Pages.
| Command | Action Performed | Problem it Solves |
|---|---|---|
| git status | I check which files have been modified or added. | Prevents accidental uploads of heavy or sensitive files. |
| git add . | I stage all the changes for the next commit. | Groups all my edits into a single preparation area. |
| git commit -m "msg" | I register the changes with a descriptive message. | Creates a history point to revert back if something fails. |
| git push | I upload the local files to the remote server. | Triggers the CI/CD pipeline to update the live website. |
First to talk about my file tree structure goes by
            rafael-lee/
            ├── index.html           # Main landing page (Home)
            ├── main.css             # Global styles and variables
            ├── .gitlab-ci.yml       # Automation for GitLab Pages deployment
            ├── assignments/         # Folder for weekly documentation
            │   ├── week01.html
            │   └── week02.html
            └── assets/              # Static resources
                ├── images/          # Screenshots and photos
                └── docs/            # Downloadable files (STL, CAD, PDF)
In the following class we got to learn about editing our website, first we got principles about doing it, in which we made a very basic Example.
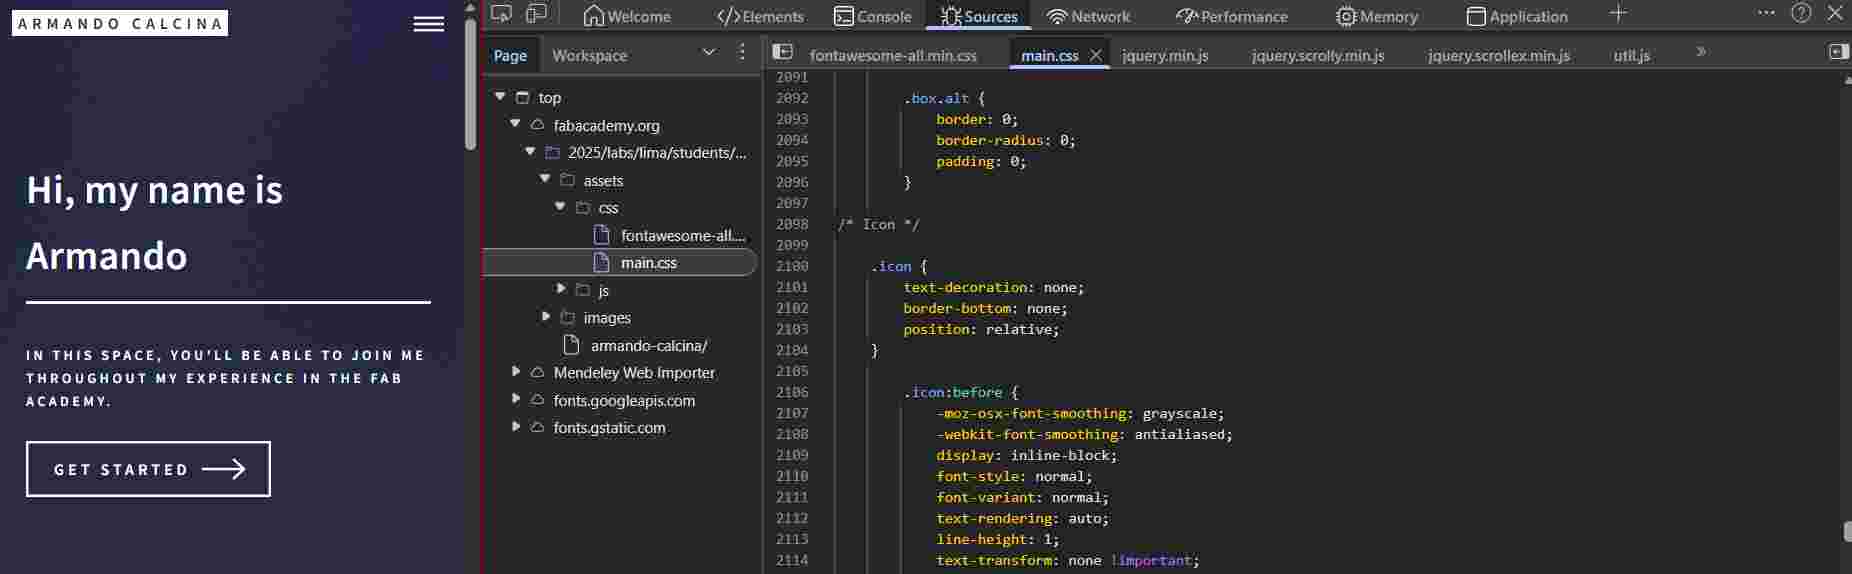
Then for the making of my own website I started by checking some websites of pasts years works, I really liked this design of a person called
Armando Calcina
made in the 2025 year, I inspected the website so I could learn more about its fonts, and design, so i could base my website on it.
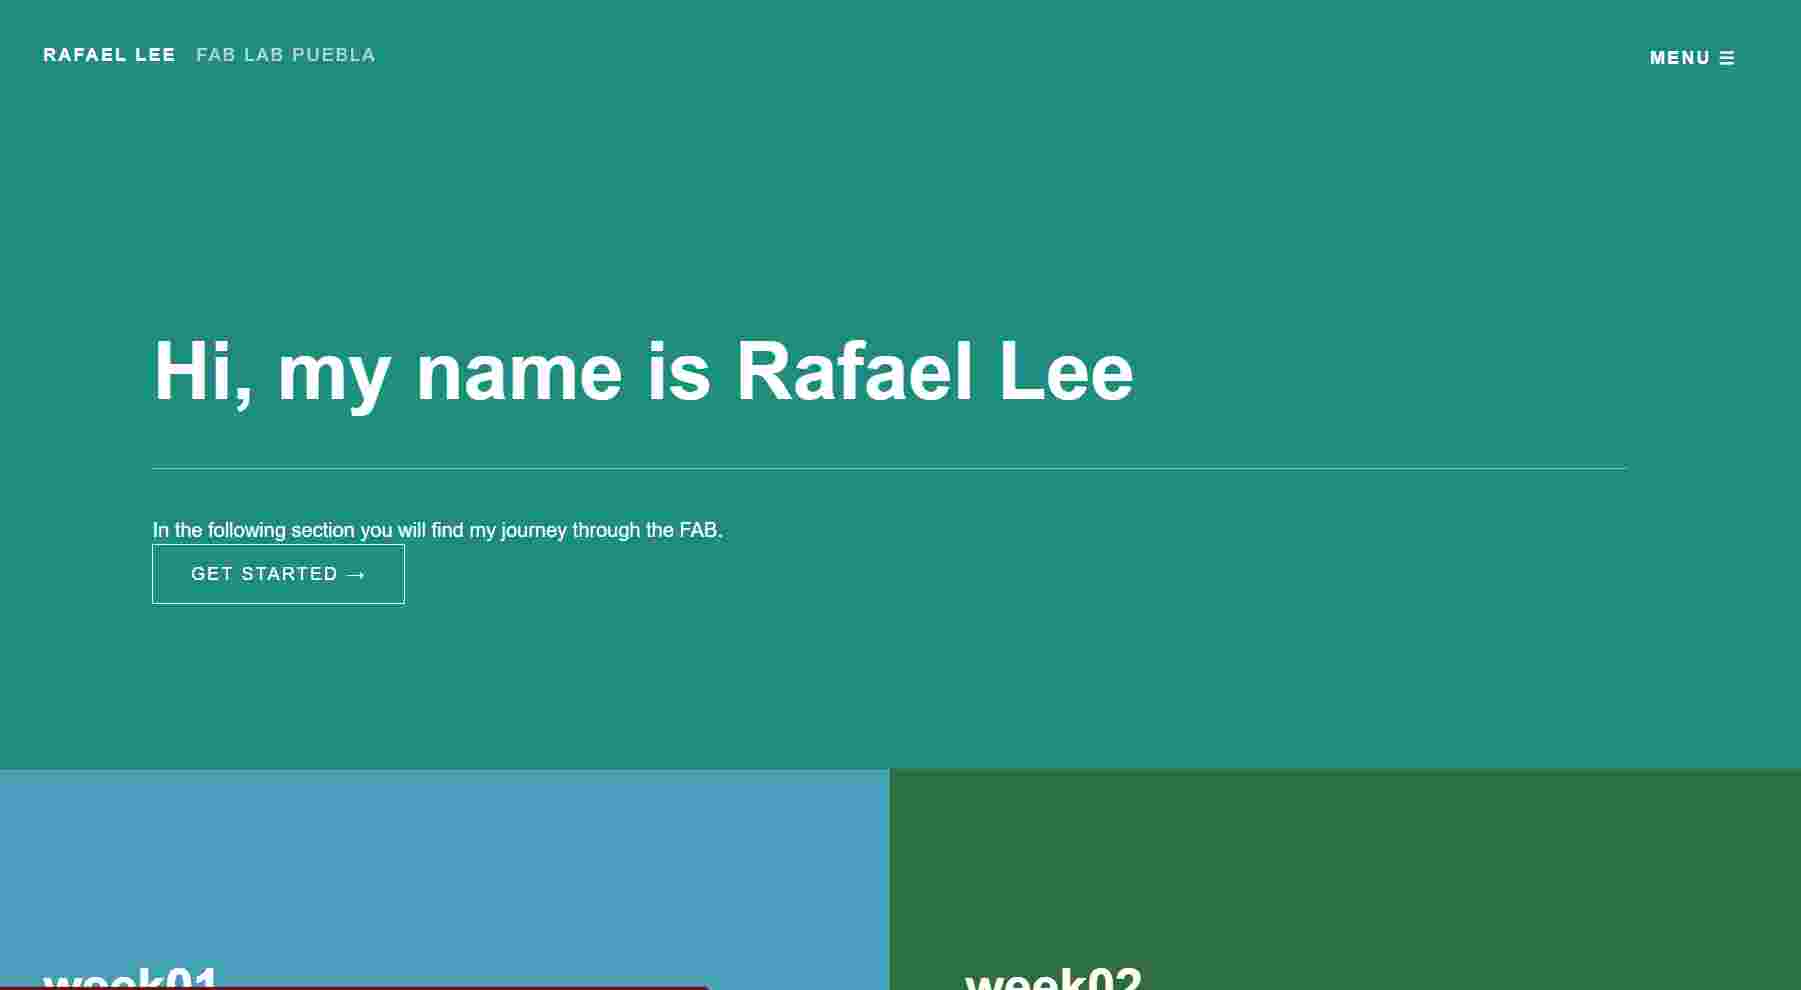
For my own website I stated by reusing the nabvar and main index design just without the animation and measures the original page have. I made sections about how I wanted some of the containers and codes to be shown, also I made all colors independant of each week and section, a permanent bar same color as the home on top showing my name in every page, and the side bar to go through other sections rather that the weekly assigments.
<div id="myNav" class="overlay">
  <a href="javascript:void(0)" class="closebtn" onclick="closeNav()">×</a>
  <div class="overlay-content">
    <a href="index.html">HOME</a>
    <a href="about.html">ABOUT ME</a>
    <a href="final-project.html">FINAL PROJECT</a>
    <a href="agreement.html">STUDENT AGREEMENT</a>
  </div>
</div>

<nav class="navbar">
  <a href="index.html" class="logo-link">
    <div class="logo">RAFAEL LEE <span>FAB LAB PUEBLA</span></div>
  </a>
  <div class="menu-button" onclick="openNav()">MENU ☰</div>
</nav>

.navbar {
    display: flex;
    justify-content: space-between; /* Pushes the logo to the left and menu to the right */
    padding: 40px 60px;
    font-size: 14px;
    letter-spacing: 2px;
    font-weight: bold;
}

.sidebar a {
  padding: 8px 32px;
  text-decoration: none;
  font-size: 25px;
  color: #818181;
  display: block;
  transition: 0.3s;
}

.overlay {
  height: 100%;
  width: 0; /* Starts hidden for the JS trigger */
  position: fixed;
  z-index: 1000;
  top: 0;
  left: 0;
  background-color: rgba(30, 34, 53, 0.95);
  transition: 0.5s;
  display: flex;
  align-items: center;
  justify-content: center;
}

:root {
  --final-bg: #364a99;
  --agree-bg: #8c7c9b;
  --about-bg: #e46d6d;
  --week1-bg: #ddc77c;
  --week2-bg: #4a62c1;
  --week3-bg: #834180;
  --week4-bg: #a57a49;
}

.hero-week1, .hero-agree, .hero-final, .hero-about {
  height: 60vh;
  display: flex;
  align-items: center;
  padding: 0 8%;
  color: rgb(255, 255, 255);
}

.main-content1, .main-content-final, .main-content-agree, .main-content-about {
  padding: 80px 10%;
  color: white;
  min-height: 40vh;
}
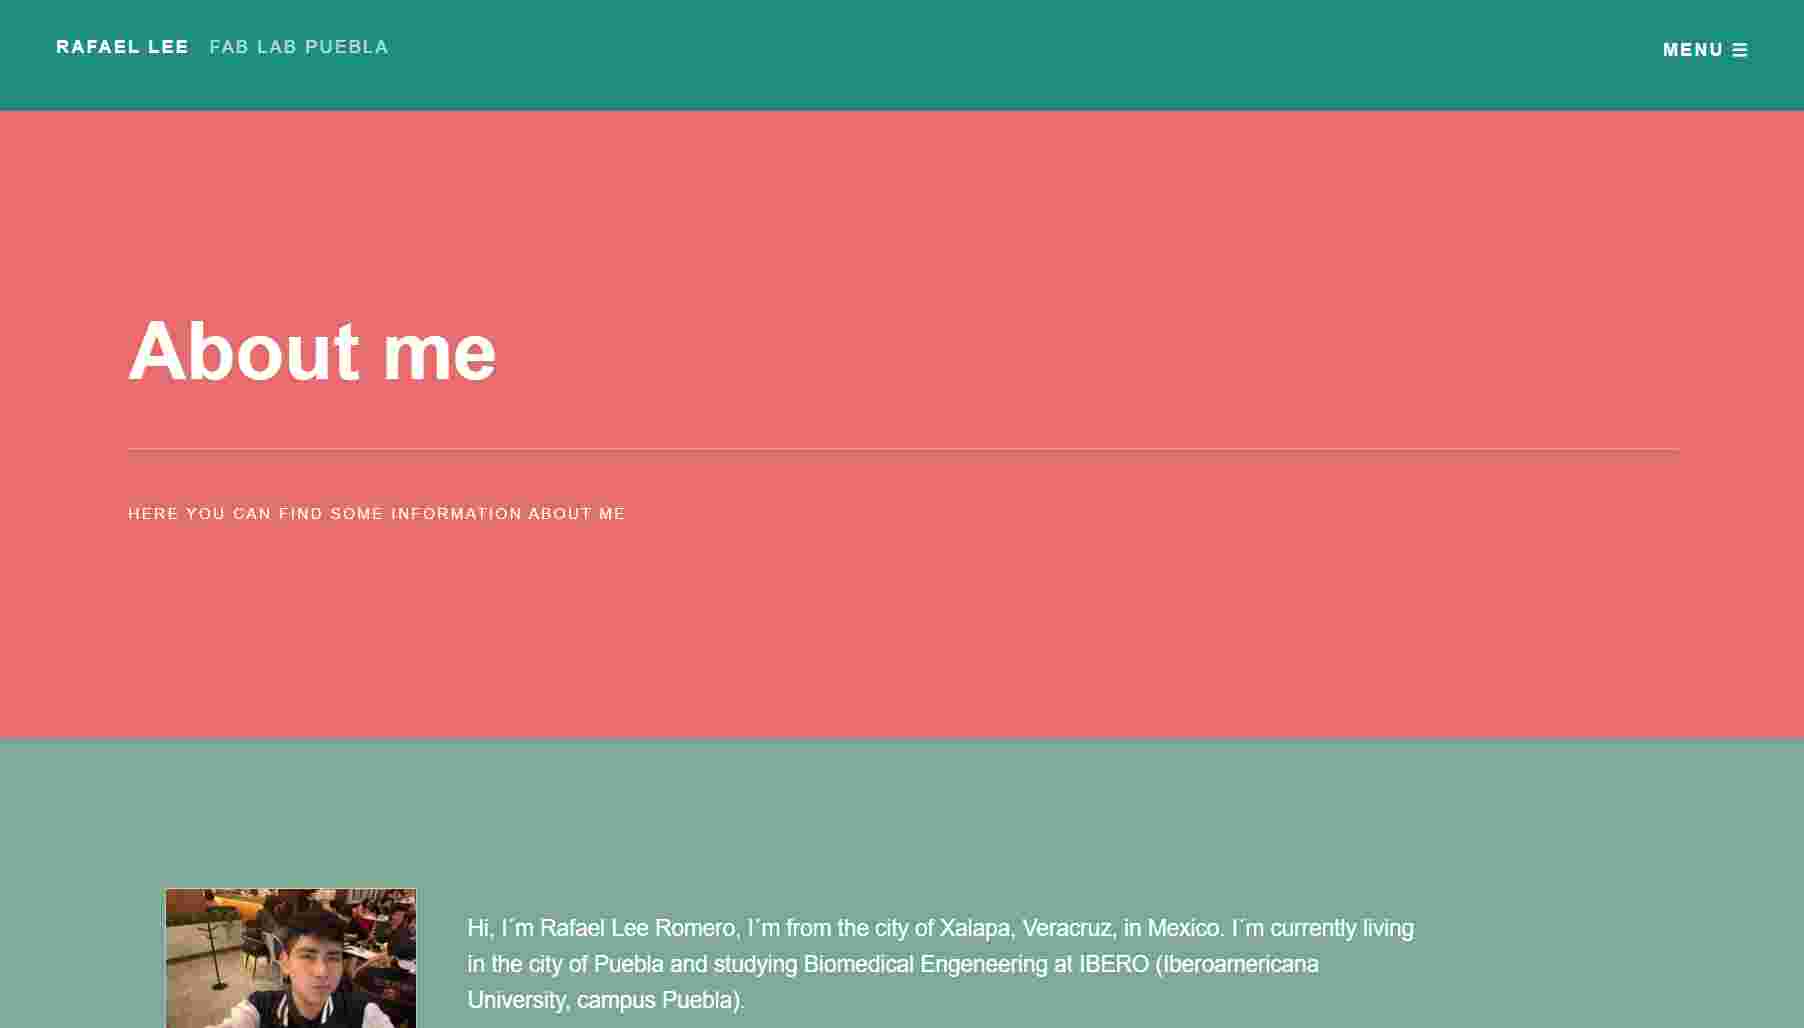
Here you can find my final home page and the about me section for the visual example of the bar at the top and the specific color palette for this section.
Project Management - Assignment:
My project consist on the development of a Wearable device that monitors movement quality, to focus on the
detection of early changes in motor control that are associated with muscular distrophy
with a system that analyzes motion pattern to identify the variability, smoothness and range, that serve
as indicaions of functional deterioration.
My First sketch of how I imagine the Wearable.
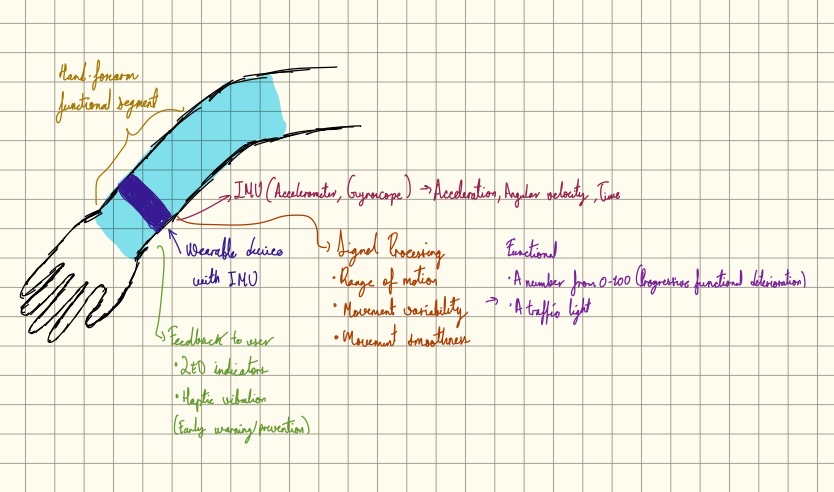
The device is meant to provide visual and haptic feedback to indicate early changes in the functional performance. The goal of the system is not to diagnose disease, but to detect early functional deterioration and support preventive monitoring in everyday conditions.