
Week 18
Invention, Intellectual Property and Income
// MAIN OBJECTIVE \\
Develop a plan for dissemination of your final project, outline future possibilities, and summarize the project's current status and learned lessons.
Status and Future Outlook
Dissemination plan for your final project
My dissemination plan is focused on the open-source engineering community. I am publishing the full C firmware repository, the SolidWorks chassis models, and the Altium/modsproject files for the "Death Star" themed custom PCB on my Fab Academy GitLab page. The project will be released under a Creative Commons Attribution-NonCommercial (CC BY-NC) license to allow hobbyists and students to learn from the drone's architecture while preventing unauthorized commercial exploitation. I also plan to showcase the fully functioning prototype locally at FabLab Puebla.
Future possibilities and probabilities
A major future possibility is transitioning the drone from a remotely piloted vehicle to a fully autonomous waypoint-navigated drone. To make this a probability, I plan to integrate localization sensors. By incorporating this via UART to the main ESP32 flight controller, the drone could transmit real-time telemetry over the network and receive commands, moving beyond the local range limitations of ESP-NOW.
What tasks have been completed, and what tasks remain?
Completed:
- 3D modeling of the main chassis and motor mounts in SolidWorks.
- Design, CNC milling, and soldering of the custom flight controller PCB.
- Construction of the 2-motor PID balancing rig for initial software calibration.
- Implementation of ESP-NOW communication between the RC controller and the drone.
Remain:
- Final 3D printing in PLA for the structural components taking the most stress and cooler view.
- Translating the PID constants from the 2-motor balancing rig to the full 4-axis thrust vectoring system.
- Final physical assembly and tethered flight tests.
What's working? what's not?
Working: The embedded firmware is executing flawlessly. The BMI160 IMU is providing accurate roll/pitch/yaw data via I2C, the ESP32-C6 is correctly generating PWM signals to drive the RS2205 motors through the ESCs, and the 2-motor balancing rig successfully stabilizes itself on a single axis. The remote control sends accurate positional data with extremely low latency.
Not working: The perfect center of gravity alignment is still slightly off when placing the heavy 4S 14.8V LiPo battery. Additionally, handling the complex aerodynamic interactions of the 4 thrust-vectoring motors simultaneously in free flight is still an ongoing calibration challenge.
What questions need to be resolved?
The primary unresolved engineering question is how aggressively the PID terms (Proportional, Integral, Derivative) need to be adjusted when moving from the constrained 1D balancing rig to full 3D free flight. Furthermore, I need to verify if the 3D-printed thrust-vectoring mounts can handle the sustained thermal and mechanical stress of the brushless motors over extended flight times without warping.
Planned what will happen when?
The upcoming schedule is tightly structured:
- Day 1-2: Complete the final PLA prints and wire the complete drone chassis.
- Day 3-4: Conduct tethered flight tests to safely fine-tune the PID controller for all 4 axes.
- Day 5-6: Perform untethered, free-flight tests and record the final demonstration video.
- Day 7: Finish all documentation, finalize the slide, and edit the final video for presentation.
What have you learned?
This project has been a massive synthesis of multiple disciplines. On the software side, I learned advanced embedded C programming, task scheduling with FreeRTOS, and the mathematical intricacies of applying PID control theory to real-world physics. On the hardware side, I mastered PCB layout for complex microcontrollers, precision CNC machining with the Roland Monofab, and structural mechanical design in SolidWorks. Most importantly, I learned how to iteratively test and calibrate systems—like building the balancing rig—rather than expecting a complex system to work perfectly on the first try.
Understanding Creative Commons Licenses
Before choosing the appropriate license for my final project, it is essential to define the differences between the main Creative Commons formats available:
- CC0 1.0: Public Domain Dedication. No rights reserved. Anyone can use, modify, and distribute the work without any restrictions or attribution.
- CC-BY 4.0: Attribution. Allows others to distribute, remix, adapt, and build upon the work, even commercially, as long as they properly credit the original creator.
- CC-BY-SA 4.0: Attribution-ShareAlike. Similar to CC-BY, but any new works based on yours must be licensed exactly under the same terms.
- CC-BY-ND 4.0: Attribution-NoDerivatives. Allows redistribution, commercial and non-commercial, but the work cannot be modified or altered in any way.
- CC-BY-NC 4.0: Attribution-NonCommercial. Allows others to remix, adapt, and build upon the work non-commercially. They must credit you, but do not have to license their derivative works on the same terms.
- CC-BY-NC-SA 4.0: Attribution-NonCommercial-ShareAlike. Others can modify the work non-commercially, but they must credit you and license their new creations under identical terms.
- CC-BY-NC-ND 4.0: Attribution-NonCommercial-NoDerivatives. The most restrictive license. Others can download and share your work with credit, but cannot alter it in any way or use it commercially.
License Making
In this part I will be creating a Creative Commons Attribution-NonCommercial-ShareAlike (CC BY-NC-SA 4.0) for my final project.
Once I defined the type of license I wanted to use, I went to the Creative Commons Chooser to generate the official badge and embed code for my documentation.
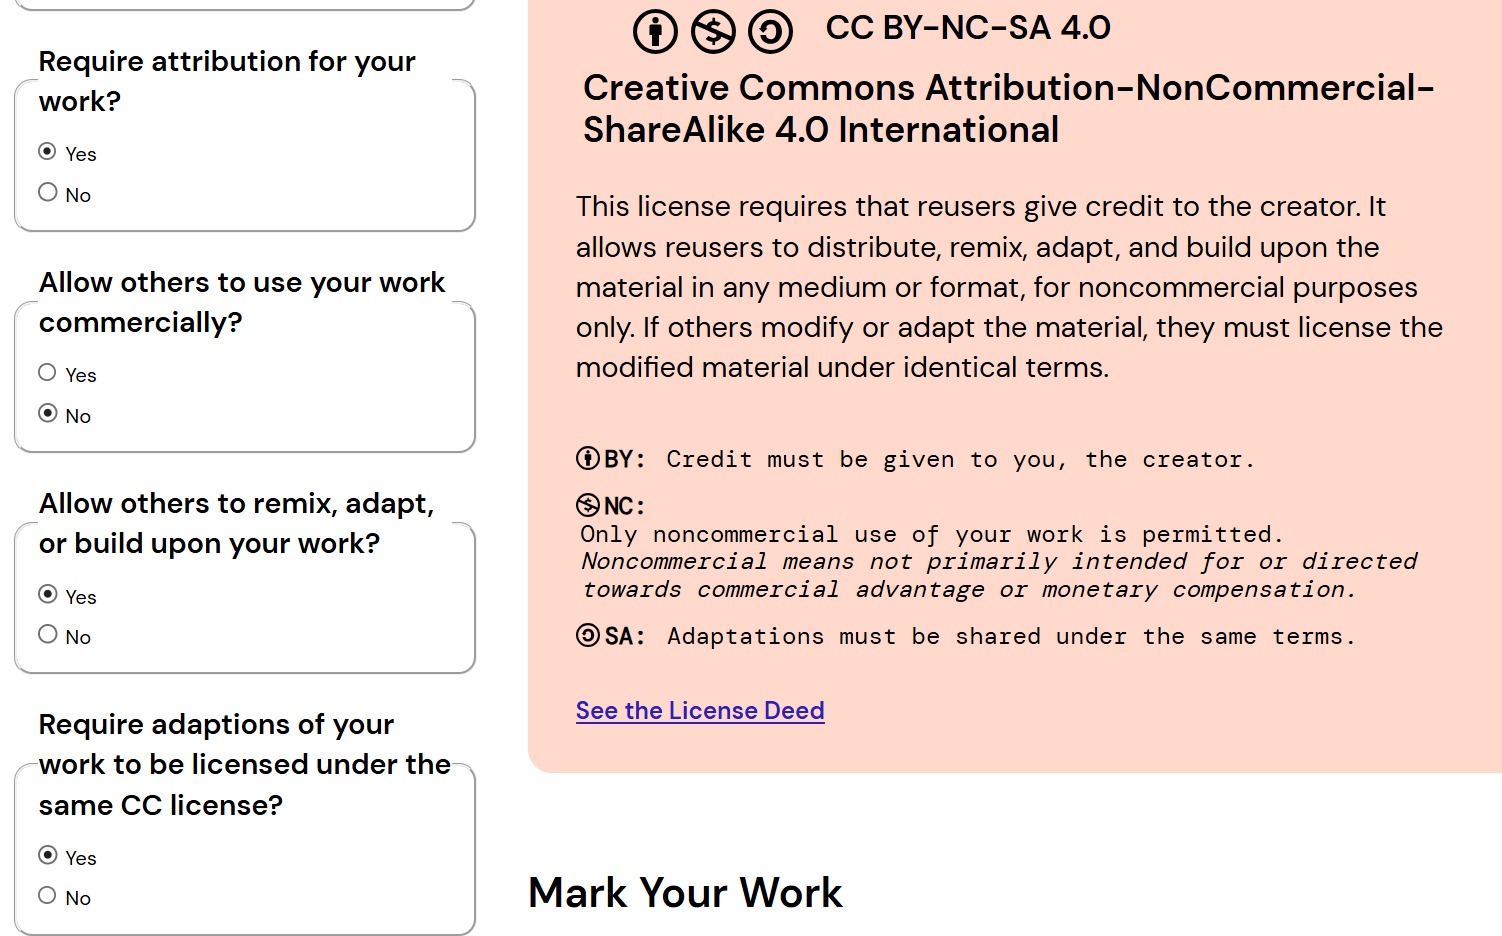
1. Answering the License Features questions: I allowed adaptations of my work but restricted commercial uses.
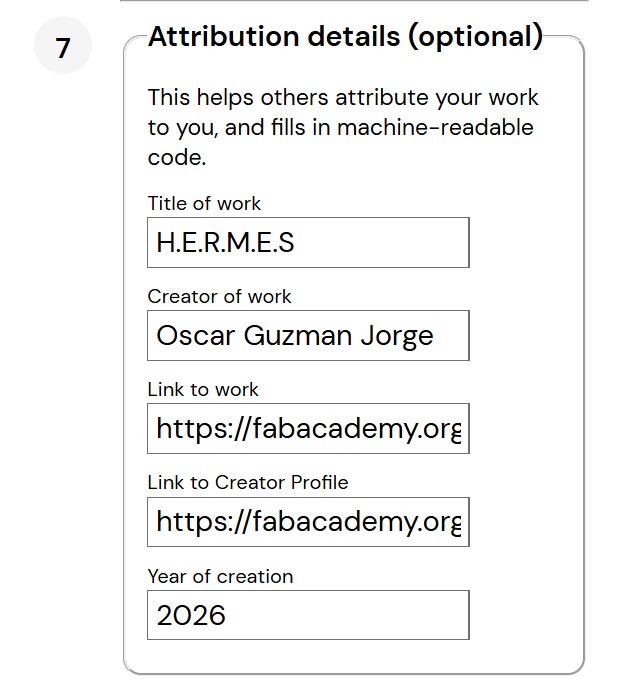
2. Filling in the optional metadata (Title, Author, URL) so the generated code includes proper attribution automatically.

3. Copying the final generated HTML code to paste directly into the footer of my final project website (you can check the license there).