

Week 02
Computer-Aided Design
// MAIN OBJECTIVE \\
In the second week of this course, we learned how to make 2D vectorized sketches, how to use the basic tools of various 3D design softwares, and how to make and export DXF and STL archives. Based on our experience, we made a comparison between two softwares of each category to select our preferred workflow for the final project.
2D Design and Vector Comparison

Inkscape is a professional vector graphics software capable of creating complex designs and exporting them in various formats suitable for laser cutting. It is open-source and widely used in the Fab Academy community.
1. Interface
The interface of this software is so complete, it feels a bit crowded an a little bit confusing at first but is very logical once you learn the options and the tools.
2. Tools

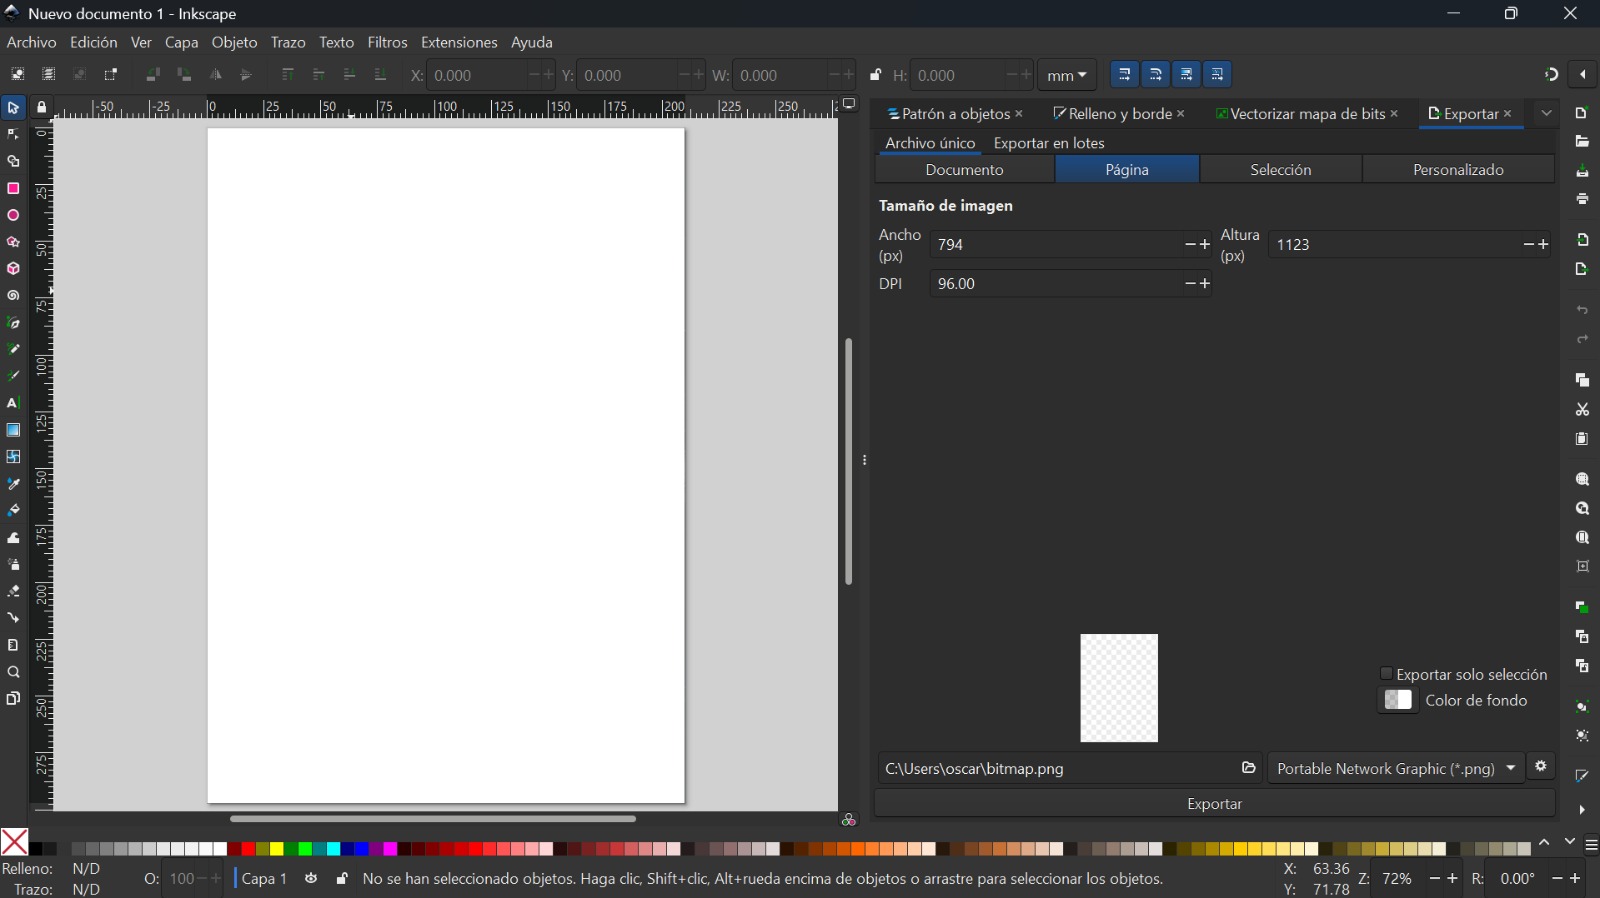
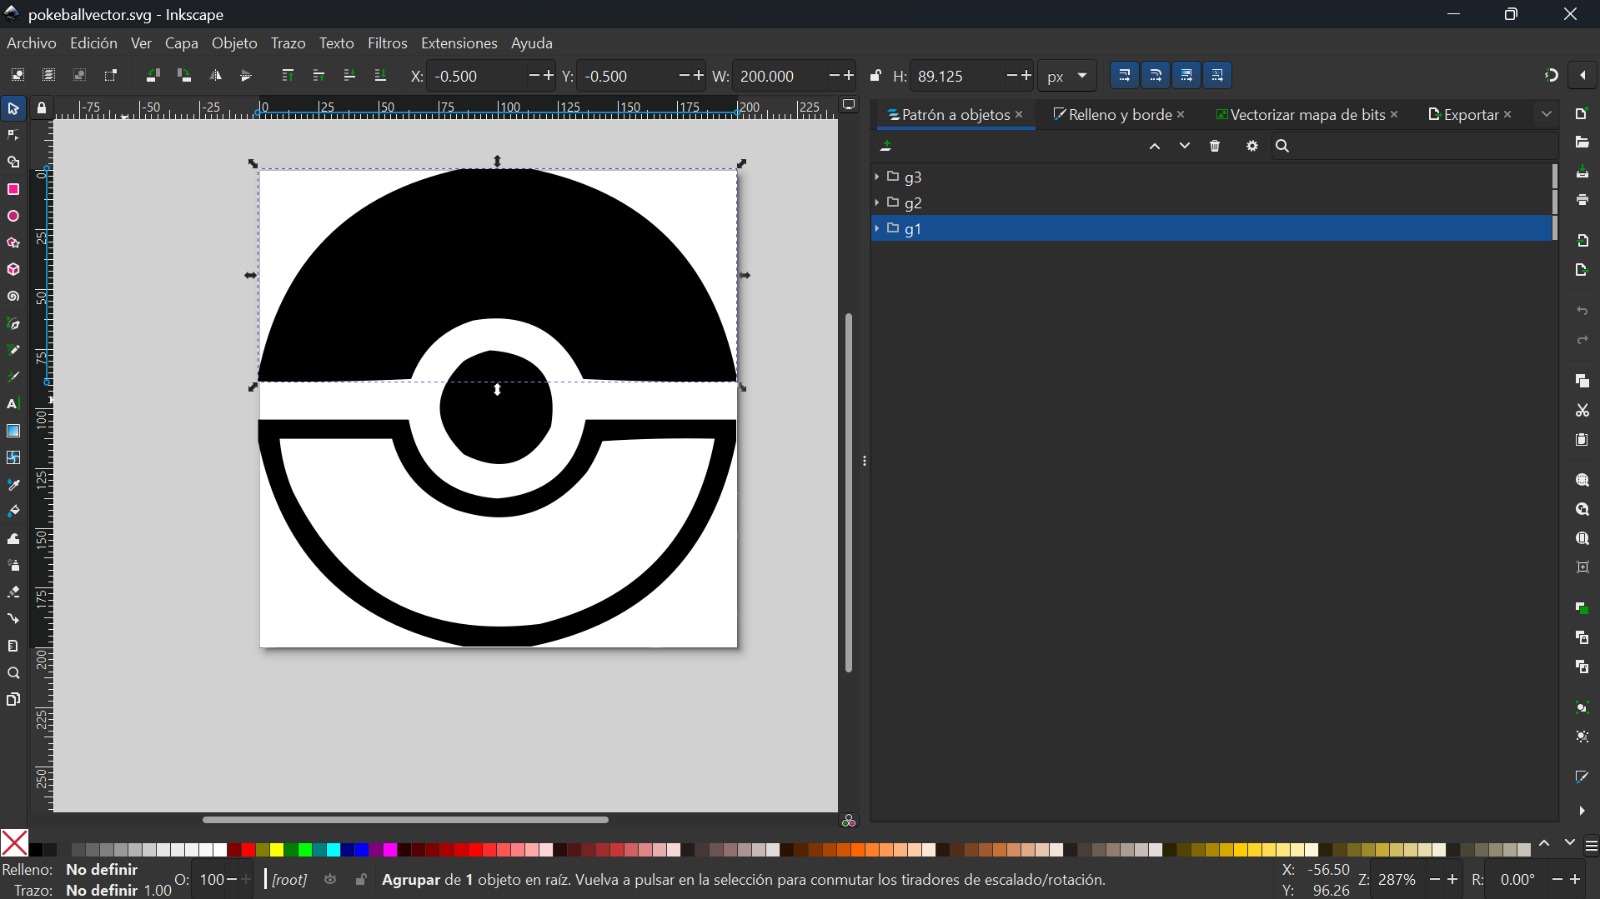
Here are the tools sections of inkscape, this software has a ton of 2D design tools, but this week we are going to vectorize the bitmap using the tool "Trace Bitmap" to prepare a SVG file.
3. Vectorization Process
- Import: First I opened my image (PNG) selecting the open with option on "archive" section.
- Select: I clicked on the image to ensure it was selected.
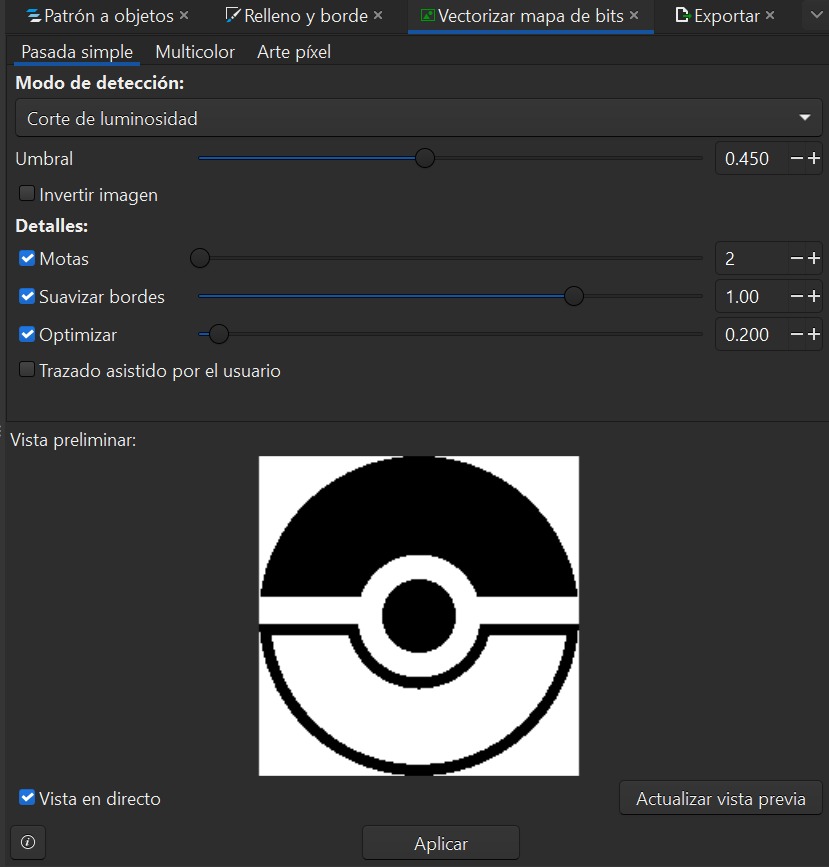
- Tracing: I went to Path > Trace Bitmap.
- Applying: I applied the bitmap tool and this was the result.
- Saving: After applying the bitmap, I saved the archive as SVG type.


4. Final Opinion
Verdict: This software is confortable and easy to understand for 2D editing an vectorizing. It might be my selected tool for this FAB course.

Vectoizer.com is a web-based AI tool designed specifically to convert images (JPG, PNG) into SVG vectors quickly without installing any software.
1. Interface
The interface is extremely simple, you just need to drag and drop the file and since this is a website, no installation is needed
2. Tools

More than tool section, the website has some other useful AI-powered functions that are useful for the 2D developing work.
3. Vectorization Process
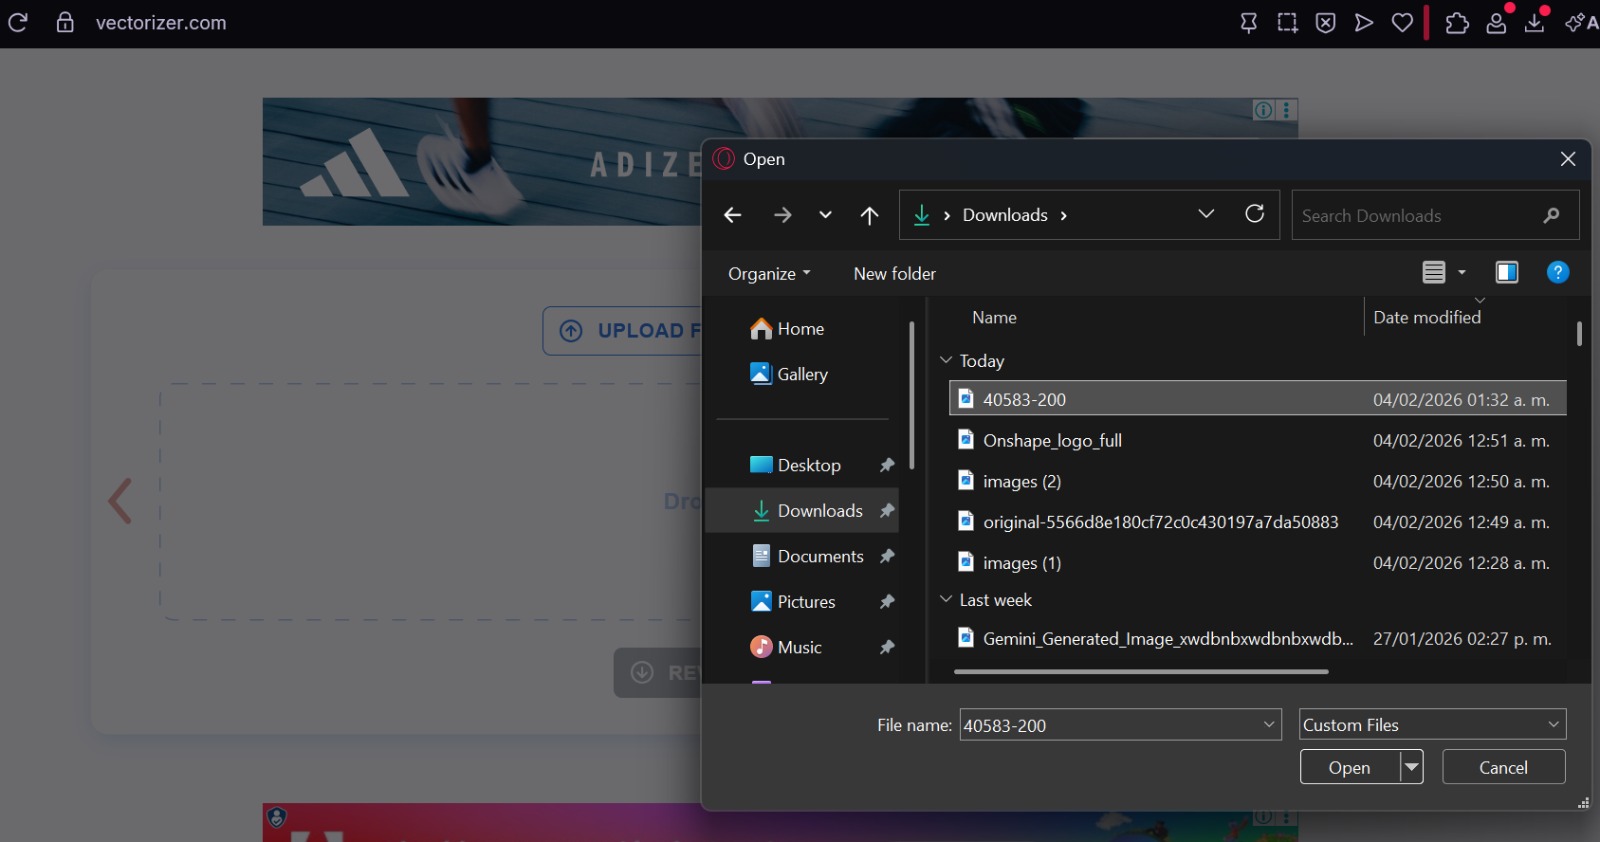
- Upload: I clicked the upload button and selected my file from the computer.
- Processing: The website automatically processed the image.
- Download: Once finished, I clicked the "Download" button to get the SVG file directly.

4. Final Opinion
Verdict: If you don't want a precise job and you need it quickly, this software is the best option to choose.
3D Modeling

Solidworks is the industry standard for mechanical engineering design, it is appealing to the user view, precise, parametric, and extremely capable for complex assemblies and simulations.
1. Interface
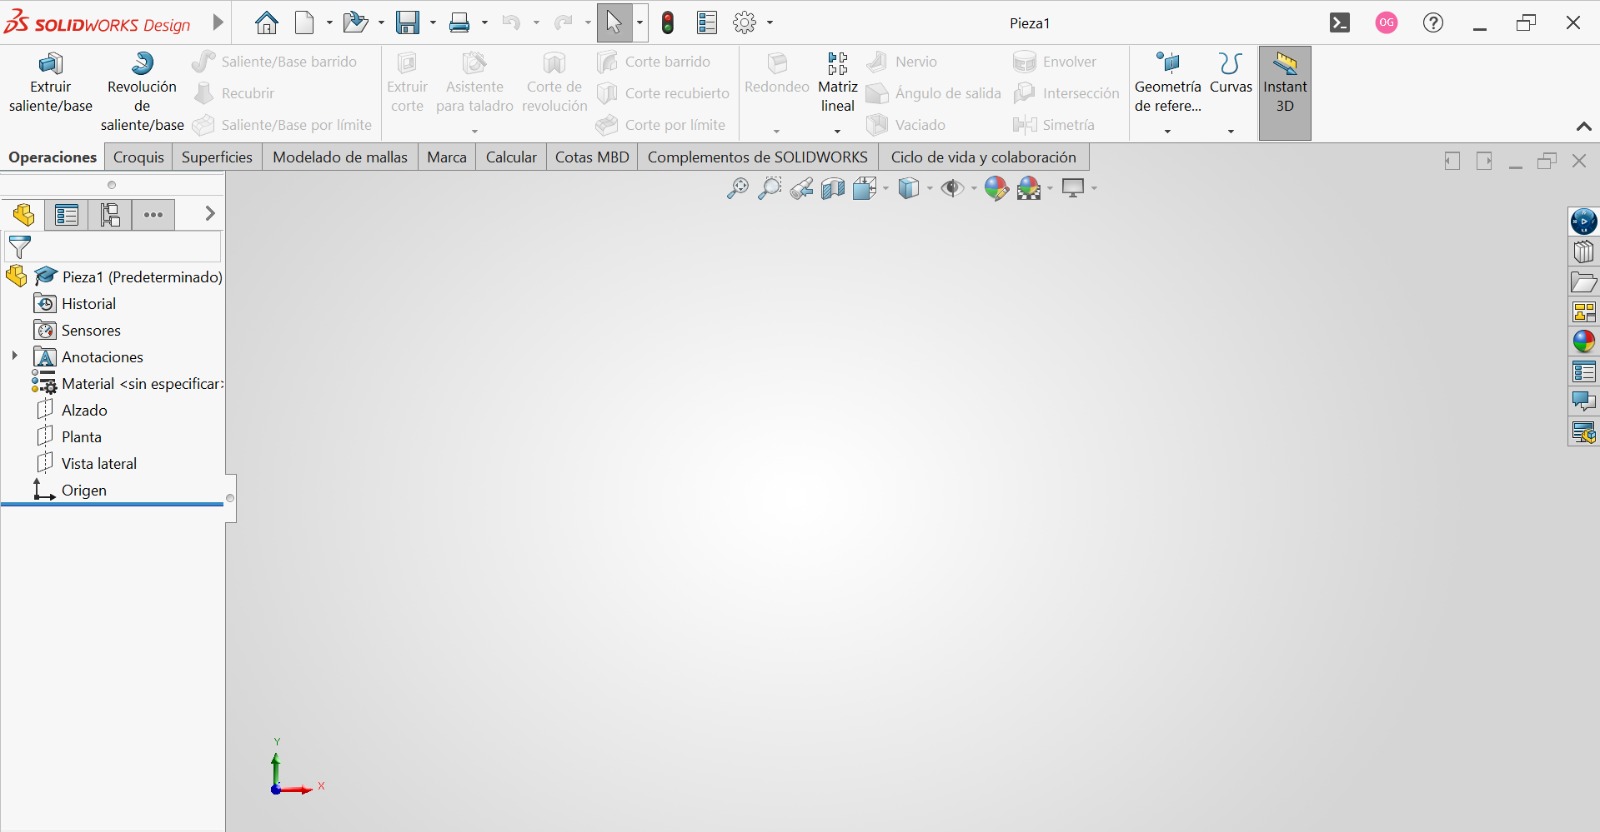
Professional and simple to understand. It uses a symbol based command bars to make any modifications easily.
2. Tools

This are all the sketch tools that we are going to use for all 2D base sketching, it includes simple and complex forms and some plain dimensions tools and constraints.

This are all extrude tools for modifications of a 3D model which is a 2D sketch extruded some distance along the axis, it includes cuts, chanfers, matrix patterns, etc.
3. My process of making

It requires a powerful computer, but this software offers more options for 2D and 3D modeling, such as simulations and rendering.
4. Final Opinion
Verdict: This is my preferred software for 3D designing thanks to its reach, more complete tools and rendering, I think it will be the software that I'll principally use for the course and my final proyect.

Onshape is a cloud-native CAD system that runs entirely in the browser. It allows real-time collaboration similar to Google Docs or Catia V5.
1. Interface
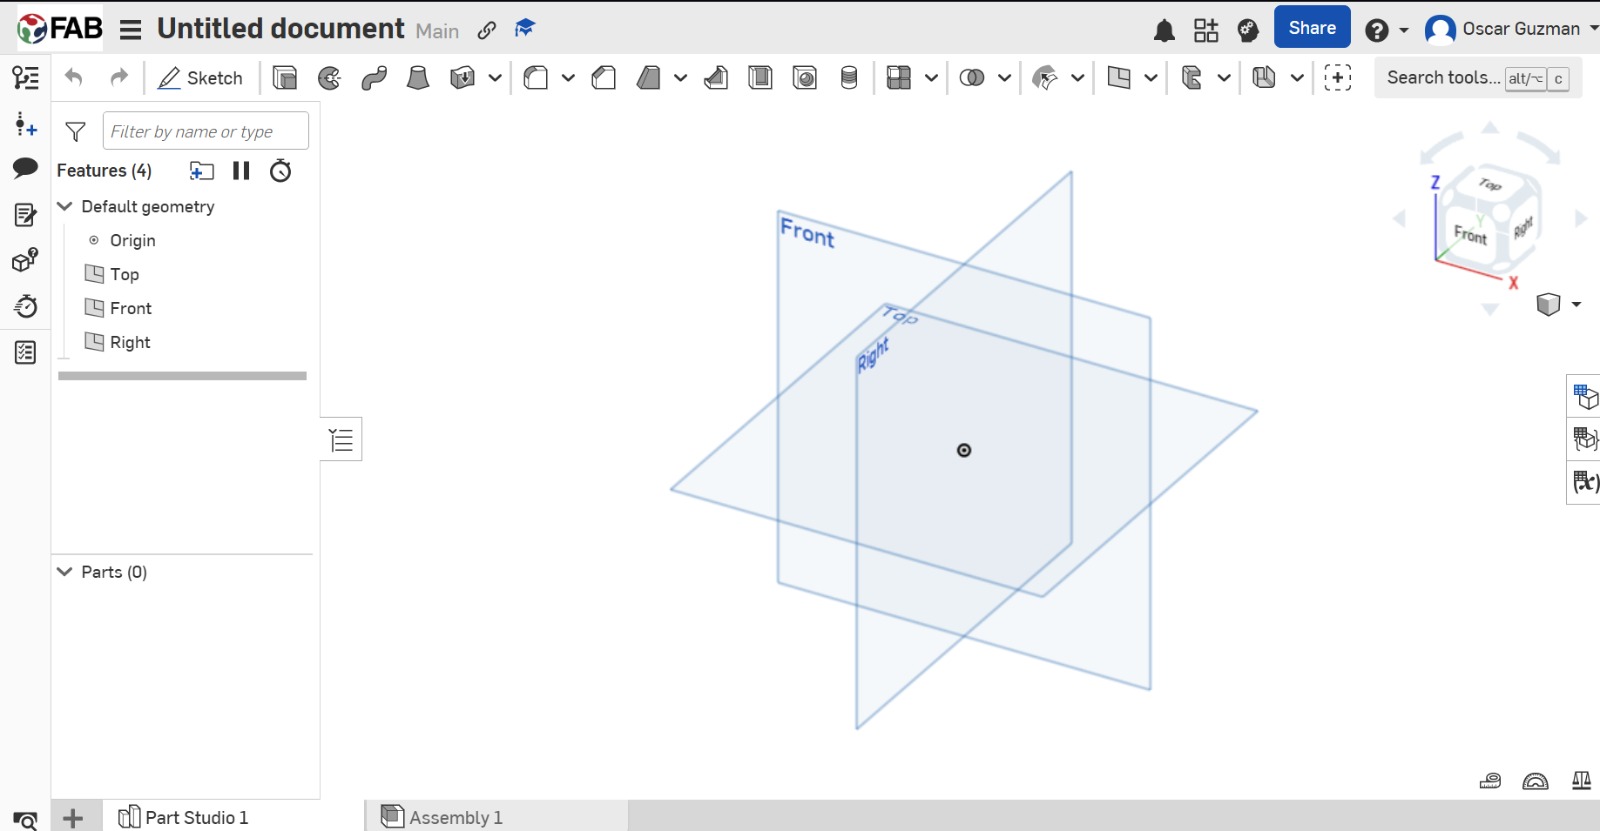
This interface is clean and modern, it's more simple to understand but in a vacuum, it doesn't have as many tools as the other software.
2. Tools

This are the sketching tools, a little bit reduced but it has all we need to do a good work.

This are the 3D tools for extruding and modeling, as the sketch section, it has everything the user needs for doing well.
3. My work

This is a simple part that I made for my final proyect, this excercise made me know a lot about Onshape and his easy way to use it.
4. Final Opinion
Verdict: Incredible for collaborative projects, but I miss some advanced features of Solidworks.
Software Comparison Conclusion
After testing all the softwares, I have decided that both options on 2D and 3D modeling are competent to use, but thanks to the potential, I will choose Inkscape for all my laser cutting, it's more complete and professional. For the 3D modeling of my final project, I will stick with Solidworks as I am more comfortable with its render and design capabilities and assembly management.
Rendering & Optimization
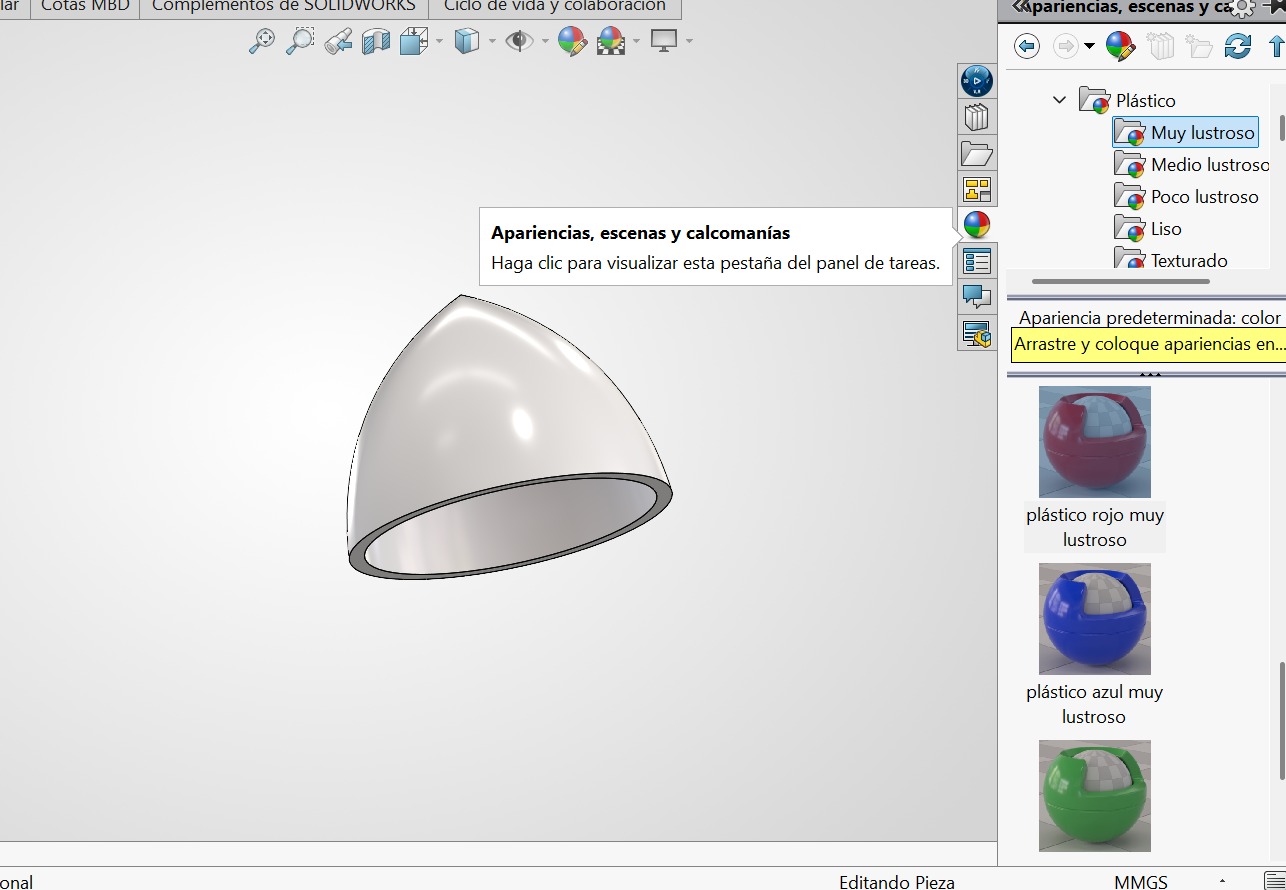
Rendering the Part
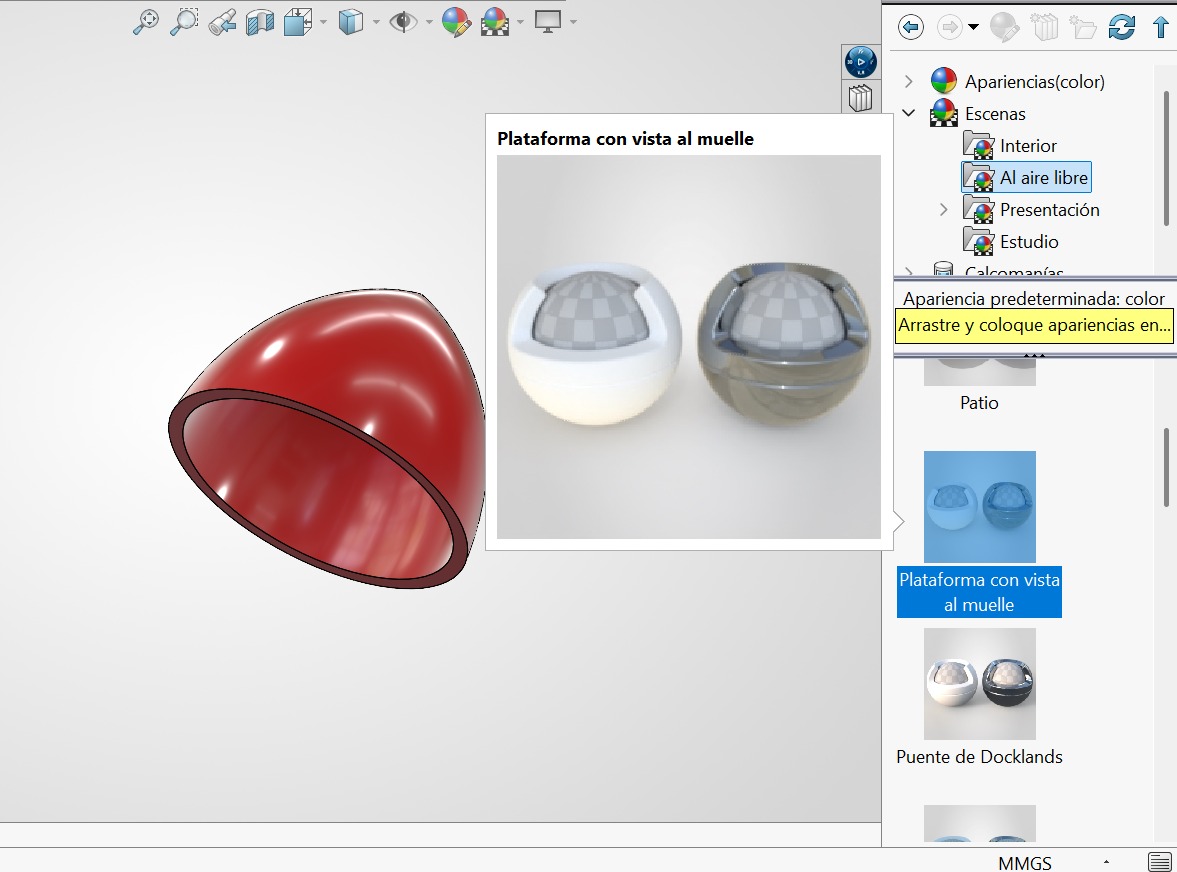
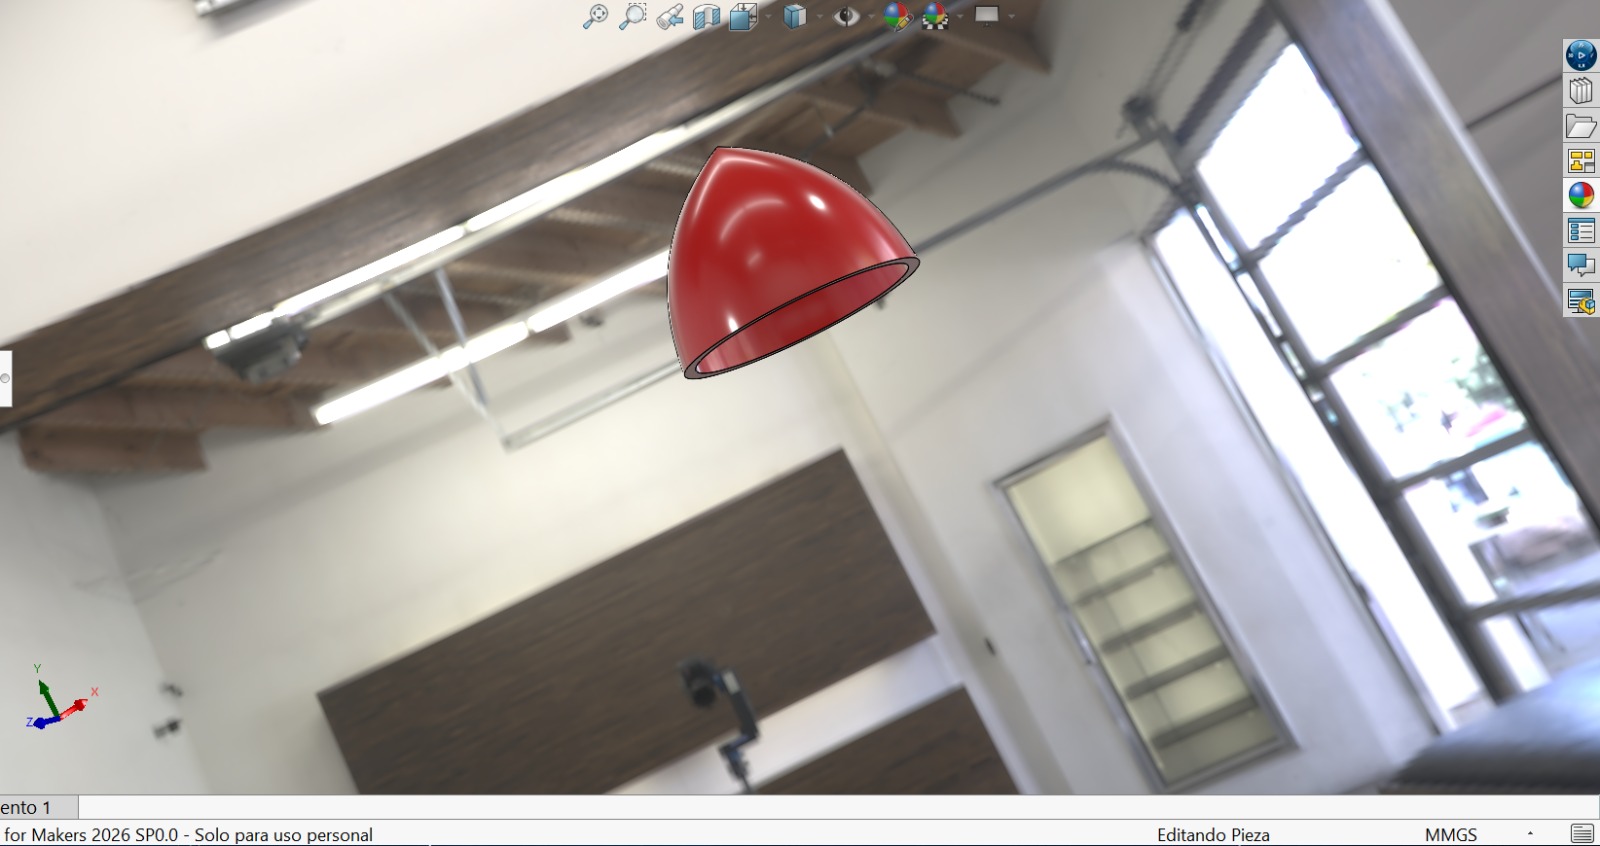
To give a realistic look to the 3D model, I used the rendering tools included in the software to apply materials, lighting, and cameras.
- Material Selection: I applied a glossy plastic material to the body of the part.
- Scene Setup: I set up a studio environment with soft lighting to highlight the edges of the model.
- Final Result: This is the final high-quality render of the part.
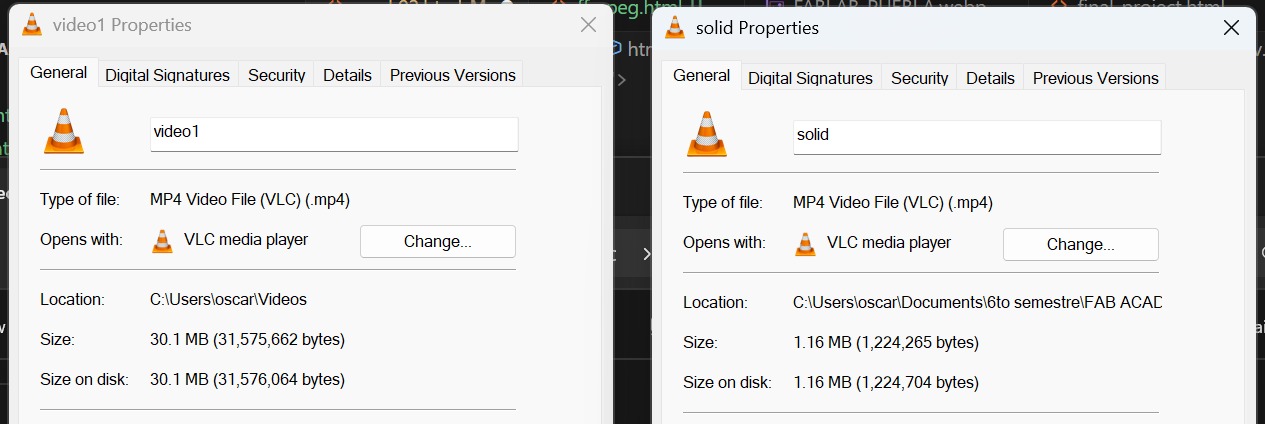
Video Compression with FFMPEG
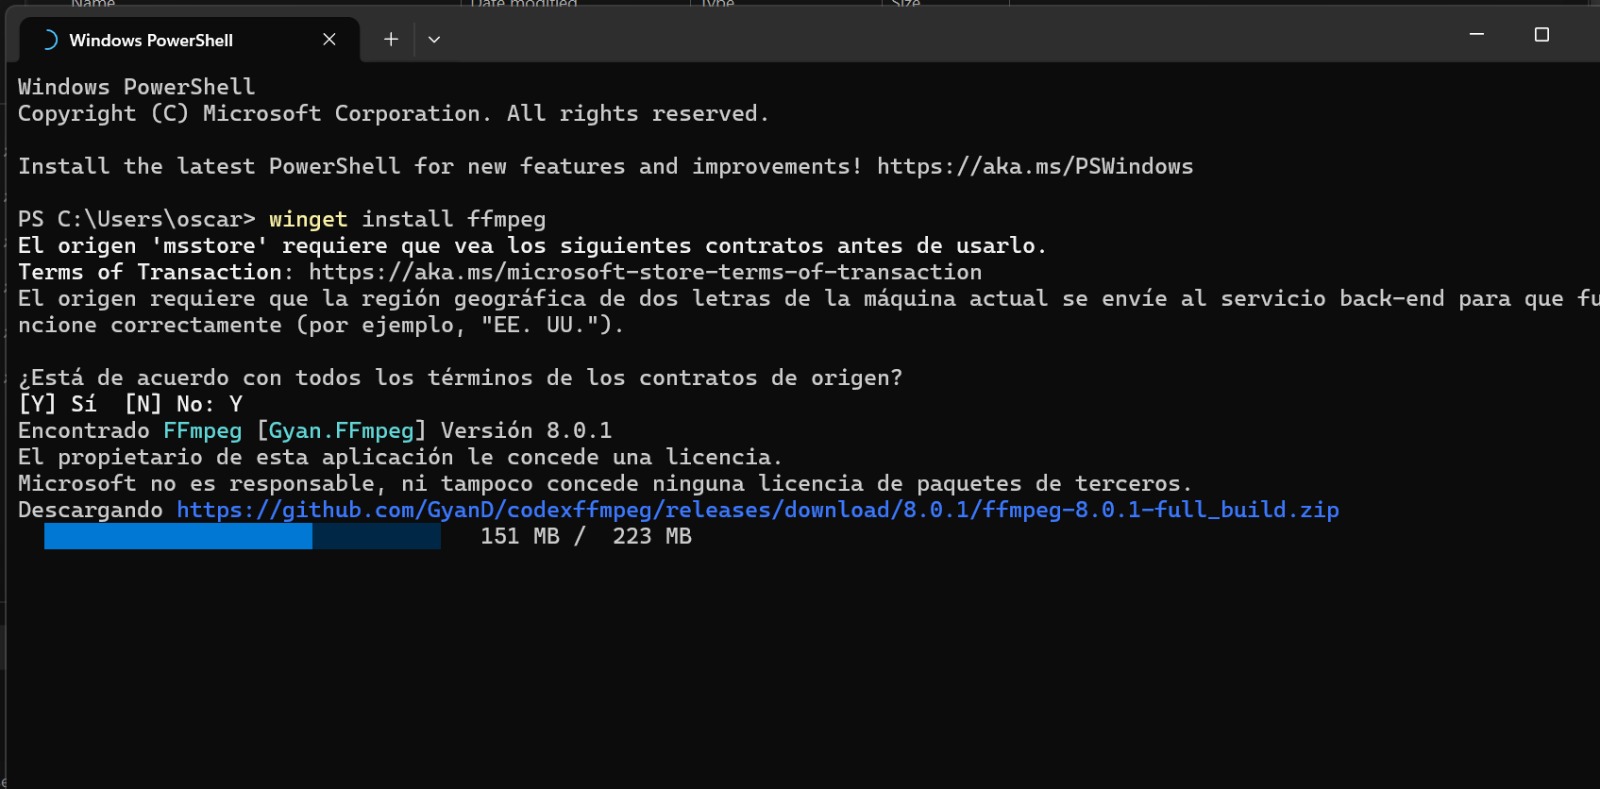
Fab Academy requires small file sizes for documentation (aprox. 10Mb per week). To achieve this without losing much quality, I used FFMPEG via terminal to compress my recording videos.
- Installation & Check: First, I ensured FFMPEG was installed and accessible in my terminal.
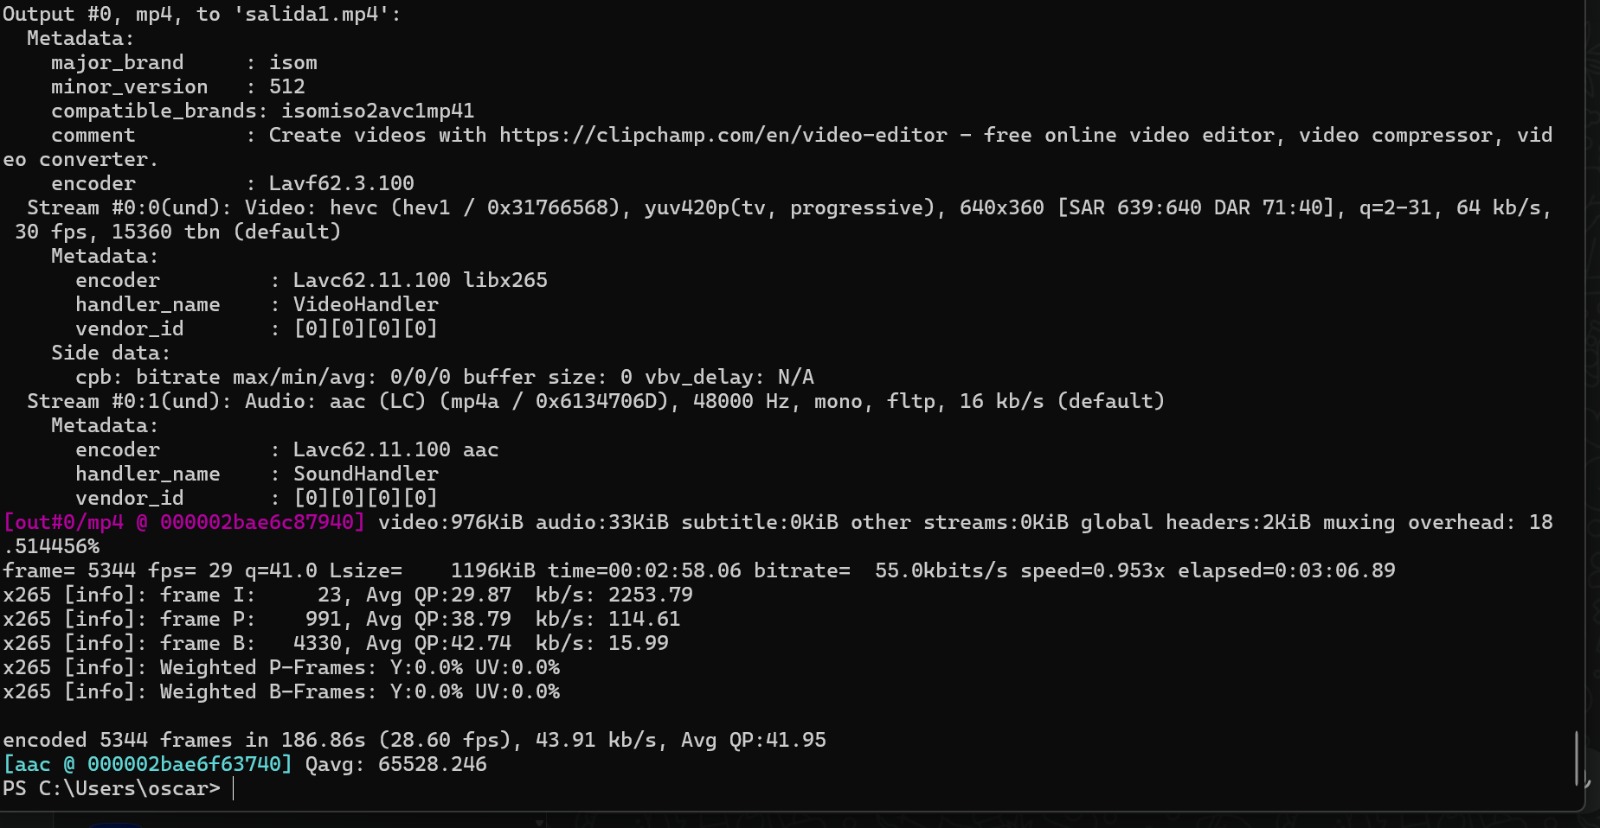
- Commands: First things first, if you want to go to the command list for learning every command that make this tool so much more efficient for every case, you can click HERE →. With this information, I opened my terminal and select the video folder and ran the following command to compress the file:
- Results: The file size was reduced significantly (from 30MB to 1.16MB!) while maintaining almost acceptable visual quality for web. Note: this was my solidworks 3D demonstration video.
ffmpeg -i entrada.mkv -vf "scale=-2:360" -c:v libx265 -crf 35 -preset veryslow -b:v 64k -c:a aac -b:a 16k -ac 1 salida.mp4
Week 2 Conclusion
This week was very productive for everything that I will be using on this course. I learned to create vector images, explored parametric modeling, and most importantly, learned how to document my process efficiently. Using rendering tools gave life to my designs, and FFMPEG proved to be a powerful tool for managing video formats, a critical constraint in Fab Academy. I now have a defined workflow for both 2D (Inkscape) and 3D (Solidworks) tasks, and I am ready to start designing my final project.
Files
Here you can download the original files I used for this week's assignments: