Week 01: Project Management
This week, I focused on setting up my Fab Academy website, which will help me record my progress through each weekly assignment. This entry explains the tools our instructors introduced and the steps I took to set up my site. Additionally, I drafted initial ideas for my final project.
Work log
Completed tasks
- Created and configured a repository.
- Built and deployed a website using HTML, CSS, and GitLab.
- Documented progress with images and notes.
Evidence
In the lead-up to the Fab Academy program, our instructors directed us to download and install Visual Studio Code and Git Bash—Fab Academy's preferred tools for editing webpages and managing project repositories on personal computers, respectively. The first step in setting up our websites was creating a Fab Academy account via the link provided by the Fab Academy Coordination. We then signed into GitLab using our new credentials, where we found our repositories already prepared by the Coordination team.
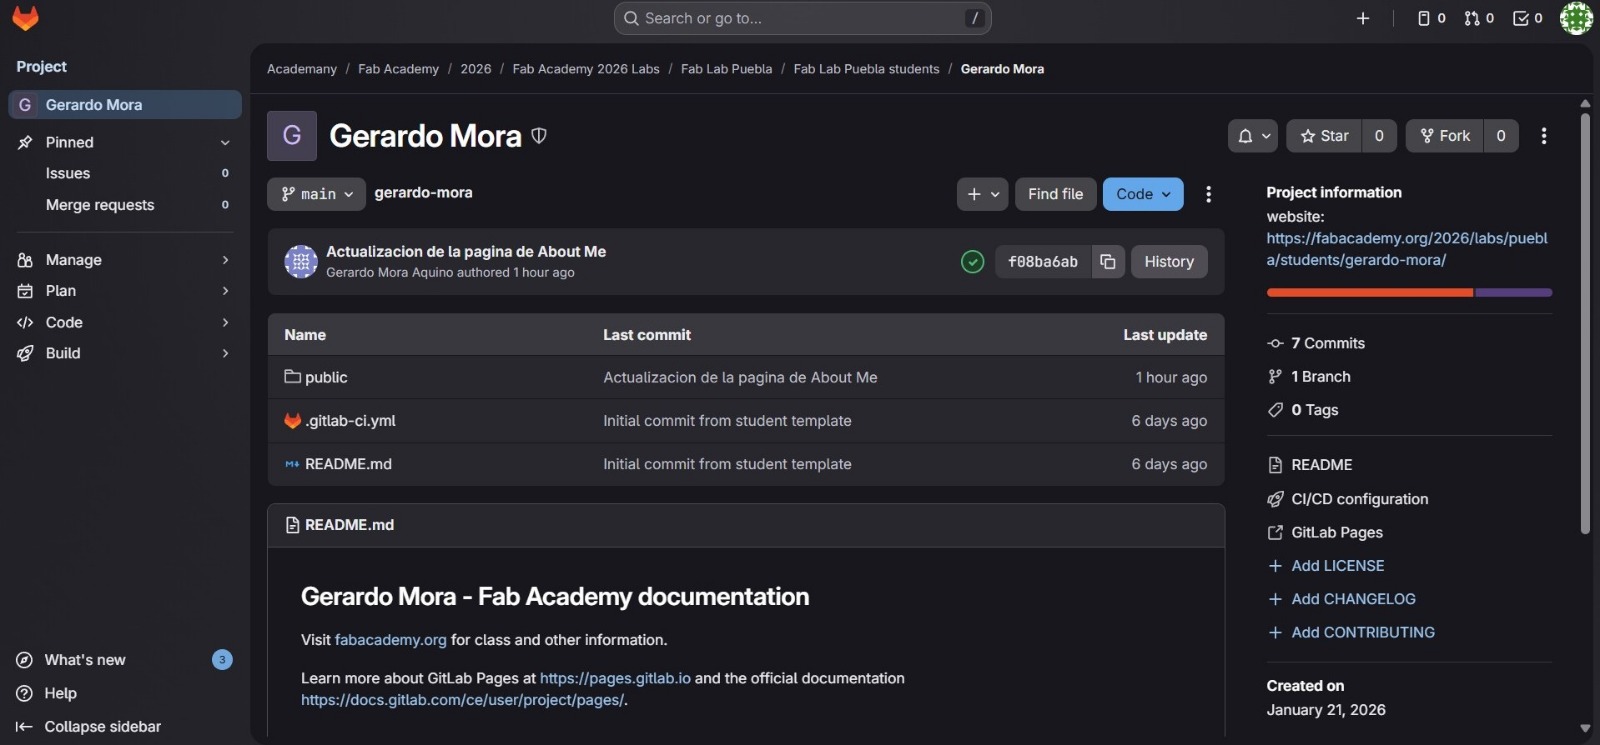
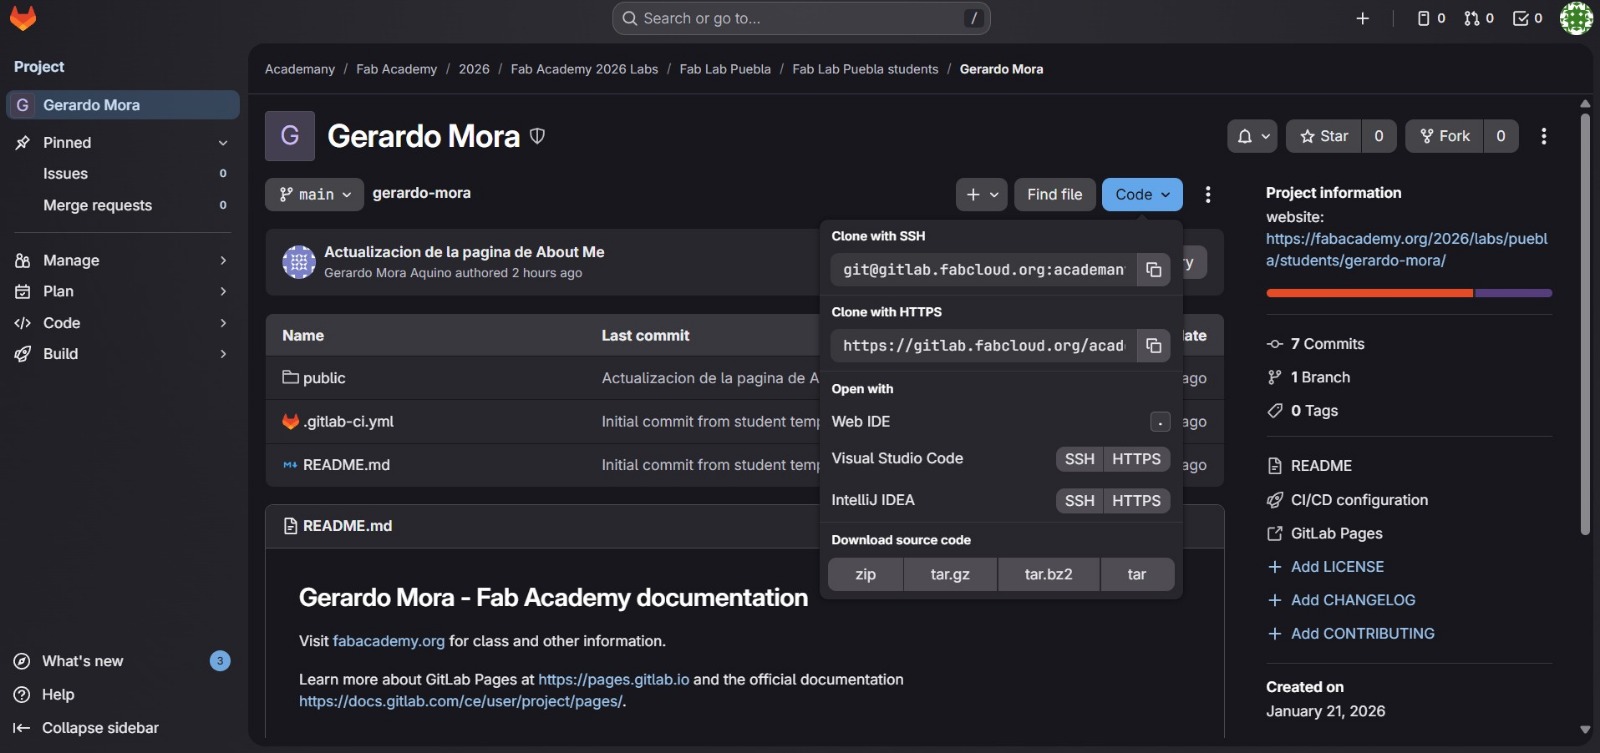
The repository homepage contained all the necessary files to kickstart our websites, including HTML and CSS files. However, our instructors advised us not to tinker with the .gitlab-ci.yml file, as doing so could disrupt the deployment process. To start building our personal websites, we then had to clone the repository to our personal computers using Git Bash. This involved copying the repository URL from GitLab using the "Clone with HTTP" option under the "Clone" button.
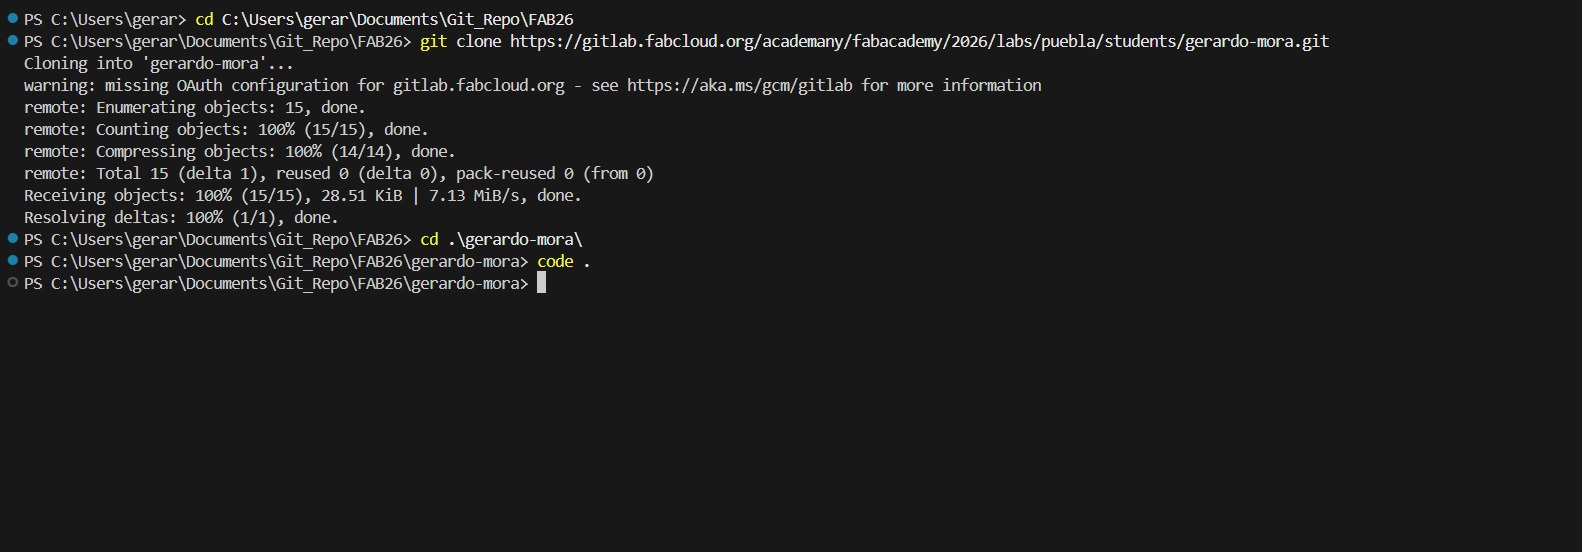
Instead of using the Git Bash terminal to navigate to the directory where I wanted to clone the repository, I used the integrated terminal in Visual Studio Code, which also supports Git commands. Before proceeding with the cloning process, our instructors explained some essential Git commands to us. The following table lists those commands, along with additional ones I learned from the official Git documentation.
| Command | Description |
|---|---|
| git clone <URL or SSH> | Downloads a full copy of an online repository to a personal computer. |
| cd folder_name | Changes directory into that folder. |
| git add . | Stages every change in the current directory for the next commit. |
| git add folder/ | Stages every change inside the specified folder for the next commit. |
| git commit -m "MESSAGE" | Commits the staged changes with a message. |
| git push | Uploads the committed changes to the online repository. |
| git status | Shows the status of changes in the working directory and staging area, showing which files are changed, staged, or untracked. |
| git pull | Downloads and merges changes from the online repository to the local one. |
| git reset --hard HEAD~ | Resets the current branch to the specified commit, discarding all changes. |
| git reset --soft HEAD~~ | Resets the current branch to the specified commit, keeping all changes staged. |
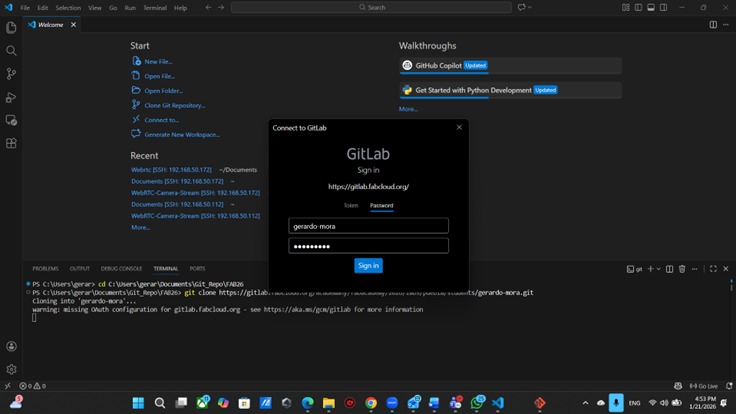
Before the cloning process can start, it is necessary to authenticate our Fab Academy GitLab account. This is done by entering our Fab Academy username and password when prompted in the terminal.
After successfully cloning the repository, we can now open the project folder in Visual Studio Code to start editing the website files.
The main files we will be working with are index.html and style.css. HTML stands for HyperText Markup Language and is used to create the structure of web pages, while CSS stands for Cascading Style Sheets and is used to style and layout web pages. HTML is not a programming language but a markup language that uses tags to define elements on a web page. CSS, on the other hand, is a stylesheet language that describes the presentation of a document written in HTML. Below are some of the most commonly used HTML tags and attributes that I learned while working on my website.
| HTML tag | Purpose |
|---|---|
| <!DOCTYPE html> | Declares the document as an HTML5 file. |
| <html lang="en-us"> | Root element of the page; sets the language to English (United States). |
| <head> | Holds metadata about the document, such as title and links to stylesheets. |
| <meta charset="utf-8"> | Specifies the character encoding for the HTML document, preventing character issues. |
| <meta name="viewport" content="width=device-width, initial-scale=1.0"> | Ensures the page is responsive and scales correctly on different devices. |
| <title> | Defines the title of the document, which appears in the browser tab and search results. |
| <link> | Links to external resources such as stylesheets or icons. |
| <body> | Contains the visible content of the HTML document. |
| <div> | Defines a division or section in an HTML document, often used for styling or grouping elements. |
| <nav> | Defines a navigation section in an HTML document, typically used for site navigation. |
| <a> | Creates a hyperlink to another page or resource. |
| <main> | Defines the main content of the HTML document. |
| <header> | Defines the header section of the HTML document, typically containing introductory content or navigation links. |
| <section> | Defines a section in an HTML document, often used for grouping related content. |
| <h1> | Defines the main heading of the HTML document. |
| <h2> | Defines a section heading in the HTML document. |
| <h3> | Defines a subsection heading in the HTML document. |
| <p> | Defines a paragraph of text in the HTML document. |
| <img> | Inserts an image into the HTML document. |
| <figure> | Defines a figure in an HTML document, often used for images and captions. |
| <figcaption> | Provides a caption for a figure element. |
| <ul> | Defines an unordered list in an HTML document. |
| <ol> | Defines an ordered list in an HTML document. |
| <li> | Defines a list item in an unordered or ordered list. |
| <br> | Inserts a line break in an HTML document. |
| <footer> | Defines the footer section of the HTML document, typically containing copyright information or links. |
| <!-- ... --> | Defines an HTML comment. |
| HTML Attributes | Purpose |
|---|---|
class |
Assigns a class name to an element, allowing it to be styled with CSS or targeted with JavaScript. |
href |
Specifies the URL of the link. |
src |
Specifies the source of an image or other media. |
alt |
Provides alternative text for an image, improving accessibility and SEO. |
rel |
Specifies the relationship between the current document and the linked document, such as "stylesheet" or "icon". |
target |
Specifies where to open the linked document (e.g., "_blank" for a new tab). |
download |
Specifies the filename to use when downloading a file. |
lang |
Specifies the language of the content in the HTML document. |
charset |
Specifies the character encoding for the HTML document, preventing character issues. |
name |
Assigns a name to an element, often used for form elements or anchors. |
content |
Specifies the content of a meta tag, such as the description or keywords for SEO. |
Similarly, CSS is used to style the HTML elements on our webpages. Below are some of the most commonly used CSS concepts and properties that I learned while working on my website.
| CSS concept/property | Purpose |
|---|---|
:root |
Defines a CSS custom property for the entire document. |
--variable + var(--variable) |
Defines a CSS custom property and uses it within a CSS rule. |
* |
Selects all elements in the document. |
alt |
Provides alternative text for an image, improving accessibility and SEO. |
box-sizing: border-box |
Includes padding and border in the element's total width and height. |
display: flex |
Creates a flexible container for aligning and distributing space among items. |
align-items |
Specifies the alignment of flex items along the cross axis. |
justify-content |
Specifies the alignment of flex items along the main axis. |
gap |
Specifies the spacing between flex items. |
display: grid |
Creates a grid container for aligning and distributing space among items. |
grid-template-columns |
Defines the columns of a grid container. |
width: min(...) |
Specifies the minimum width of an element, using the smallest value from a list of values. |
max-width |
Specifies the maximum width of an element. |
margin: 0 auto |
Centers an element horizontally within its container. |
padding |
Specifies the space between an element's content and its border. |
position: sticky + top: 0 |
Makes an element stick to the top of its container when scrolling. |
z-index |
Controls the stacking order of elements on a page. |
font-family |
Specifies the font family for an element. |
font-size |
Specifies the size of the font for an element. |
font-weight |
Specifies the weight (boldness) of the font for an element. |
letter-spacing |
Specifies the spacing between characters in a text element. |
line-height |
Specifies the height of a line of text. |
text-transform |
Specifies the transformation of text (uppercase, lowercase, capitalize). |
background |
Specifies the background color or image for an element. |
color |
Specifies the color of the text for an element. |
border |
Specifies the border style, width, and color for an element. |
border-radius |
Specifies the radius of the border corners for an element. |
box-shadow |
Specifies the shadow effect for an element. |
object-fit |
Specifies how an image or video should be resized to fit its container. |
display: block |
Displays an element as a block-level element. |
:hover |
Applies styles when a user hovers over an element. |
@media (max-width: ...) |
Applies styles when the viewport width is less than or equal to a specified value. |
display: none |
Removes an element from the layout and hides it. |
backdrop-filter: blur |
Applies a blur effect to the backdrop of an element. |
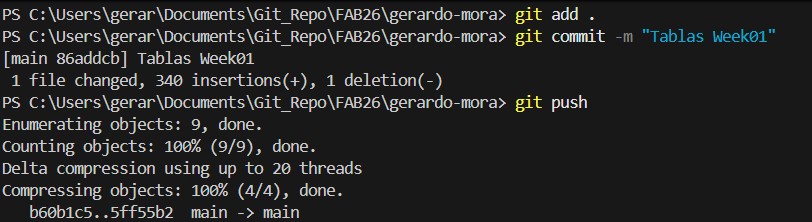
For each change to the HTML structure, we must also update the corresponding CSS rules to ensure proper styling and layout. To update the files in the repository, we have to go through this sequence: git add ., git commit -m "Update files", and git push.
Reflection
This was my first time working with GitLab and Git commands to manage a repository. However, I did not find any of these tools hard to grasp, since each task felt straightforward. I think the biggest takeaway from this week is understanding the importance of version control and documentation in iterative projects like those in Fab Academy.