15. System Integration
This week I dedicated myself to the organization and planning of the integration of my final project: a hamster-shaped alarm clock that "runs away" to force the user to get up. To achieve this goal in a structured way, I divided the project into different phases: Outputs, Inputs, 3D Printing, Laser Cutting, Integrated Programming, and Interface.
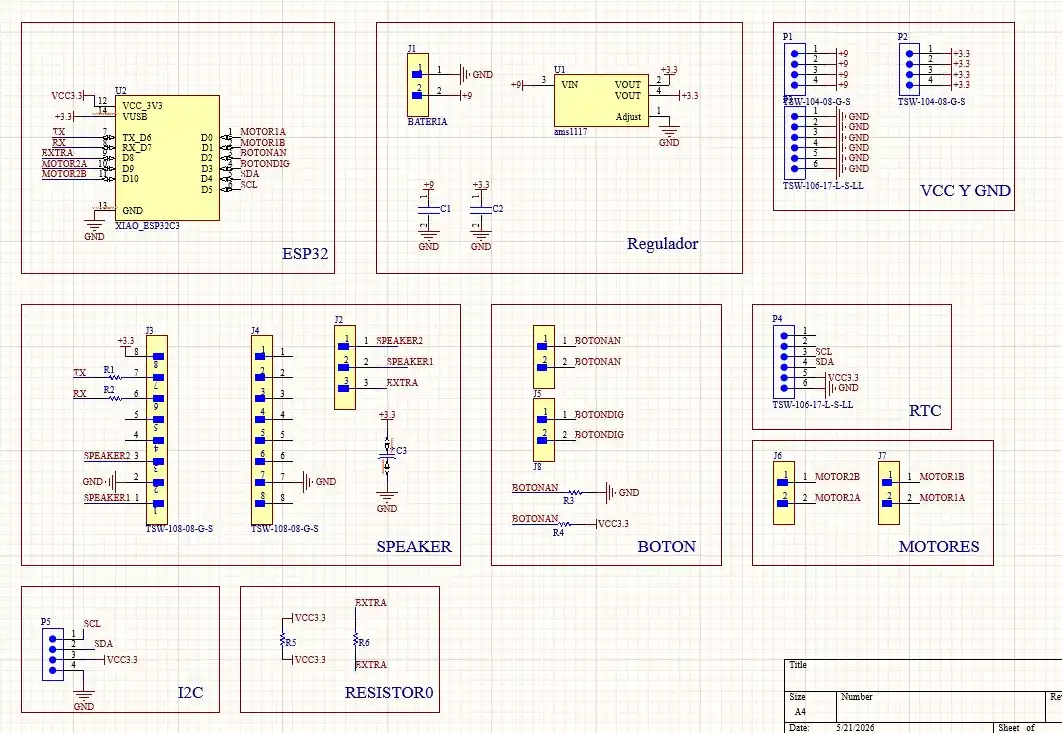
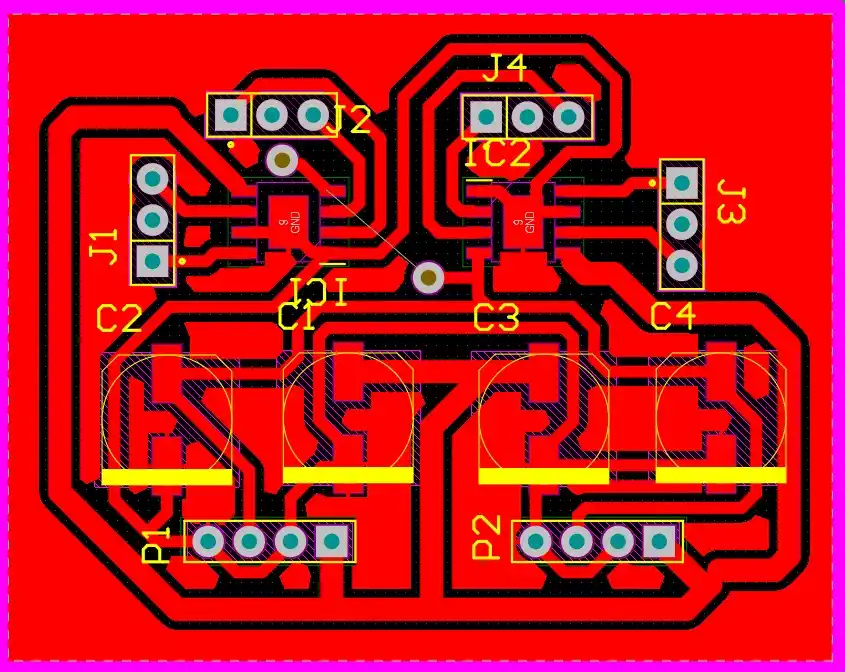
Electronic Design (Inputs and Outputs)
For the electronic section, I designed three printed circuit boards (PCBs) in Altium, logically separating the control of the system:
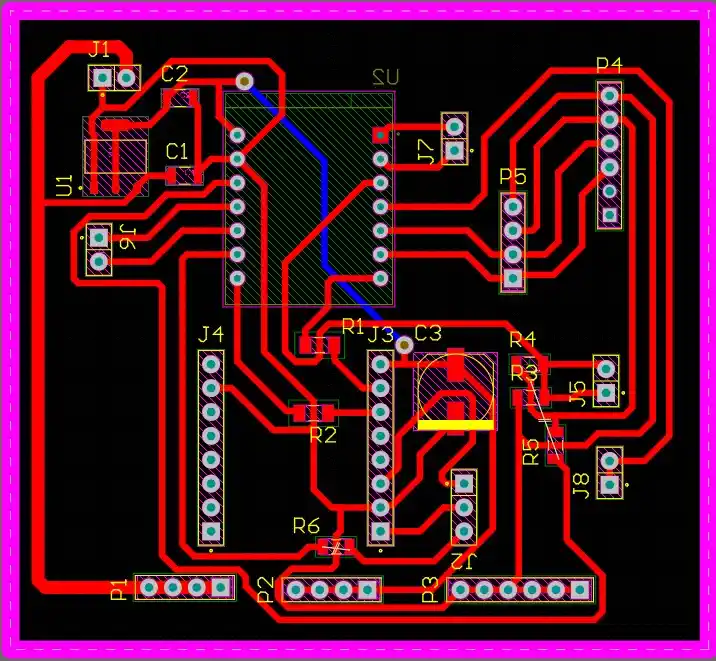
Main board: Here is the XIAO ESP32-C6 microcontroller. I chose this board because it has Wi-Fi connectivity, which is necessary to receive alarm instructions via MQTT. In addition, this board has the output pins for the motor signals, the I2C communication pins, and the connections for a capacitive button that, when touched, turns off the alarm.
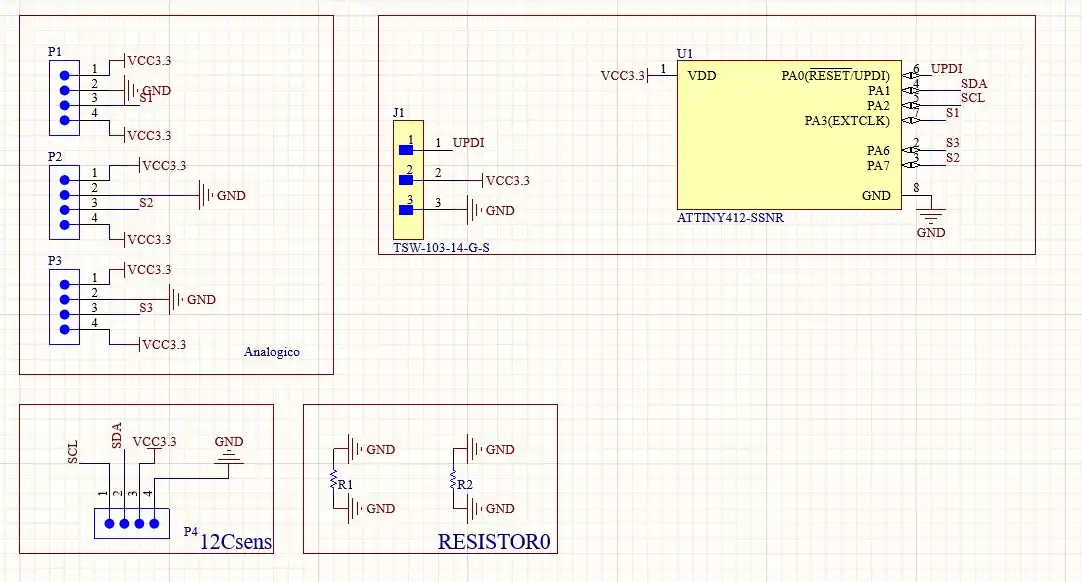
Sensor board: Its function is to read three analog distance sensors that will allow the hamster to dodge obstacles while running away. I decided to use an ATtiny microcontroller due to the limited amount of analog pins available on my XIAO. The ATtiny processes the readings from the three sensors and then sends the data to the main board via I2C.

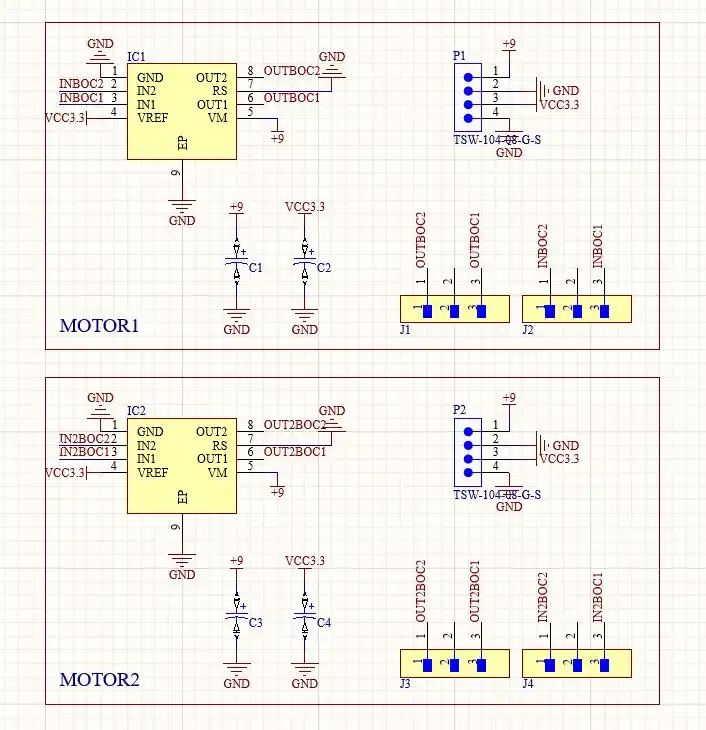
Motor board: It is in charge of supplying power to the motors. For this, I used the TB67H451FNG H-bridge driver; it was important to consider the maximum current demanded by the motors when starting. Using the KiCad trace width calculator, I determined that I needed 1.2 mm traces.
Product Design
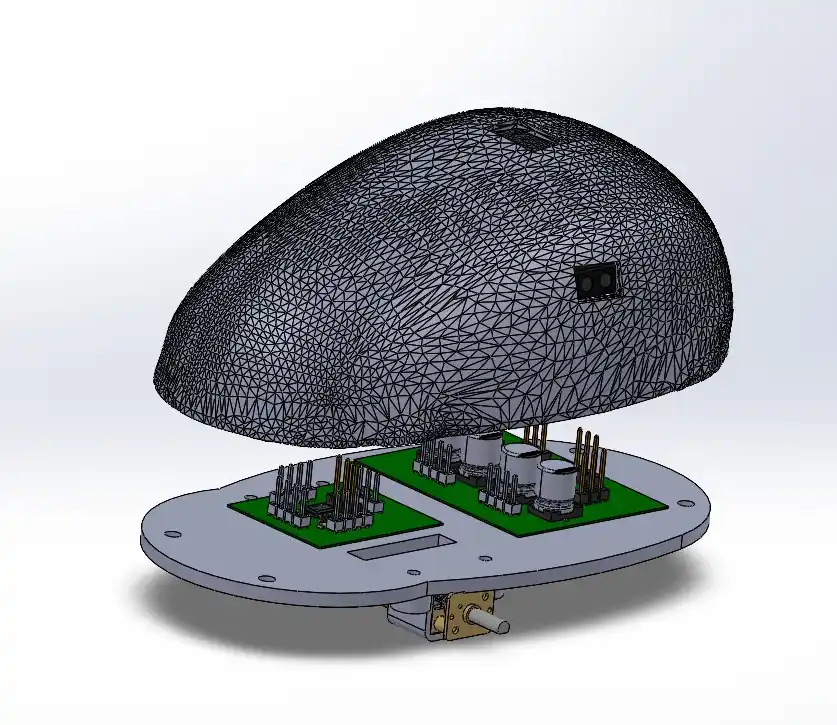
For the design of the hamster, it was important to first visualize the physical dimensions of all the stacked electronic components.
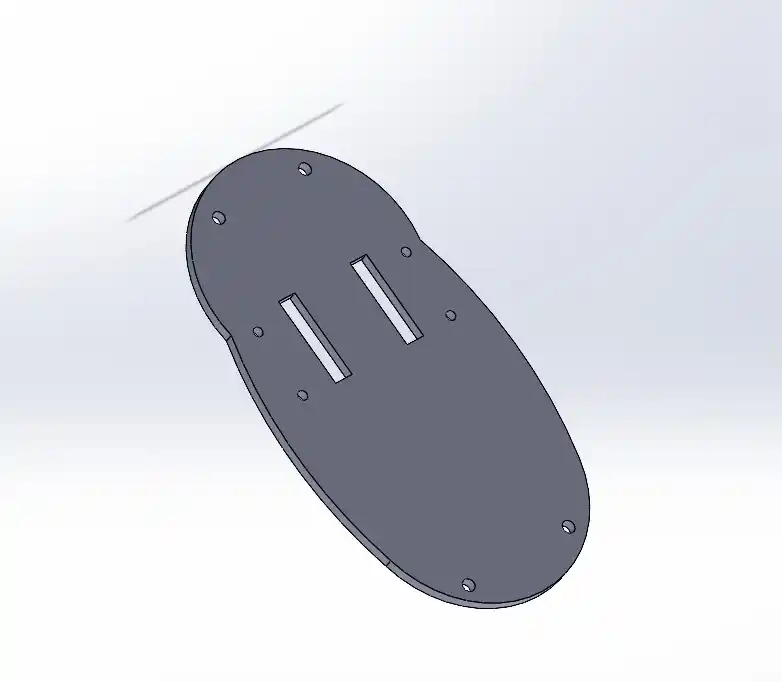
The first thing I designed in SolidWorks was the flat bottom base. This piece will be cut in acrylic with the laser cutter and will serve to mount the motors and the boards. Having this base defined allowed me to visually determine the exact size that the top shell should have.
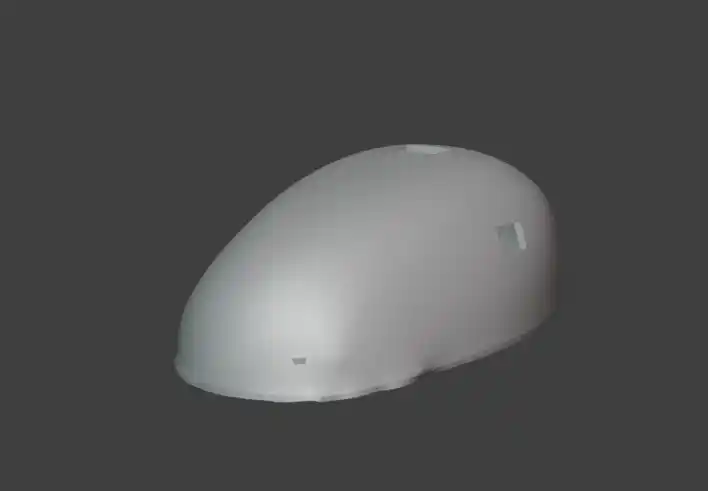
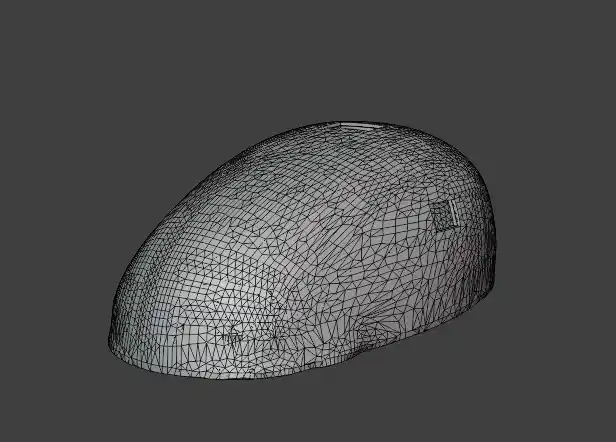
Next, I made the design of the shell. I started with a sketch in SolidWorks to define the interior volumes and then exported the model to Blender. In Blender, I rounded and smoothed the design to give it an aesthetic hamster appearance, made it hollow, and generated the holes to place the three distance sensors. I also added the posts to be able to screw the PLA filament printed shell to the acrylic base.
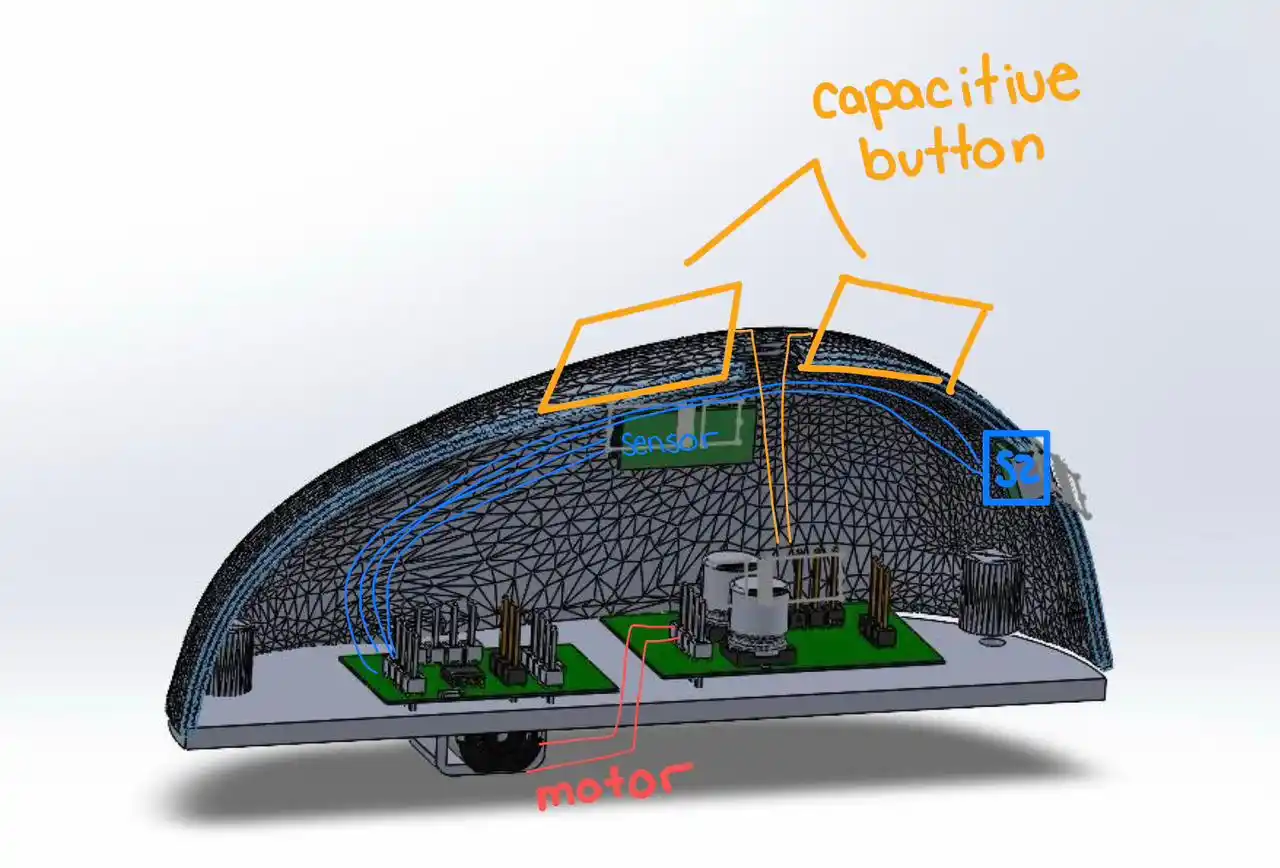
Finally, I transferred all the components—the exported boards from Altium, sensors, motors, base, and shell—to an assembly in SolidWorks. This helped me since I managed to get a very clear idea of how I should arrange the cables in the interior space.
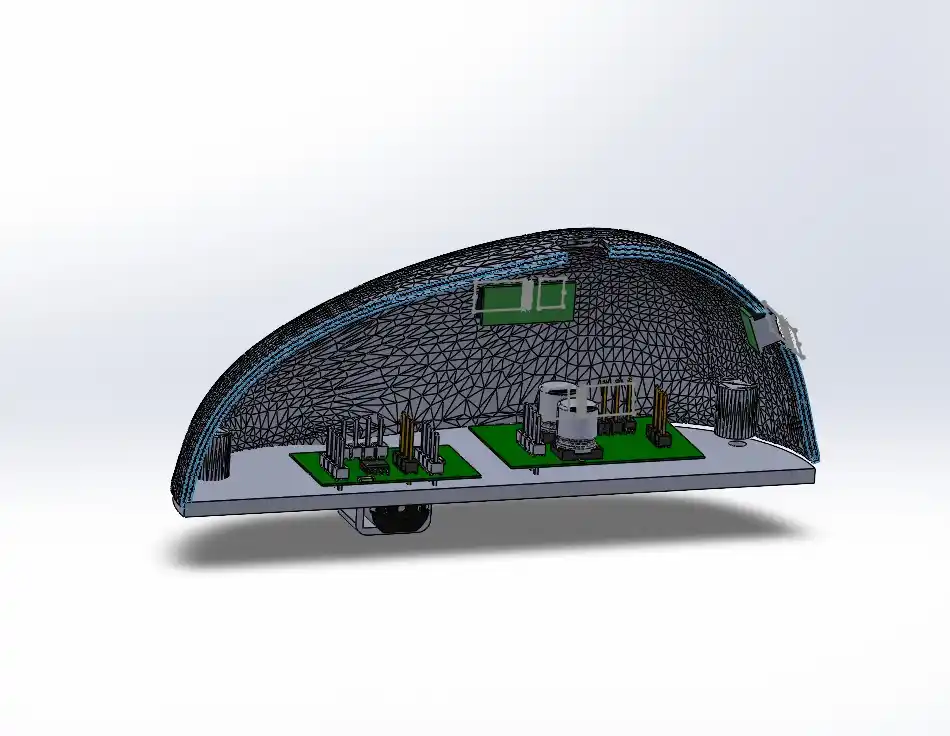
This is how I plan to arrange the cables for my components.
Furthermore, for a nicer finish, the plan is to cover the case with a brown fabric similar to the one shown and add details with colored felt. To do this, the fabric will need to be cut to a size similar to the case so that it can be covered without any excess fabric.


Integrated Programming and Interface
To program the system, I decided to use the Arduino IDE environment because of the ease and speed offered by its C/C++ language. From here I programmed the logic of the XIAO ESP32-C6: the I2C reading, the motor drive, and the speaker operation.
In addition, I developed an interface which is in charge of controlling the main operation: it allows the user to configure the exact time at which the alarm should sound. The application communicates with the XIAO ESP32-C6 through the MQTT protocol.
The final integration works exactly like this: When the time configured in the interface arrives, the command is sent via MQTT. The main board activates the speaker and the motors; the ATtiny starts sending the distance readings to dodge walls, and the hamster robot will not stop until the user reaches it and touches the capacitive button.