GitLab
Software required
To begin building in the digital world, I established a solid foundation with these essential tools (Click to download it):
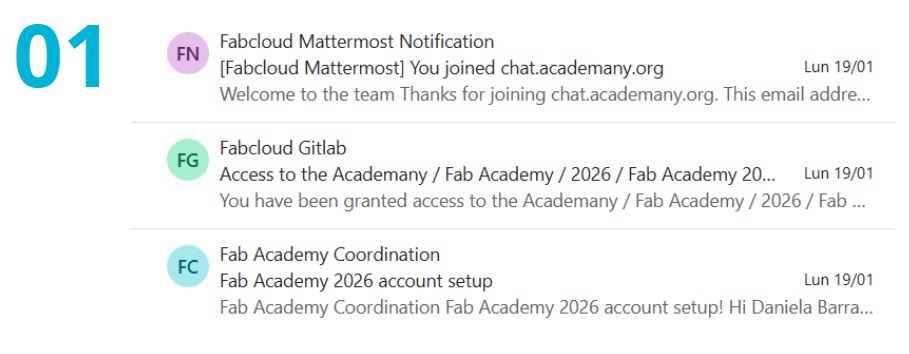
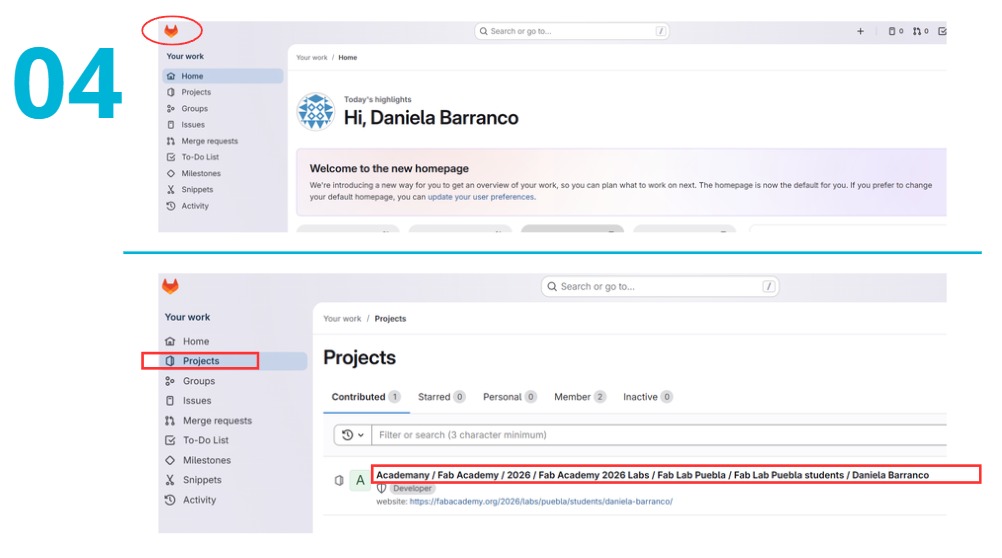
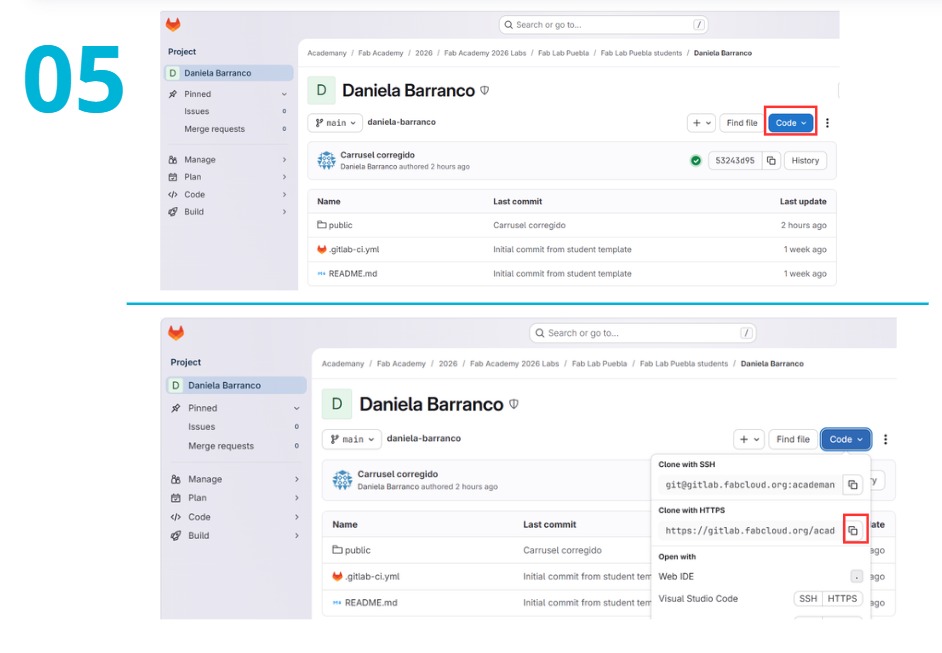
Steps for GitLab
Get Into Git Lab
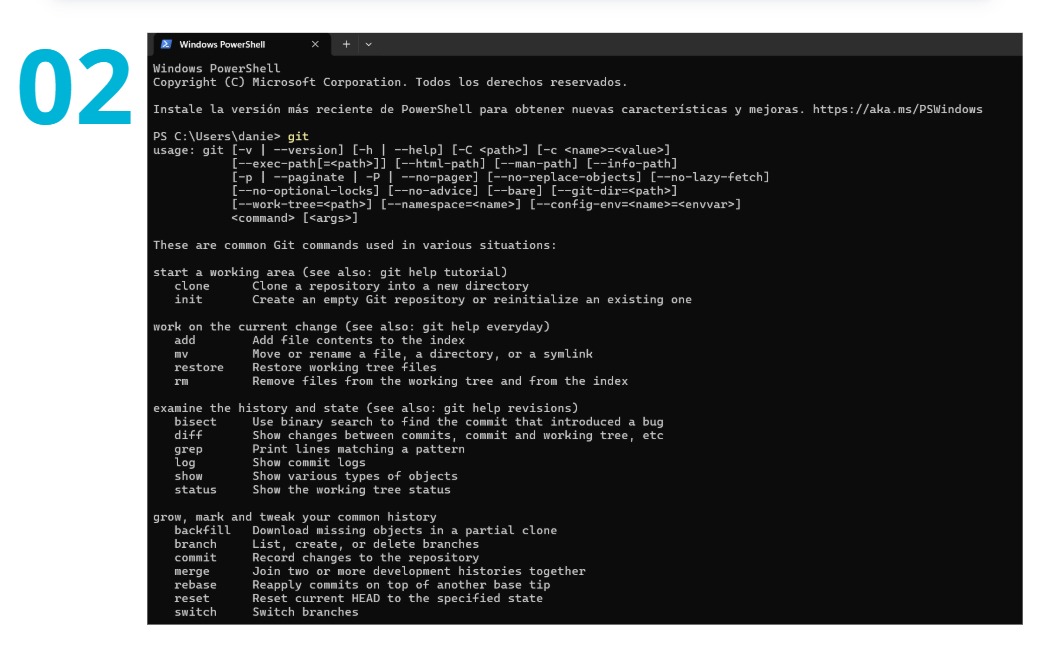
Git Essential Commands
| # | Command | Use |
|---|---|---|
| 1 | git clone URL | Downloads the project from GitLab to the local computer for the first time. |
| 2 | git add . | Adds all changes made to the staging area, preparing them for a commit. |
| 3 | git commit -m "message" | Records the changes in the local repository with a descriptive message. |
| 4 | git push | Uploads the committed changes from the local repository to the remote repository on GitLab. |
| 5 | git pull | Fetches and integrates changes from the remote repository to the local repository. |
| 6 | git status | Displays the state of the working directory and staging area, showing changes. |
| 7 | git log | Shows a log of all commits made in the repository. |
HTML Programming Process
Internal Structure & Organization
One of the most important aspects is file organization. Generally, a web project is divided into three core sections:
- HTML: The content and structure.
- CSS: The aesthetics and style.
- JavaScript: The interactions and behavior.
In my case, the organization followed the minimalist tree structure shown in the diagram above, ensuring all assets were correctly linked.
Visual Consistency & Components
To achieve a uniform visual identity throughout my site, I utilized specific HTML components and CSS classes:
<div class="navbar">and<div class="navbar-inner">to build a functional navigation menu.<div class="hero-section">with<div class="hero-container">to create the blue-themed headers for each section.- The
class="..."attribute to link my elements to the styles defined in my style.css file.
Most Used Codes & Functions in my Code
| CATEGORY | CODE / TAG / ATTRIBUTE | FUNCTION / USE |
|---|---|---|
| LAYOUT | <div class="hero-section"> |
Creates the main header section with the blue-themed background and centered text. |
| LAYOUT | <aside class="week-sidebar"> |
Used to create the side navigation menu to move between sections of the page. |
| LAYOUT | <section class="collage-section"> |
Dedicated container for the grid or collage of images on the home page. |
| LINKS | target="_blank" |
Attribute within <a> that opens a link in a new browser tab. |
| MULTIMEDIA | <div class="slide"> |
Individual container for each image and text block within your carousel. |
| IMAGES | object-fit: cover; |
Ensures images fill their assigned space without being stretched or distorted. |
| STYLE | <link href="...remixicon.css"> |
Imports the external library used to display icons (Instagram, WhatsApp, etc.). |
| STYLE | display: flex; / grid |
CSS properties used to align elements horizontally or in grids (like your "Stuff I Do" cards). |
| TEXT | <blockquote class="ai-prompts"> |
Specific tag used to highlight and distinguish the prompts sent to the AI. |
| TEXT | font-weight: 600; |
Sets a semi-bold thickness for headings and important UI text. |
| COMPONENTS | <div class="navbar-inner"> |
Centered wrapper that keeps the navigation links organized and aligned. |
Examples in my website of diferents codes
div class="hero-section"
Example Code
            <!DOCTYPE html>
            <html lang="en">
            <head>
                <meta charset="UTF-8">
                <title>Small Example</title>
                <style>
                    body {
                        font-family: sans-serif;
                        margin: 30px;
                    }
                    .project-row {
                        display: flex;
                        gap: 20px;
                    }
                </style>
            </head>
Refining with AI
The original draft was based on the web development knowledge gained during Fab Lab classes. To further enhance the visual design and user interface, I used AI tools integrated into Visual Studio Code. Below are the specific "Prompts" I used to improve my site's code:
First Stage
First Prompt
Generate an improved design proposal; let's create a template that I can modify later. You must maintain the current folder structure (keeping index.html in the public folder and preserving the assignments directory). For the design, draw inspiration from the minimalist style of the link provided (https://www.bdsn.club/about) using light blue tones. On the Assignment page, I want a sidebar menu to navigate between page sections. Do not modify the .yml files. Feel free to ask any questions if needed.
Second Prompt
Hello! In week01.html, I want you to place a sidebar menu on the left side of the main content to allow navigation between sections. You must maintain the folder structure (index.html in public and the assignments folder). Do not modify the .yml files. Feel free to ask any questions if needed.
Third Prompt
I need you to make only two changes. 1) In the about.html file, keep the first part as it was before (matching the "Pasted Image" attached), but keep the "Stuff I Do" section exactly the same without any modifications. 2) In index.html, change the image collage from 6 images to 10 images, using the same penguin image for all of them. Remember to maintain the folder structure and do not modify the .yml files. Feel free to ask anything.
Fourth Prompt
I need only two specific changes. 1) In about.html, keep the "Stuff I Do" section's content and aesthetics exactly the same, but instead of placing it below the image, position it to the right of the first section. The section shown in the attached image (Pasted Image) should remain fixed (no scrolling), while only the "Stuff I Do" section should be scrollable. 2) In index.html, instead of an ordered collage, provide a more aesthetic and creative proposal. Keep using the image at daniela-barranco\public\weeks\loading_penguin.jpg for all slots. Maintain the folder structure and do not touch the .yml files.
Fifth Prompt
I want you to add the same left-side navigation menu from week01.html to the final-project.html file. Ensure that the menu items correspond to the sections within the final project document. Remember to maintain the folder structure (index in public and the assignments folder) and do not modify the .yml files. Feel free to ask for any clarification.
Parts in my website
The original draft was based on the web development knowledge gained during Fab Lab classes. To further enhance the visual design and user interface, I used AI tools integrated into Visual Studio Code. Below are the specific "Prompts" I used to improve my site's code:
Design Inspiration
Once the structure was ready, I looked for inspiration from other sites to create my own unique design. I analyzed the following references:
- Fonder Studio
- Balavignesh | Senior Product Designer
- Alberto Blanco - Fab Academy 2023
- Fab Lab Puebla | Ibero Puebla
Extra Tools for HTML pages
| # | Tool Name | Main Use / Strength |
|---|---|---|
| 1 | Code space | A fast, cloud-based coding environment that allows you to start web projects instantly without local configuration. |
| 2 | Framer | A powerful design and publishing tool that allows you to build high-fidelity interactive prototypes and professional websites. |
| 3 | Flaticon | The largest database of free customizable icons and stickers in various formats like SVG and PNG for web projects. |
| 4 | Claude AI | An advanced AI assistant focused on coding efficiency, capable of generating complex snippets and debugging logic. |
| 5 | Gemini | Google's multimodal AI that helps brainstorm ideas, generate code, and optimize documentation for technical portfolios. |
| 6 | Bootstrap | The most popular CSS framework for developing responsive and mobile-first websites with pre-built components. |
| 7 | CSS Grid Generator | A visual tool that simplifies the creation of complex CSS Grid layouts by generating the necessary code automatically. |
Workflow
Summary
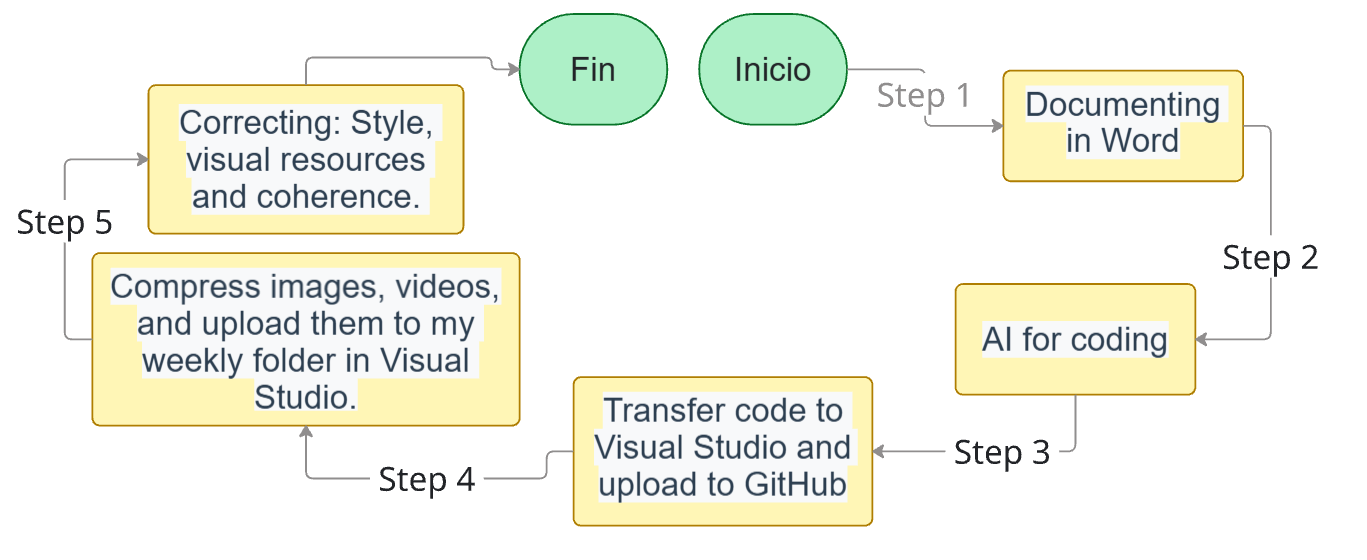
Step 1
Documenting everything in Word
For this first part, what worked very well for me was documenting everything in a Word document in my native language. There, I included the information, the image numbers needed, missing elements to be added later in Visual Studio Code, and instructions for the AI (which handles generating my code). These instructions help the AI apply my CSS styles or use specific code from my template—extra code I created to know how to place each element on my page, such as tables, images, captioned images, embedded code, etc. I indicated all of this using brackets and color-coding:
- [Yellow] = Missing elements to be added later in VSC, such as images, videos, etc.
- [Blue] = Instructions for the AI regarding CSS styles or template codes to be applied to specific sections.
This is the workflow I use for documenting my weekly process.
Note: To generate the document, use Word Styles so the AI can easily identify the header hierarchy for your code. I used them as follows:
- Heading 1: To separate information into different tabs/sections that act as subtopics or steps within my process (found on the left side of my website).
- Heading 2: Interpreted within the code as an h1, the main title of each section (which matched my tab/section name).
- Heading 3: Acts as a subtitle, or Header 2.
- If I wanted to differentiate another subtitle within that part, I used Heading 4 or the following code:
<!-- Manually change the subtitle/header color to blue -->

<h2 style="color: #0895b1;">Different Subtitle / Header</h2>

<!-- End: Manually change subtitle color to blue -->
Step 2
AI for coding
Once the documentation is complete, I give the AI (in my case, Claude) the following prompt:
"Hello! I am currently taking Fab Academy 2026, and I am a student at the Universidad Iberoamericana Puebla. I am required to create an HTML website programmed from scratch to document my weekly process, fulfilling the objectives specified on the website (here is the URL for the Fab Academy weekly requirements). This week's topic is [insert week title].
I need to transfer some information into the HTML code for my website. I will provide a template with the base code I have been using, and I would like you to do the following:
- If there is information within the template, it is only for illustrative purposes; therefore, I want you to replace that information with the data I will provide in the attached document.
- Provide a code where you organize the information I give you based on the template code. You have the freedom to organize the information as you see fit, but it must include all the information from the document without summarizing it. Everything must remain exactly as it appears in the document and must follow the Fab Academy requirements from the link provided. Additionally, do not add any information from your own research. Remember that the information I provide must remain exactly as I wrote it, and the order must be preserved. You have the freedom to use the different types of resources included in the template to make the information more visually appealing.
In my following responses, I will provide the information, the template code, and my documentation from the previous week."
Subsequently, the AI asks for the following:
- My information
I attach the Word file.
- My template code
In the next message, I attach the following code:
Template Code
<!DOCTYPE html>
<html lang="en-us">
<link href="https://cdn.jsdelivr.net/npm/bootstrap@5.3.8/dist/css/bootstrap.min.css" rel="stylesheet" integrity="sha384-sRIl4kxILFvY47J16cr9ZwB07vP4J8+LH7qKQnuqkuIAvNWLzeN8tE5YBujZqJLB" crossorigin="anonymous">
<script src="../../assignments/css/slideshow.js"></script>
<head>
<meta charset="UTF-8">
<meta name="viewport" content="width=device-width, initial-scale=1.0">
<title>Daniela Barranco - Week 03</title>
<link rel="stylesheet" href="../../assignments/css/style.css">
</head>
<body>
<div class="navbar">
<div class="navbar-inner">
<a href="../../index.html">Home</a>
<a href="../../assignments.html">Weekly Assignments</a>
<a href="../../final-project.html">Final Project</a>
<a href="../../about.html">About me</a>
</div>
</div>
<div class="hero-section">
<div class="hero-container">
<div class="hero-text text-center">
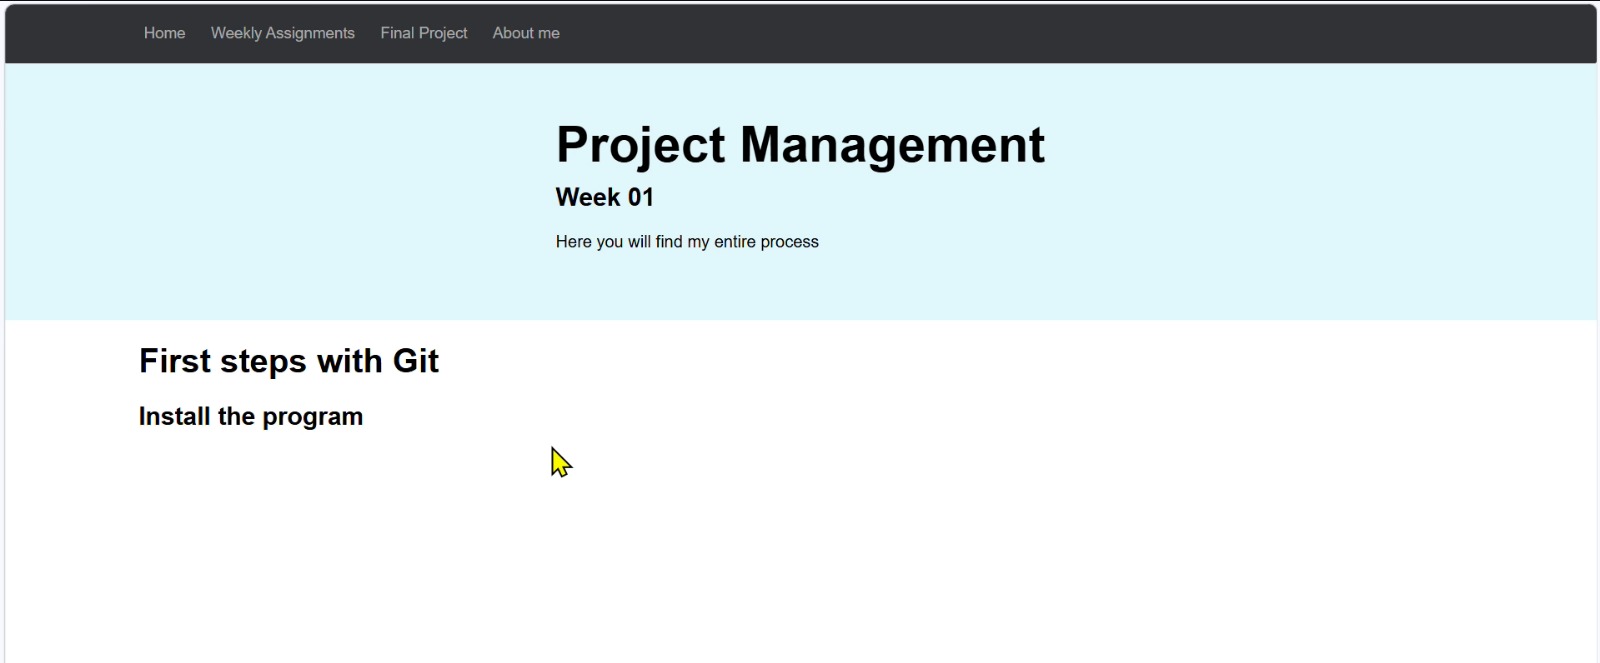
<h1>Computer-Controlled Cutting</h1>
<h2>Week 03</h2>
<p>Laser Cutting and Vinyl Cutting Process</p>
</div>
</div>
</div>
<div class="week-layout">
<aside class="week-sidebar">
<nav class="week-sidebar-menu">
<a onclick="showWeekSection('first-section')" class="week-link active">First Section</a>
<a onclick="showWeekSection('files')" class="week-link active">Files</a>
<a onclick="showWeekSection('#')" class="week-link active">Additional Section</a>
</nav>
</aside>
<div class="week-main-content">
<section id="first-section" class="week-section active">
<h2>Main Title</h2>
<h3>Group Assignment</h3>
<div class="assignment-card" style="max-width: 500px; margin: 20px 0;">
<div class="card-content">
<h4>Group page</h4>
<p>Insert text here.</p>
<a href="#" target="_blank" class="btn-read-more">Group Page</a>
</div>
</div>
<h2 style="color: #0895b1;">Different Subtitle/Header</h2>
<div class="notes-container" style="background-color: #caf0f8; border-left: 5px solid #0096c7; padding: 15px;">
<h3>Title</h3>
<ul>
<li>List item.</li>
</ul>
</div>
<div class="summary-box">
<p><strong>Formula:</strong> Total space / Number of lines = result</p>
</div>
</section>
<section id="files" class="week-section">
<h2>Files I used this week</h2>
</section>
</div>
</div>
<footer>
<p>Copyright 2026 Daniela Barranco - Creative Commons Attribution Non Commercial </p>
<p>Source code hosted at <a href="https://gitlab.fabcloud.org/academany/fabacademy/2026/labs/puebla/students/daniela-barranco" target="_blank">gitlab.fabcloud.org</a></p>
</footer>
<script src="https://cdn.jsdelivr.net/npm/bootstrap@5.3.8/dist/js/bootstrap.bundle.min.js"></script>
<script src="../../assignments/css/slideshow.js"></script>
<script>
function showWeekSection(sectionId) {
const sections = document.querySelectorAll('.week-section');
sections.forEach(section => section.classList.remove('active'));
const links = document.querySelectorAll('.week-link');
links.forEach(link => link.classList.remove('active'));
document.getElementById(sectionId).classList.add('active');
event.target.classList.add('active');
event.preventDefault();
}
</script>
</body>
</html>
- Previous Week
In another message, I add the code from my entire page from the previous week to use as a reference for how I usually organize things.
Step 3
Transfer code to Visual Studio and upload to GitHub
I copy the code provided by Claude and paste it as is into VSC.
Then, I upload it to my repository using GitHub through the terminal at the bottom of my VSC workspace. I show this process in the video further down in this section.
The three commands I use are as follows, in the order they appear in the table:
| Command | Description |
|---|---|
git add . |
Prepares all new or modified files in your folder to be tracked by Git. |
git commit -m "Message" |
Saves a "snapshot" or version of your changes in your computer's history with a brief description. |
git push |
Uploads that saved version from your computer to the remote server (like GitHub or GitLab) to update it on the web. |
My process
This is how I did commits:
Step 4
Compress images, videos, and upload them to my weekly folder in Visual Studio.
This is shown in my Week 2 documentation.
Step 5
Correcting
- I go to my browser to review the version Claude delivered and make necessary corrections regarding:
- CSS Styling
- Adding missing visual resources
- Moving information if the current position doesn't seem coherent.
Note: All of the above is done without re-uploading corrections to GitHub yet.
- Once I consider everything correct, I copy my code for the week and give it to Claude or any AI to translate using the following prompt:
Help me translate the information in my code for the week into English.
- Finally, upload the final code to GitHub using the terminal.
What I learned this week:
- I learned how to configure and use GitLab along with Git Bash to clone repositories and upload changes using essential commands:
git add,git commit, andgit push. - I learned how to structure and program a website from scratch in HTML, organizing the code into three main sections: structure (HTML), aesthetics (CSS), and interactions (JavaScript).
- I developed a personal workflow for documentation: drafting in Word using style hierarchies, using AI to convert that information into HTML code, debugging it in the browser, and uploading it to GitLab.
Codes that I used in this week
Index HTML
<!DOCTYPE html>
<html lang="en-us">
<head>
<meta charset="UTF-8">
<meta name="viewport" content="width=device-width, initial-scale=1.0">
<title>Daniela Barranco - Fab Academy 2026</title>
<link rel="stylesheet" href="assignments/css/style.css">
</head>
<body>
<div class="navbar">
<div class="navbar-inner">
<a href="index.html">Home</a>
<a href="assignments.html">Weekly Assignments</a>
<a href="final-project.html">Final Project</a>
<a href="about.html">About me</a>
</div>
</div>
<div class="hero-section">
<div class="hero-container">
<img src="assignments/img_index/logo_fabacademy.png" alt="Logo Fab Academy" class="hero-logo">
<div class="hero-text">
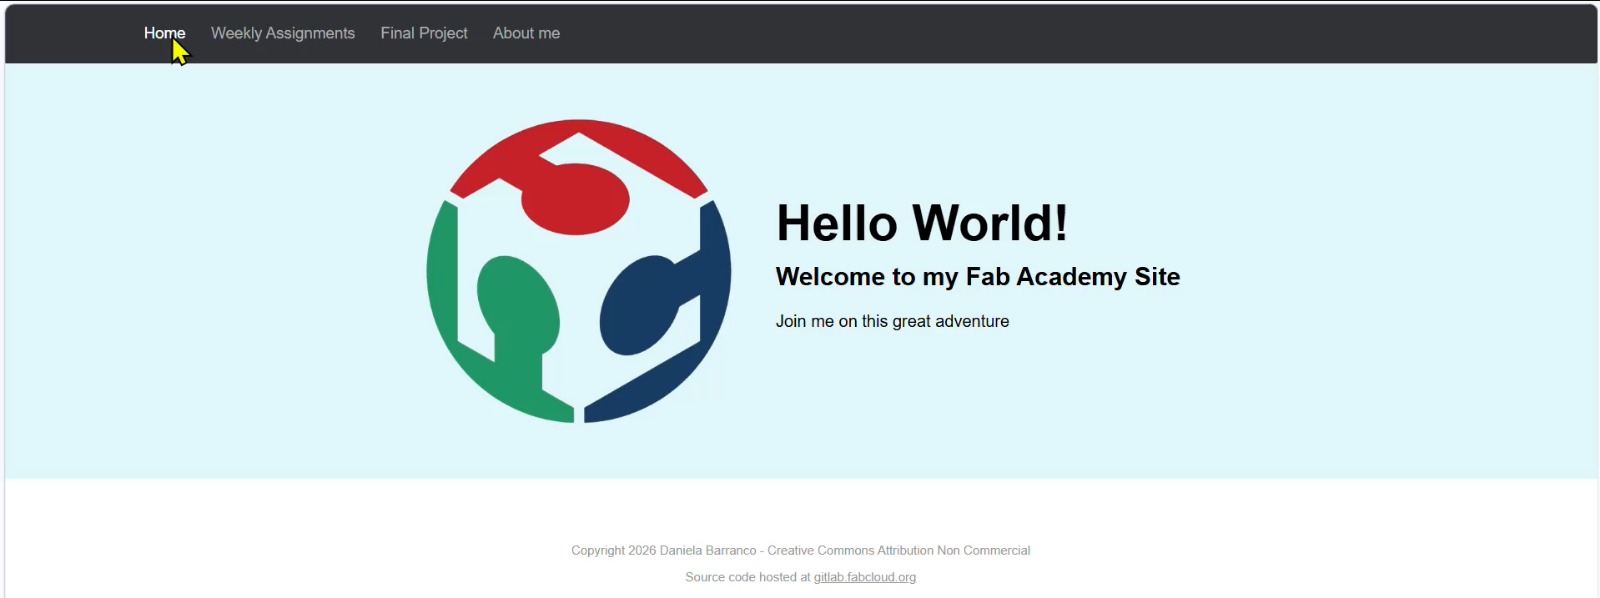
<h1>Hello World!</h1>
<h2>Welcome to my Fab Academy Site</h2>
<p>Join me on this great adventure where we explore making, design, and innovation!</p>
</div>
</div>
</div>
<section class="collage-section">
<h2>My Fab Academy Journey</h2>
<p class="collage-subtitle">A visual exploration of projects, ideas, and moments from my learning experience</p>
<div class="collage-container">
<div class="collage-item collage-large">
<img src="assignments/img_finalproject/brillitos_cristal_cortados.jpeg" alt="Journey moment 1">
</div>
<div class="collage-item collage-small">
<img src="assignments/img_finalproject/first_process.jpeg" alt="Journey moment 2">
</div>
<div class="collage-item collage-medium">
<img src="assignments/img_finalproject/grapas.jpeg" alt="Journey moment 3">
</div>
<div class="collage-item collage-small">
<img src="assignments/img_finalproject/candil_imperial.jpeg" alt="Journey moment 4">
</div>
</div>
</section>
<footer>
<p>Copyright 2026 Daniela Barranco</p>
</footer>
</body>
</html>
Weekly Assignment HTML
<!DOCTYPE html>
<html lang="en-us">
<head>
<meta charset="UTF-8">
<meta name="viewport" content="width=device-width, initial-scale=1.0">
<title>Daniela Barranco - Fab Academy 2026</title>
<link rel="stylesheet" href="assignments/css/style.css">
</head>
<body>
<div class="navbar">
<div class="navbar-inner">
<a href="index.html">Home</a>
<a href="assignments.html">Weekly Assignments</a>
<a href="final-project.html">Final Project</a>
<a href="about.html">About me</a>
</div>
</div>
<!--Encabezado azul celeste-->
<div class="hero-section">
<div class="hero-container">
<div class="hero-text text-center">
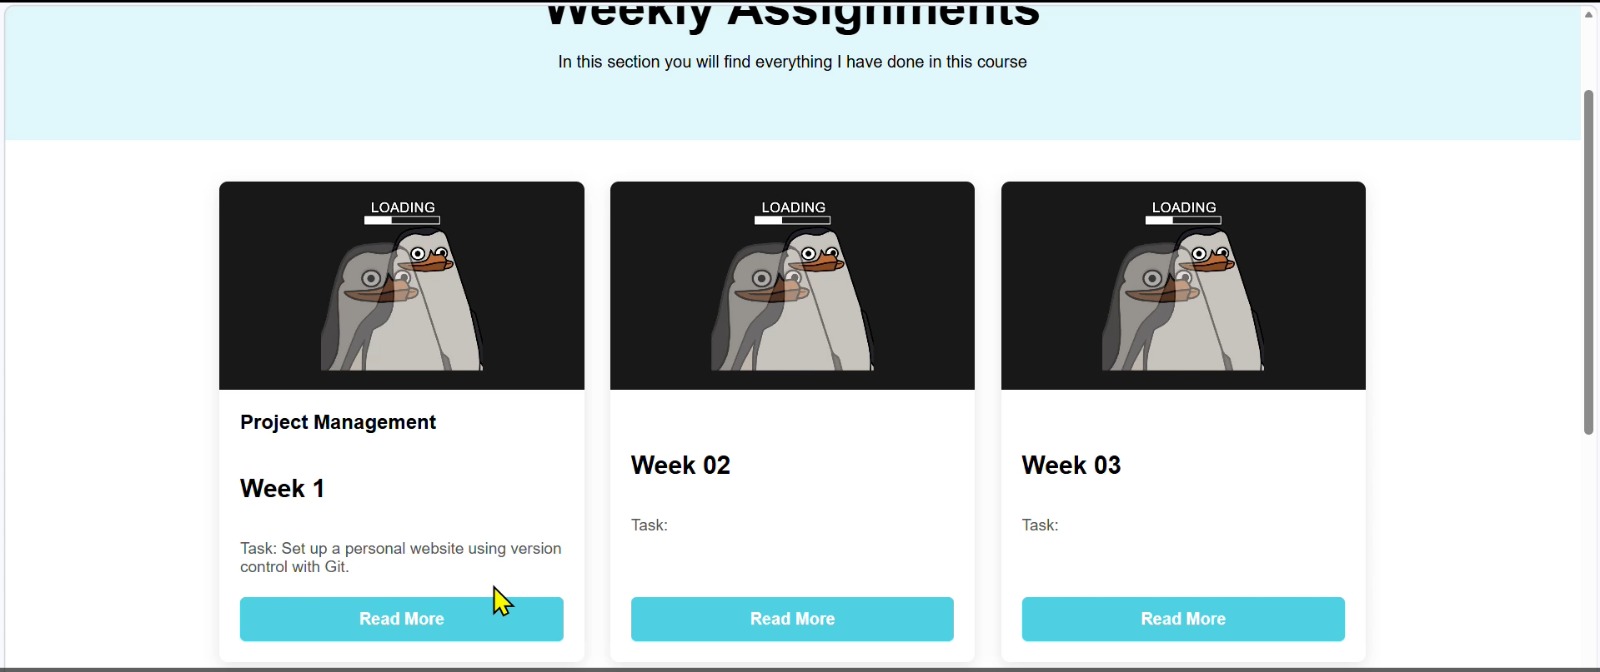
<h1>Weekly Assignments</h1>
<p>In this section you will find everything I have done in this course</p>
</div>
</div>
</div>
<div class="content">
</div>
<!--Tarjetas de sección por semana-->
<section class="assignments-section">
<div class="cards-container">
<!--Week 01-->
<div class="assignment-card">
<img src="assignments/img_assignments/w01_code02.jpeg" alt="Week 1">
<div class="card-content">
<h3>Project Management</h3>
<h2>Week 1</h2>
<p><strong>Task:</strong> Set up a personal website using version control with Git.</p>
<a href="weeks/w01/week01.html" class="btn-read-more">Read More</a>
</div>
</div>
<!--Week 02-->
<div class="assignment-card">
<img src="weeks/w02/img_w02/3D.jpeg" alt="Week 2">
<div class="card-content">
<h3>Computer-Aided Design</h3>
<h2>Week 02</h2>
<p><strong>Task:</strong> Model, render, and animate a possible final project using 2D and 3D software.</p>
<a href="weeks/w02/week02.html" class="btn-read-more">Read More</a>
</div>
</div>
</div>
</section>
<footer>
<p>Copyright 2026 Daniela Barranco</p>
<p>Source code hosted at <a href="https://gitlab.fabcloud.org/...">gitlab.fabcloud.org</a></p>
</footer>
</body>
</html>
Final Project HTML
      <!DOCTYPE html>
      <html lang="en-us">
        <head>
          <meta charset="UTF-8">
          <meta name="viewport" content="width=device-width, initial-scale=1.0">
          <title>Final Project - Daniela Barranco - Fab Academy 2026</title>
          <link rel="stylesheet" href="assignments/css/style.css">
          <link href="https://cdn.jsdelivr.net/npm/remixicon@4.1.0/fonts/remixicon.css" rel="stylesheet"/>
          <script src="assignments/css/slideshow.js"></script>
        </head>
        <body>
          <div class="navbar">
            <div class="navbar-inner">
              <a href="index.html">Home</a>
              <a href="assignments.html">Weekly Assignments</a>
              <a href="final-project.html">Final Project</a>
              <a href="about.html">About me</a>
            </div>
          </div>

          <div class="hero-section">
            <div class="hero-container">
              <div class="hero-text text-center">
                <h1>Final Project</h1>
                <p>My innovative project for Fab Academy 2026</p>
              </div>
            </div>
          </div>

          <div class="week-layout">
            <aside class="week-sidebar">
              <nav class="week-sidebar-menu">
                <a href="#" onclick="showProjectSection('overview')" class="week-link active">Project Overview</a>
                <a href="#" onclick="showProjectSection('research')" class="week-link">Research & Inspiration</a>
                <a href="#" onclick="showProjectSection('design')" class="week-link">Design & Planning</a>
                <a href="#" onclick="showProjectSection('timeline')" class="week-link">Implementation Timeline</a>
                <a href="#" onclick="showProjectSection('resources')" class="week-link">Resources & Materials</a>
              </nav>
            </aside>

            <div class="week-main-content">
              <section id="overview" class="week-section active">
                <h2>My Final Project</h2>
                <p>This project focuses on the automation of traditional craftsmanship used in high-end lighting.</p>

                <h3>Project Overview</h3>
                <p>The project consists of a cut glass assembly machine designed to automate a process.</p>

                <!-- Carrusel candil imperial-->
                <div id="slideshow1" class="slideshow-container">
                  <!-- Slides content here -->
                  <div class="buttons-container" style="text-align: center; margin: 20px;">
                      <button class="prev" data-target="slideshow1">Previous</button>
                      <button class="next" data-target="slideshow1">Next</button>
                  </div>
                </div>

                <script>
                  document.addEventListener('DOMContentLoaded', function() {
                    initializeCarousel('slideshow1');
                  });
                </script>
              </section>

              <section id="research" class="week-section">
                <h2>Research & Inspiration</h2>
                <ul>
                  <li><strong>Automatic Eyeletting Machines</strong></li>
                  <li><strong>Pneumatic Crimping Tools</strong></li>
                </ul>
              </section>

              <section id="design" class="week-section">
                <h2>Design & Planning</h2>
                <h3>Workflow Sketch</h3>
                <ol>
                  <li><strong>Top Magazine:</strong> Staples descend through a rail. ↓</li>
                  <li><strong>Actuator:</strong> Pushes the staple. ↓</li>
                </ol>
              </section>
            </div>
          </div>

          <footer>
            <p>Copyright 2026 Daniela Barranco</p>
          </footer>

          <script>
            function showProjectSection(sectionId) {
              // Logic to switch sections
            }
          </script>
        </body>
      </html>
About Me HTML
    <!DOCTYPE html>
    <html lang="en-us">
      <head>
        <meta charset="UTF-8">
        <meta name="viewport" content="width=device-width, initial-scale=1.0">
        <title>Final Project - Daniela Barranco - Fab Academy 2026</title>
        <link rel="stylesheet" href="assignments/css/style.css">
        <link href="https://cdn.jsdelivr.net/npm/remixicon@4.1.0/fonts/remixicon.css" rel="stylesheet"/>
        <script src="assignments/css/slideshow.js"></script>
      </head>
      <body>
        <div class="navbar">
          <div class="navbar-inner">
            <a href="index.html">Home</a>
            <a href="assignments.html">Weekly Assignments</a>
            <a href="final-project.html">Final Project</a>
            <a href="about.html">About me</a>
          </div>
        </div>

        <div class="hero-section">
          <div class="hero-container">
            <div class="hero-text text-center">
              <h1>Final Project</h1>
              <p>My innovative project for Fab Academy 2026</p>
            </div>
          </div>
        </div>

        <div class="week-layout">
          <aside class="week-sidebar">
            <nav class="week-sidebar-menu">
              <a href="#" onclick="showProjectSection('overview')" class="week-link active">Project Overview</a>
              <a href="#" onclick="showProjectSection('research')" class="week-link">Research & Inspiration</a>
              <a href="#" onclick="showProjectSection('design')" class="week-link">Design & Planning</a>
              <a href="#" onclick="showProjectSection('timeline')" class="week-link">Implementation Timeline</a>
              <a href="#" onclick="showProjectSection('resources')" class="week-link">Resources & Materials</a>
            </nav>
          </aside>

          <div class="week-main-content">
            <section id="overview" class="week-section active">
              <h2>My Final Project</h2>
              <p>This project focuses on the automation of traditional craftsmanship used in high-end lighting.</p>

              <h3>Project Overview</h3>
              <p>The project consists of a cut glass assembly machine designed to automate a process.</p>

              <!-- Carrusel candil imperial-->
              <div id="slideshow1" class="slideshow-container">
                <!-- Slides content here -->
                <div class="buttons-container" style="text-align: center; margin: 20px;">
                    <button class="prev" data-target="slideshow1">Previous</button>
                    <button class="next" data-target="slideshow1">Next</button>
                </div>
              </div>

              <script>
                document.addEventListener('DOMContentLoaded', function() {
                  initializeCarousel('slideshow1');
                });
              </script>
            </section>

            <section id="research" class="week-section">
              <h2>Research & Inspiration</h2>
              <ul>
                <li><strong>Automatic Eyeletting Machines</strong></li>
                <li><strong>Pneumatic Crimping Tools</strong></li>
              </ul>
            </section>

            <section id="design" class="week-section">
              <h2>Design & Planning</h2>
              <h3>Workflow Sketch</h3>
              <ol>
                <li><strong>Top Magazine:</strong> Staples descend through a rail. ↓</li>
                <li><strong>Actuator:</strong> Pushes the staple. ↓</li>
              </ol>
            </section>
          </div>
        </div>

        <footer>
          <p>Copyright 2026 Daniela Barranco</p>
        </footer>

        <script>
          function showProjectSection(sectionId) {
            // Logic to switch sections
          }
        </script>
      </body>
    </html>
My Site Stylesheet (CSS)
  /* ==========================================
    GLOBAL STYLES - Minimalista Design
    Tonos azules celeste
    ========================================== */

  * {
    margin: 0;
    padding: 0;
    box-sizing: border-box;
  }

  :root {
    --primary-light: #e0f7fa;
    --primary: #00BCD4;
    --primary-dark: #0097A7;
    --secondary: #B0E0E6;
    --text-dark: #2c3e50;
    --text-light: #353f40;
    --background: #f8f9fa;
    --white: #ffffff;
    --border: #e0e0e0;
  }

  html {
    scroll-behavior: smooth;
  }

  body {
    font-family: -apple-system, BlinkMacSystemFont, 'Segoe UI', Roboto, sans-serif;
    line-height: 1.6;
    color: var(--text-dark);
    background-color: var(--background);
  }

  /* ==========================================
    EMBEBER CÓDIGO (Estilo del contenedor)
    ========================================== */

  pre {
      background-color: #caf0f8 !important;
      border: 2px solid #0096c7;
      border-radius: 15px;
      padding: 20px;
      margin: 20px auto;
      max-width: 90%;
      overflow-x: auto;
      box-shadow: 0 10px 30px rgba(0,0,0,0.5);
  }

  pre code {
      font-family: 'Consolas', 'Monaco', 'Courier New', monospace;
      font-size: 14px;
      line-height: 1.6;
      color: #03045e !important;
      display: block;
      white-space: pre;
      text-align: left;
  }

  /* ==========================================
    HERO SECTION
    ========================================== */

  .hero-section {
    background: linear-gradient(135deg, var(--secondary) 0%, var(--primary-light) 100%);
    padding: 4rem 2rem;
    text-align: center;
    display: flex;
    align-items: center;
    justify-content: center;
  }

  .hero-logo {
    max-width: 300px;
    width: 100%;
    border-radius: 8px;
    box-shadow: 0 8px 24px rgba(0, 188, 212, 0.15);
    transition: all 0.4s ease;
  }

  /* Redes Sociales */
  .social-icon {
      display: flex;
      align-items: center;
      justify-content: center;
      width: 45px;
      height: 45px;
      background-color: #e0f7fa;
      border-radius: 50%;
      transition: transform 0.3s ease;
  }

  .social-icon:hover {
      transform: scale(1.2);
  }
Javascript Functionality (Slideshow)
/**
 * Slideshow / Carrusel Functionality
 * Manages multiple slideshows on the page with navigation controls
 */

// Store slide indices for each slideshow container
const slideIndices = {};

/**
 * Initialize all slideshows on page load
 */
document.addEventListener('DOMContentLoaded', function() {
  const slideshows = document.querySelectorAll('.slideshow-container');

  slideshows.forEach(slideshow => {
    const slideshowId = slideshow.id;
    if (slideshowId) {
      slideIndices[slideshowId] = 1;
      showSlides(1, slideshowId);
    }
  });
});

/**
 * Display the slide at the specified index
 */
function showSlides(n, containerId) {
  const container = document.getElementById(containerId);
  if (!container) return;

  const slides = container.querySelectorAll('.slide');

  if (n > slides.length) { slideIndices[containerId] = 1; }
  if (n < 1) { slideIndices[containerId] = slides.length; }

  slides.forEach(slide => {
    slide.style.display = 'none';
  });

  if (slides.length > 0) {
    slides[slideIndices[containerId] - 1].style.display = 'block';
  }
}

/* --- PROFE OLIVER VERSION --- */
function initializeCarousel(carouselId) {
  let slideIndex = 0;
  showSlides(carouselId, slideIndex);

  function plusSlides(carouselId, n) {
    showSlides(carouselId, slideIndex += n);
  }

  function showSlides(carouselId, n) {
    let i;
    let carousel = document.getElementById(carouselId);
    let slides = carousel.getElementsByClassName("slide");
    if (n >= slides.length) { slideIndex = 0; }
    if (n < 0) { slideIndex = slides.length - 1; }
    for (i = 0; i < slides.length; i++) {
      slides[i].style.display = "none";
    }
    slides[slideIndex].style.display = "flex";
  }

  // Event Listeners for buttons
  document.querySelectorAll('.prev[data-target="' + carouselId + '"]').forEach(button => {
    button.addEventListener('click', () => plusSlides(carouselId, -1));
  });
  document.querySelectorAll('.next[data-target="' + carouselId + '"]').forEach(button => {
    button.addEventListener('click', () => plusSlides(carouselId, 1));
  });
}