This week I explored user interface development to interact with hardware. The goal was to create a visual application capable of sending control commands and receiving real-time data to be displayed on an OLED screen.
Group Assignment
Comparison of tools and communication protocols for graphic interfaces.
Firmware Arduino C++ & I2C
The Arduino Nano acts as a bridge. It listens to the Serial Port for incoming strings. Using the serialEvent() function, the microcontroller captures characters until a newline \n is detected, indicating the end of a message. Once the message is complete, the Adafruit SSD1306 library renders the text onto the 128x64 OLED display via the I2C protocol.
#include <Wire.h>
#include <Adafruit_GFX.h>
#include <Adafruit_SSD1306.h>

#define SCREEN_WIDTH 128
#define SCREEN_HEIGHT 64

Adafruit_SSD1306 display(SCREEN_WIDTH, SCREEN_HEIGHT, &Wire, -1);

String inputString = "";
bool stringComplete = false;

void setup() {
  Serial.begin(9600);

  if(!display.begin(SSD1306_SWITCHCAPVCC, 0x3C)) {
    for(;;);
  }

  display.clearDisplay();
  display.setTextSize(2);
  display.setTextColor(SSD1306_WHITE);

  display.setCursor(0, 10);
  display.println("Waiting");
  display.println("for data...");
  display.display();
}

void loop() {
  if (stringComplete) {
    display.clearDisplay();
    display.setCursor(0, 10);
    display.println(inputString);
    display.display();

    inputString = "";
    stringComplete = false;
  }
}

void serialEvent() {
  while (Serial.available()) {
    char inChar = (char)Serial.read();
    if (inChar == '\n') {
      stringComplete = true;
    } else {
      inputString += inChar;
    }
  }
}
The Interface Layout
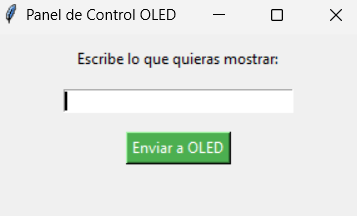
This is the Tkinter-based Graphical User Interface (GUI). It features a clean input field where the user can type any status message and a button to transmit it. For my final project, DragonTrack, this interface serves as the Command Center. It allows the operator to manually override the robotic ball-collector's status or send specific coordinates to be displayed on the robot's "face" (the OLED screen).
Application Development Python & PySerial
I chose Python due to its efficient pyserial library. The script creates a window where the enviar_texto() function encodes the string into UTF-8 and pushes it through the COM port. To make it user-friendly, I bound the Enter key to the send function, allowing for rapid communication with the robot.
import tkinter as tk
from tkinter import messagebox
import serial
import time

try:
    arduino = serial.Serial(port='COM3', baudrate=9600, timeout=0.1)
    time.sleep(2)
except:
    arduino = None

def enviar_texto():
    texto = entry.get()
    if arduino:
        arduino.write(bytes(texto + '\n', 'utf-8'))
        entry.delete(0, tk.END)
    else:
        messagebox.showerror("Error", "Arduino not connected.")

root = tk.Tk()
root.title("OLED Control Panel")
root.geometry("300x150")

label = tk.Label(root, text="Enter text for DragonTrack:", pady=10)
label.pack()

entry = tk.Entry(root, width=30)
entry.pack(pady=5)
entry.bind('<Return>', lambda event: enviar_texto())

btn = tk.Button(root, text="Send to Robot", command=enviar_texto, bg="#ff4d00", fg="white")
btn.pack(pady=10)

root.mainloop()
System Demonstration
In this video, you can see the seamless integration between the Python interface and the hardware. When running the script, the control window opens, allowing me to input strings like "BALL DETECTED" or "TRACKING...".
For DragonTrack, this is a crucial debugging tool. By using the OLED as a status monitor, I can see exactly what the robot's AI is "thinking" during the ball-collection process without needing a computer attached via serial monitor, making field testing much more efficient.