
Week 01 — Principles and Practices
This week marked the beginning of my Fab Academy journey. The focus was understanding the course structure, setting up the development environment, and creating the personal website that will document the entire learning process.
Week 1 establishes the mindset of documentation, project planning, and iterative development that will guide the final project.
Objectives of the Week
- Understand the structure and methodology of Fab Academy
- Sign and upload the student agreement
- Build and customize a personal website
- Learn basic Git workflow for version control
- Document progress and learning process
- Sketch an initial concept for the final project
Website Development
To build my Fab Academy documentation website, I used the Phantom template from HTML5 UP. This template provides a responsive structure with navigation menus, CSS stylesheets, and reusable layout elements that can be adapted for academic documentation. Starting from this base, I customized the pages to document my weekly assignments, group work, and final project development.
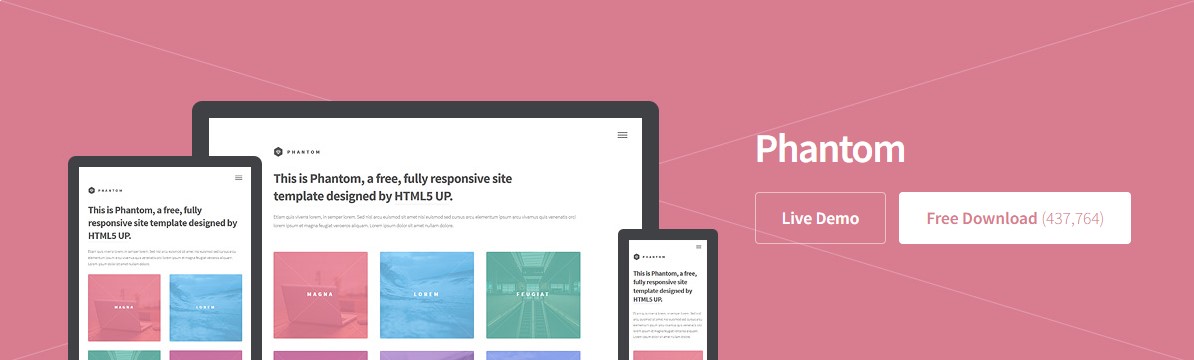
Phantom template from HTML5 UP used as the base structure for the Fab Academy documentation website.
To manage and publish the website, I used Git together with Visual Studio Code. Git is a version control system that allows tracking changes in files, reverting versions if needed, and synchronizing the local project with the remote Fab Academy GitLab repository.
1. Fab Academy GitLab Repository
The Fab Academy provides each student with a personal GitLab repository where the website and documentation files are stored. This repository acts as the central location where all files are synchronized, versioned, and published online. Before cloning the repository, I accessed the GitLab page to review the project structure and obtain the repository URL.
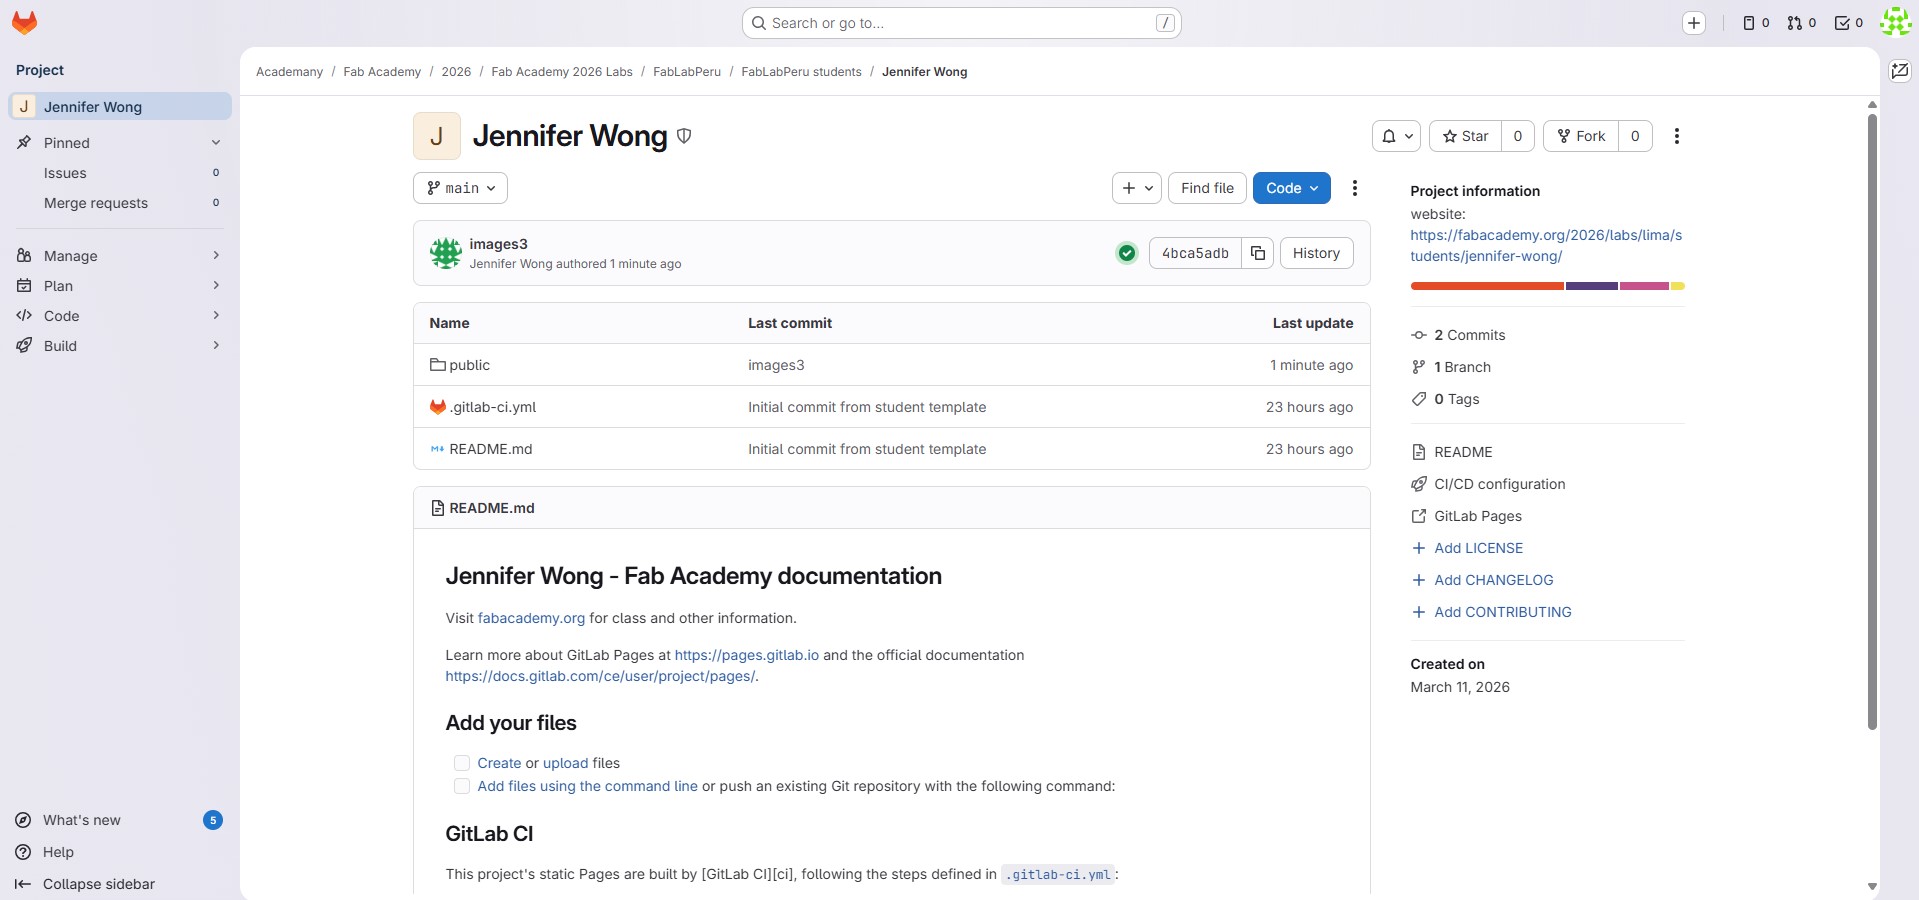
Personal Fab Academy GitLab repository used to store, track, and publish the website documentation.
2. Repository Installation and Setup
Before cloning the repository, I installed Git on my computer and verified that the installation was successful. Git Bash was used as a terminal interface to run Git commands locally, while Visual Studio Code was used as the main editor for modifying the HTML files.
The installation process included:
- Downloading and installing Git
- Opening Git Bash and confirming the installation with the command git --version
- Configuring the Git user name and email for commit identification
- Opening the project folder in Visual Studio Code for editing and synchronization
Installed Git and configured Git Bash
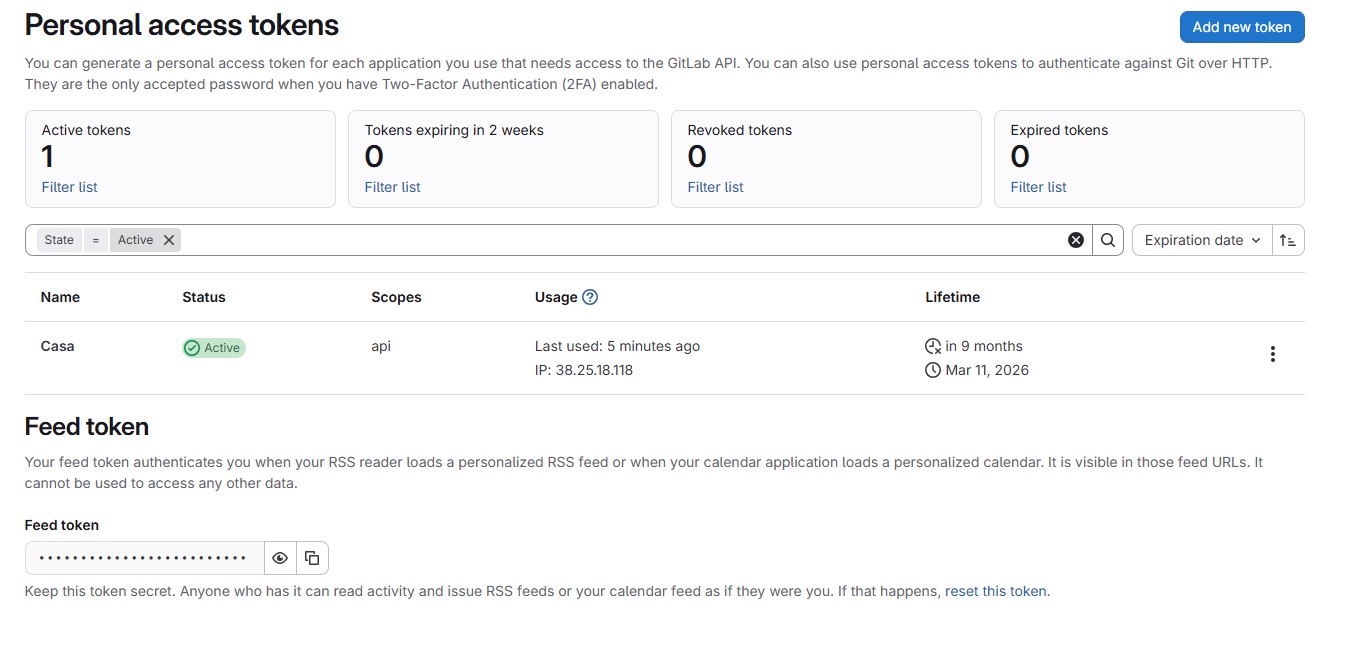
GitLab personal access token used to authenticate and connect the local repository with the remote Fab Academy GitLab repository.
3. Cloning the Repository
At the beginning of the program, each student receives access to a personal repository hosted on the Fab Academy GitLab server. This repository contains the base structure of the website where all weekly assignments are documented. Cloning the repository creates a complete local copy of the remote project, allowing offline editing before publishing updates online.
The cloning process was carried out from Git Bash using the repository URL provided by Fab Academy. The main command used for this step was:
git clone [repository-url]After cloning, the folder containing the project files was created locally. This folder included the HTML pages, CSS files, JavaScript resources, and image directories required for the website. Then, the repository folder was opened in Visual Studio Code to start editing the content.
To confirm that the local folder was correctly connected to the remote repository, Git status and synchronization tools were checked during the editing process.
4. Opening the Repository in Visual Studio Code
After cloning the repository using Git, the project folder was opened in Visual Studio Code. This allowed me to visualize the file structure, edit HTML files, manage images, and synchronize changes using Git. Working locally made it easier to organize files and continuously update the website.
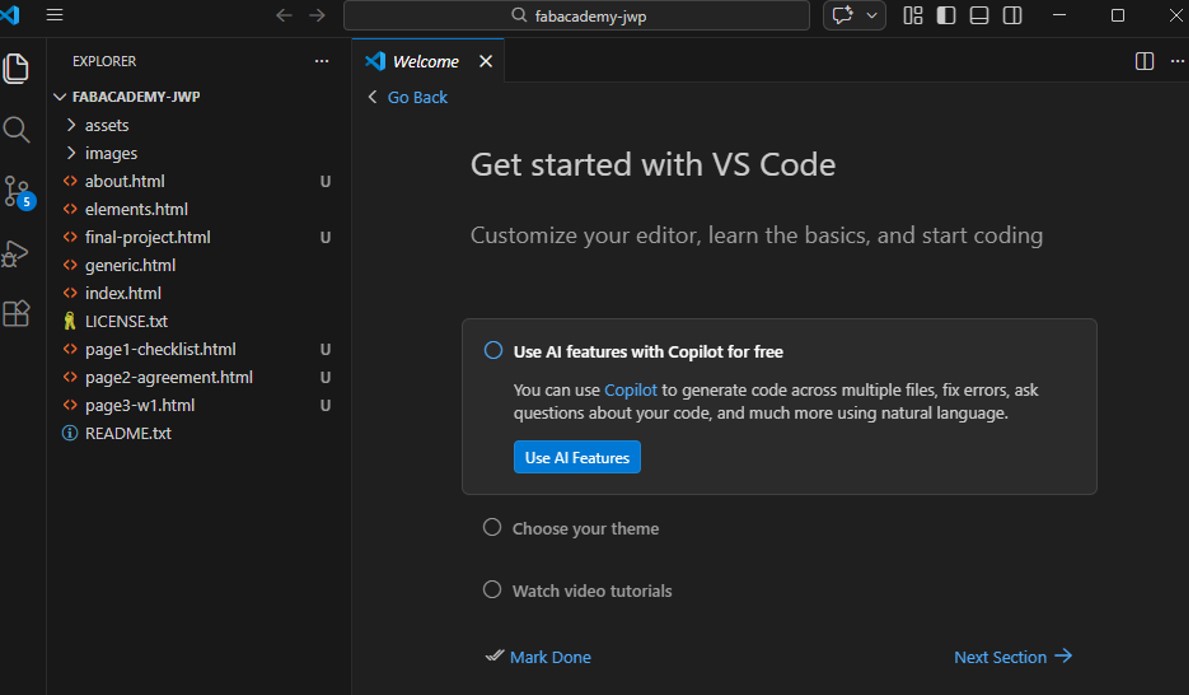
Local Fab Academy repository opened in Visual Studio Code showing the project structure and HTML files.
5. Editing the Files
All files were edited using Visual Studio Code. Starting from the Phantom template structure, I created new HTML pages for each weekly assignment, updated the navigation menu, inserted text and images, and adapted the site structure to the Fab Academy documentation requirements.
Images and media files are stored in the images folder and referenced in the HTML files using relative paths. This keeps the site organized and ensures that resources load correctly once the website is published online.
Editing HTML files and website structure using Visual Studio Code.
6. Commit and Push Using Visual Studio Code
After editing the HTML files and images, the changes must be saved and synchronized with the remote repository. Instead of using only the terminal, I used the Source Control interface integrated in Visual Studio Code. This interface allows tracking modified files, writing commit messages, committing changes, and pushing updates to the remote repository.
Source Control panel in Visual Studio Code used to commit and push changes to the Fab Academy GitLab repository.
Git Workflow Used
- Modify HTML files, images, or folders in the local project
- Review the detected changes in the Source Control panel
- Stage the files to be included in the update
- Write a commit message describing the modifications
- Commit the changes to save a local version history
- Push the commit to the Fab Academy GitLab repository
In command-line terms, this workflow corresponds to:
git add .
					git commit -m "updated week 1 documentation"
					git push
Once the changes are pushed, the website is updated on the Fab Academy server and becomes publicly accessible online. This workflow will be repeated throughout the academy to continuously document progress and maintain an organized record of the learning process.
Final Project — Initial Concept
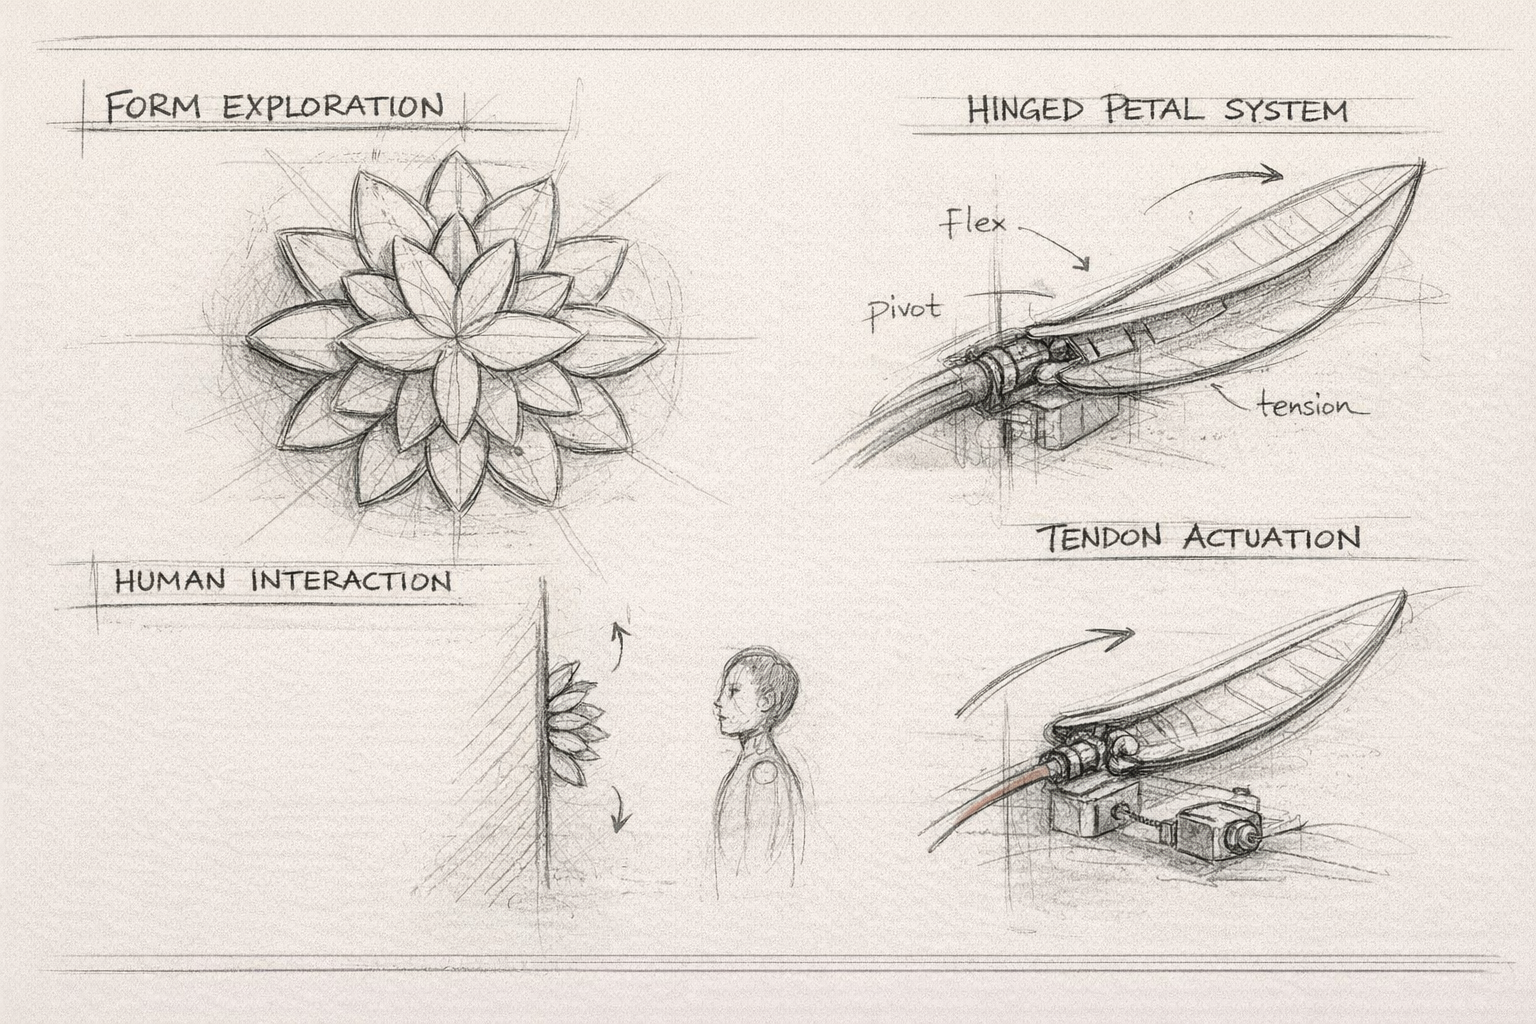
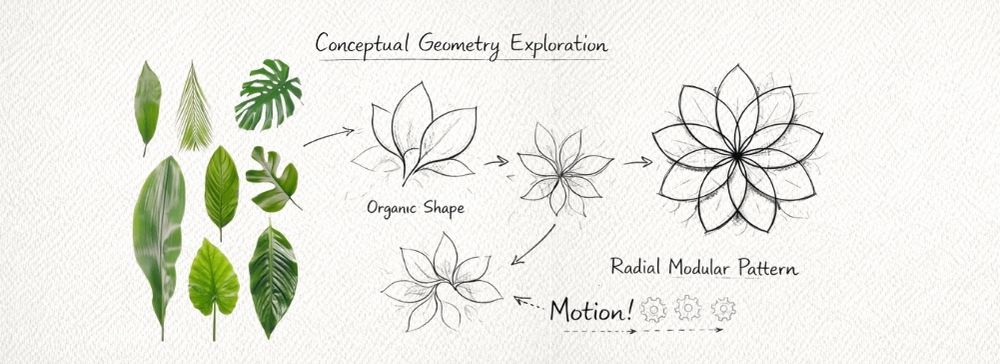
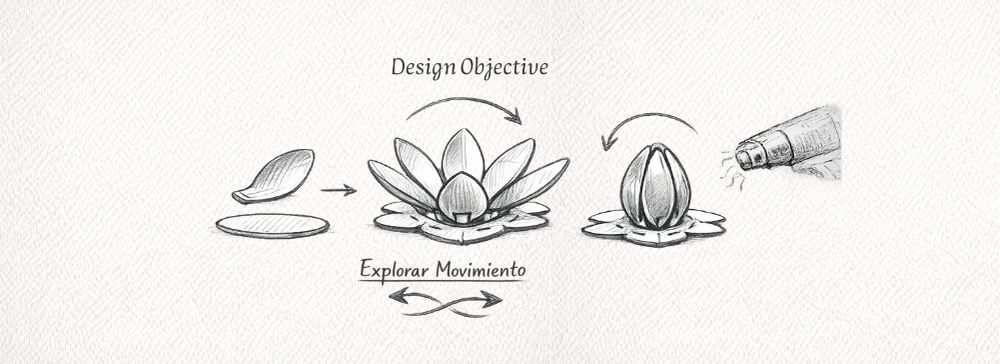
During Week 1, I began exploring ideas for my final project. The initial concept is a Responsive Kinetic Flower: an interactive object inspired by the behavior of natural flowers, designed to open, close, or move in response to external stimuli. The intention is to combine sculpture, product design, electronics, and digital fabrication in a single artifact.
Expected characteristics of the project:
- A flower-like structure with moving petals
- Mechanical opening and closing movement
- Reaction to human presence or environmental input
- Integration of electronics inside a designed physical object
- Fabricated parts combining aesthetic and functional requirements
Possible technologies to be used:
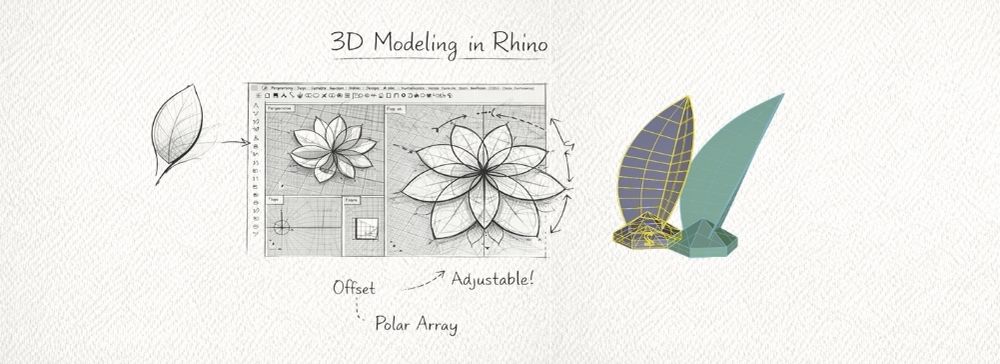
- 3D modeling for the petal geometry, support structure, and mechanical joints
- 3D printing for customized structural and decorative components
- Electronics design for the control board and connections
- Embedded programming for sensor reading and motion control
- Input devices to detect presence, distance, touch, or light conditions
- Output devices such as servo motors or LEDs to generate movement and visual feedback
Possible components:
- Microcontroller board
- Servo motor or another compact actuation system
- PIR sensor, ultrasonic sensor, or light sensor
- Power supply and wiring system
- Mechanical linkages, hinges, or gear-based movement elements
- 3D-printed petals and support base
Preferred operation:
The preferred interaction is that the flower remains in a resting position and changes its state when a person approaches. This response could be expressed through the opening of petals, subtle motion, or light activation. The project aims to create an emotional and poetic interaction rather than a purely utilitarian device.
References for operation and inspiration:
The conceptual direction of this project is influenced by artists and studios that work with interactive environments, kinetic installations, responsive systems, and the intersection of art, technology, and human interaction. These references are important because the project is not only a mechanical object, but an interactive and emotional artifact that reacts to human presence.
- Refik Anadol — creates immersive environments using data and AI to generate emotional and sensory experiences through light, movement, and digital media.
- Random International — their installation Rain Room responds to human presence, allowing visitors to influence the environment through movement.
- Studio Roosegaarde — develops interactive installations that react to human behavior and environmental signals, combining technology, design, and public space.
- Neri Oxman — explores the integration of biology, material systems, and computational design to create responsive structures and material-driven design.
- teamLab — produces immersive digital environments where artworks react dynamically to visitor movement and presence.
At this stage, the exact mechanism is still under exploration, but the project direction is already defined as a responsive kinetic artifact that merges art, design, and engineering through digital fabrication.