Week 17 – Wildcard Week
This week is focused on Wildcard Week. The goal of the assignment was to design and produce something using a digital process that had not been covered in another Fab Academy assignment.
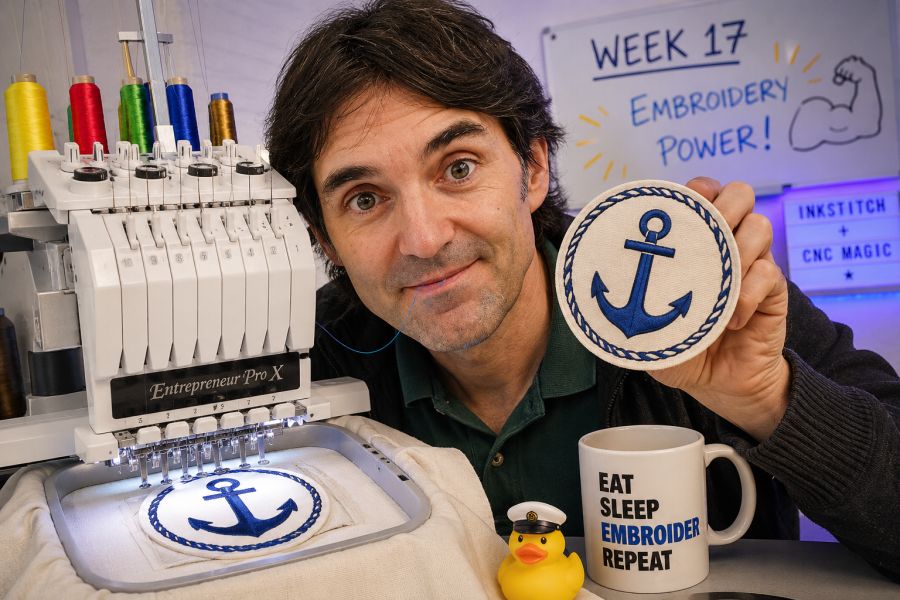
For this assignment, I decided to work with a CNC embroidery machine. I used Inkscape together with the Ink/Stitch extension to convert a digital vector design into embroidery machine instructions. My first test was to embroider a captain symbol, and the next objective is to apply this workflow to embroider a robotic hand that will be part of an inflatable element for my final project.
On this page I document:
- The digital embroidery workflow I used.
- Why CNC embroidery is a process not covered in previous assignments.
- The software tools used: Inkscape and Ink/Stitch.
- The design preparation for embroidery.
- The machine setup and material selection.
- The production of the first embroidery test.
- The problems found during the process and how I fixed them.
- The files needed to reproduce the assignment.
- The connection between this assignment and my final project.
Assignment and Learning Outcomes
The weekly assignment is:
- Design and produce something with a digital process incorporating computer-aided design and manufacturing, not covered in another assignment.
Learning Outcomes
- Demonstrate the workflow used in a chosen digital fabrication process.
- Select and apply suitable processes and materials for the assignment.
- Document all the steps needed to reproduce the process.
- Understand how digital design data is converted into machine operations.
- Evaluate the limitations and possibilities of CNC embroidery.
Checklist
- Documented the workflow and process used.
- Explained how the process is not covered in other assignments.
- Described the problems encountered and how I fixed them.
- Included original design files and machine files.
- Included a hero shot of the final result.
Official Fab Academy Wildcard Week page: Wildcard Week
Chosen Process – CNC Embroidery
For this week I chose CNC embroidery because it combines digital design, computer-aided manufacturing and textile fabrication. The process starts with a vector drawing and finishes with a real embroidered object produced by a machine.
Embroidery is interesting for my final project because Hugbot will have soft and inflatable parts. Instead of only using rigid materials, embroidery allows me to add graphic details, symbols, textures and functional sewing patterns to textile surfaces.
Why This Process Is Different
In previous assignments I worked with processes such as laser cutting, 3D printing, electronics production, molding, casting, programming and mechanical design. CNC embroidery is different because the final result is produced on fabric using thread, stitch paths, density, direction and tension.
The machine does not remove material like a milling machine and does not add melted plastic like a 3D printer. Instead, it creates a design by moving fabric under a needle and placing stitches in specific positions. For this reason, the design must be prepared considering the behaviour of fabric and thread.
Project Idea
My main idea for this week was to learn the complete embroidery workflow before applying it to the final project. The final objective is to embroider a robotic hand design that can be used on an inflatable part of Hugbot.
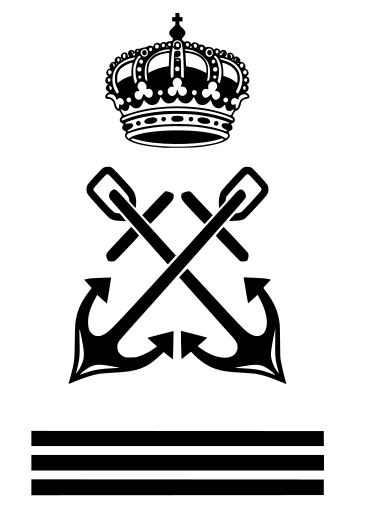
As a first test, I decided to embroider a captain symbol. This was a good starting point because it has a clear shape and allows me to test the conversion from vector drawing to stitches.
Design Goals
- Create a simple but recognizable embroidery design.
- Prepare the design digitally using Inkscape.
- Convert the design into stitch paths using Ink/Stitch.
- Test the design on fabric using the CNC embroidery machine.
- Document the workflow so I can repeat it with the robotic hand design.
Software Tools
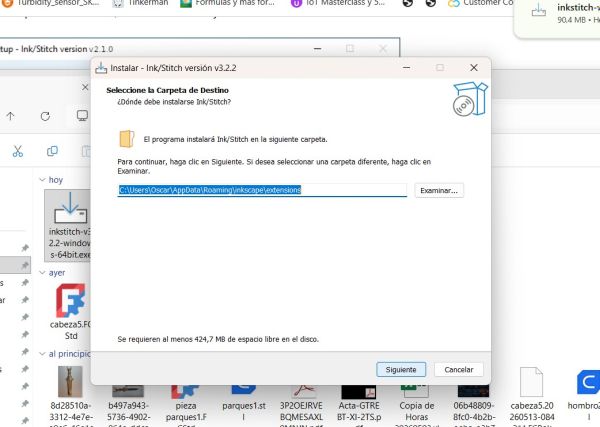
I used Inkscape as the main vector design software. Inkscape allows me to draw, modify and organize the geometry of the design. To generate embroidery files, I used the Ink/Stitch extension.
Embroidery files were created using Inkscape , Inkscape. ( see assignment week 3)
| Tool | Use | Reason |
|---|---|---|
| Inkscape | Vector drawing and design preparation | Free, open-source and compatible with SVG files |
| Ink/Stitch | Embroidery digitizing and stitch generation | Allows SVG designs to be converted into embroidery machine files |
| CNC embroidery machine software | Machine operation and file loading | Used to send the embroidery file to the machine |

Embroidery files were created using Ink/Stitch , an embroidery extension for Inkscape.
About Ink/Stitch
Ink/Stitch is an extension for Inkscape that adds embroidery functions. It allows the user to define stitch types, simulate the result and export machine-readable embroidery files.
This was important because a normal SVG file is only a drawing. The embroidery machine needs information about stitches, order, direction and thread changes.
First we need to install Inksticht and follow the turorial of Nuria (fablab León)
Workflow
Workflow Diagram
🧵 Embroidery Workflow Diagram
1. Create Design
Create or import the captain symbol in Inkscape.
2. Clean Vector
Simplify shapes and prepare the drawing.
3. Convert to Paths
Transform objects into embroidery-ready paths.
4. Define Stitches
Choose fill areas and outline areas.
5. Ink/Stitch Magic
Assign embroidery parameters and stitch settings.
6. Simulation
Check stitch order and thread direction.
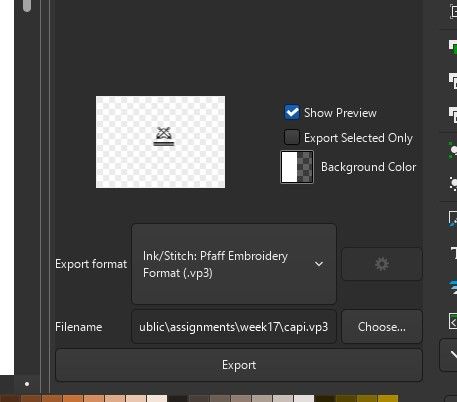
7. Export File
Generate the embroidery machine file.
8. Prepare Fabric
Mount fabric, stabilizer and embroidery hoop.
9. CNC Embroidery
Load the file and start the machine.
10. Final Result
Inspect the embroidery and improve the design if needed.
The complete process can be summarized as:
Vector design → Path cleanup → Ink/Stitch parameters → Simulation → Machine file export → Fabric preparation → CNC embroidery → Final result
Notes of Design Preparation in Inkscape
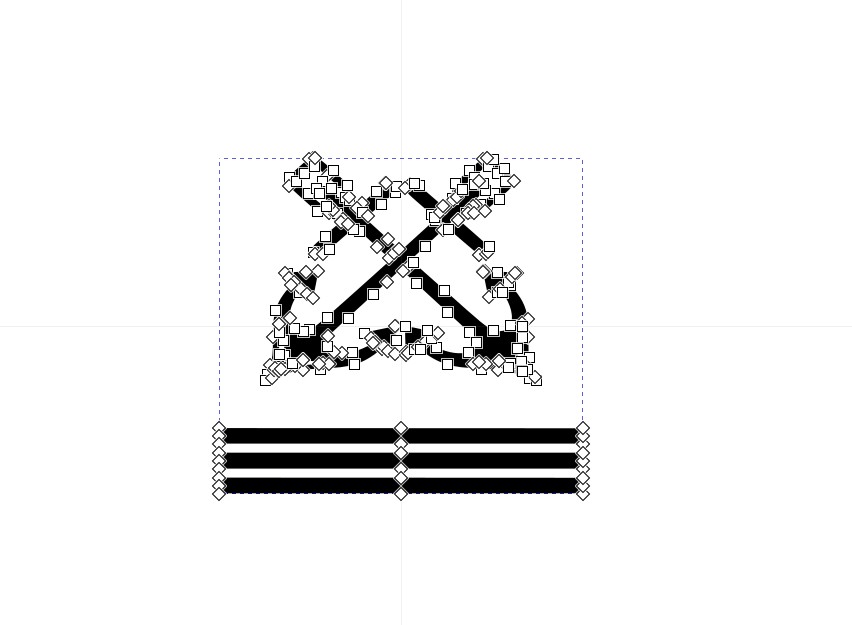
I started by preparing the captain symbol as a vector drawing. Before sending the design to Ink/Stitch, I had to make sure that the geometry was clean and suitable for embroidery.
Notes of the Design Preparation Steps
- I adjusted the size of the design to fit the embroidery hoop.
- I removed unnecessary details that would be too small to embroider correctly.
- I converted the objects into paths.
- I checked that closed shapes were correctly defined for fill stitches.
- I separated the design into logical embroidery areas.
- I prepared outlines and filled areas depending on the desired result.
One important lesson is that a design that looks good on the screen is not always suitable for embroidery. Very small details, sharp corners and thin lines can be difficult because the thread has a physical thickness.
Digitizing Process with Ink/Stitch
After preparing the SVG file, I used Ink/Stitch to convert the vector design into embroidery information. This process is known as digitizing.
Assigning Embroidery Stitches
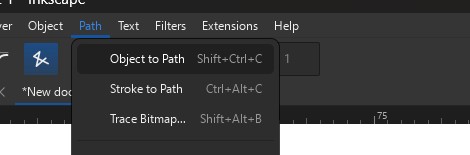
The design was divided into separate elements: the background circle, the anchor symbol, and the horizontal lines. Each object was converted to a path in Inkscape using Path → Object to Path and then configured individually through Extensions → Ink/Stitch → Params.
- Import the SVG design into Inkscape.
- Convert all objects to paths using Path → Object to Path.
- Separate the design into individual elements.
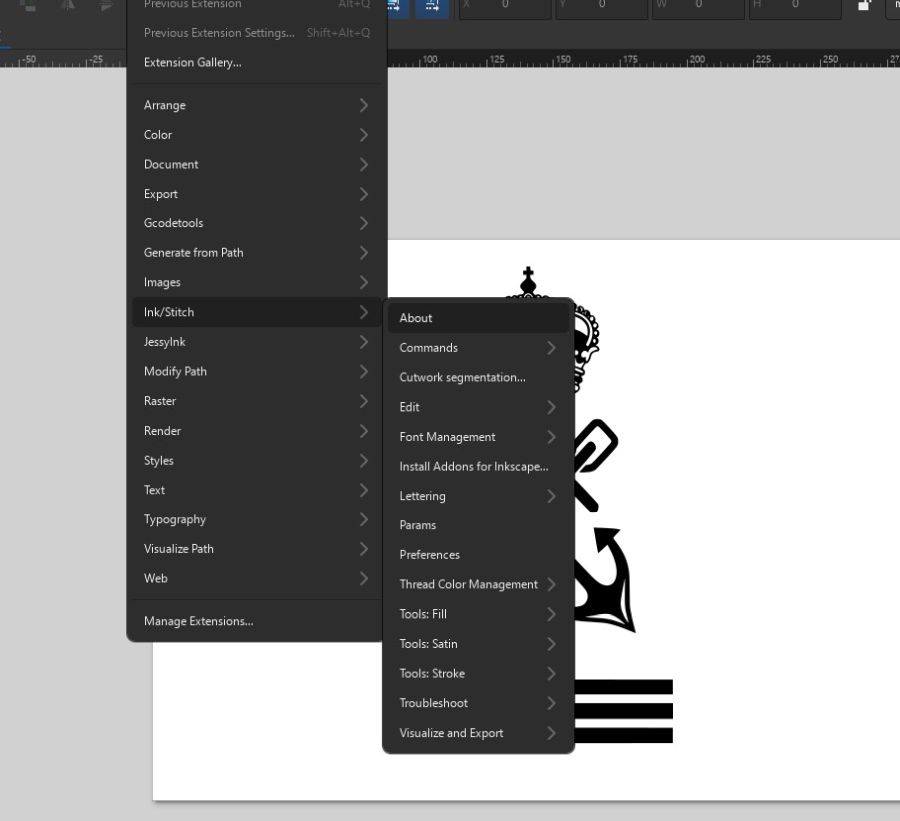
- Open the embroidery settings through Extensions → Ink/Stitch → Params.
- Assign the appropriate stitch type to each object.
- Adjust the stitch parameters and verify the result with the simulator.
- Export the embroidery file for the machine.
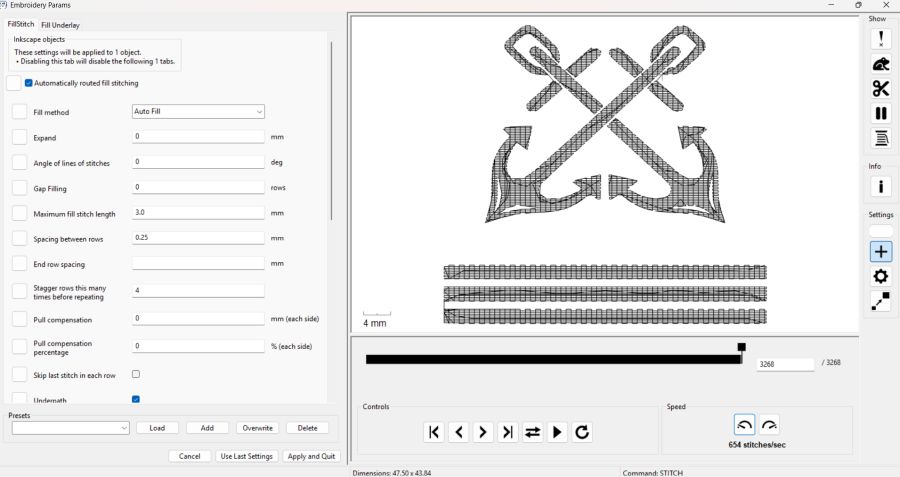
Different stitch types were assigned according to the geometry of each element:
- Background circle: Auto Fill stitch.
- Anchor symbol: Satin stitch for wide sections and running stitch for narrow details.
- Horizontal lines: Running stitch.
Embroidery Parameters
| Parameter | Purpose | My Decision |
|---|---|---|
| Stitch type | Defines how the machine creates each area | Auto Fill for the background, satin and running stitches for details |
| Stitch density | Controls how close the stitches are | Medium density for the first test |
| Stitch direction | Changes texture and fabric behaviour | Adjusted to follow the main shape of the symbol |
| Order of objects | Defines the sequence of embroidery | Background first, details and outlines later |
| Jump stitches | Thread movements between separated areas | Reduced by organizing the object order |
The stitch parameters were adjusted using the Ink/Stitch Embroidery Params panel, and the final design was verified using the Ink/Stitch Simulator before exporting the embroidery file.
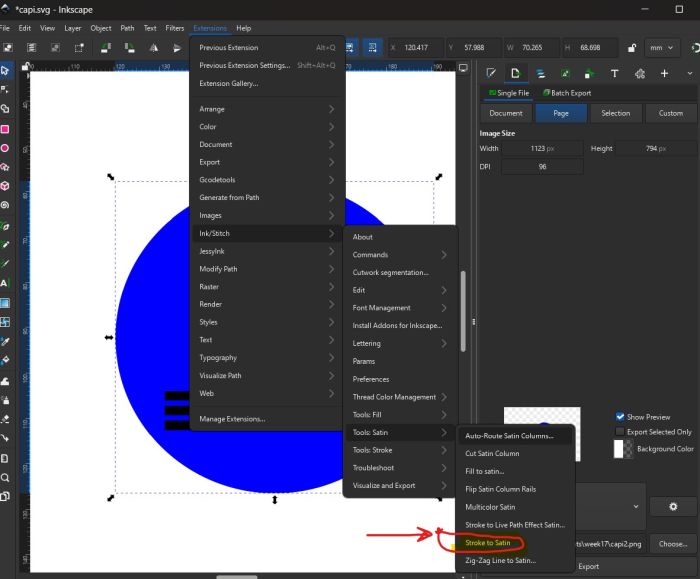
Figure 1. Assigning an Auto Fill stitch to the background circle.
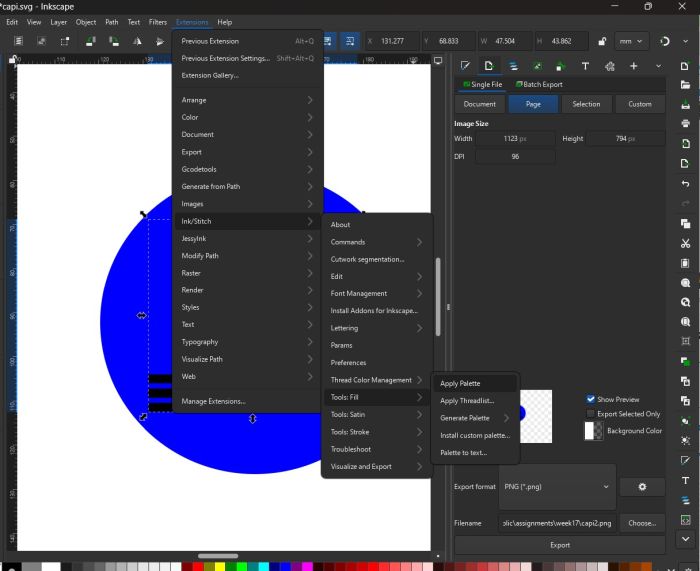
Figure 2. Configuring satin stitches for the anchor symbol.

Figure 3. Adjusting embroidery parameters in Ink/Stitch.
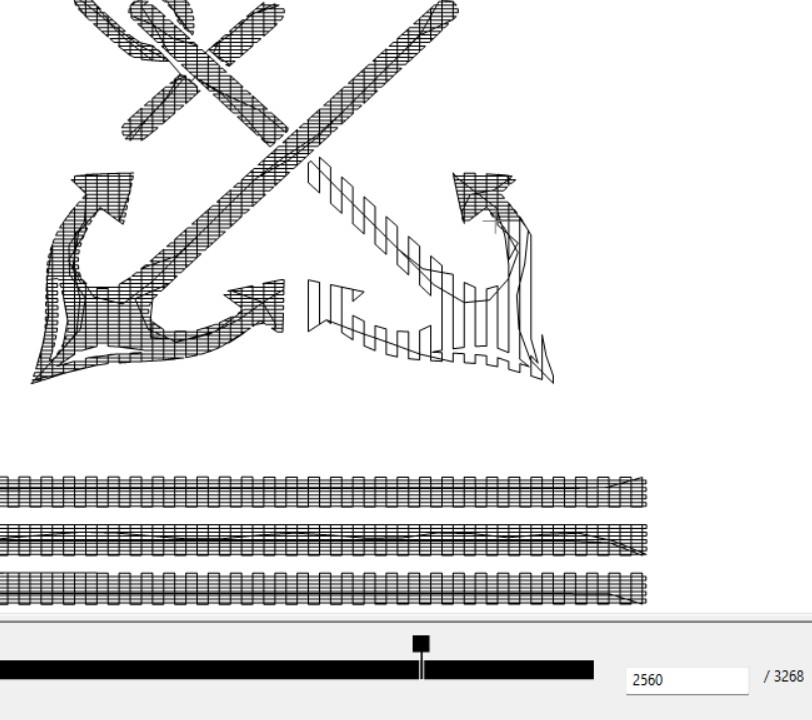
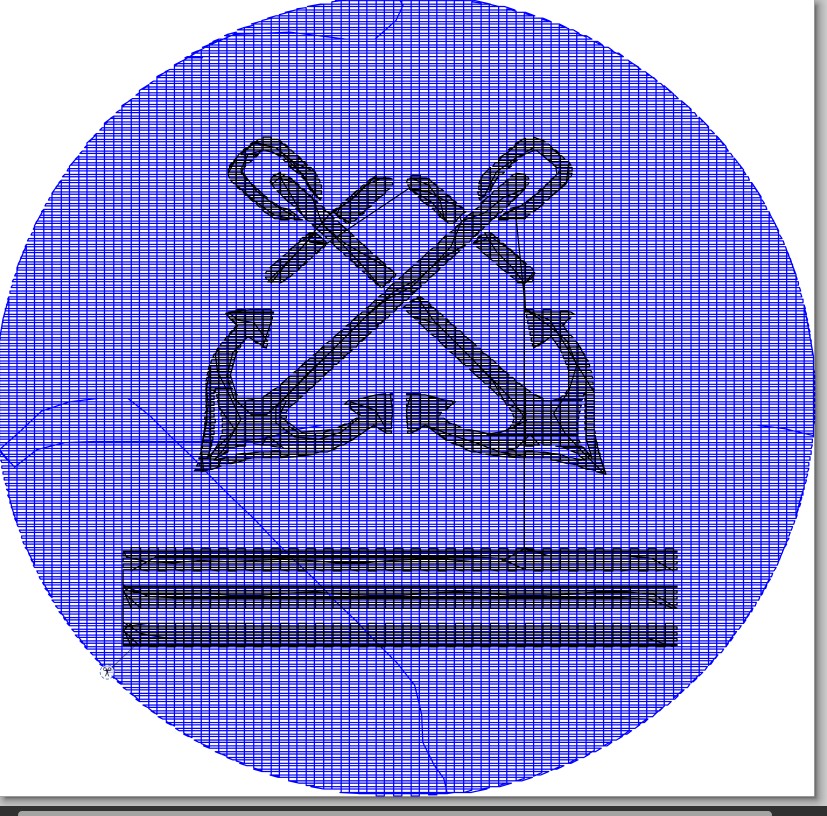
Simulation
Before using the embroidery machine, I ran the simulation in Ink/Stitch. This allowed me to verify the stitch sequence, check the thread path, and detect possible issues such as unnecessary jump stitches or incorrect object order before wasting material.
Figure 4. Ink/Stitch simulation showing the embroidery sequence and stitch path.
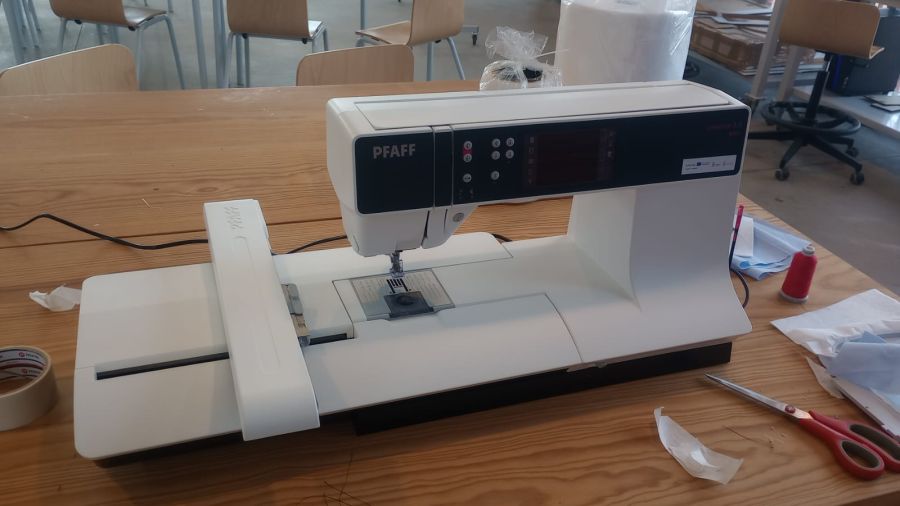
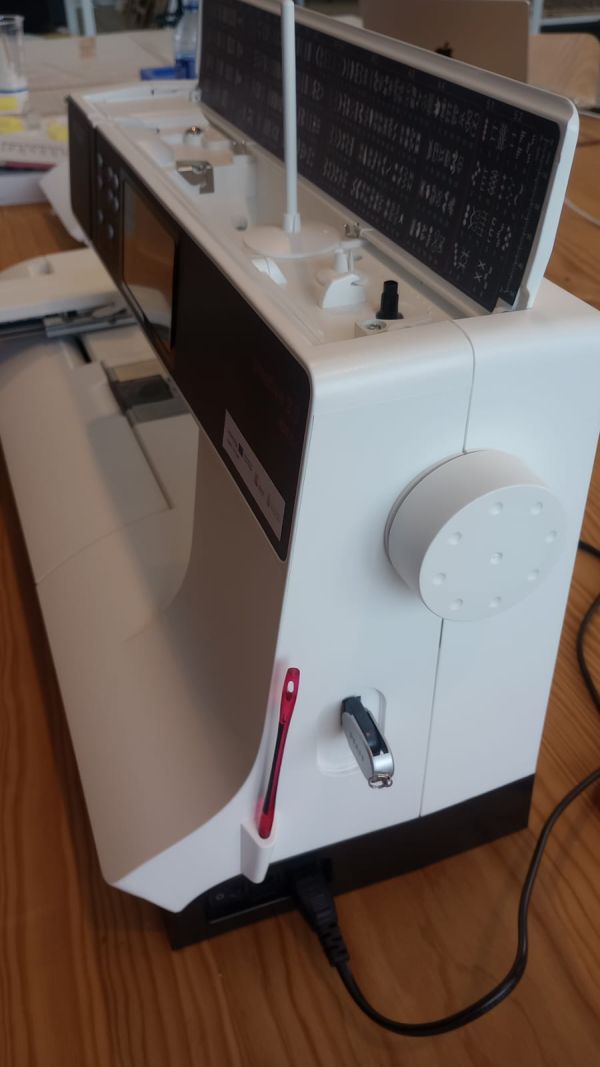
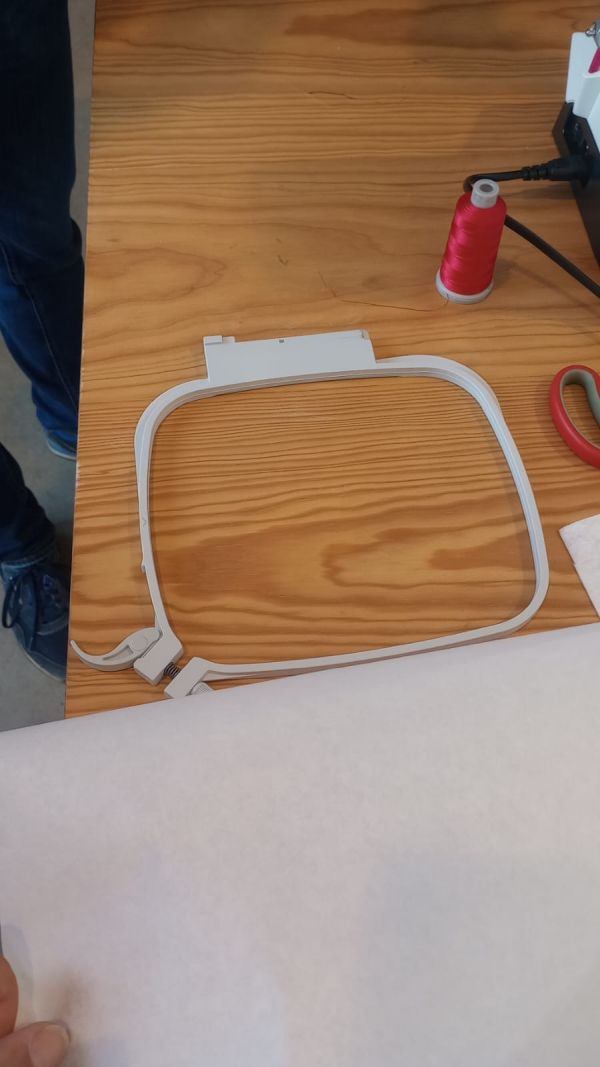
Materials and Machine Setup
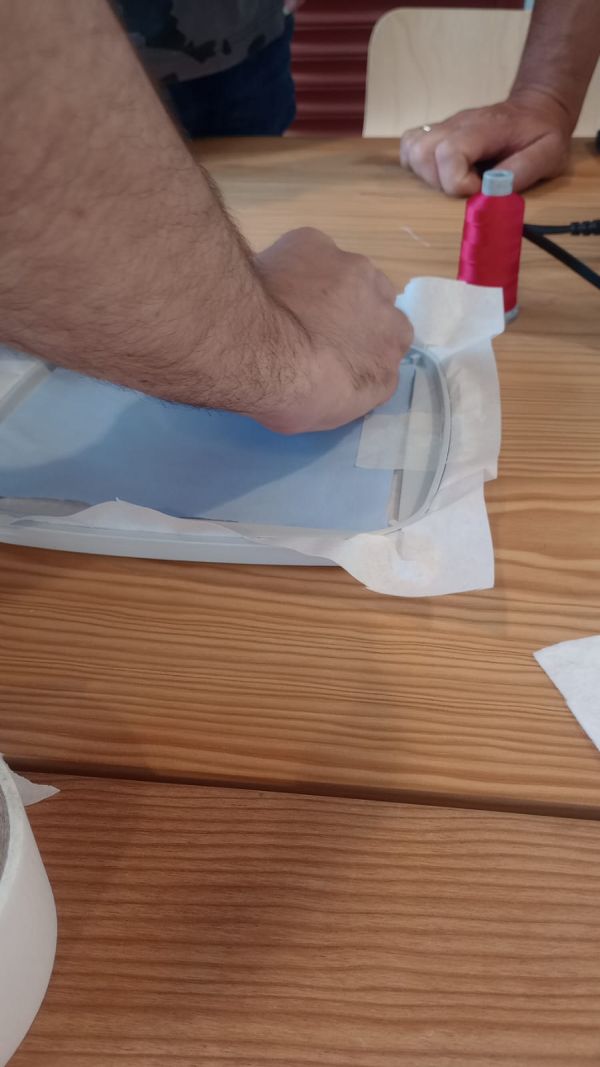
For the first embroidery test I used fabric, embroidery thread and stabilizer. The stabilizer is important because it keeps the fabric firm while the needle moves quickly over the design.
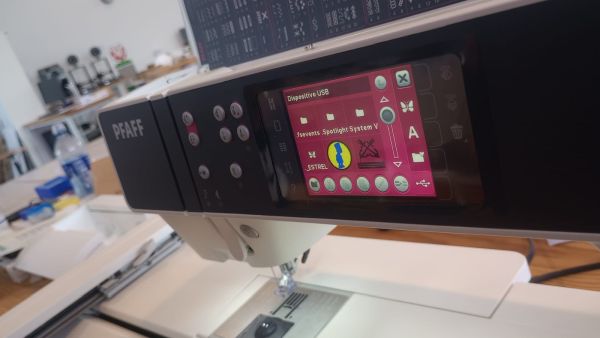
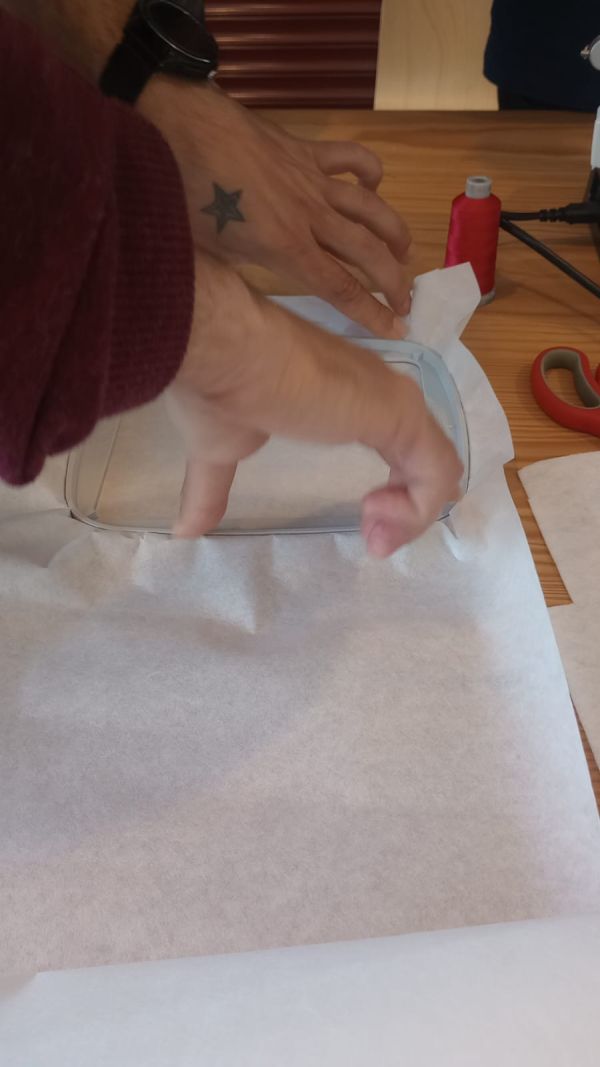
USB files
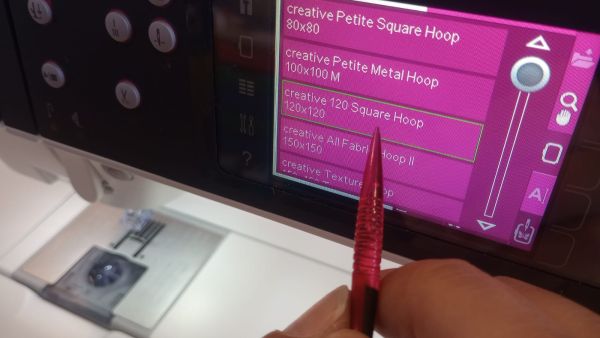
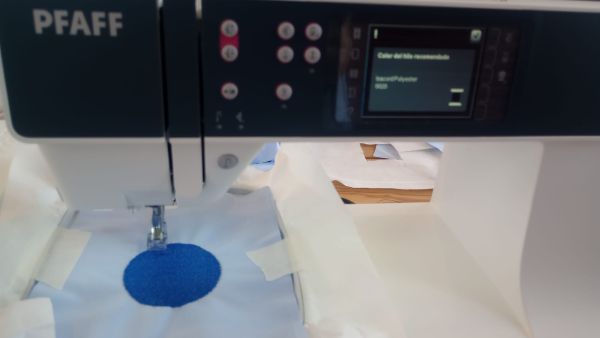
We mount the stabilizer and the fabric onto the hoop, and the fabric is fixed with adhesive tape. The machine performs a home movement, so its working area must be clear. Select the 120 × 120 hoop. In the “Lines” menu, press the horizontal bars to select the device. Then select the design.
Materials
- Fabric for the embroidery test.
- Embroidery thread.
- Stabilizer to support the fabric.
- Embroidery hoop.
- CNC embroidery machine.
Machine Setup
- Place the stabilizer under the fabric.
- Fix the fabric and stabilizer inside the embroidery hoop.
- Check that the fabric is flat and correctly tensioned.
- Install the correct thread colour.
- Load the embroidery file into the machine.
- Check the origin position and embroidery area.
- Start the embroidery process slowly and observe the first stitches.
Production Test – Captain Symbol
The first production test was the captain symbol. This test helped me understand the relation between digital paths and the real behaviour of the embroidery machine.
The simbol
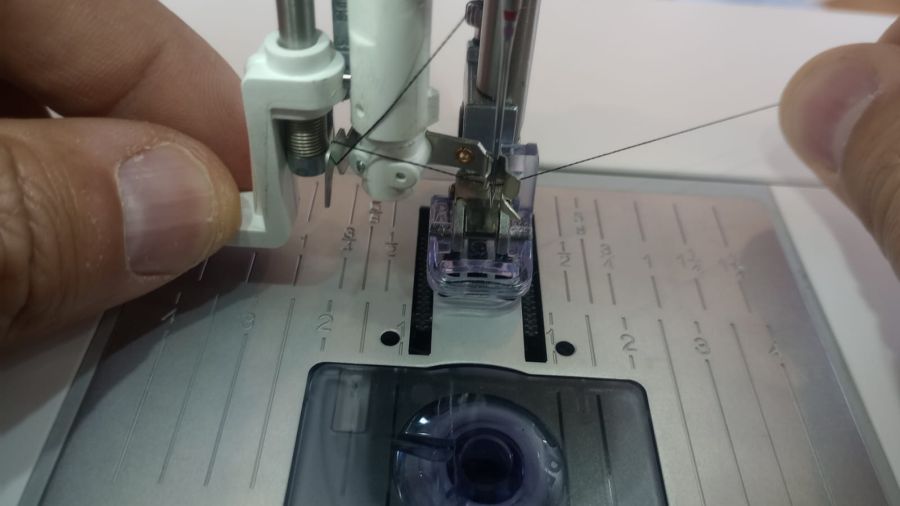
We place the thread of the chosen color before starting.
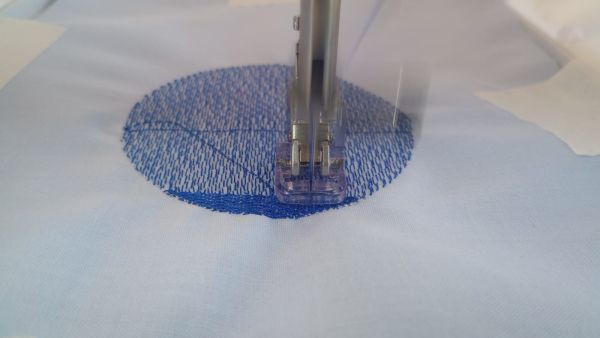
We start to work.
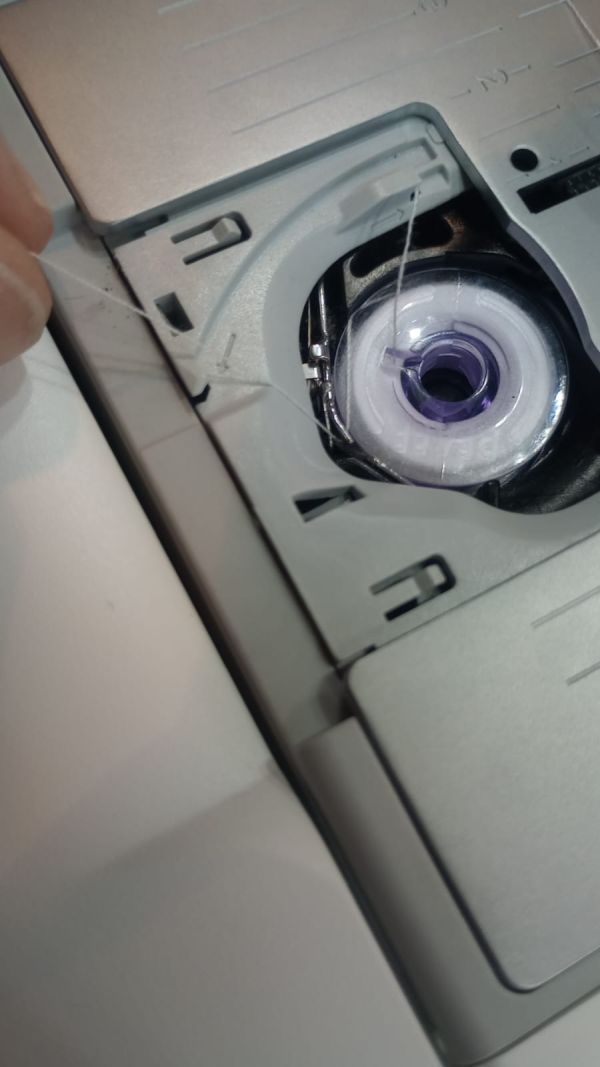
The bobbin ran out, and it had to be replaced with another one with thread.
Working again.
Worked with another thread.
During the test, I observed the movement of the hoop, the stitch direction and the tension of the fabric. This was very useful because some problems only appear when the design is physically embroidered.
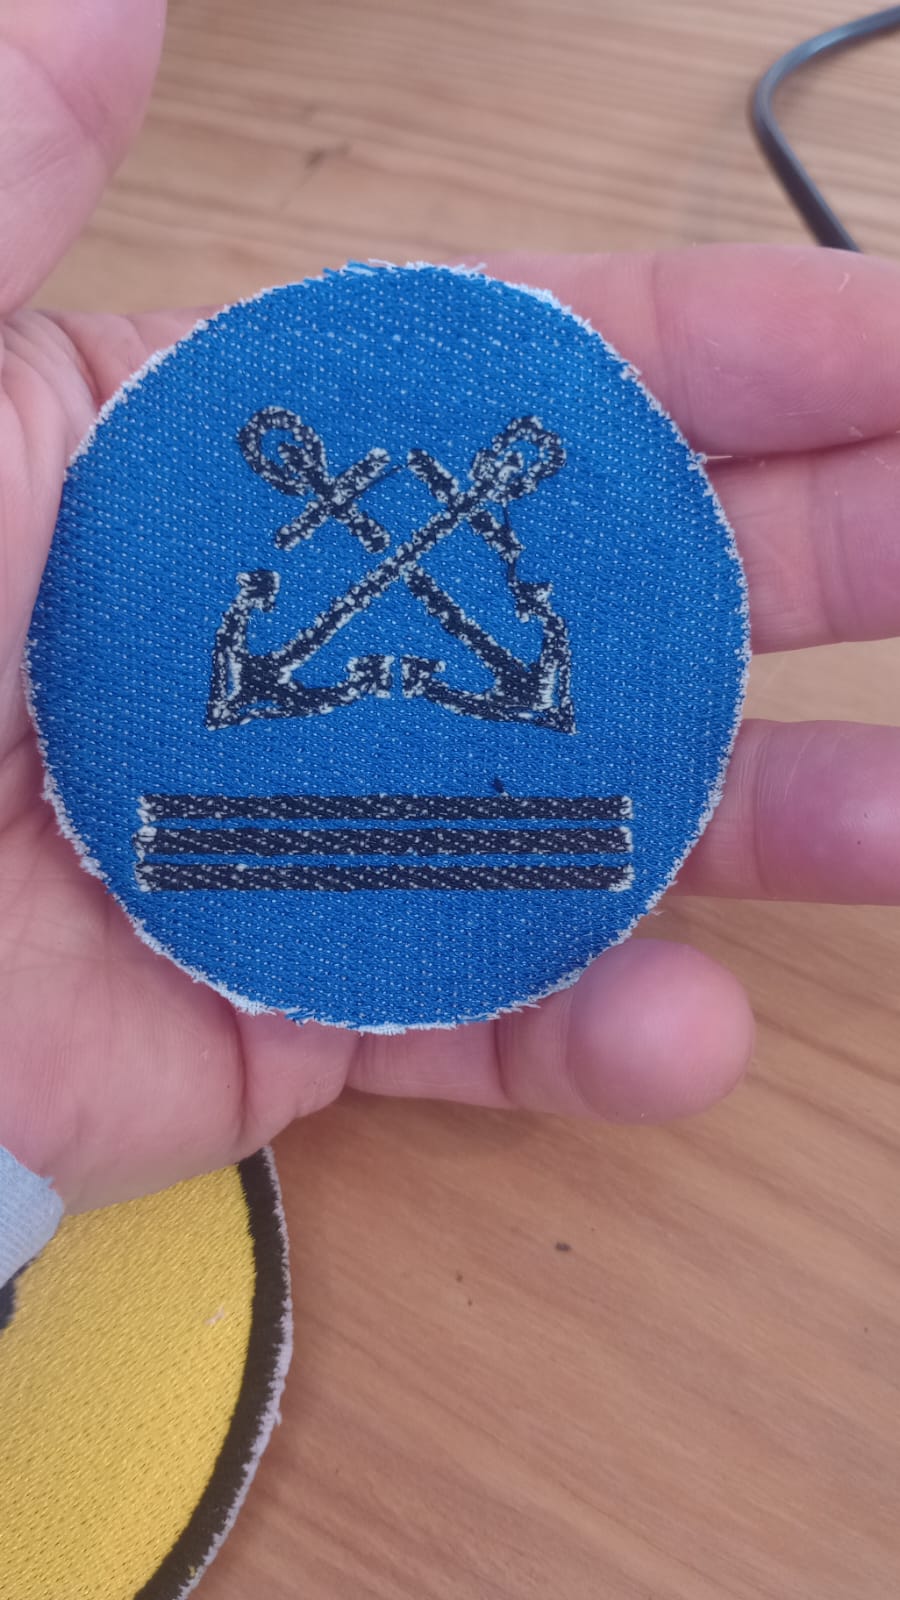
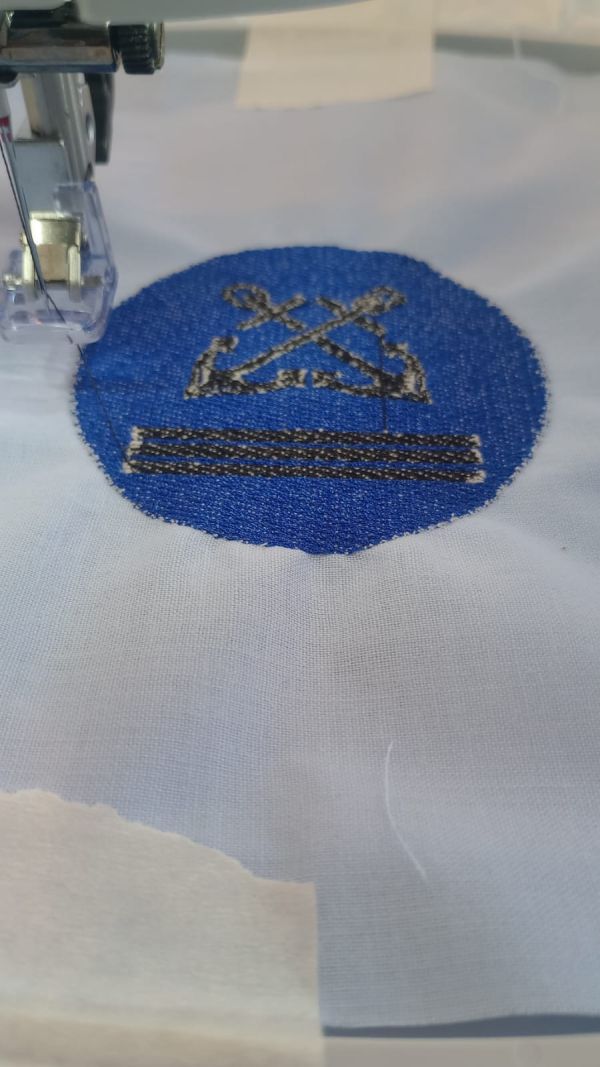
Result
The result was a first successful embroidery test. The symbol was recognizable and the process confirmed that I can use this workflow to create custom textile details
Problems and Fixes
Problem 1 – The SVG was not ready for embroidery
- Problem: Some shapes looked correct in Inkscape but were not suitable for stitch generation.
- Fix: I simplified the geometry, converted objects to paths and checked closed shapes before using Ink/Stitch.
Problem 2 – Small details were difficult to embroider
- Problem: Very small details can disappear or become messy because the thread has physical thickness.
- Fix: I increased the size of some elements and removed unnecessary details from the first test.
Problem 3 – Fabric movement
- Problem: If the fabric is not correctly tensioned, the embroidery can deform.
- Fix: I used stabilizer and tightened the fabric correctly in the embroidery hoop.
Problem 4 – Stitch order
- Problem: A bad stitch order can create unnecessary jumps and a less clean result.
- Fix: I organized the objects in Inkscape and checked the sequence with the Ink/Stitch simulation.
Files to Reproduce the Assignment
To reproduce this assignment, the following files are needed:
| File | Description | Link |
|---|---|---|
| Captain symbol SVG | Original vector design prepared in Inkscape | Download SVG |
| Ink/Stitch file | Embroidery file generated from the SVG design | Download Ink/Stitch SVG |
| Machine embroidery file | File exported for the CNC embroidery machine | Download machine file |
The exact machine file extension depends on the embroidery machine used. Common embroidery formats include files such as vp3
Summary and Reflection
This week helped me understand a new digital fabrication process that is very different from the other machines I used during Fab Academy. CNC embroidery requires thinking not only about geometry, but also about material behaviour, thread, fabric tension and stitch order.
The most important lesson was that embroidery design is not just drawing. A good embroidery file needs clean paths, correct stitch parameters and a good simulation before using the machine.
The captain symbol was a useful first test because it allowed me to validate the complete workflow from Inkscape to the embroidery machine. Now I can apply the same process to more complex textile elements, such as the robotic hand for the inflatable part of Hugbot.
Credits and Acknowledgements
This documentation was developed as part of Fab Academy 2026.
- Project design and development: Oscar Cela Cobo.
- Fab Lab support: Fab Lab León / Fab Lab Ponferrada.
- Embroidery workflow: Inkscape, Ink/Stitch and CNC embroidery machine.
- English translation and documentation support were assisted with ChatGPT.
- All design decisions, fabrication work, tests and final documentation were reviewed and adapted by me.