WEEK 17 WILDCARD WEEK
- INTRODUCTION
- SCHEDULE
- THE MACHINE
- INSTALLATION
- DESIGN
- PARAMETERS
- EMBROIDERING
- THE RESULT
- CONCLUSION
- ORIGINAL FILES
INTRODUCTION
We are hitting the final stretch! The task for this week consists of an individual assignment, which is described below:
Design and produce something with a digital process (incorporating computer-aided design and manufacturing) not covered in another assignment, documenting the requirements that your assignment meets, and including everything necessary to reproduce it.
As a result, the possibilities for fulfilling this assignment are extensive. The core options are detailed within the official documentation guidelines:
Possibilities include (but are not limited to): wildcard Week
In my case, and after discussing with my instructors, we decided to create a design using the CNC embroidery machine.
This digital fabrication method is completely different from the ones applied throughout the FabAcademy so far, thereby meeting all the requirements.
Given the advanced stage of the course and that my final project is still under development, I do not have the time to experiment with other techniques right now. However, like many other skills that are currently in my backlog, I plan to revisit this in the future.
SCHEDULE
Time management for this assignment was challenging due to the same recurring constraints: during the week, my professional workload leaves very little time for development.
However, unlike previous weeks where the bulk of the work was completed over the weekend, this time I could only manage the design phase. The practical manufacturing had to be pushed to the following Monday.
This constraint, combined with the fact that the final project presentation deadlines are fast approaching, meant that documenting the practical workflow had to be deferred to the subsequent weekend.
- Thursday: Attended the assignment review and briefing with my local instructors.
- Friday: Watched Neil's global lecture asynchronously, as I was unable to attend the live stream prior to the local briefing.
- Saturday (Morning): Downloaded, installed, and started working with the InkStitch extension. (Afternoon): Dedicated the remaining time to Final Project development.
- Sunday: Finalized the vector designs and documented the workflow completed up to this point.
- Monday: Executed the practical embroidery manufacturing at the Ponferrada FabLab.
- Following Sunday: Finalized the documentation and closed out the assignment.
THE MACHINE
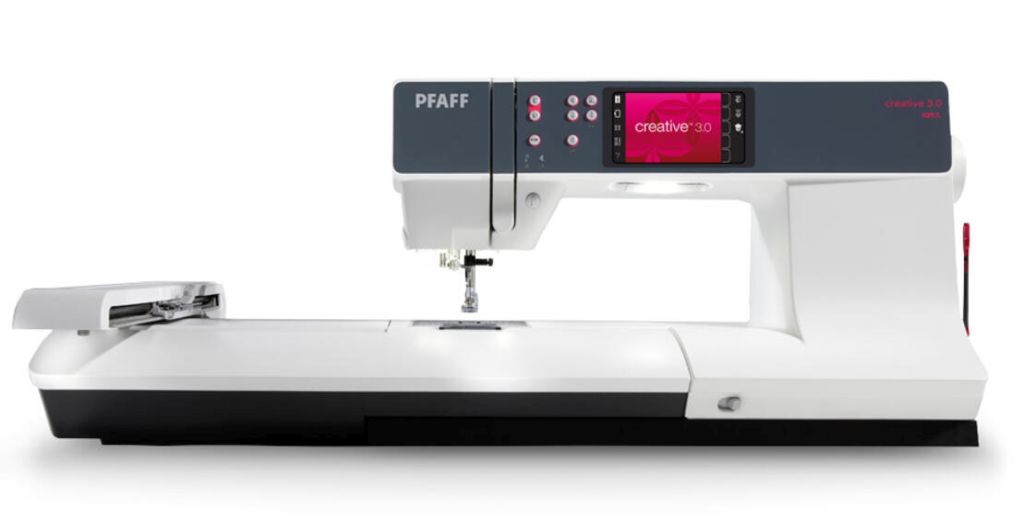
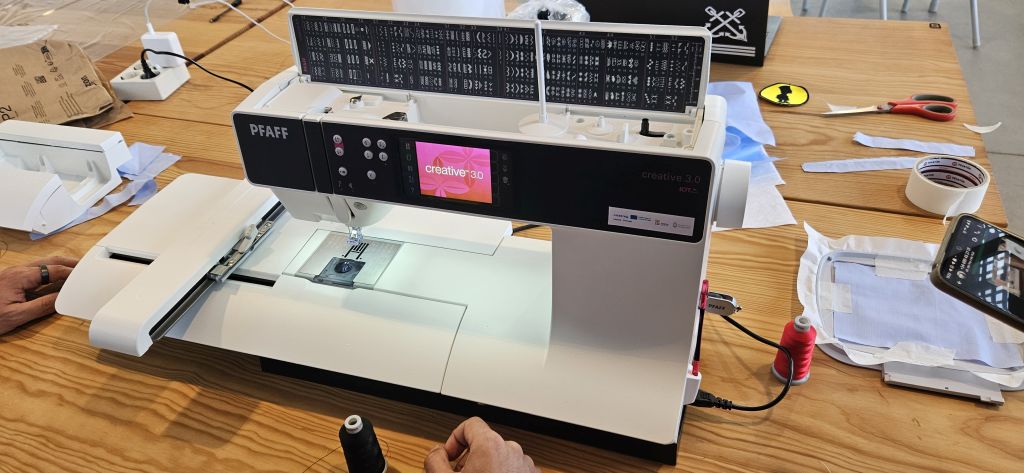
The embroidery machine I will be using is a Pfaff Creative™ 3.0 Sewing and Embroidery Machine.
Its main specifications are:
| Specification | Value | Description / Details |
|---|---|---|
| Stitches | 254 | Total number of built-in decorative and utility stitches. |
| Max Stitch Width | 9 mm | The distance the needle moves from side to side while creating a stitch. |
| Max Stitch Length | 6 mm | How long each stitch is sewn by the machine. |
| Sewing Fonts | 4 | Built-in typography fonts for lettering and programming. |
| Sewing Space | 250 mm | Generous workspace area from the needle to the inner machine tower. |
| Screen Size | 3.5" diagonal | High-resolution display screen for editing designs and pattern settings. |
| Needle Threader | Built-In (Manual) | Integrated mechanism to assist with quick and precise threading. |
| Needle Up/Down | Yes | Controls whether the needle stops inside or outside the fabric. |
| Thread Cutter | Auto Snip | Automatically cuts top and bobbin threads at the touch of a button. |
| Speed Control | Digital | Electronic slider control to set the maximum stitching speed limits. |
| Max Sewing Speed | 1,050 stitches/min | Maximum mechanical speed threshold under standard sewing operations. |
| IDT™ System | Original Integrated Dual Feed | Exclusive Pfaff technology that feeds fabric evenly from both top and bottom. |
| Max Embroidery Area | 260 x 200 mm (10.2" x 7.9") | Maximum dimensions supported for a single-hoop automated embroidery layout. |
| Start/Stop Button | Yes | Enables sewing and automated embroidery without a traditional foot pedal. |
| Automatic Presser Foot Lift | Yes | Automatically raises the foot when the machine stops with the needle down. |
| Automatic Feed Dog Drop | Automatic | Lowers feed dogs automatically when entering free-motion or embroidery modes. |
| Bobbin Thread Sensor | Yes | Alerts the user on screen when the lower bobbin thread is running low. |
| Thread Tension | Automatic | Electronically adjusts tension values for consistent stitch quality. |
| Precise Stitch Positioning | Basic | Aligns custom designs precisely with specific starting points on the fabric. |
| Stitch Sequencing | Yes | Allows combining multiple stitches and letters into unique continuous sequences. |
| Built-In Embroidery Designs | 157 | Pre-loaded patterns ready for scaling and execution. |
| Embroidery Fonts | 2 | Dedicated typography styles pre-installed for automated embroidery text. |
| Auto-Cut Jump Stitches | Yes | Automatically trims connecting threads during design jumps to save finishing time. |
INSTALLATION
First and foremost, to embroider anything onto fabric, we obviously need a design. To create our 2D vector design and convert it into an embroidery pattern, we will be using Inkscape alongside a dedicated extension for this purpose: InkStitch.
Therefore, the very first step, if you haven't already done so, is to install Inkscape from its official website:
Once Inkscape is successfully installed, setting up InkStitch is just as straightforward, as this extension is installed directly from within Inkscape itself.
DESIGN
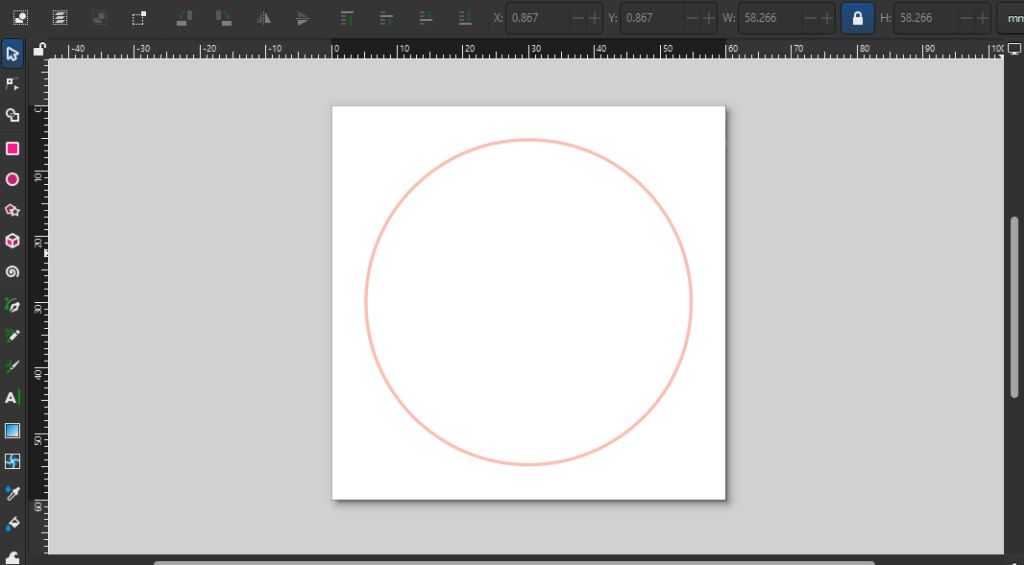
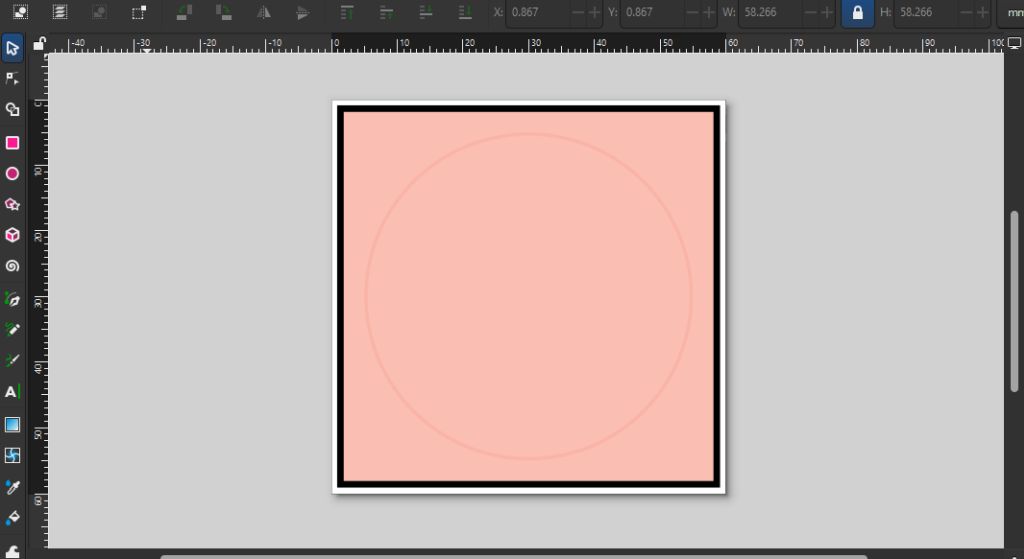
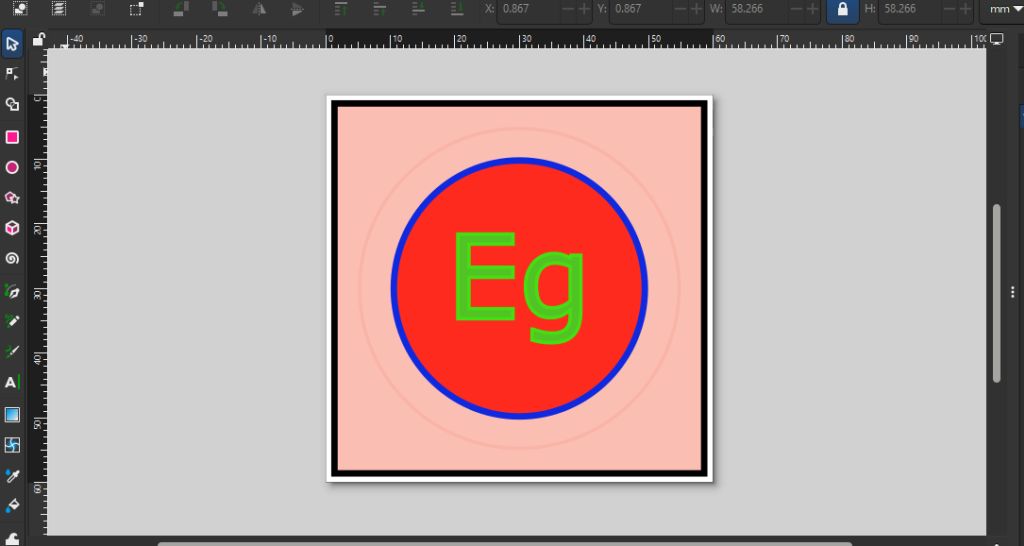
With the software up and running, we created a test design using different colors, which allows us to apply different embroidery patterns to each section later on.
The InkStitch extension features a simulator tool that lets us preview the various stitch patterns before executing them on the embroidery machine.
Design Workflow
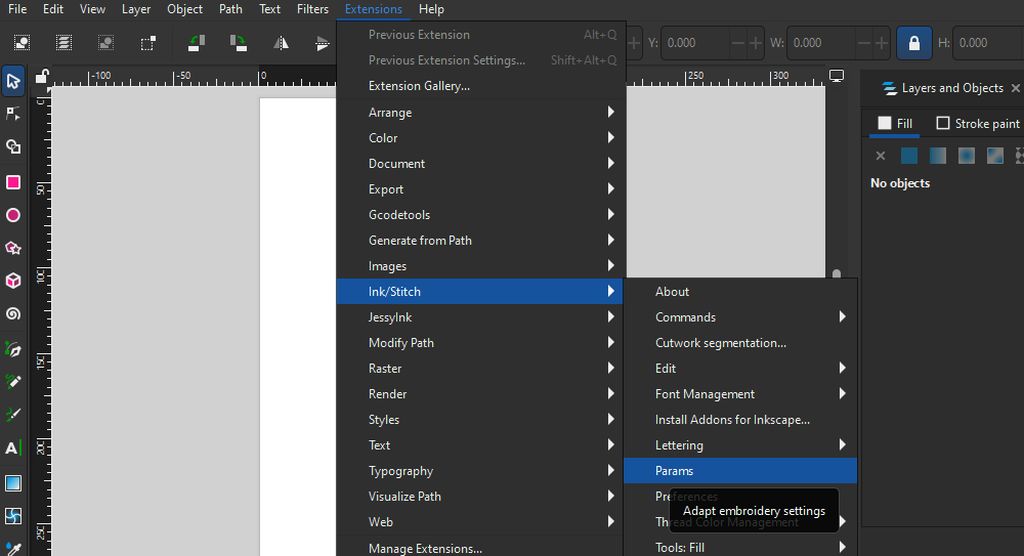
The next step is to launch the InkStitch extension from within Inkscape:
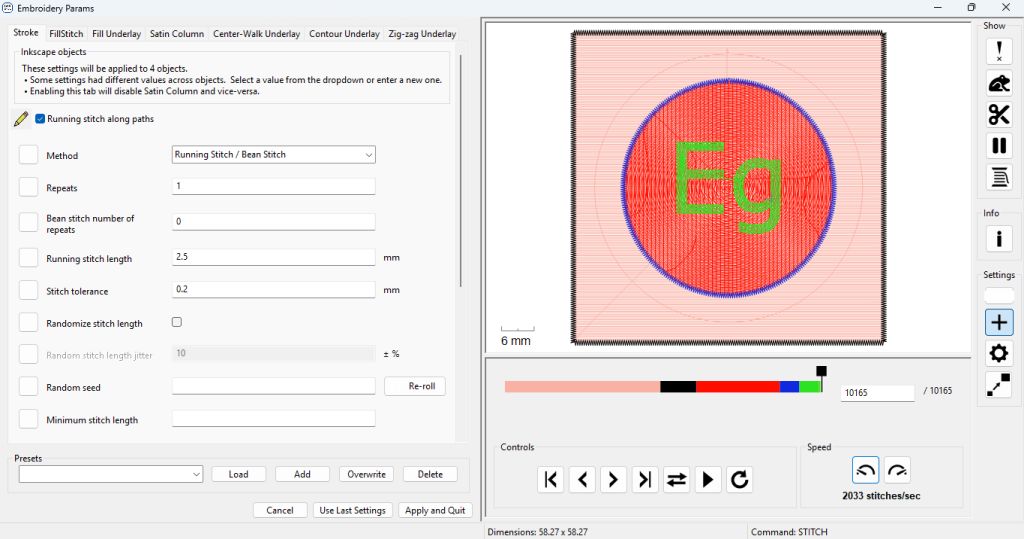
In the embroidery parameters panel, we can choose from a wide variety of available stitch patterns.
The selected pattern will be applied to the specific color layer or object that was highlighted before opening the Params menu.
It is important to pay close attention to the simulation sequence displayed on the right-side preview pane. In this instance, since we selected all colors prior to entering this menu, the software generates a complete, full-design simulation.
This detail is critical; in our case, for instance, the lettering must be stitched last. Otherwise, if embroidered earlier, the background fill would stitch right over the text, covering it up and rendering it completely illegible.
Types of Stitch Patterns
- Outlines and Lines (Strokes)
- Running Stitch: This is the basic sewing stitch. The machine follows the vectorized line, making single stitches one after another.
- Common Use: Fine outlines, subtle details, or placement guidelines that will later be covered by another embroidery layer.
- Variation: You can configure it as a Bean Stitch (triple stitch). The needle moves forward, backward, and forward for each step, creating a much thicker and more visible line.
- Satin Column: The king of traditional embroidery. It consists of a continuous zigzag that goes back and forth across a track. In InkStitch, it is generated by defining two parallel lines with the exact same number of nodes (or by using the auto-convert tool).
- Common Use: Text (lettering), thick patch borders, heraldic motifs, and professional finishes that add sheen, texture, and relief.
- Fills (Large Surface Areas)
- Tatami Fill (Fill Stitch): The ultimate standard pattern for filling shapes. The machine fills the area with rows of straight stitches back and forth (at whatever angle you choose), but staggers the needle penetration points on each row so that unwanted dividing lines do not form.
- Common Use: Backgrounds, character bodies, large logos, and any area requiring solid color. It is highly durable but can make the fabric stiff if the area is too large.
- Contour Fill: Instead of filling in straight horizontal or vertical lines, this pattern mirrors the outer shape of the vector object, creating concentric "rings" that step inward.
- Common Use: Creating depth effects, organic textures (like fur or wood grain), or adding dynamism to geometric figures.
- Decorative and Advanced Patterns
- Ripple Stitch: Similar to the contour fill, but it generates fluid parallel lines mimicking water ripples or radar waves. It leaves space between the lines, so it does not provide 100% fabric coverage.
- Common Use: Modern visual effects or lightweight backgrounds that don't add too much stiffness to the garment.
- Cross Stitch: InkStitch can fill a vector shape by simulating traditional handmade cross-stitching, creating a grid of tiny "X" shapes.
- Common Use: Retro aesthetics, pixel art, or imitating folk/traditional embroidery styles.
- E-Stitch (Blanket Stitch): A variation of the satin stitch that locks on one side of the border and then makes a straight perpendicular stitch, leaving a finish that looks like a series of "E" shapes or a comb.
- Common Use: Appliqué work (fabric on fabric) to secure the edges of a patch before final finishing.
These are applied directly to vector paths or open lines. They form the foundation for drawing, details, and borders.
These are applied to closed shapes. Since you cannot have an infinitely long stitch from one side to the other (the thread would loose tension and snag), InkStitch breaks the interior into specific patterns.
Used when looking for a more artistic finish, unique textures, or specialized techniques.
PARAMETERS
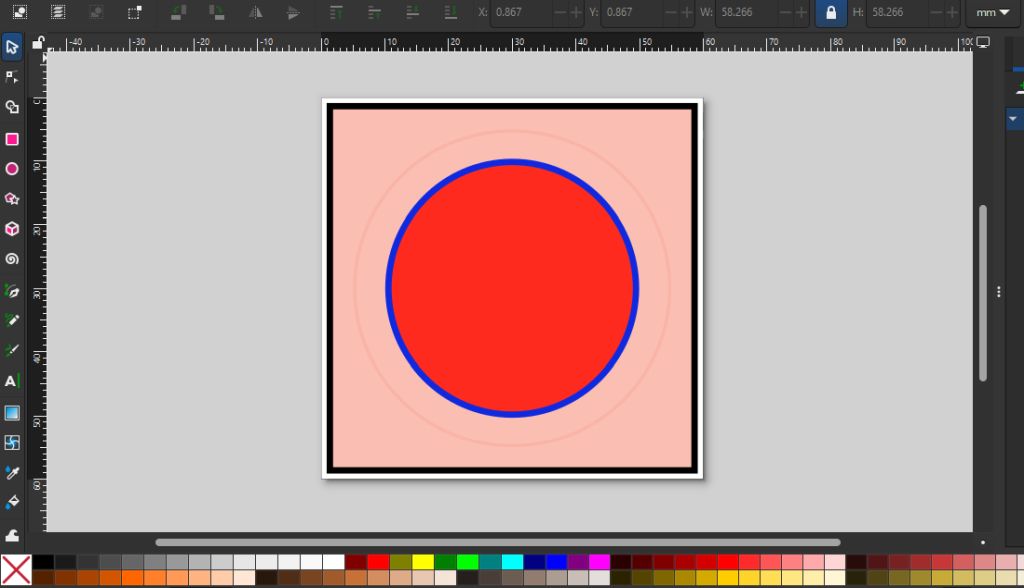
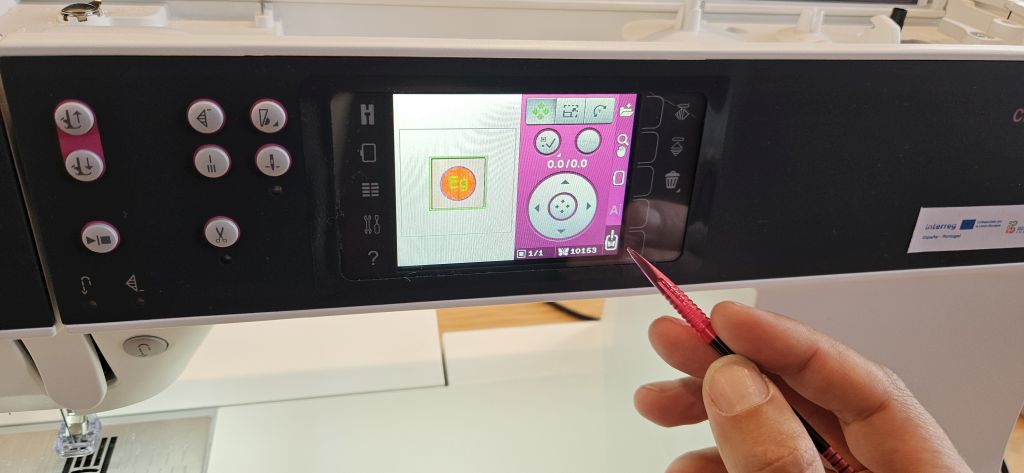
With all the previous steps completed, we simply select each shape individually and open the embroidery params panel to apply the desired settings:
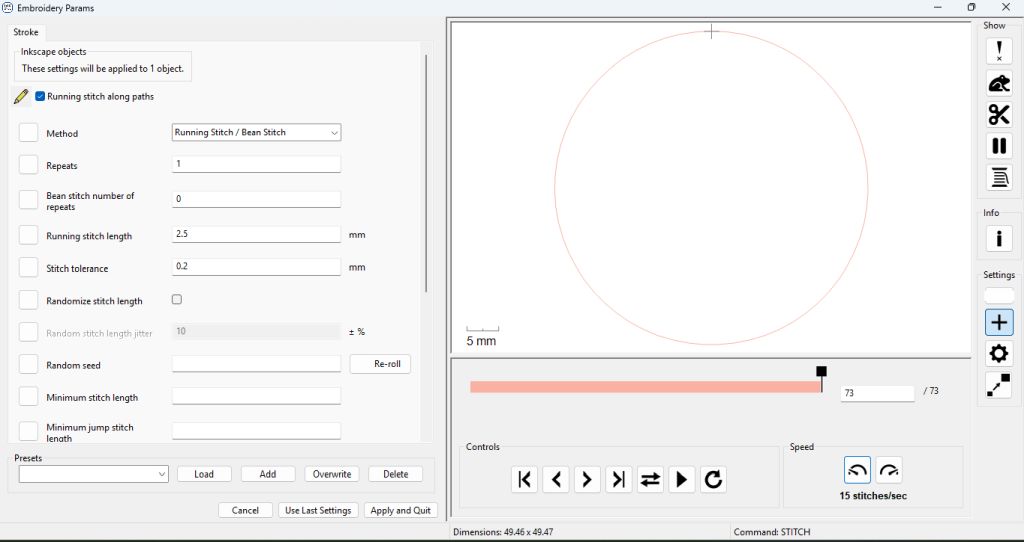
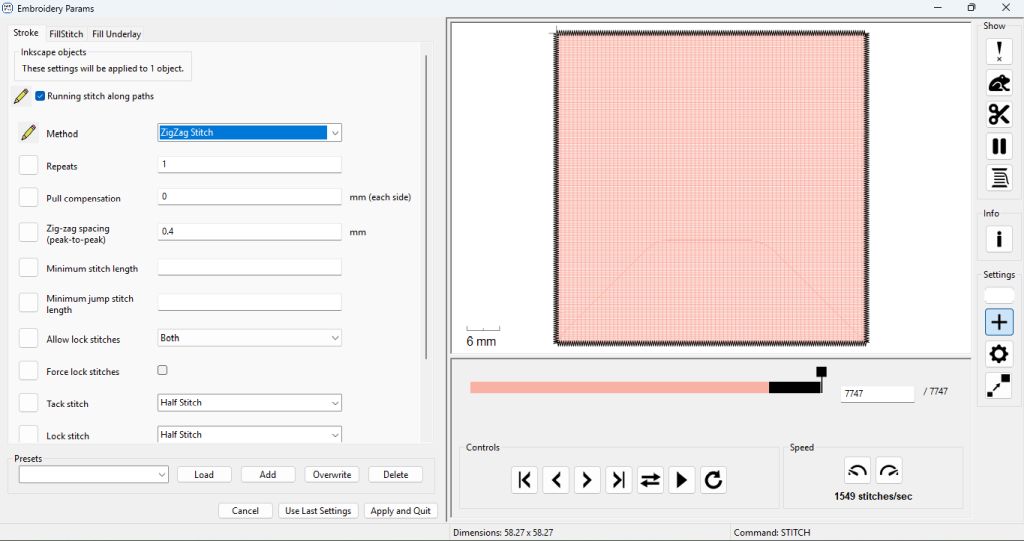
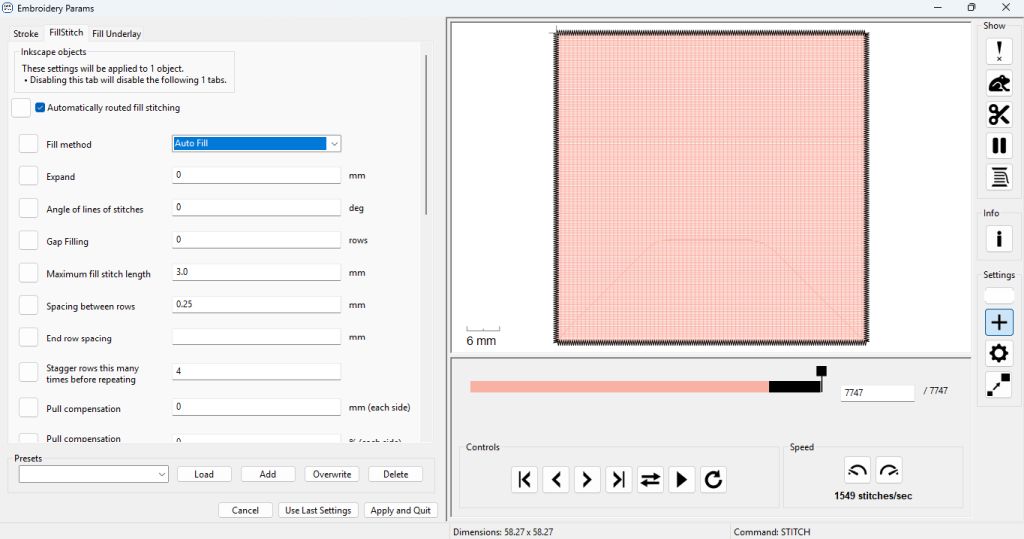
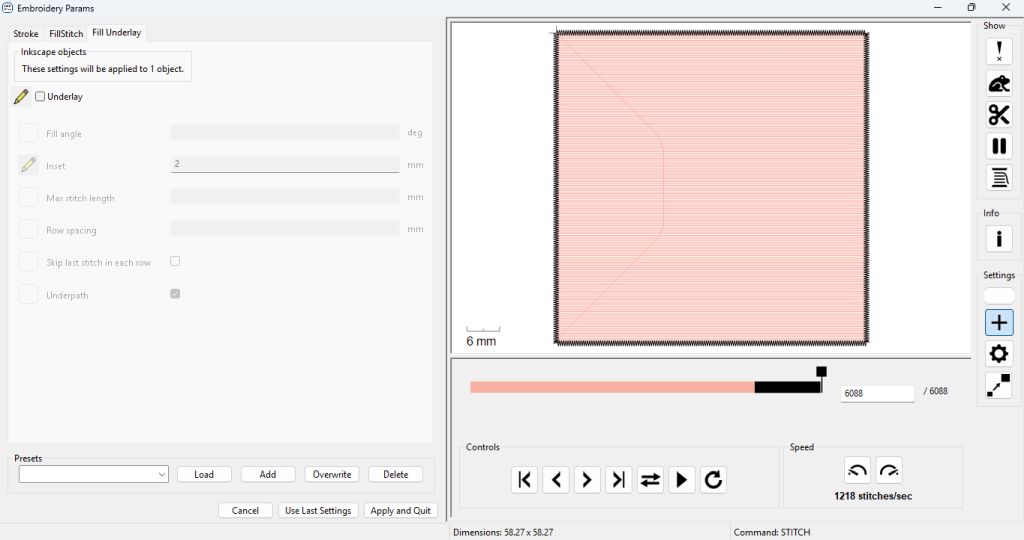
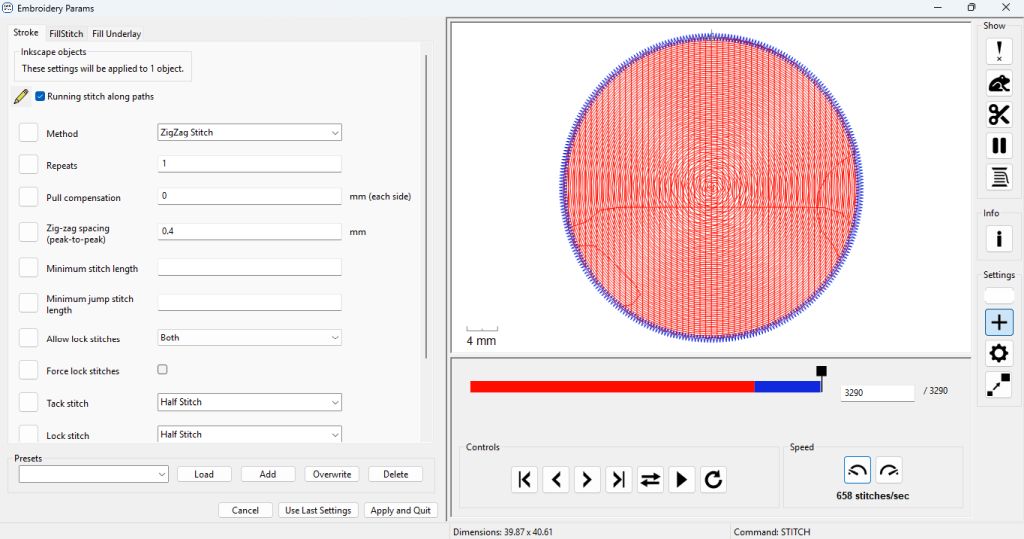
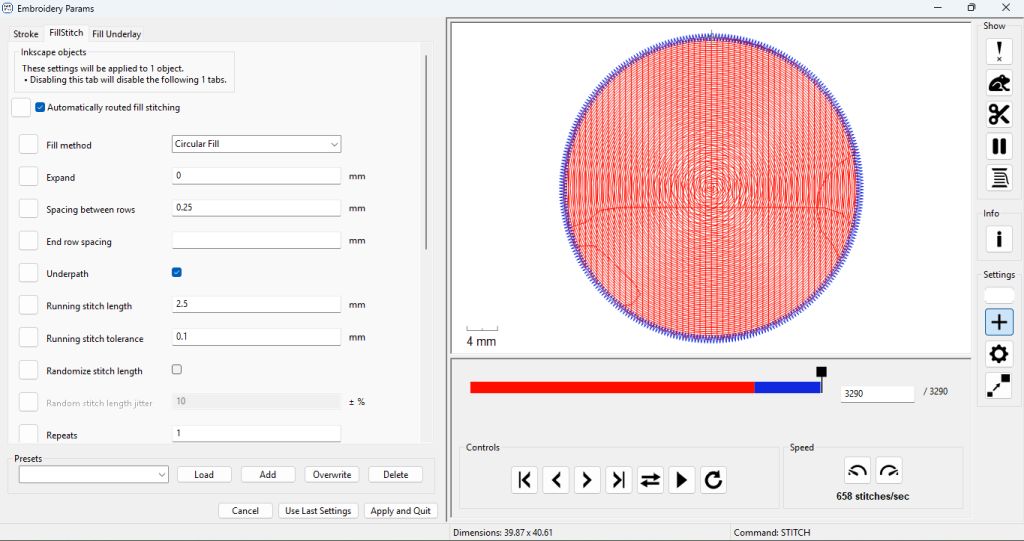
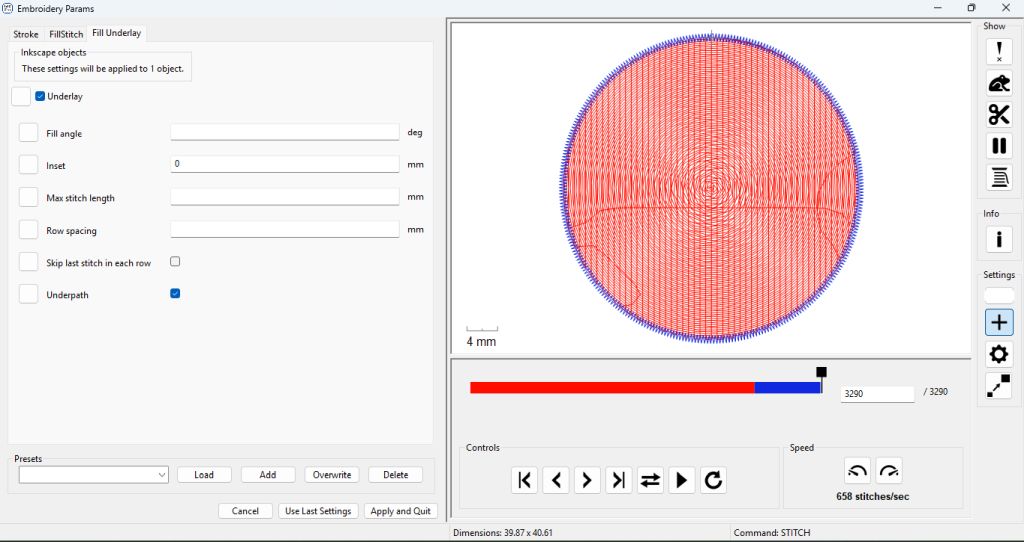
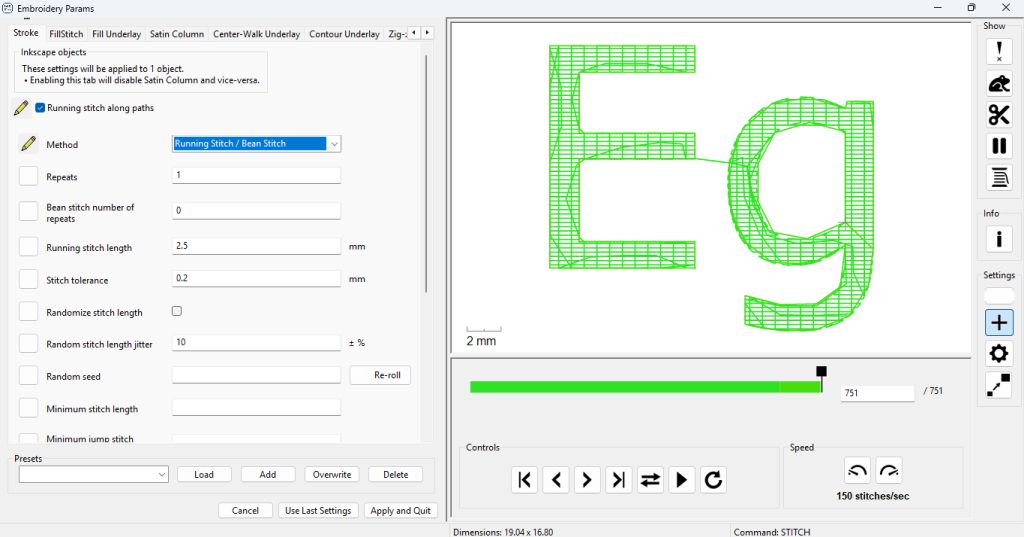
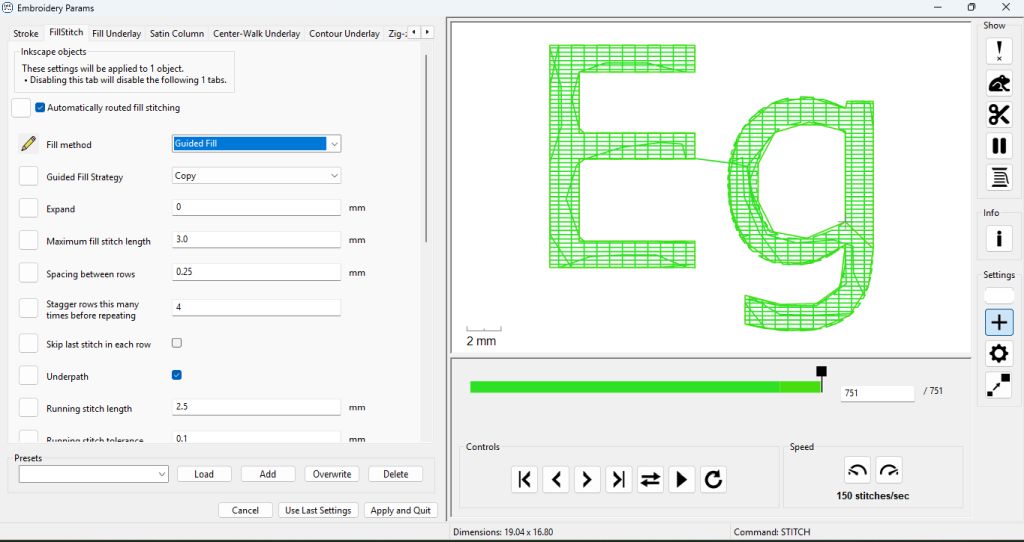
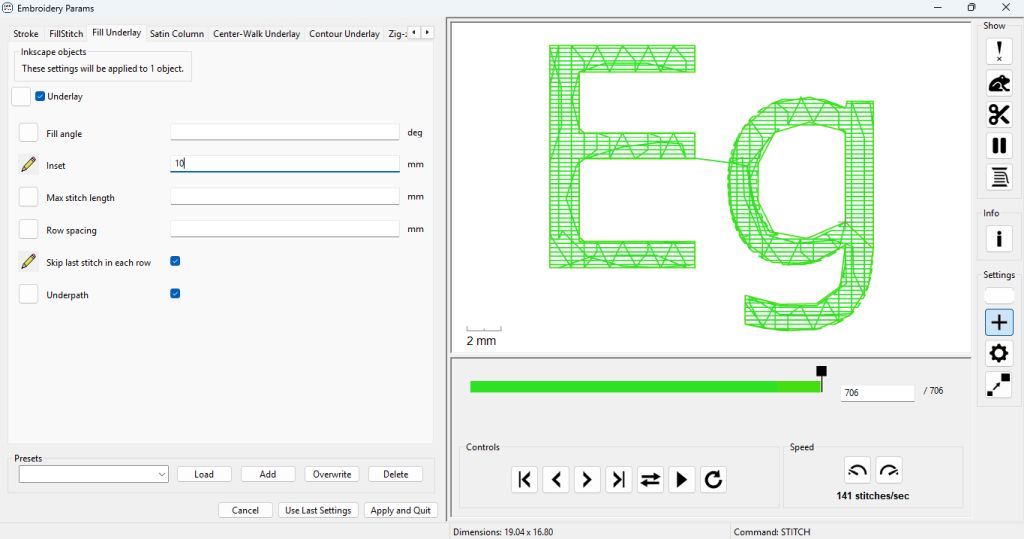
Once the parameters are set for each shape, we select the entire design and reopen the parameters menu to view the full embroidery simulation:
EMBROIDERING
Once the design is complete, the final step is to export it in .VP3 format, which is the proprietary file extension for Pfaff embroidery machines.
Technical Insight: .VP3 vs .DST File Formats
While both formats are used in digital embroidery, .VP3 (Proprietary) is preferred over .DST (Generic) for modern workflows because:
- Color Preservation: Unlike .DST, which only stores blind "color change" commands, .VP3 embeds specific thread colors and commercial brand charts directly into the file.
- Hardware Safety: .VP3 files save the designated hoop and frame boundaries, preventing the machine from operating if there is a size mismatch, whereas .DST lacks physical scale metadata.
- Design Integrity: .VP3 keeps high-level vector and geometric data that allows for minor scaling on the machine, while resizing a raw coordinate-based .DST file drastically ruins stitch density.
DST (Tajima Format)
It is the closest thing to an "unformatted text file" or a generic G-code in 3D printing. It was developed by Tajima for industrial machines and only stores raw coordinate instructions: "move here, drop the needle, move there, jump, change tool."
The catch: It doesn't save color names or thread brands. When you load a .DST file into a machine, the software assigns random colors, and the operator must manually map each needle to the correct spool.
VP3 (Pfaff / Husqvarna Format)
It is an intelligent, high-level format used by modern machines like the Pfaff Creative series. Beyond the simple XYZ coordinate matrix of the stitches, it contains rich metadata.
- It embeds the exact color palette (often linked to specific commercial thread charts like Madeira or Sulky).
- It remembers the hoop size used during design, preventing the machine from operating if the physical frame doesn't match, which acts as a crucial safety feature during execution.
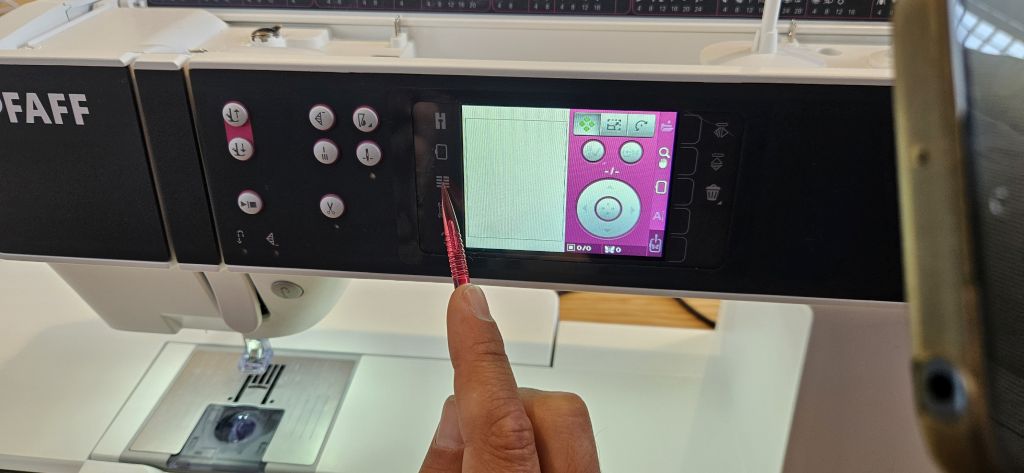
Embroidery Workflow
Once the file is saved, we transfer it to a USB drive and plug it into the embroidery machine to load the design. After this is done, the remainder of the process involves the physical preparation of both the machine and the fabric to be embroidered.
The operation and handling of our embroidery machine, a PFAFF Creative 3.0, is thoroughly detailed in its own MANUAL.
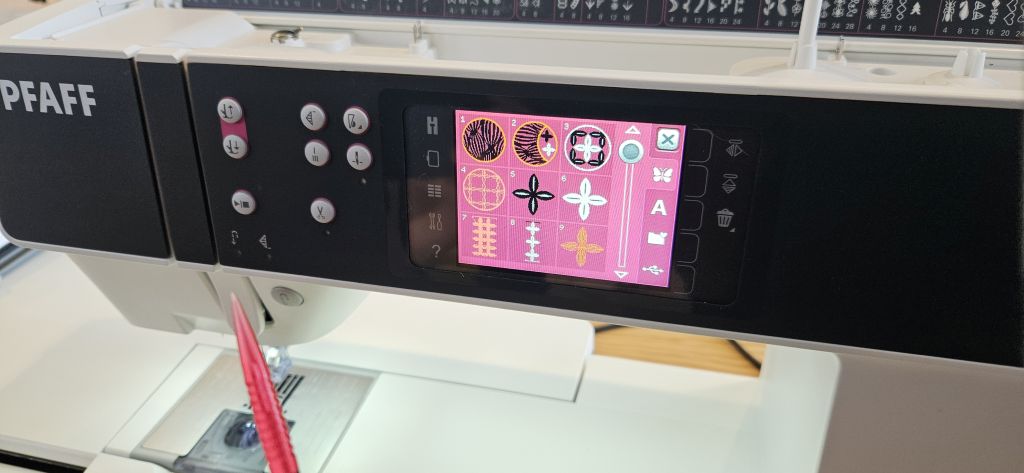
The process can be summarized into three basic operations:
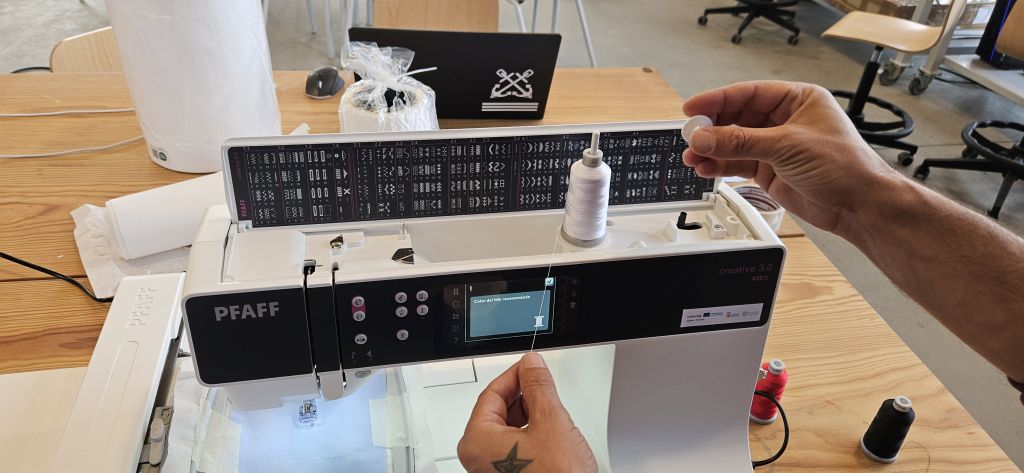
- Load the file and configure the embroidery machine settings.
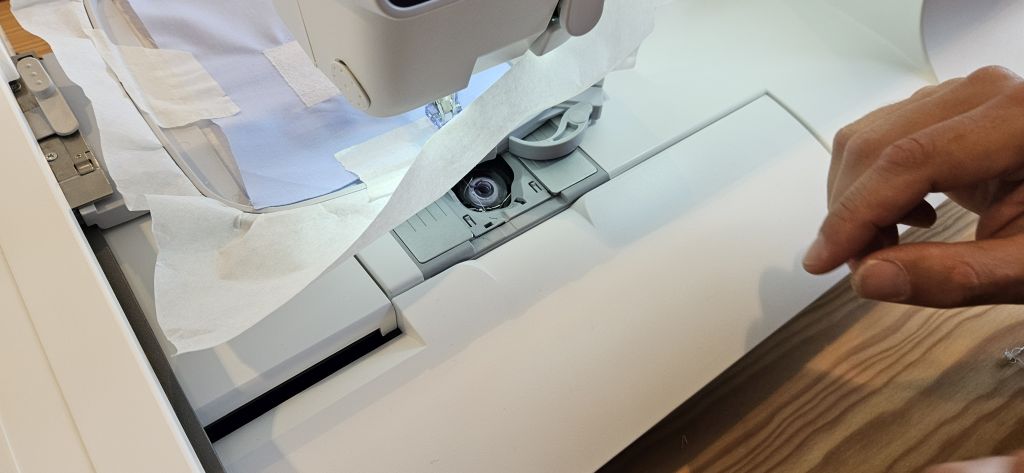
- Install the needle and thread both the upper spool and the lower bobbin.
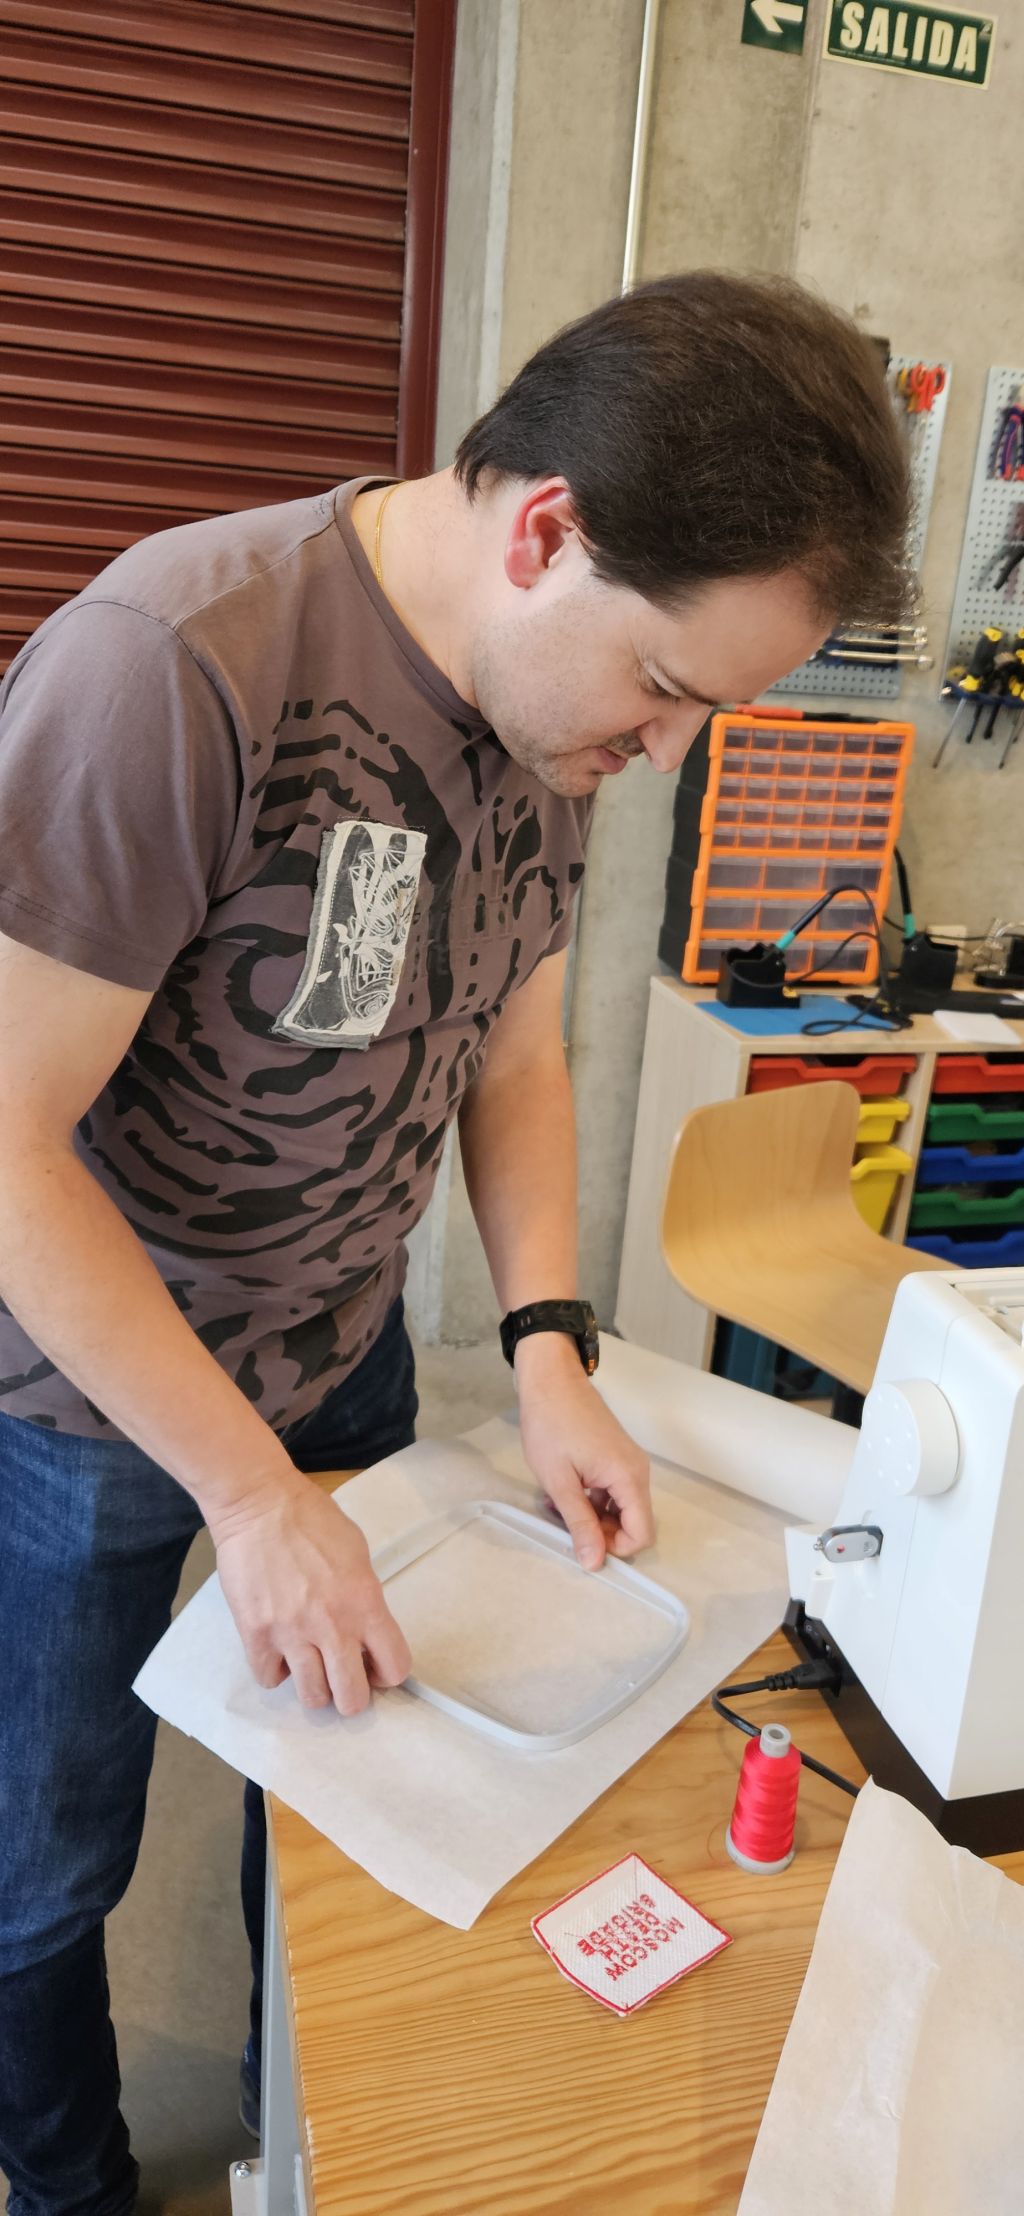
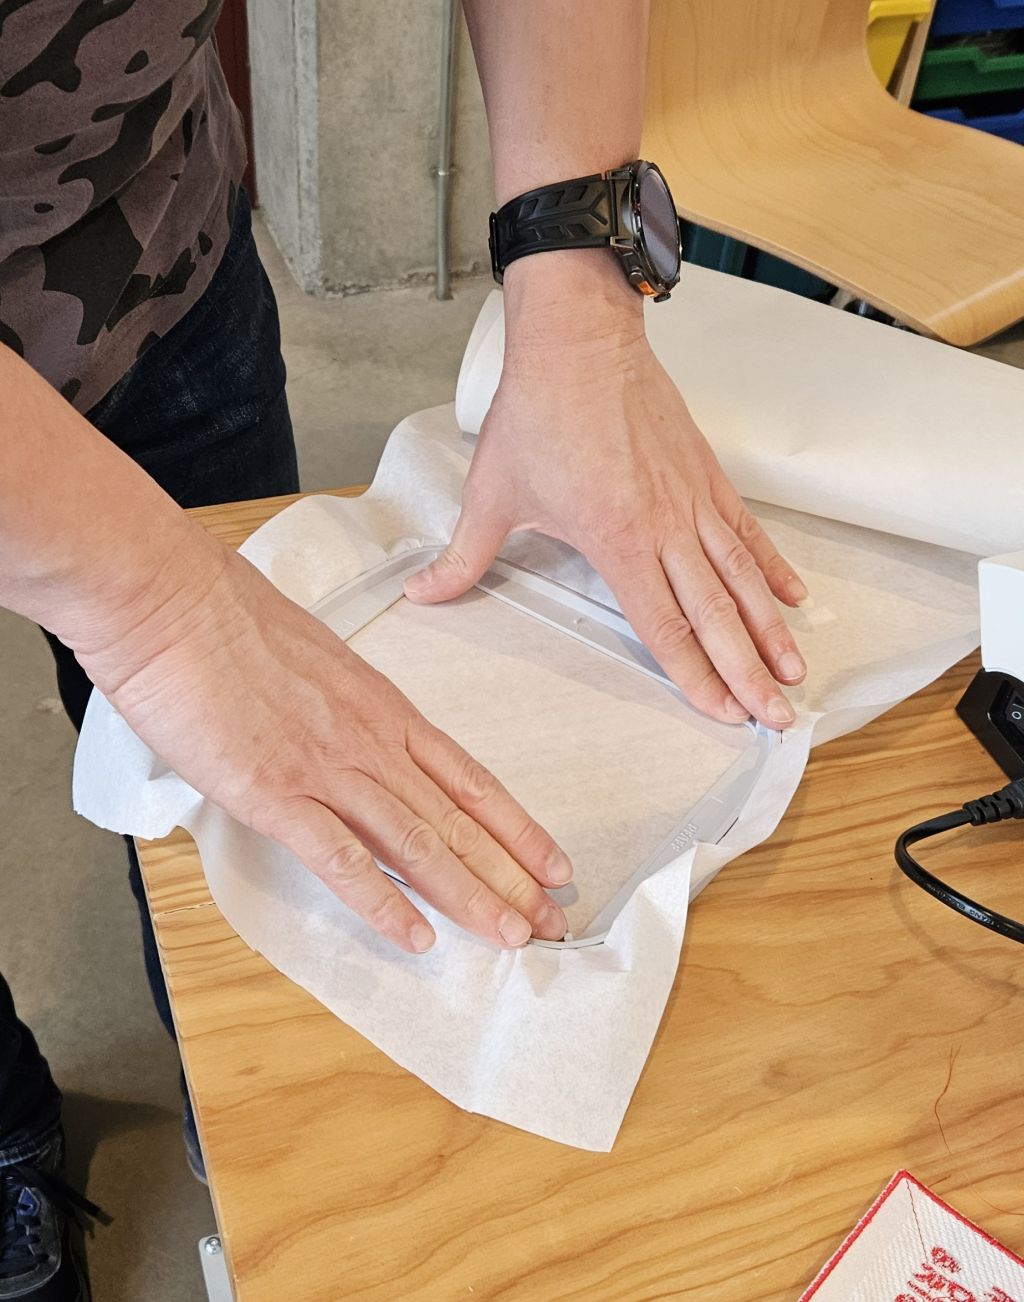
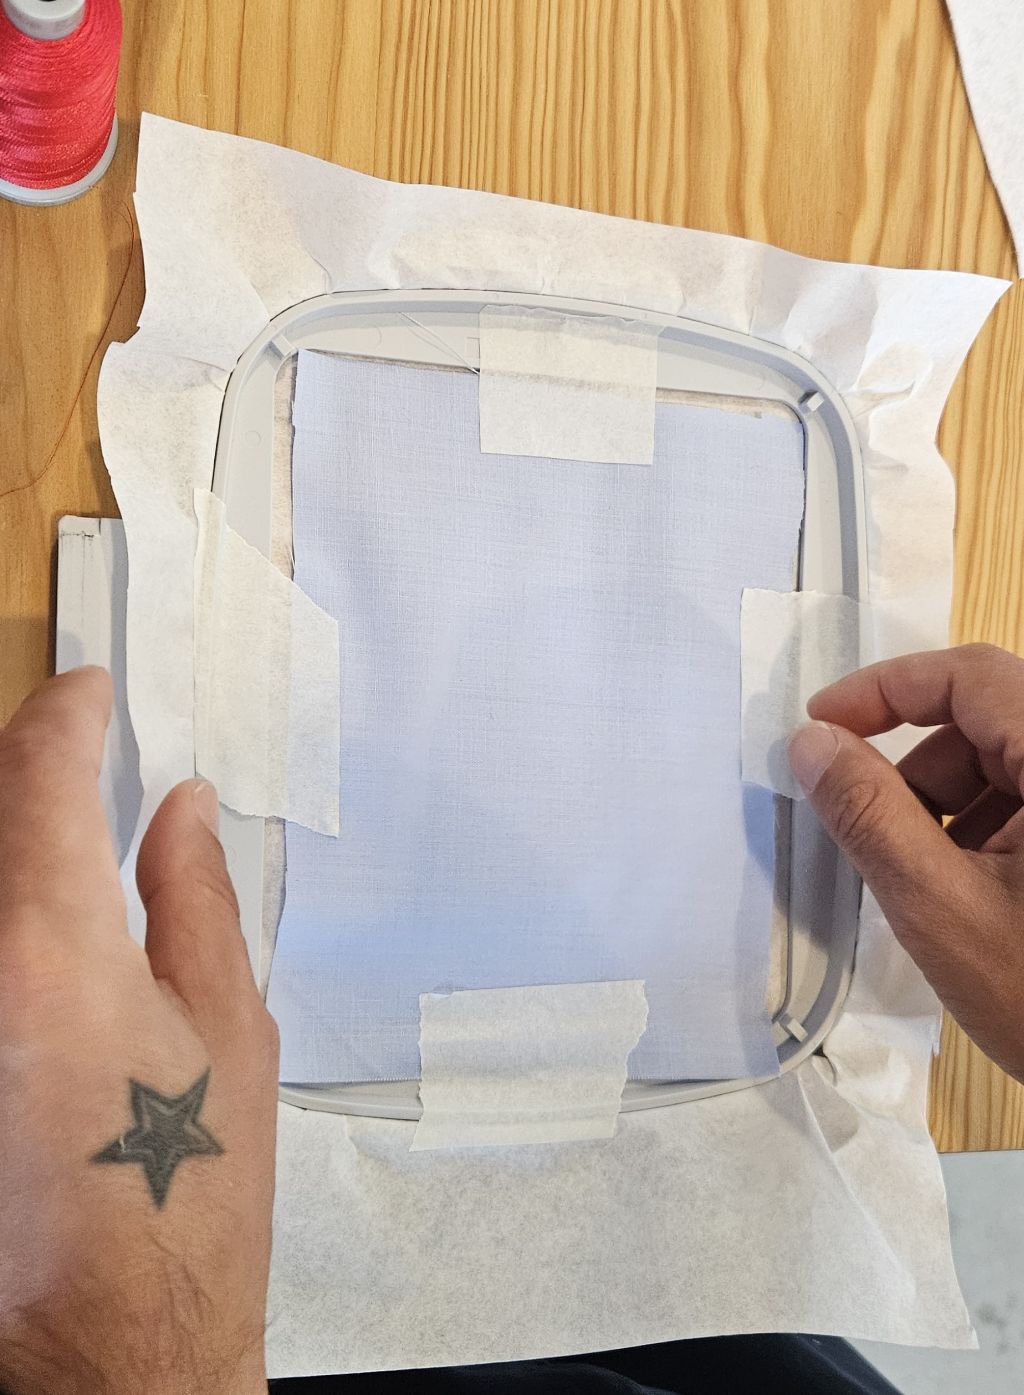
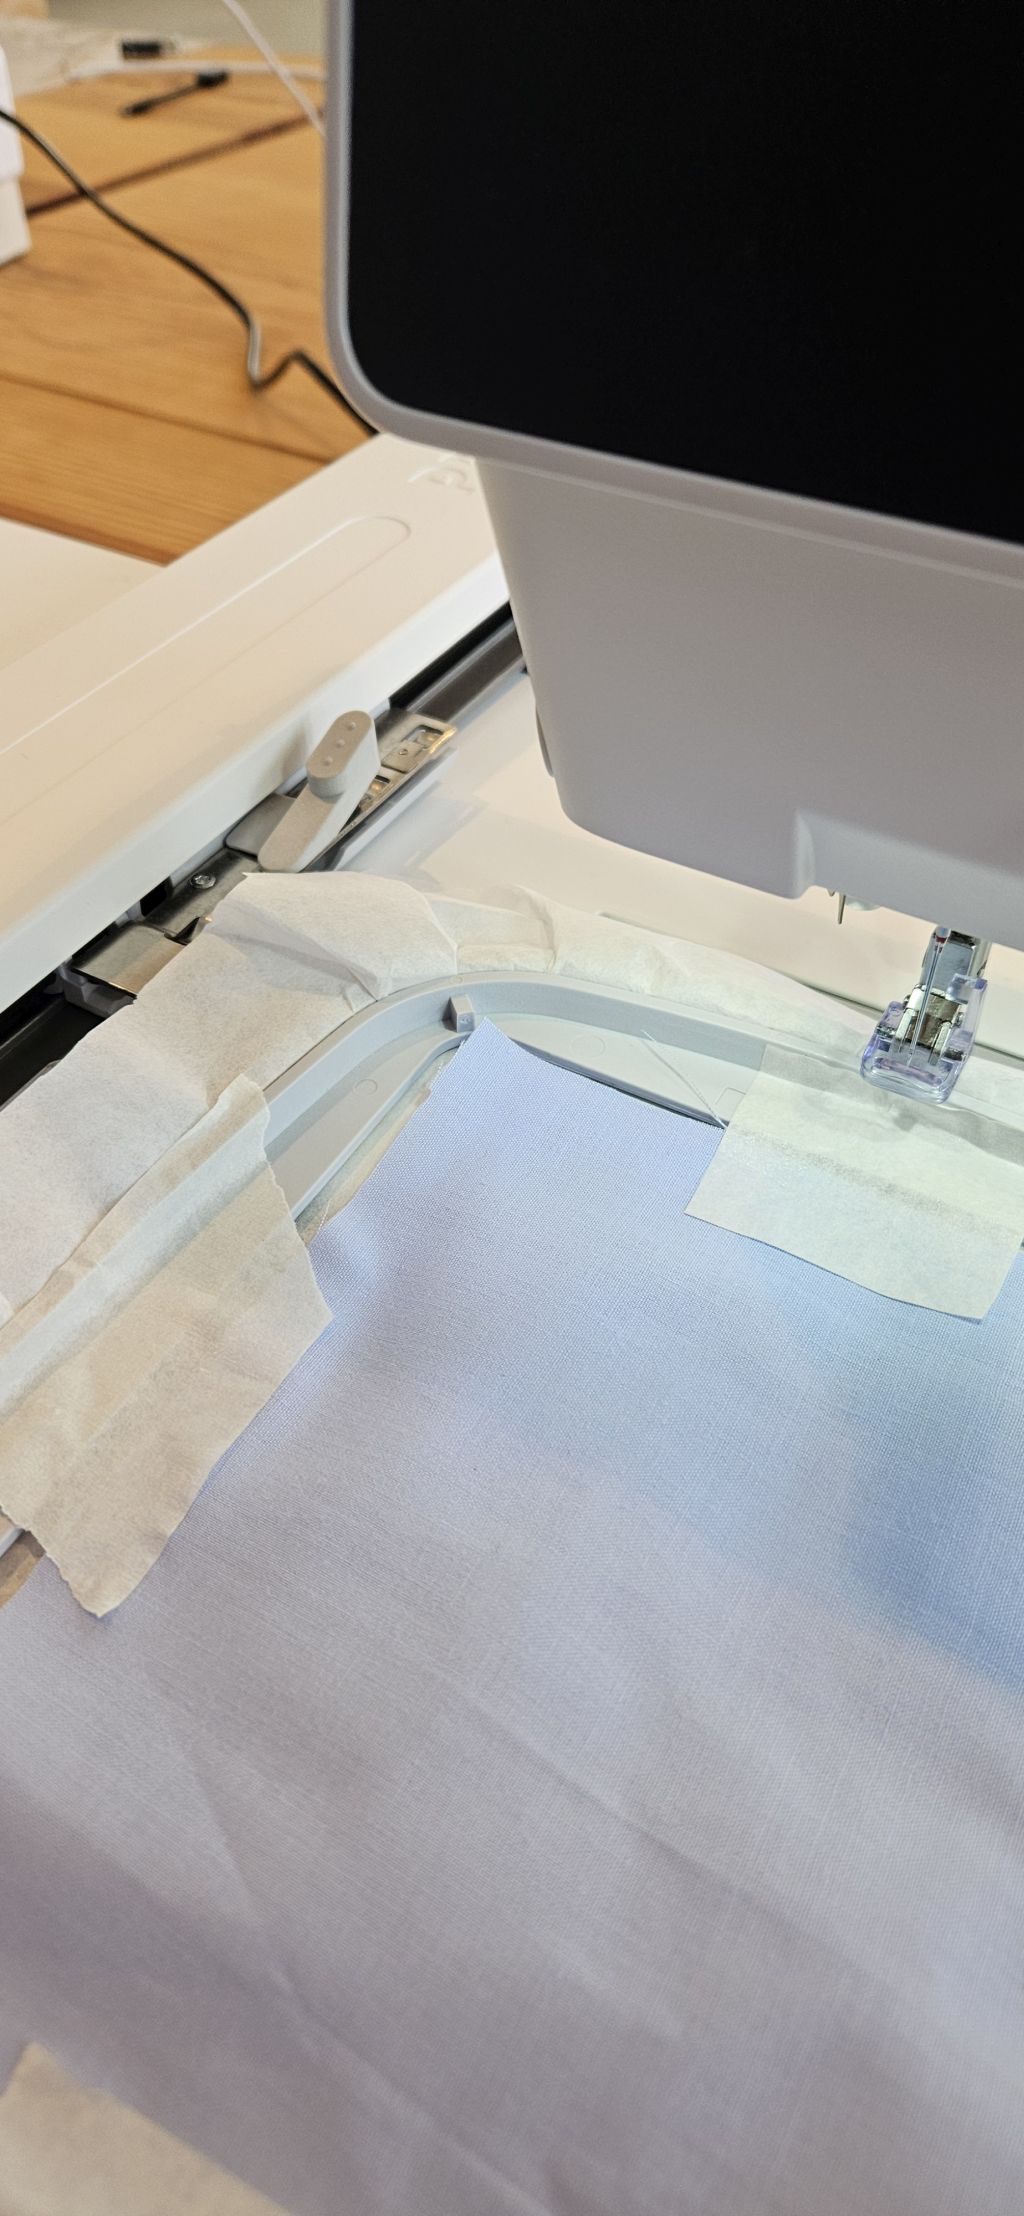
- Mount the fabric to be embroidered into the hoop.
The rest of the process is simply pressing 'play' and monitoring that everything runs smoothly.

Technical Insight: The Embroidery Hoop
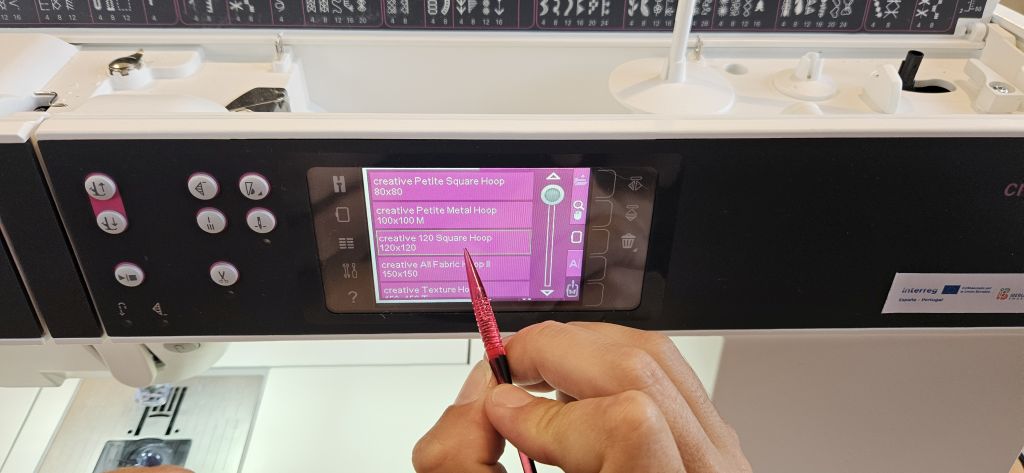
In computer-controlled embroidery, the hoop acts as the physical clamping fixture. It is a critical hardware component because:
- Tension Control: It holds the fabric completely taut. Without this uniform tension, the physical displacement caused by the needle punctures would warp the fabric, leading to misalignment or puckering.
- CNC Machine Coordinates: The hoop locks rigidly into the machine's XY axes carriage. This establishes the physical work coordinate system, allowing the machine to translate digital vector coordinates into precise mechanical stitches.
- Safety Boundaries: Modern machines read the hoop size to software-lock the machine's travel limits, ensuring the needle never collides with the physical frame.
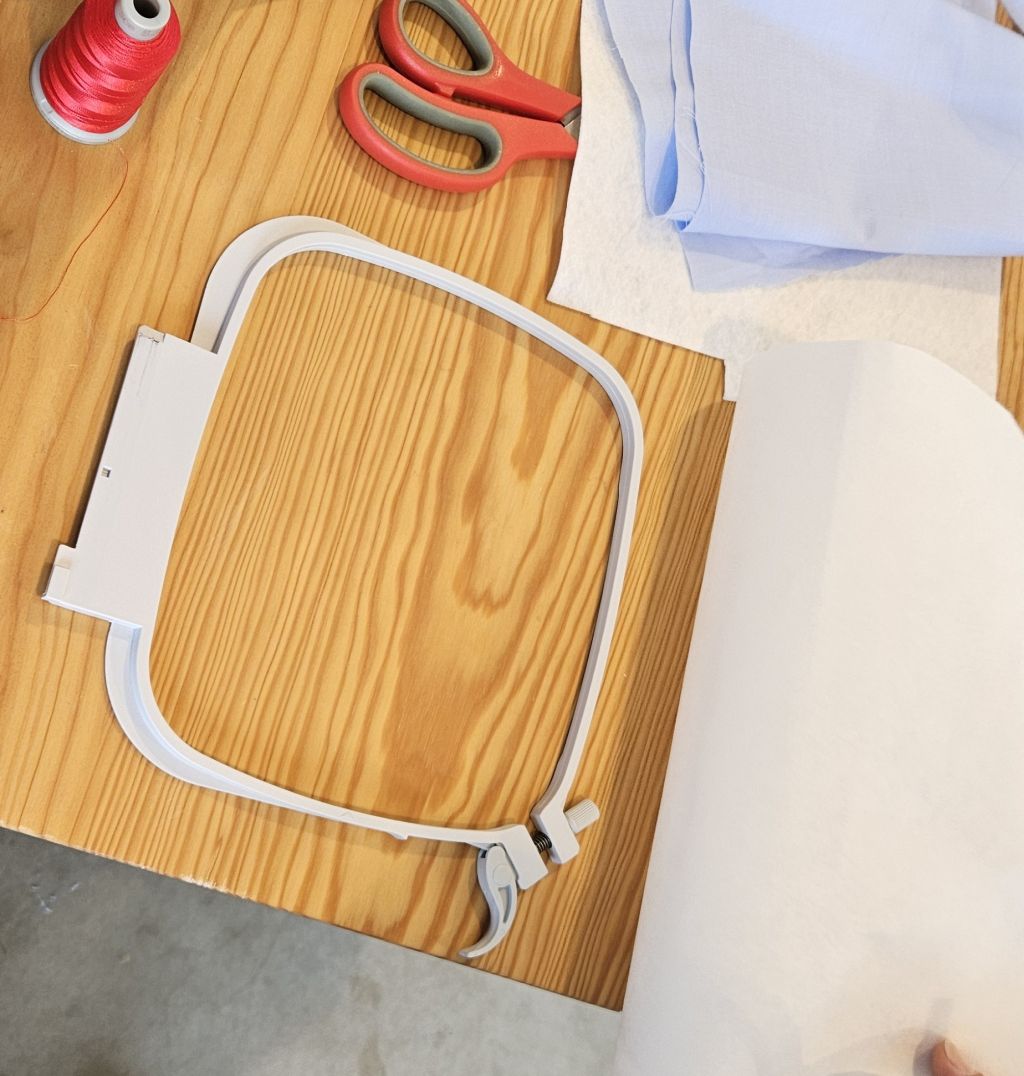
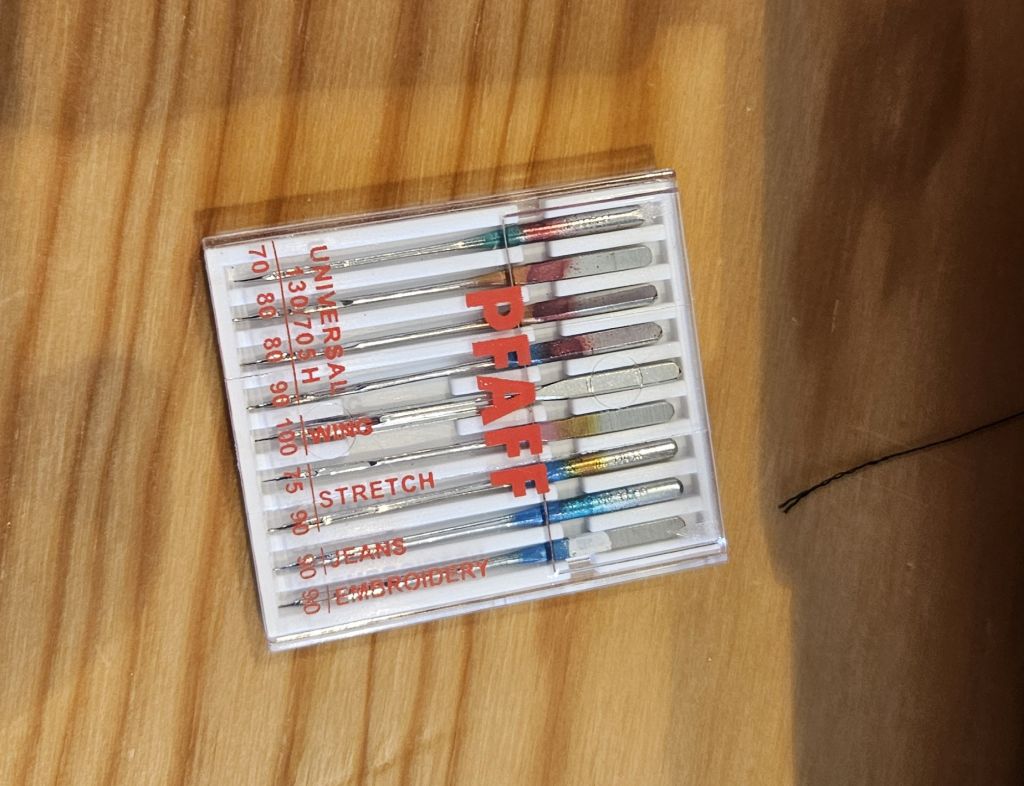
The installation of the thread and needle is carried out by following the manual instructions step-by-step.
It is crucial to follow these steps strictly; otherwise, the machine will trigger an error. Small details, such as a slightly misaligned needle mechanism, are enough to prompt an error message on the screen.
On the positive side, this machine is highly intuitive: the interface displays exactly what is happening whenever a fault occurs, ranging from running out of bobbin thread to detecting excessive fabric tension.
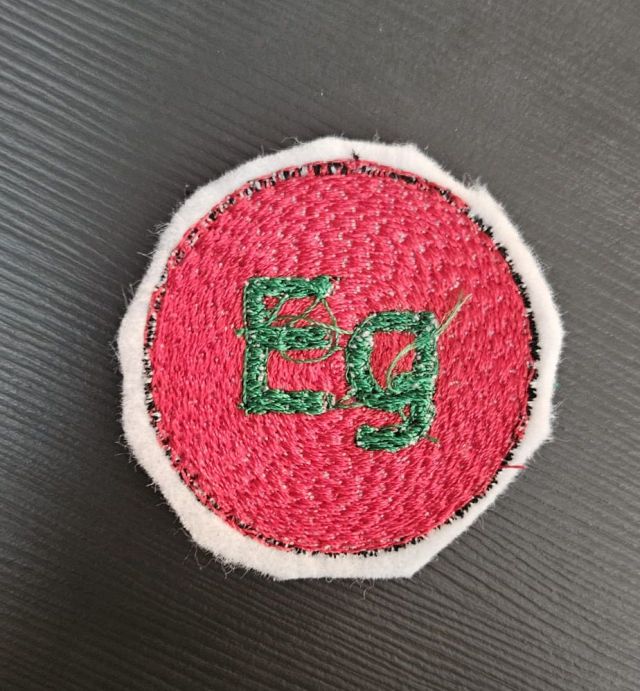
THE RESULT
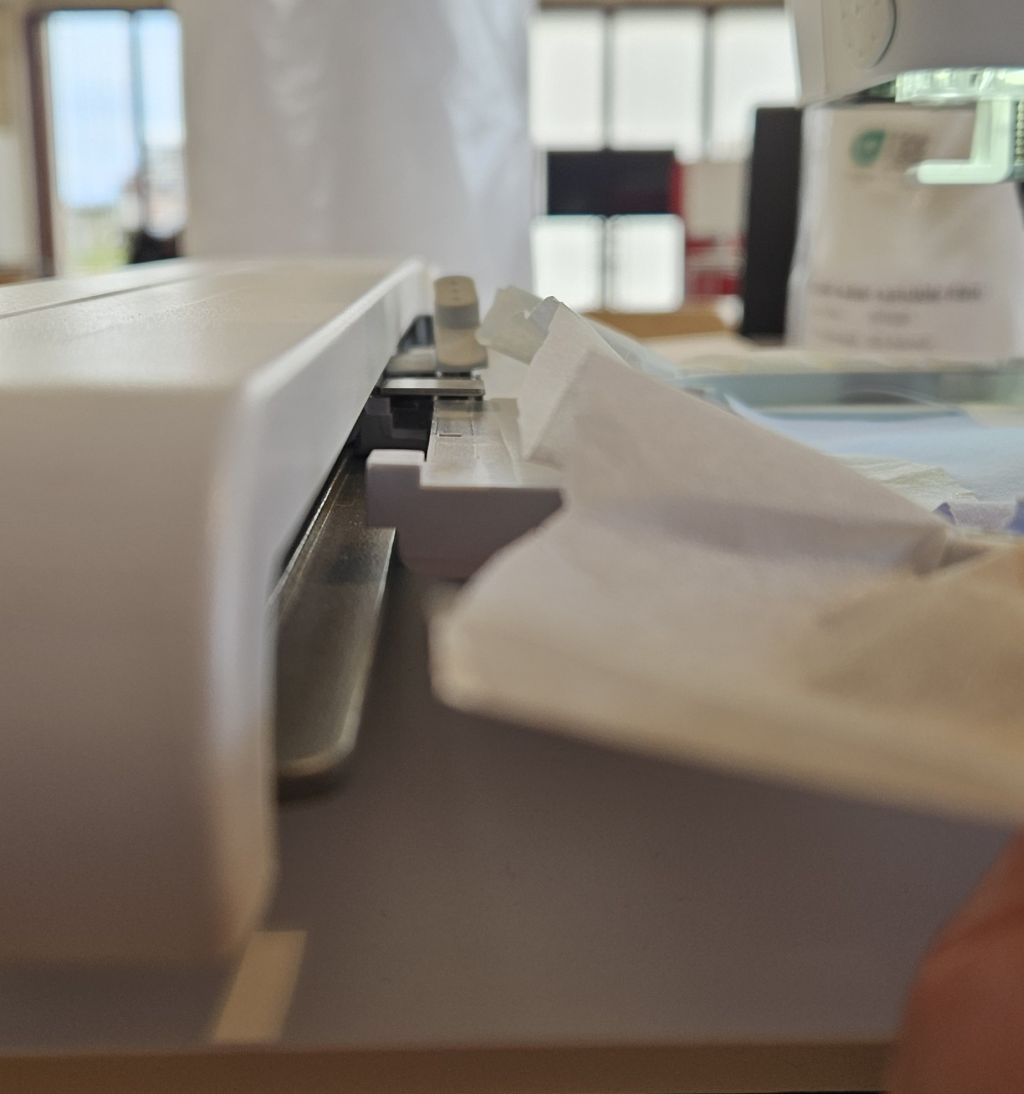
Once all the previous steps are completed, we press play and the machine begins operation.
It is important to note that continuous monitoring is required even during the execution phase. Depending on the current embroidery stage, it might be necessary to adjust the thread tension and embroidery speed parameters, both of which can be tweaked on-the-fly or by pausing the process.
Furthermore, if the design involves multiple colors, the machine will execute one specific color and automatically pause for a manual thread change. The screen will then prompt which color to load next based on the sequence pre-defined during the design phase in Inkscape. However, this color sequence can also be overridden and altered directly from the machine's interface.
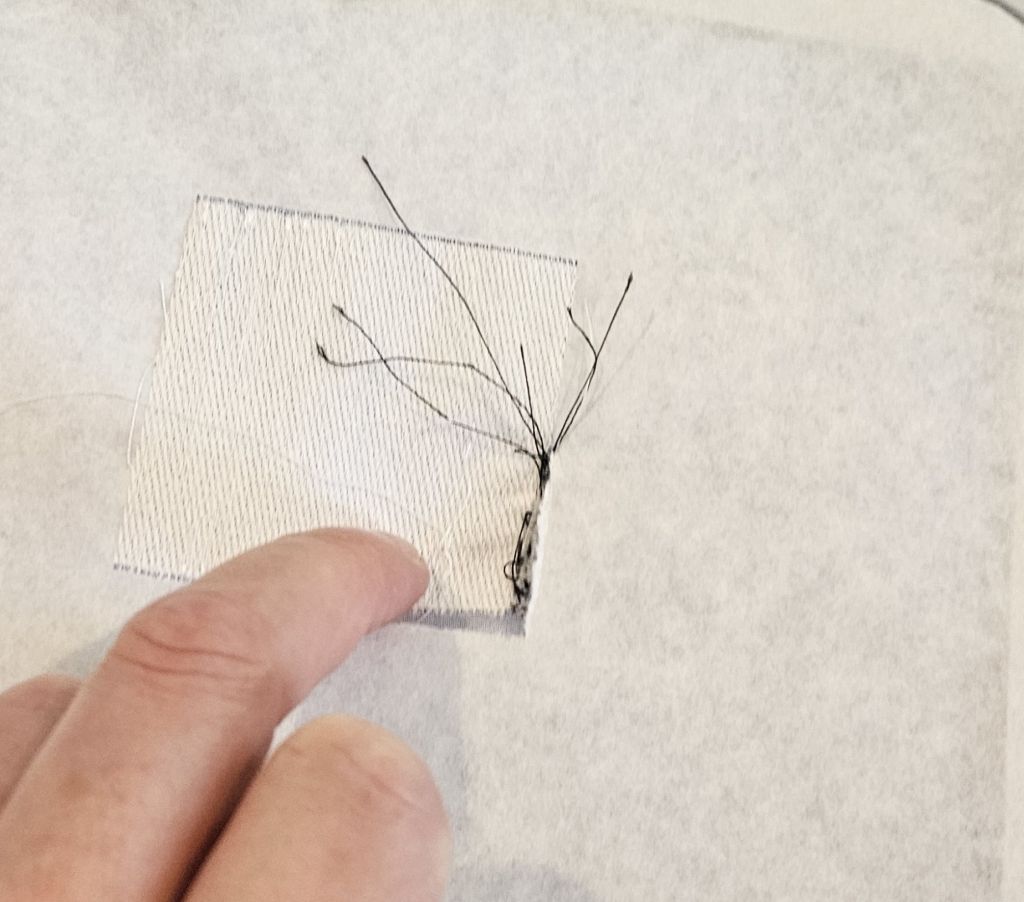
An example of why continuous monitoring is vital occurred when changing the stitch pattern.
The thread tangled to such an extent that it dragged the fabric, tearing the stabilizer backing and completely ruining the work done up to that point.
In this scenario, the immediate response was to stop the machine and assess the situation. It became evident that the damage was irreversible. Due to time constraints, I decided to restart the embroidery on a new piece of fabric but initiated the run from mid-process; I skipped the design's outer square boundary and selectively executed only the circle and the lettering.
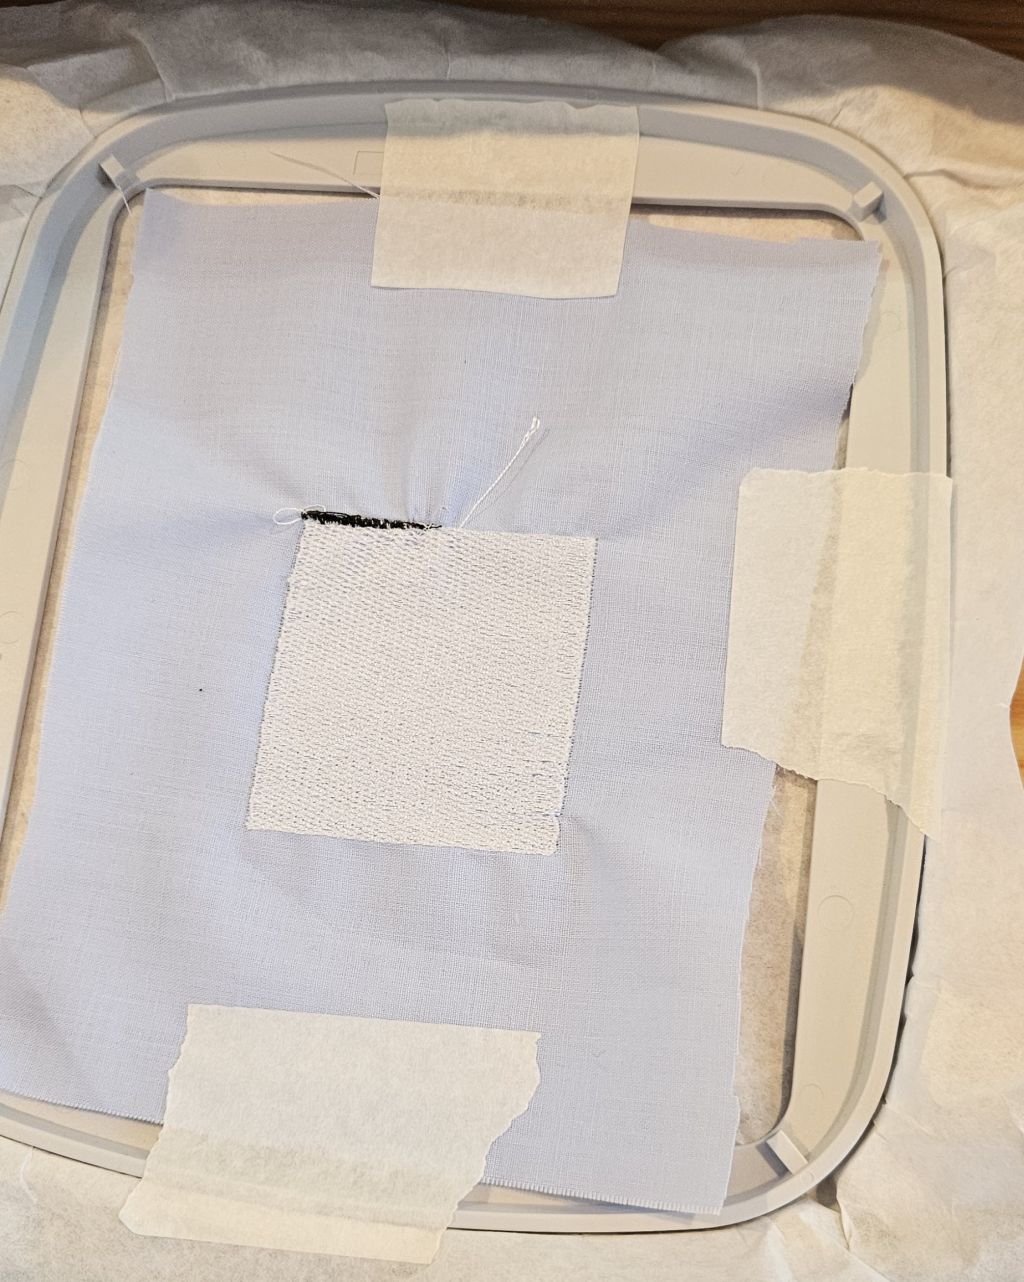
Fortunately, the final phase proceeded without any further issues, and the remainder of the design was embroidered perfectly.
CONCLUSION
This week's assignment, like previous ones, has been highly rewarding because of the opportunity it provides to see a digital design come to life in the physical world, in this case, on fabric.
However, the recurring time constraints left me wanting more once again. In the future, I will certainly experiment with more embroidery techniques by diving deeper into both Inkscape design workflows and advanced machine operations.