WEEK 14 MOLDING AND CASTING
- INTRODUCTION
- SCHEDULE
- GROUP ASSIGNMENT
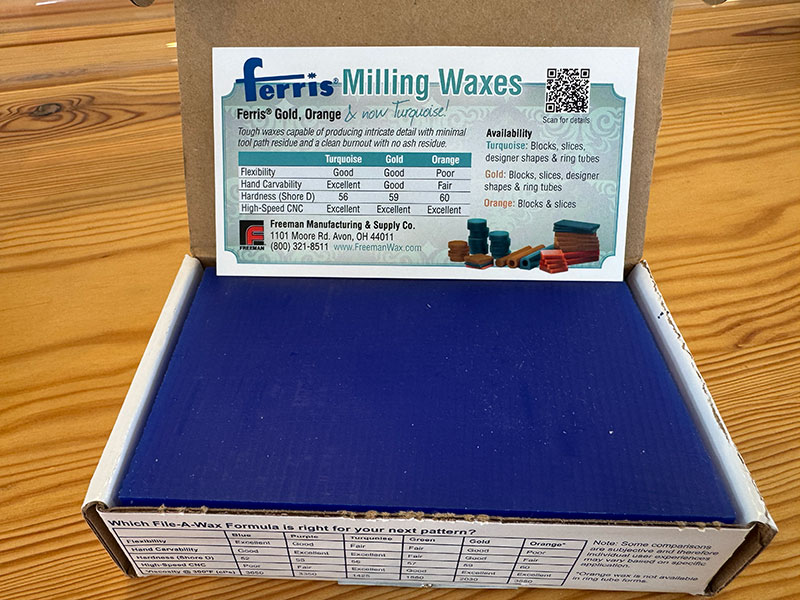
- Ferris File-A-Wax Blue
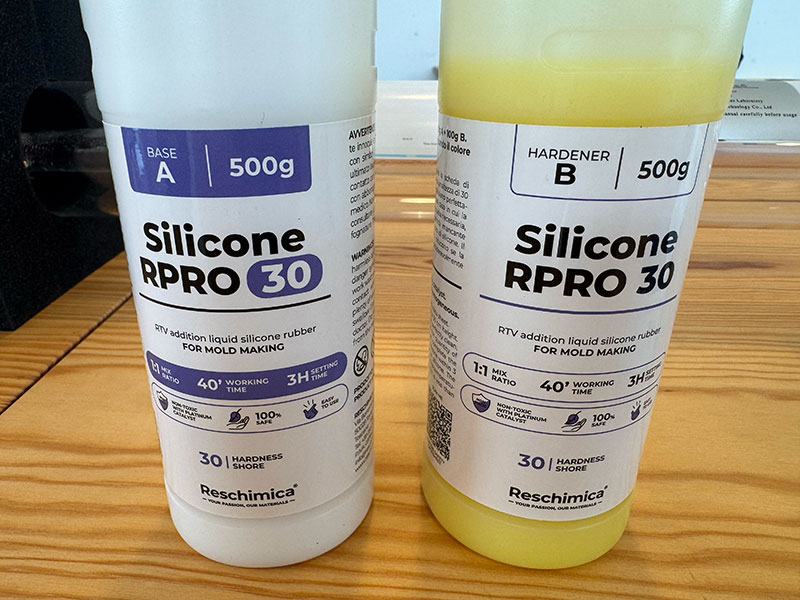
- Reschimica R PRO 30 - Silicone rubber mould making
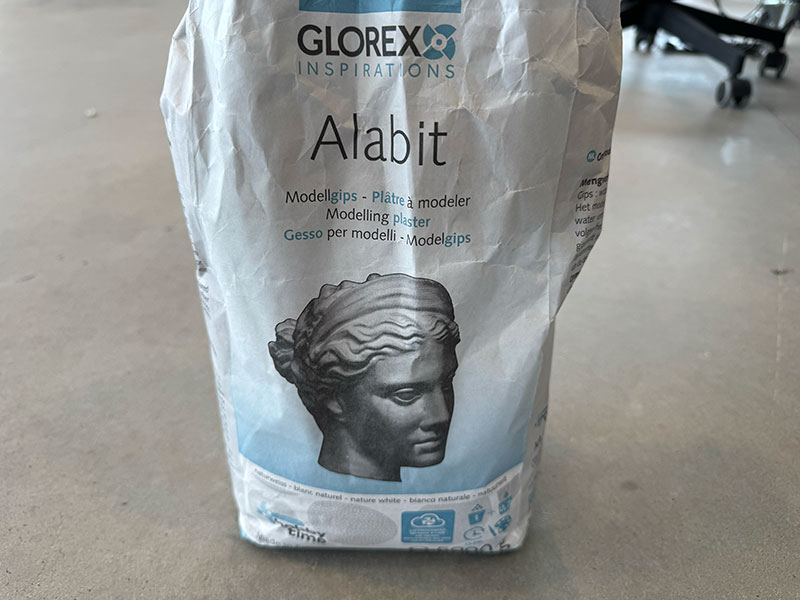
- Alabit modelling plaster
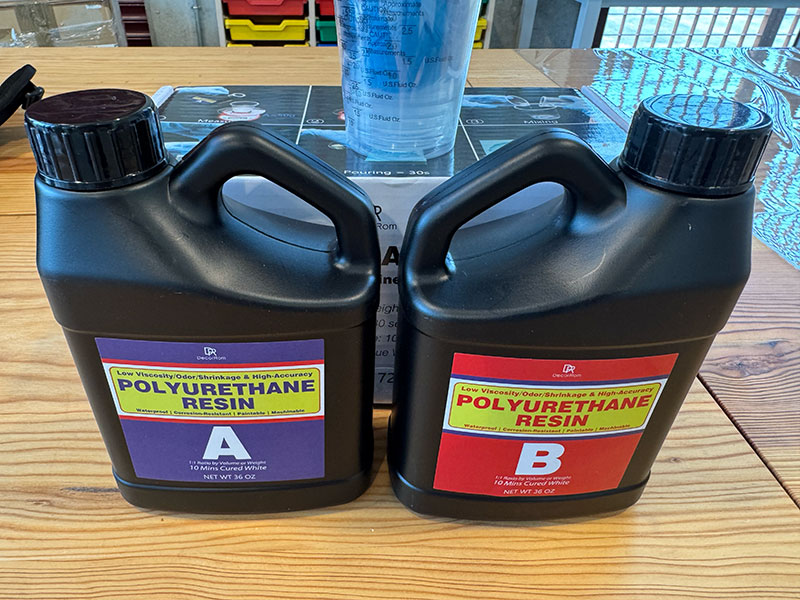
- DecorRom two-part Polyurethane Resin
- Test casts
- Why CNC Milling over 3D Printing for Mold Making?
- INDIVIDUAL ASSIGNMENT
- CONCLUSION
- ORIGINAL FILES
INTRODUCTION
This week's assignment focuses on different techniques for producing parts from various materials using casting. To achieve this, a mold is required beforehand, which is where molding comes into play.
The challenge of this assignment is to design and create a mold and a negative mold to be filled with different materials. These materials are handled in a liquid state and, after a specific curing time, they harden and become solid, resulting in the desired final part.
SCHEDULE
Time management for this assignment was extremely challenging. Due to my work schedule, I watched Neil’s lecture on Thursday, the same day my instructors gave me the local review. Since this assignment requires many hours of physical presence in the FabLab, I spent the first few days focusing on the CAD design.
The real challenges began over the weekend:
- Saturday & Sunday: I dedicated these days entirely to the FabLab, but due to technical issues with the milling machine, we could only produce molds using FDM and Resin 3D printing. This led to the discovery of the silicone inhibition issue with the resin mold.
- Tuesday: The casting resin finally arrived, allowing me to complete the physical part of the assignment.
- Friday (Public Holiday): I took advantage of the holiday to complete the entire documentation, working from 9:00 AM until 2:15 AM.
As I finish writing these lines, I am preparing to start the next assignment, which began this past Wednesday. It has been a race against the clock, but a highly instructive one.
dependency management. The delay in material delivery and machine availability forced a 17-hour documentation marathon, highlighting the importance of the "supply-side tracking" principle in Fab Academy.
GROUP ASSIGNMENT
FabLab Leon work groupFor the group assignment, we characterized the materials for this week, documenting their processing properties and their Safety Data Sheets (SDS) requirements.
Below are the materials used for this assignment along with their technical specifications:
| Material | Type | Mixing Ratio | Pot Life / Curing Time |
|---|---|---|---|
| Ferris File-A-Wax (Blue) | Machinable Wax | N/A (Solid) | --- |
| Reschimica R PRO 30 | Silicone Rubber | 1:1 (by weight or volume) | 30 min / 3 hours |
| Alabit Modelling Plaster | Casting Plaster | 100g Water : 140g Plaster | 10-15 min / 30-45 min |
| DecorRom Polyurethane | Two-part Resin | 1:1 (by volume) | 5-10 min / 24 hours |
- Ferris Wax: Ideal for high-detail CNC milling as it does not melt during high-speed machining.
- R PRO 30 Silicone: It is a professional addition-cured silicone. It is non-toxic but requires clean containers to avoid inhibition.
- Alabit Plaster: Always add the powder to the water, not the other way around, to avoid lumps and dust inhalation.
- Polyurethane Resin: High fluidity and fast curing. Safety Note: Must be used in a well-ventilated area with gloves and eye protection due to chemical sensitivity.
Ferris File-A-Wax Blue
Ferris File-A-Wax Blue is a professional-grade carving and machining wax widely used for jewelry and prototyping. Its key characteristics include:
- Versatility: Provides a balance of rigidity and flexibility, making it ideal for both manual hand-carving and high-precision CNC machining.
- Clean Finishing: It has a very low residue content, which ensures smooth surface finishes and high-precision detail.
- Safety & Processing: The material is stable and safe for handling, featuring a relatively low melting point that simplifies the molding and casting workflow.
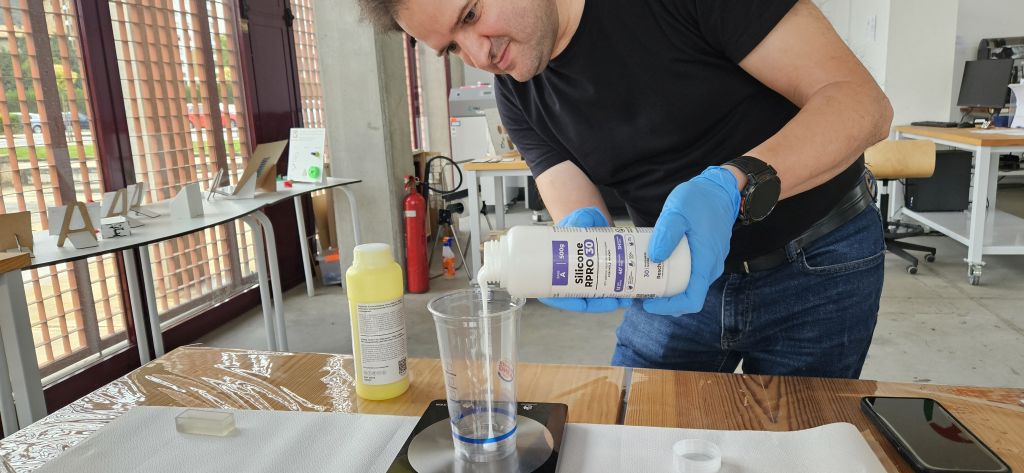
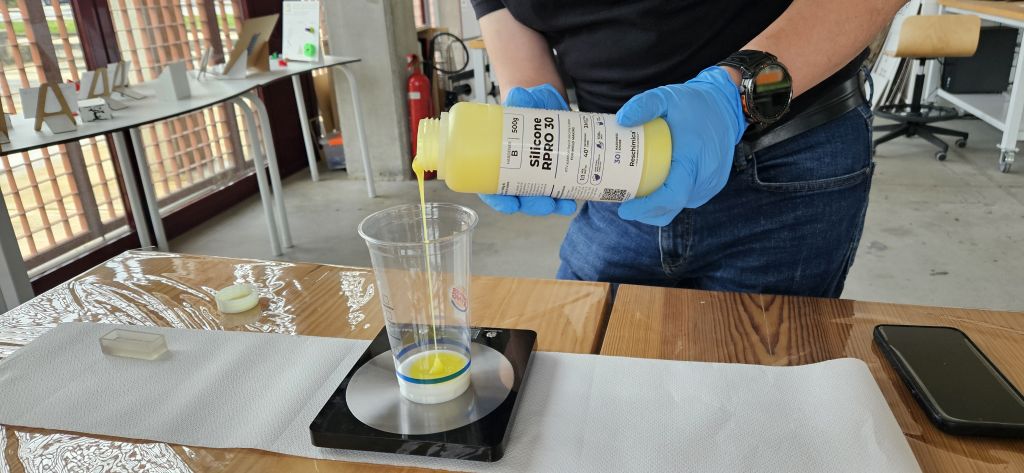
Reschimica R PRO 30 - Silicone rubber mould making
RESCHIMICA R PRO 30 is a professional-grade, two-component (Base + Catalyst) addition-cured silicone rubber, specifically engineered for high-performance mold making.
- Accuracy & Flexibility: Once cured, it transforms into a highly stable and flexible material, capable of capturing intricate details with extreme precision.
- Safety Profile: It is non-hazardous under standard operating conditions, making it a safe choice for prototyping environments and workshops.
- Key Application: Its liquid consistency and dimensional stability make it ideal for creating durable molds that require high fidelity and easy demolding.
Alabit modelling plaster
Alabit is a high-quality white plaster specifically designed for creating small reliefs, detailed models, and casting molds.
- Mixing Ratio: The precise ratio is 1 kg of plaster to 0.7 liters of water.
- Setting & Drying: The material reaches a firm consistency within 30 minutes (setting time). However, full curing and drying require 12 to 24 hours at room temperature, depending on the object's thickness.
- Compatibility: It is highly versatile and can be poured into rubber, silicone, clay, or plaster molds.
- Important Tip: For porous molds (like clay or other plaster), a release agent (e.g., wax) is mandatory to prevent sticking.
DecorRom two-part Polyurethane Resin
DecorRom Polyurethane Resin is a two-part (A:B) fast-casting system optimized for high-detail reproduction and prototyping.
- Easy Processing: It features a simple 1:1 mixing ratio by volume and low viscosity, allowing the liquid to flow effortlessly into complex mold cavities and minimize air bubbles.
- Rapid Curing: Designed for efficiency, it has a very short working time and fast demolding, curing into a solid, stable white part.
- Material Properties: Once fully cured, it provides high hardness and excellent dimensional stability, ideal for figurines and functional models.
- Usage Note: While it has a low-odor formulation, it is highly sensitive to moisture and requires a fast workflow due to its quick setting speed.
Test casts
Why CNC Milling over 3D Printing for Mold Making?
To understand why we chose CNC milling for this assignment, we performed a comparative analysis between additive and subtractive manufacturing, evaluating surface finish, material properties, and suitability for mold making.
FDM 3D Printing (Fused Deposition Modeling)
- Process: Additive. It melts a plastic filament (PLA, PETG, ABS) and extrudes it layer by layer.
- Pros: Cheap materials, large build volumes, and very easy to use.
- Cons: Visible layer lines, not "watertight" by default, and limited resolution for fine details.
- Ideal for rapid prototyping and structural parts that don't require a perfect surface finish.
SLA 3D Printing (Stereolithography / Resin)

- Process: Additive. It uses a UV light source to cure liquid resin layer by layer.
- Pros: Incredible detail, smooth surface finish, and isotropic properties (equally strong in all directions).
- Cons: Messy post-processing (washing and curing), smaller build volume, and more expensive/toxic materials.
- Great for small, high-detail masters, but often less durable than milled or FDM parts.
CNC Milling (Subtractive Manufacturing)
- Process: Subtractive. A high-speed rotating tool (end mill) removes material from a solid block (wax, wood, metal).
- Pros: Extremely precise, works with "real" materials (like the Ferris Wax you used), and produces the best surface finish for molds.
- Cons: Limited by the tool's geometry (cannot do internal 90° corners), generates waste (chips/shavings), and requires complex CAM setup.
- This is the standard for molding and casting because the milled wax provides a non-porous, perfectly smooth surface for the silicone.
| Feature | FDM (Filament) | SLA (Resin) | CNC Milling |
|---|---|---|---|
| Material | Thermoplastics (PLA) | Photopolymers | Wax, Wood, Metal |
| Surface Finish | Rough (Visible Layers) | Very Smooth | Excellent (Machined) |
| Detail Level | Medium | Very High | High (Limited by bit) |
| Waste | Low | Low | High (Chips) |
| Best Use Case | Functional Prototypes | Jewelry / High Detail | Molding Masters |
Why CNC Milling over 3D Printing for Mold Making?
While FDM and SLA are great for prototyping, CNC Milling on machinable wax (like Ferris Wax) is the gold standard for this assignment for several reasons:
- Surface Porosity: FDM prints have microscopic gaps between layers where silicone can seep in, making it difficult to demold. Milled wax is a solid, non-porous block, resulting in a perfectly smooth silicone mold.
- Chemical Compatibility (SLA vs. Silicone): Many SLA resins contain sulfur or chemical photoinitiators that can cause Cure Inhibition in platinum-cured silicones (the silicone stays sticky and never hardens). Milled wax is chemically inert and doesn't interfere with the curing process.
- Draft Angles and Precision: CNC allows us to control the Draft Angle precisely, ensuring the positive mold can be easily removed from the silicone without tearing it.
Technical Insight: Milling vs 3D Printing
Although 3D printing is more common for rapid prototyping, CNC Milling is preferred for molding because:
- No Porosity: Unlike FDM, milled wax provides a solid surface that prevents silicone from seeping into layer lines.
- No Chemical Inhibition: Some SLA resins can prevent silicone from curing; wax is chemically stable and safe for all silicones.
- Superior Finish: The surface quality of machined wax translates directly into a high-quality final part.
INDIVIDUAL ASSIGNMENT
At first, this week's task seemed straightforward: creating a 3D design to be machined into a wax master, followed by casting a silicone negative mold, and finally producing the end pieces in both plaster and resin.
The problem arose when the Roland SRM-20 milling machine in our FabLab failed. During the initial tests, it began showing signs of malfunction until it finally stopped working altogether. As a result, we had to send our 3D designs in .stl format to the FabLab León. Our instructors there milled the >wax molds for us and sent them back to Ponferrada.
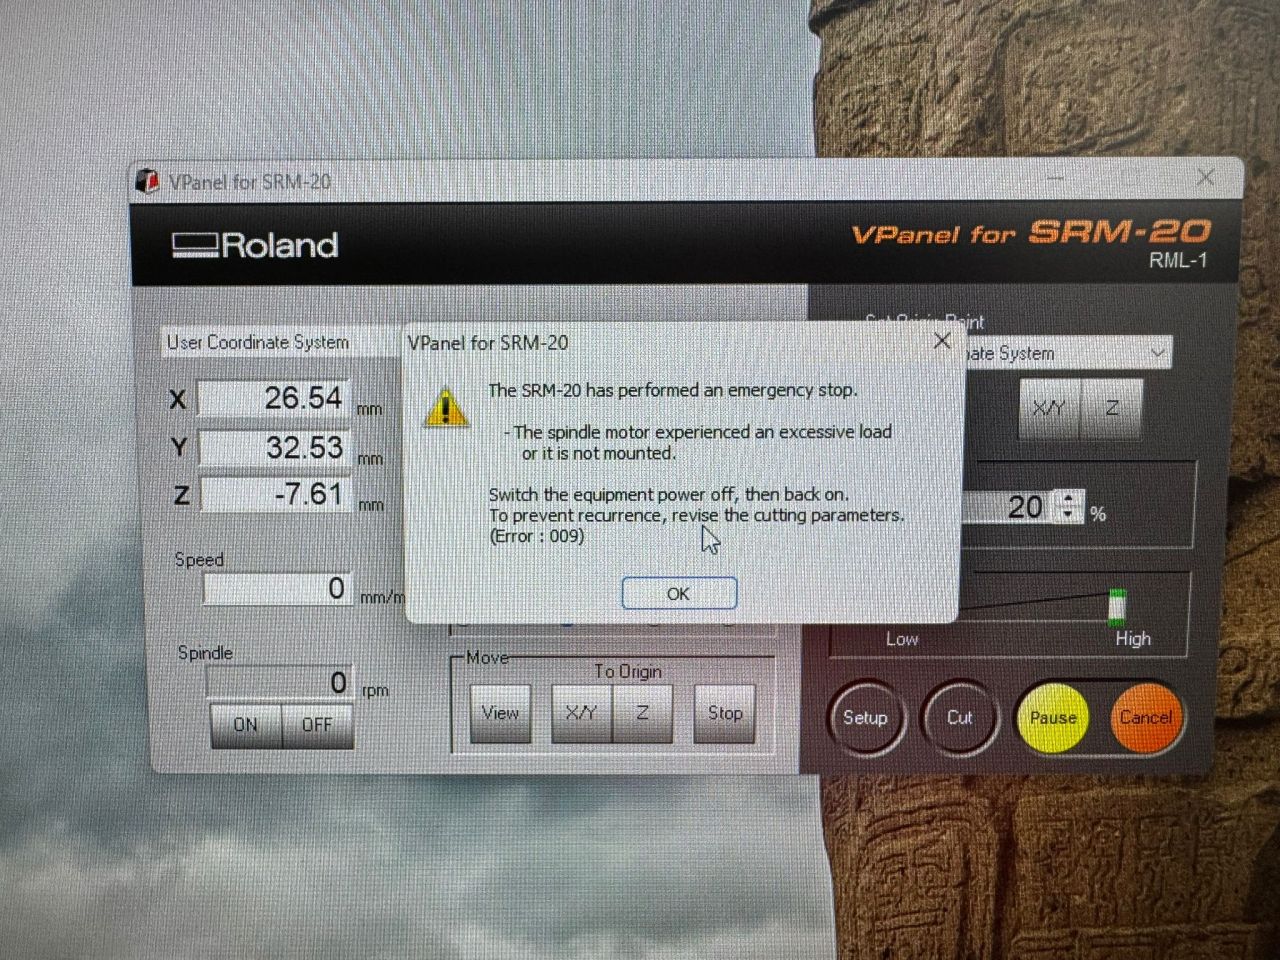
Due to this technical setback and my usual time constraints, I spent the weekend unsuccessfully trying to fix the milling machine, followed by 3D resin printing and casting. However, I ran out of time to properly document the assignment, pushing the documentation process to the following week.
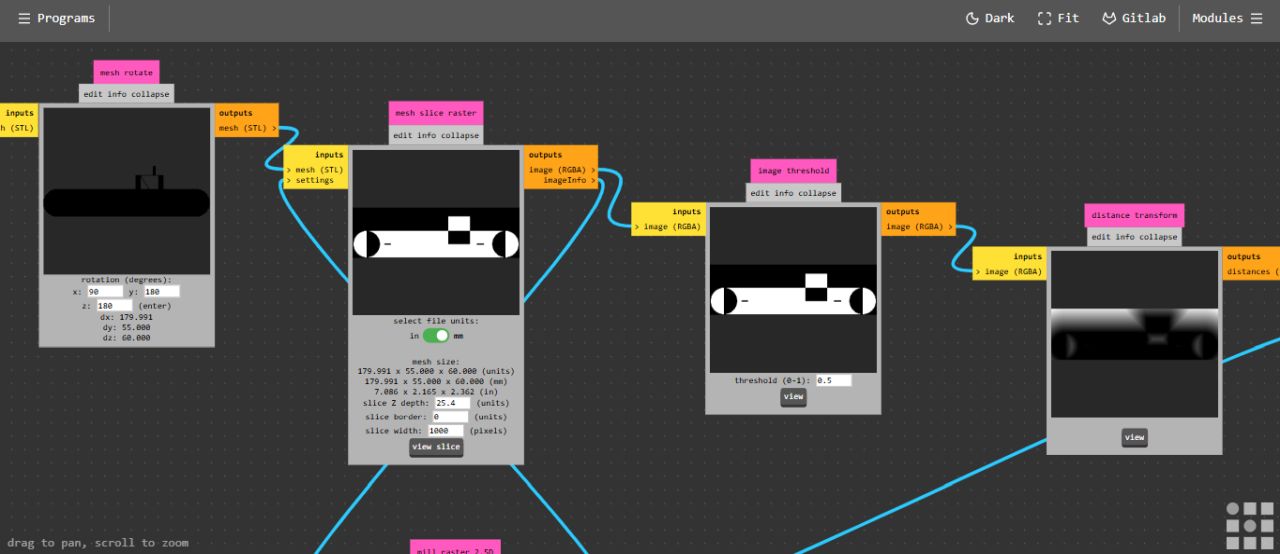
CAD DESIGN
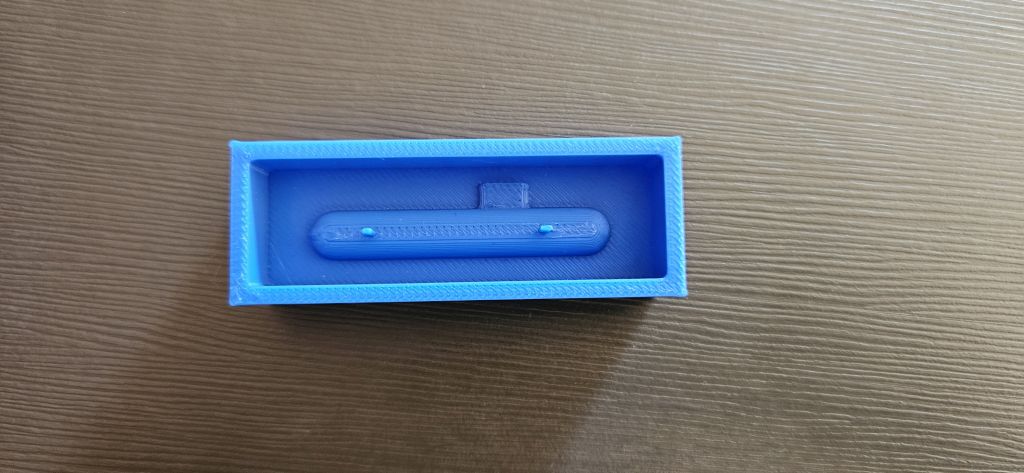
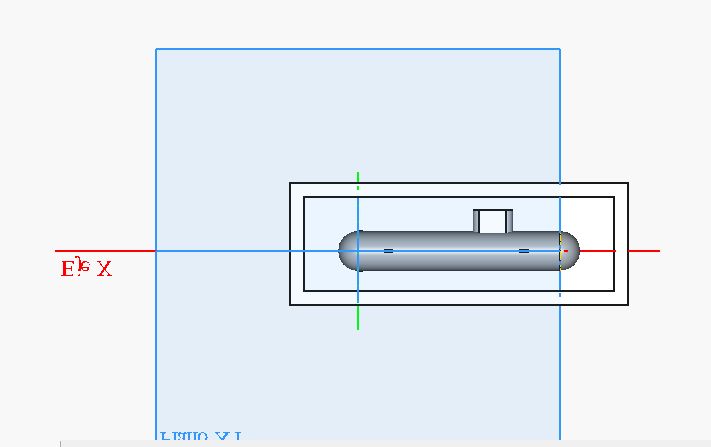
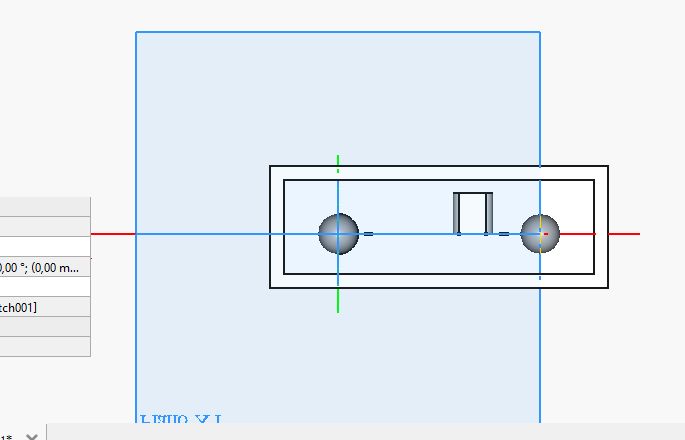
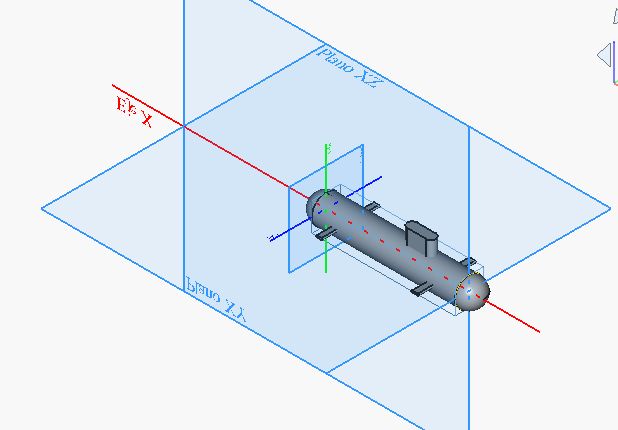
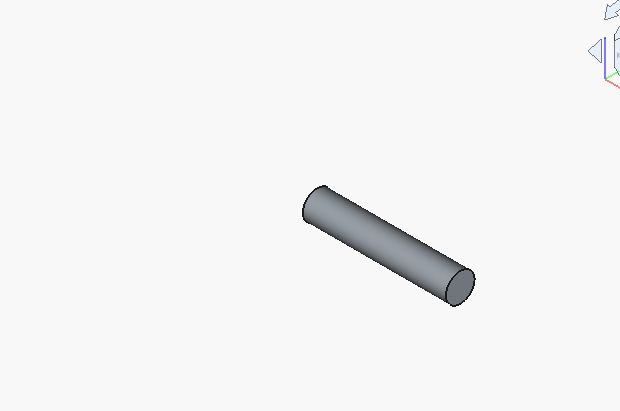
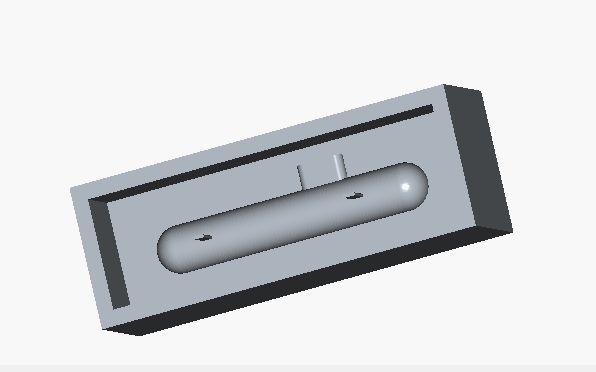
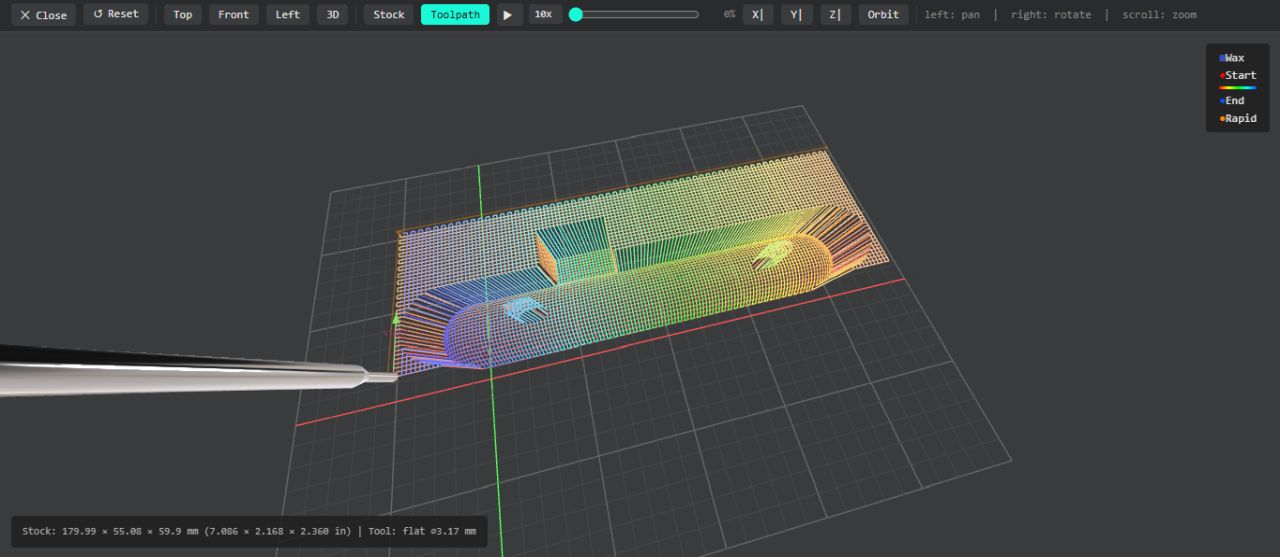
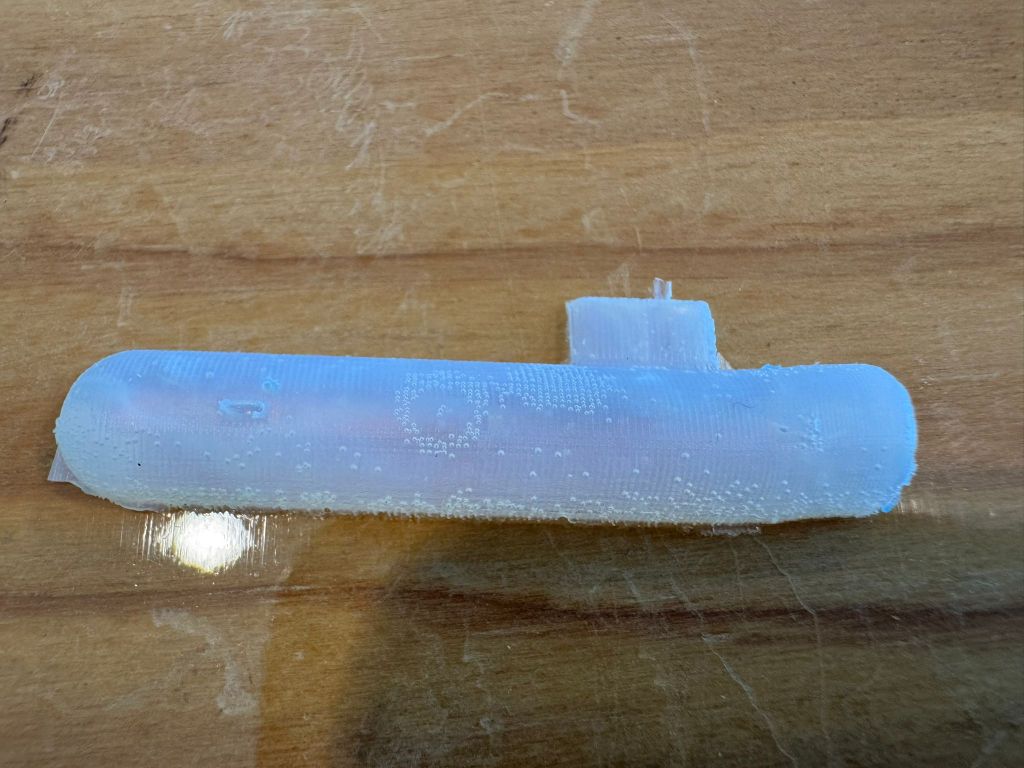
Given my limited experience with FreeCAD, I aimed for a simple design that still met the criteria for complex 3D surfaces. I wanted to avoid a 2.5D look (stacked 2D profiles) and show the smooth toolpaths of the milling process. My interest in maritime themes led me to design a simple submarine.
I used three fundamental shapes:
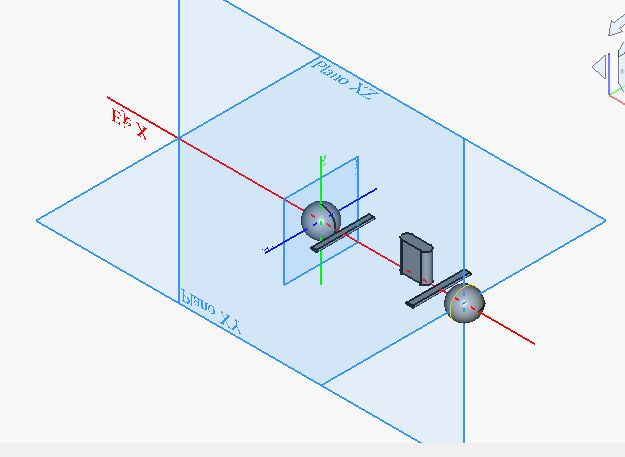
- A circle, which I then extruded to create the central hull.
- Two spheres, embedded at 50% into each end of the tube, forming the bow and the stern.
- Three extruded ellipses to create the conning tower (bridge) and the lateral fins.
My original plan was to include more details, such as a periscope, and to design a two-part mold for a full 3D casting. However, due to the technical setbacks mentioned before, I decided to simplify the project and produce a one-sided mold.

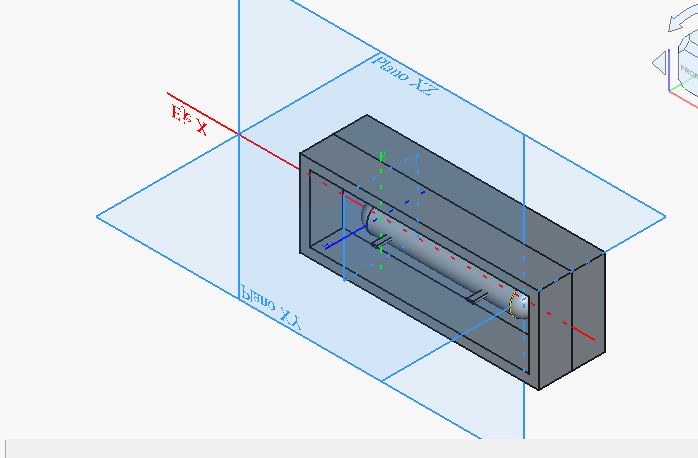
After completing the CAD model, I exported it in .stl format. My original intention was to use Mods for the toolpath generation and mill it on our local Roland SRM-20. Due to the machine failure, the file was instead sent to the FabLab León.
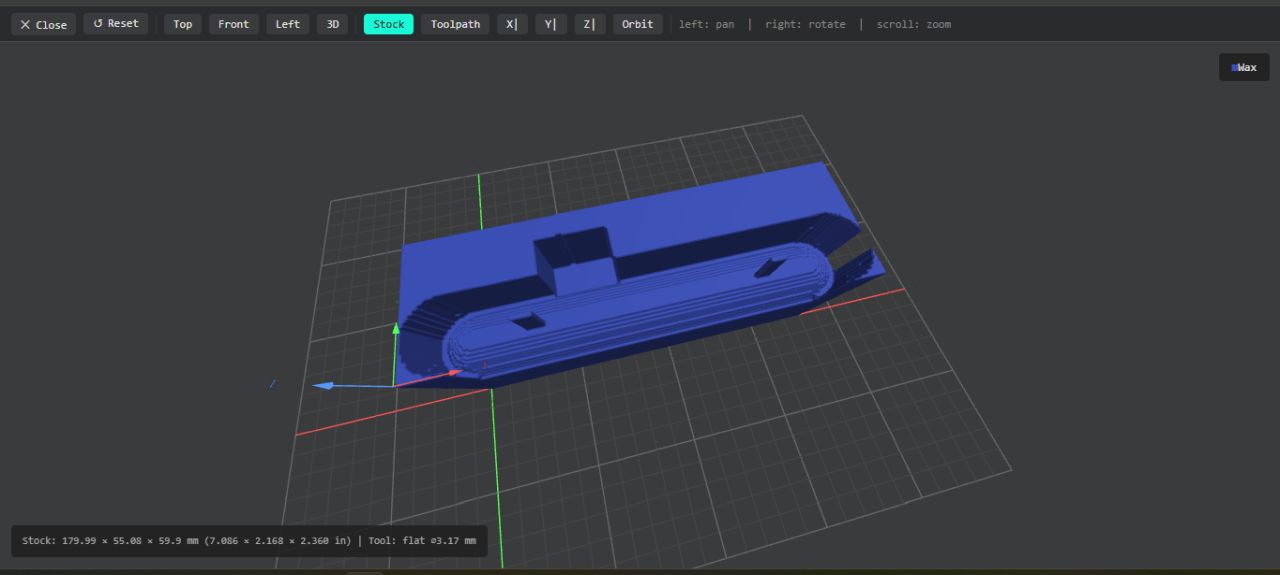
MOLDING - MILLING
The milling process is divided into two main strategies:
ROUGHING: This technique is used to remove large amounts of material quickly. It creates the general shape of the part but leaves a 'stepped' or rough surface finish.
FINISHING: This is the final pass. It follows the contours of the design with high precision to achieve a smooth, high-quality surface finish.
Both strategies are programmed using Mods to generate the .rml files required by the Roland milling machine. However, as previously stated, these files couldn't be used locally due to the hardware failure.
.rml (Roland Machine Language) is the specific command language used by Roland DG milling machines to interpret coordinates and tool movements.
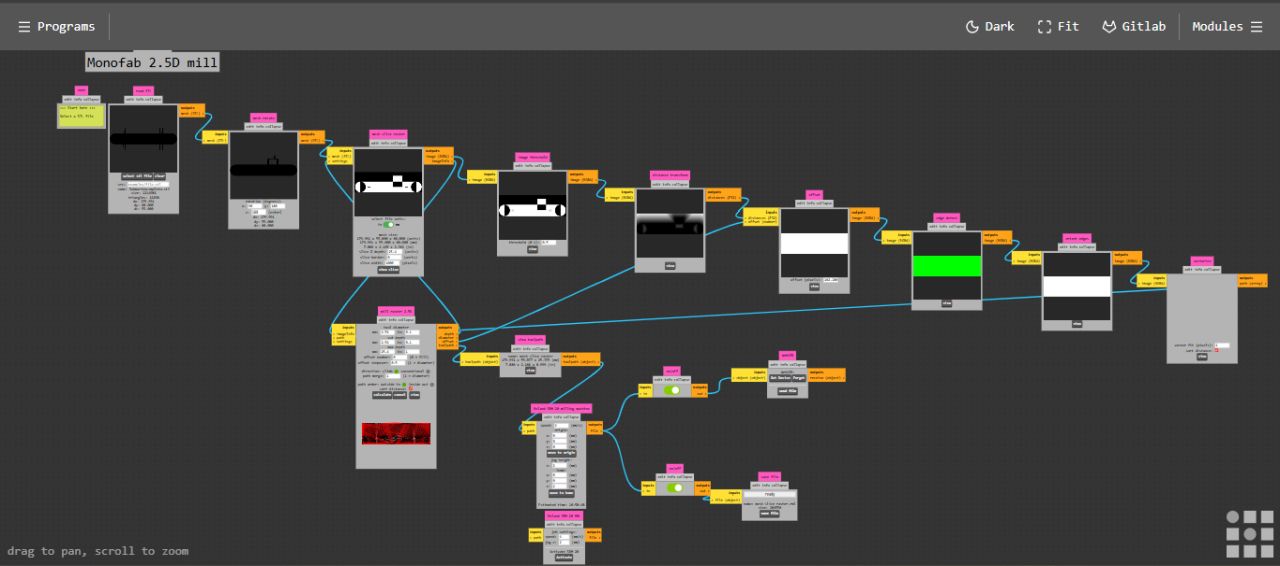
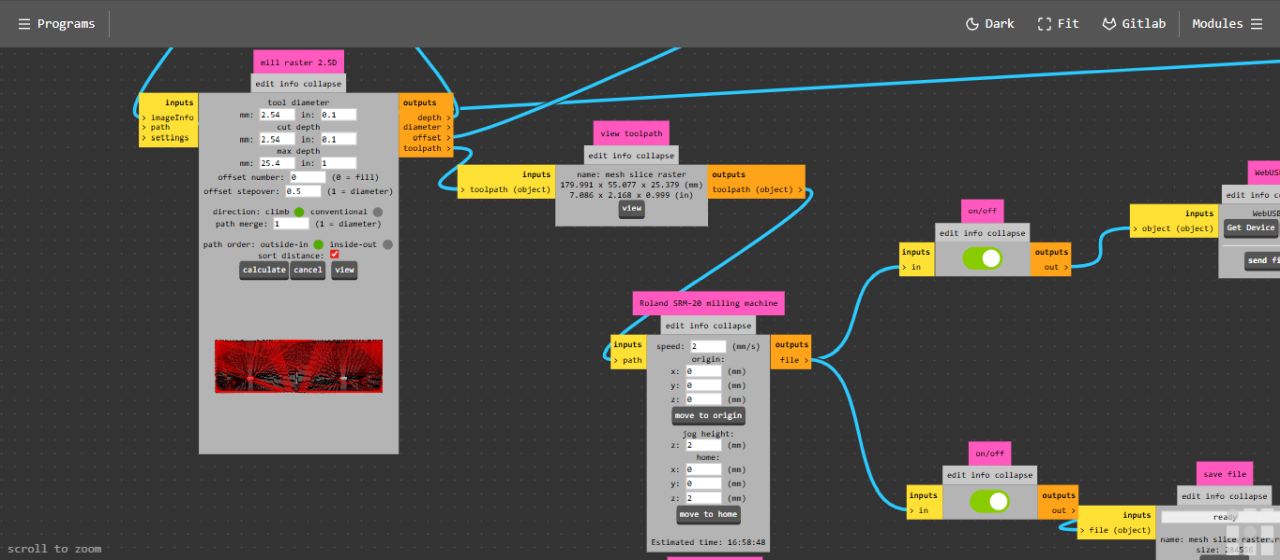
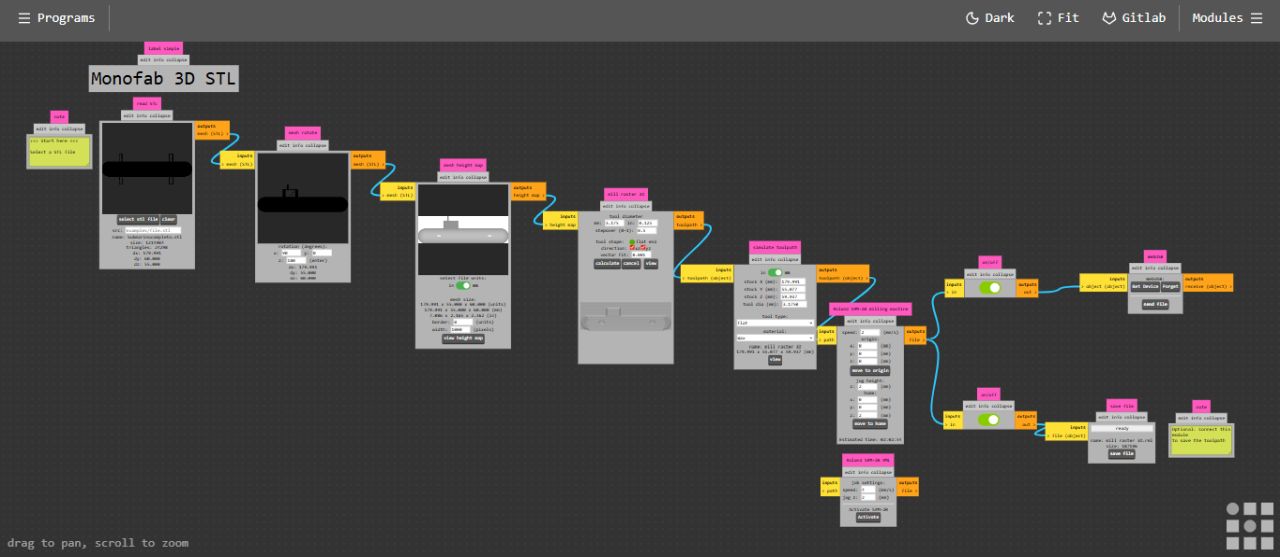
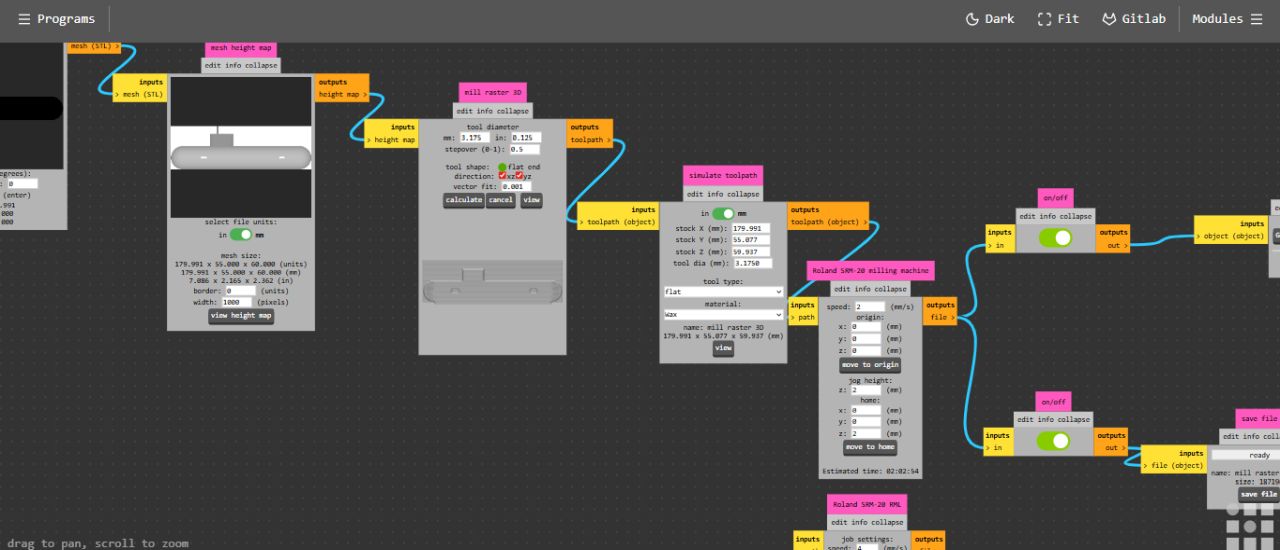
As previously mentioned, the milling process was ultimately carried out at FabLab León.
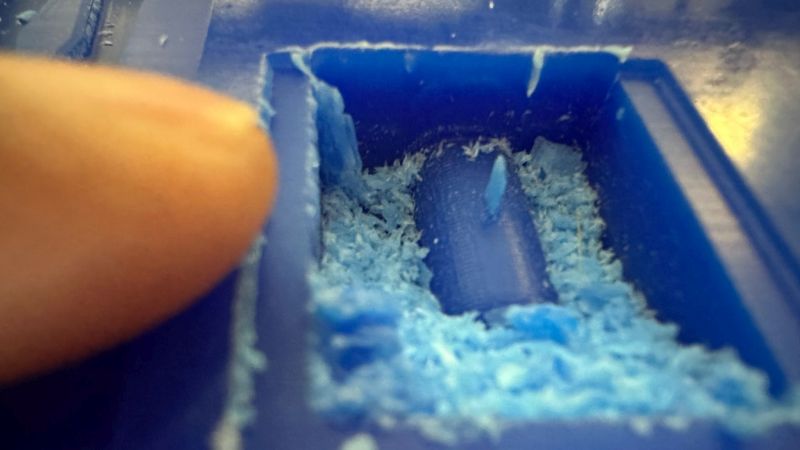
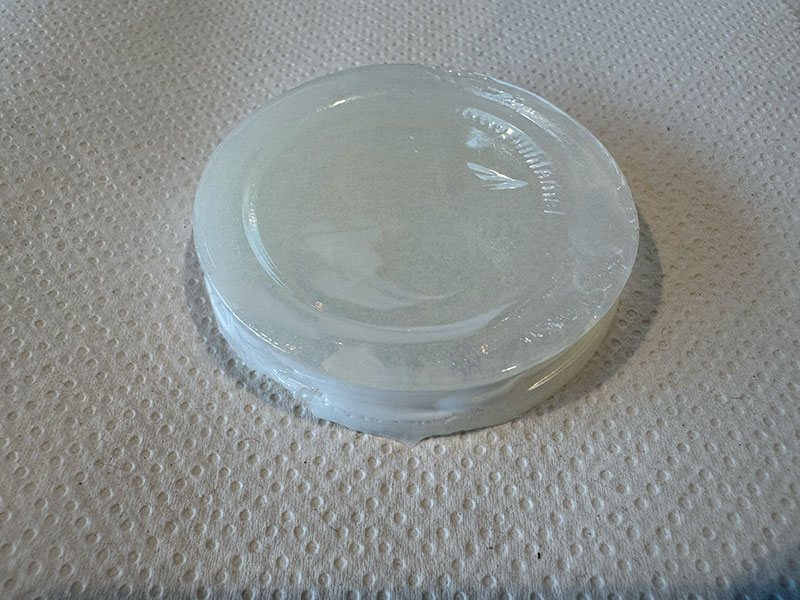
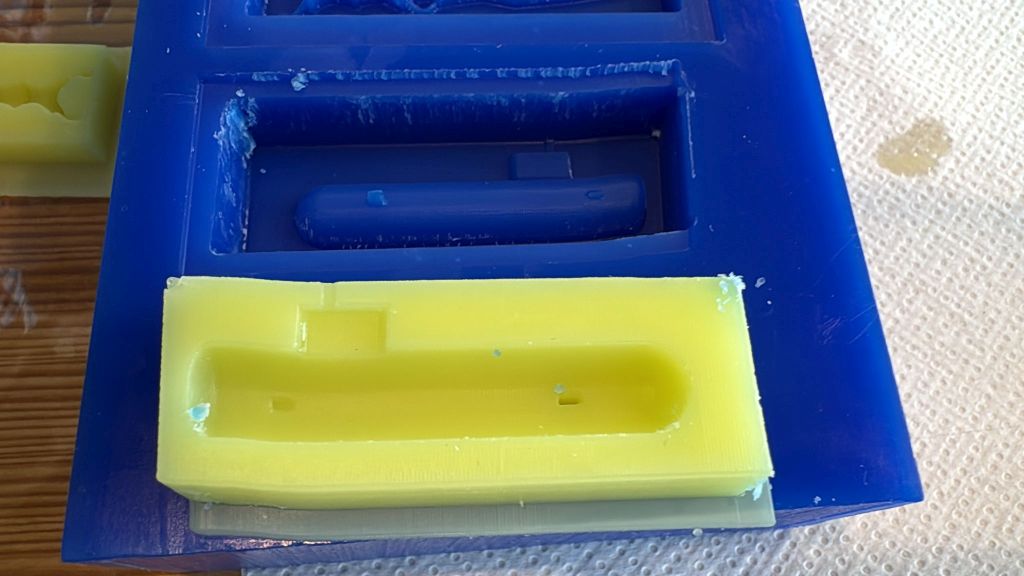
SILICONE NEGATIVE MOLD
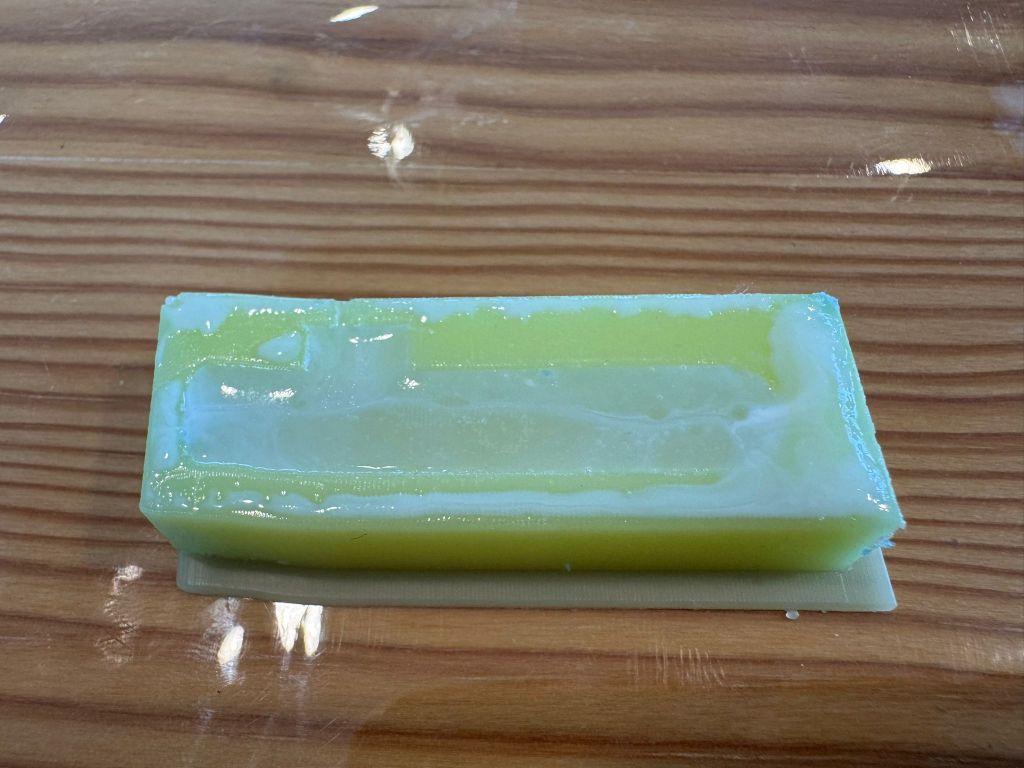
Once the milled wax molds arrived from León, I proceeded to create the silicone negative mold.
Following the datasheet instructions, I mixed the two components at a 1:1 ratio (50/50).
After stirring thoroughly to ensure a homogeneous mixture, I prepared the wax block. Before pouring, I applied a mold release agent to facilitate the extraction once the silicone had fully cured.
Finally, I filled the wax mold with the mixture, ensuring it covered all the details of the submarine.
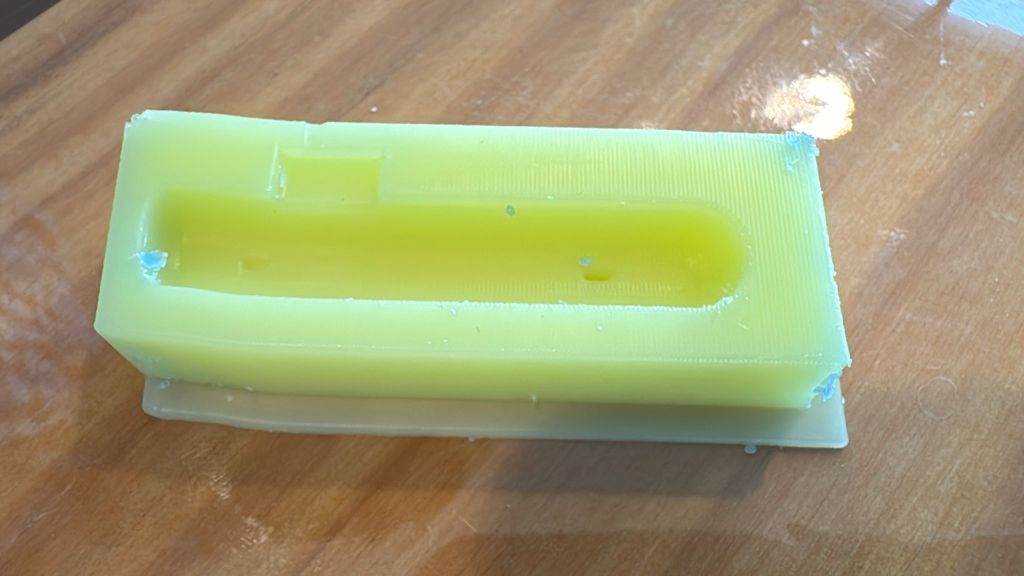
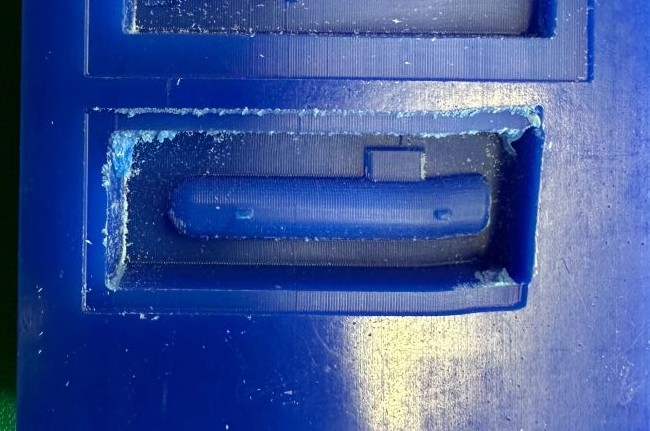
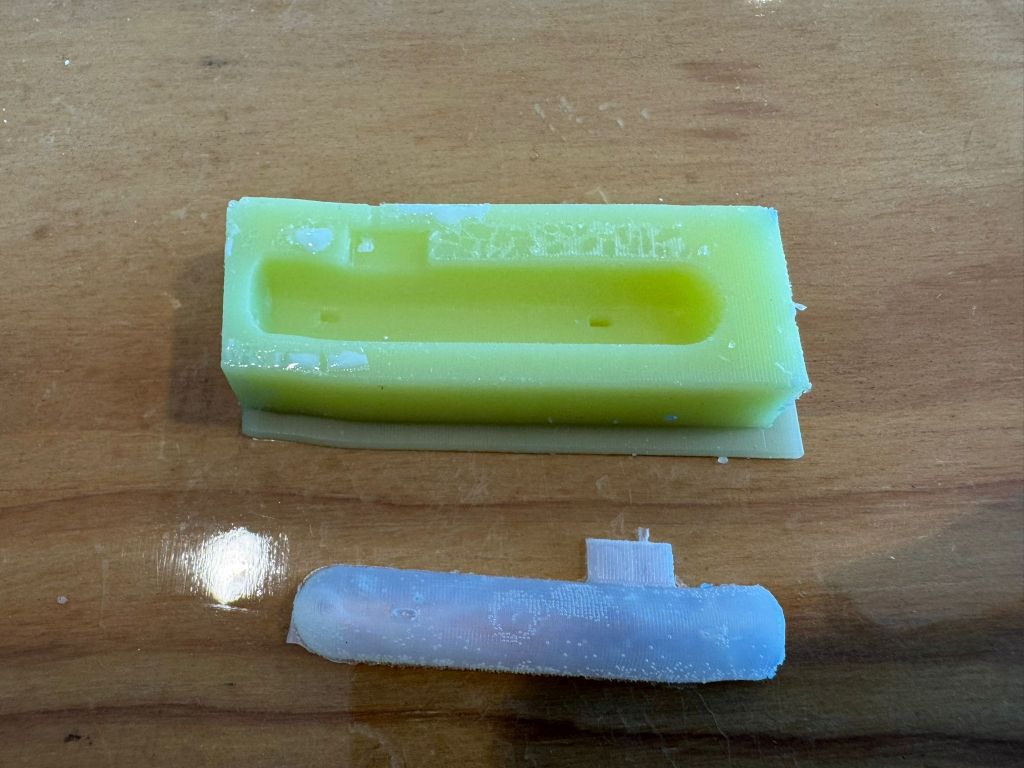
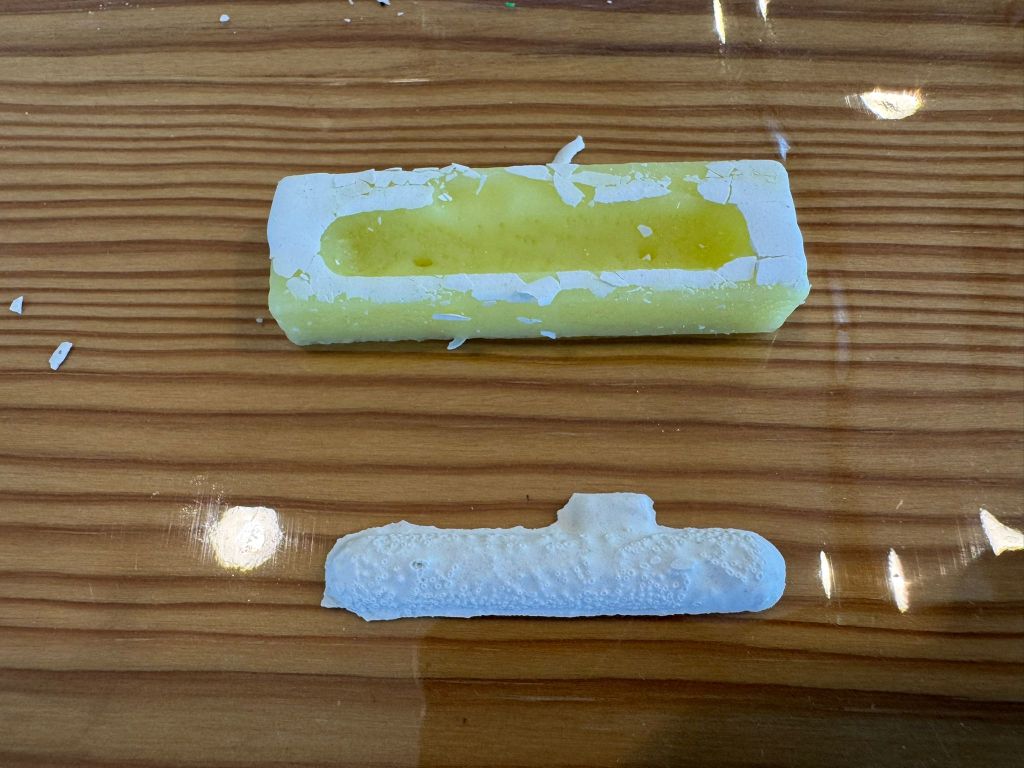
As seen in the photo, a 3D-printed resin mold was used for the silicone pour. Although this wasn't part of the original plan, the experiment revealed that it was not a good idea due to material incompatibility, leading to cure inhibition.
This resulted in a sticky surface, confirming that the wax block is a much safer substrate for this specific silicone.
material inhibition. This resulted in a sticky surface, proving that the chemical components of the resin interfere with the silicone catalyst, unlike the machinable wax which is a much safer substrate.
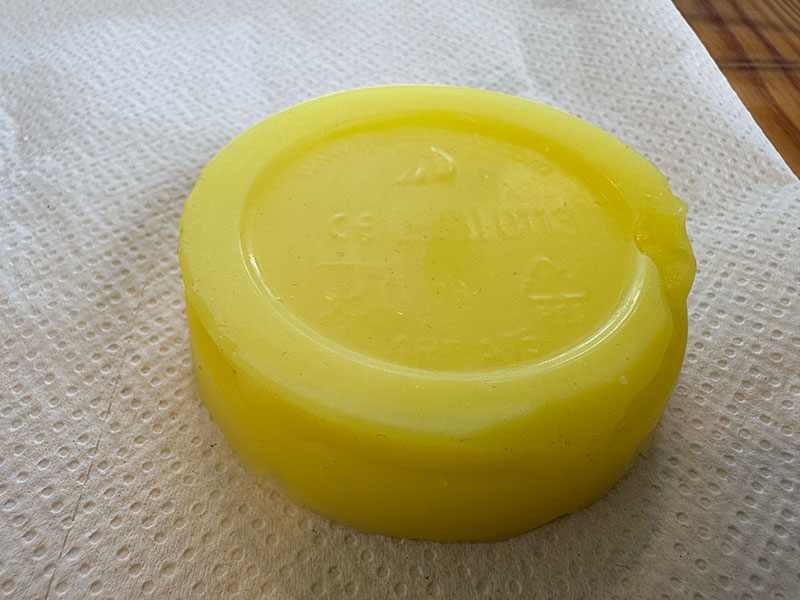
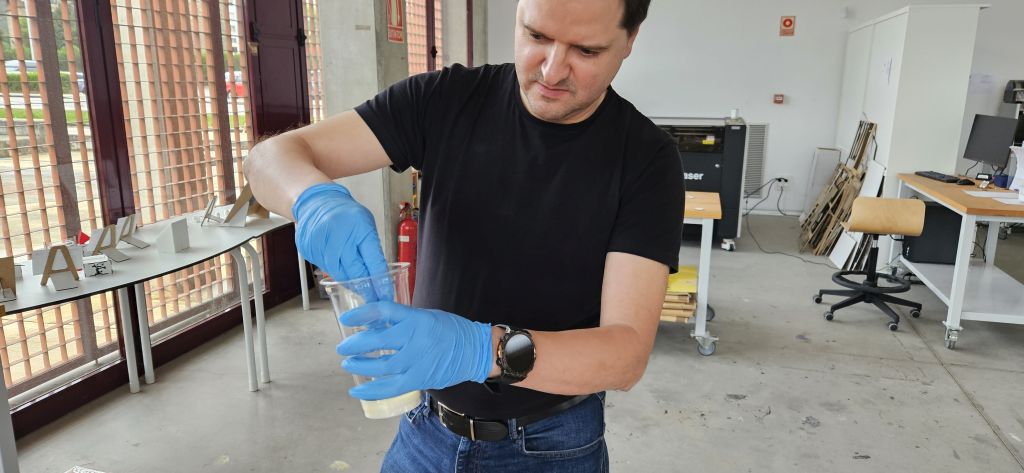
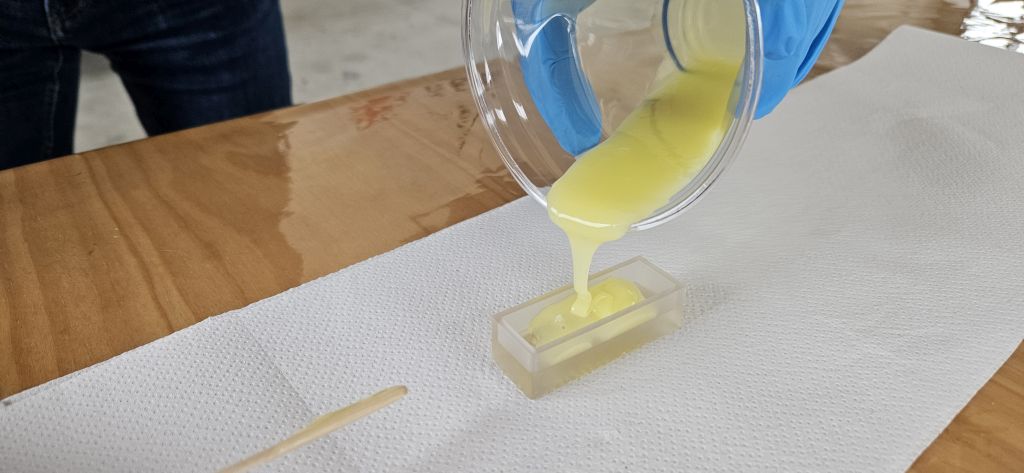
CASTING
RESIN
For the final casting, I used a two-part casting resin. This process is similar to the silicone one but requires faster handling due to the material's shorter pot life (working time). After mixing the resin carefully to avoid bubbles, I poured it into the silicone mold and waited for it to fully harden.
mechanical demolding is much easier, but you must ensure the resin has reached its full curing time to avoid deforming the details.
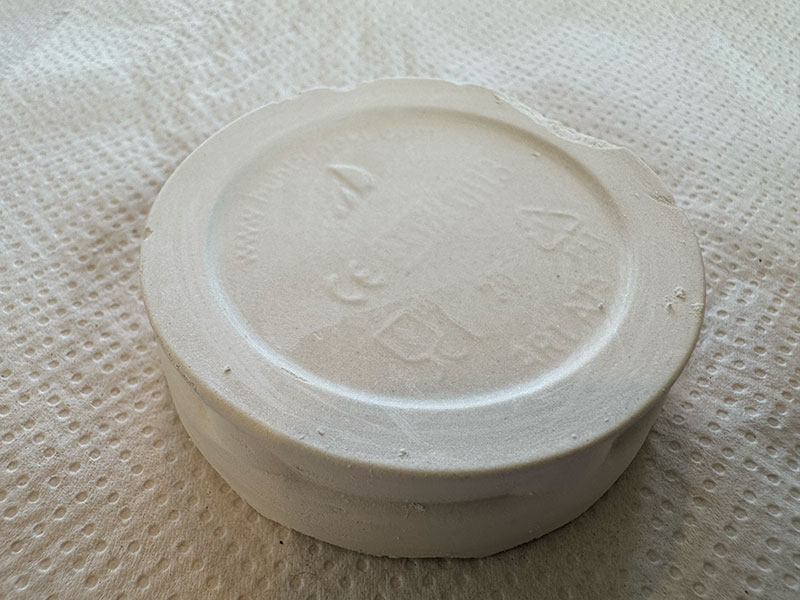
PLASTER
To explore different finishes, I also performed several casts using plaster. This material is interesting because it's easy to handle, eco-friendly, and provides a very different aesthetic compared to resin.
I mixed the plaster powder with water following the manufacturer's ratio until I reached a creamy consistency, then filled the silicone molds.
porous material and involves an exothermic reaction (it gets warm) during the setting process. It is vital to tap the mold gently to release any trapped air bubbles.
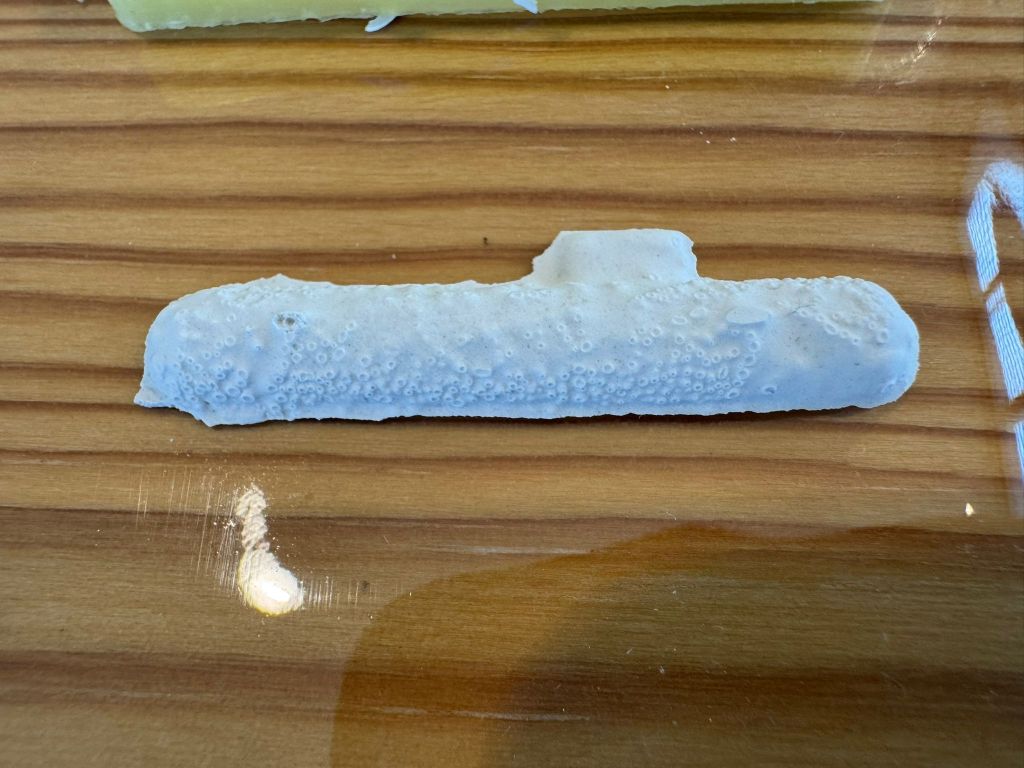
RESULT
After testing both materials, the resin provided a much better surface finish and structural integrity.
The plaster version, while successful in terms of demolding without breaking, showed more surface imperfections and a less defined finish. However, it was a valuable exercise to understand how different materials behave within the same silicone mold.
demolding, the surface tension and viscosity of the resin captured the submarine's details much better. Plaster is prone to air traps in complex geometries like the bow and propeller.
CONCLUSION
It is difficult to draw a single final conclusion from this assignment given the multiple challenges encountered: From the lack of time to the inability to "play" more with the materials and perform more milling tests.
However, once the core techniques are learned, I am confident that I will revisit and improve this exercise in the future with more time and resources.