Week4 Embedded programming.
- Group Assignment
- Individual Assignment Part 1
- Individual Assignment Part 2 Programming the RP2040 microcontroller with Arduino
- Summary
Group Assignment
FabLab Leon work groupDemonstrate and compare the toolchains and development workflows for available embedded architectures
This section corresponds to the Arduino installation stage, where the steps required to obtain the necessary toolchains are described.
InstallationToolchain and Development Workflow Reflection
Since our group page was missing the collective assignment, I am detailing here the development workflow and toolchain I used during this week, which focused exclusively on the Arduino IDE.
- The Toolchain (C/C++): My workflow relied on the Arduino IDE, which acts as a frontend for the compilation toolchain (such as
arm-none-eabi-gccorxtensa-esp32-elf-gccdepending on the microcontroller architecture used). This process takes the high-level C/C++ source code, compiles it into object code, and links it with necessary libraries to generate a final binary file (like a.binfile). - The Workflow:
- Writing & Libraries: Writing the code using Arduino's structure (
setup()andloop()), leveraging its extensive library ecosystem. - Compilation: The IDE compiles the code. This step is crucial as it performs static type checking and memory allocation before anything touches the hardware.
- Flashing: Using the built-in bootloader over USB to upload the binary machine code directly to the microcontroller's flash memory.
Workflow Comparison & Future Work: While other workflows like MicroPython allow for interpreted scripting (where code is executed on the fly without a compilation phase), I chose to stick with the Arduino IDE / C++ ecosystem because it guarantees optimized execution speed and minimal memory overhead, which is essential for stable, low-level hardware control.
Unfortunately, due to a lack of time, I did not have the chance to work with MicroPython to gain a deeper hands-on experience and make a better practical comparison between both options. This is definitely another task to develop once I finish the FabAcademy.
Individual Assignment Part 1
QPAD – XIAO
The assignment for this week is to study, understand, and program a microcontroller provided by FabLab León: a XIAO RP2040 For this study, we use the manufacturer’s datasheet, and for programming we use Arduino, which must be installed and configured on our computer.
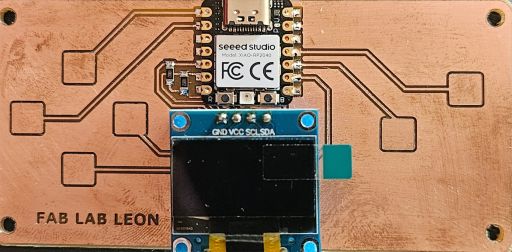
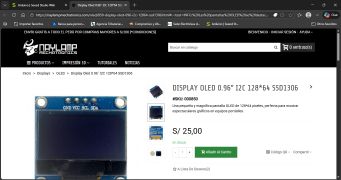
The electronic board provided to us is a QPAD-XIAO, equipped with a Seeed Studio XIAO RP2040 development board, a 0.96-inch I2C OLED display (128×64, SSD1306), and six capacitive touch buttons.
Seeed Studio XIAO RP2040 & RP2040 Microcontroller
In the documentation available online, we can find all the technical specifications, inputs, outputs, and other details.
XIAO-RP2040 RP2040It is important to differentiate between the Seeed Studio XIAO RP2040 development board and the RP2040 microcontroller.
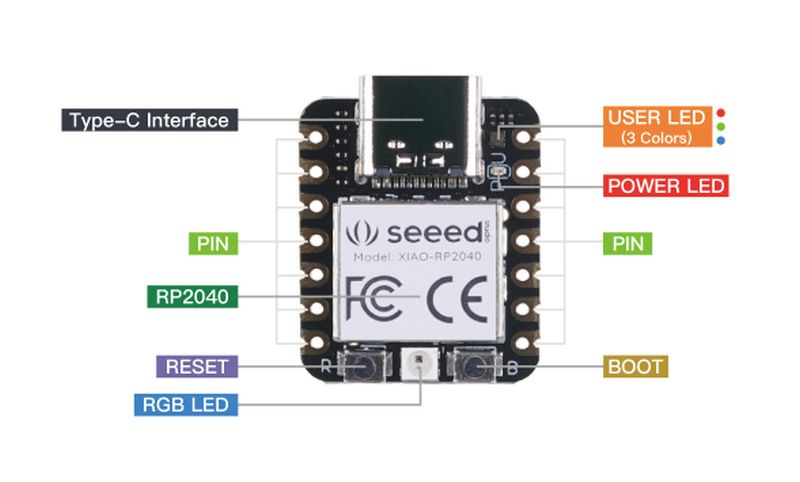
The development board includes:
The microcontroller
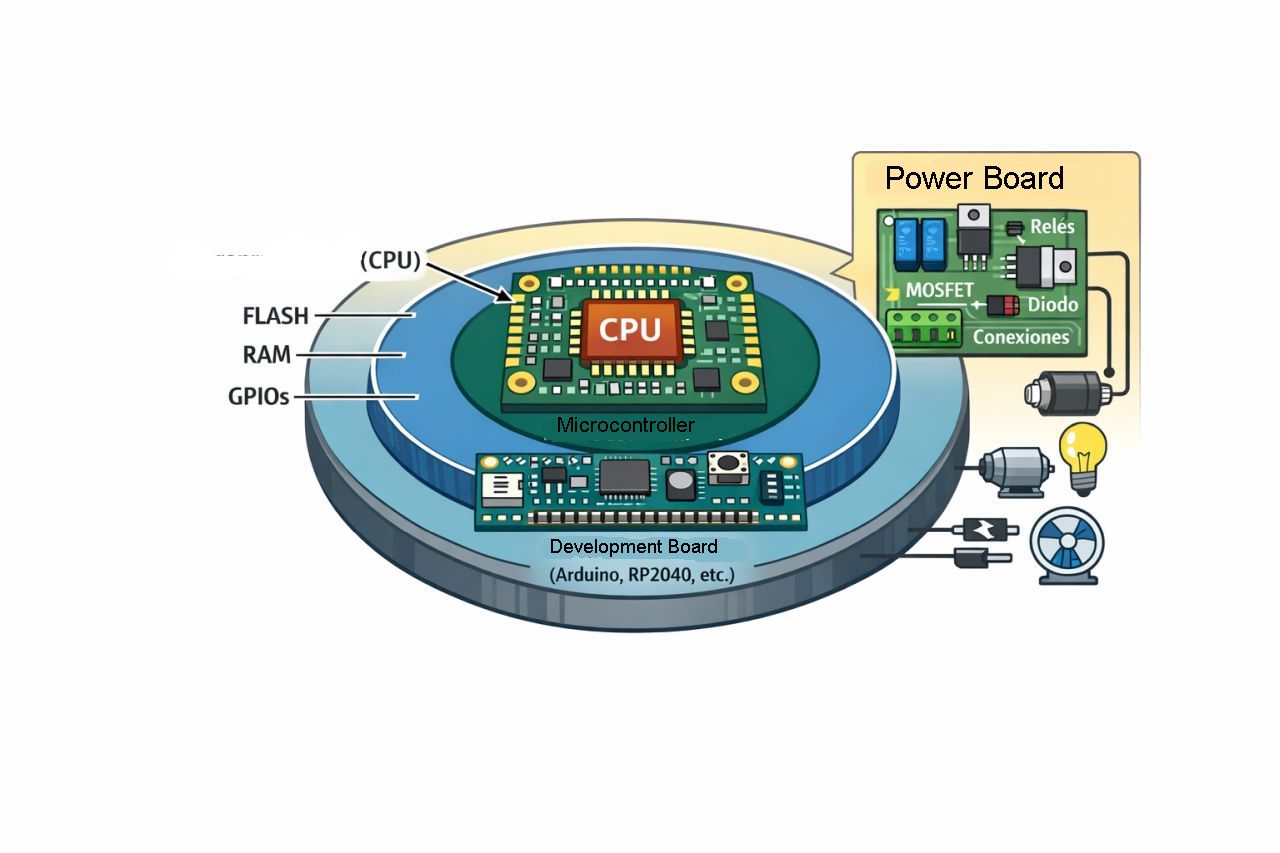
The microcontroller, in this case an RP2040 designed by Raspberry Pi, is part of the development board and is composed of:
The microprocessor itself consists of two ARM Cortex-M0+ cores running at 133 MHz.
This differentiation between the different layers of components was a real discovery for me, since I had never worked at this level of detail before. I had always thought that the large black chip in the middle of a power board was already “the processor”.
In the following image, created by ChatGPT, we can clearly see this differentiation between the different component levels.
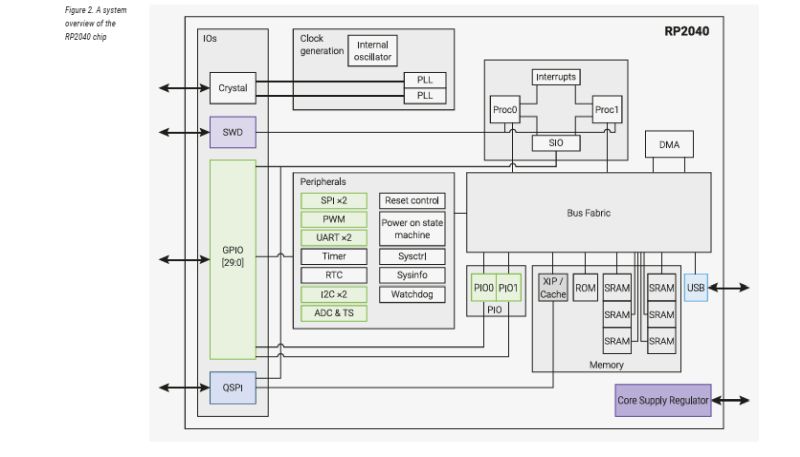
In the following diagrams, we can see the interconnection between the different components of the board.
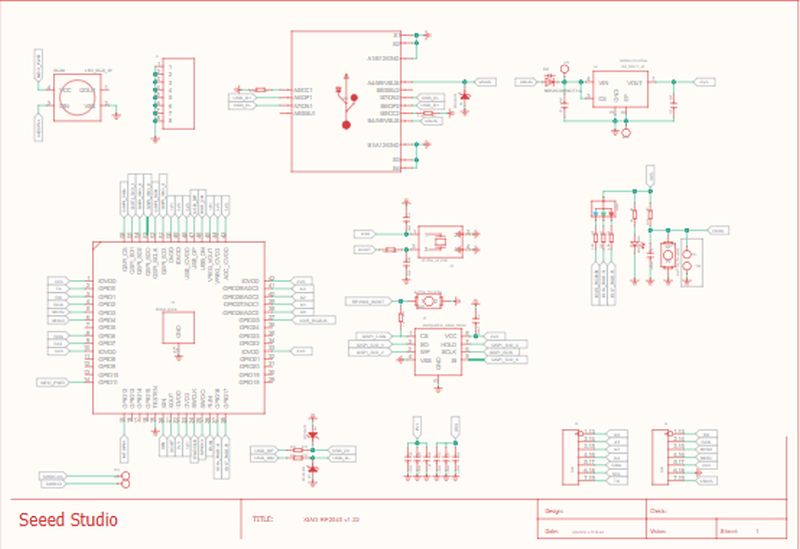
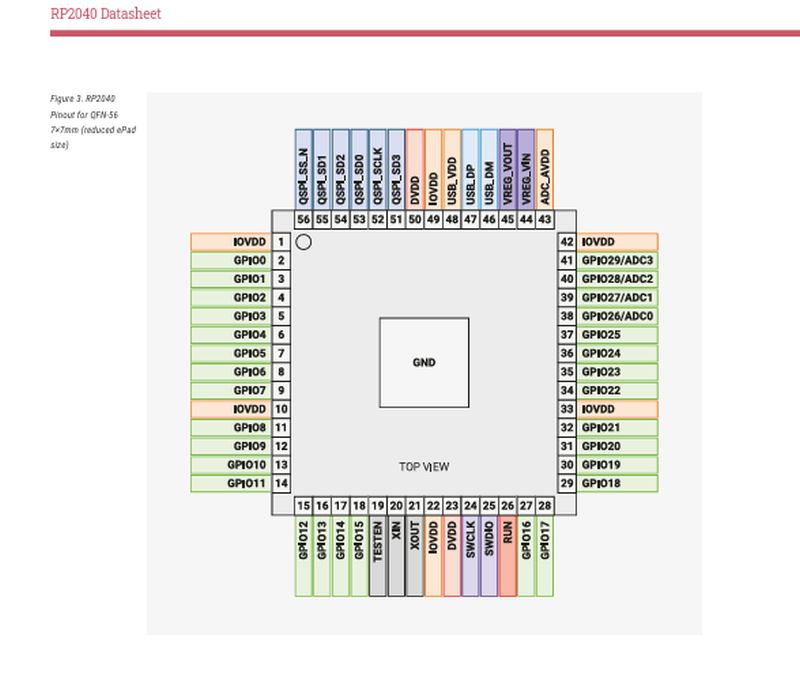
Seeed XIAO-RP2040
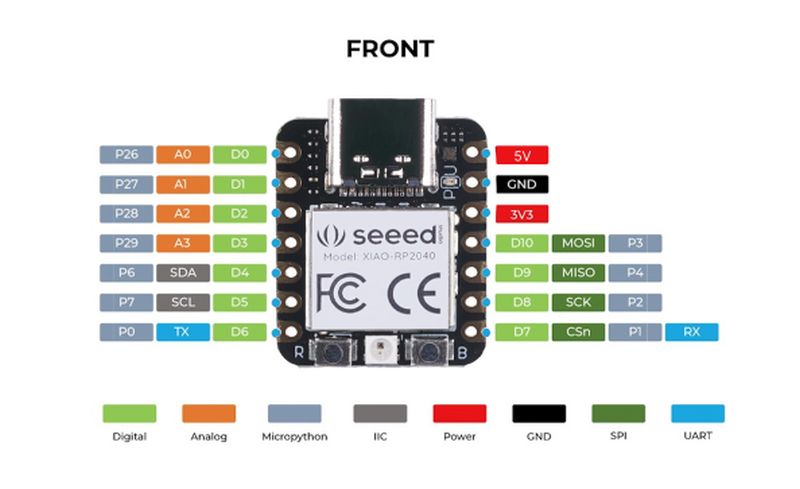
Pinout Development board
Summary of functions
In summary, the functions of each of the three main components present in a board such as the Seeed Studio XIAO RP2040 are as follows:
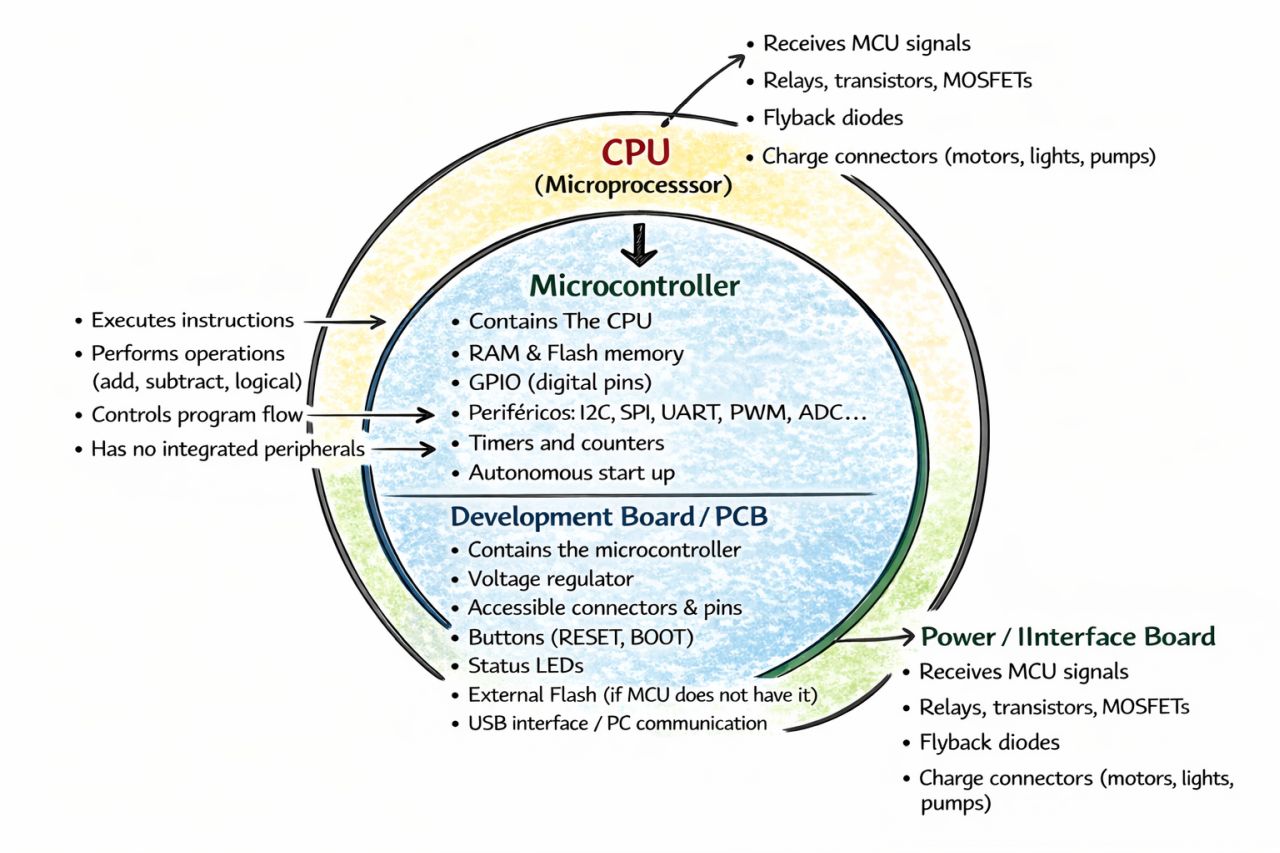
Finally, the power board corresponds to the complete assembly provided to us, where the display and buttons are already installed.
Individual Assignment Part 2 Programming the RP2040 microcontroller with Arduino
Once we understand what we are working with, it is time to start programming.
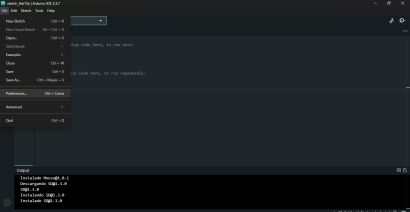
Installation
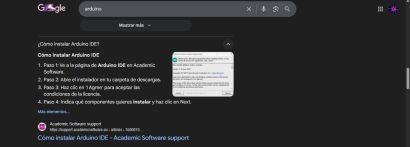
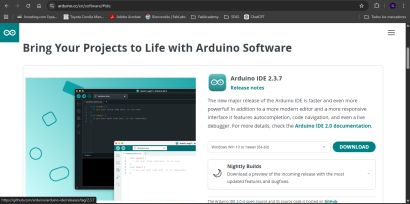
In my case, I had never programmed a microcontroller before; in fact, I did not even know what Arduino was. Therefore, the first step was to download and install the Arduino IDE on my computer.
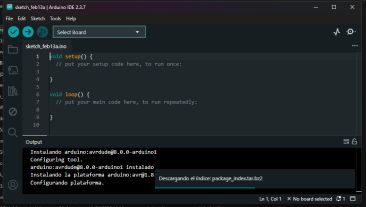
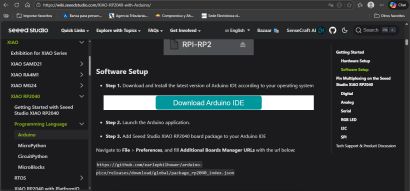
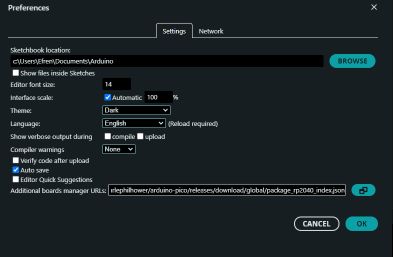
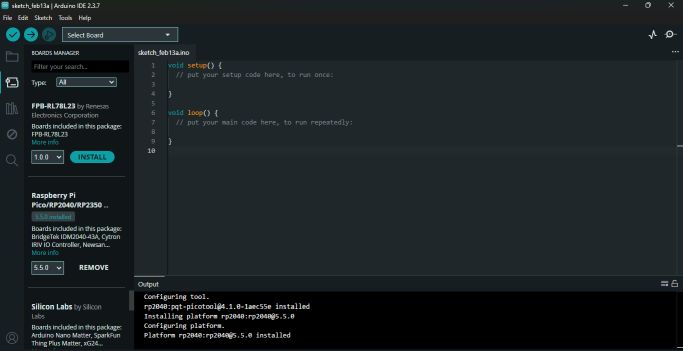
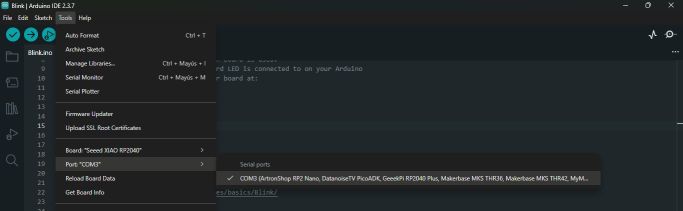
Once installed, it must be configured, which includes selecting the type of board to be used. Since the Seeed XIAO RP2040 is not included by default in the Arduino libraries, it must be downloaded from the official Seeed Studio website. After that, I installed Raspberry Pi Pico/RP2040 from the Boards Manager.

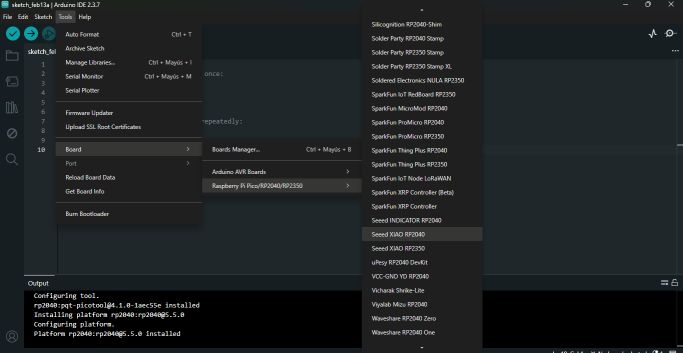
With the correct board installed, the next step was to select it and configure the communication port where the QPAD–XIAO was connected, in my case COM3.
Programming
Since I had never worked with this type of software before, the first step was to use the examples included in the Arduino IDE. Additionally, I was able to use the examples provided in the QPAD–XIAO Repository.
First example: Blink
The first program was simple: making one of the onboard LEDs blink. I opened the example, compiled it, and… it worked!
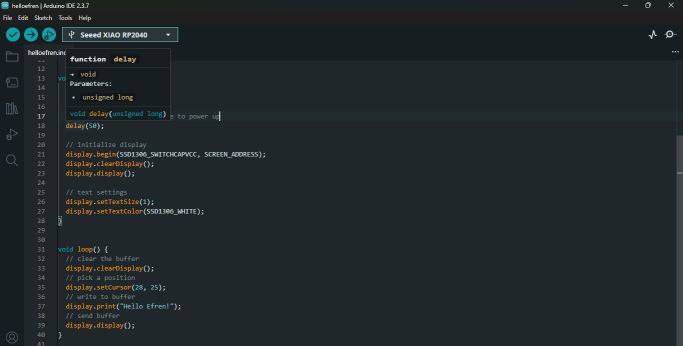
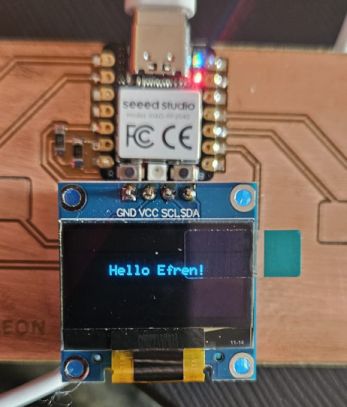
Second example: Hello World – Hello Efren
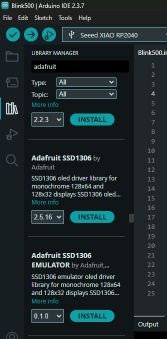
In this example, I realized during compilation that some components were missing. Arduino warned me that the Adafruit library was not installed. I searched online for the display model and installed the corresponding libraries, specifically Adafruit SSD1306. After that, I modified the text line and, instead of “Hello World”, I obtained a nice “Hello Efren” on the screen.
Third example: Buttons
In this example, I learned how to use the buttons included on the board. After compiling the example, all the buttons responded correctly.
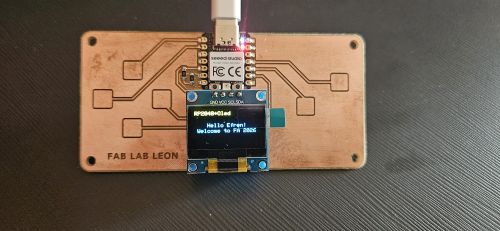
Custom program
In this case, I tried to write more text on the display by configuring the cursor position, achieving a third line of text.

Summary
My experience with this assignment has been very rewarding. I cannot say that I have learned how to program in Arduino yet, but I have discovered more layers in the construction of microcontroller-based systems and now better understand their architecture. At the same time, reading and testing different example codes is helping me become familiar with this programming language, even if for now I barely know how to edit the code. But every journey has to start somewhere.