Bambu Lab · X1 Carbon
3D printing — Operation & Safety
Machine specifications
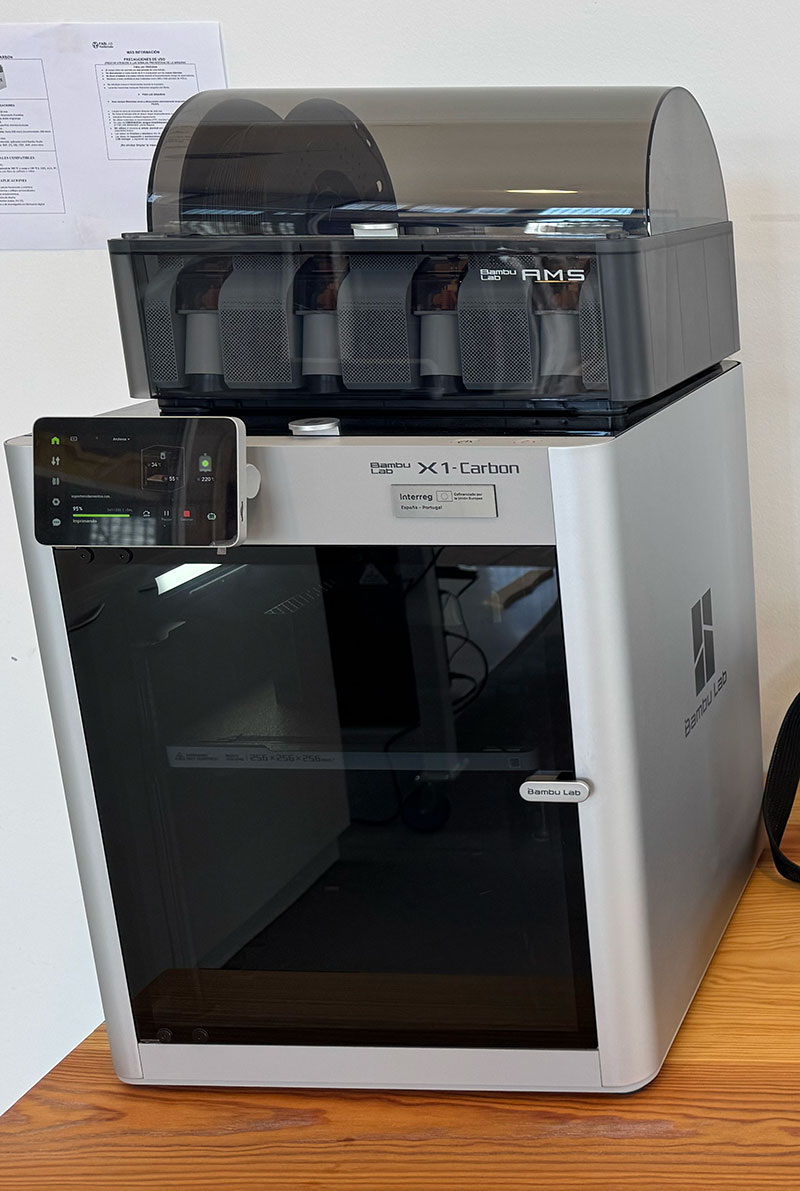
The Bambu Lab X1 Carbon is a high-performance FDM 3D printer designed to be fast, accurate, and easy to run day-to-day. Compared to more “manual” machines, a lot of the routine work here is automated (bed leveling, flow calibration, vibration tuning), so you spend more time on design decisions and less time chasing random print issues.
| Parameter | Value |
|---|---|
| Technology | FDM (Fused Deposition Modeling) |
| Build volume | 256 × 256 × 256 mm |
| Motion system | CoreXY |
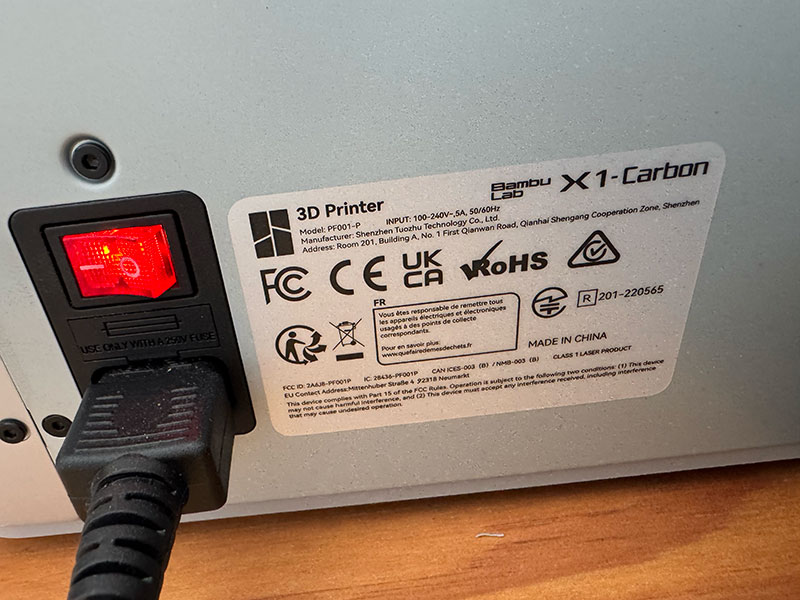
| Max nozzle temperature | Up to 300 °C |
| Max bed temperature | Up to 120 °C |
| Connectivity | Wi-Fi (network printing + monitoring) |
| Automation features | Auto bed leveling, flow calibration, vibration compensation, first-layer inspection (LiDAR) |
| Multi-material | AMS compatible (up to 4 spools per AMS; expandable) |
In real use, the biggest difference is not just speed — it’s repeatability. Once profiles are dialed in, the printer tends to produce consistent results across multiple runs.
Compatible materials
One of the nice things about the X1 Carbon is that it’s not “PLA only”. Thanks to the enclosed chamber and a hotend capable of high temperatures, it can handle a wide range of common and technical materials. That said, material choice still matters: each filament behaves differently and benefits from the right profile.
- PLA
- PETG
- ABS
- ASA
- TPU (typically better without AMS)
- Nylon (PA)
- Polycarbonate (PC)
- Fiber-reinforced filaments (carbon fiber / glass fiber)
Machine operation
Power on and quick pre-check
The printer boots like a small computer. Before starting a job, I do a quick sanity check: the plate is clean, the filament is loaded correctly, and there is no leftover plastic around the nozzle. These tiny habits prevent most “mystery failures”.
- Turn the printer on (rear switch) and wait for the touchscreen to load.
- Check the build plate is seated correctly and clean.
- Confirm the right filament is available (or loaded in AMS).
- Make sure there are no scraps or failed-print blobs around the nozzle.
Typical print flow
- Prepare the model in Bambu Studio (orientation, supports, material/profile).
- Slice and preview the toolpath.
- Send the job over Wi-Fi and start the print.
- Watch the first layer (it’s still the make-or-break moment).
Automatic calibration (what it does for you)
If enabled, the printer runs automatic routines like bed leveling and flow checks. It may add a bit of time to the start of a job, but it saves far more time by preventing failed prints — especially in a lab where different people use the machine.
- Auto bed leveling
- Flow calibration
- Vibration compensation
- First-layer inspection (LiDAR)
Bambu Studio workflow
Bambu Studio is not just a slicer — it’s basically the whole “control room” for the printer. The workflow is guided and integrated, which makes it especially comfortable for FabLab / Fab Academy use: you can go from model to print without juggling SD cards or separate monitoring tools.
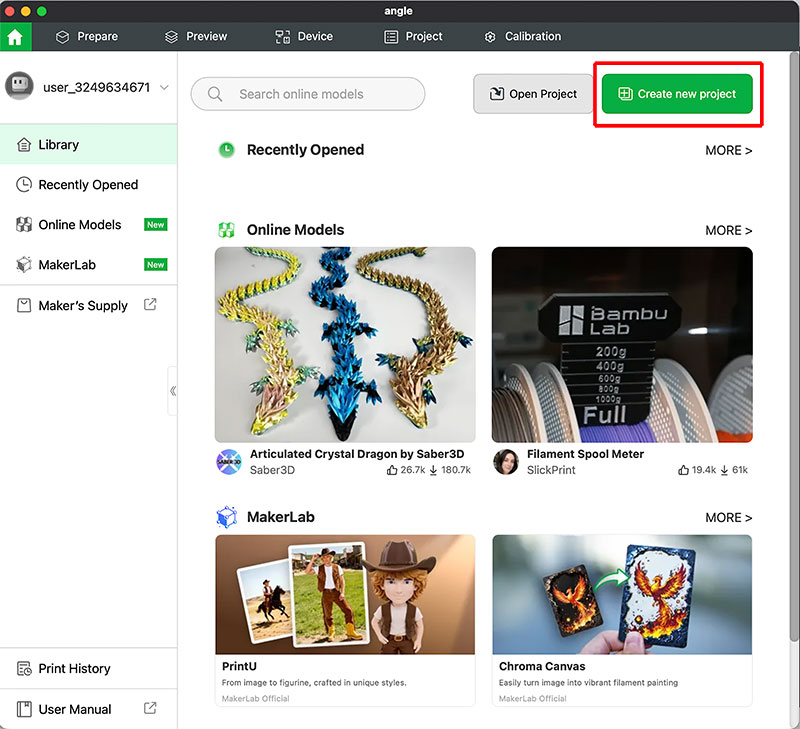
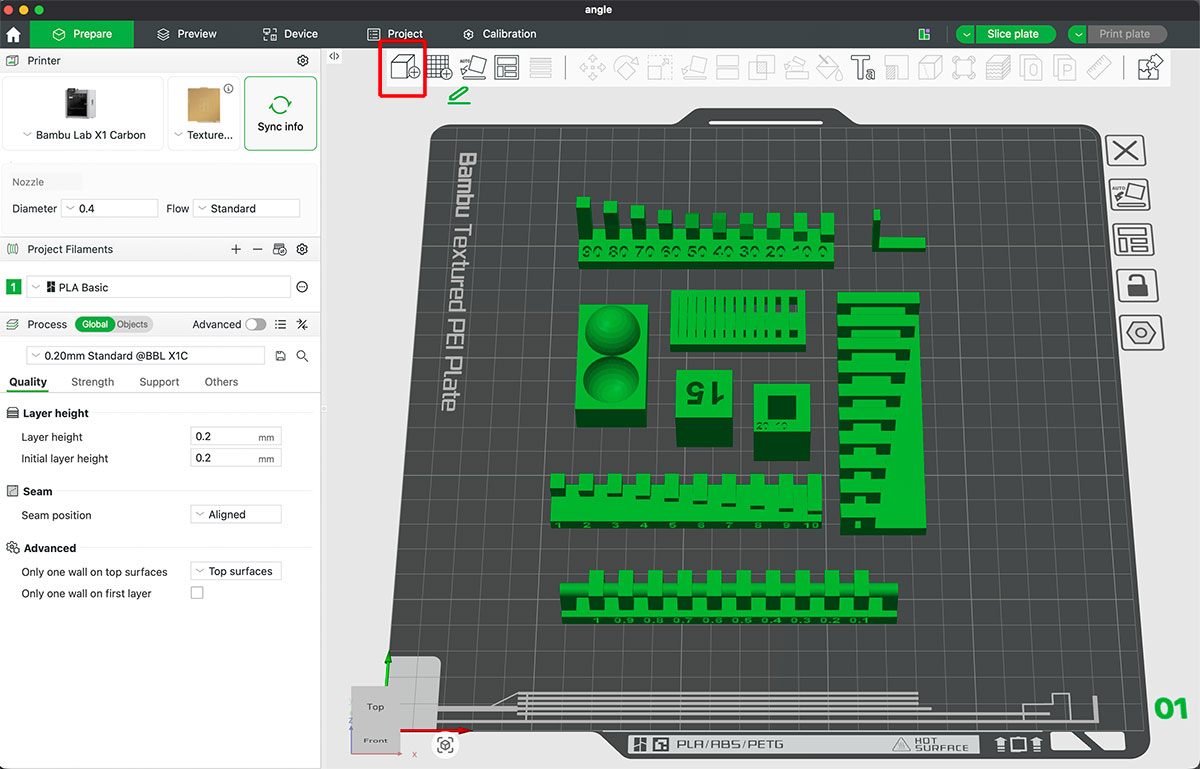
1) Import and prepare the model
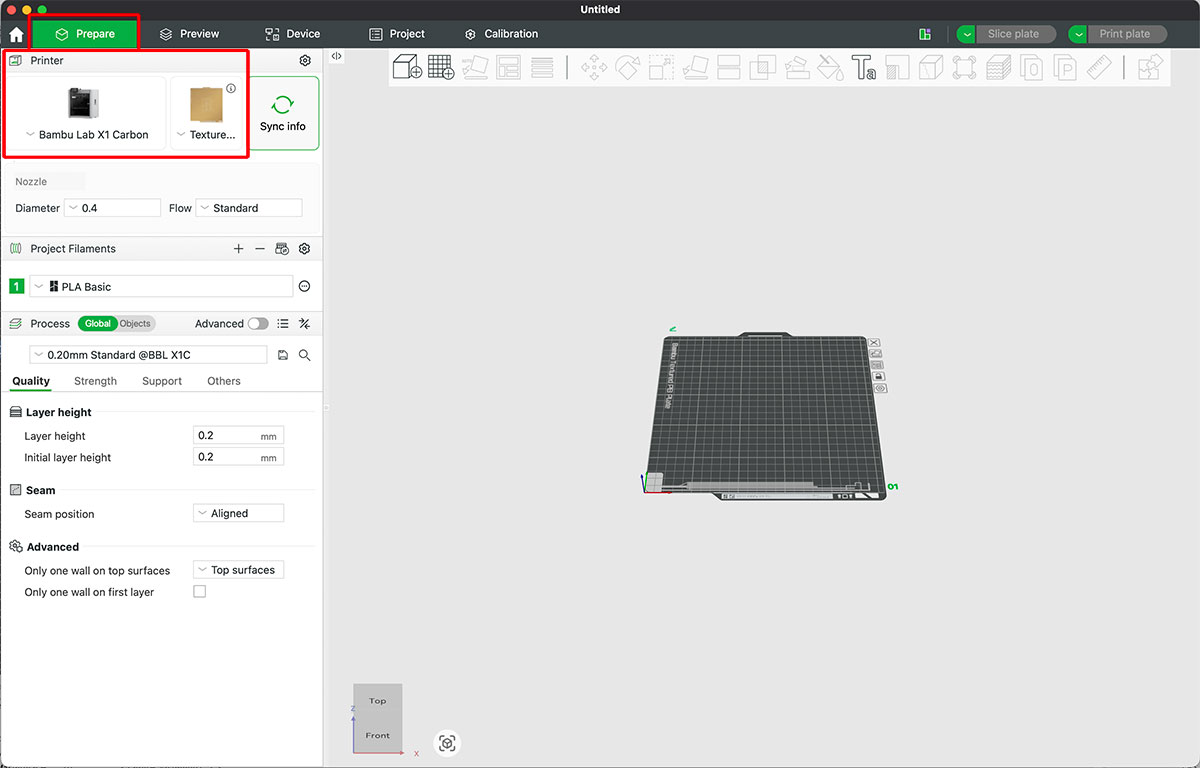
First, I select "Create a new project" and in the "Prepate" option you can select the pinter.
Next, I start by importing the file (usually STL or STEP). In this case, I import all the test .stl files (available in the next section). Once they appear, a quick check is necessary: which face should be on the build plate, where should I add supports, and whether it's more efficient to split the part. Good planning often saves more time than any advanced parameter adjustments.
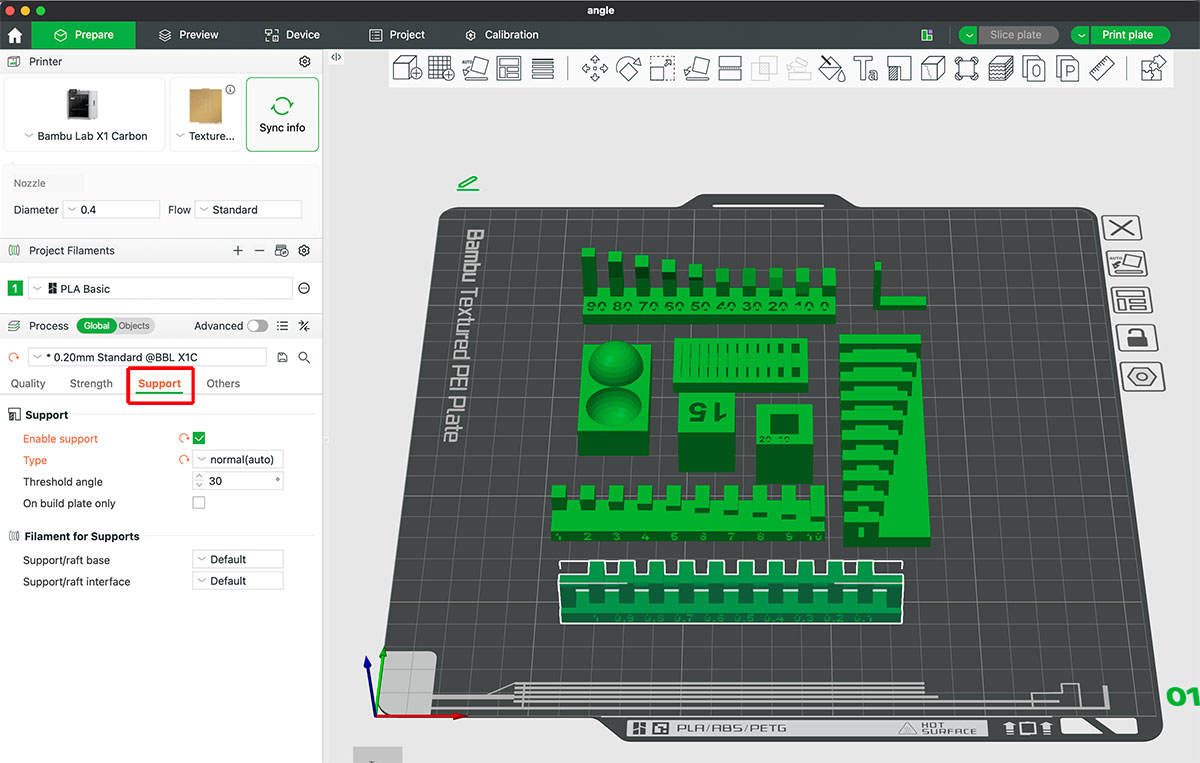
To be more practical, I separate the objects to work with them individually, place them on the build plate, and apply supports where I think they're needed or strength or quality parameters.
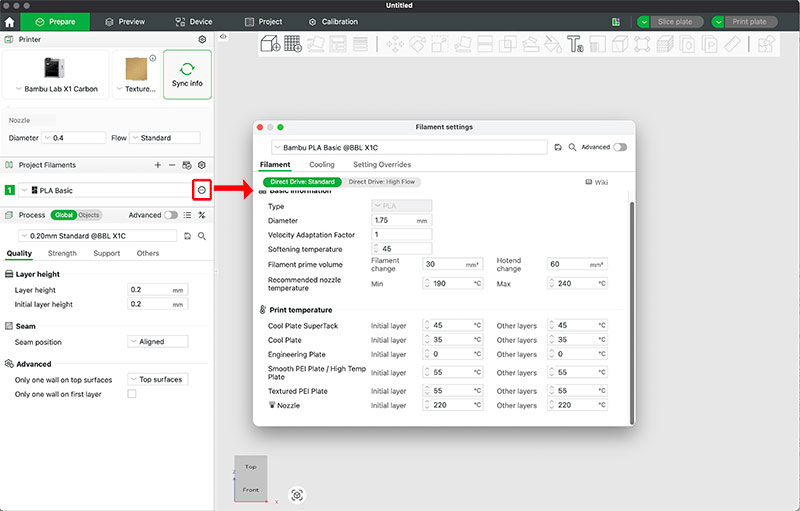
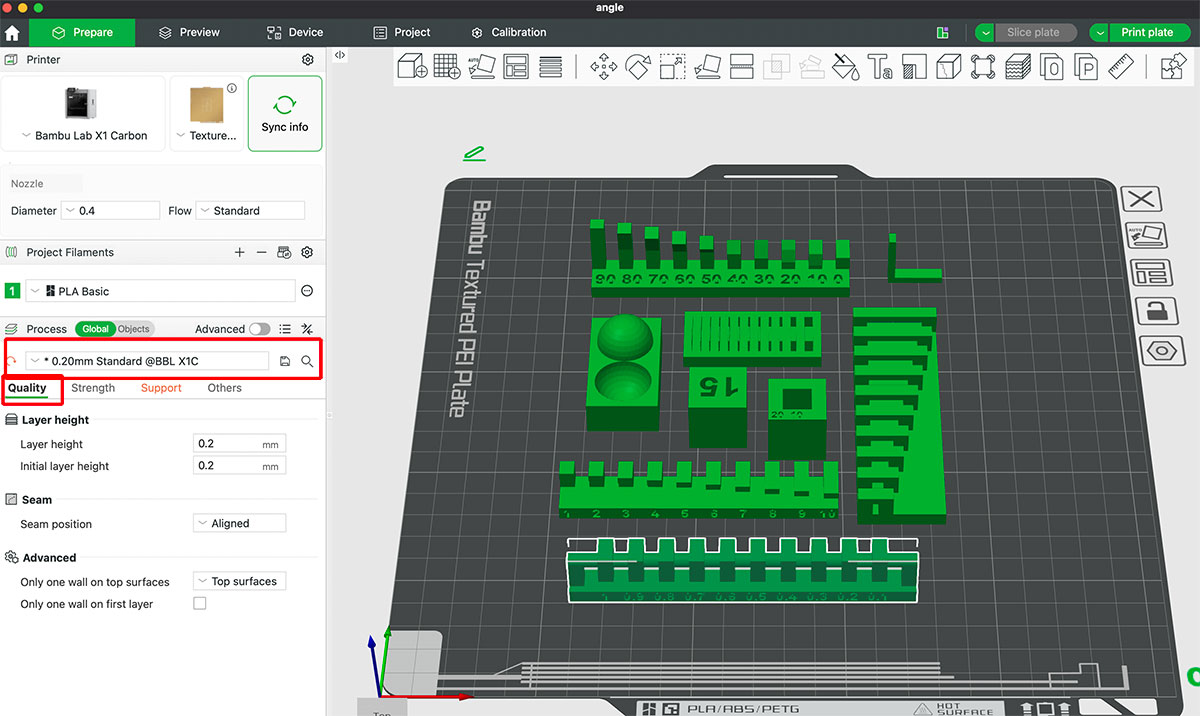
2) Choose material and print profile
This is where Bambu Studio makes things easy: you pick the material and a quality preset (draft/standard/high),
and the default profiles are already very usable. You can go deeper, but you don’t have to for most prints.
Next to the filament, you can click on settings to see al the parameters of the filament ant you can set theirs
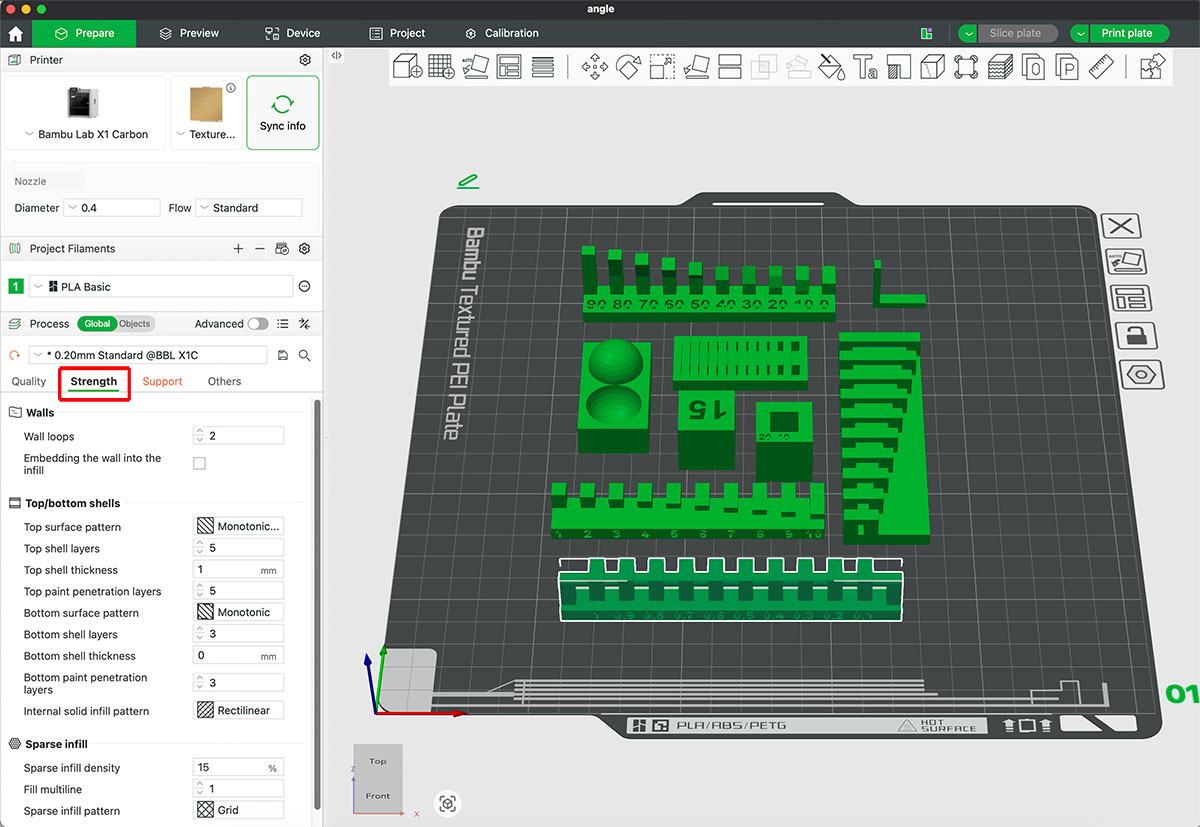
- Layer height (surface quality vs. speed)
- Walls/perimeters (strength and finish)
- Infill (weight vs. rigidity)
- Supports (automatic or manual tuning)
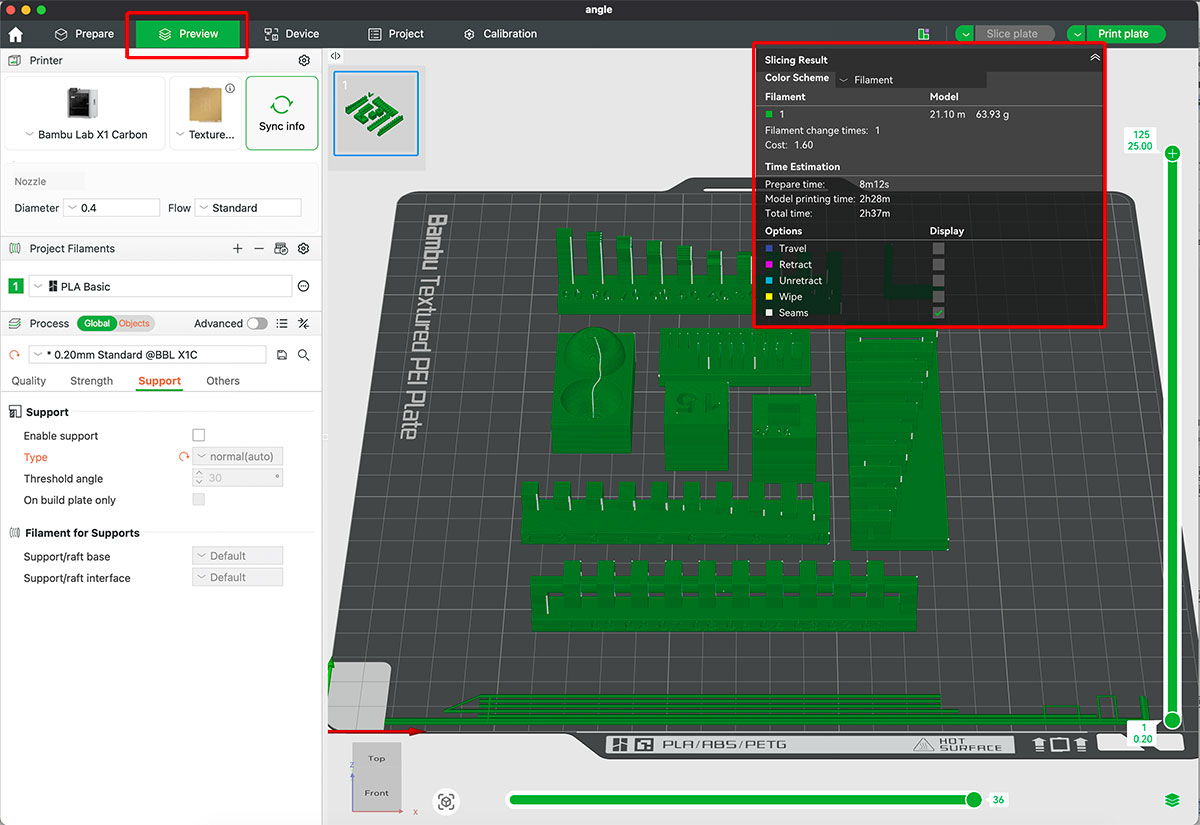
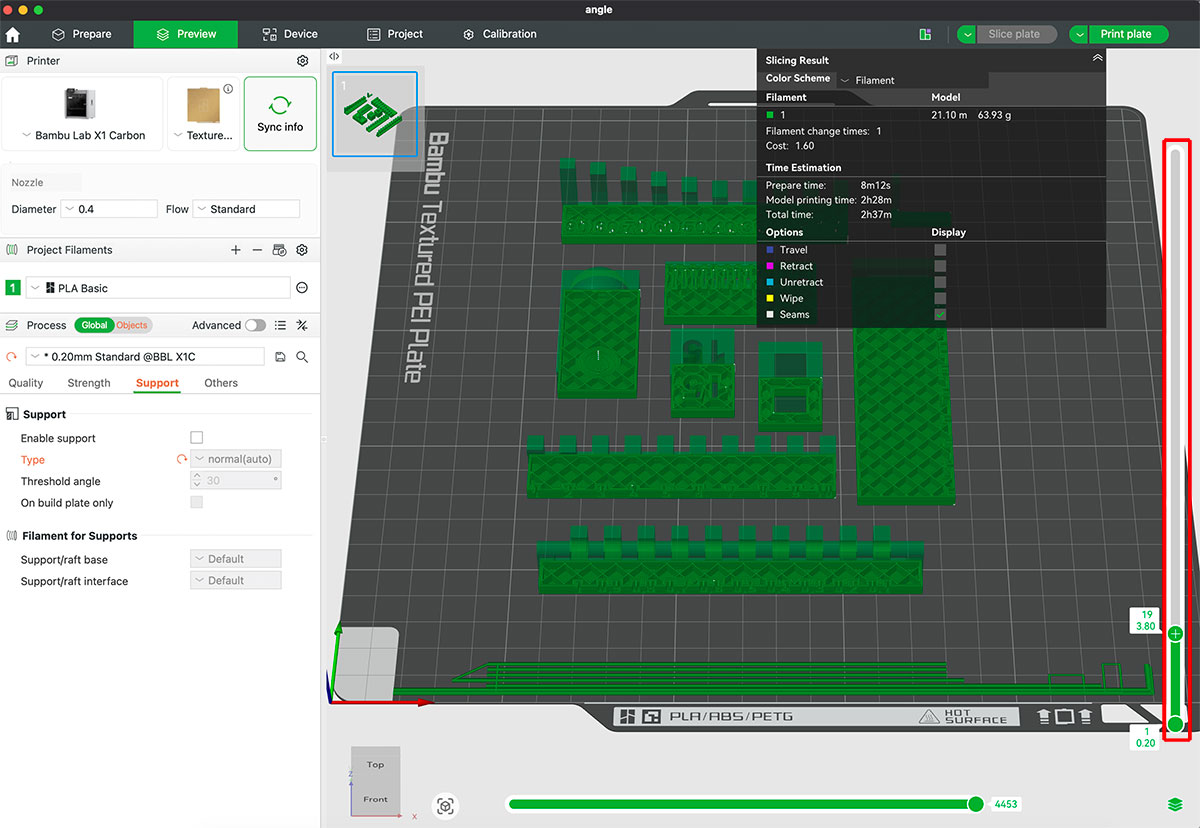
3) Slice and preview (don’t skip this step)
After slicing, I always preview the toolpath for a few seconds: supports in the right place, no weird thin towers, and an infill pattern that makes sense for the part’s purpose. It’s the fastest way to catch mistakes before you burn material and time.
In this section you can see the estimate time required and the amount of material to be used. Also, by moving the scroll bar on the right, you can see the printing over time and add stops by pressing "+".
4) Send to printer (Wi-Fi)
Sending the job over the network is one of the most convenient parts. From Bambu Studio you can push the file, start the print, and keep an eye on the machine status without moving files around manually.

5) Monitor and react
During the print, I mainly monitor the first layer and any filament changes (if I’m using AMS). Having camera access and real-time status helps a lot, especially for long jobs — you don’t need to hover next to the printer, but you also don’t run it “blind”.
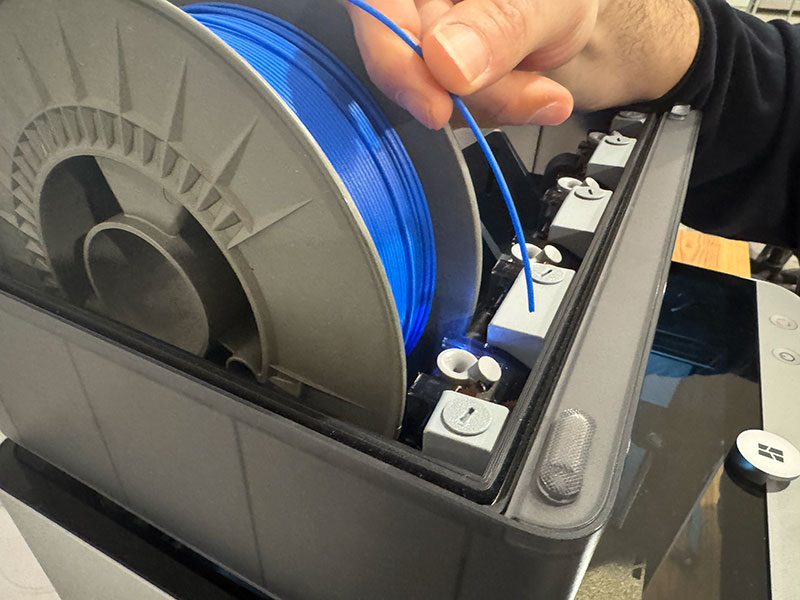
Filament load and unload
Filament handling is simple, but doing it calmly avoids jams. The most important detail is: never force filament when the nozzle is cold. The printer can heat automatically for load/unload, so there’s no reason to fight it.
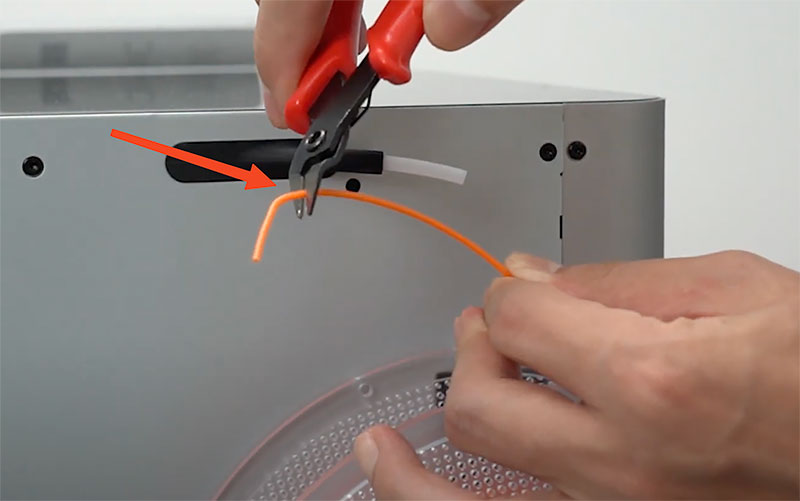
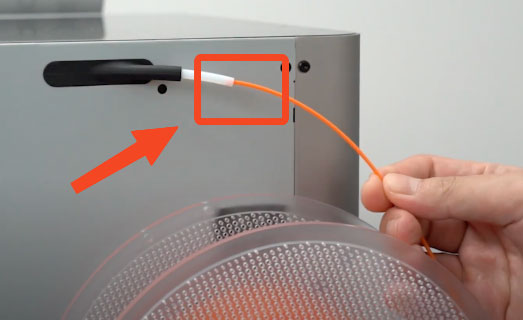
Manual load (without AMS)
- Cut the filament tip at an angle (it helps it find the path).
- Insert it into the filament inlet.
- On the touchscreen, select Load.
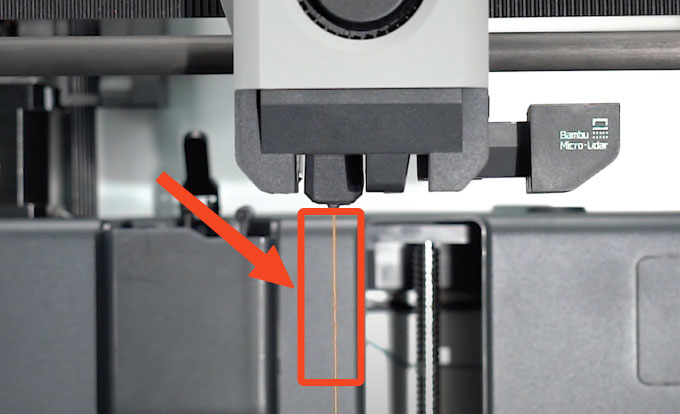
- Wait until the nozzle heats up and extrusion becomes consistent.
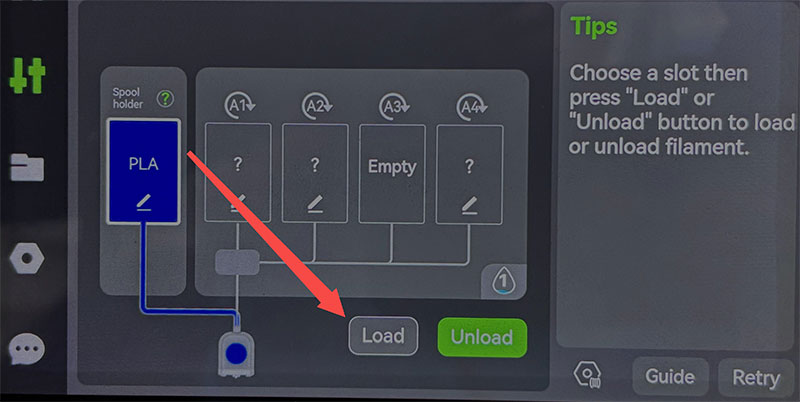
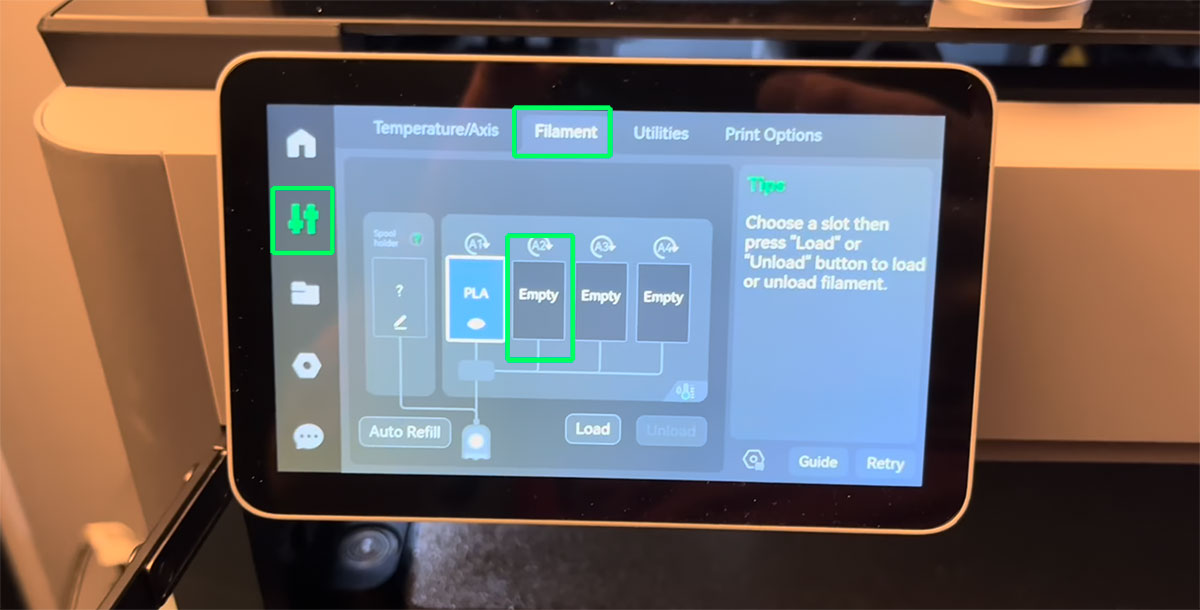
Manual load with AMS
Loading the filament with AMS is more simple:
- Touch in the screen the filamente optiónl, and select one is empty (without filament loades) pushing "load".
- Cut the filamente and insert it into the filament inlet.
- Wait until the nozzle heats up and extrusion becomes consistent.
Manual unload
- On the touchscreen, select Unload.
- Let the printer heat the nozzle to the correct temperature.
- Remove the filament gently once prompted.
AMS (Automatic Material System)
The AMS is basically the “quality of life” upgrade: it can automatically load/unload filament and switch between spools for multi-color or multi-material jobs. It also reduces the chance of human error when swapping spools manually.
- Up to 4 spools per AMS unit
- Automatic filament switching
- Runout detection (end-of-filament)
- Organized spool management (especially useful in shared labs)
Design rules for your 3D printer
Even with a reliable printer, not every geometry prints the same. To understand the real limits of this setup (machine + material + profiles), I printed a set of standard test files. The goal is simple: observe the results, detect weak points, and extract practical design rules I can apply in future projects.
Reference test files
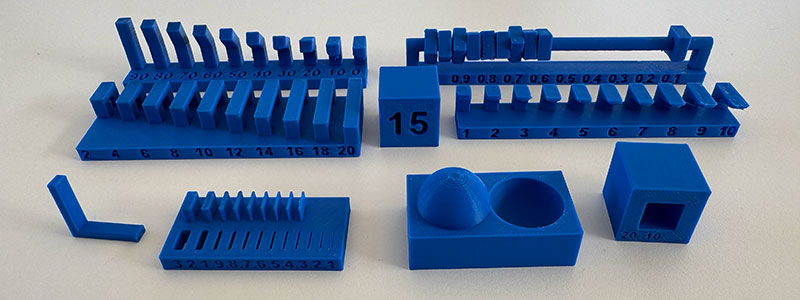
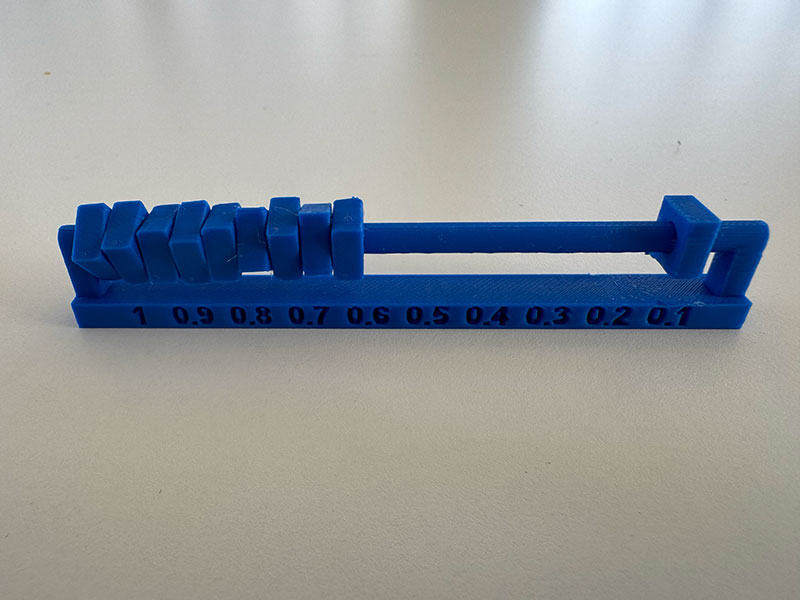
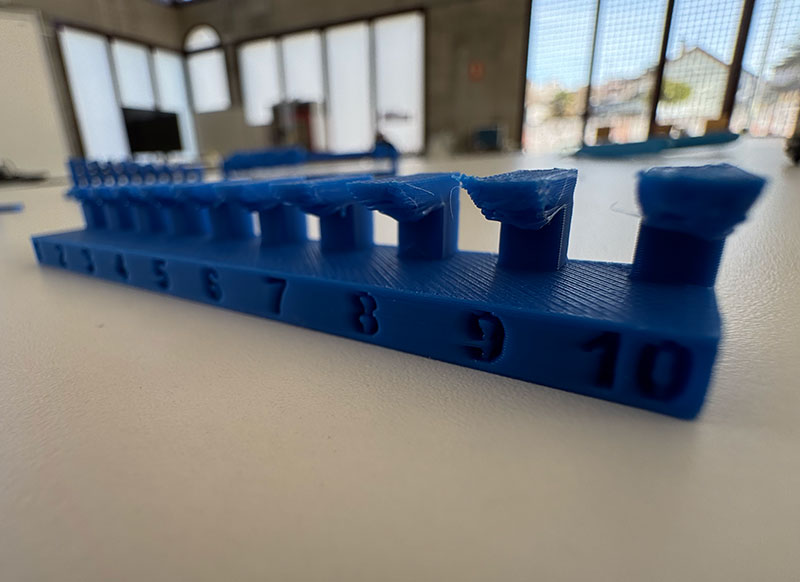
1) Clearance
Determines the minimum gap required for moving parts to print assembled.
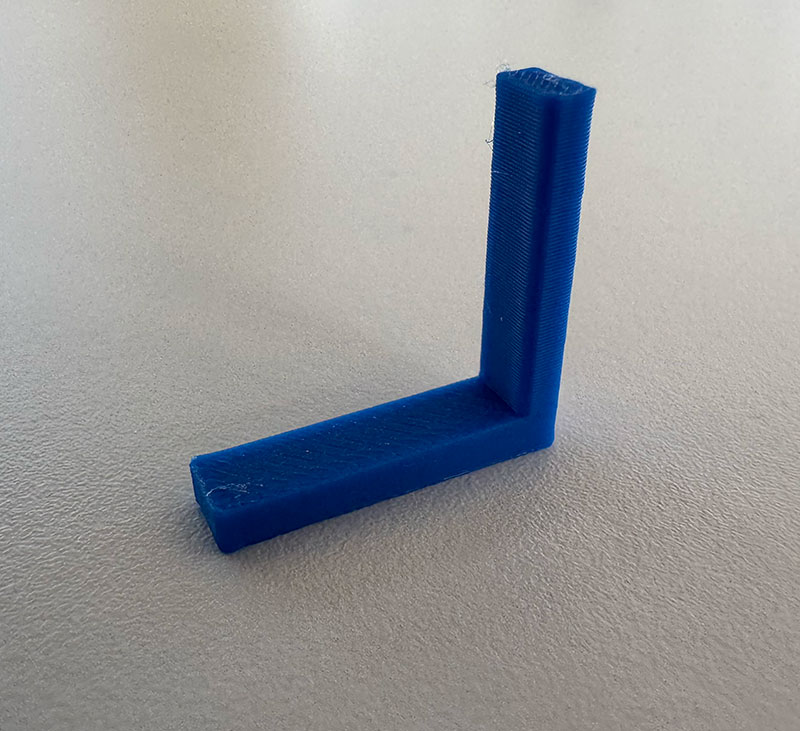
2) Angle
Checks dimensional consistency across inclined planes.
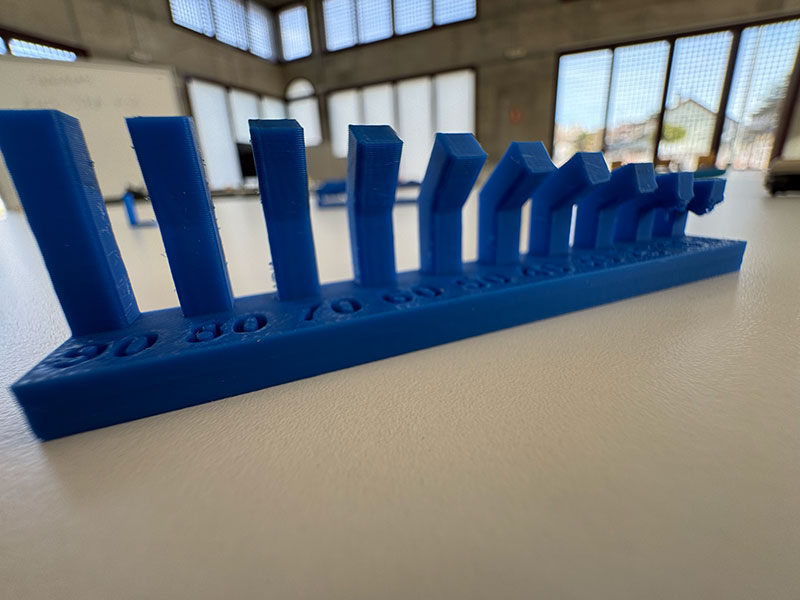
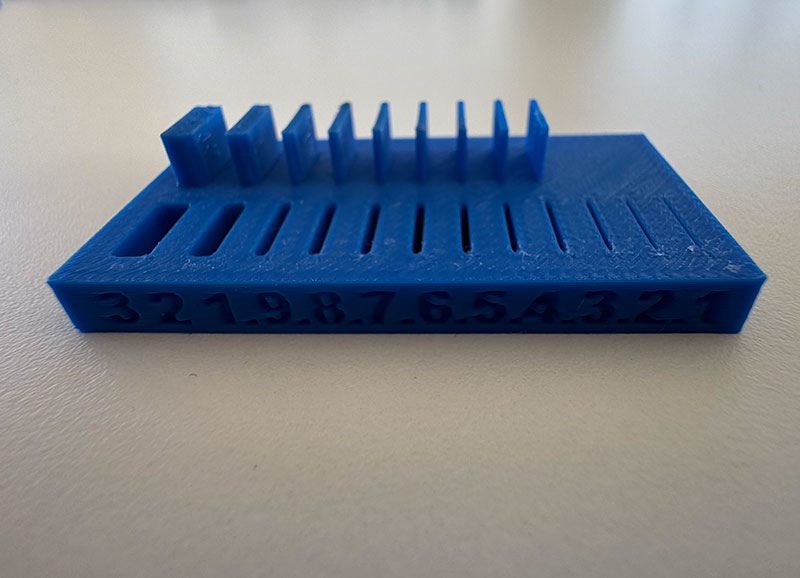
3) Free Overhang
Tests unsupported protrusions and “floating” features.
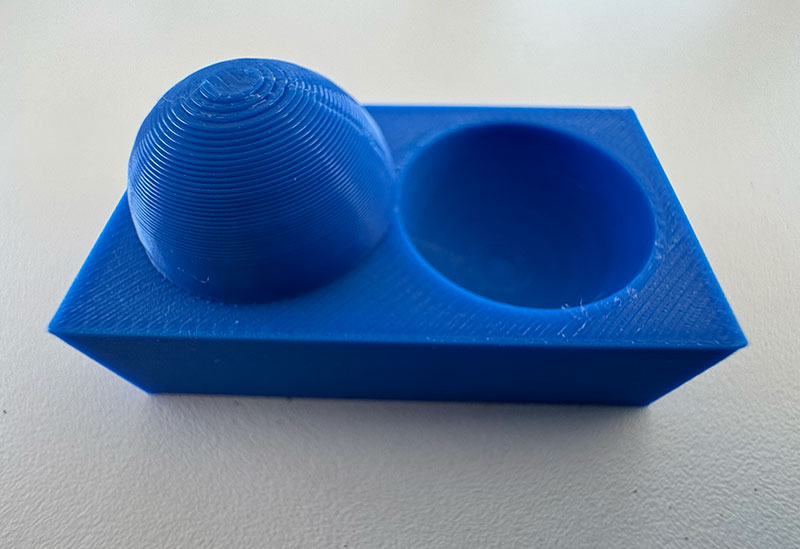
4) Bridging
Evaluates how well the printer spans gaps without supports.
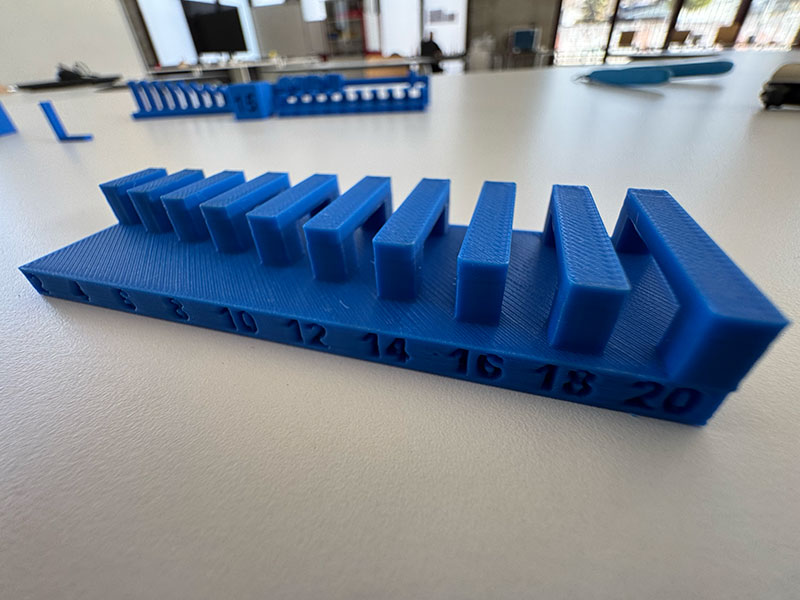
5) Wall Thickness
Tests minimum printable wall thickness.
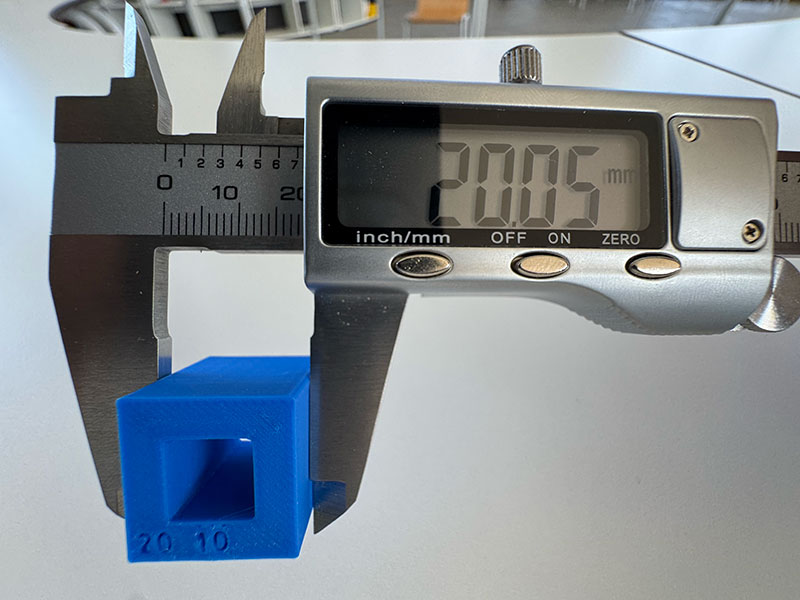
6) Dimensional Accuracy
Compares designed vs. measured dimensions.
7) Anisotropy / Orientation
Shows how strength changes depending on print orientation.
8) Surface Finish
Analyzes visual quality at different layer heights.
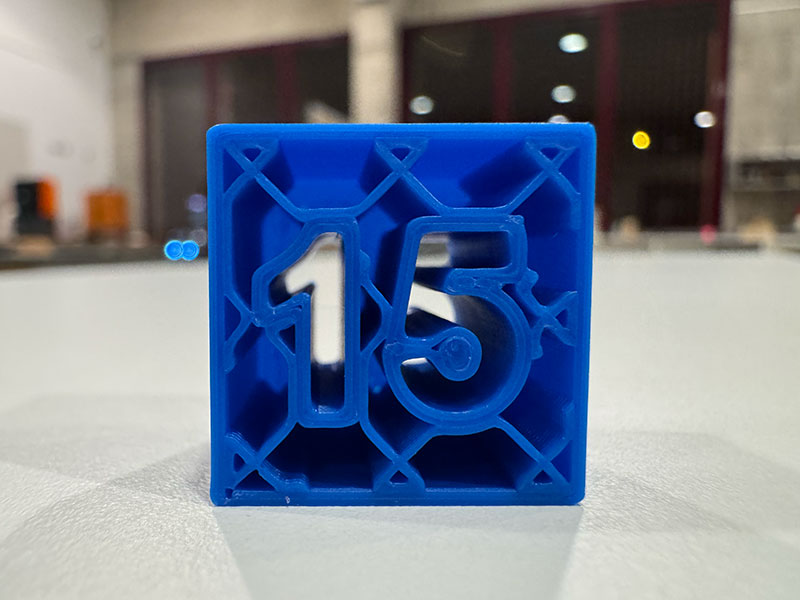
9) Infill
Compares structural behavior at different infill percentages/patterns.
Filament and printer parametrs used in this test:
| Filament Parameter | Value |
|---|---|
| Type | PLA - HD |
| Thickness | 1,75 mm |
| Print temperature | 190 - 230 ºC |
| Bed temperature | 50 - 70 °C |
| Nozzle | 0,4 mm |
| Print used parameter | |
| Layer height | 0.20 mm |
| Strength | 2 walls |
| Infill | 15% |
| Support | without supports (except clearance.stl) |
| Estimated time | 2h37' |
| Estimane filament | 64 gr |
Basic maintenance
The X1 Carbon is fairly “hands-off”, but it still rewards simple maintenance. Most print issues I’ve seen come from a dirty plate, old filament, or small plastic buildup around the nozzle — not from complex hardware failures.
- Clean the build plate regularly (adhesion depends on it).
- Remove any filament blobs or strings around the nozzle area.
- Keep filament dry (especially PETG, Nylon, and PC).
- Check fans and airflow paths are not clogged with dust.
- Update firmware when needed (lab policy may apply).
Safety rules
Even without a laser, a 3D printer still involves hot surfaces, moving mechanics, and (depending on material) air quality considerations. Safe operation is mostly about good habits and not taking shortcuts.
1) Heat hazards (nozzle and bed)
- The nozzle can reach 300 °C — avoid touching anything near the hotend during/after printing.
- The bed can reach 120 °C — wait for cooldown before removing parts.
- Use tools (scraper, tweezers) when needed, and move slowly to avoid slips.
2) Moving parts
- Keep hands clear while printing (CoreXY moves fast).
- Avoid loose clothing or accessories near the motion system.
- Don’t open panels or reach inside when the machine is moving.
3) Fumes and ventilation (material-dependent)
- For technical materials (e.g., ABS/PC), ensure the room is well ventilated.
- Keep filters in good condition and follow lab rules for material use.
- If you notice strong odor or irritation: stop the print and ventilate.
4) Electrical and maintenance boundaries
- Do not open internal electronics compartments.
- Only perform basic cleaning/maintenance you’ve been trained to do.
- If something sounds or looks wrong, stop the print and ask the lab manager.
Safety checklist (visual)
Quick checklist I follow before starting and while running a job on the X1 Carbon.