2. Computer-Aided Design
- Model (raster, vector, 2D, 3D, render, animate, simulate, ...) a possible final project, compress your images and videos, and post a description with your design files on your class page
Raster vs Vector Graphics
Before getting into the software workflow, it’s important to understand the difference between raster and vector graphics, since both are used at different stages of this project.
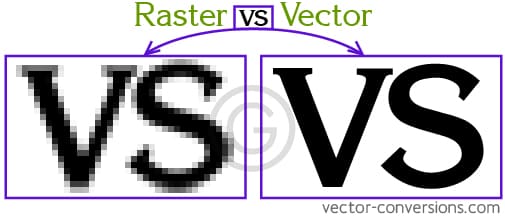
Raster Images
Raster images are made up of pixels arranged in a grid. Each pixel stores color information, which is why raster images (JPEG, PNG, GIF) are great for photographs and realistic renders. The downside is that when scaled up, they lose quality and become pixelated. Raster images are typically edited in software like Photoshop or GIMP.
Vector Graphics
Vector images are created using mathematical paths—points, lines, and curves. Because of this, they can be scaled infinitely without losing quality. This makes them ideal for logos, icons, and diagrams. Vector graphics are commonly edited in Illustrator, CorelDRAW, or Inkscape, and saved as SVG, EPS, or PDF.
3D Modelling
The three-dimensional aspects of my final project were developed using CAD and animation software. Fusion 360 was used to create and render the product model, while Blender was used to animate the product logo and learn the fundamentals of keyframe animation.
Software Used
- Fusion 360 – Parametric CAD modelling and rendering.
- Blender – 3D animation and rendering.
Fusion 360 – CAD Modeling and Rendering
Fusion 360 is a parametric CAD software used for precise 3D modeling, commonly used in product design and engineering.
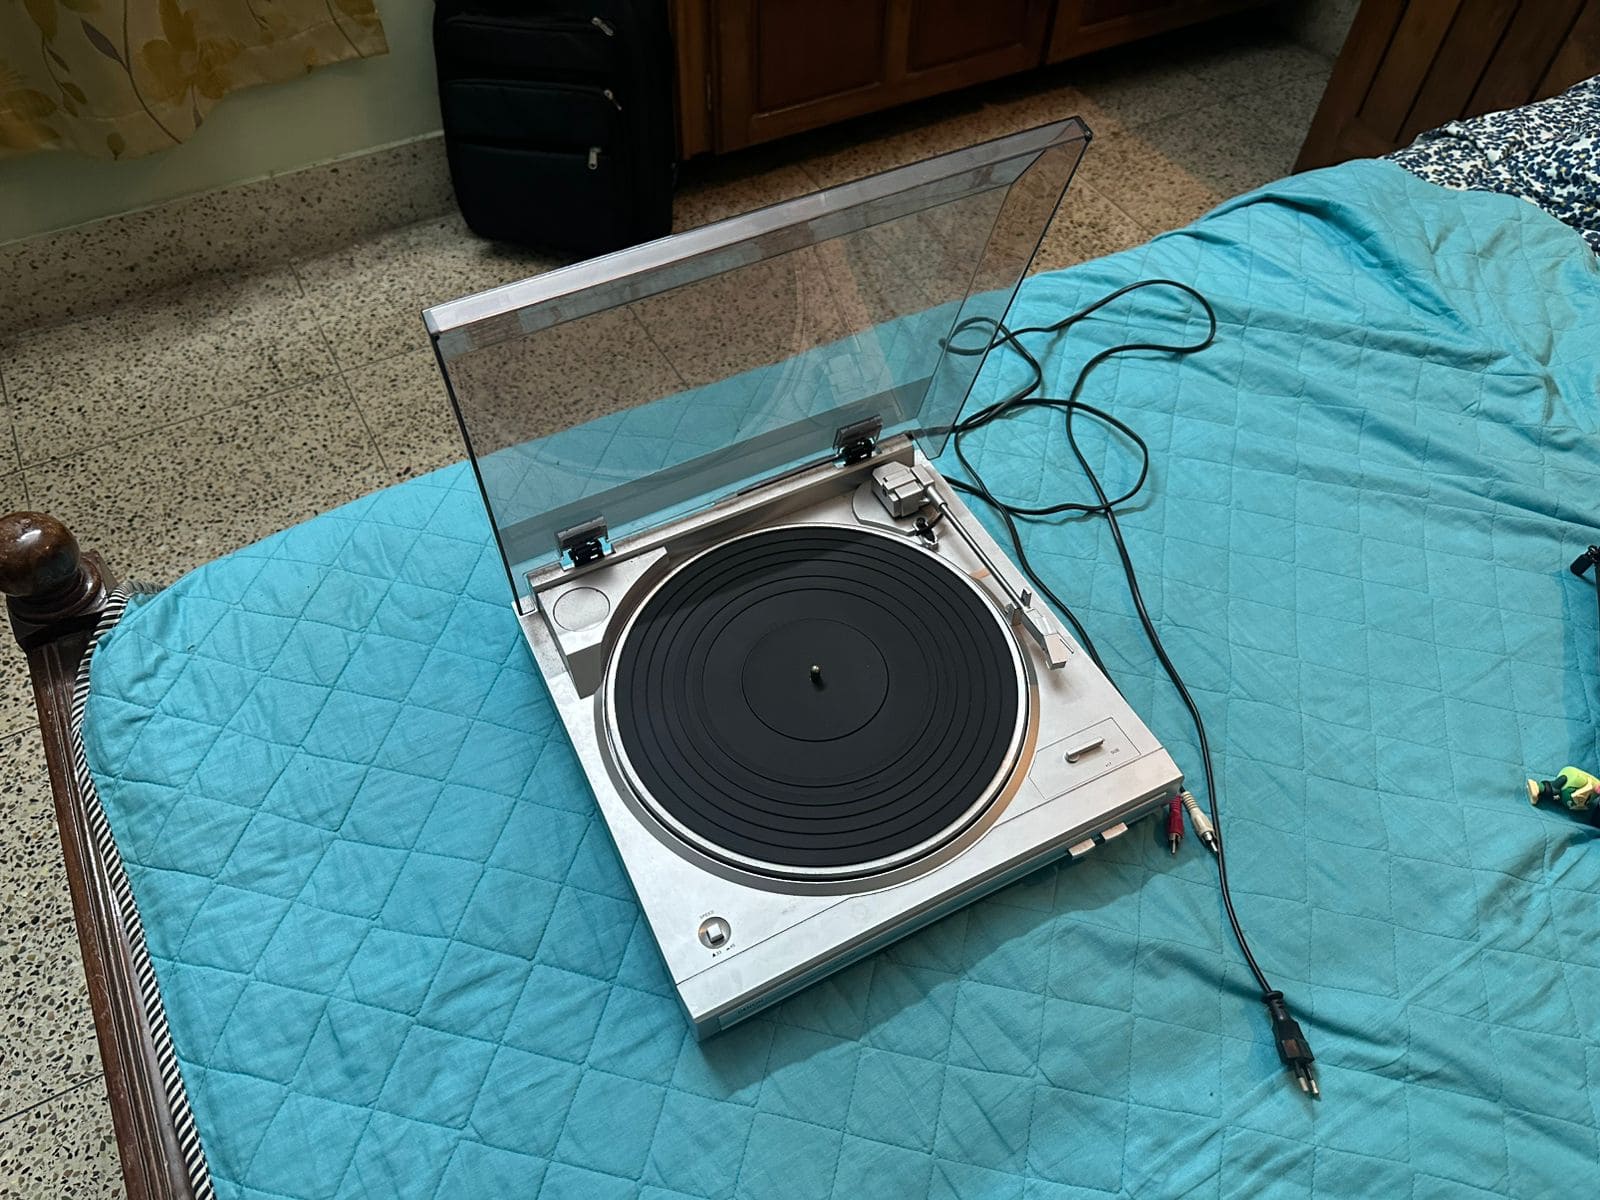
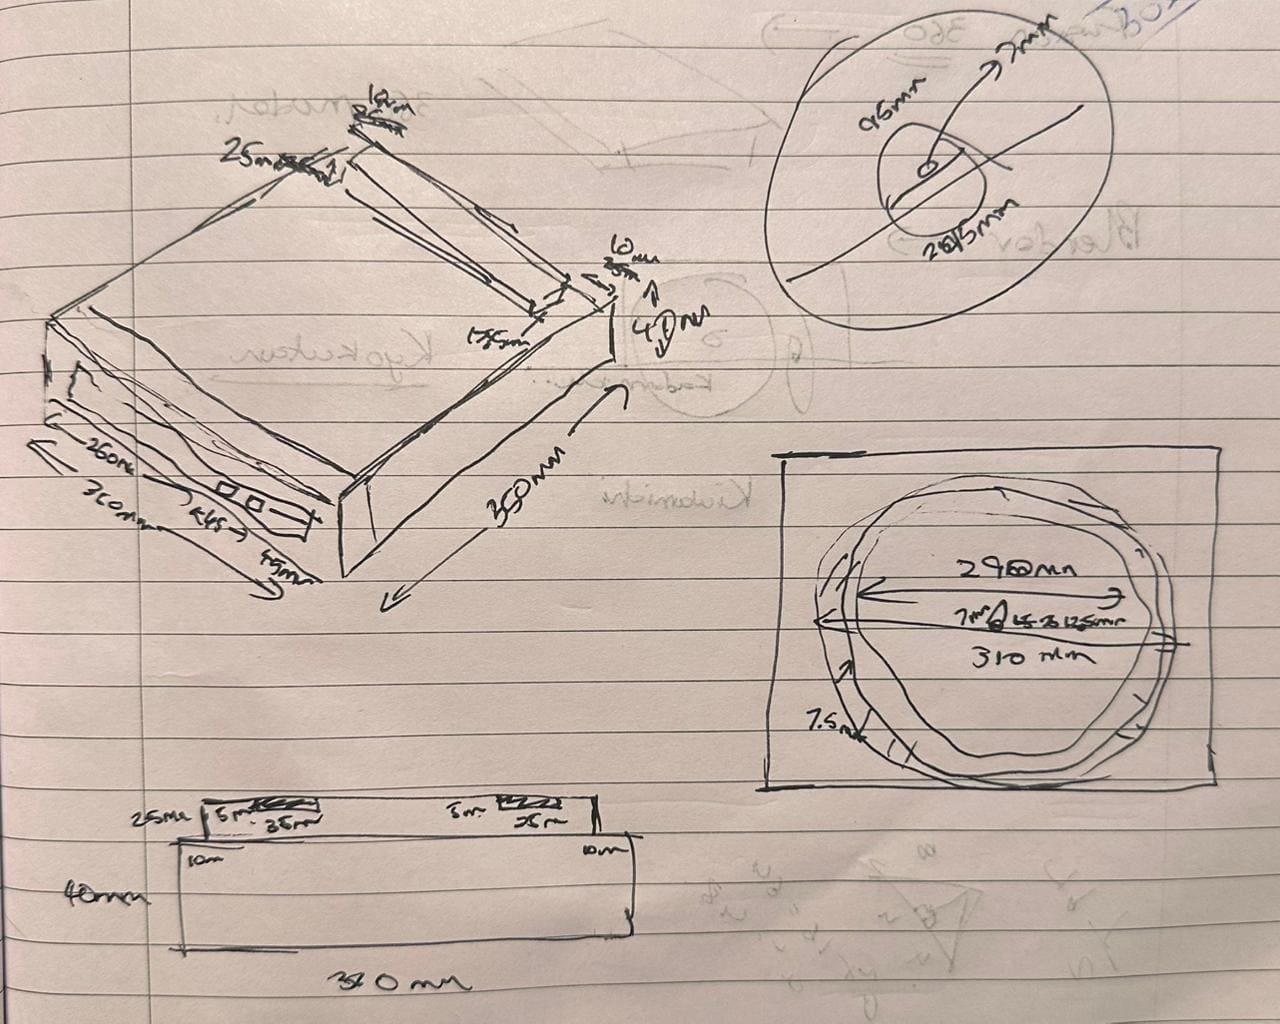
First, I unplugged my record player (Denon DP-29F), removed the RCA cable from my speakers, wiped down all the dust, and took general measurements of the entire structure. Even though we were not supposed to make a 1:1 model, I wanted to roughly stick to real-world dimensions since this was my first time properly using Fusion 360.
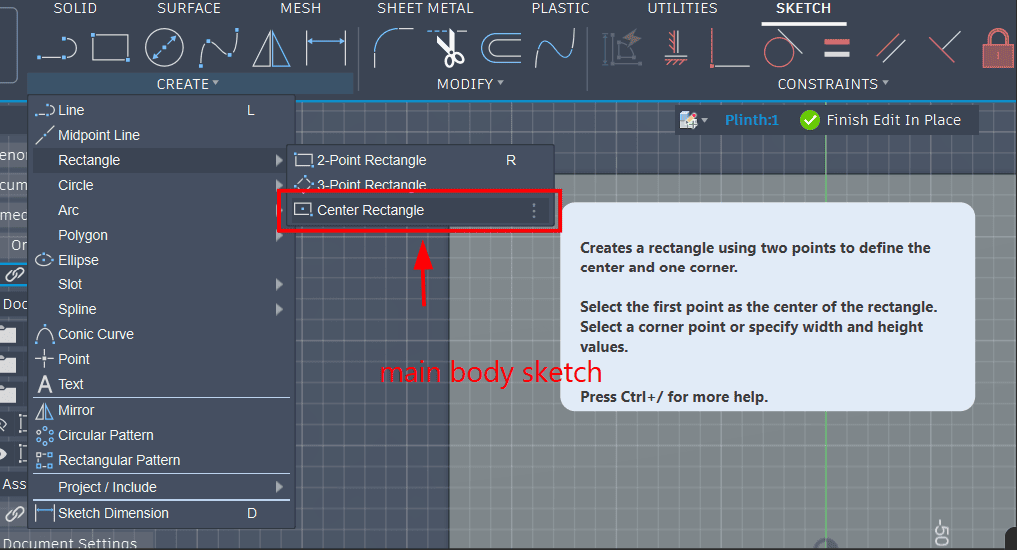
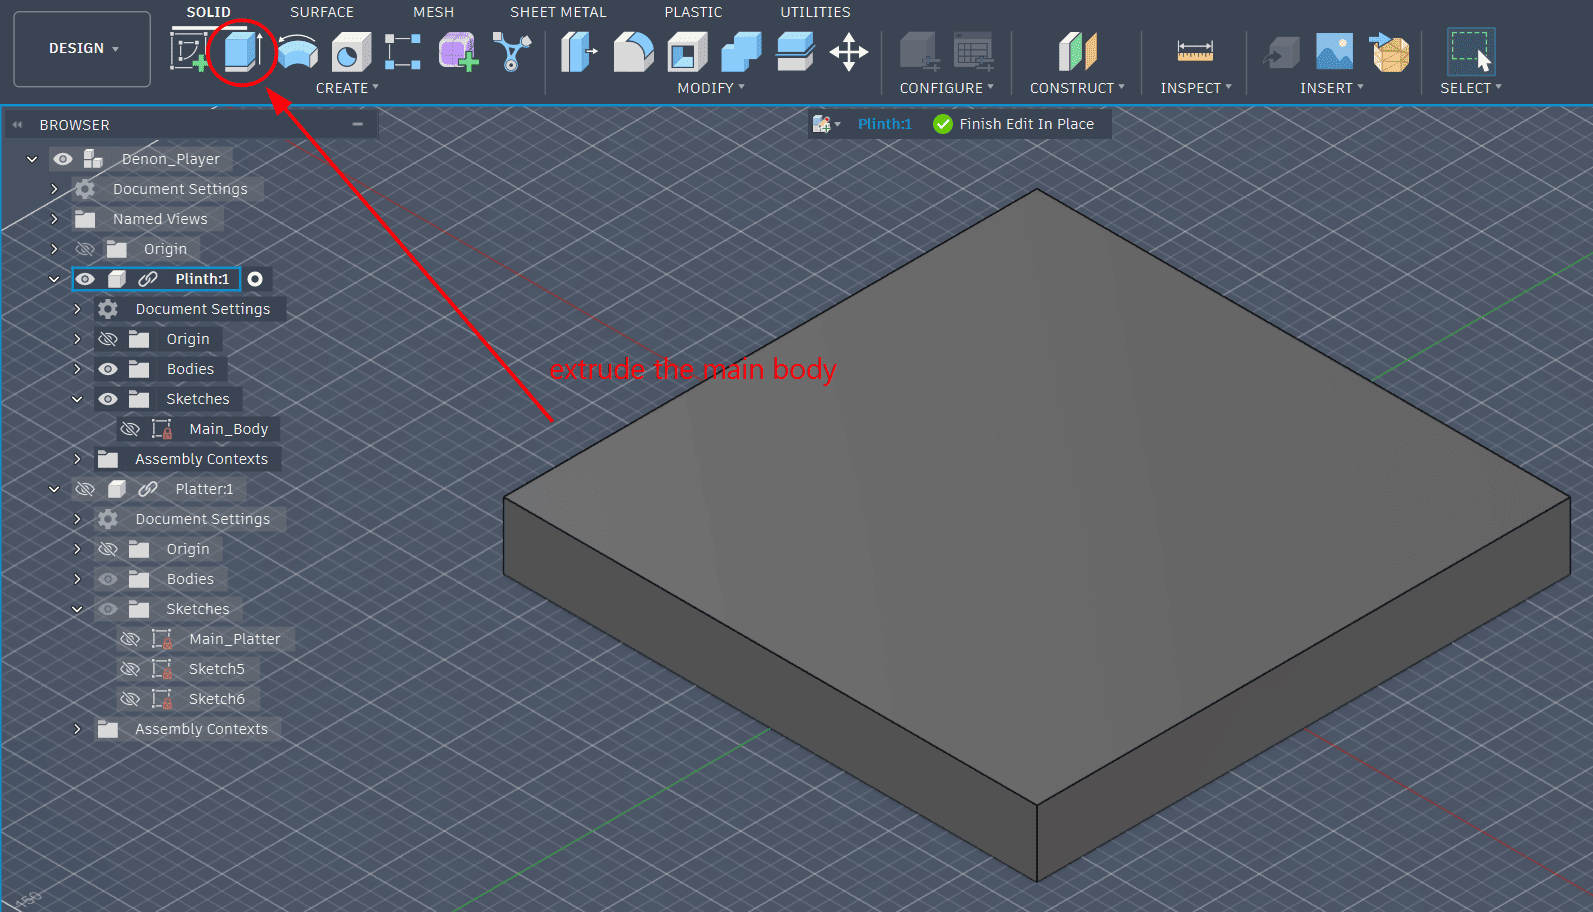
I started by creating the base sketch of the plinth (main body) using the center rectangle function.
The main body of the record player was then extruded using approximate real dimensions.
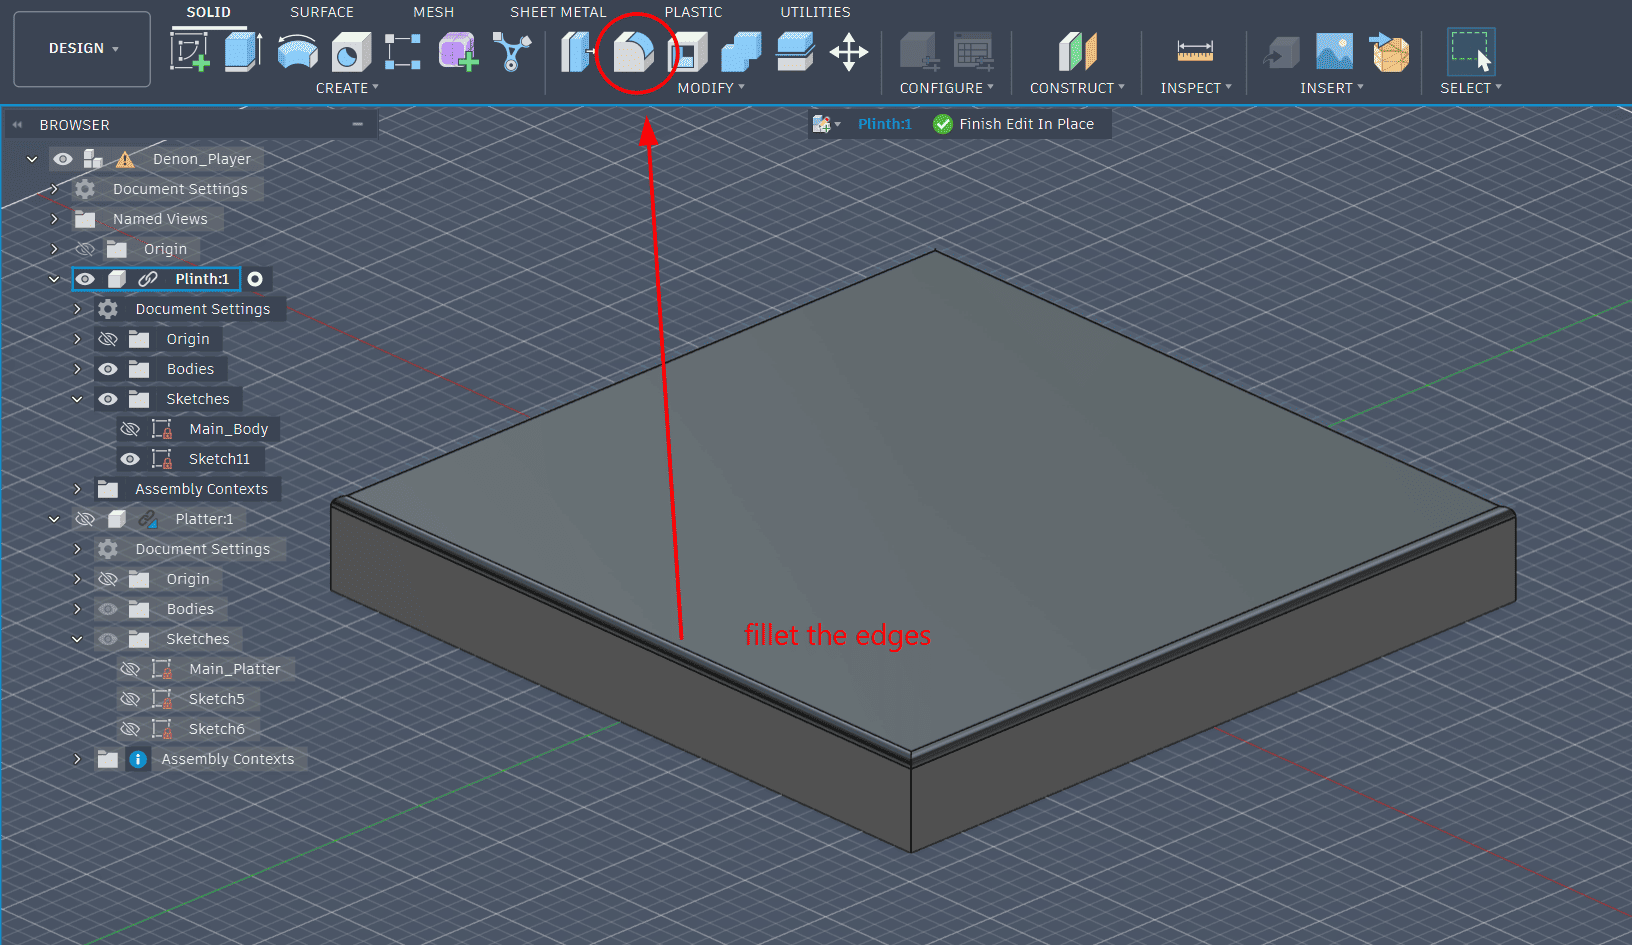
Fillets were added to refine the edges and make the design feel more product-like.
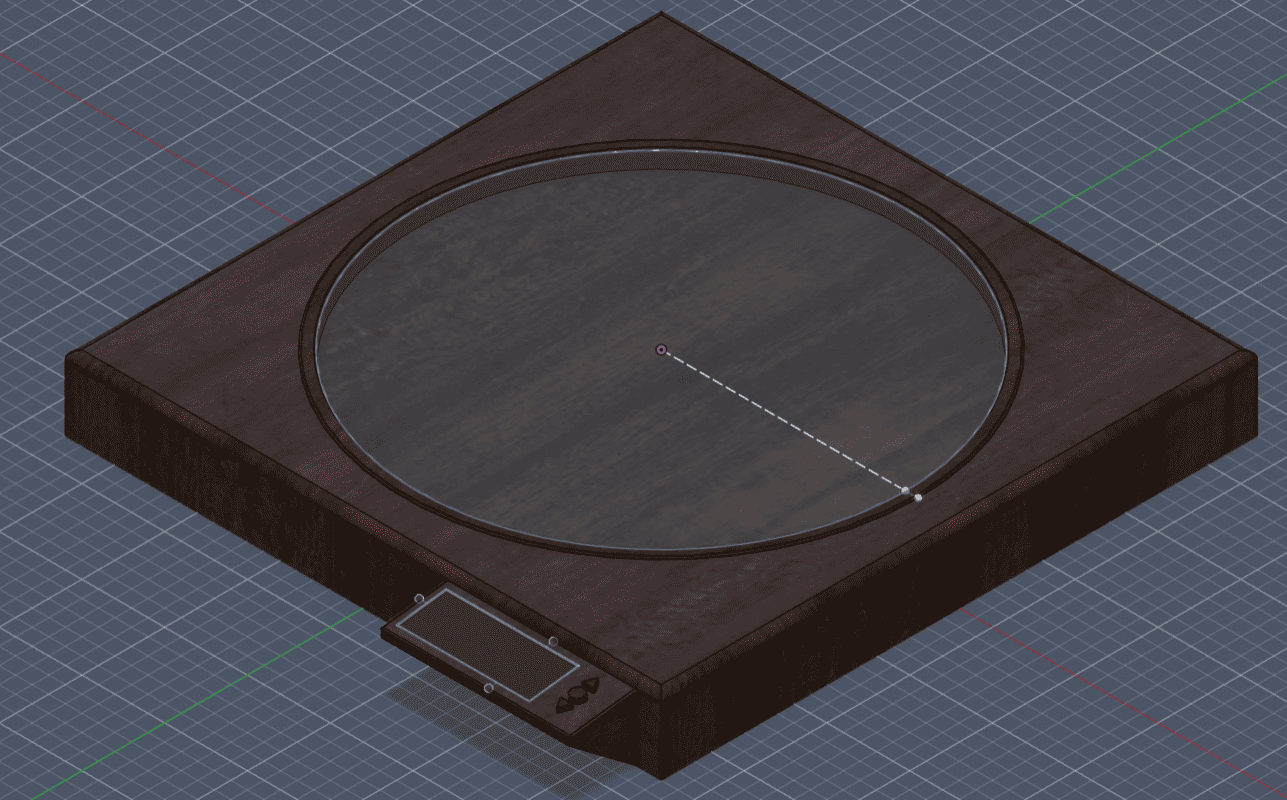
For the final product, I wanted to add a screen that displays all the songs available on the record. An offset plane was created to position the screen.

A smaller rectangle was sketched on the offset plane and extruded to form the screen platform.
To give the screen a dark glass display look, I applied a dark glass appearance material.

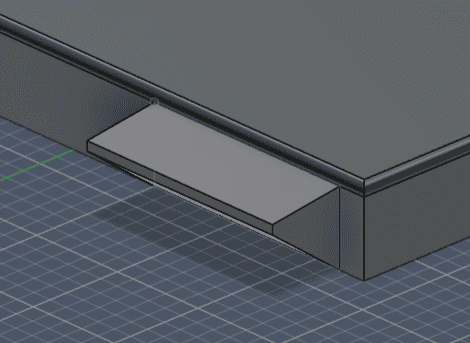
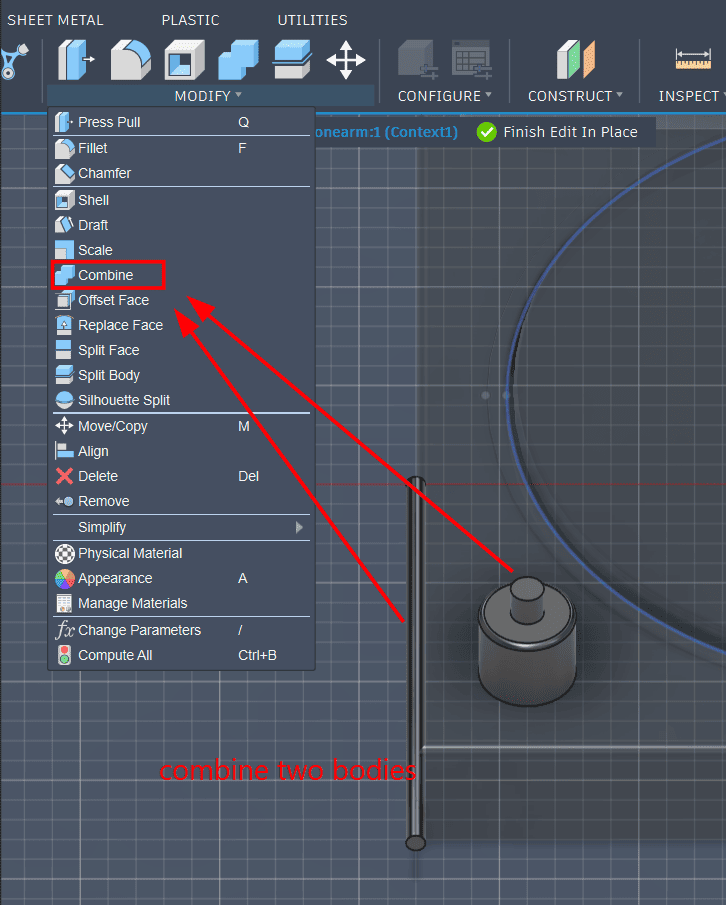
I avoided sketching directly onto the tonearm base to prevent unnecessary constraints.
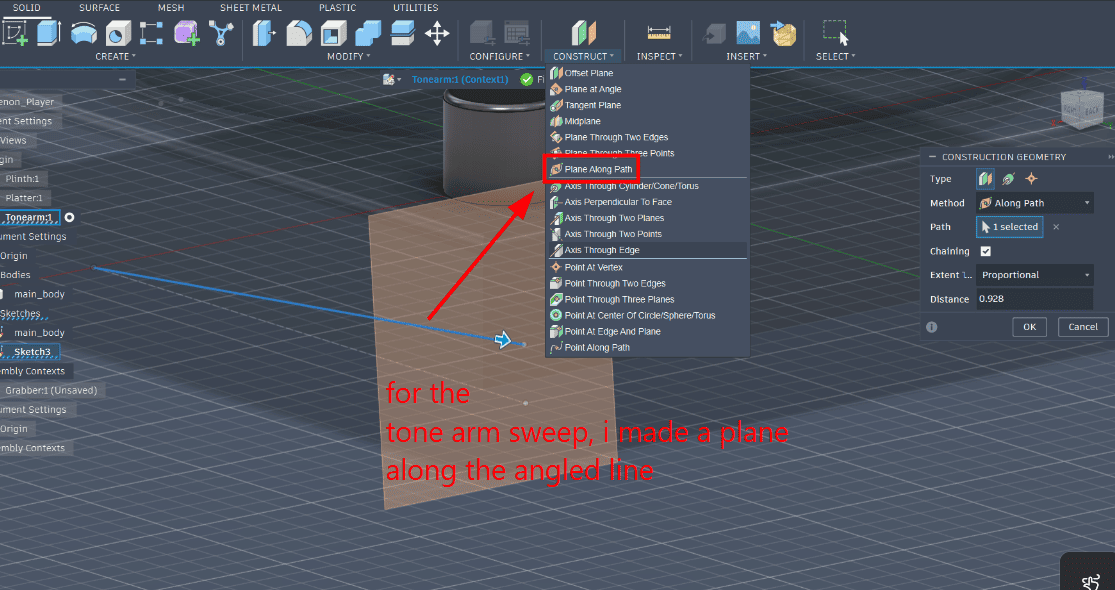
The tonearm and its base were modeled as separate bodies and then combined.
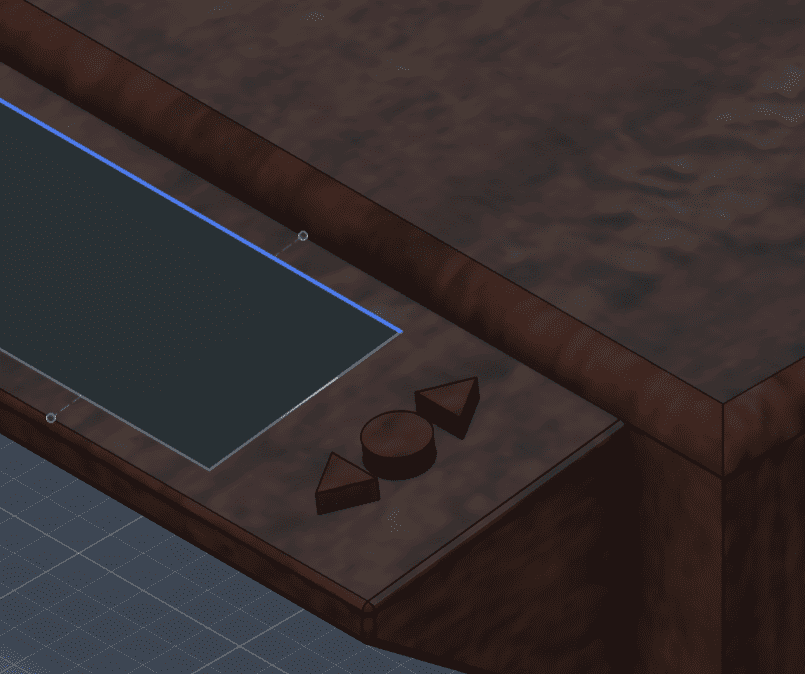
Because the edges were filleted, I created a construction rectangle aligned with the inner edges to place centered buttons.

Buttons were added and a mahogany wood appearance was applied to the plinth.
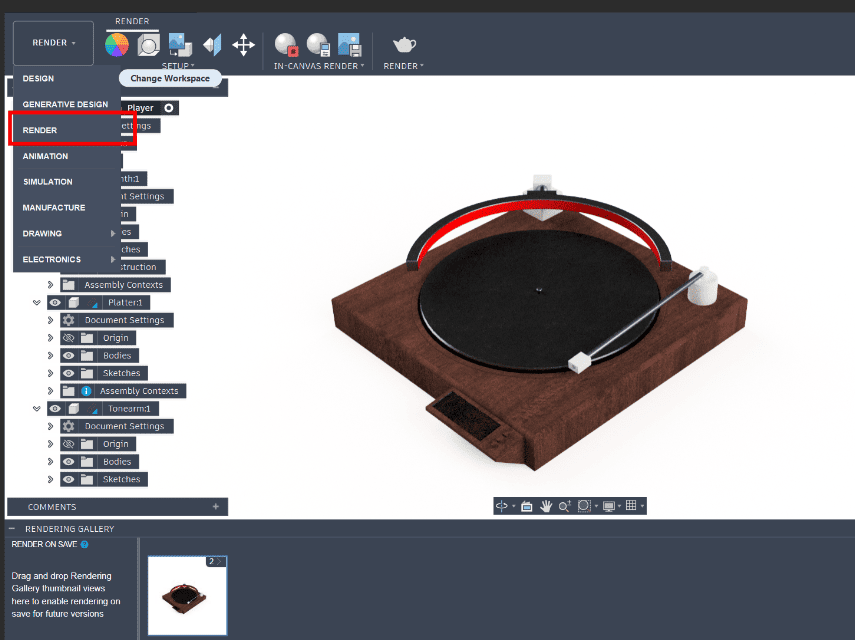
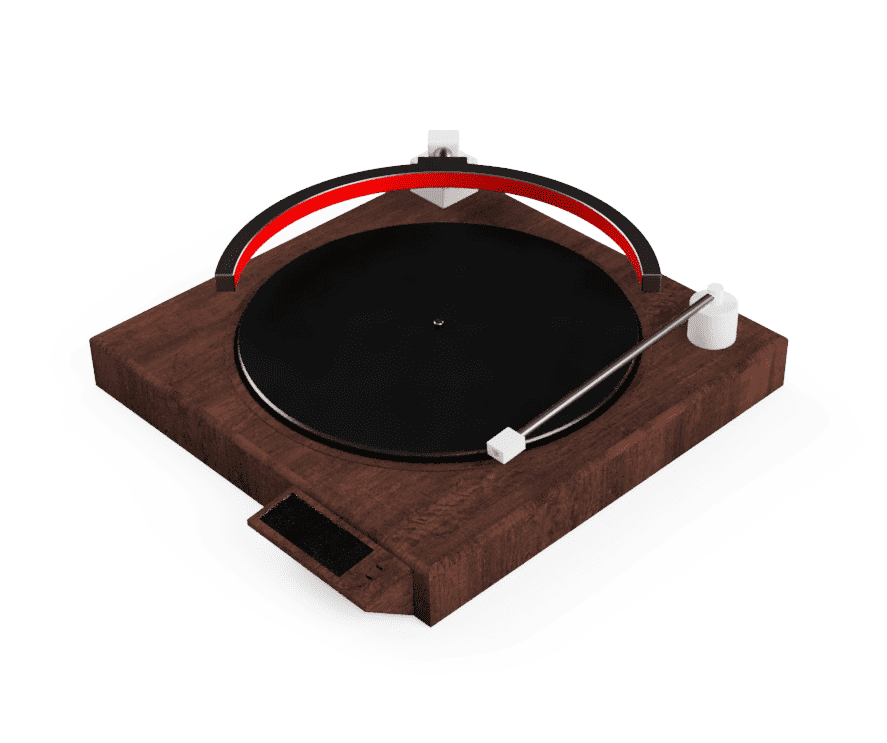
The model was rendered using the Render workspace in Fusion 360.
Construction Videos
This is a video of the complete construction of the plinth
This is a video of the complete construction of the platter
This is a video of the complete construction of the tonearm
This is a video of the complete construction of the grabber
Final Render
2D Design
The 2D assets for the project consisted of a product logo and a promotional poster. Vector graphics were used for the logo to allow infinite scaling without quality loss, while raster graphics were used for photo editing and poster composition.
Software Used
- Inkscape – Vector logo design.
- GIMP – Raster poster design and image editing.
Inkscape – Logo Design
Inkscape is an open-source vector graphics editor mainly used for creating and editing SVG files. Since vector graphics can be scaled infinitely without losing quality, it’s ideal for logo design.
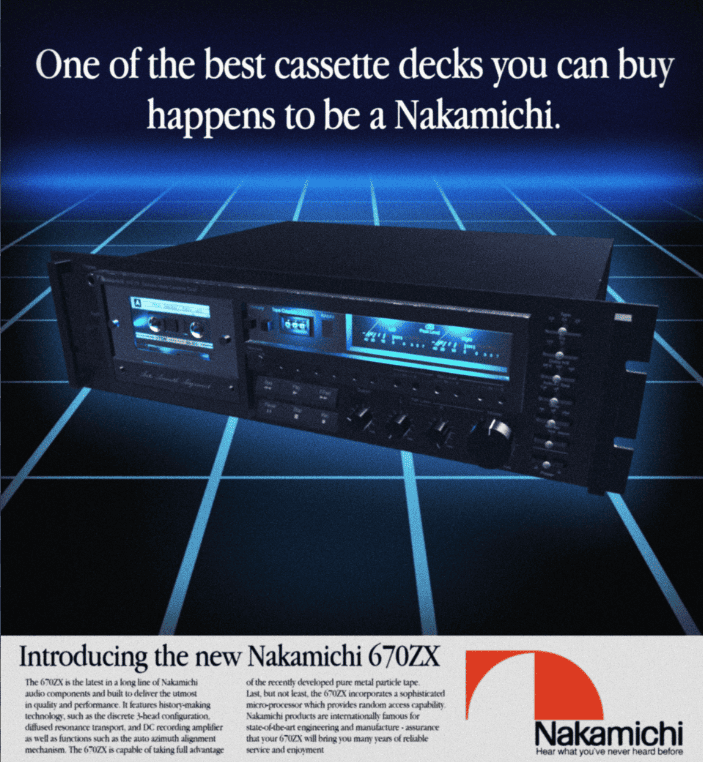
Nakamichi is a Japanese audio company that's been around for a while. Nowadays they make audio systems for cars and such, but they used to make stellar cassette players. They had one cassette player, the RX505. My vinyl flipper is kind of inspired by that, so I felt it was only right for my logo to be inspired by the same. I imported the logo into Inkscape.
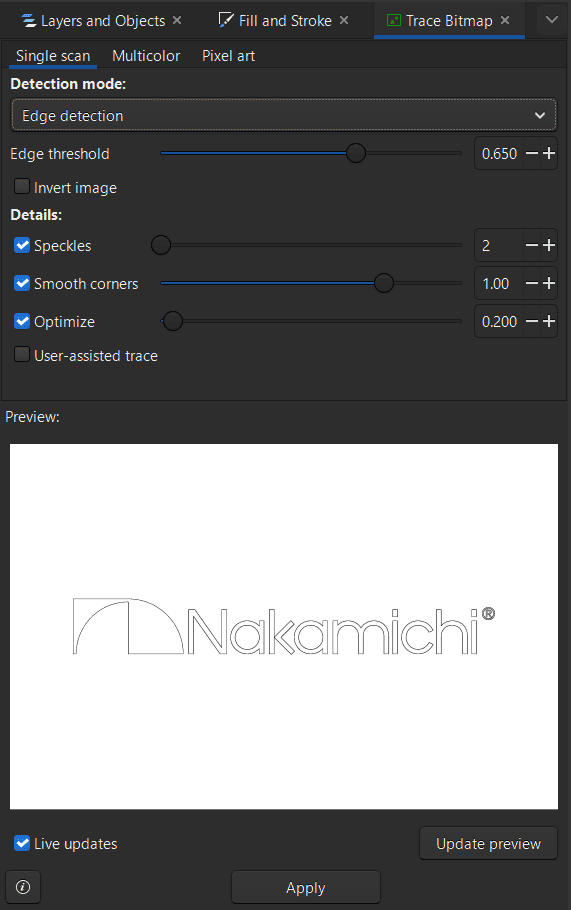
I converted the raster original Nakamichi logo using trace bitmap to get the vector outline(here I used edge detection) and made a new logo for my record player. I do not know Japanese, so I referred to the internet to understand the meaning behind the brand name. Nakamichi roughly translates to “middle path,” relating to moderation or a balanced approach.
I decided to go in the opposite direction and found the word for extremities, meaning “going too far,” which became the name for my product.
I added a vinyl element to the logo since my device is a record player. (artistic self expression)
Blender – Logo Animation
Blender is a free and open-source 3D creation software used for modeling, animation, lighting, and rendering. In this project, it was used to animate the logo.
I imported the SVG files from Inkscape and created a simple logo animation. The imported SVG came with three circles (red, yellow, and orange), a maroon cover, and the Kyokutan text.
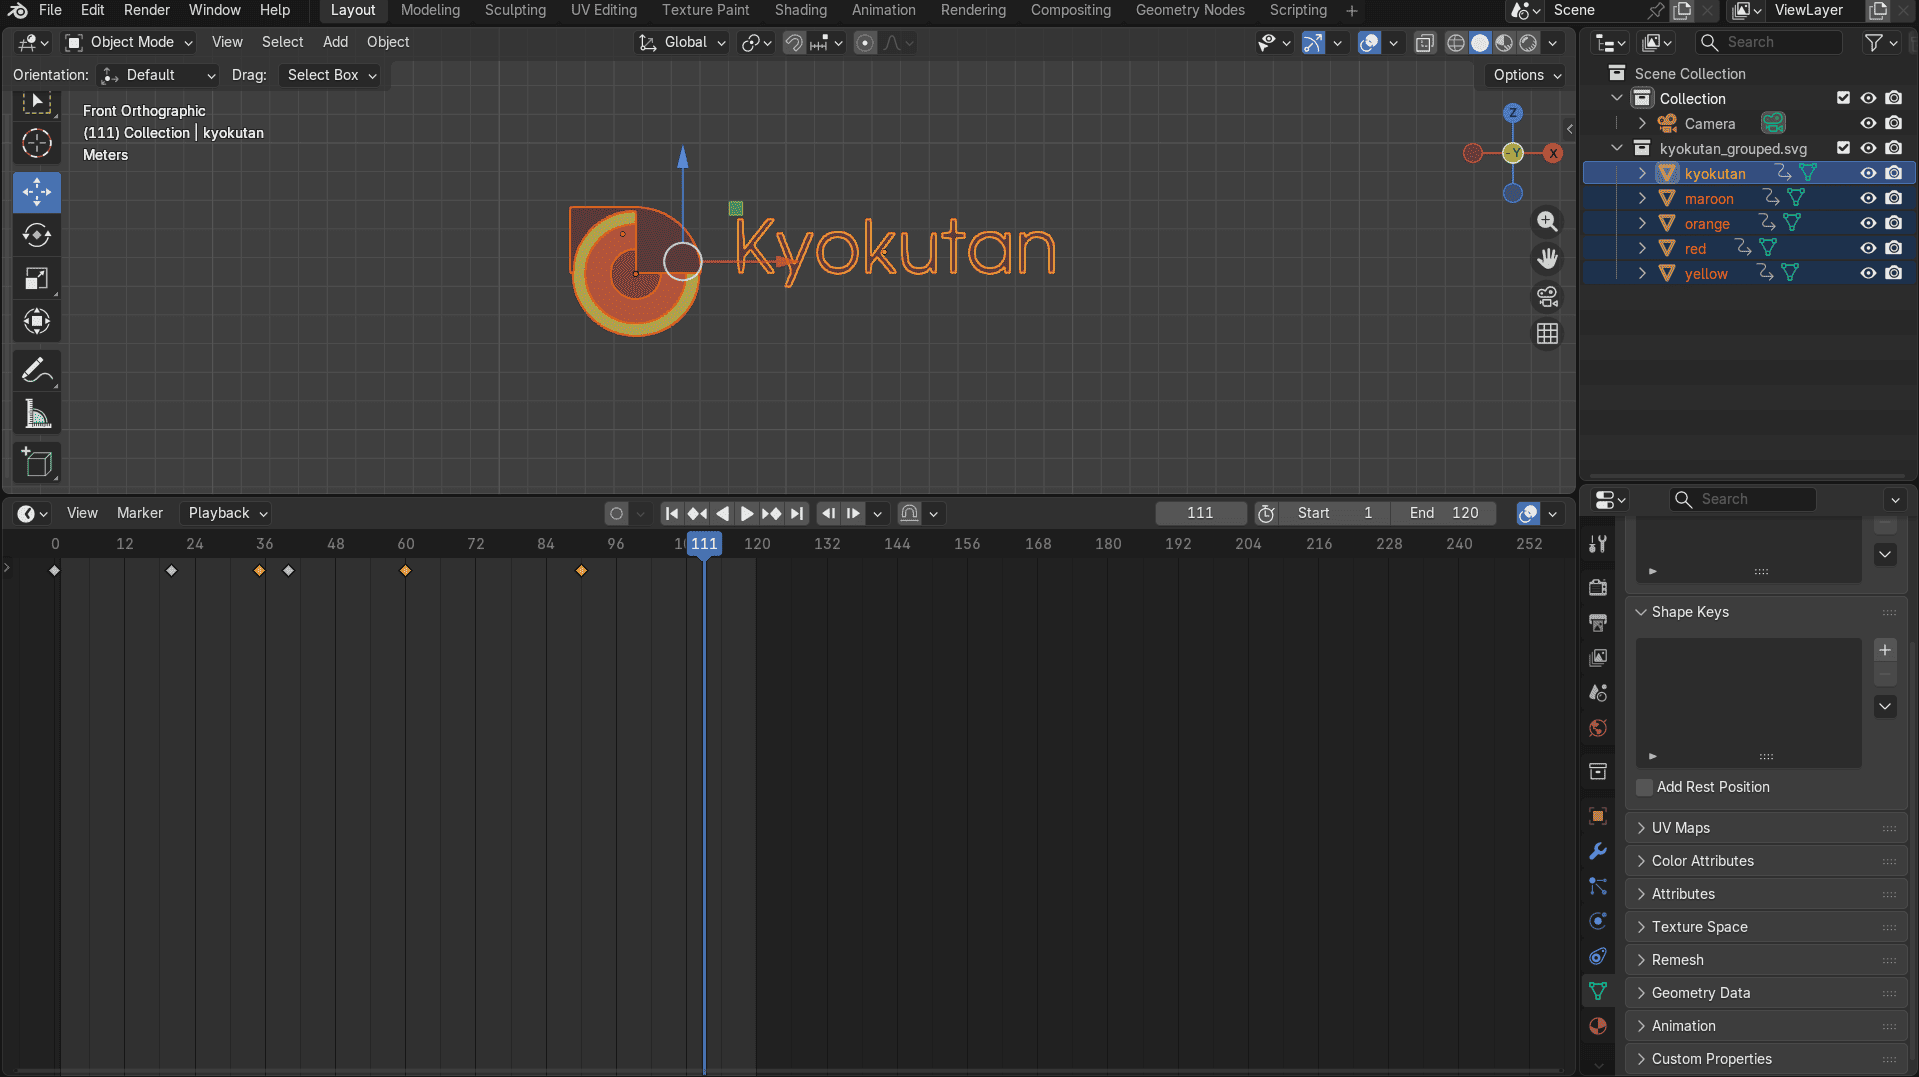
One very important thing I learned is that the cursor must be hovering over the object being animated while creating keyframes. Otherwise, the keyframes do not get created at all. So you can change the scale, the location, the rotation and then add a keyframe using i key. This has to be done while your mouse is hovering on top of the object you are animating. Blender can animate anything, even the material on the object and it's properties.
Shift+A -> Camera, Shift+A -> Light (added a camera and an area light for rendering.)
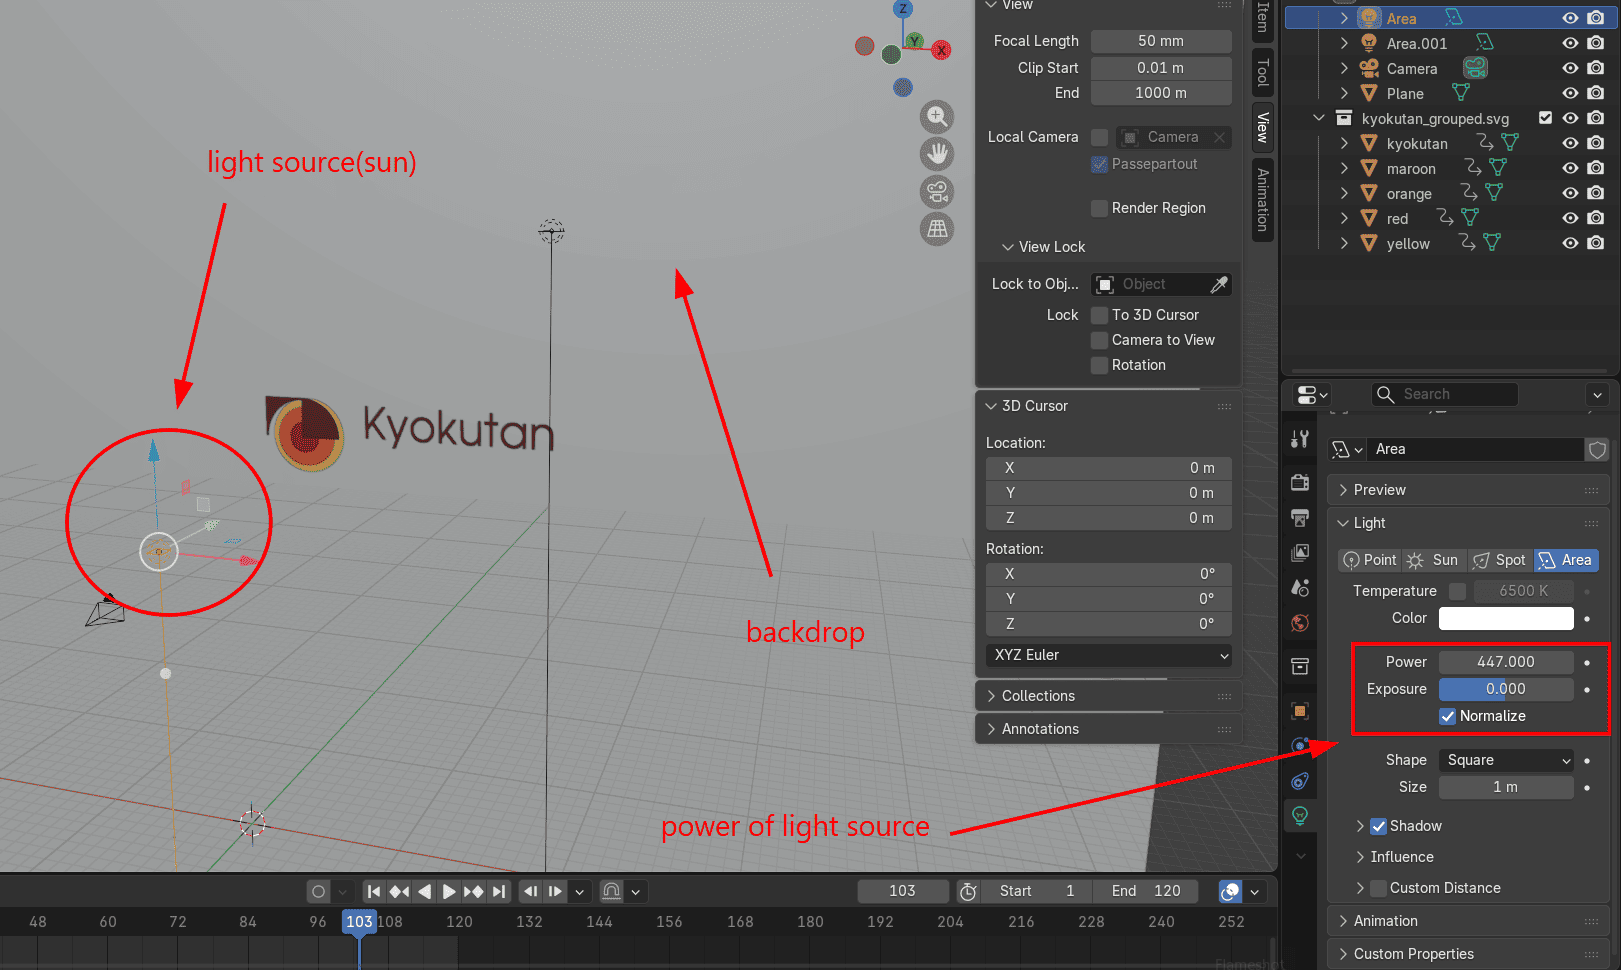
The render still appeared dark, which is likely because there was no proper backdrop.
Added a backdrop and the final logo animation was rendered in Blender.
Final Logo Animation
Blender Animation Basics
I followed this YouTube tutorial on how to make an animation of a box jumping.
Transform Controls
- Move – G
- Rotate – R
- Scale – S
Inserting Keyframes
- Select an object
- Move to a frame in the timeline
- Hover in the 3D Viewport and press I
Editing Keyframes
- Move keyframes – G
- Delete keyframes – X
- Duplicate keyframes – Shift + D
Auto Keying
Auto Keying automatically adds keyframes whenever an object is transformed.
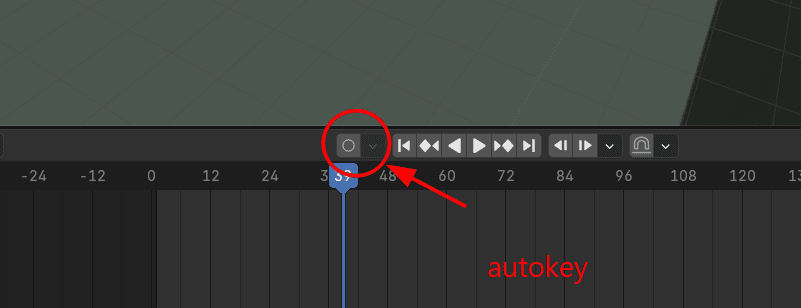
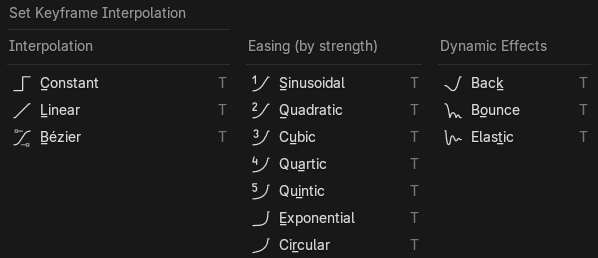
Keyframe Interpolation
Interpolation controls how Blender moves between keyframes. Press T to change the interpolation mode.
- Constant – Instant change
- Linear – Constant speed
- Bezier – Smooth motion (default)
Useful Shortcuts
- A – Select / deselect all
- Shift + A – Add new object
- Shift + D – Duplicate object or keyframe
- Top-right window crosshair – Split or merge panels
- Graph Editor – Edit animation curves
Camera Controls
- Ctrl + Alt + Numpad 0 – Align camera to view
- G – Move camera
- Double-tap Z – Zoom camera
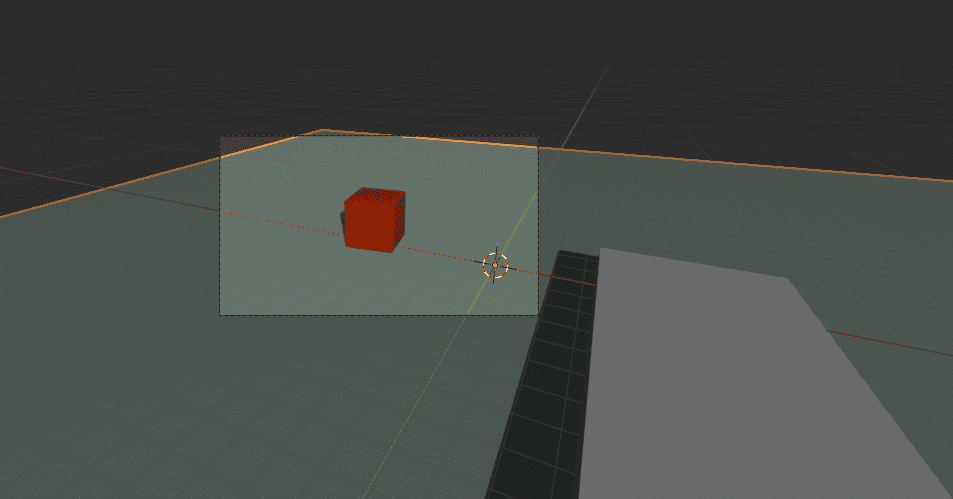
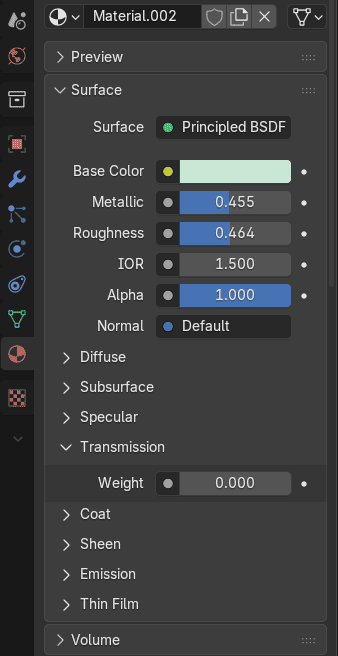
Materials were added to the objects to improve visual clarity during animation.
Finally, the viewport came out to look like this.
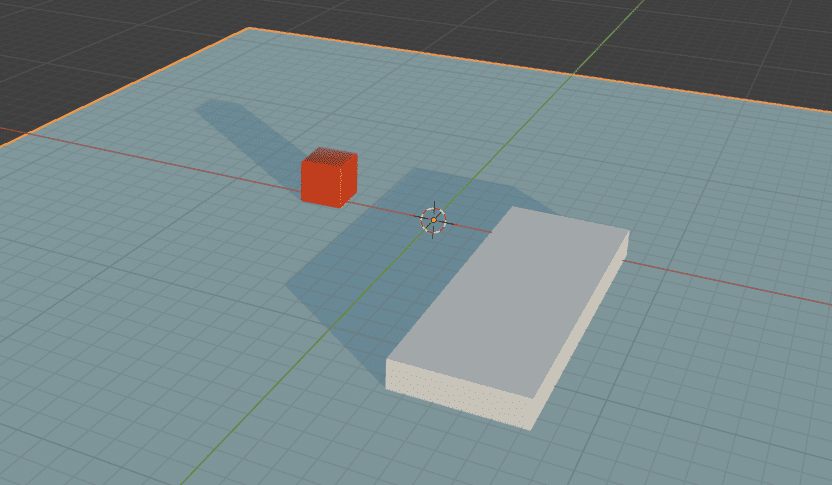
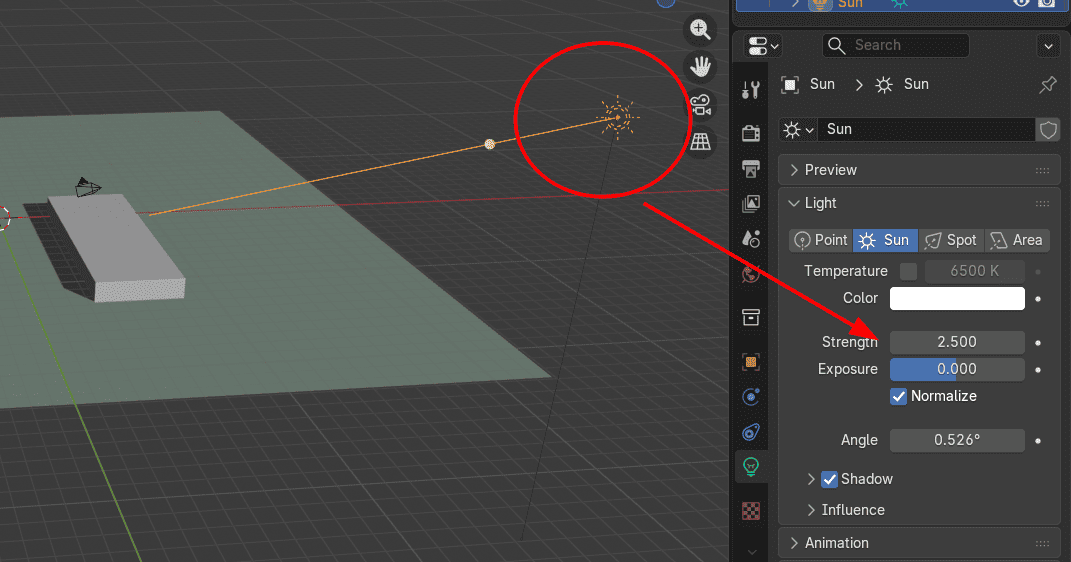
Added a light source, used a sun light source and put its strength at 2.5.
Finally, rendered the video.
GIMP – Poster Design
GIMP is an open-source raster editor used here to design the final poster.
My poster was inspired by an old Nakamichi cassette player advertisement.
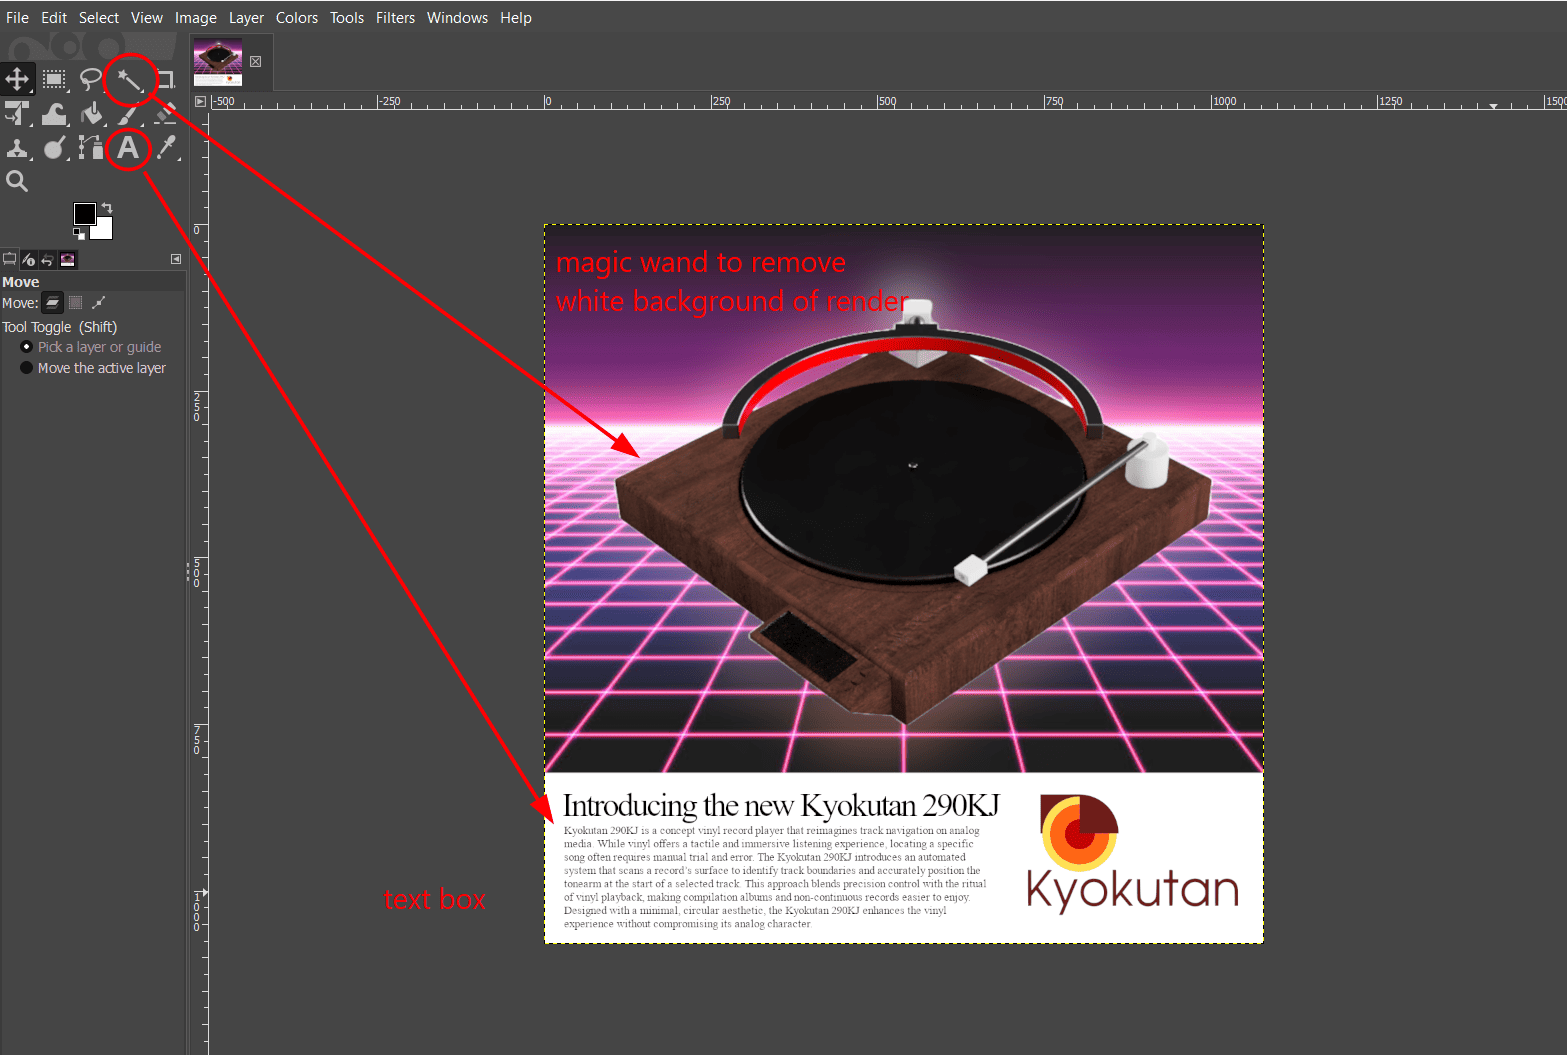
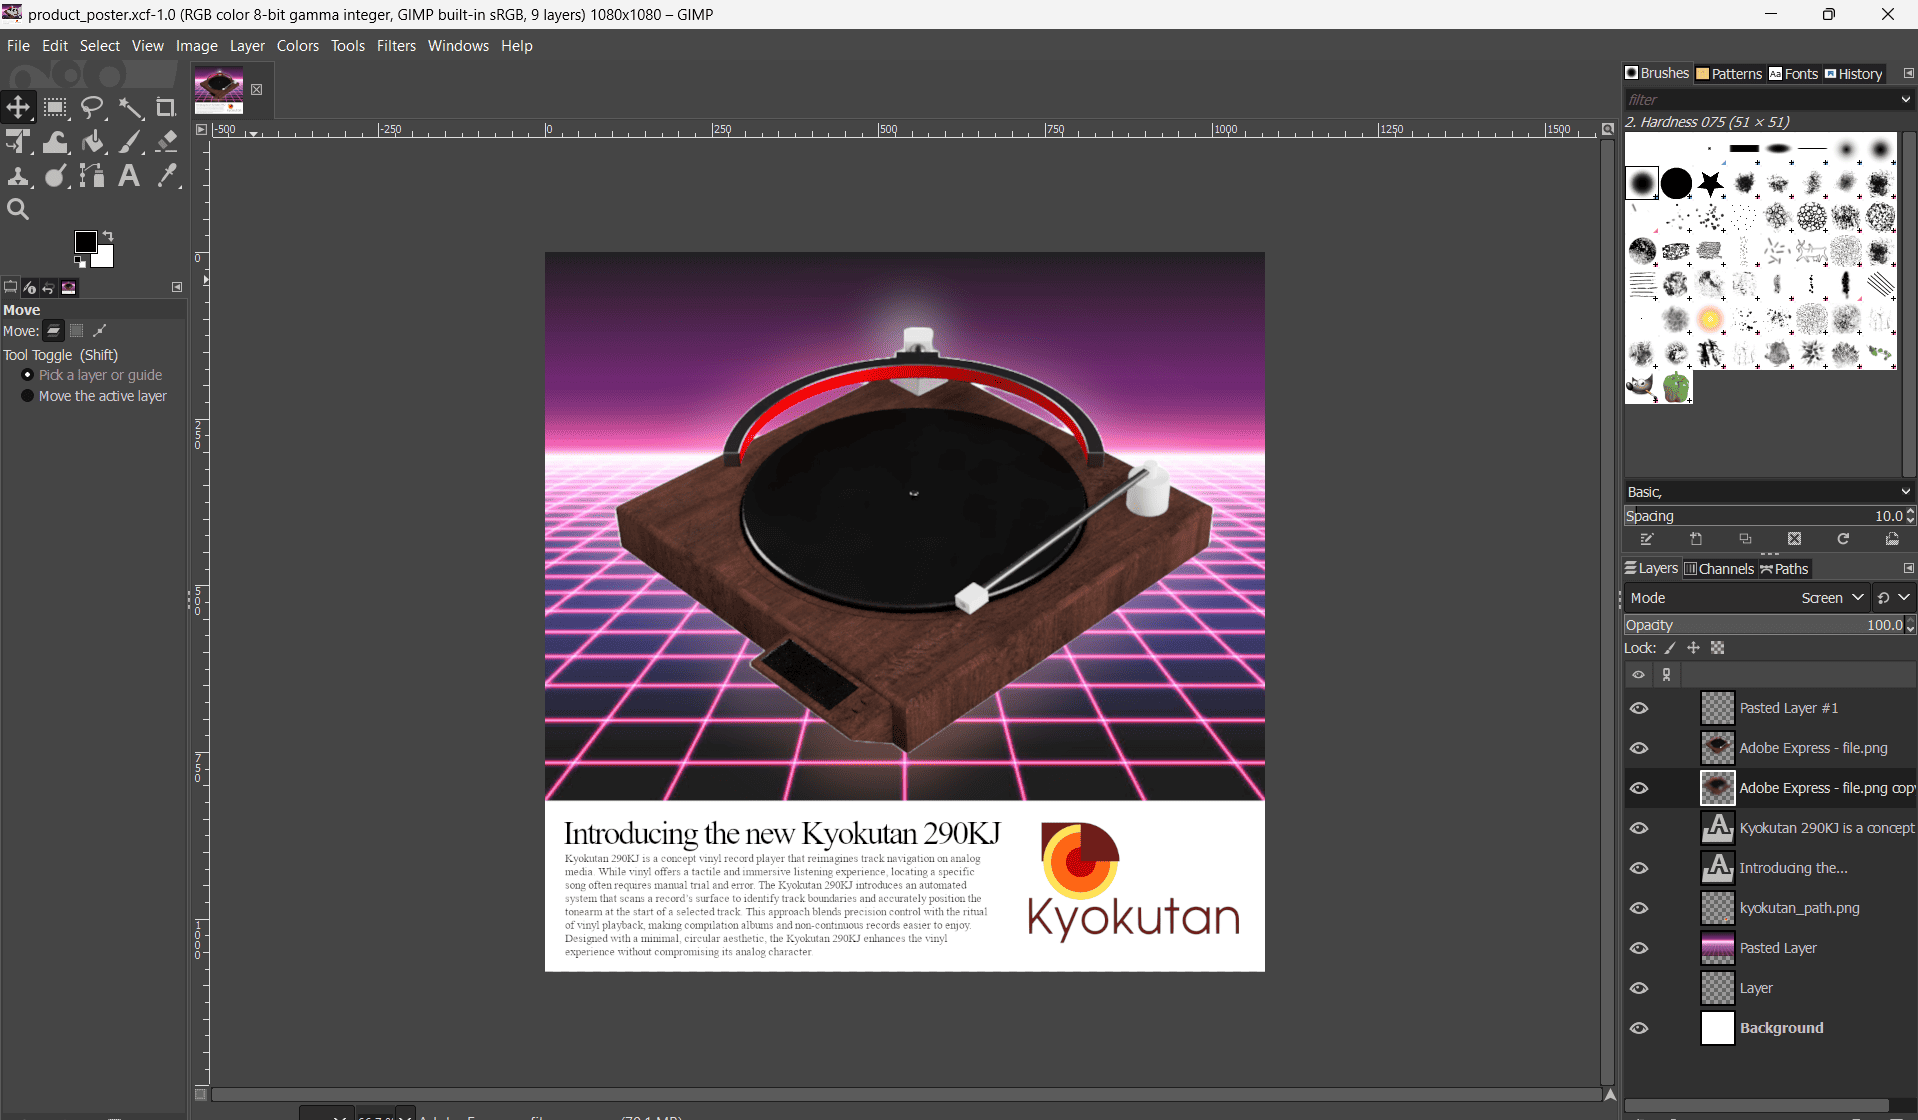
Initially, used magic brush to remove the white background from the final render image from fusion 360. Then added text box with production description to give the poster a completed look.
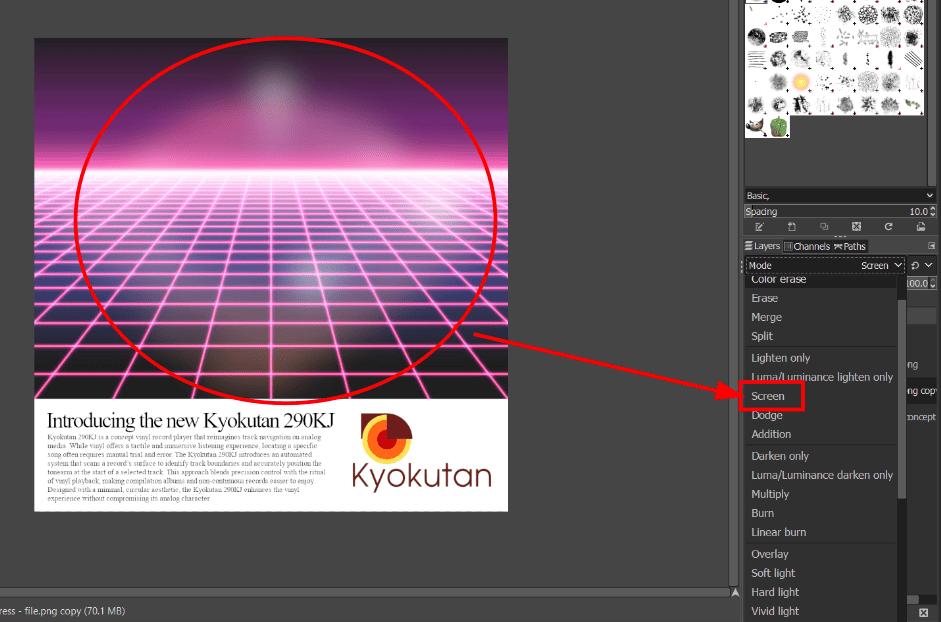
In the original poster there was a glowing fade behind the cassette player, to recreate this effect I used gaussian blur on the product layer and then applied screen effect to it.

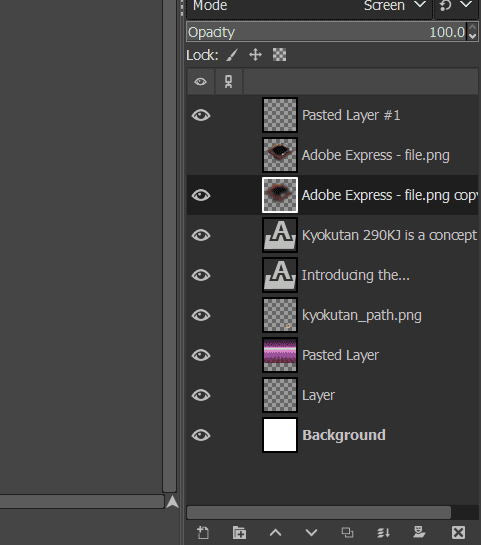
This is how my gimp workspace looked towards the end, a few layers each with certain features in the final poster, a raster image.
This is the final poster.
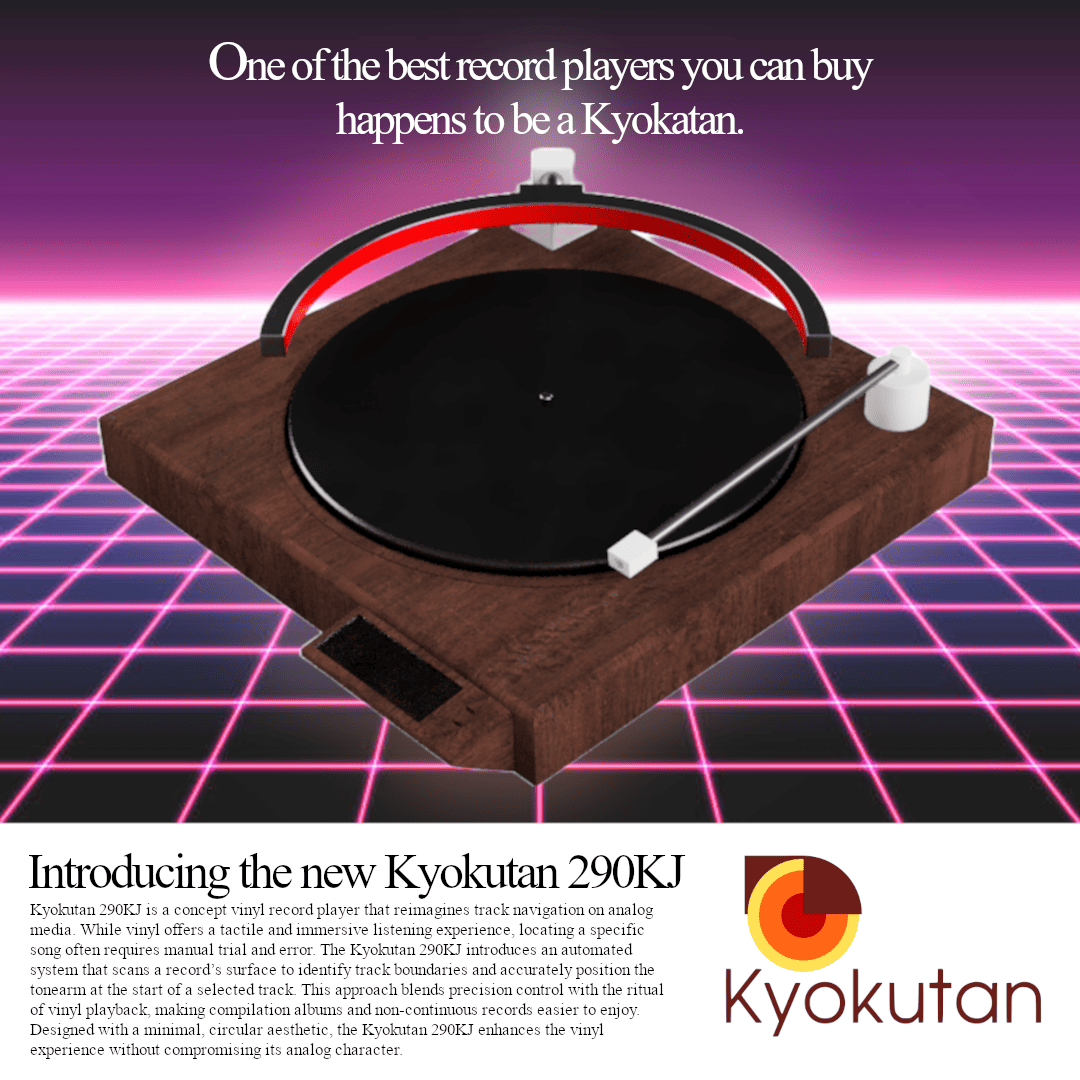
Image and Video Compression
Before uploading the documentation to the GitLab repository, I compressed all images and videos to reduce the overall file size and improve webpage loading times. Images were compressed in batches using iLoveIMG, while videos were compressed using HandBrake by selecting the H.264 encoder and an appropriate quality setting. This maintained good visual quality while keeping the repository lightweight and responsive.
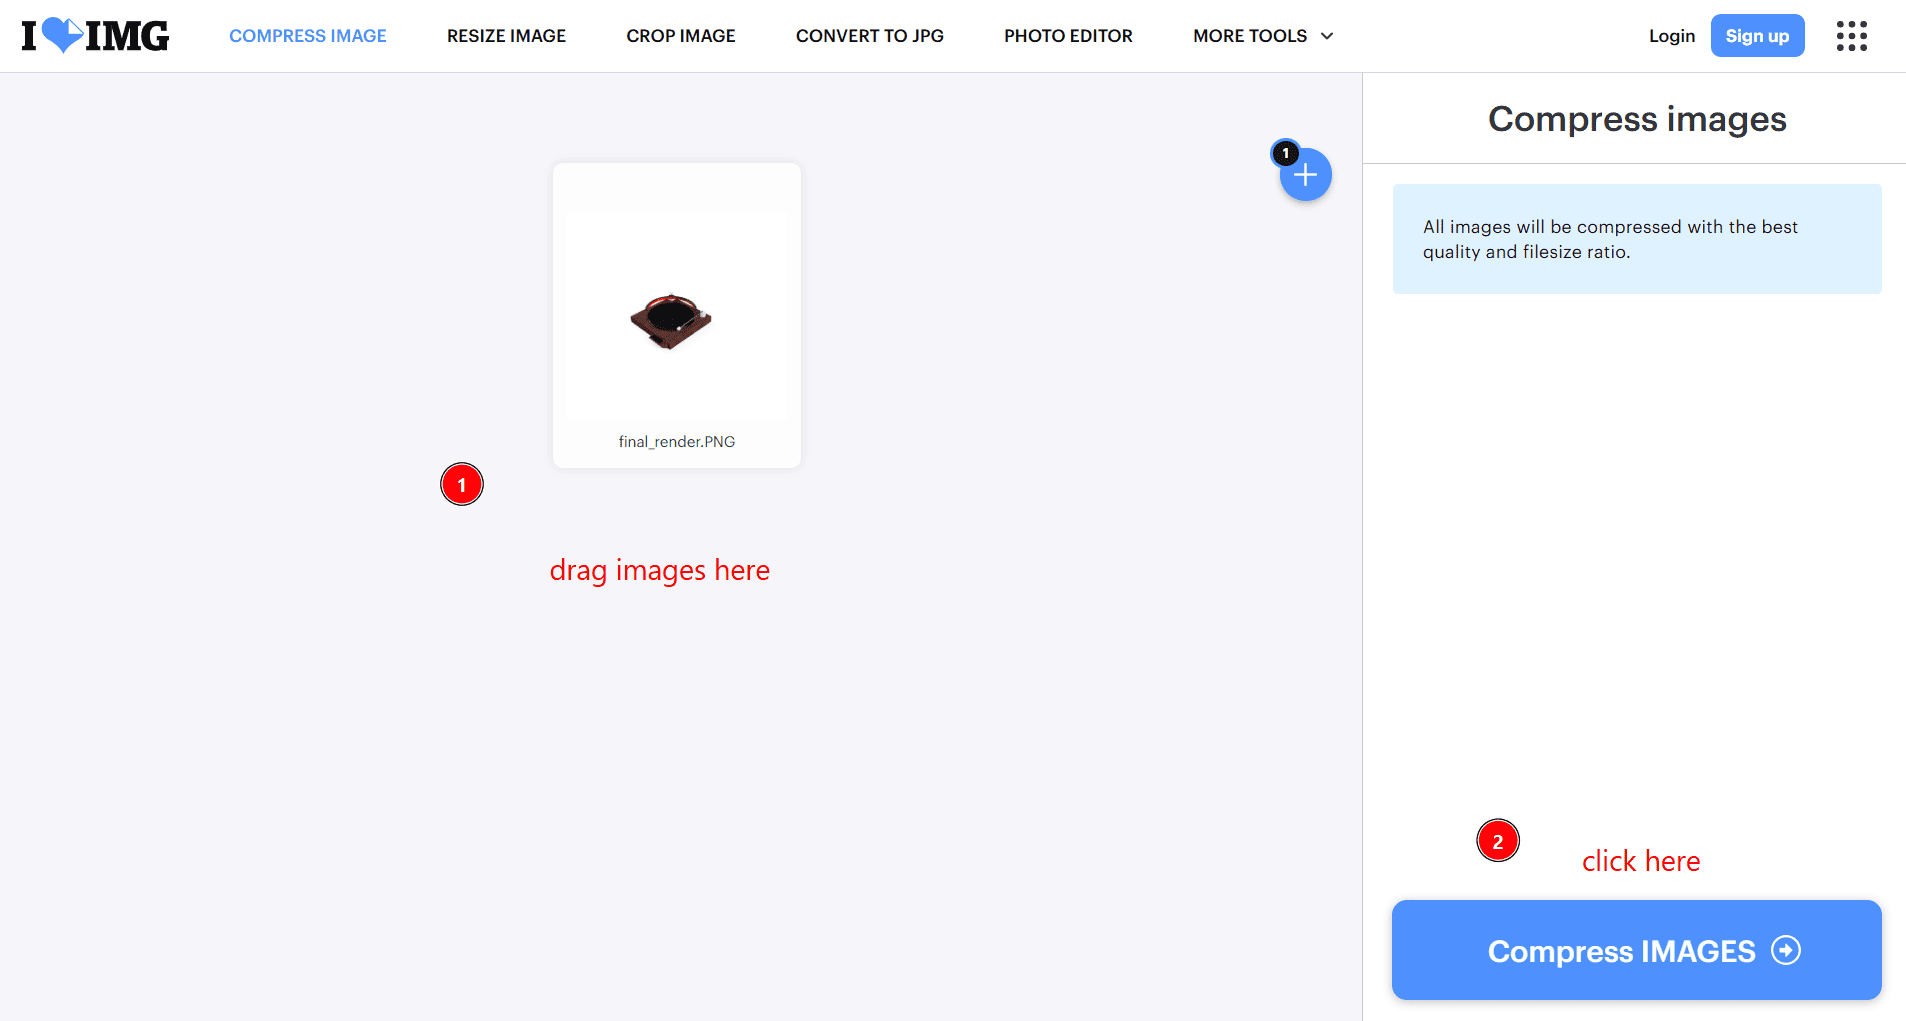
Image Compression - iloveimg
I used iLoveIMG to batch compress and resize all screenshots and photographs before uploading them to my repository. This reduced storage requirements and improved page loading speed while maintaining sufficient image quality for documentation.
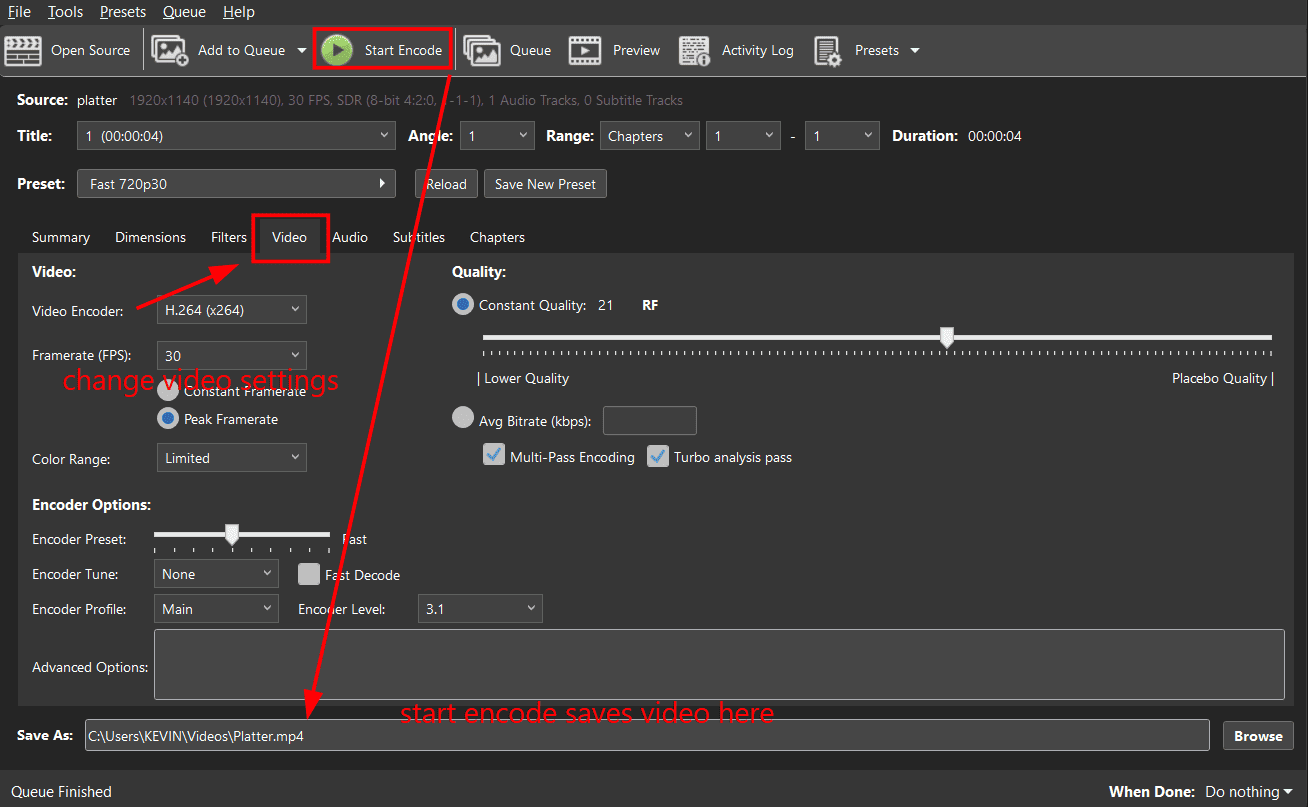
Video Compression – HandBrake
I used HandBrake to compress the construction and animation videos before uploading them. The videos were encoded using H.264 in MP4 format, significantly reducing file size while preserving good playback quality for the documentation website.
Final Files
The following links contain the final project files produced for this project using the respective software tools.
- Fusion 360: Final 3D model
- Inkscape: Final Kyokutan logo (SVG)
- Blender: Final Logo and Box animations
- GIMP: Final poster design