
Most of my task has been completed, the PCB board, Enclosure design, User Interface etc. What actually remains is the elevation of the current experiences put out by PixelJam.
Design Process
My Project started with the designing of the enclosure in Fusion 360. I designed the enclosure to be ergonomic and easy to hold, with a rotating disk mechanism that allows users to select different audio samples. The enclosure also includes a slot for the OLED display and a space for the XIAO ESP32-S3 microcontroller and SD Card.PCB Milling and Soldering
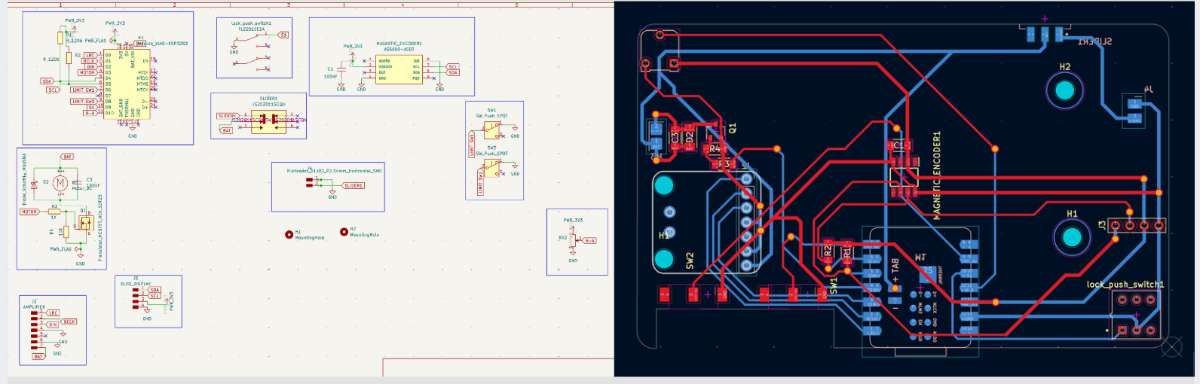
The PCB includes the XIAO ESP32-S3 sense microcontroller, an OLED display, an audio amplifier, a rotary encoder etc. The PCB layout has been optimized for size and component placement to fit within the enclosure design.The following was the initial PCB design which i had created in KiCad(have attached the files below)):
Later on, while programming it we realized that the pinout of the XIAO ESP32-S3 was different from what we had assumed, and we had to modify the PCB design to accommodate the correct pinout and also that the motor needed a capacitor to run at a slower PWM.
The modified schematic and PCB layout are shown below:
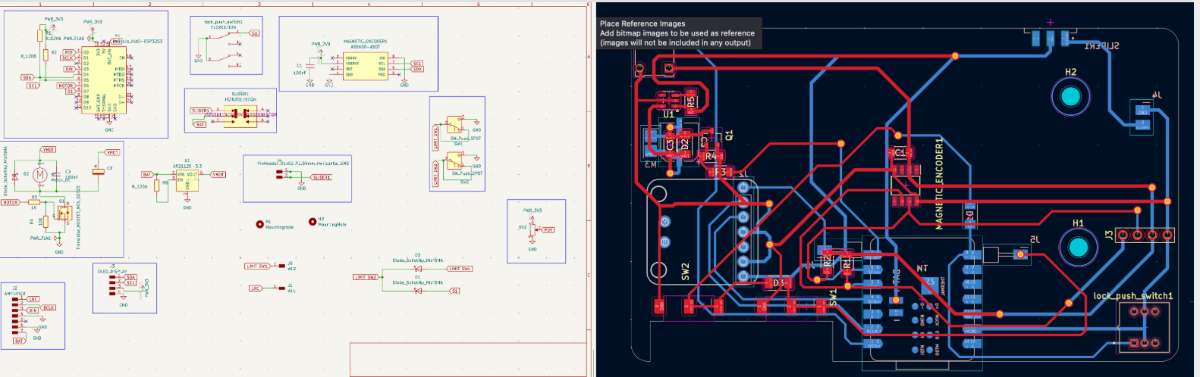
The PCB layout has been optimized for size and component placement to fit within the enclosure design.
Rotating Disk Mechanism
In System Integration Week i had designed and 3D printed the rotating mechanism for my disk which upon trials i had modified, i made the magnet bearer attached to the motor take in 6 axial magnets(right) instead of 1 diametric magnet(left).
But after further testing it turned out that the mechanism was not stable enough and the disk would tilt when rotated, causing it to get stuck and not rotate smoothly.
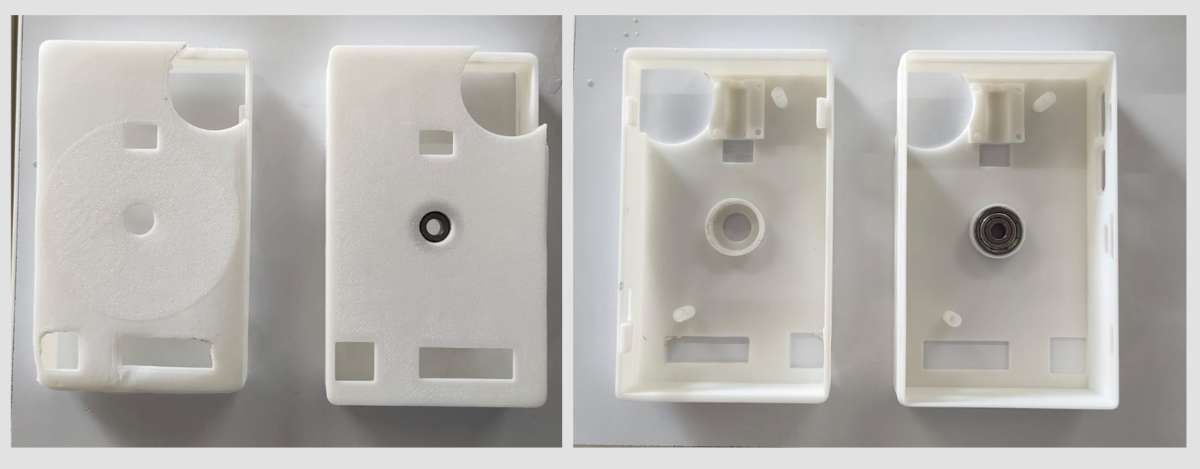
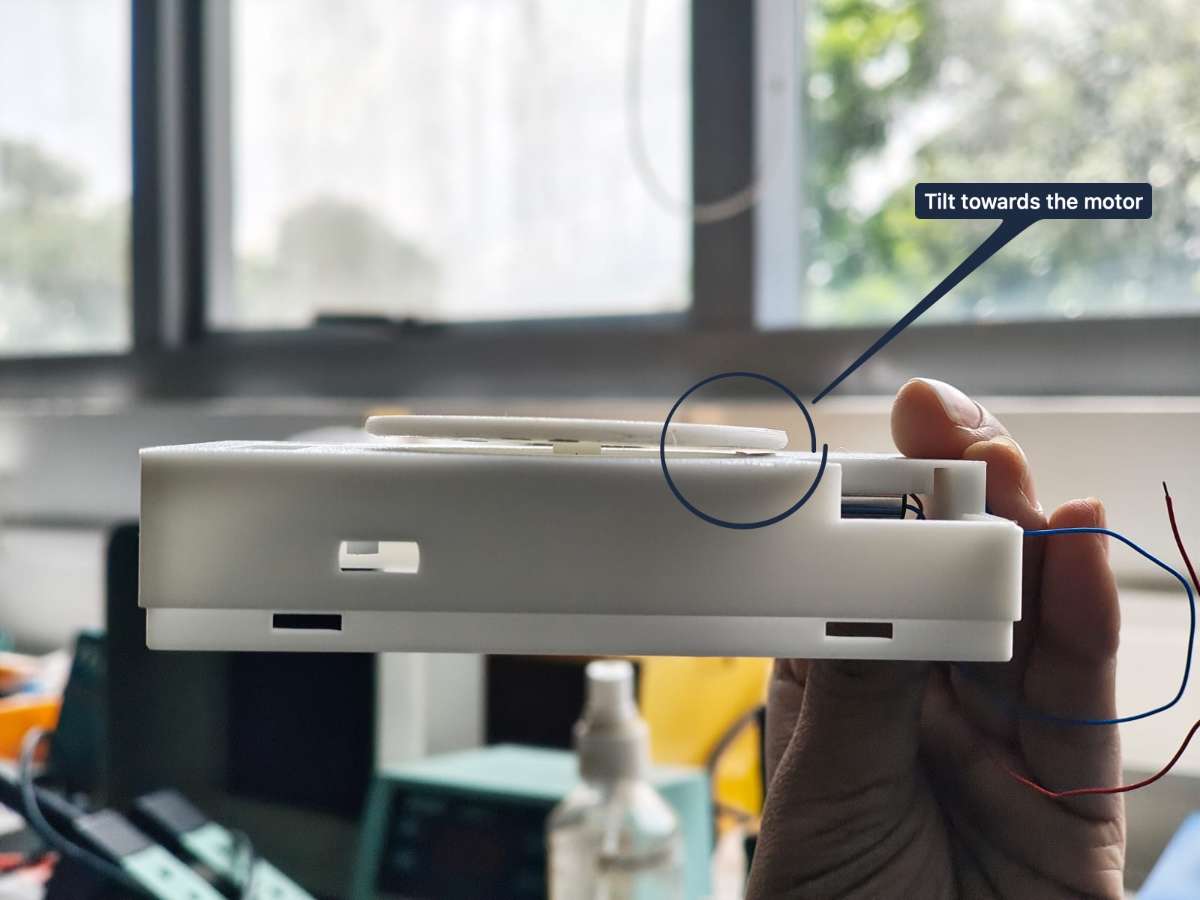
To fix this issue, I redesigned the mechanism to include a bearing that allows the disk to rotate smoothly without tilting. The new design also includes a more secure attachment, a larger bearing, for the disk to prevent it from tilting.
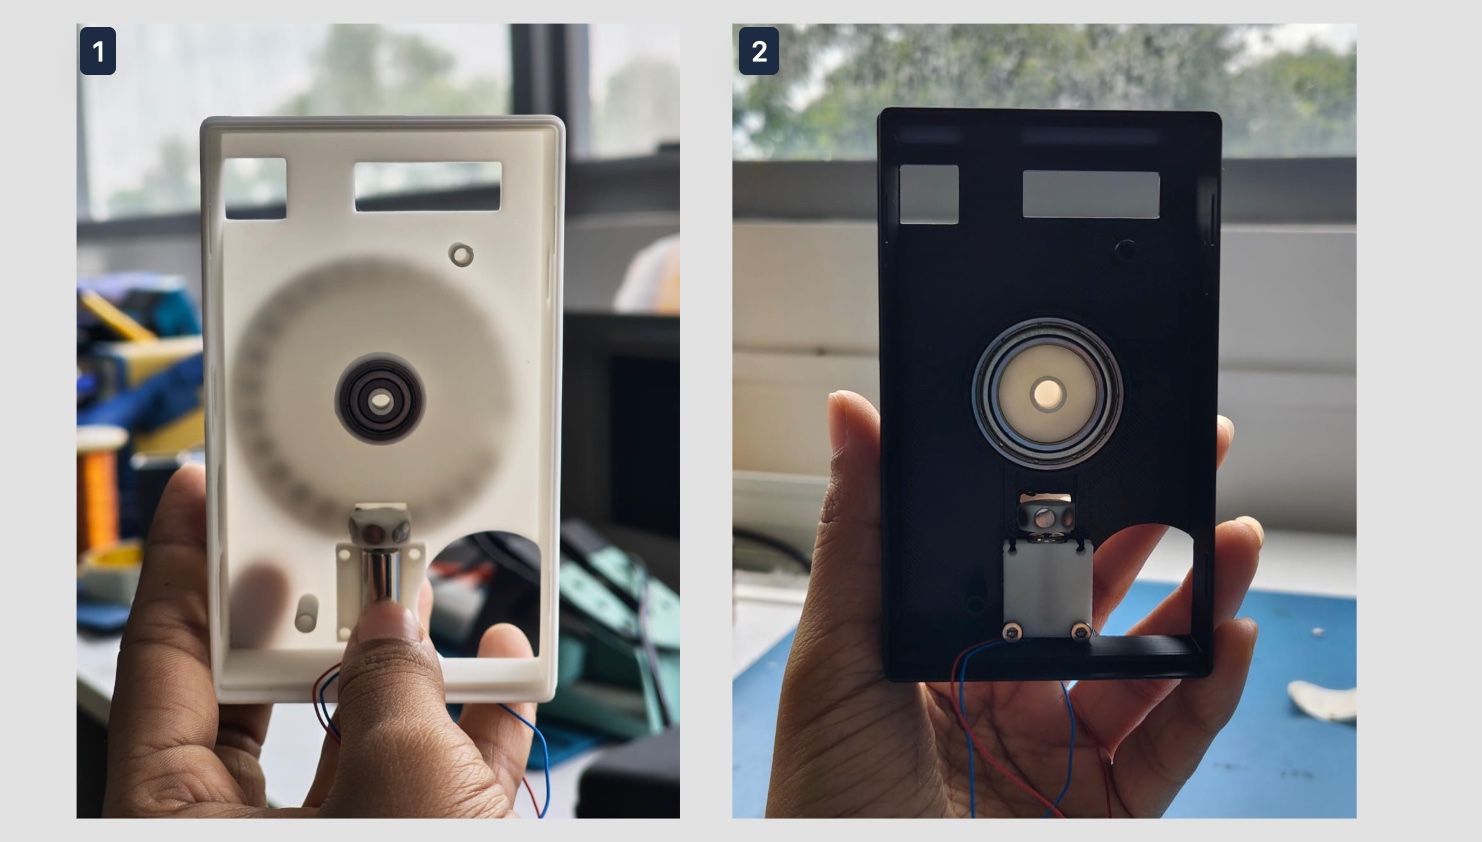
Eventhough the disk magnetic disk mechanism worked well, while programming the device i realized that the motor was not able to rotate slow enough to allow the magnetic force to rotate the disk even when i added a capacitor to slow down the PWM.
So i had to change the design of the mechanism with the help of Jogin, my instructor, last minute to a gear mechanism which would allow the motor to rotate the disk at a slower speed and with more torque.

Following is a video of the gear mechanism in action.
Web UI
This tactile player can be operated from your browser made in the Interface Week which allows you to browse through the list of songs and play it in your PixelJam.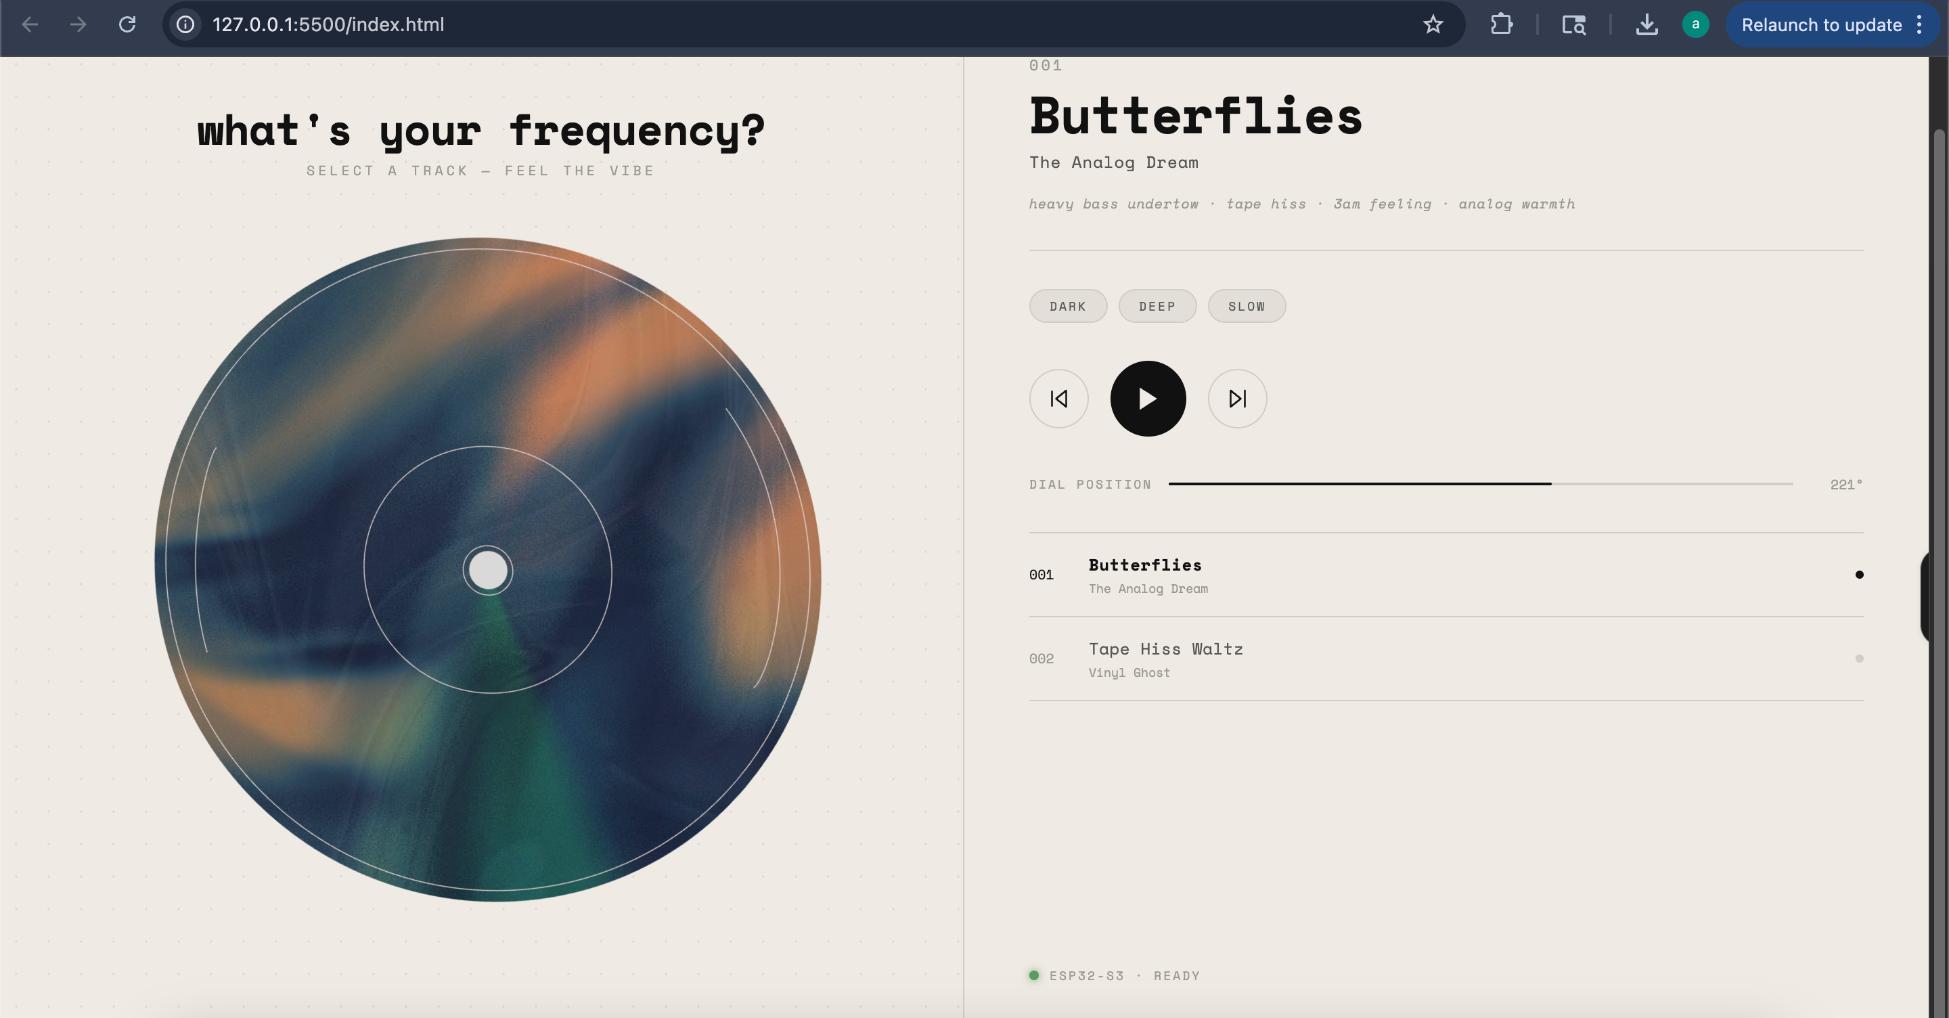
Laser cutting
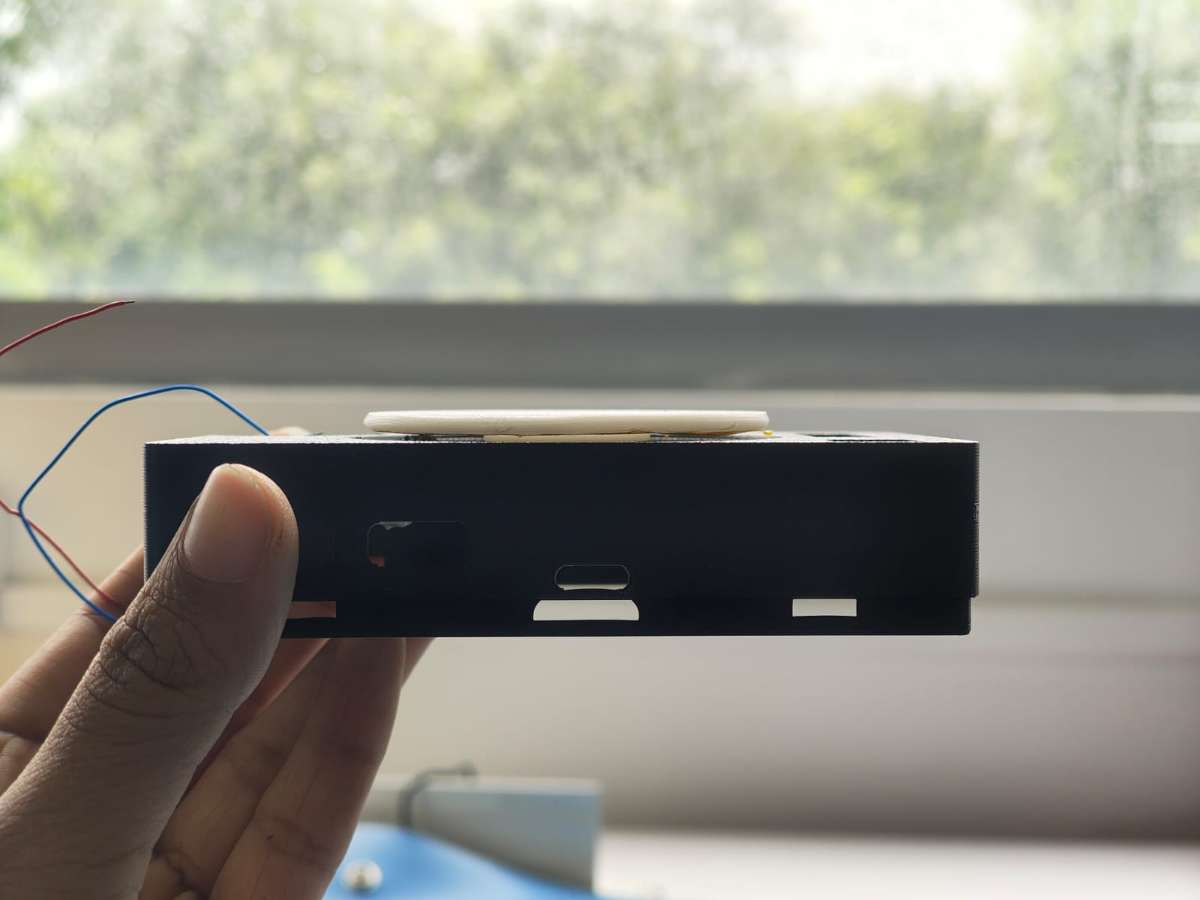
The display glass was made in 1.8mm clear acrylic and cut to shape keeping the kerf values using the laser cutting machine.Integration of Components
I integrated the PCB, rotating disk mechanism, and enclosure design to create a functional prototype of the NanoJam device. The components were carefully arranged within the enclosure to ensure proper fit and functionality.Firmware
The device was built around the XIAO ESP32-S3 Sense microcontroller, which manages audio playback, wireless communication, user inputs, motor control, and display updates.Several hardware components work together to create the final experience:
A MicroSD card stores MP3 and WAV files.
A digital audio amplifier drives the speaker.
A magnetic encoder continuously measures the position of the rotating disc.
A coreless motor keeps the disc spinning.
An OLED display provides visual feedback.
Physical switches and a volume knob offer traditional controls.
The challenge was not simply connecting these components, but making them behave as one seamless system that responds naturally to user actions.
I started by integrating the firmware with the hardware components.
2. what's working? what's not?
I have been able to achieve 92% of things i had planned for PixelJam, the display works perfectly, it plays music, changes music, volume, shows the track etc. But am i satisfied with the product? That is debatable, i would say what i have is half baked. I want to improvise on my existing features, need to make the disk mechanism a bit smoother, add the scrubbing sound effect while the listner scrubs, make the product be able to play songs via bluetooth, improvise on the whole feel or look of the product.
Audio Library Journey
During development, I experimented with three different approaches for handling audio playback before settling on the final solution.
Attempt 1 – ESP32Synth
My first choice was ESP32Synth. However, I quickly ran into compatibility issues, and the library failed to build in my development environment. Even beyond that, it lacked important features such as MP3 playback and proper audio seeking. Since ESP32Synth is primarily designed for generating sounds and music synthesis rather than playing audio files, it wasn't the right fit for PixelJam.
Attempt 2 – Custom PSRAM Audio Engine
Next, I developed a custom audio engine that loaded music files from the SD card into the ESP32's PSRAM and streamed them directly to the audio output. This approach offered one major advantage: instant seeking with no noticeable delay. However, it introduced several playback issues, including songs playing at the wrong speed due to audio format mismatches. Although some of these problems were fixed, the system still required significant debugging. With a limited project timeline, continuing this approach became impractical.
Attempt 3 – ESP32-audioI2S (Final Choice)
The final solution was ESP32-audioI2S, a library specifically designed for streaming audio files on ESP32 devices. It provided built-in support for MP3 and WAV files, reliable seeking, automatic track progression, and efficient memory management using PSRAM. While there is a small delay of around half a second when jumping to a new position in a song, the overall stability and feature set made it the most reliable option. This is the library used in the final version of PixelJam.
Motor Control Challenge
During testing, I noticed that the motor would immediately start spinning at full speed as soon as the device was powered on, even before the program began running properly. After investigating, I found that the motor control pin (GPIO43) behaves differently during startup. Since the motor driver was connected to this pin, it was receiving a signal by default, causing the motor to run uncontrollably. To solve this, I configured the motor control pin as the very first step in the setup process and immediately set its output to zero. This ensured that the motor would spin once during startup and only then begin continuously spinning when instructed by the firmware. This small change eliminated the unwanted motor movement and made the startup behavior predictable and reliable.
code snippet:
void setup() {

// FIRST — prevent GPIO43 from idling HIGH

ledcAttachPin(MOTOR_PIN, 0);

ledcSetup(0, 2500, 8);

ledcWrite(0, 0); // motor off

Serial.begin(115200); // native USB, not UART
// ...
}
One of the most important features of PixelJam is its ability to detect when a user touches the spinning disc.
My approach was simple: if the disc's speed dropped below a fixed value, the system would assume that someone had touched it. While this worked initially, it proved unreliable during real-world testing.
code snippet:
float speed = abs(readEncoderDeg()) / 0.05; // deg/s

baseline = baseline * 0.95 + speed * 0.05; // rolling avg

if (speed < baseline * 0.3 for > 800ms) ® hand detected
Creating a Natural Scrubbing Experience
Once touch detection became reliable, I was able to make the interaction much more intuitive.
While music is playing and the disc is spinning, the user simply grabs the disc. The velocity drops, the firmware detects the hand within 800ms, cuts the motor, and pauses audio. The user then turns the disc to seek through the track — 3 degrees of rotation equals 1 second of audio, with counter-clockwise rewinding. The OLED displays the seek offset in real time (e.g., +12s or -5s).
code snippet:
void checkScrubRelease() {

if (isScrubbing && abs(encoderDelta) < 0.5) {

stillMs += 50;

if (stillMs > 800) {

int newPos = currentPosSec + scrubAccumDeg / 3;

audio.setAudioPlayTime(constrain(newPos, 0, totalSec));

resumePlayback();

}

} else { stillMs = 0; }
}
Click on main-code to avail the Arduino code for PixelJam.
Here's the final look:
NANOJAM © 2026 by archita b k is licensed under CC BY-NC-SA 4.0
what questions need to be resolved?
Although the prototype is functional, there are still a few things I would like to improve. I want to further optimize the user experience, especially the responsiveness of the interface and the overall interaction flow. I also want to explore how the product can be made more reliable for long-term use, including better enclosure design and easier assembly.
what will happen when?
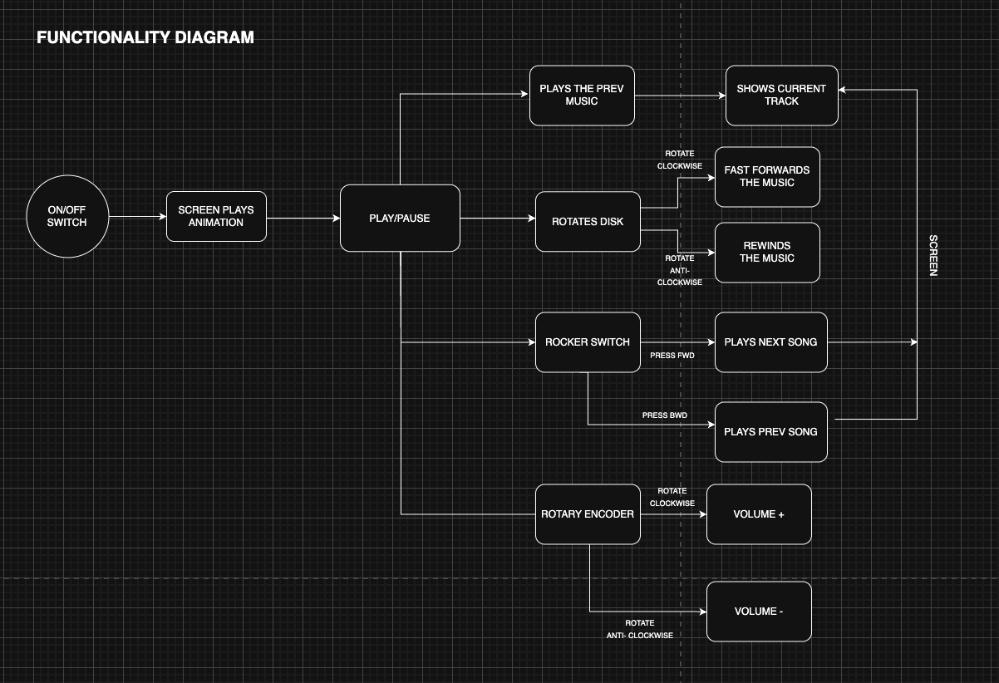
This diagram maps out everything PixelJam can do, starting from the controls and ending at what shows up on the screen. It has an ON/OFF switch to power on the device, then the screen plays an animation, and then the device sits at Play/Pause, ready to use.
From there, each physical control branches off into its own action:
The disk is the heart of it — rotating it clockwise fast forwards the music, and rotating it anti-clockwise rewinds it. There are also controls to play the previous track.
The side switches handles track changes — pressing the first one plays the next song, and pressing the other one plays the previous song.
The rotary encoder controls volume — turning it clockwise raises the volume, and anti clockwise lowers it.
On the far right, almost every action feeds back to the screen, which shows the current track and the seek position, so the user always gets visual feedback for what they just did.
what have you learned?
PixelJam started as one of four very different sketches back in Week 1, and turning that little "nano jammer" idea into a device you can actually hold and scrub through music with has been the most demanding and the most rewarding thing I've done at Fab Academy. It pulled together almost everything I learned across the weeks: enclosure design in Fusion, PCB design and milling, the encoder, motor control, and a lot of embedded programming.
What I didn't expect was how much of the project would be about adapting when things didn't work. The
magnetic disk mechanism I was proud of turned out to tilt and stick,
and then right towards the end, the motor still couldn't spin slowly enough to let the magnets do their job, so I had to
switch to a gear mechanism last minute for more torque at low speed.
The audio side went through three
libraries before ESP32-audioI2S finally gave me reliable MP3 playback and seeking. And the firmware threw
problem after problem at me: the motor screaming to life on boot, false touches
from encoder vibration, the SD card dropping out, a volume at zero making me think everything was
broken when it was actually playing fine. Each one taught me to slow down and diagnose instead of guessing.
The moment it all came together made every reprint and every debugging session worth it. That was the exact interaction I'd imagined at the start, finally working in my hands.
There's still more I'd love to do, tighten up the half-second seek delay, refine the touch detection further, and clean up the enclosure but PixelJam does what I set out to build: a compact, playful, physical way to scratch and scrub digital audio. More than the device itself, I'm walking away knowing I can take a rough idea and push it all the way through electronics, fabrication, and code into something real.
NANOJAM © 2026 by archita b k is licensed under CC BY-NC-SA 4.0