Individual Assignment
This week is about us trying new workflow and machines which we have not yet tried out and introducing it to the masses in our on way. I chose the Embroidery machine and Xtool S1 for this week.About Machine
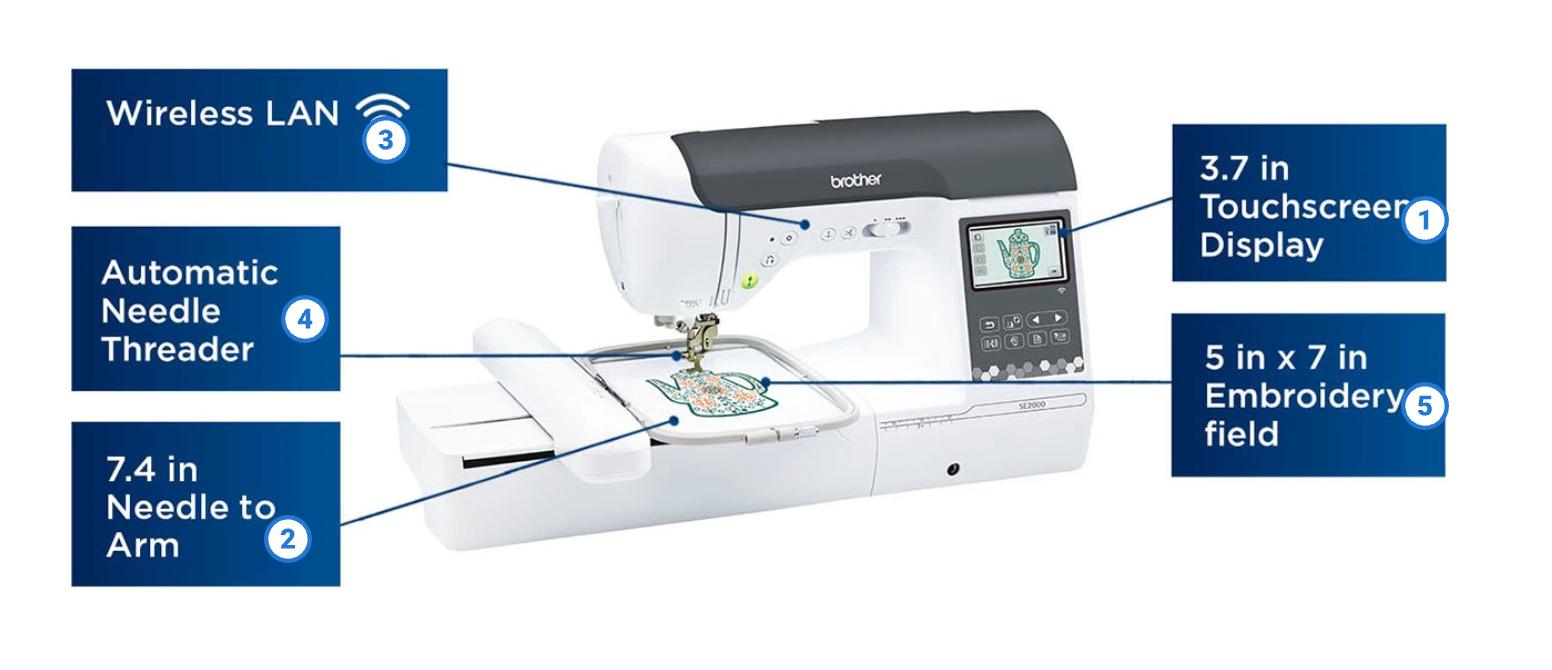
This week i tried out the Brother SE-2000 Embroidery machine available at our lab.
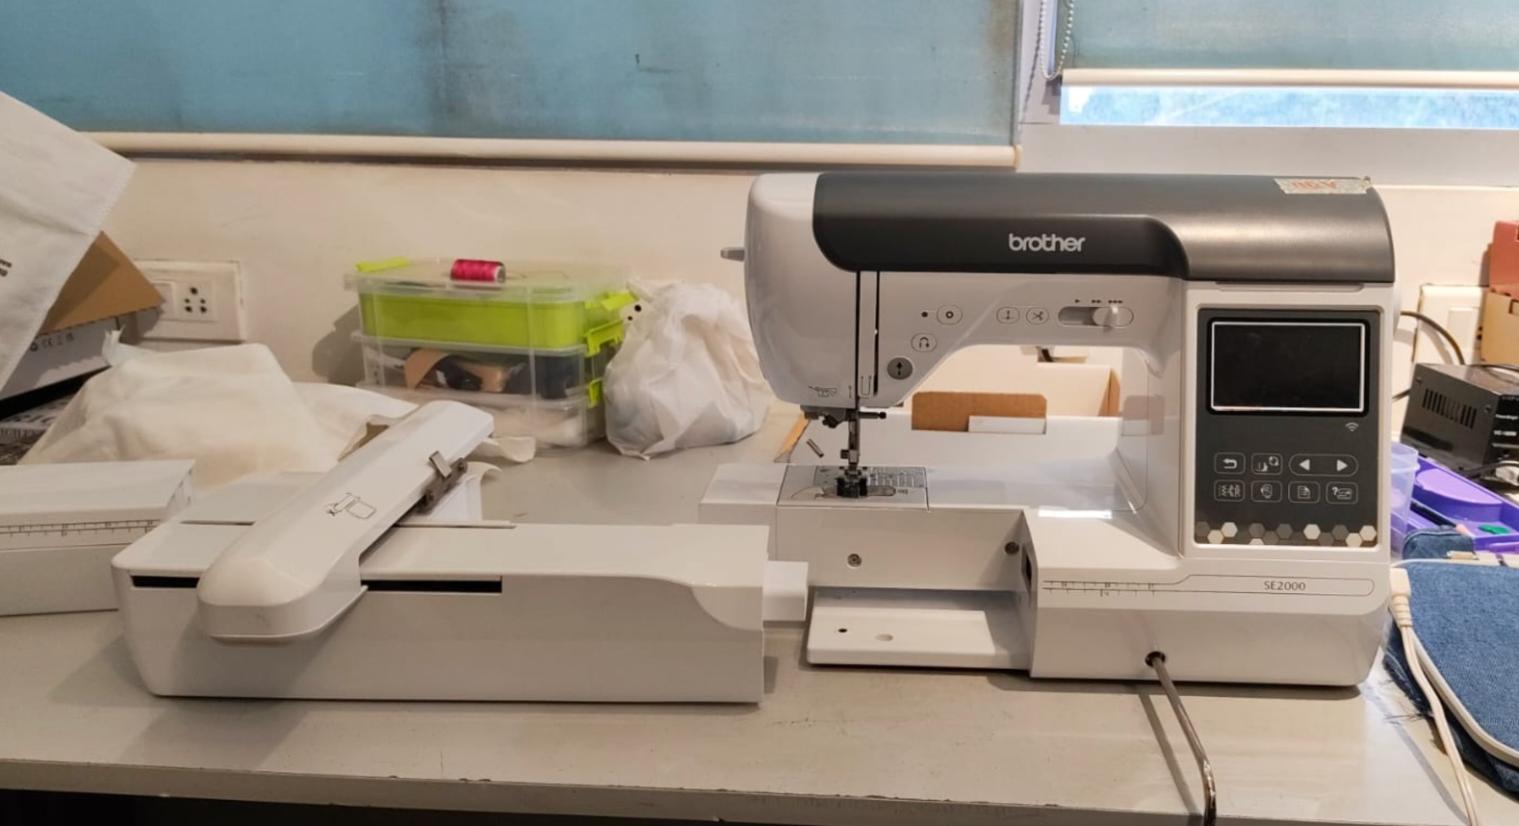 It is a multifunctional sewing and embroidery machine, Equipped with both sewing and embroidery capabilities,
the machine supports a wide range of stitches, decorative patterns, buttonhole functions, and built-in embroidery designs. It features an interface, wireless
connectivity for transferring embroidery files, automated functions such as bobbin winding and thread cutting, and compatibility with various sewing techniques. Click for the machine manual.
It is a multifunctional sewing and embroidery machine, Equipped with both sewing and embroidery capabilities,
the machine supports a wide range of stitches, decorative patterns, buttonhole functions, and built-in embroidery designs. It features an interface, wireless
connectivity for transferring embroidery files, automated functions such as bobbin winding and thread cutting, and compatibility with various sewing techniques. Click for the machine manual.
 img
imgDesigning the Embroidery File
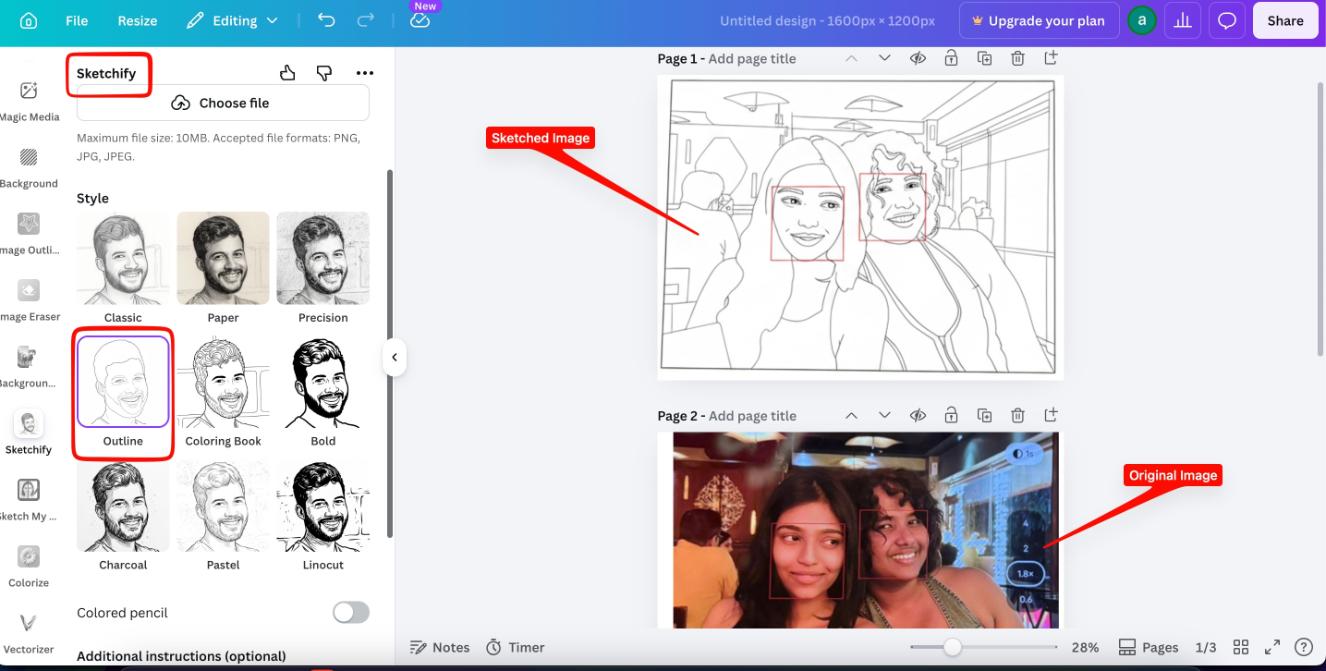
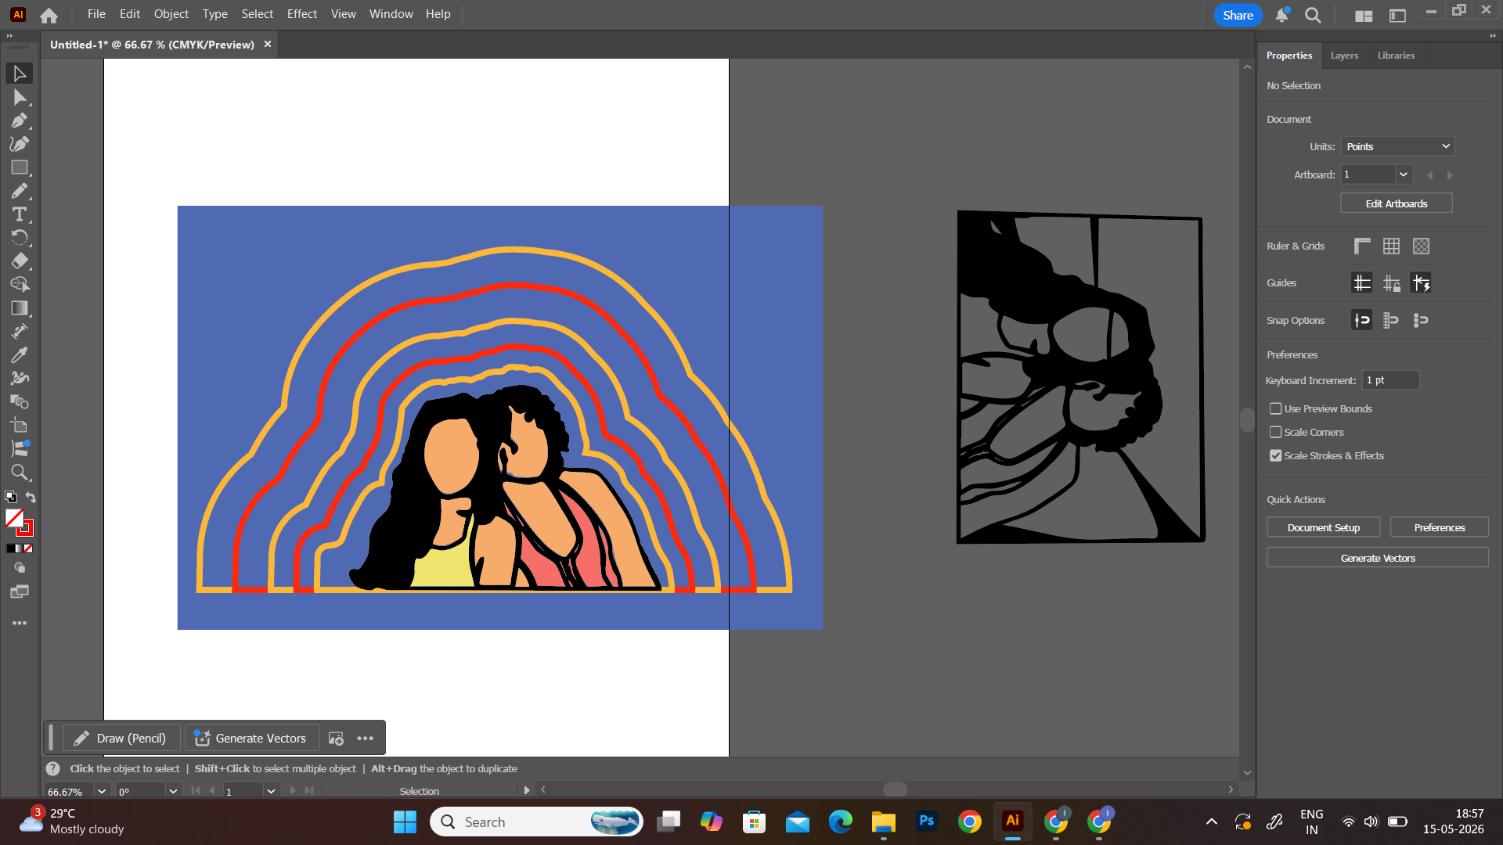
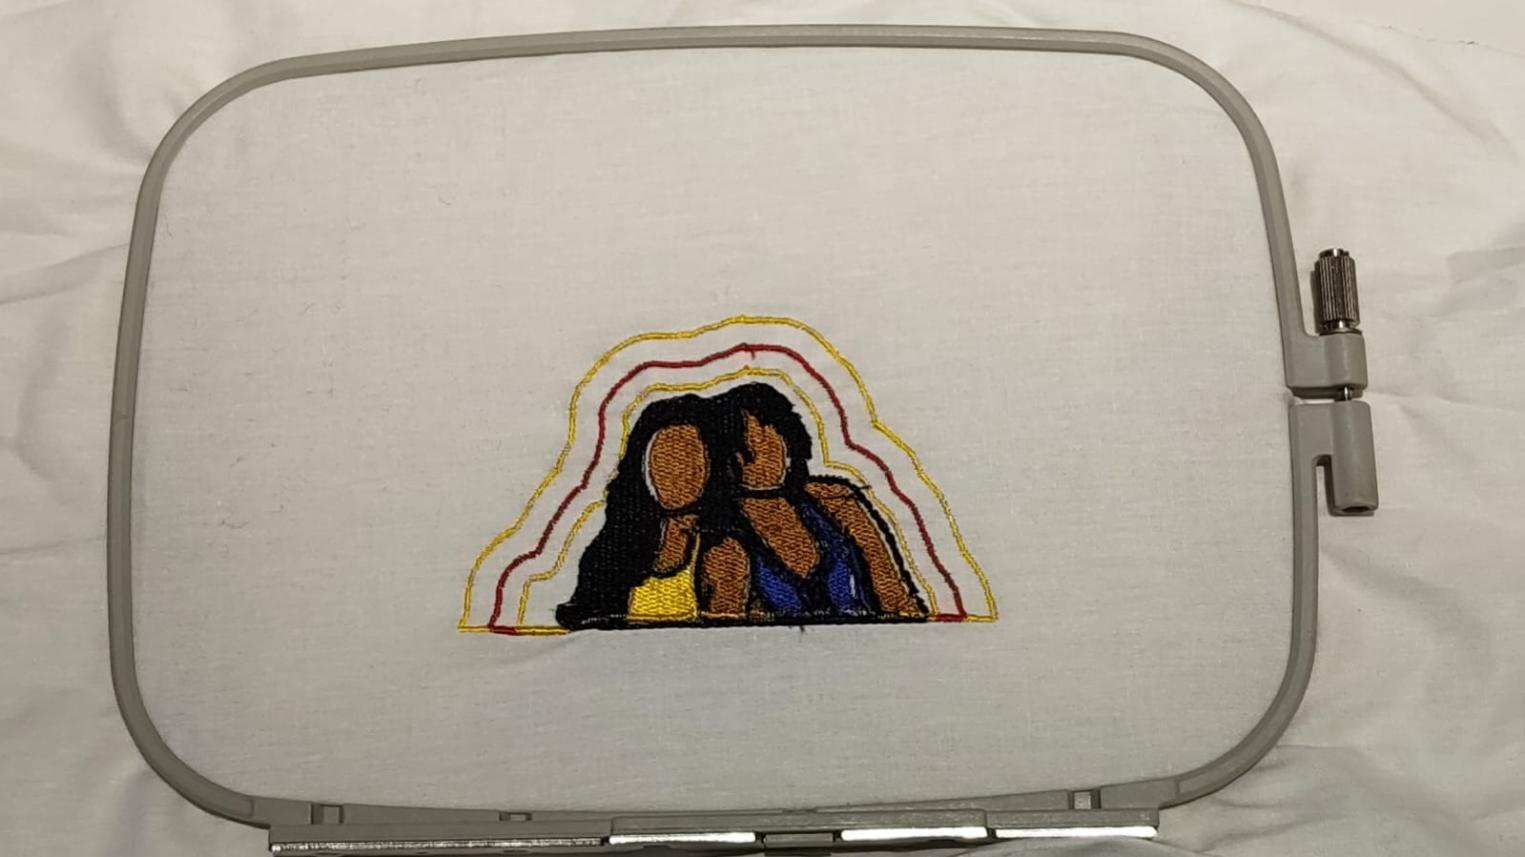
Now to design the embroidery file, I first imported a picture of me and my friend into Canva and applied ""Sketchify"" filter to it.
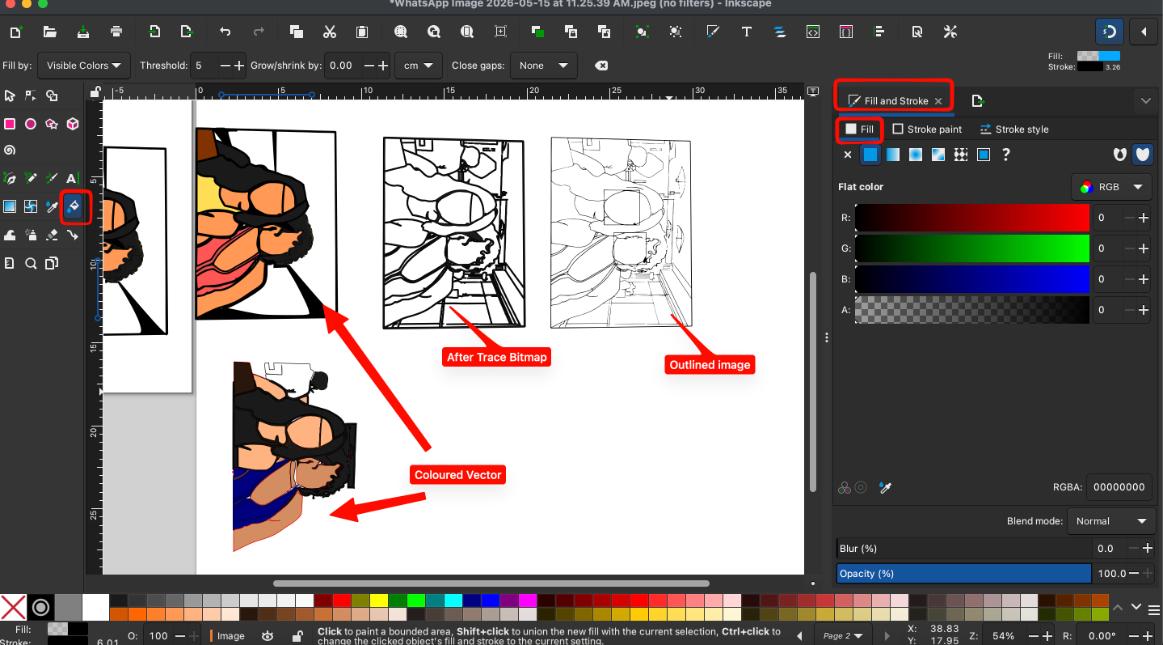
 Then I exported the image to Inkscape,bit traced it to get the vector file, removed some vectors which i thought would not look good in embroidery, they were too small to get the details right in the machine. and then using the paint tool I colored the different sections of the image.
 Then went to Adobe Illustrator (borrowed from a friend) and made the wavy outlines.
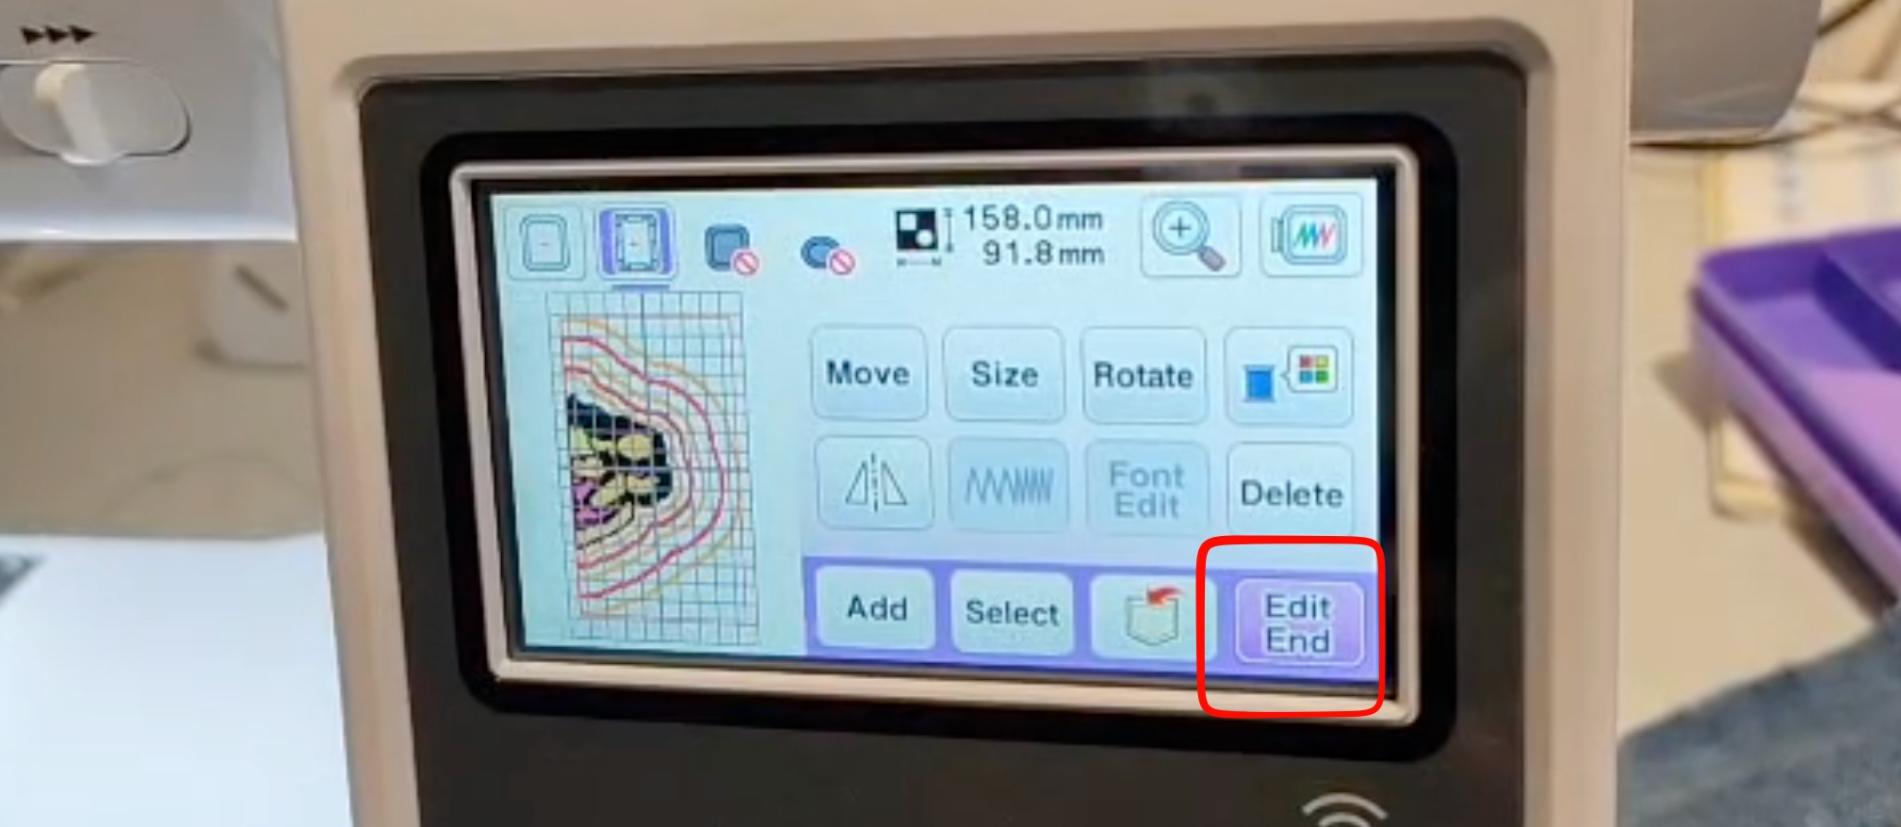
Installation and working of the Ink/Stitch extension
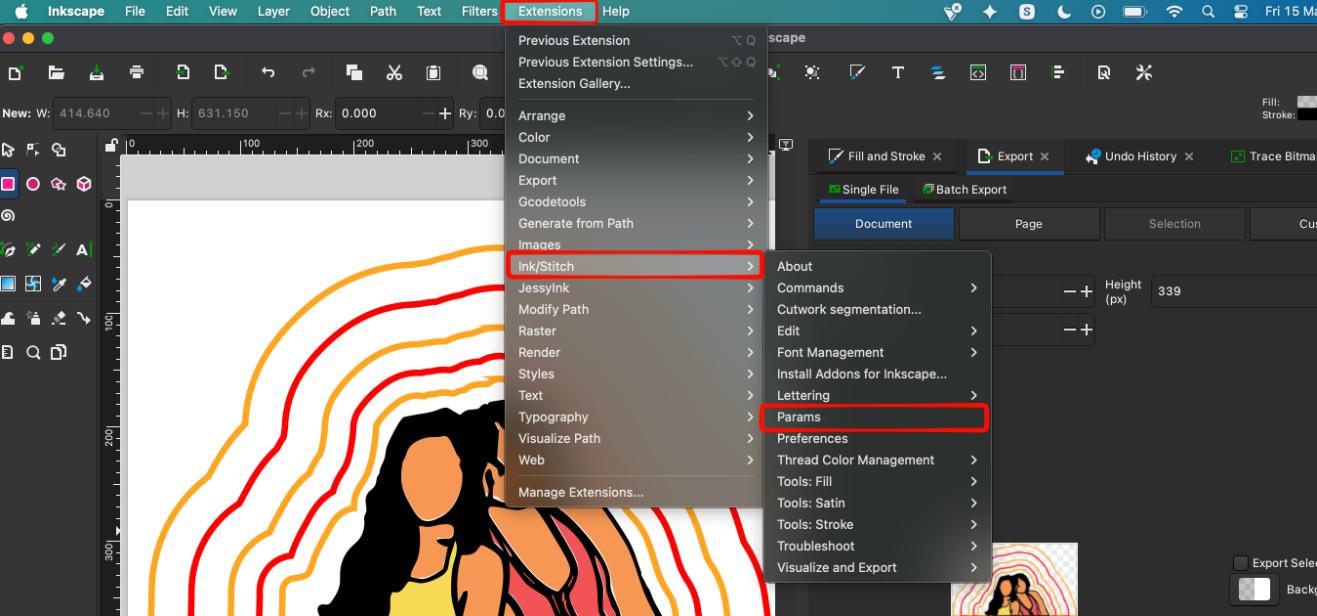
Downloaded an extension called Ink/Stitch , An open-source machine embroidery design platform based on Inkscape Ink/Stitch aims to be a full-fledged, cross-platform embroidery digitizing platform based entirely on free, open-source software. It provides a user-friendly interface for creating and editing embroidery designs, allowing users to convert vector graphics into stitch files compatible with various embroidery machines. With features like stitch simulation, design editing, and support for multiple file formats, Ink/Stitch empowers users to bring their creative embroidery ideas to life using a free and accessible toolset.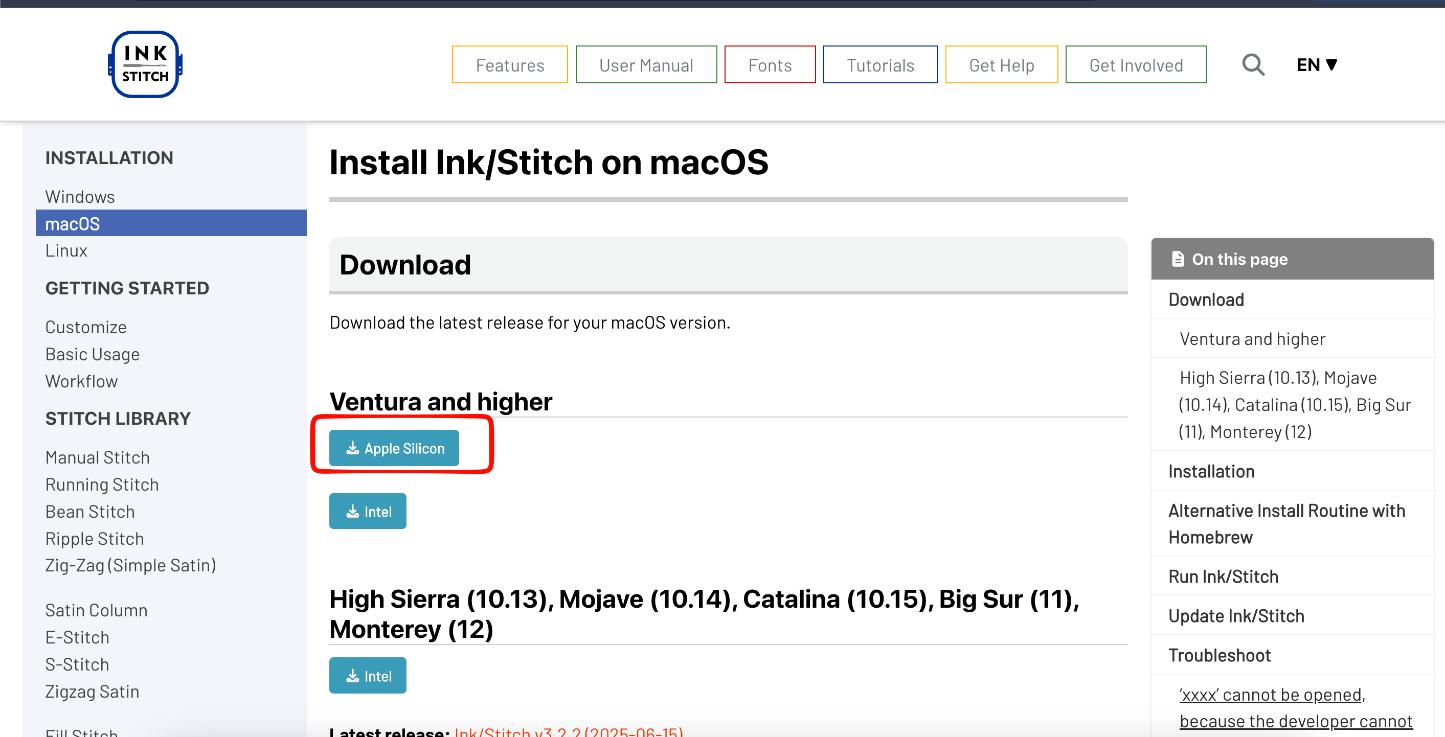 I used Ink/Stitch to convert the vector file into a PES file which can be read by the machine.
after installing, go to extensions, there you will see "Ink/Stitch" click and go to "Params"
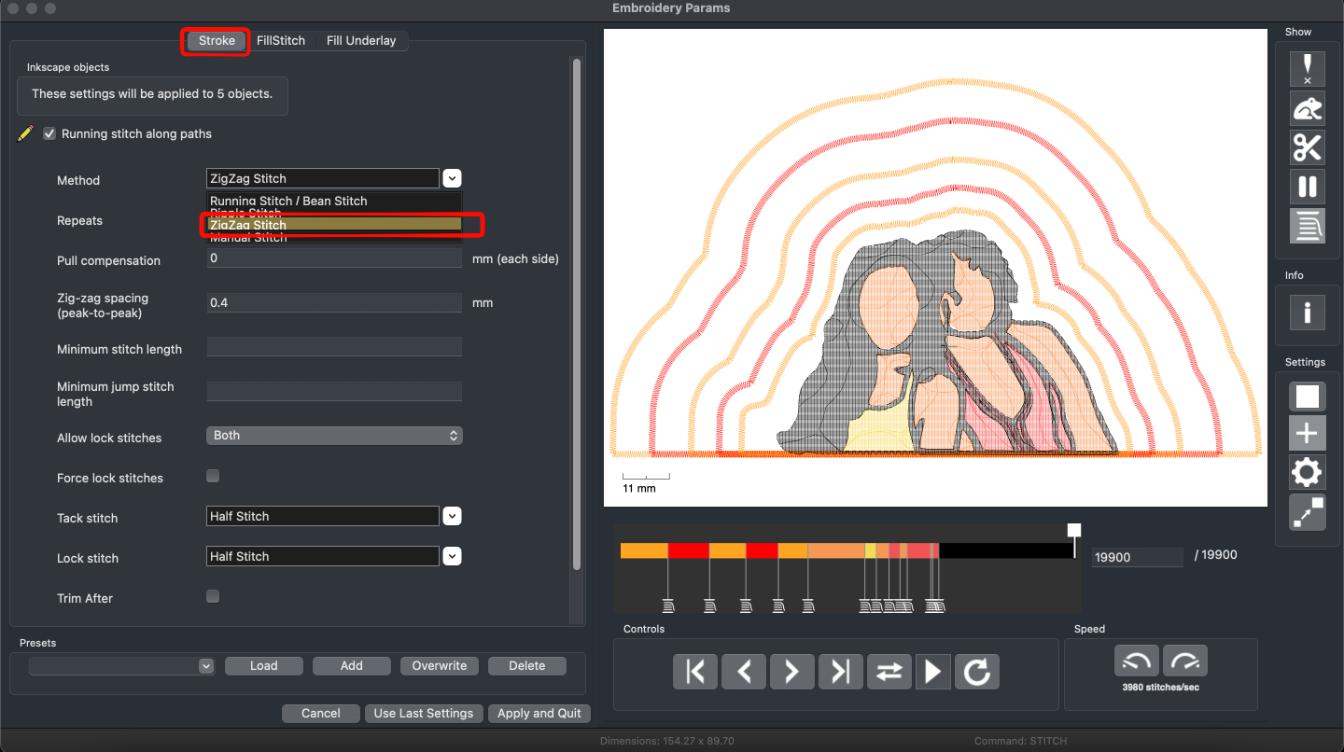
 An interface will pop up showing how the machine is going to stitch your design. You can change the settings as per your interests.
Here i have only changed the method in which it stitches and infill type :
An interface will pop up showing how the machine is going to stitch your design. You can change the settings as per your interests.
Here i have only changed the method in which it stitches and infill type :
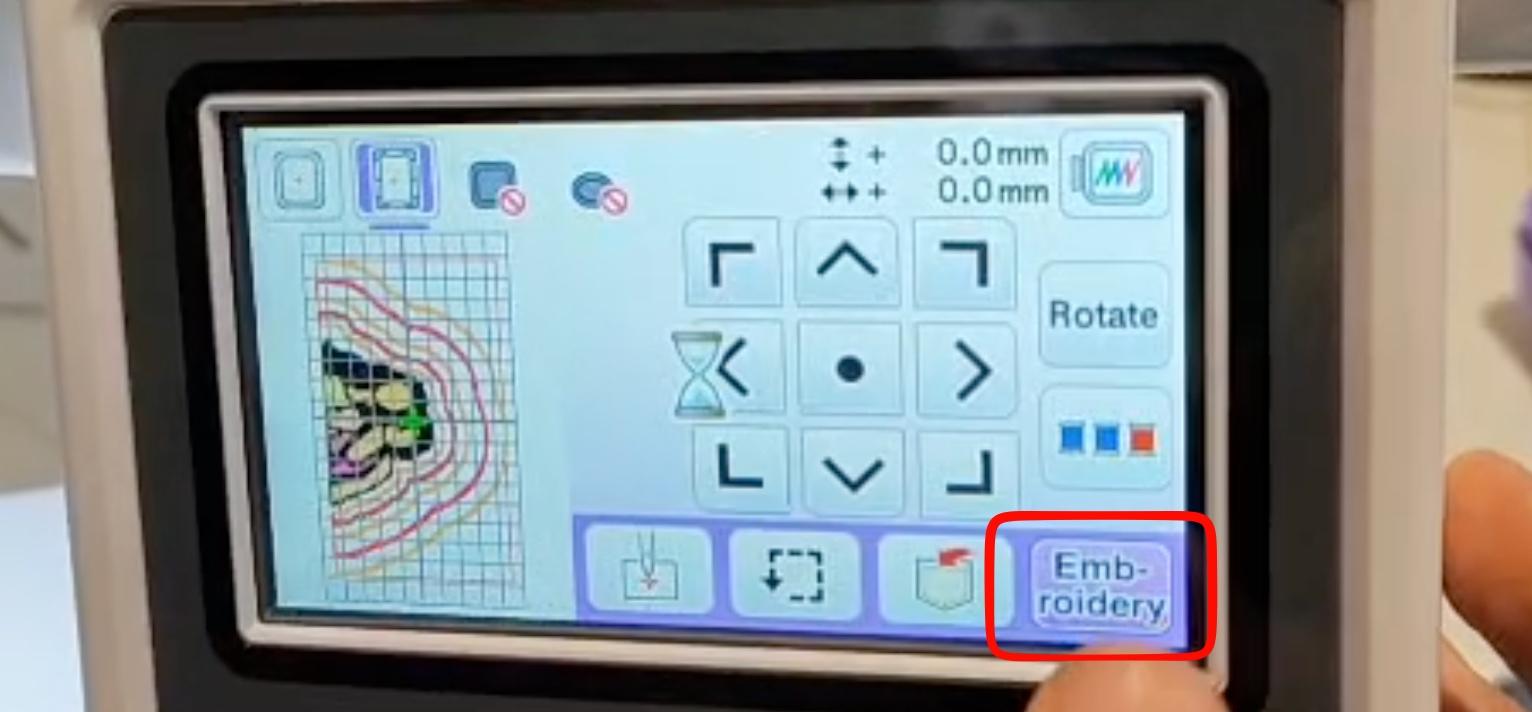
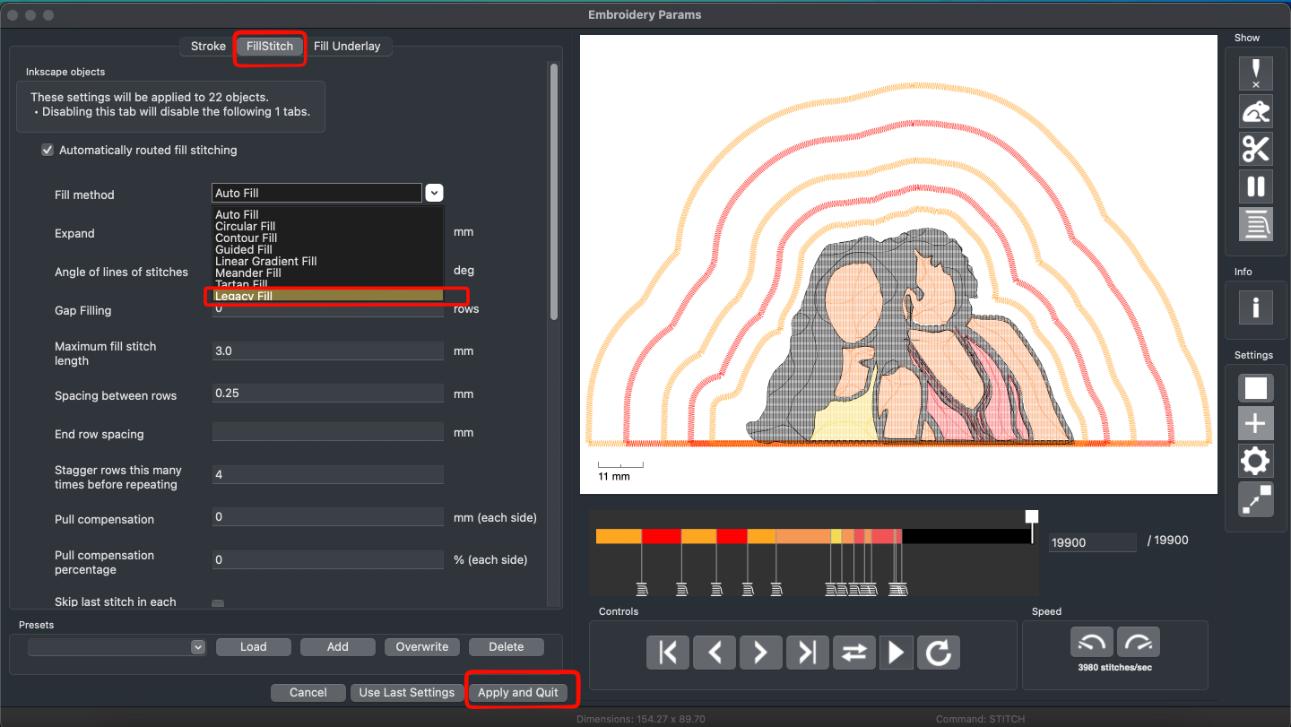 Overview of how the stitch works:
After all this is set you can export the file in PES format.
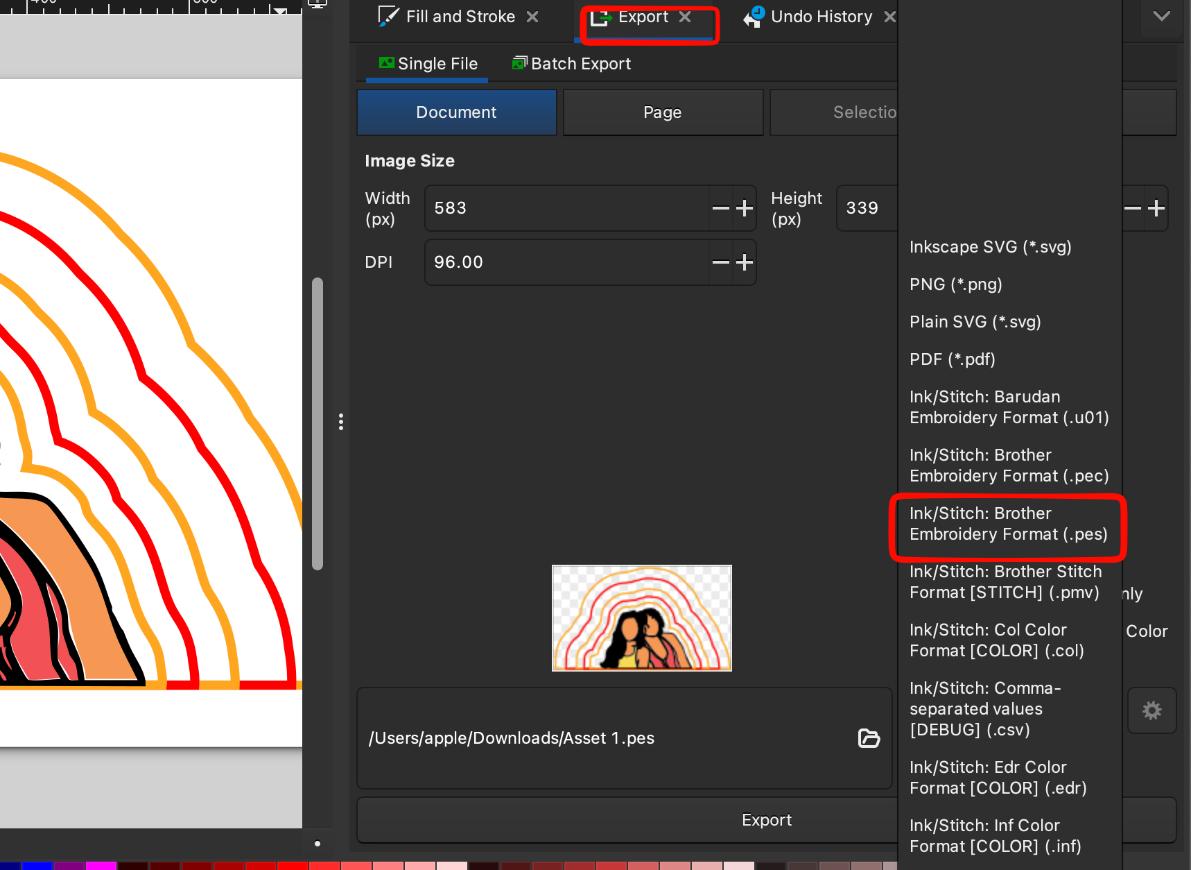 Afterwards you send it to the embroidery machine through an application.
 Prepping the material and machine for the Stitch
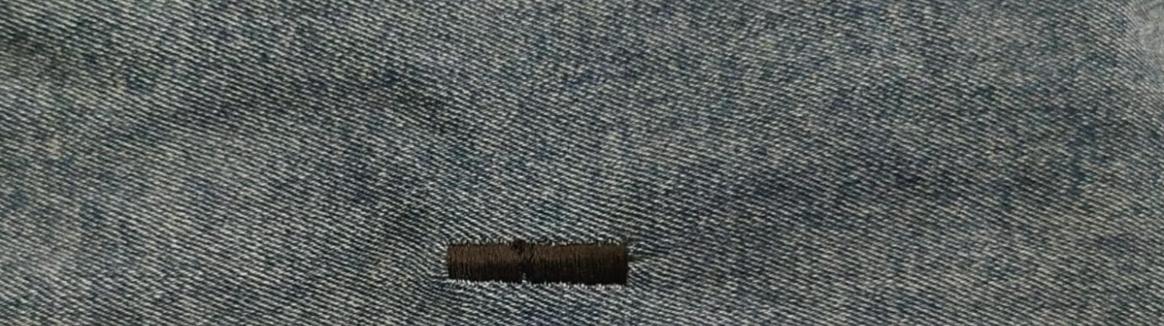
I tried stitching on Denim, which had not yet been done on the machine. Started by cutting up an old jeans of mine. Placed it in the embroidery frame:
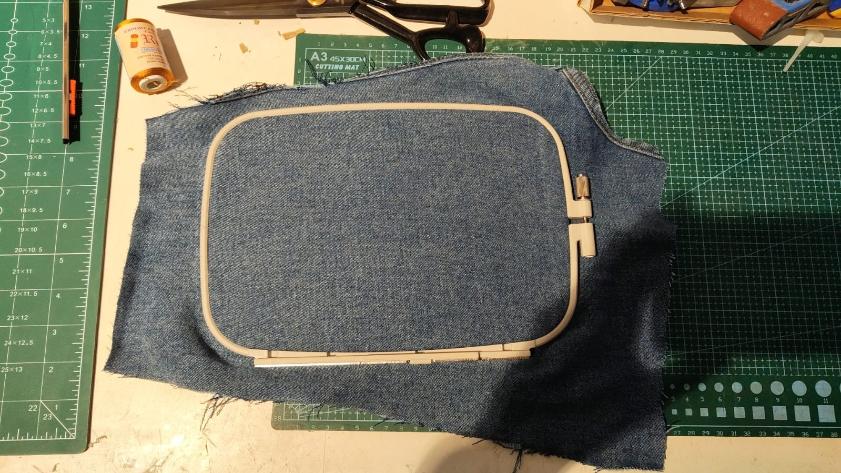 One thing to keep in mind while doing that is :
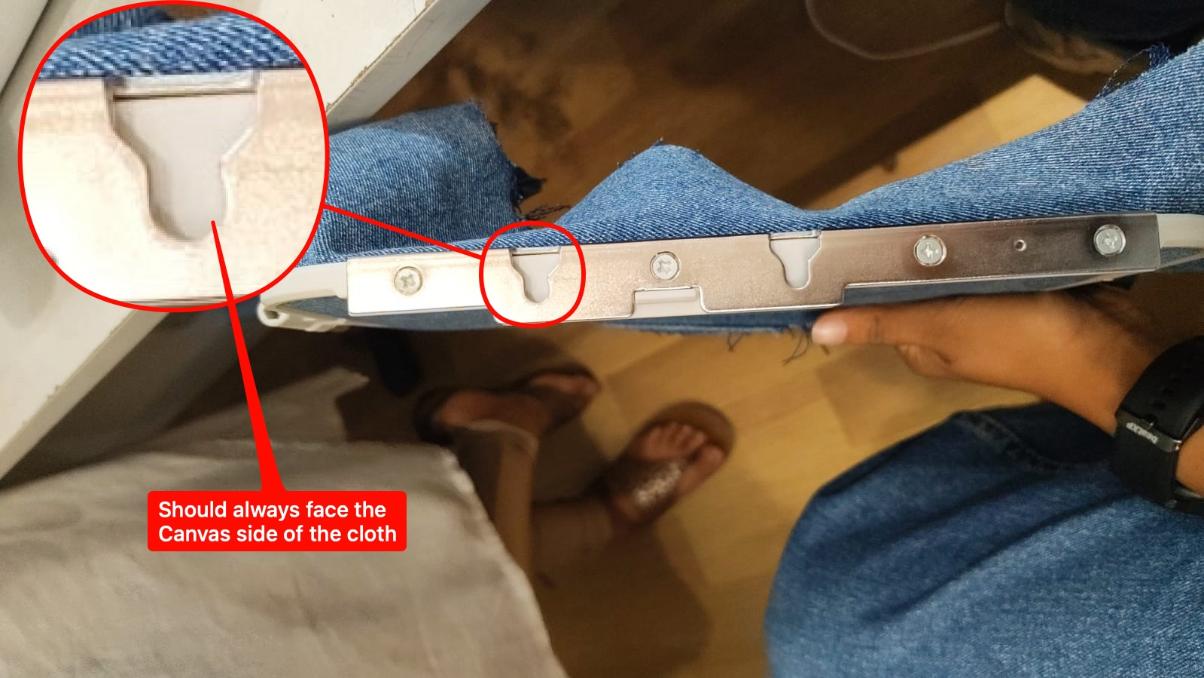 Then we attach it to the baseplate of the machine:
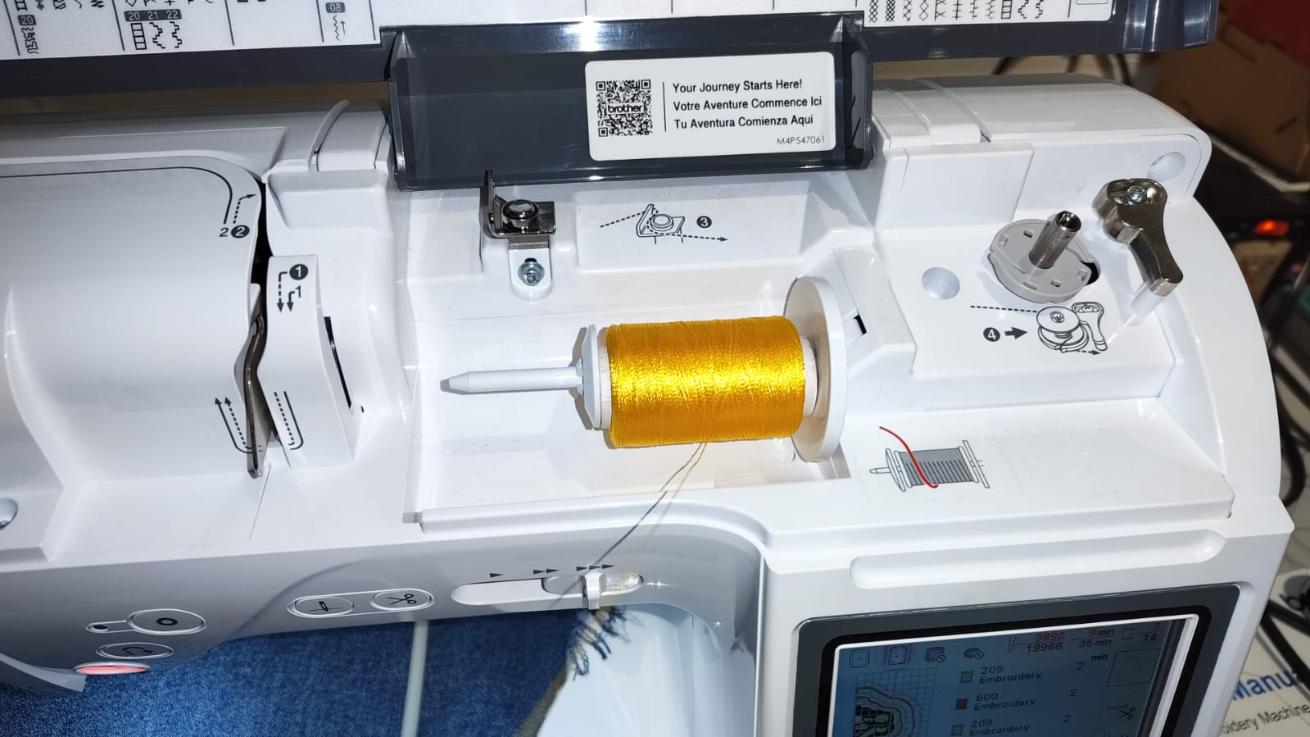
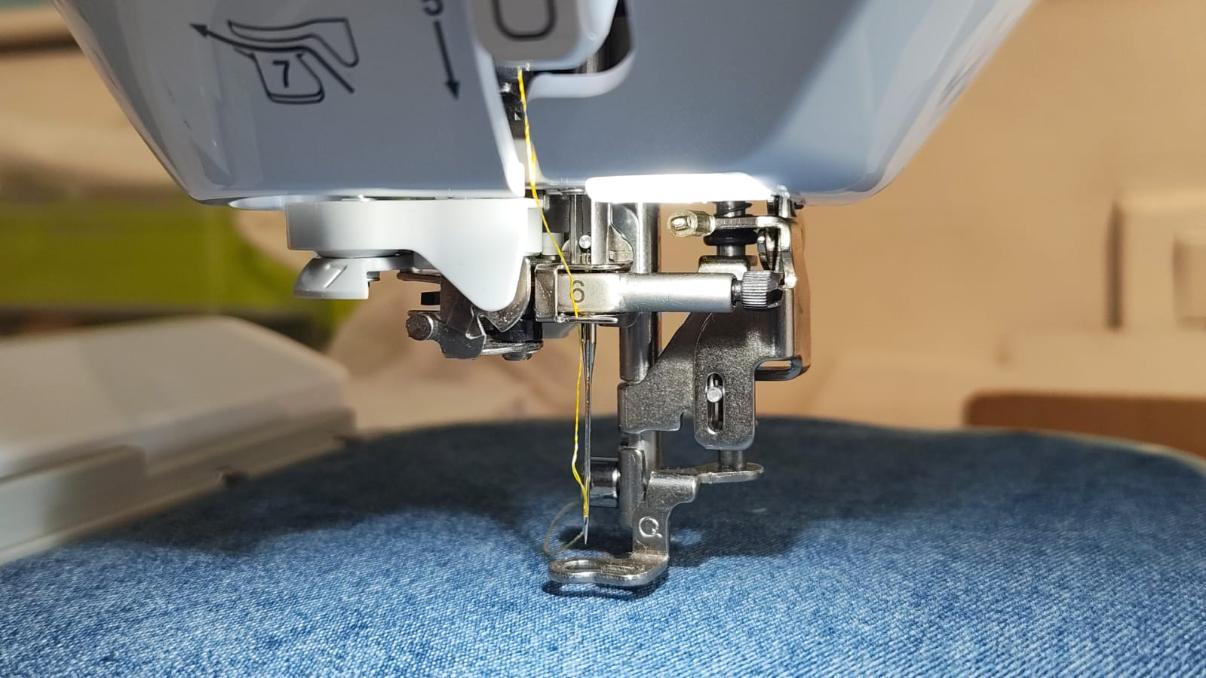
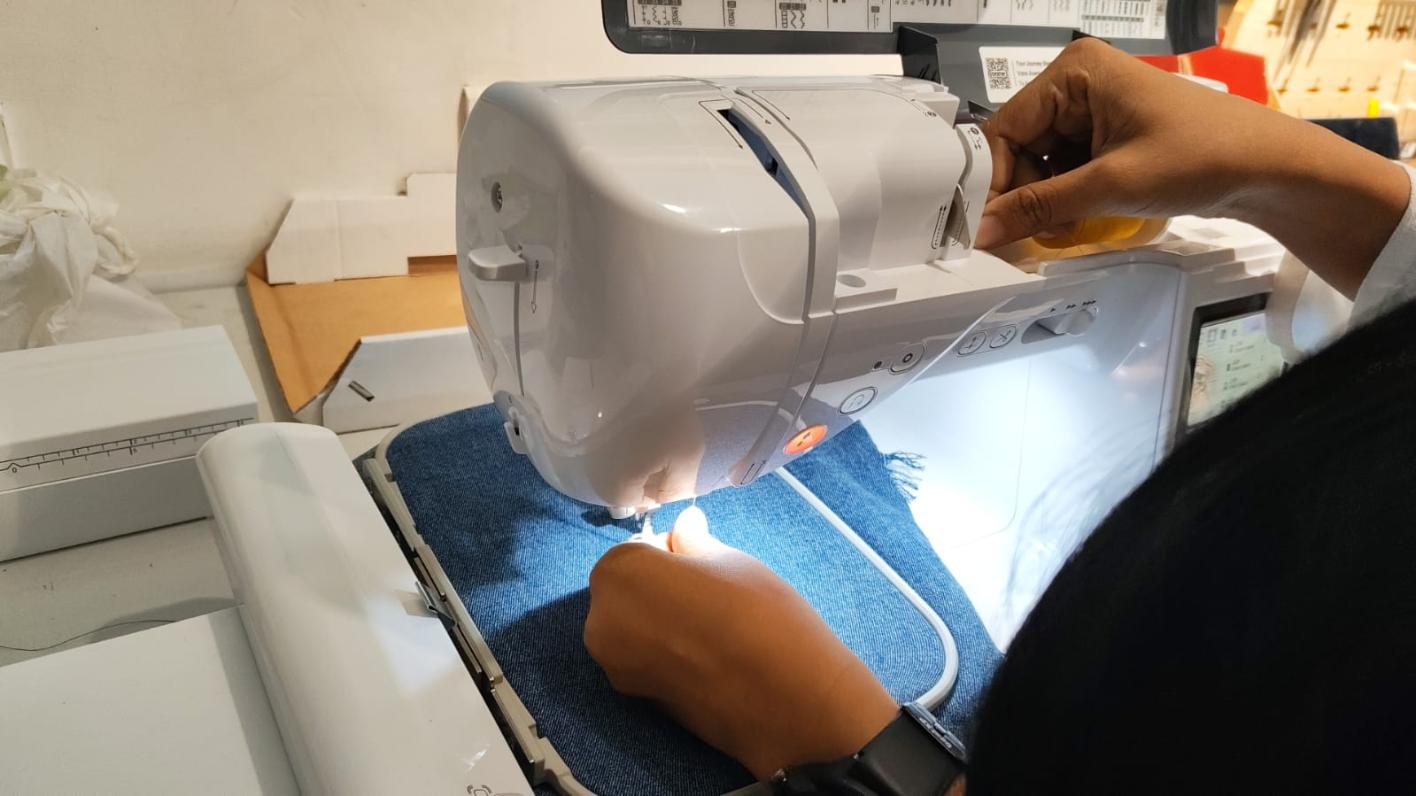 After this you put in the embroidery thread into the machine, follow the image :
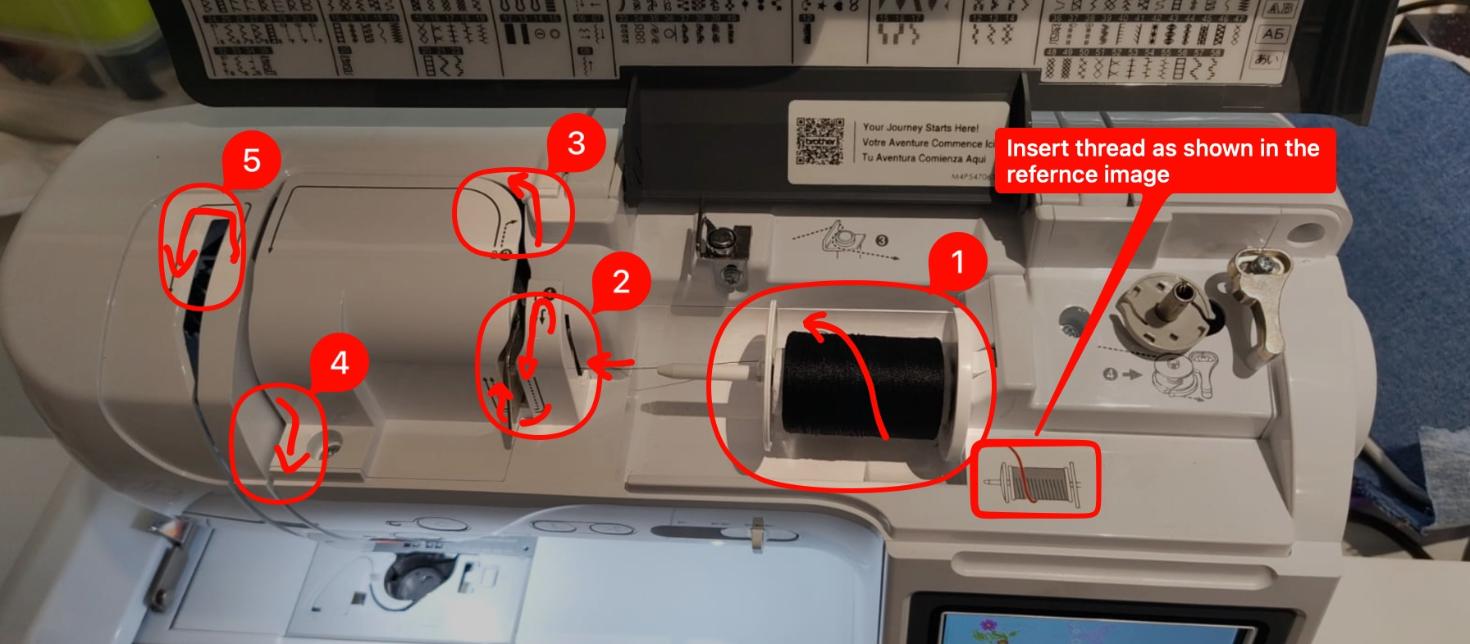 Also the body of the machine has instructions written over it, so there's no way you can go wrong.


Test Runs
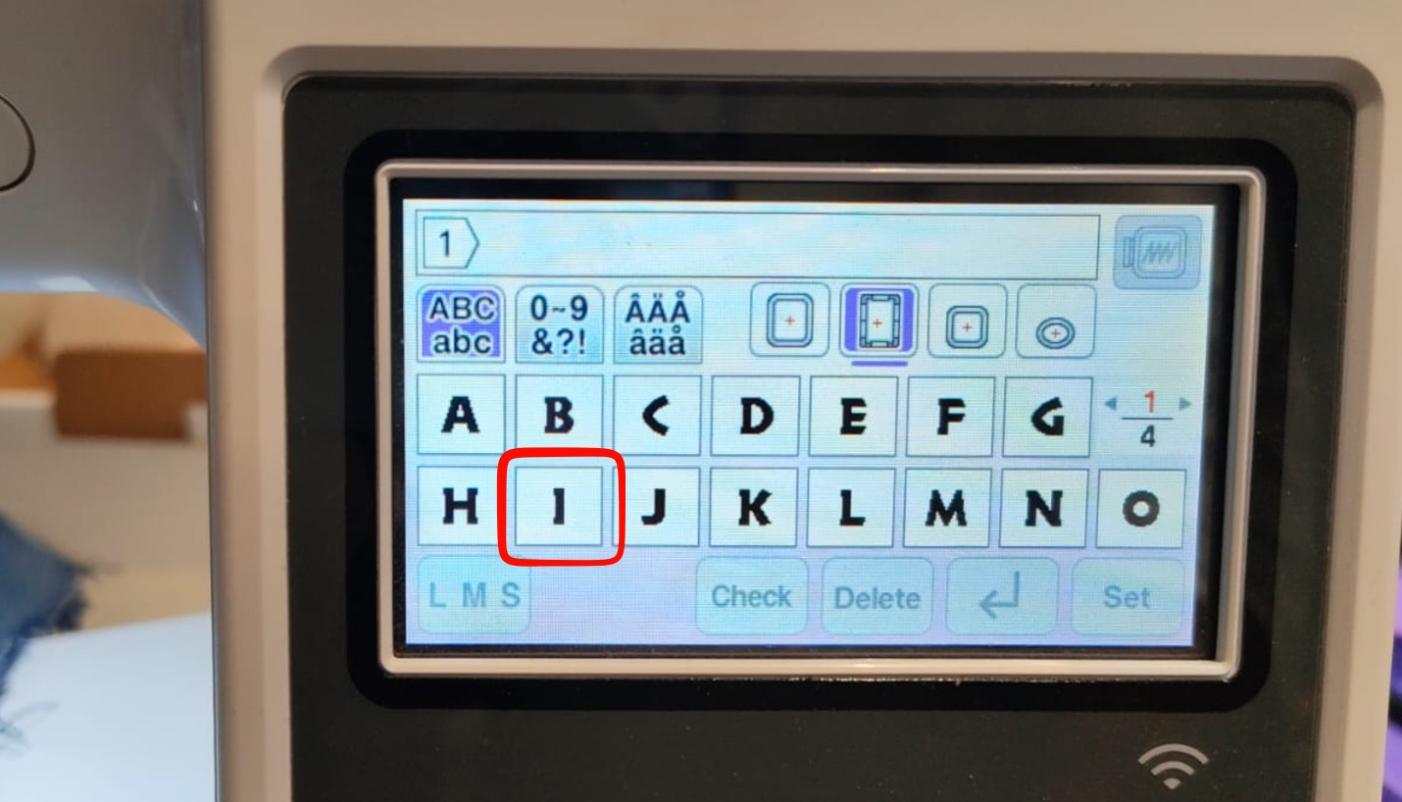
Next i did a test run to see how the machine works and to check if the settings are correct, for that i selected an alphabet from the built in designs and tried stitching it on a piece of fabric.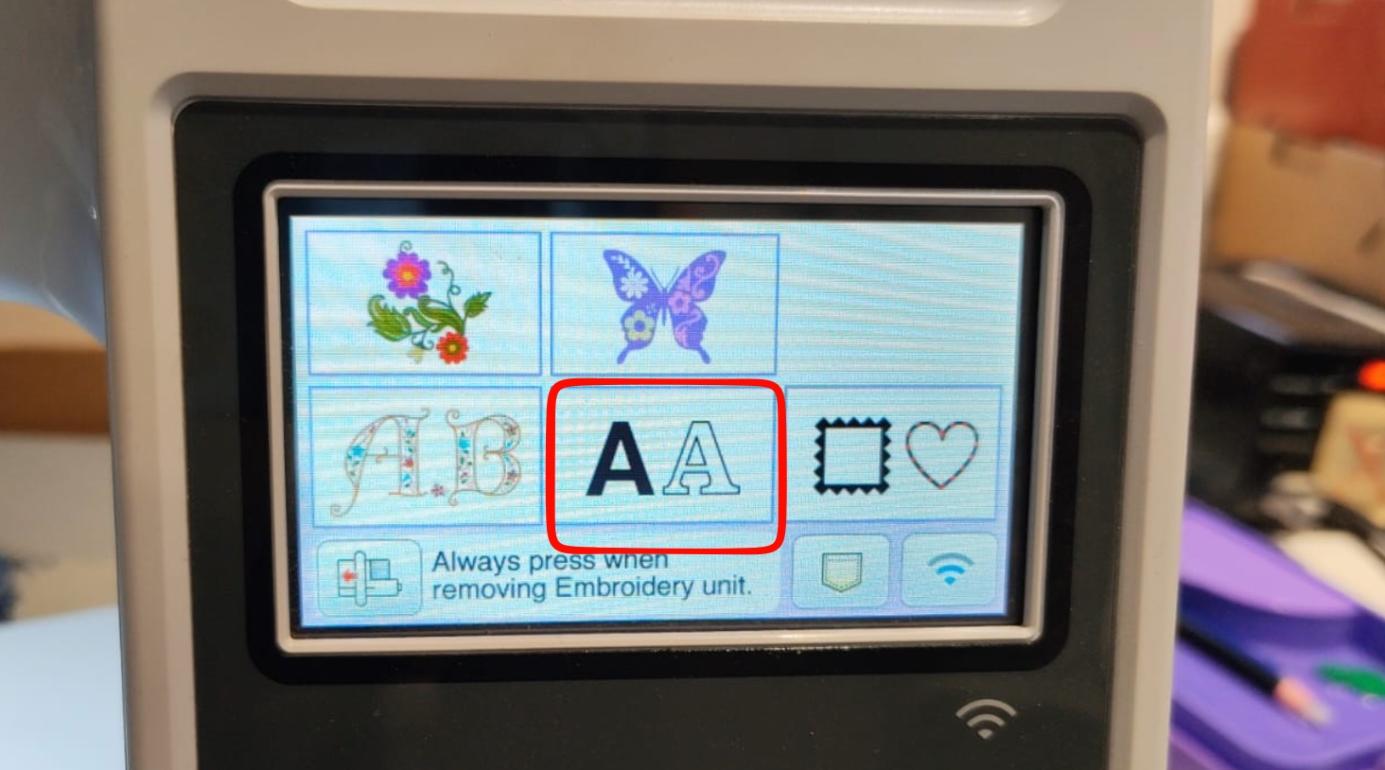
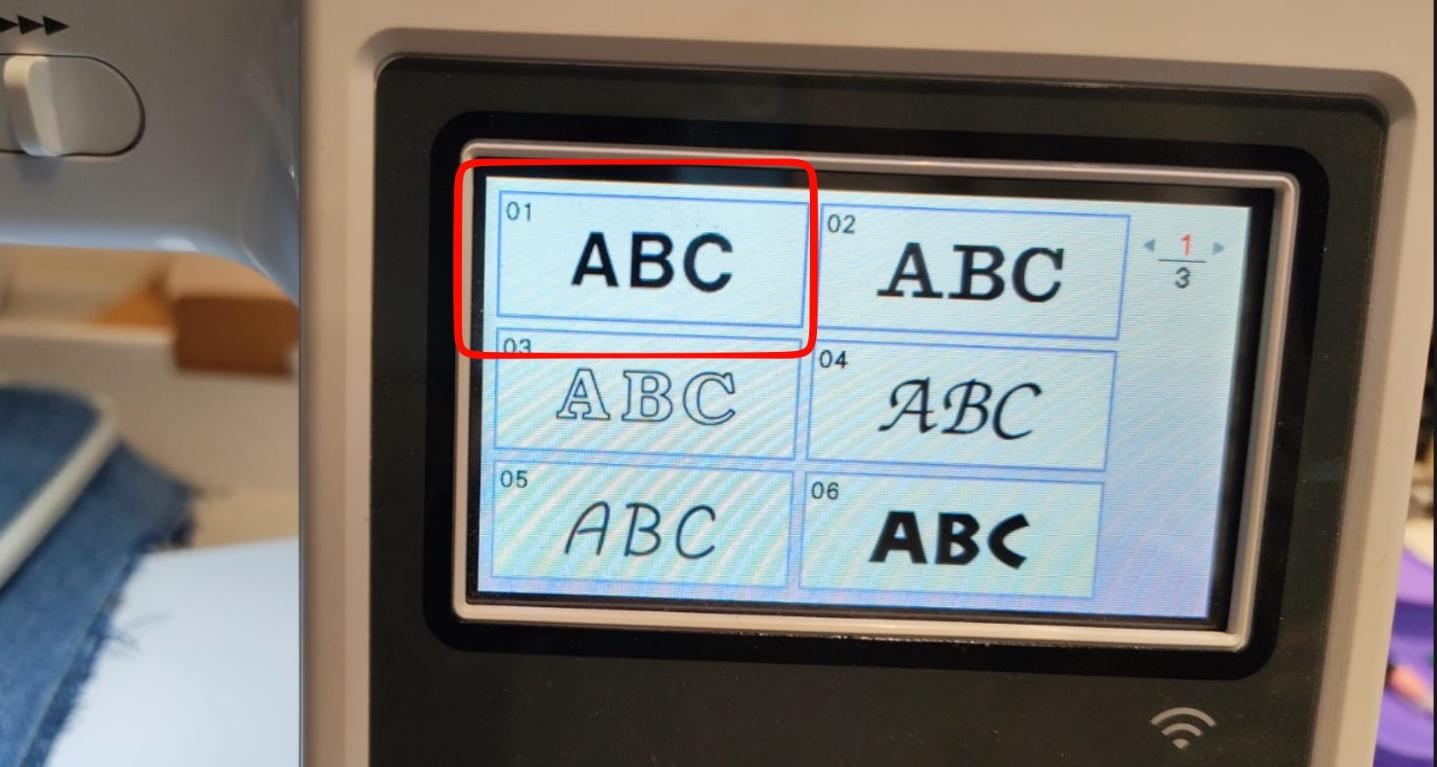 Here, i chose the letter "I"
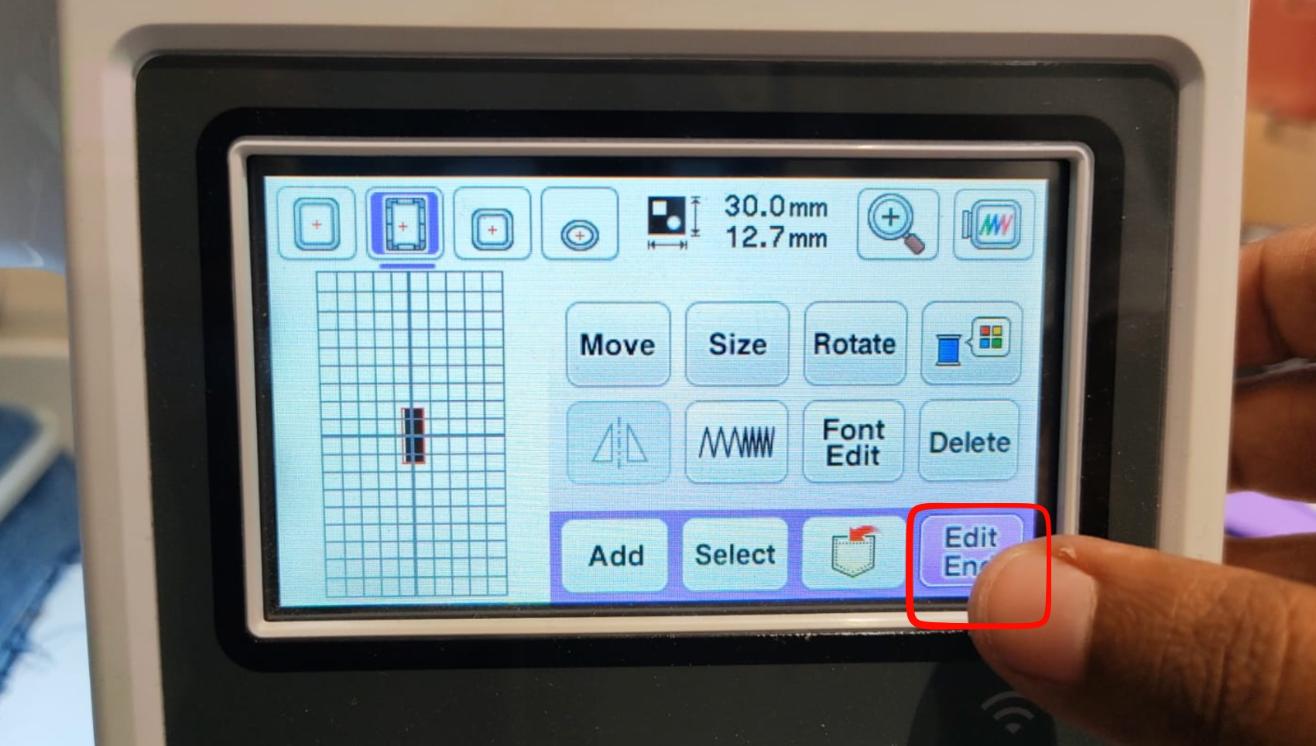 I moved the needle to the end of the fabric and started stitching from there.
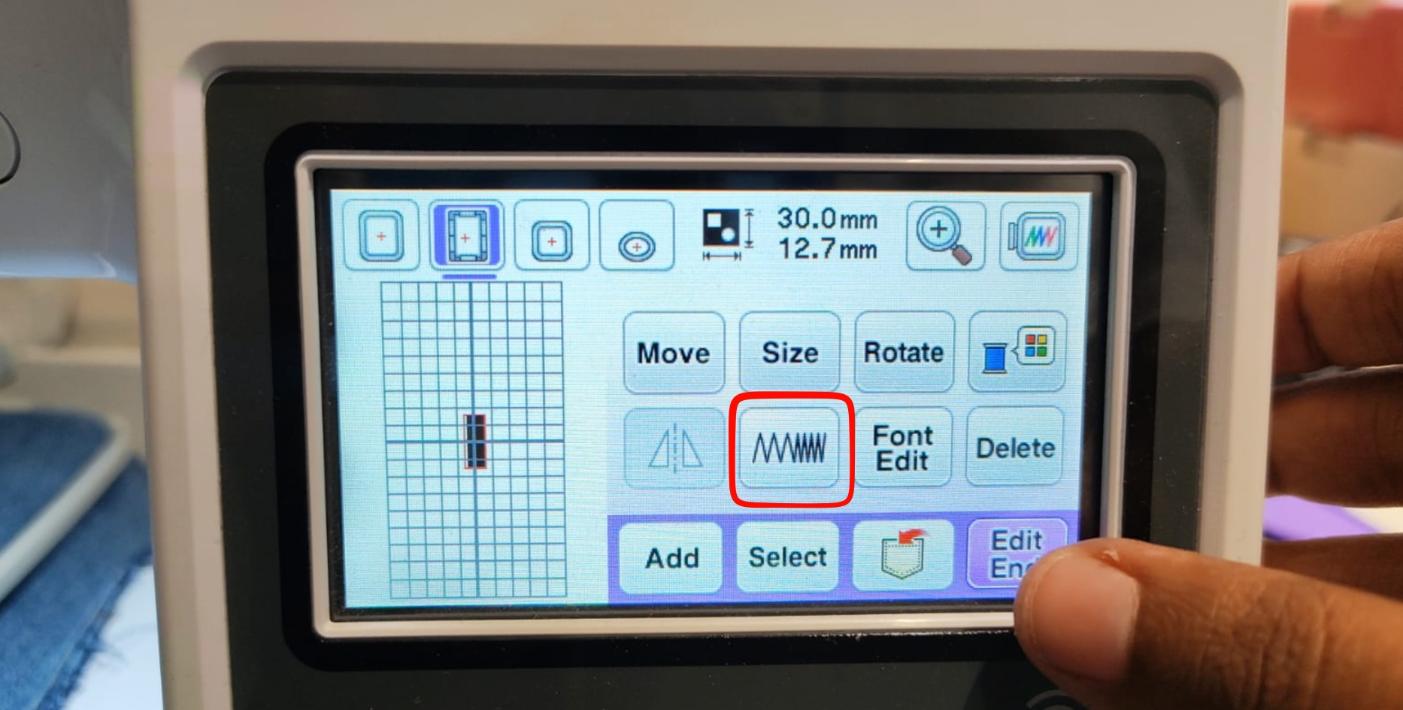
Next we can adjust the tension of the thread to make the stitches tighter or looser, here i have made it a bit loose to give it a more "sketchy" look.
Prepping the Main File
Then after the test i send my PES file to the machine through their app Artspera, you can install it through Play Store.Then open the app and follow the instructions given in the images:
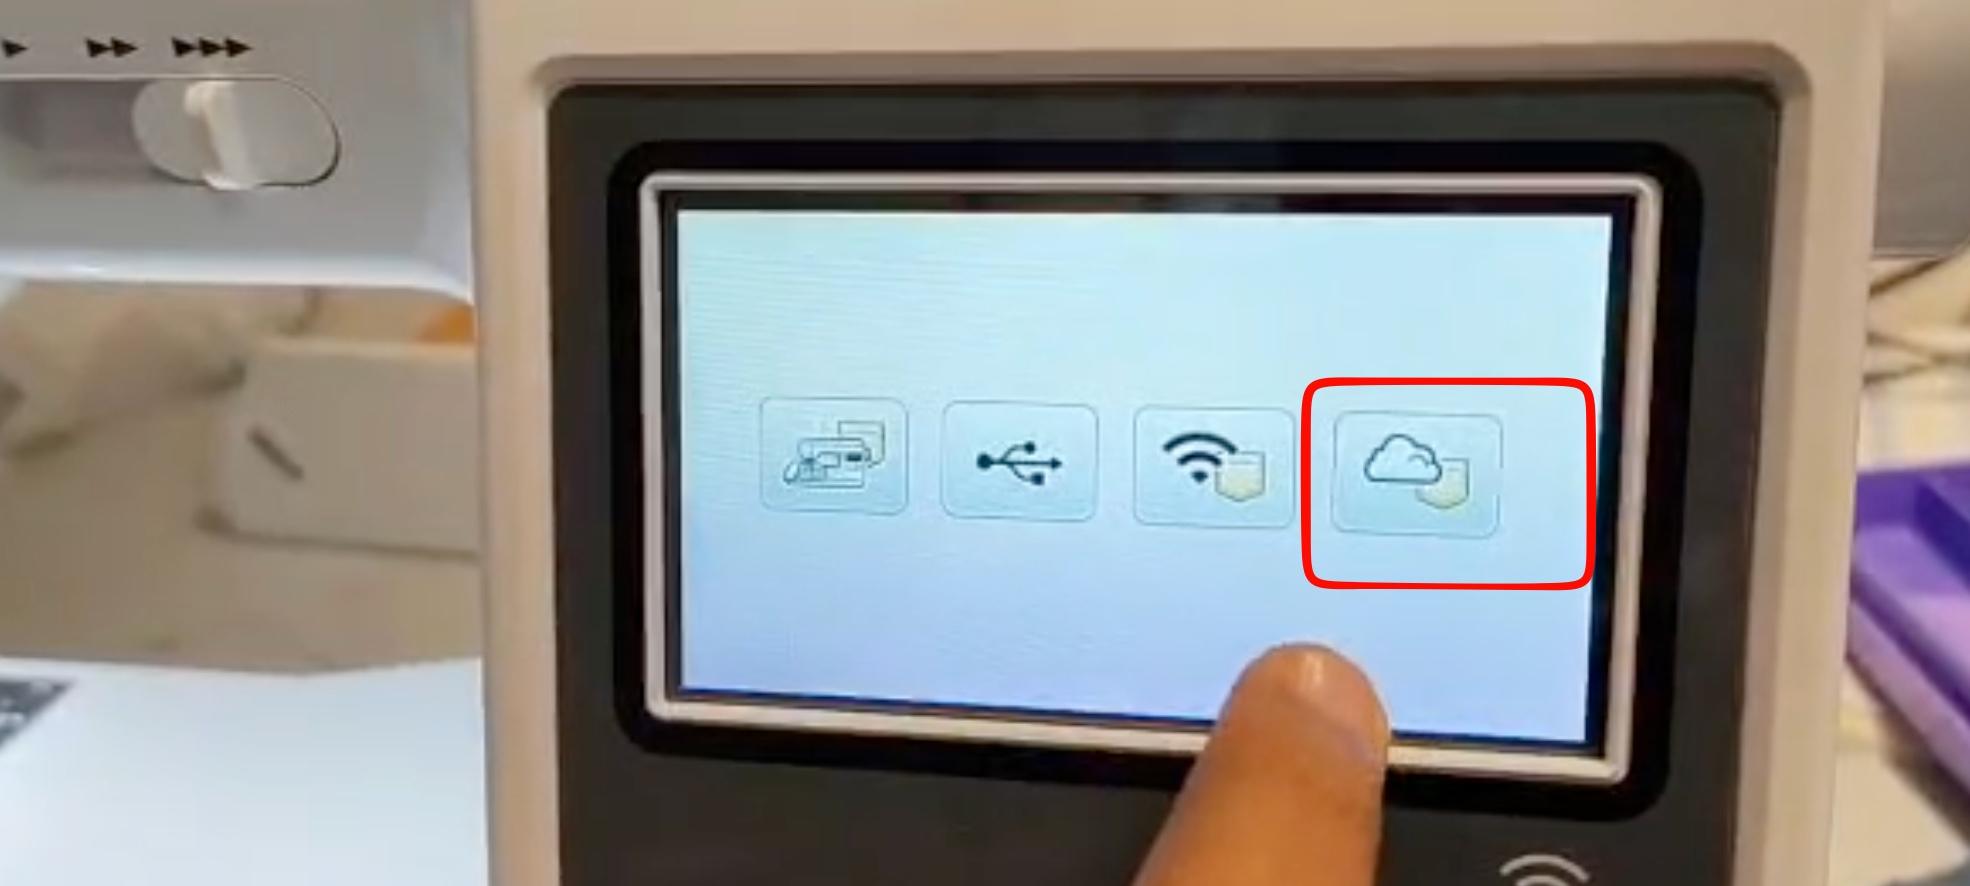
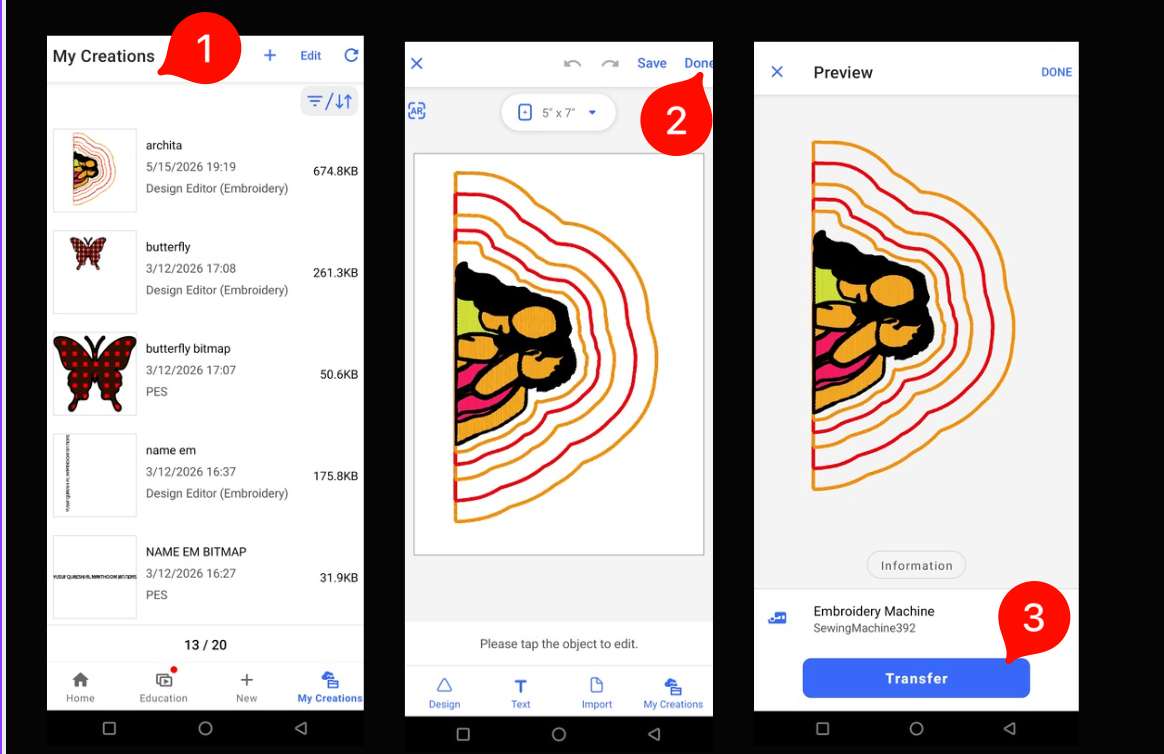 Then onthe Display you select:
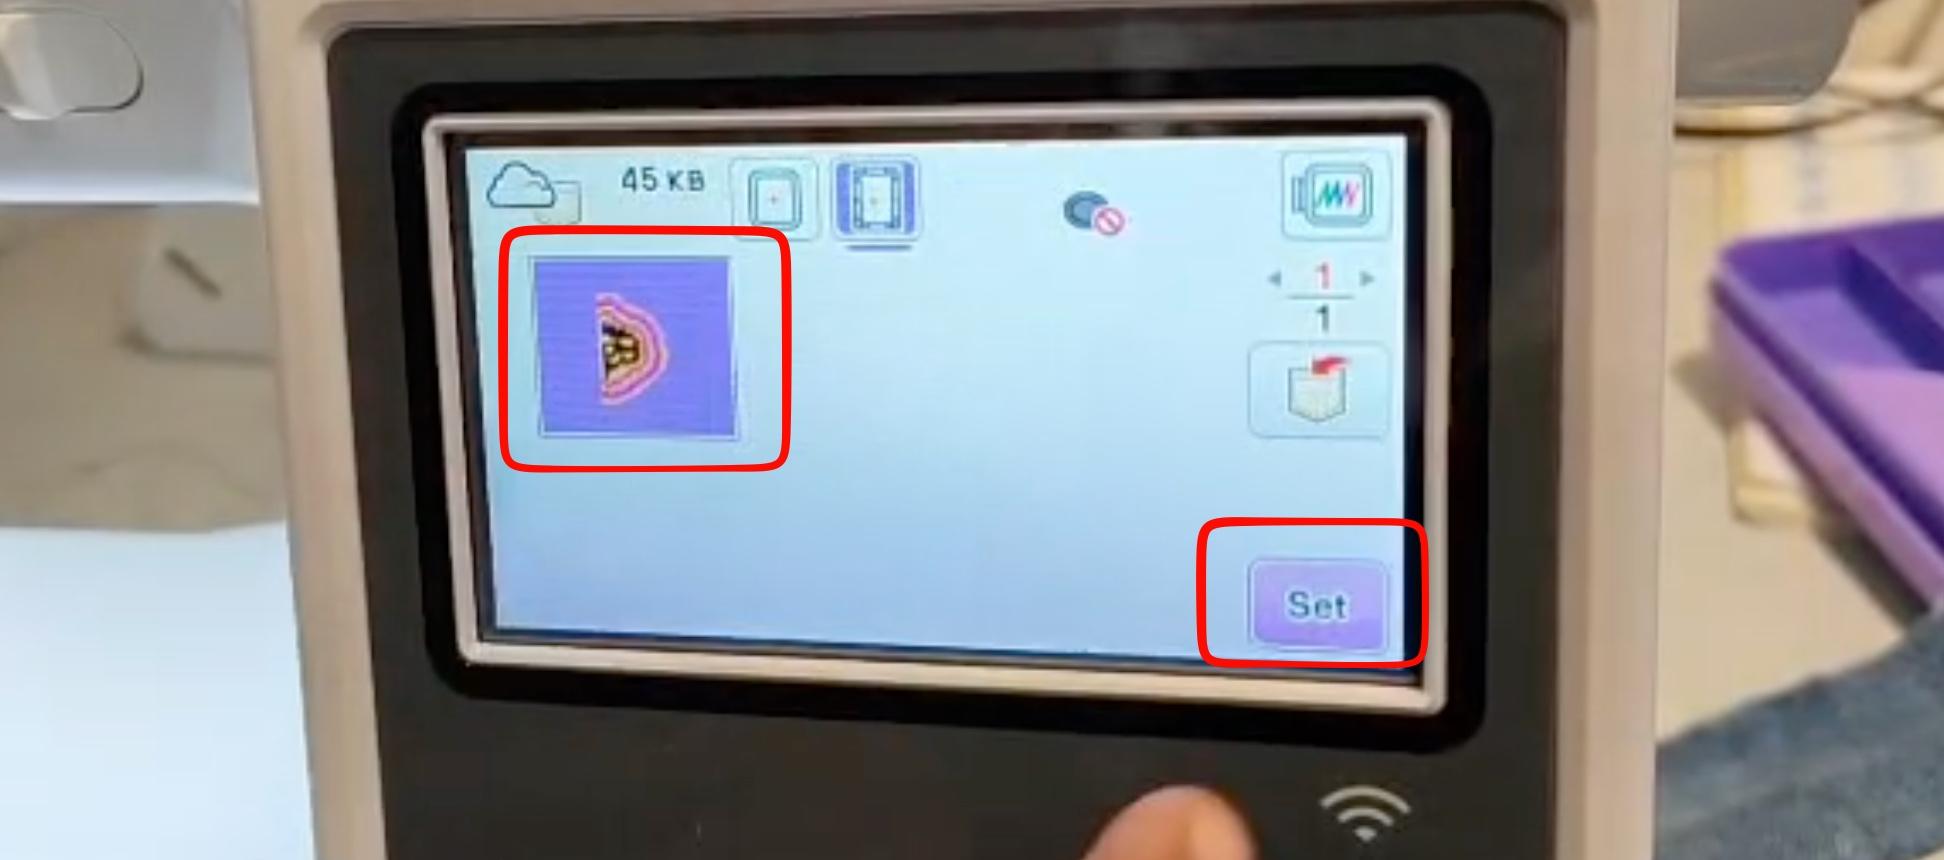
 From the above image you can see that the first thread to be loaded is the yellow thread, all threads used in this documentation were purchased locally.
Embroidery
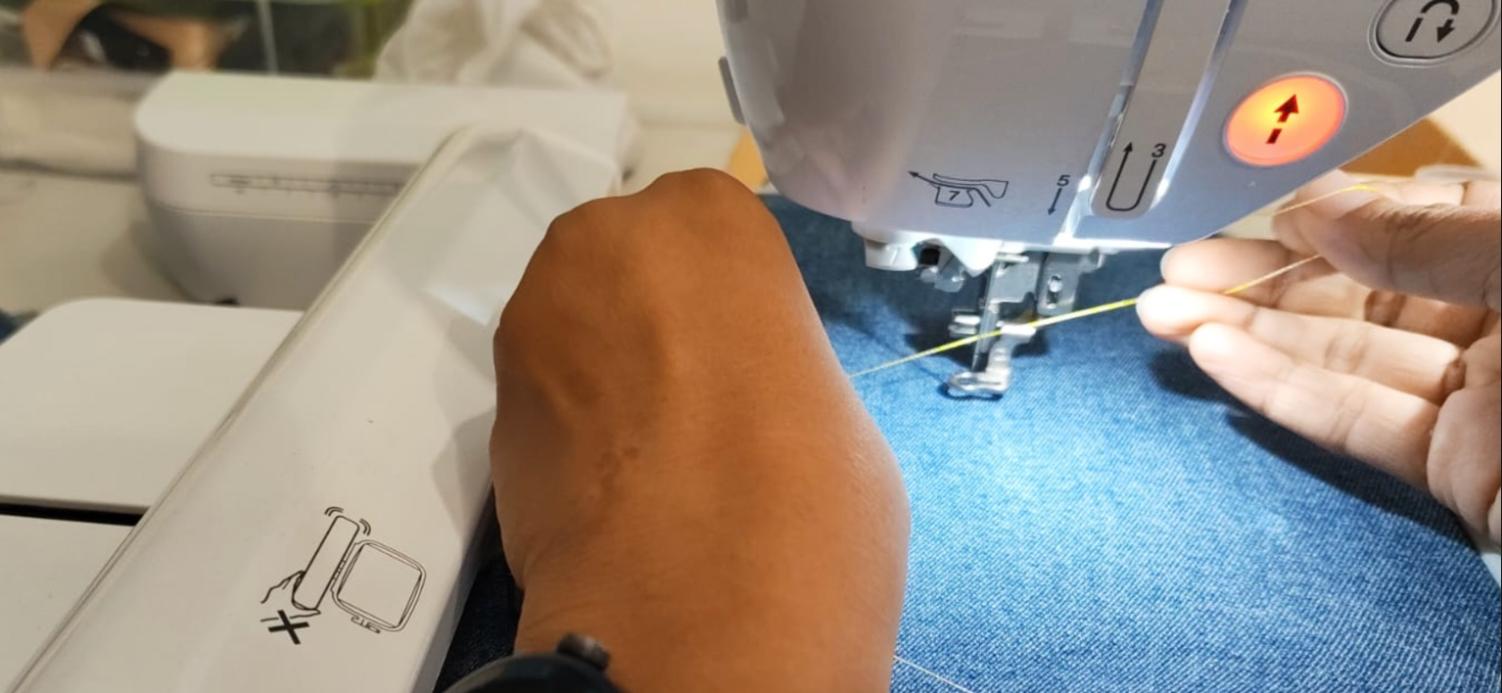
 We load the thread as given in the top of the documentation.
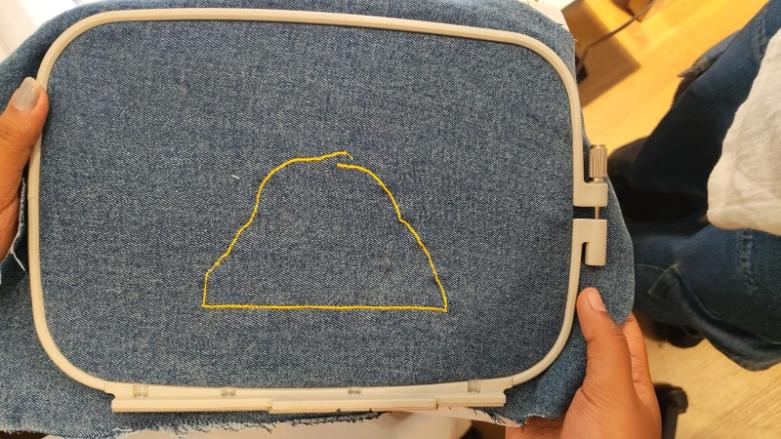
Here, you can see that the outline has been offseted as the stitch goes, this is because the denim i chose had a bit of elasticity and hence the fabric stretched as the stitching happened
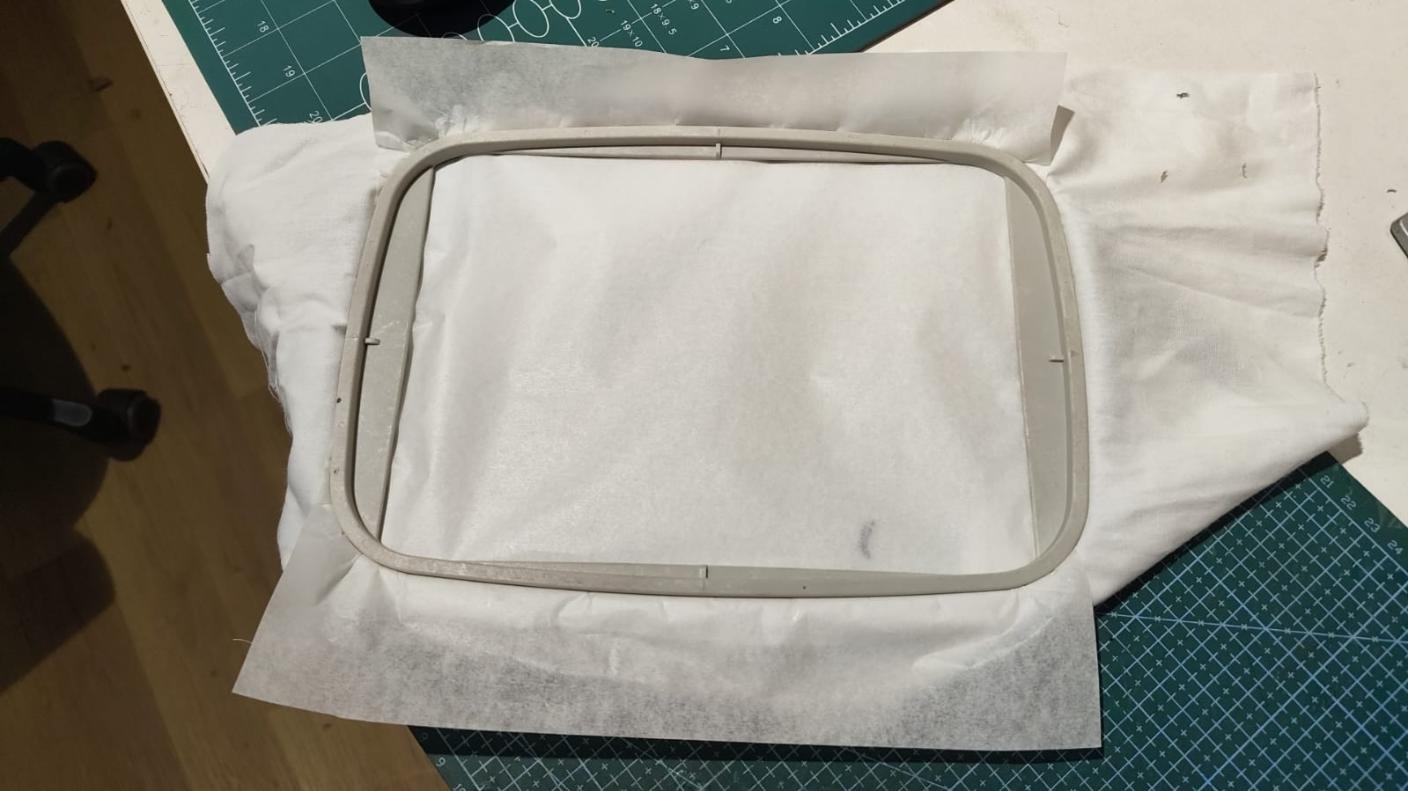 Next i did it in cotton cloth instead and also put a butter paper underneath to keep the cloth tight.
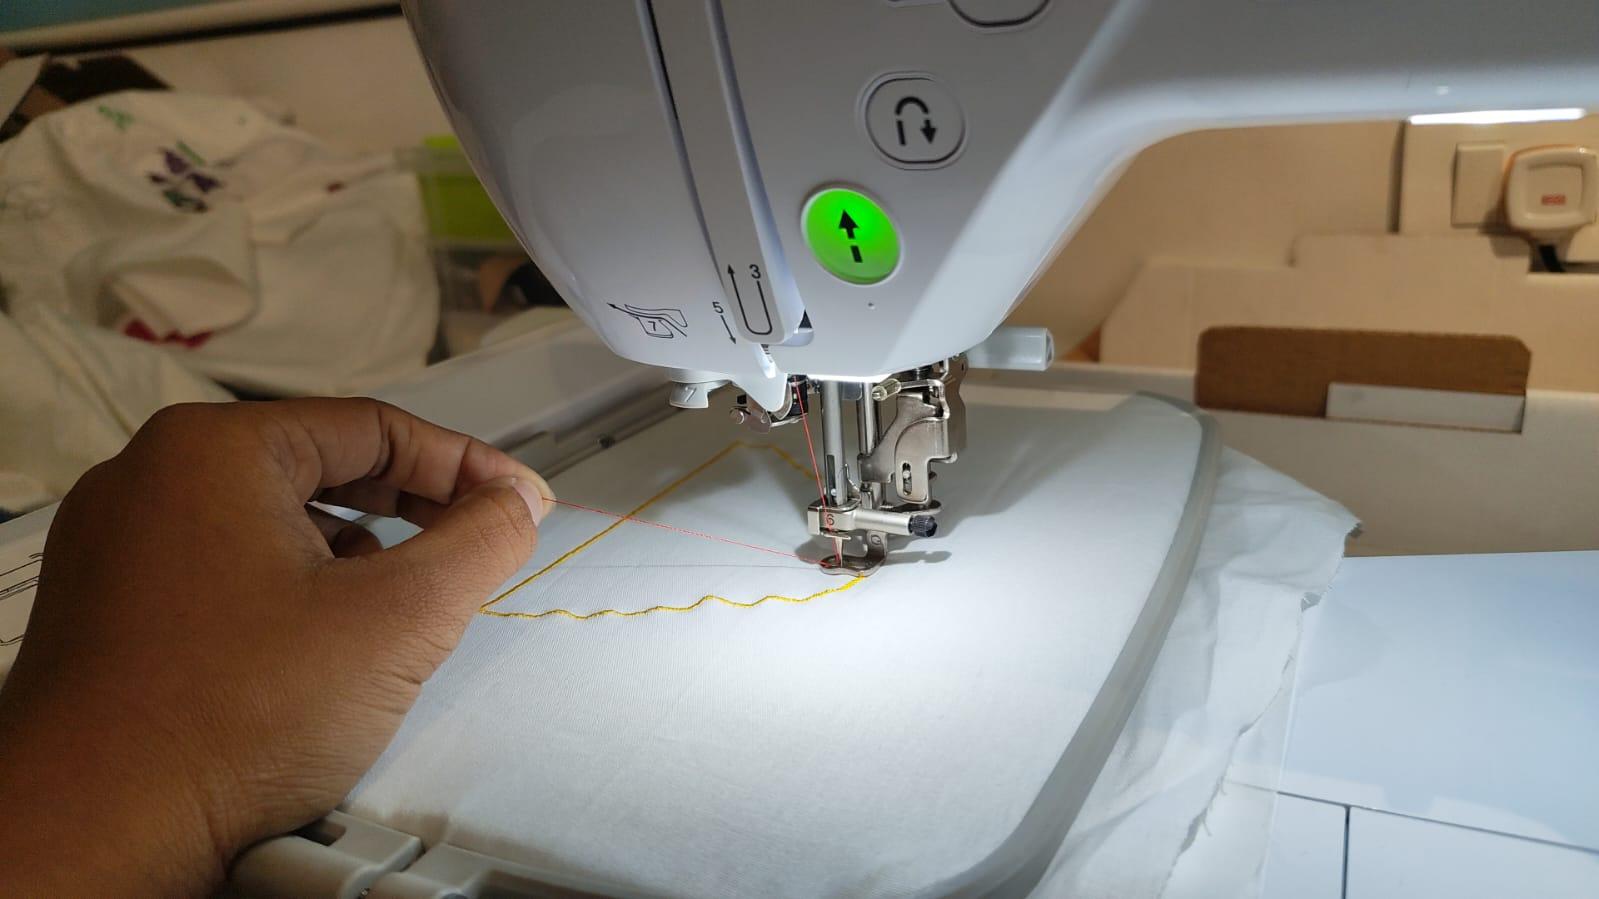
 Here you can see that the thread has been broke or it has cone loose, this happened often, and was the biggest drawback of the machine.

 On the cotton cloth it was coming out beautifully.

The final out:
Engraving using XTool S1
 I wanted to try out engraving on jeans using the xXTool S1 , so i cut out a piece of the jeans and put it in the laser cutter and decided to do a Starry Night engraving on it.
I took an image from Pinterest and pasted it to Inkscape and then traced it to get the vector file. Then I exported the file to the xTool software and set the parameters for engraving on denim.

Prepping the File and Setting up the Xtool
Then I exported the file to the xTool software and set the parameters for engraving on denim.
 Then i taped the jeans to the bed of the laser cutter.
 The first thing to do was autofocus the leaser:
  Also always remember to make sure the tool is on top of the material while you're doing the autofocus, otherwise it will hit the bed of the machine and damage it.
Next i set the area for engraving the design:

 Here i clicked on rectangle.
 Now you have to manually move the tool and set the dimentions of the area, here i have set the vertically opposite sides as the limits:


 Next you select the material and the parameters will automatically be set, but you can change them as per your requirements.
Testing different Settings
Now before starting the process test the engraving , for that i drew a rectangle on the xtool and tried out the settings:

 Then we started engraving the test settings:
And again tried a different setting to see which was better :
 The following are the test results:
 I liked the middle result more which was the light blue jeans settings and decided to use the same for out final engraving. Then we started the engraving process:
Engraving Starry Nights

The following is the final out:
 Then i decided to make a Frame for it so i laser cutter a piece of acrylic:

Laser Cutting the Acrylic Frame
I laser cut a blue acrylic sheet and a transparent oneThen i glued them together
 Hero Shot:

Pouring Resin
Then i decided to pour resin on it to make it more durable and give it a glossy finish. I mixed the resin and hardener in a 1:1 ratio and poured it over the engraving. and it just did not work out the way i expected it to, it just made the engraving look dull.
Final look

Conclusion
Wildcard week was a nice change of pace, instead of electronics I got to play with two machines I'd never touched before.
The embroidery taught me that the fabric matters as much as the design. Denim seemed like a fun challenge since no one had tried it on the machine yet, but its stretch threw off my outlines as it stitched, and the thread kept breaking that was easily the most frustrating part, the more layers you stitch the faster the thread breaks.
The laser engraving on jeans was the part I was the most happy with. Doing test swatches before committing
paid off comparing the settings side by side let me pick the one that actually looked best instead of
guessing.
The acrylic frame tied it together nicely. The resin, though, was a good reminder that not
everything goes to plan, I expected it to add a glossy finish but it just dulled the engraving instead. I'd
test resin on a scrap piece first next time rather than pouring it straight onto the final.
Overall this week was a reminder that digital fabrication isn't only about the machine, the material, the prep, and a willingness to redo things when they go wrong matter just as much. I came away with a finished embroidered piece and a framed engraving, and a much better feel for two tools I'd happily use again.
Final Files
Download Files