Week 1. Project Management, Principle and Practices
Overview
Week 1 focused on two key areas:
- Principles and Practices – defining and sketching my final project idea
- Project Management – setting up tools for web design and version control
This week laid the foundation for documenting my work throughout Fab Academy.
Principles and Practices – defining and sketching my final project idea
Final Project Selection
Fab Academy Project Criteria
To select a suitable topic for the Fab Academy final project, the following core criteria must be met:
- The project must include at least one input and one output
- It should involve both hardware and a mechanical component
- Preference is given to projects with movement controlled by electronics
- The project should utilize multiple Fab Lab tools and machines during fabrication
- All designs, code, and documentation must be open source and shared with the community
Initial Project Ideas
Based on these guidelines, I proposed four project ideas to the instructors. After discussions and feedback, we shortlisted the most feasible and impactful concepts. Below are the key ideas I explored:
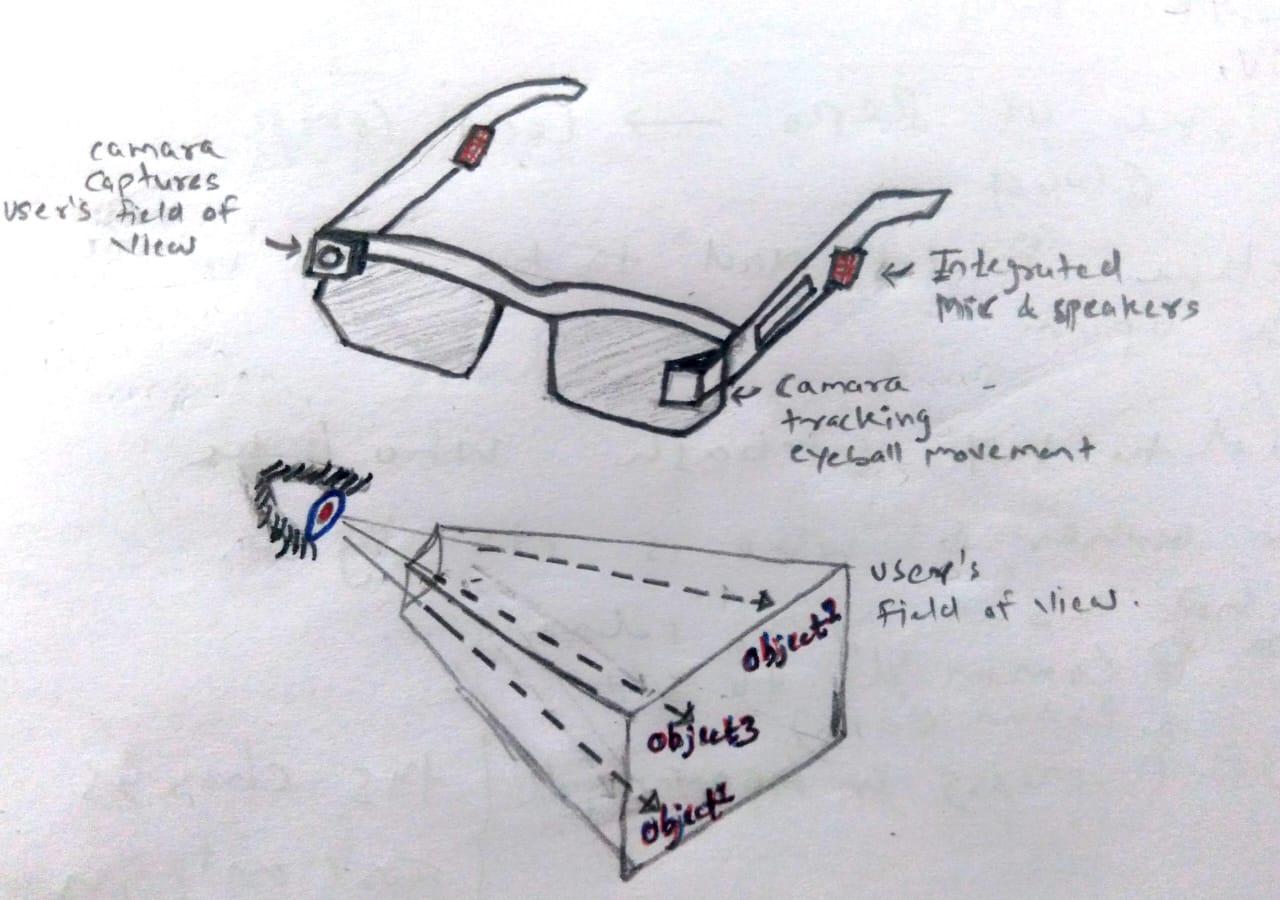
Smart Glasses for Gaze-Based Object Identification
This concept involves designing smart glasses equipped with two cameras:
- One camera facing the eye to track eyeball movement
- Another camera facing forward to capture the user’s field of view
By combining eye-tracking data with computer vision from the front camera, the system would identify, in real time, the object or direction the user is looking at. This concept explores human–computer interaction and wearable sensing.
“Follow-Me” Travel Bag / Robotic Vehicle
The idea is to build an autonomous follow-me travel bag or a small robotic vehicle that dynamically follows the user.
Key behaviors include:
- Smooth and agile movement
- Rapid speed increase when the user runs
- Immediate stopping and direction change when the user suddenly stops or turns
This project focuses on motion control, sensor fusion, and real-time responsiveness.
Vehicle-Based Road Pothole Detection System
This concept proposes a device mounted on a vehicle that:
- Detects road potholes based on sudden vertical acceleration (jerks) using an IMU
- Logs GPS coordinates (latitude and longitude)
- Sends data to the cloud to geo-tag potholes on a map
The collected data could help city authorities prioritize road maintenance and improve road safety.
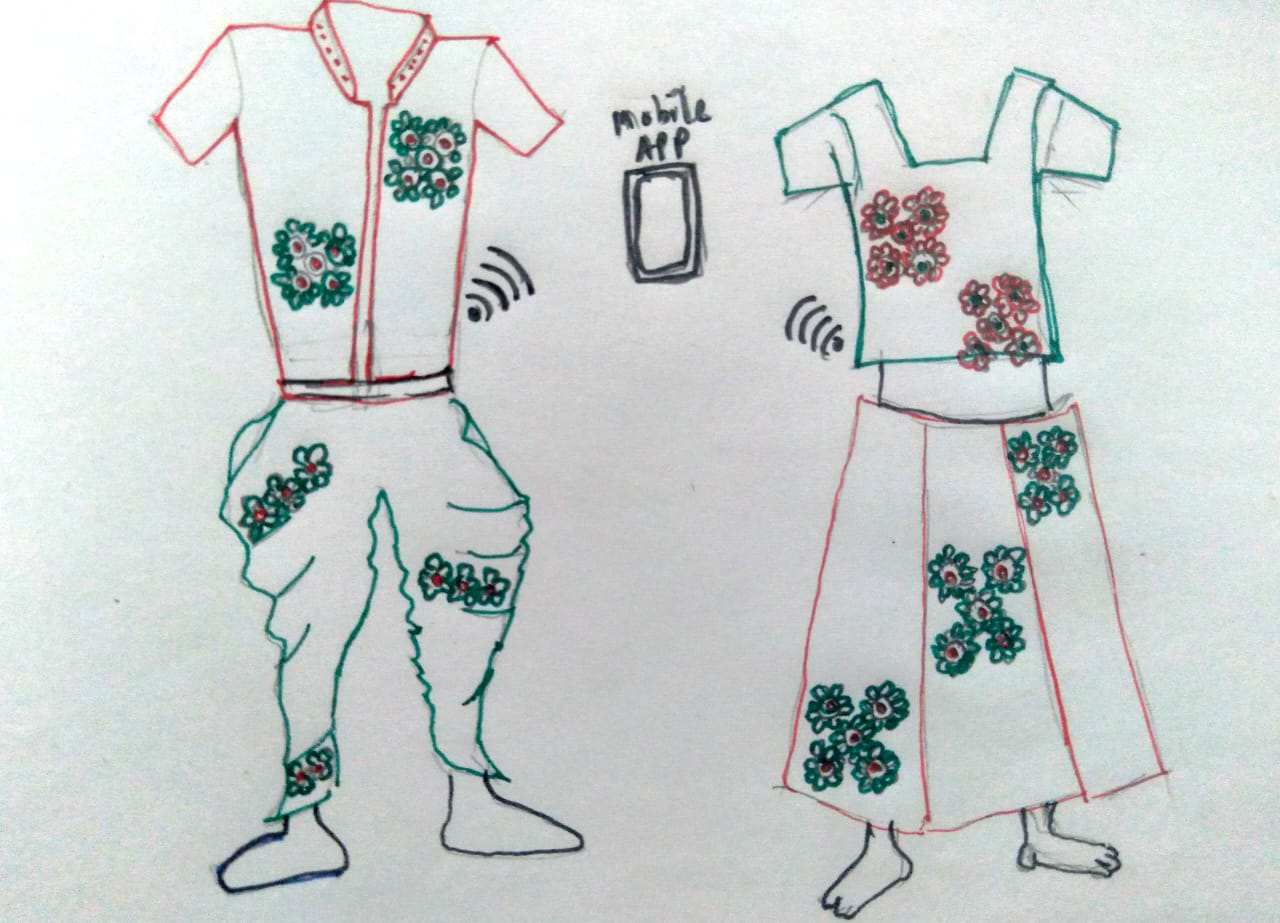
Computational Navratri Attire with NeoPixels
This project blends traditional Indian hand embroidery with modern electronics to create responsive, illuminated Garba attire.
Key elements include:
- Traditional Rabari, Kutchi, and Kashmiri embroidery
- Sewable NeoPixel RGB LEDs
- Microcontroller-based control
- Sensors for motion and sound
- Bluetooth connectivity for smartphone-based control
The attire responds dynamically to movement and music, creating a visually engaging and culturally rooted wearable technology.
Project Management – setting up tools for web design and version control
1. Setting Up the Development Environment
Visual Studio Code (VS Code)
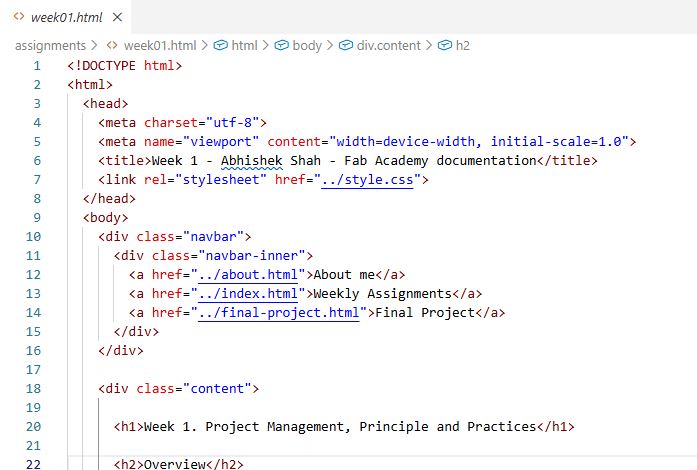
We began by installing Visual Studio Code, which will be my primary code editor for creating and maintaining HTML and CSS files for my personal Fab Academy website.
VS Code provides a lightweight yet powerful environment for web development. VS Code was already installed on my laptop. Installation guide
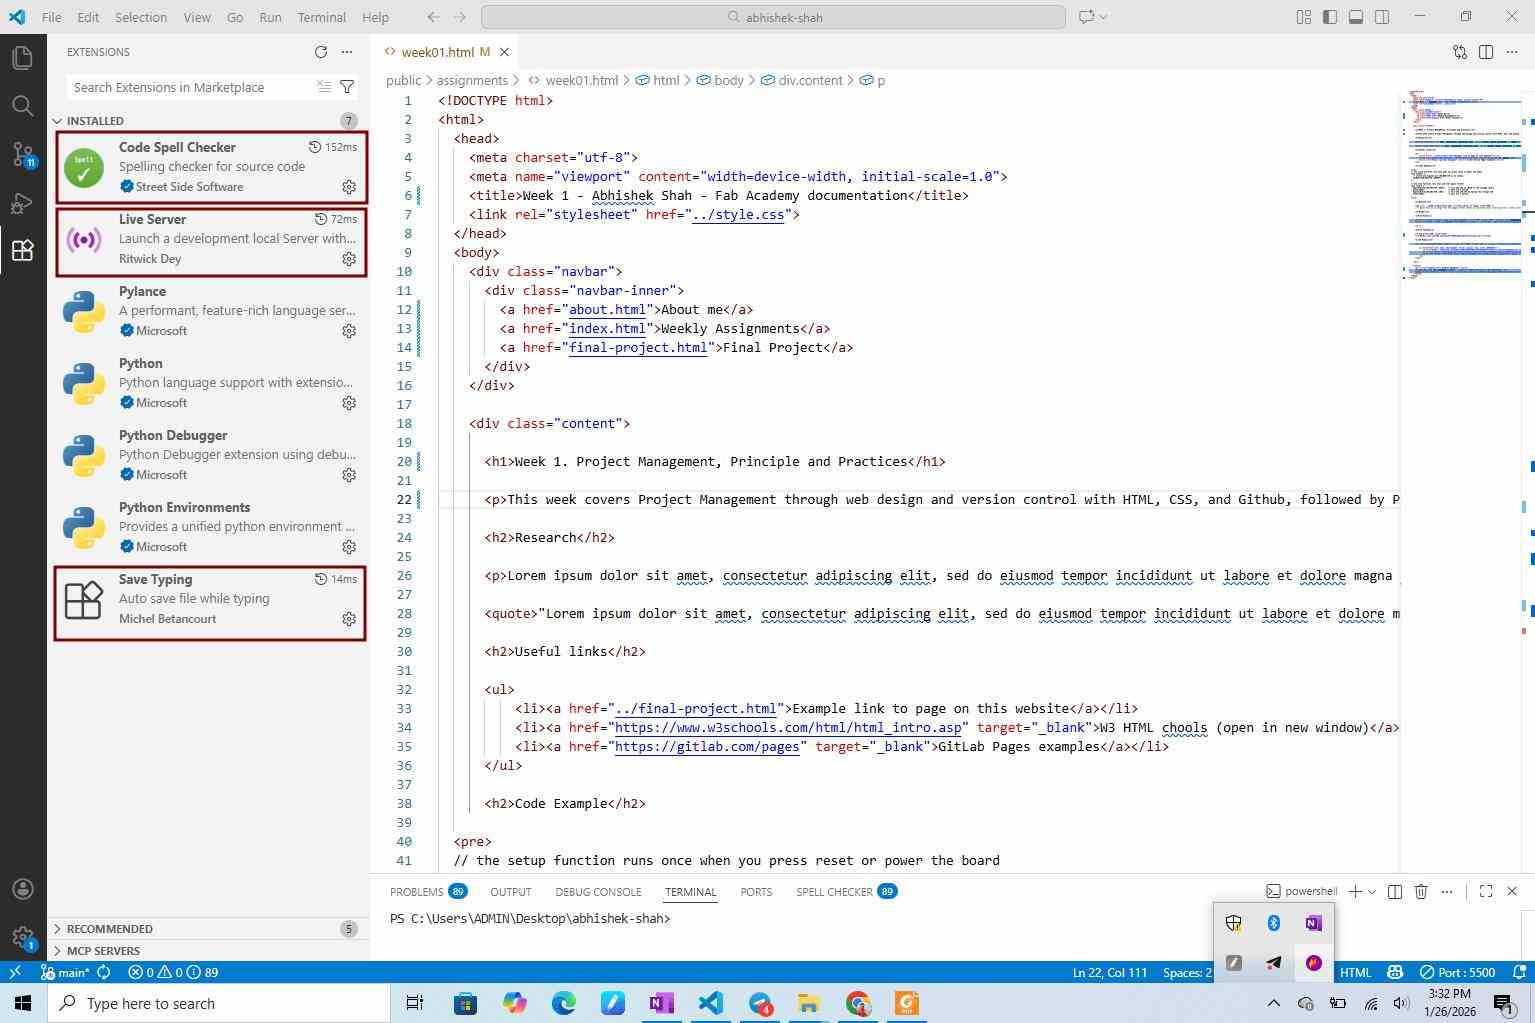
VS Code Extensions
Extensions enhance the functionality of the IDE (Integrated Development Environment).
Live Server
The Live Server extension allows real-time preview of HTML pages in the browser. Any change made in the code is instantly reflected in the browser.
Steps to install:Open VS Code -> Go to View → Extensions -> Search for Live Server -> Install the extension
Save Typing
This extension automatically saves files while typing, reducing the risk of losing work due to crashes or accidental closure.
2. Website Structure and HTML Basics
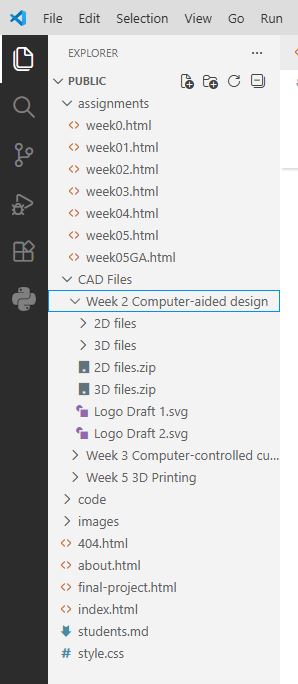
We downloaded the Fab Academy website template (ZIP file) and opened it in VS Code. The folder structure is as follows:
- index.html - Homepage
- about.html - About Me page
- final-project.html - Final project documentation
- students.md - Student agreement file
- assignments/ – Weekly documentation files
- week1.html
- week2.html
- images/ – Image assets
- Subfolders created per week for better organization
- style.css - CSS stylesheet controlling the website layout and design
This structure helps keep documentation organized and scalable.
Editing HTML Pages
As a beginner in HTML and CSS, I used W3Schools, Guidance from the instructor, and support from peers.
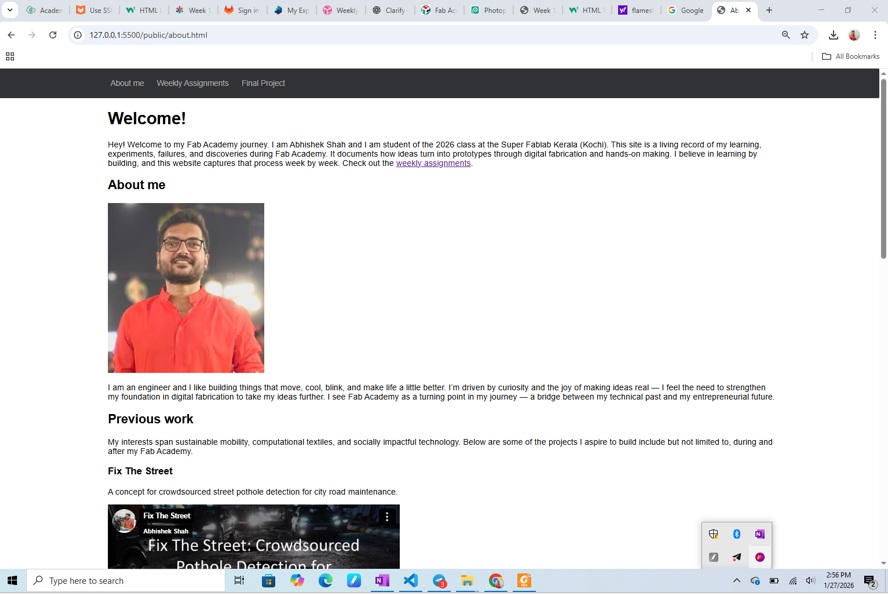
I started editing:
- about.html to add personal information
- index.html to understand navigation menus and page linking
To add images: Images are first placed inside the images/ folder (with week-wise subfolders) and Then referenced correctly in the HTML file.
Seeing my photo appear on a live webpage for the first time was a “wow” moment! 😀
3. Version Control with Git and GitLab
What is Git?
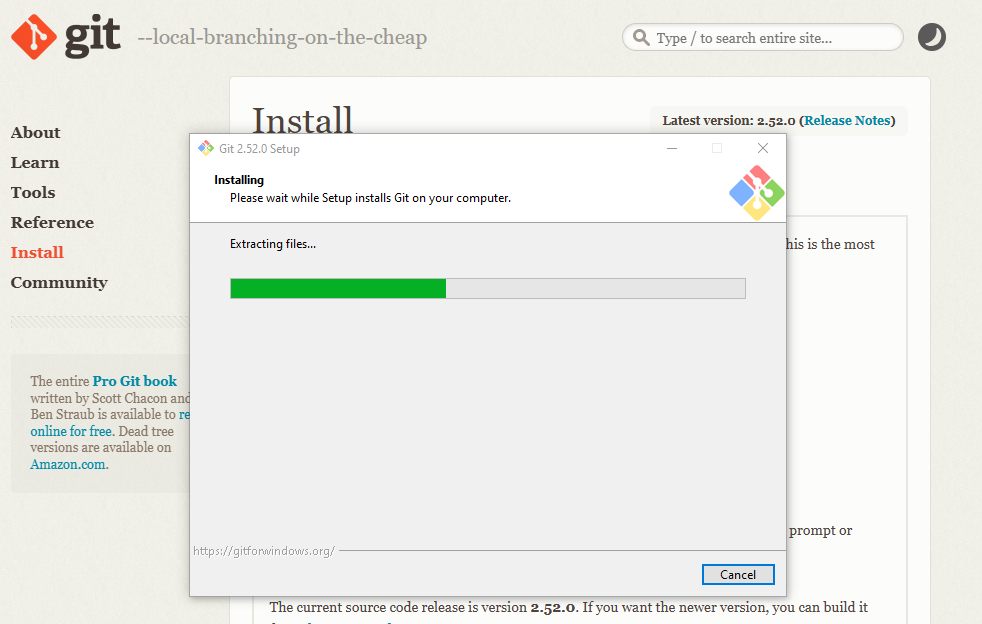
Git is a free and open-source distributed version control system that tracks changes in files and allows reverting to previous versions when needed. Installation guide
Git vs GitLab
- Git → Version control tool
- GitLab / GitHub / Bitbucket → Platforms that host Git repositories remotely
GitLab also provides code collaboration, issue tracking, secure repository management, CI/CD tools
A repository = project files + version history.
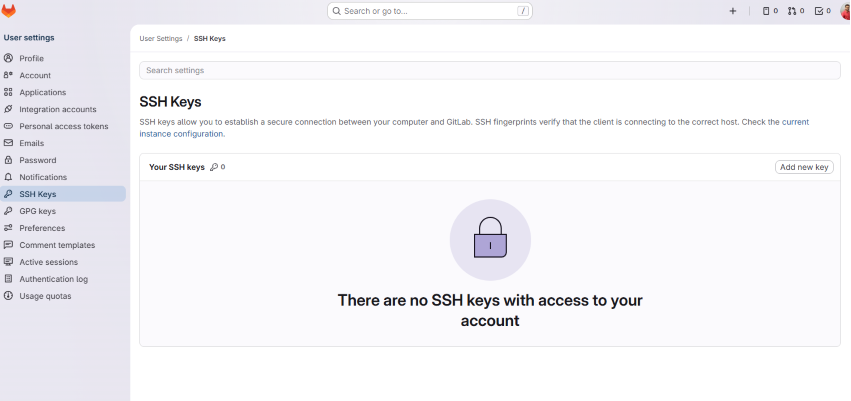
4. SSH Key Setup for GitLab
To securely connect my local system to GitLab, we used SSH authentication.
Steps followed : Open Git Bash -> Generate SSH key (public + private key) -> Copy public key -> Add it to GitLab -> Profile -> Preferences -> SSH Keys
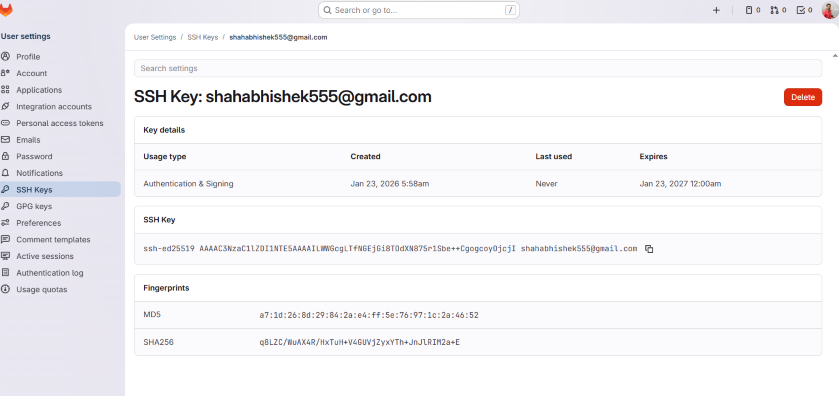
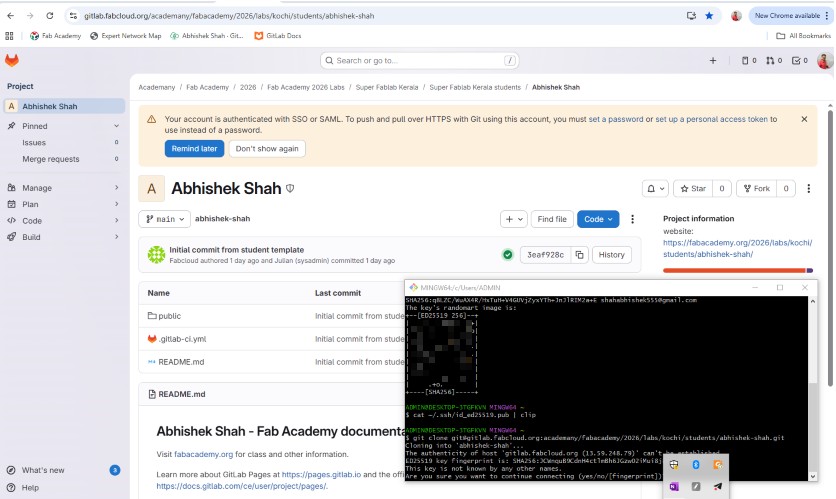
Command :-
cat ~/.ssh/id_ed25519.pub | clip
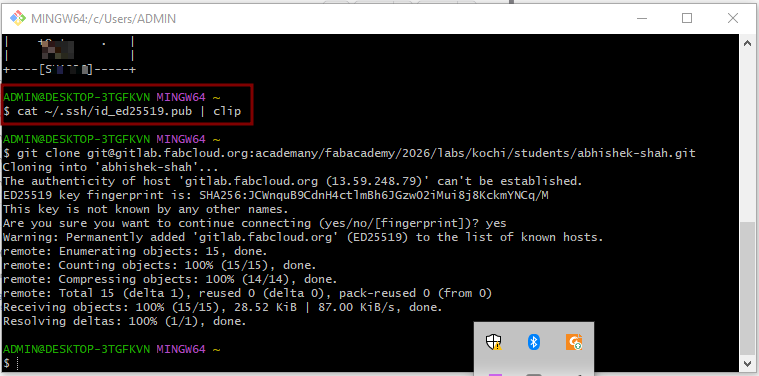
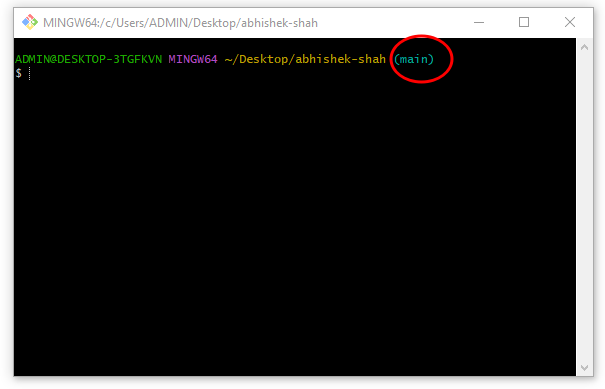
Verifying Repository Access
Once configured - Opening Git Bash inside the project folder shows "main", this confirms Git is tracking the repository
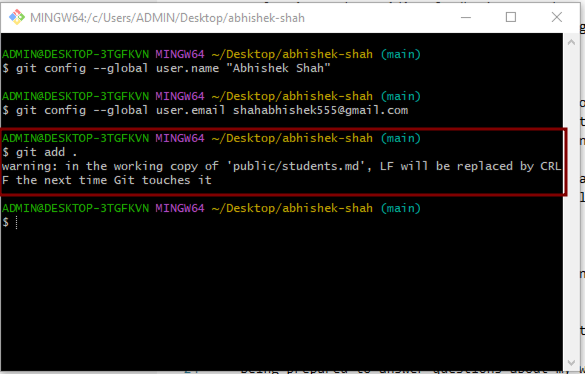
5. Configuring Git Identity
Git needs to know who is making changes to the repository.
We configured : Username and Email address

6. Git Workflow: Add, Commit, Push
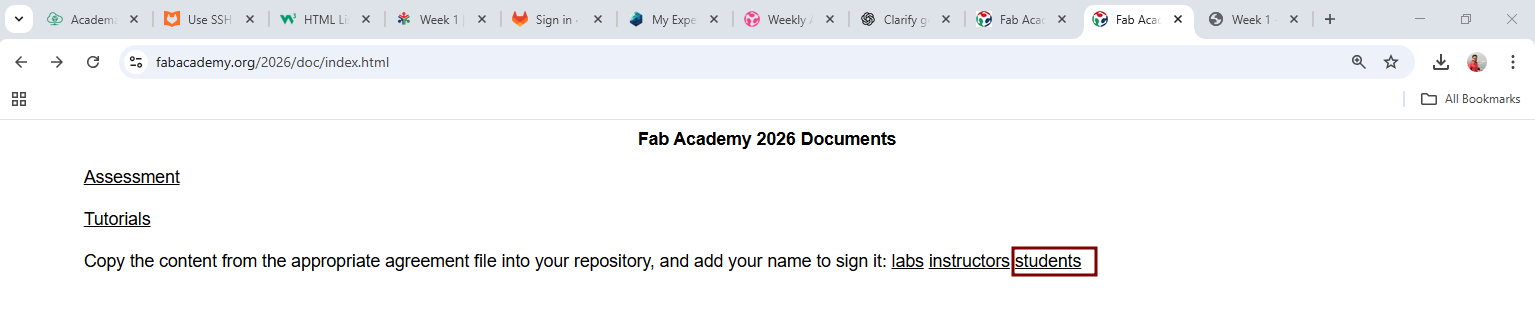
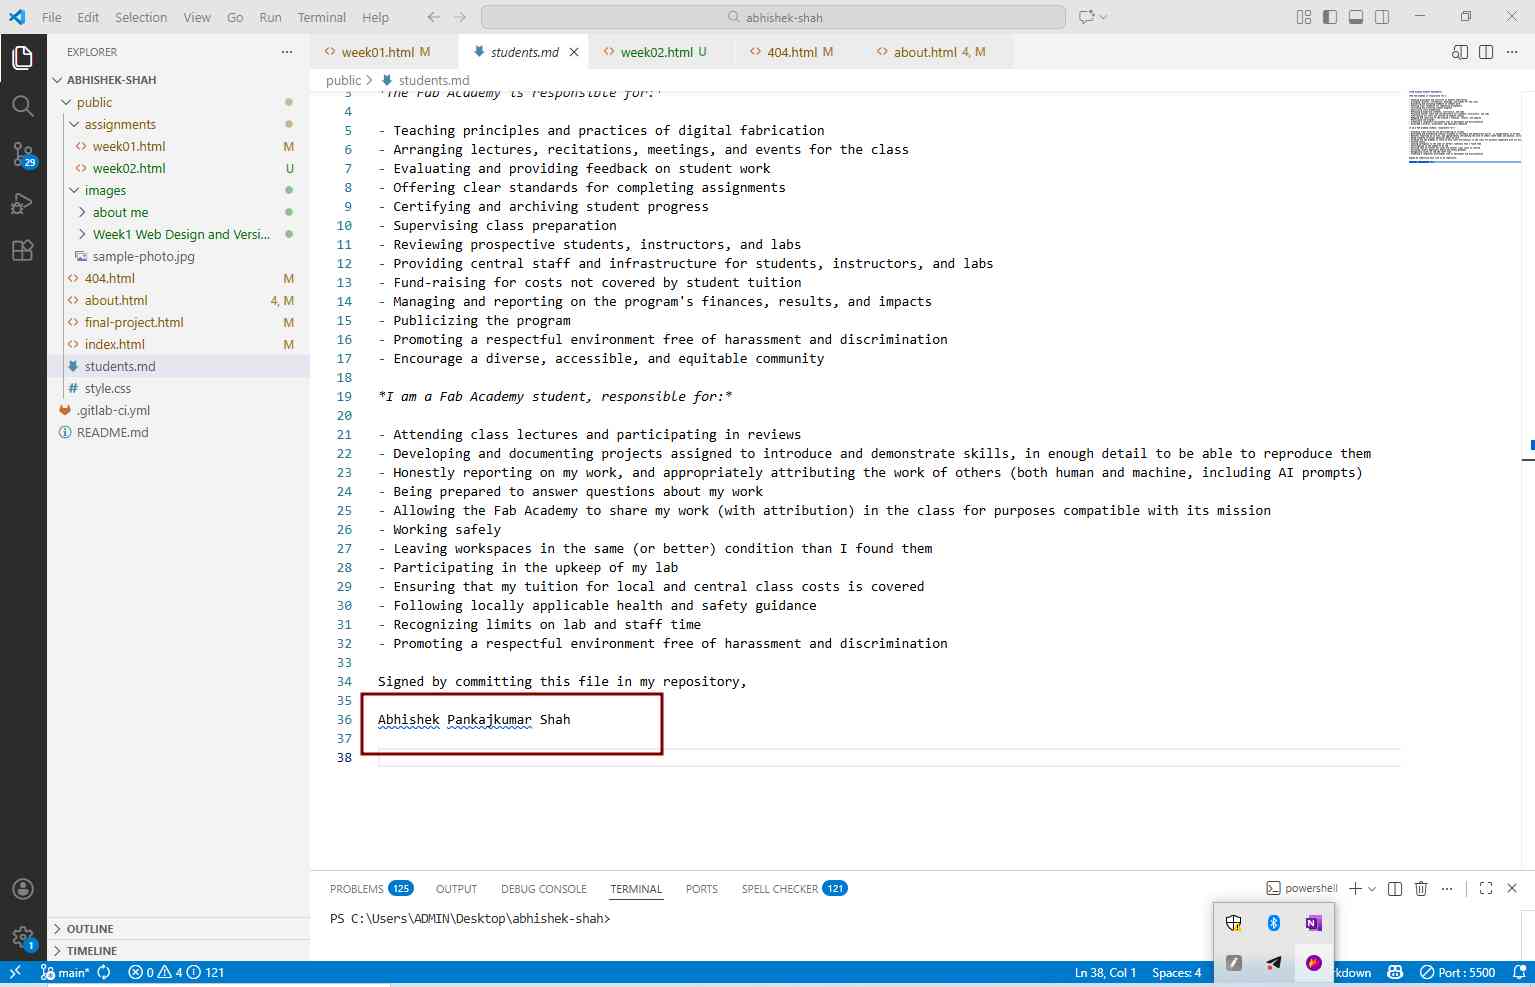
First we downloaded the student agreement for the Fab Academy 2026 Documents then pasted the "student.md" file into the public folder so that it will appear in the VSCode, Now we opened it inside the VSCode and entered our name and saved.
Now to add, commit and push this change to our repository, we used below commands. The standard Git workflow used:
Add command puts changes on temporary memory and stages all changes
git add .
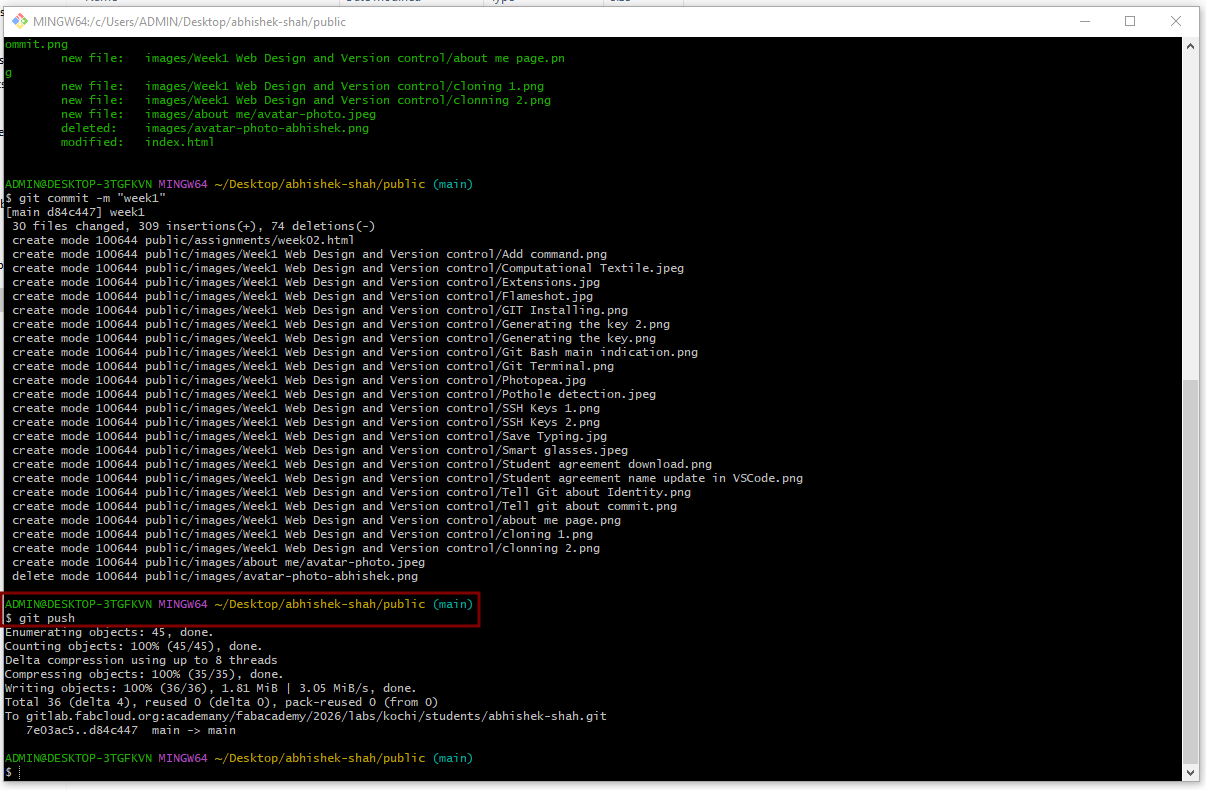
Commit command records changes with a description or history comment, in my case, I committed updates such as adding the student agreement file.
git commit -m "comment"

Push command uploads changes to GitLab repository
git push
My website improvement
I am new to web design and development, I have never worked with HTML and CSS, because of this reason my website looks very raw and in some case even ugly. So in my week 5 and week 6, I planned to improve my website by learning from AI. So I have planned to give 2 hr every to add new styles and make my website look better.
My instructor advised me to come back to this page and document it for my learning reference. In my first prompt, I asked AI that I already have a repository and I gave screen shot of the repo so that it knows how my structure looks like.
Prompt:
Hey ChatGPT, I already have a repository of my FAB Academy website. I am new to HTML and CSS so my website looks very ugly. I want to make is pleasing to the reader. In my repository, I have structure as below:
Each HTML file currently has below on top of it.
Each HTML page has a footer like below.

Please help me with the styling of my website.
Weekly Assignment : At the top of each page, I am writing tasks of each week, what is to be done in a group and what is to be done individually. basically weekly assignment description.
Weekly Activity Table : I write what I did each day in just one line. Image: please give style such that the corners of images are round, the images are in center alignment and it has a label to add info and width can be adjustable.
Video: please give styling such that when page is scrolled to video, the video shall get automatically played. and try to keep corners of the video round, the video shall be center alignment and it has a label to add info and width can be adjustable.
Table: Give a good pleasing style, I have multiple tables with different numbers of columns and rows in my different weekly assignment pages. Please make sure that the information in the first row and first column are bold.
Code: please make code look pleasing, some of my codes are very lengthy so make them fix windows/sections and give vertical scroll buttons, so that instead scrolling on the page I can scroll in code. Reflection: I have a reflection section under each weekly page. Please get some creativity here in reflection styling.
References : I have a reference section under each page wherein provide 2D and 3D CAD download links, Code download links other links to important references.
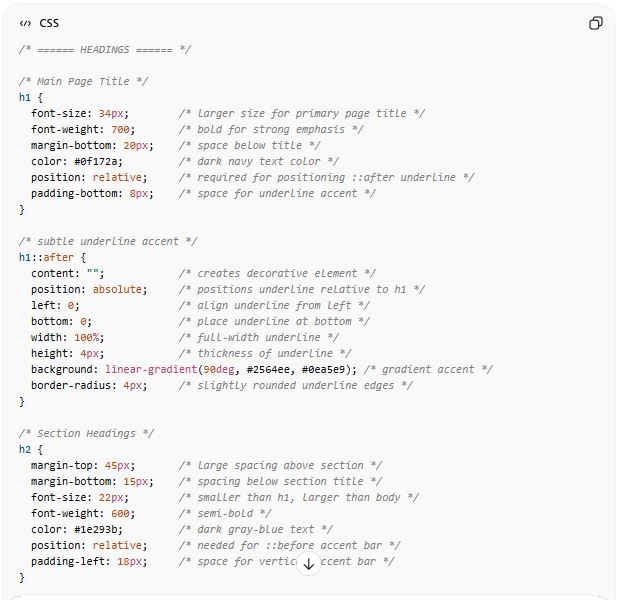
Please give good styling to Headings, Paragraphs etc.
Result : Headings, Paragraph and Fonts etc
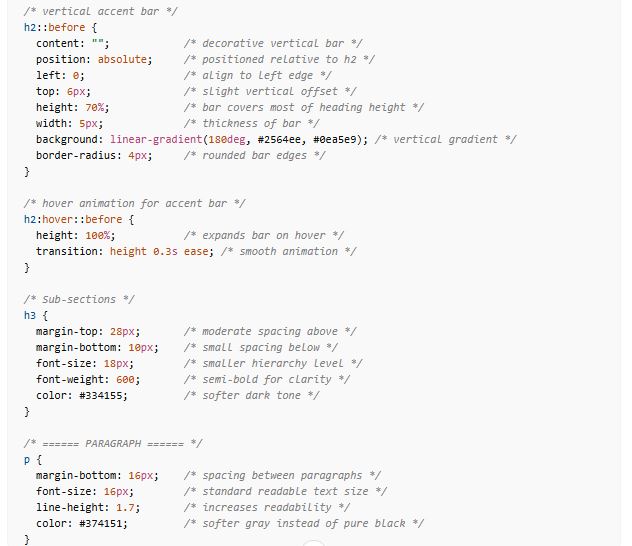
For Heading H1, H2, H3 the AI gave me below result and I asked to add short comments in code for important lines, about its function or use, so that I can paly with it and change it later.
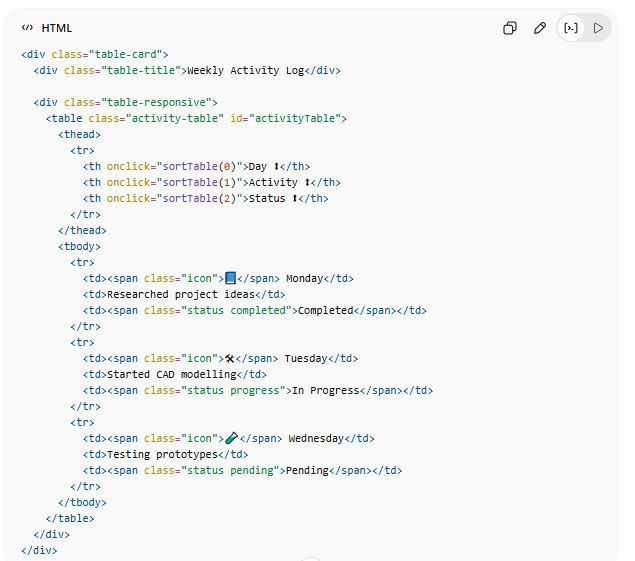
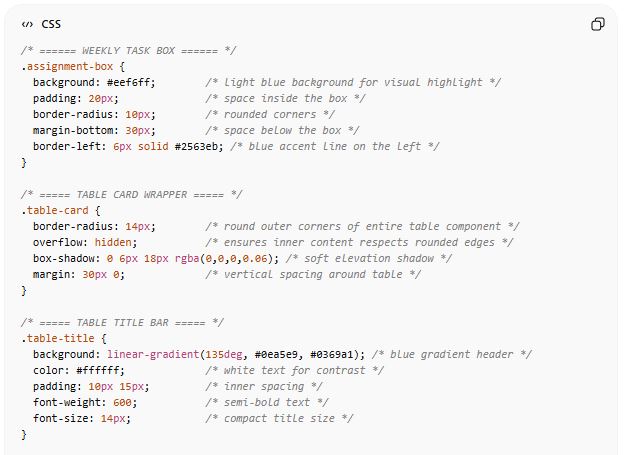
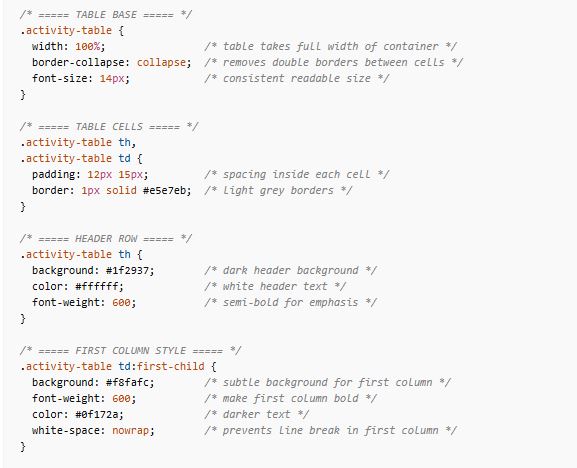
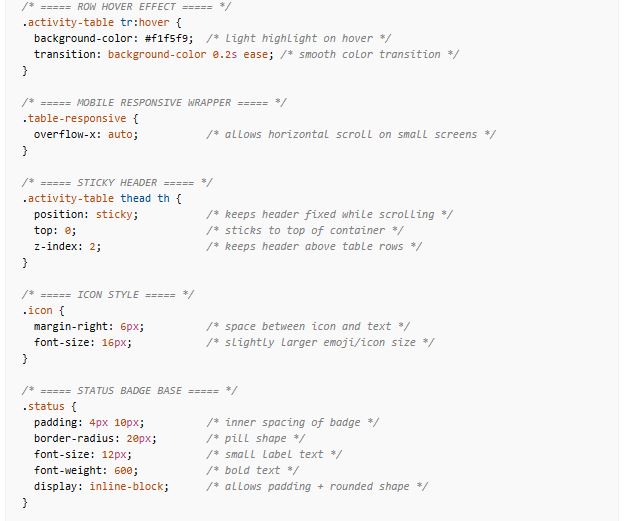
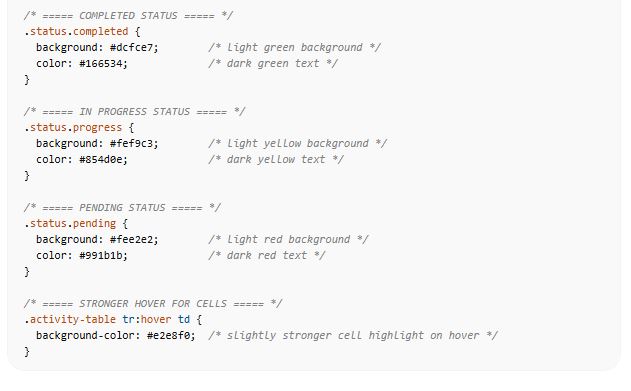
Result : Activity Table and general Table
For table, the AI gave me below HTML and CSS, I asked to add short comments in CSS code for important lines, about its function or use
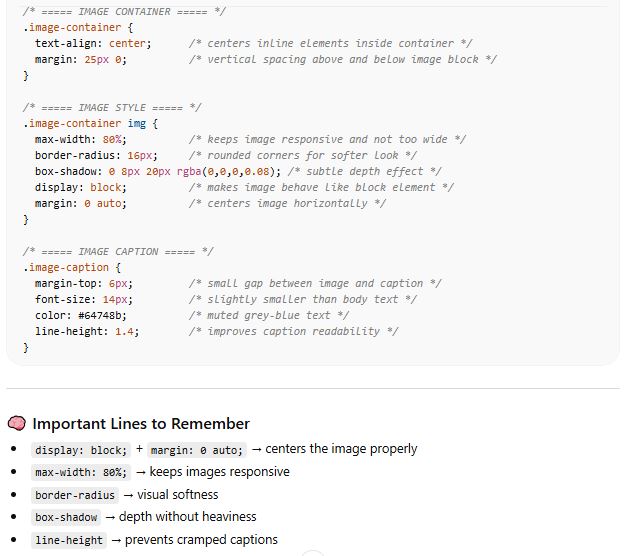
Result : Images
for Images, the AI gave me below response and I also asked to add short comments in code for important lines, about its function or use, so that I can paly with it and change it later. I asked AI that I want autoplay only when scrolled into view.
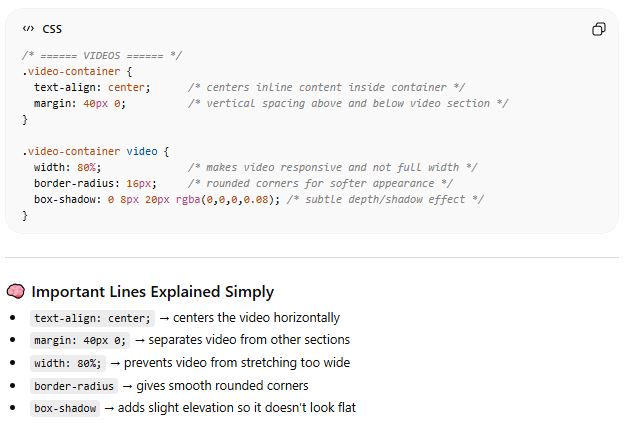
Result : Videos
for Videos, the AI gave me below response and I also asked to add short comments in code for important lines, about its function or use, so that I can paly with it and change it later.
Result : Code
For code, the AI gave me below HTML.
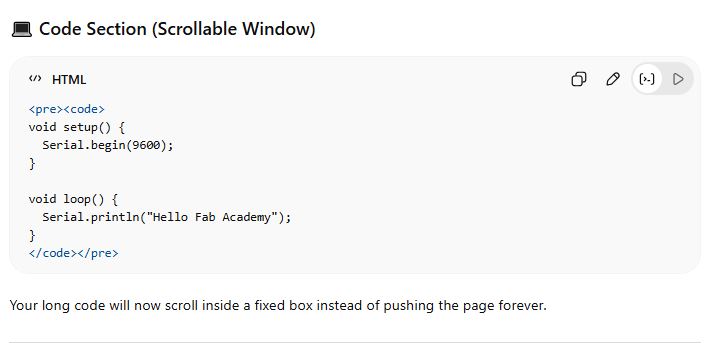
However I wanted to further refine it. So I asked as below.
Prompt:
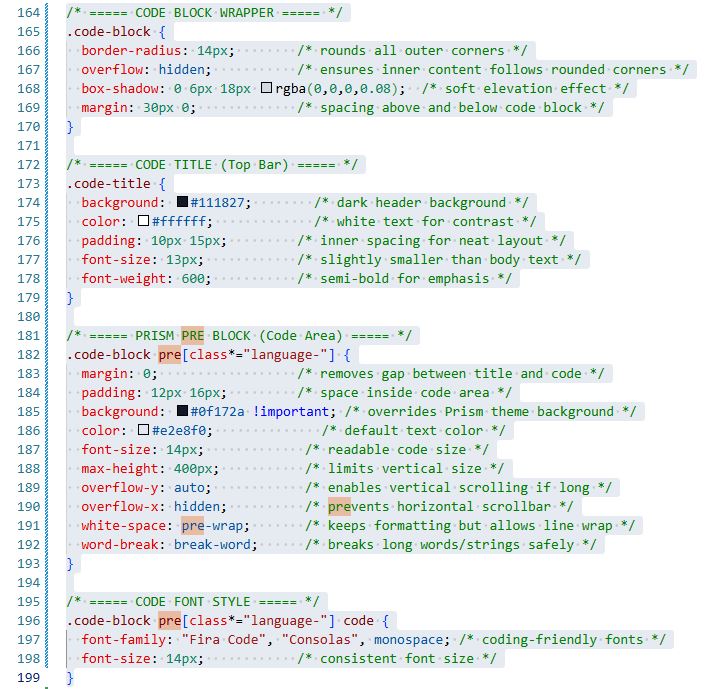
Hello ChatGPT, above one you gave me for code documentation, but what if in some code my comments are very long then scroll also appears on bottom that goes from left to right, but can I have HTML code such that it applies "wrap text" kind of effect so that only one scroll from top to bottom is shown vertical movement no horizontal scroll is required then.
Result:
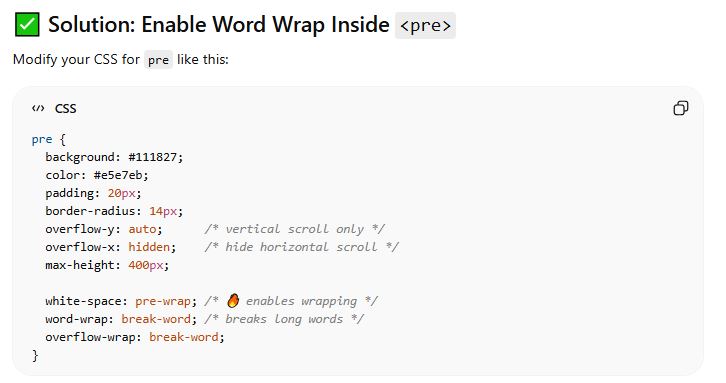
⚠ Important Note, Wrapping is great for documentation readability. But in some languages (like Python), indentation matters. Wrapping will not break indentation, but visually it may look split across lines.
Prompt:
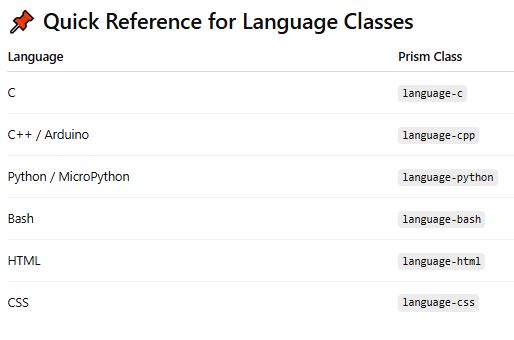
I want to integrate Prism.js in my HTML and CSS, along with below. So please help me step by step. Please help me with: integrate Prism.js, Line numbers, Syntax highlighting (Arduino, Python, C Language), Copy button, Clean GitHub-like look, Style Prism to match my website theme, Auto-wrap long lines, Create a clean “Code Block Component” style. Please also add line by line expansion for what is its function and usage?
Result: