INTRODUCTION
This week we're kind of in a weird paradoxical type of manufacturing. We're using subtractive manufacturing to create an additive process, and along the way we end up making a positive (3D model) that ends up in the wax mold, a negative made out of the silicone rubber, and then again another positive casted object as your final output. It's all very confusing to wrap your head around. Let me try to explain!
[x] Review the safety data sheets for each of your molding and casting materials
[x] Make and compare test casts with each of them
[x] Compare printing vs milling molds
[x] Design a mold around the process you'll be using, produce it with a smooth surface finish that does not show the production process toolpath, and use it to cast parts.
My contributions to the group assignment this week included reviewing and documenting the safety procedures necessary for handling the materials we worked with this week.
Molding
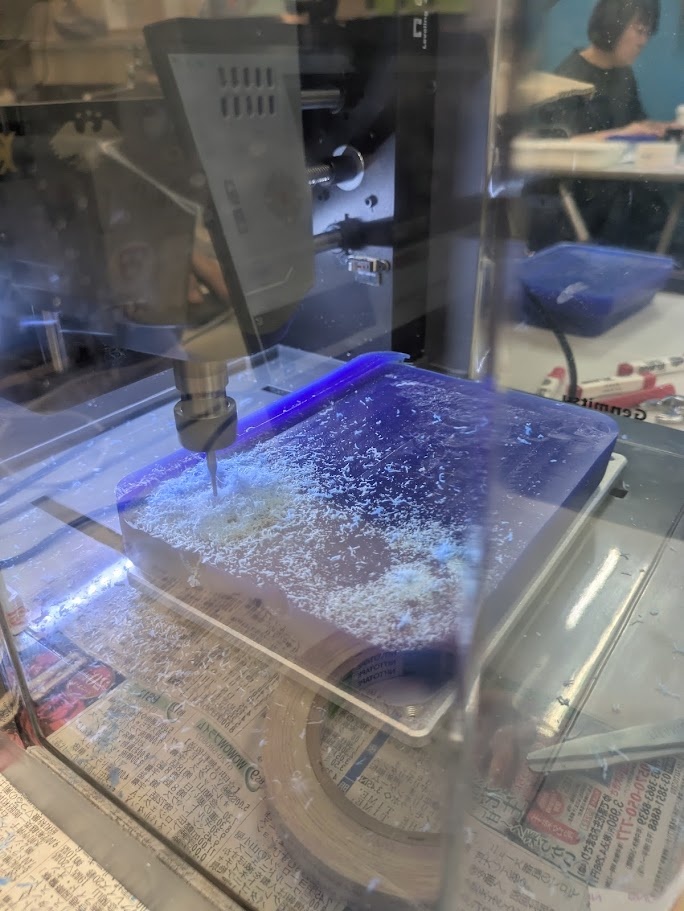
➔ Machinable Wax
This is a new kind of material for me, prior to this week, I had no idea this was something we could use to make molds, and was blown away when I learned we could do it with the same machine we've been milling PCBs with. Machinable wax isn't like regular candle wax, it has plastic mixed into it's composition, which gives it much firmer and harder to melt properties. However, you can mill it away with a standard 1/8" or 1/16" 2/4 flute ballnose mill bit, which was exactly what we installed into our lab's Genmitsu Cubiko.
In order for you to be able to mill, you need G-Code, and in order to get G-code, you need a model!
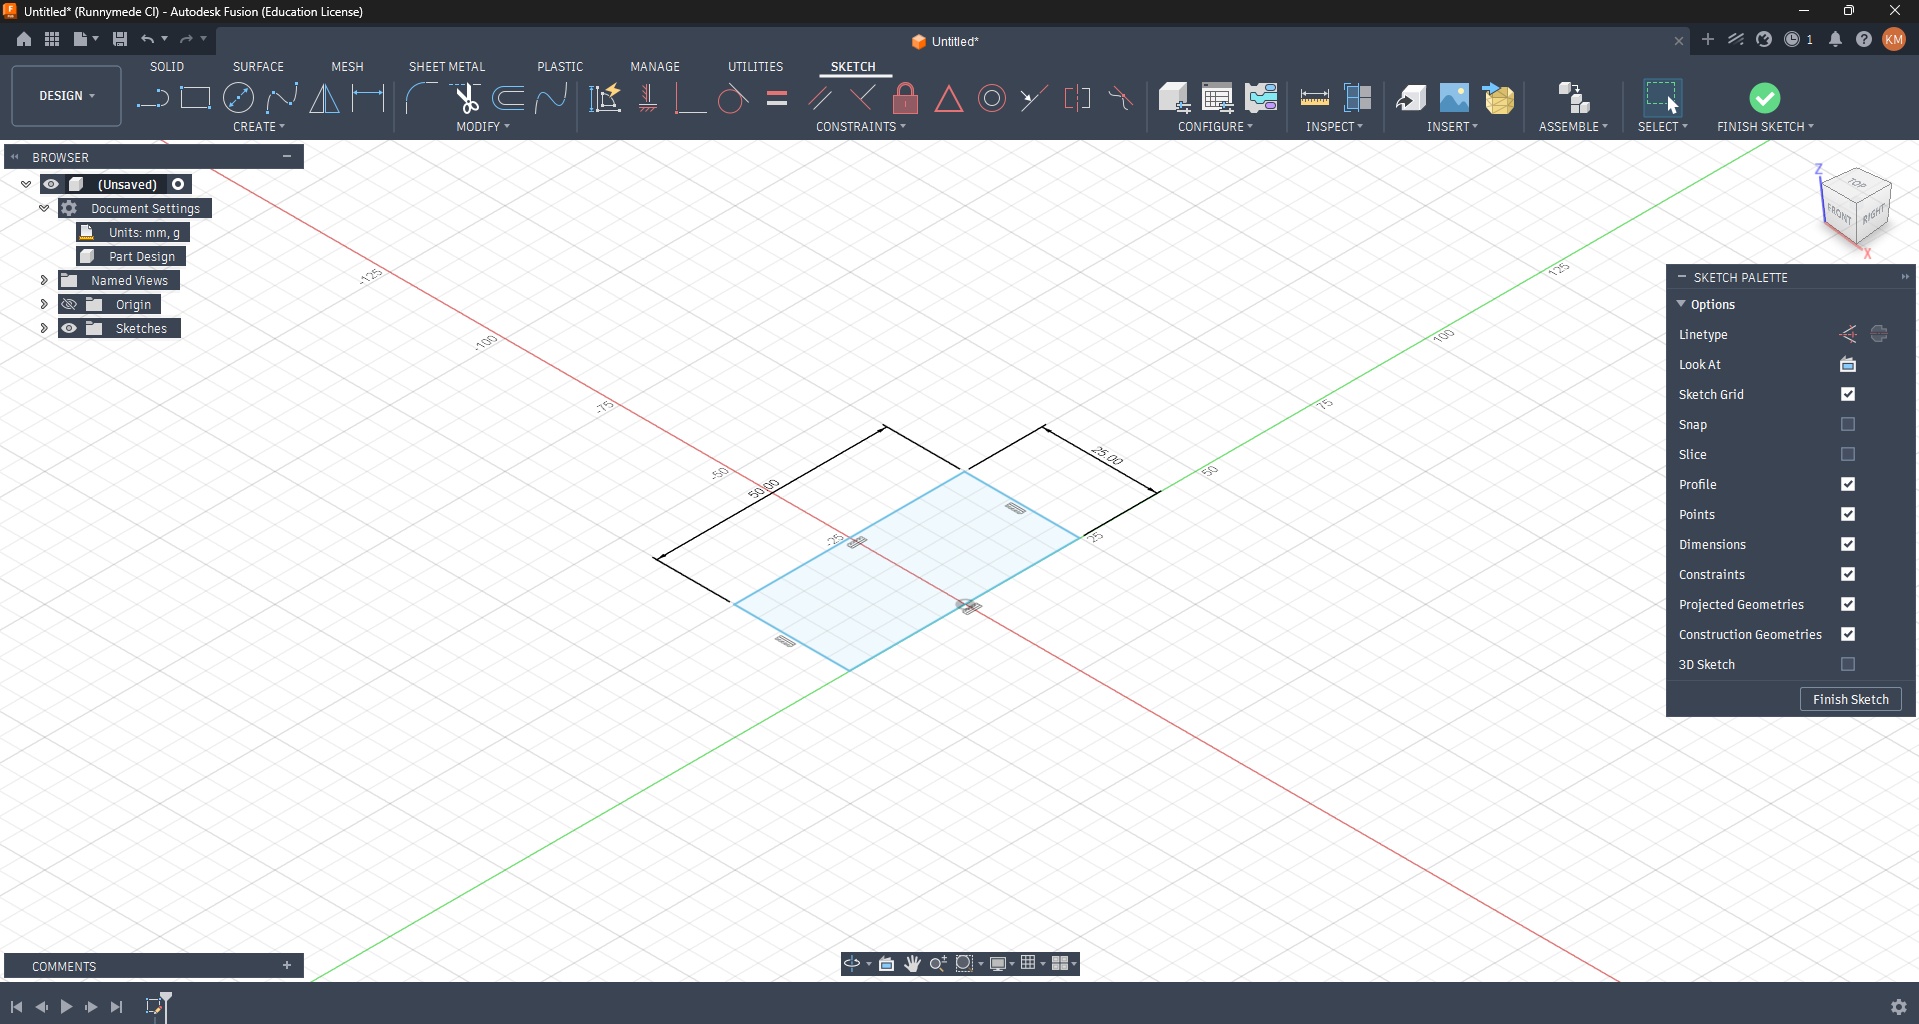
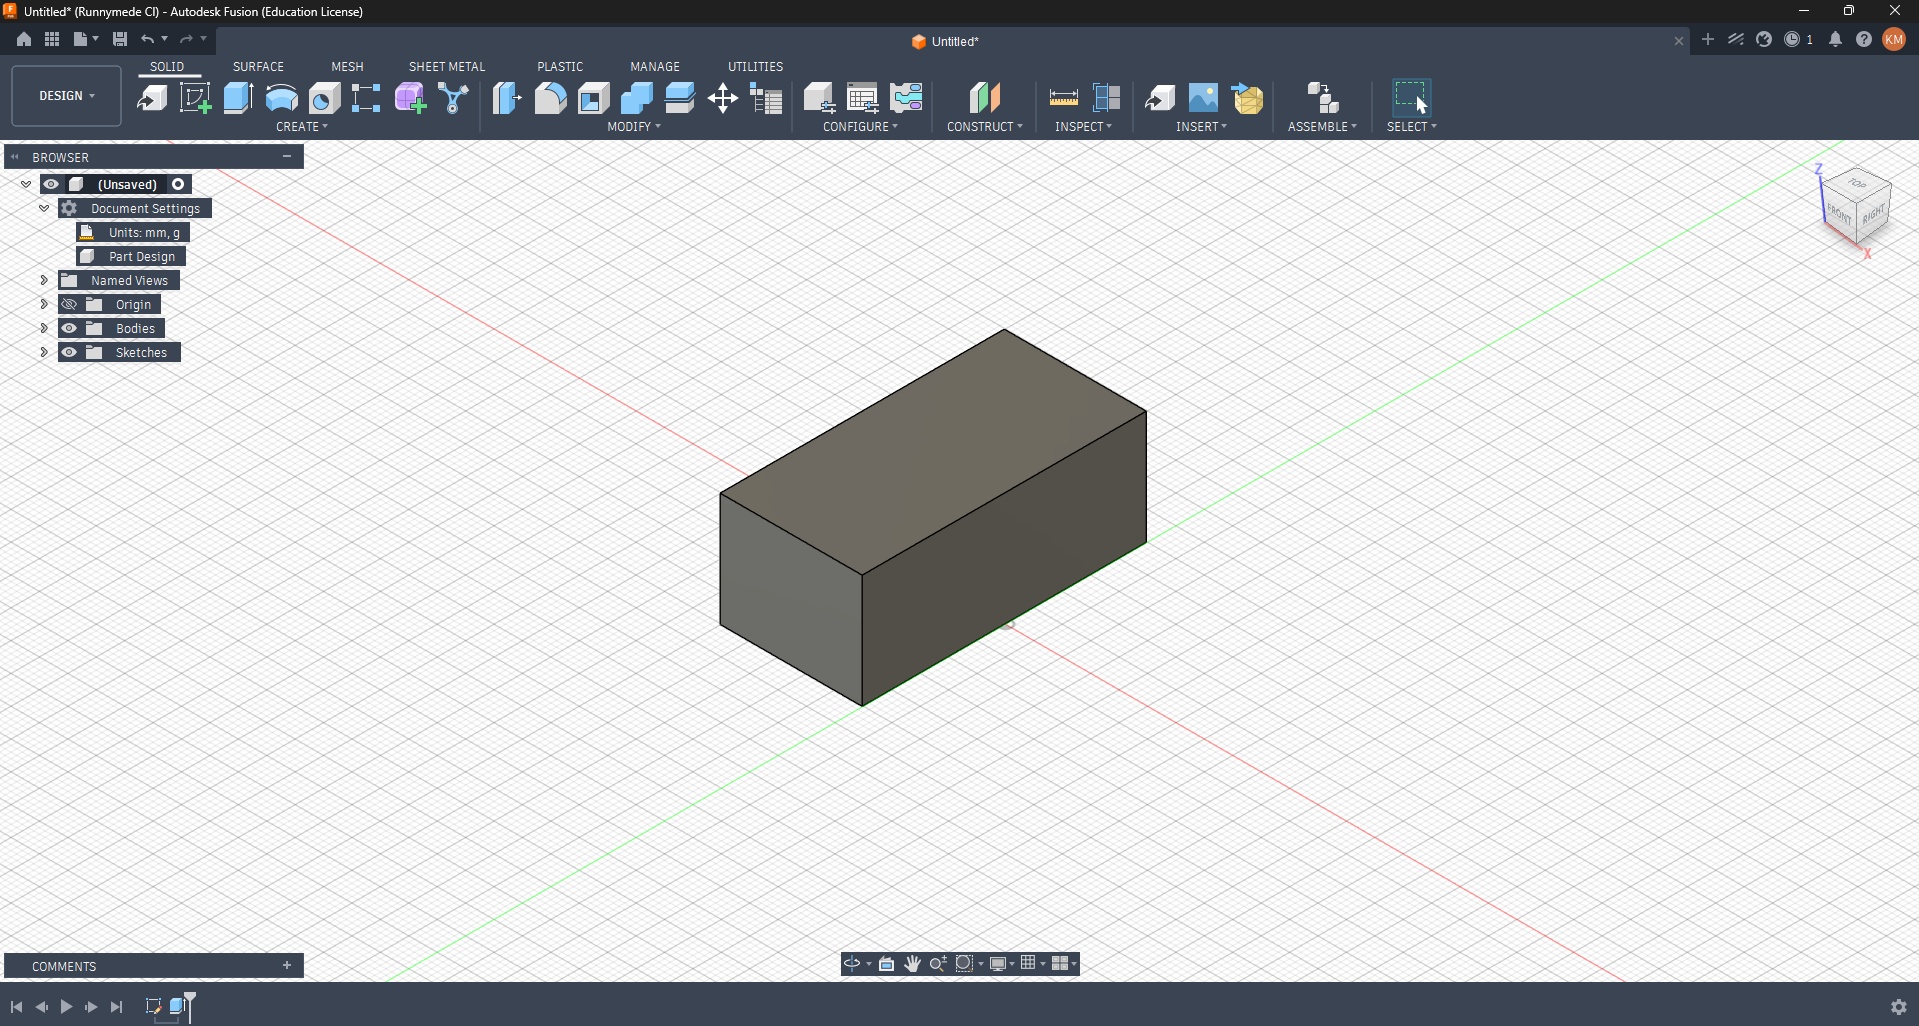
➔ 3D Modelling for Molds
To create a model for a mold, you go about things exactly as you normally would. CAD out your entire object, just as you want it to be cast (there's no need to include any extra tolerances, you're assuming your mold and cast will be airtight - which is for all intents and purposes is!).
Once you have your model created, you'll want to decide what process you're going to cast. However, the first decision is likely made for you depending on your model:
- One Part Mold - this can be achieved if your model has a single flat surface and if your model is completely solid on the inside. You only need to mill out a single mold, regardless of the next process choice.
- Two Part Mold - this must be used if your model is hollow (meaning - does it have walls?) or does not have a simple surface that can serve as the termination level for your liquid cast substance. It involves breaking up your model into two parts, an outer mold and an inner mold.
Once you know what kind of mold you need to create, you should review your materials available and need to decide between:
- Direct Molding - this is when you cast your final material directly into your first mold. This is only really doable if your final material can be easily retrieved from the mold, i.e. it needs to be flexible or not bond easily to the wax. If you do this, you want to create a negative of your model in your wax block, subtracting it from your material.
- Indirect Molding - this is when you cast an intermediate material, usually silicone or rubber, into your first mold. Doing this step allows you to cast materials that have complex surfaces or shapes that would otherwise get stuck in a rigid mold. Using silicone first means you need to create a positive model in your wax block
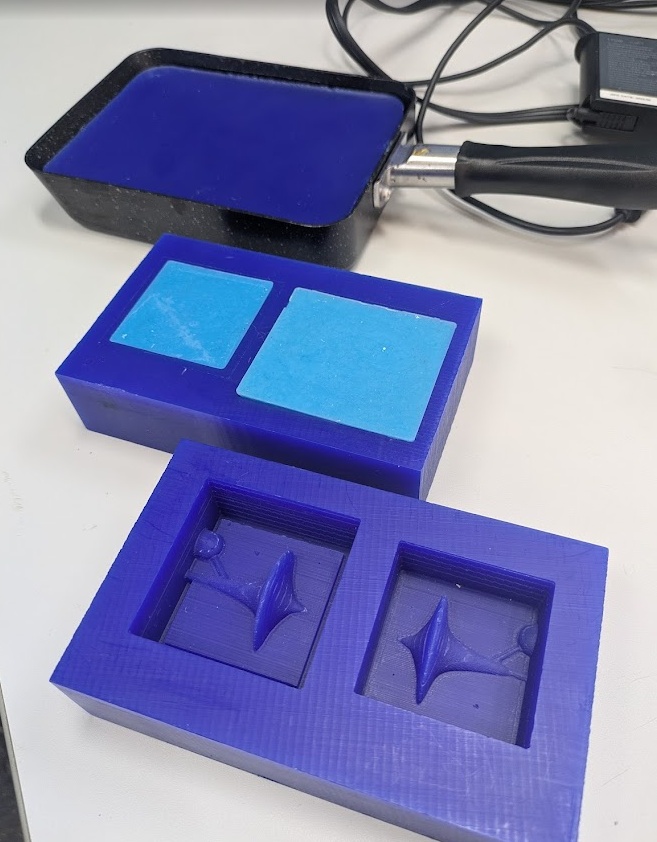
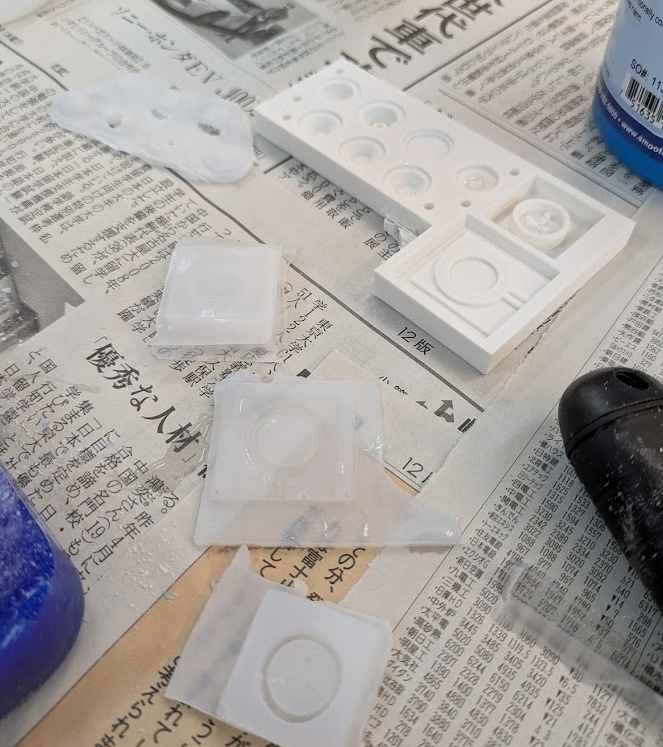
Here I'll be demonstrating the process for Direct Modling first, but with a two part mold!
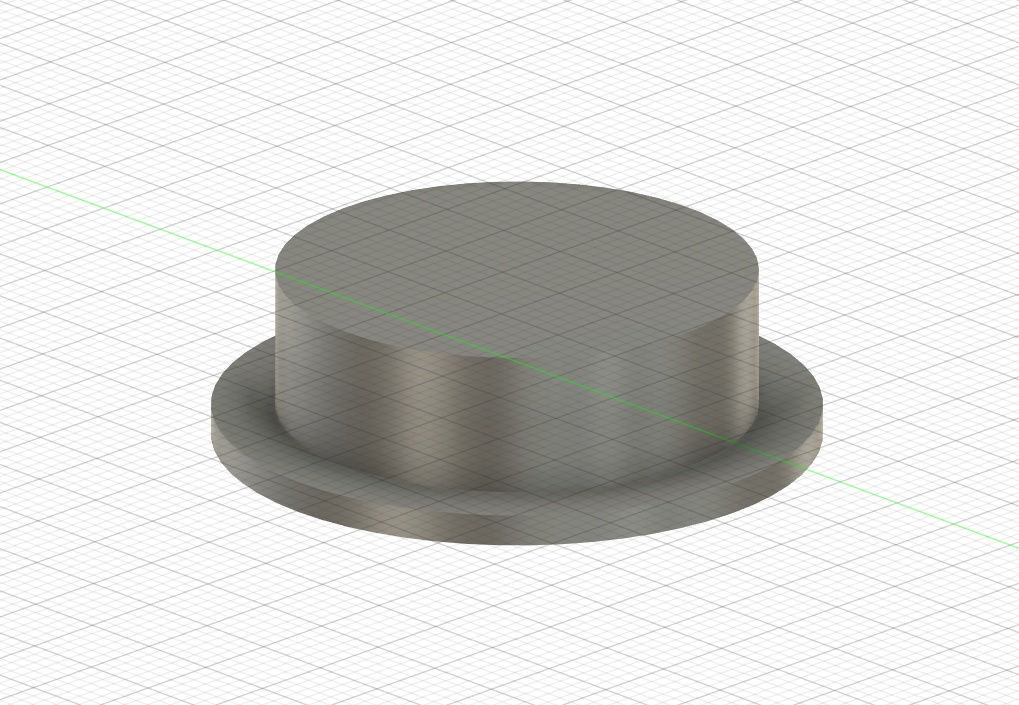
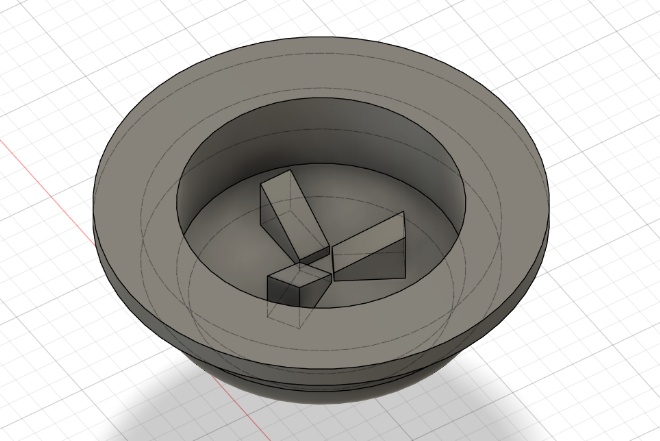
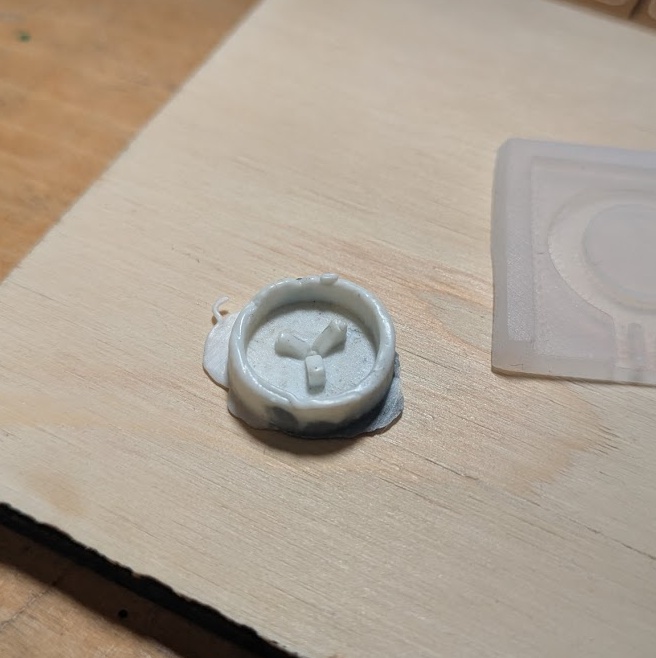
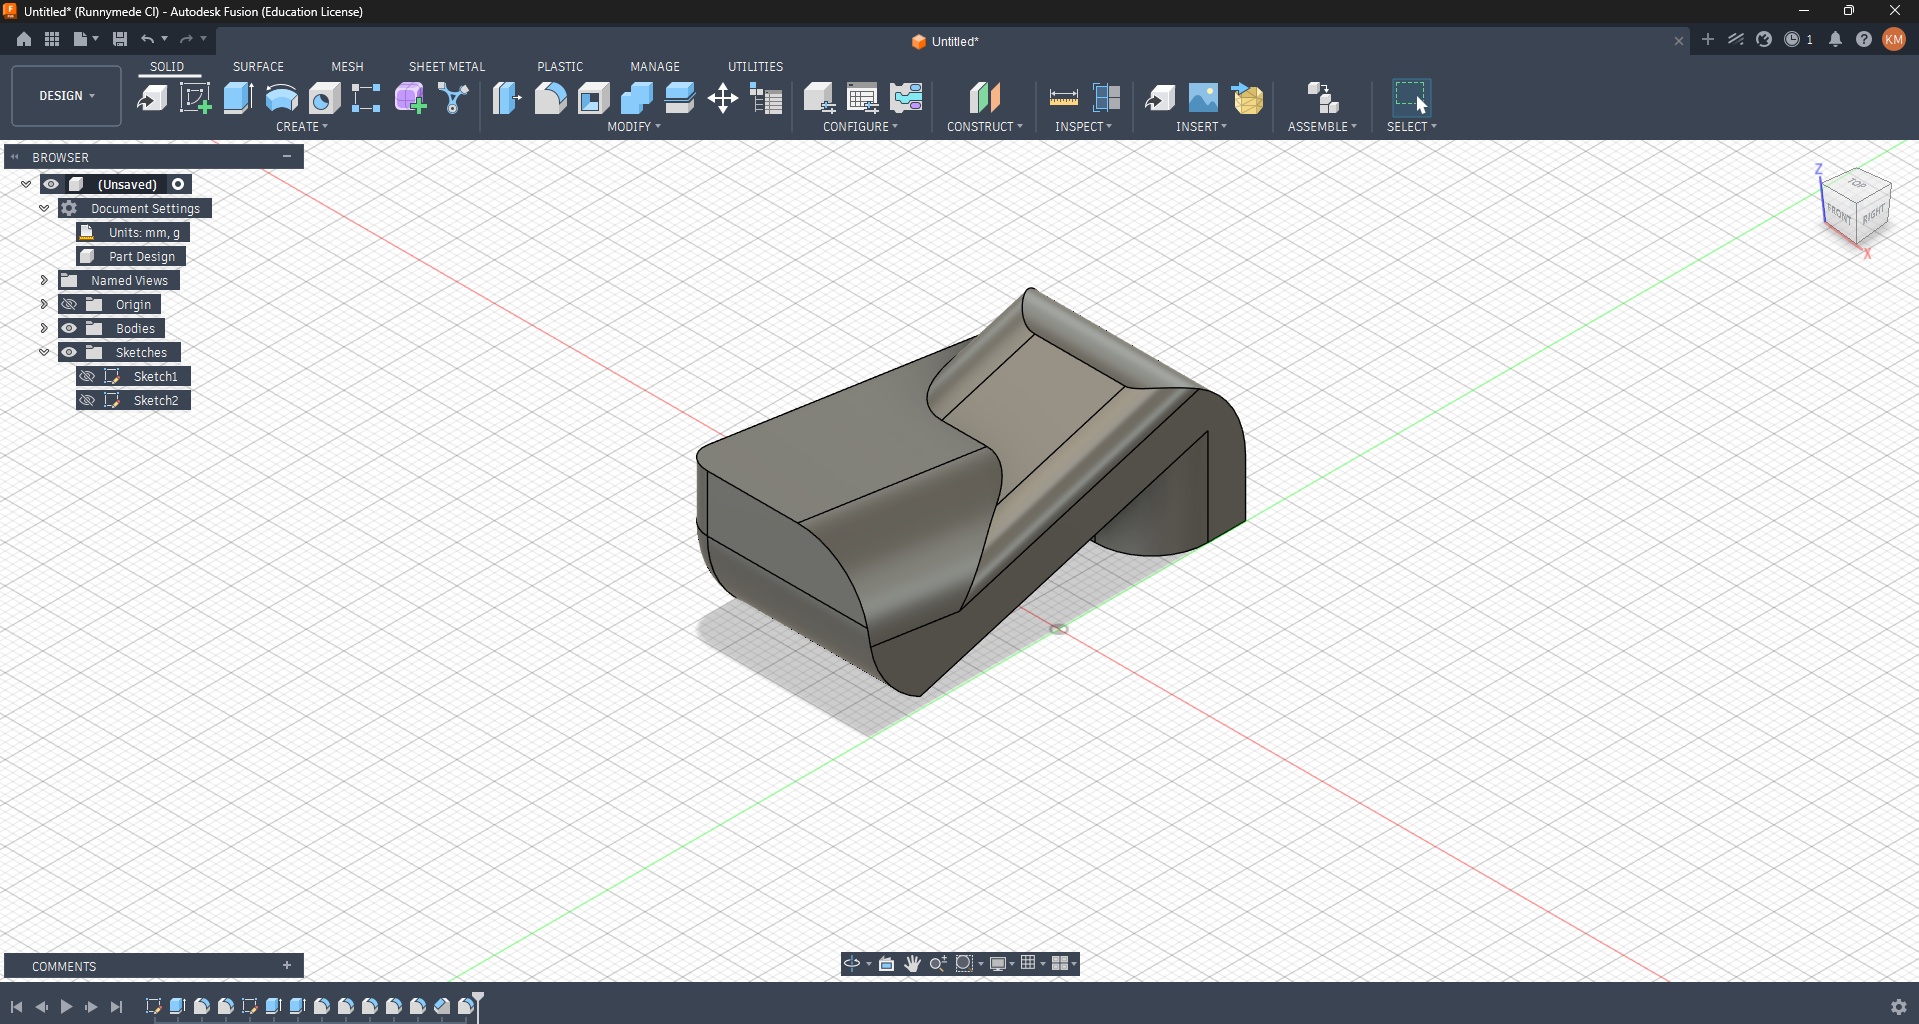
Here I have a silicone button modelled in Fusion. For those thinking I've just modeled a booby ceiling light, this part is meant to be a flexible interface between plastic buttons and copper PCB traces, meant to provide the end user with a bit less of a tactile/clickly button press - think TV remote or Game Boy.
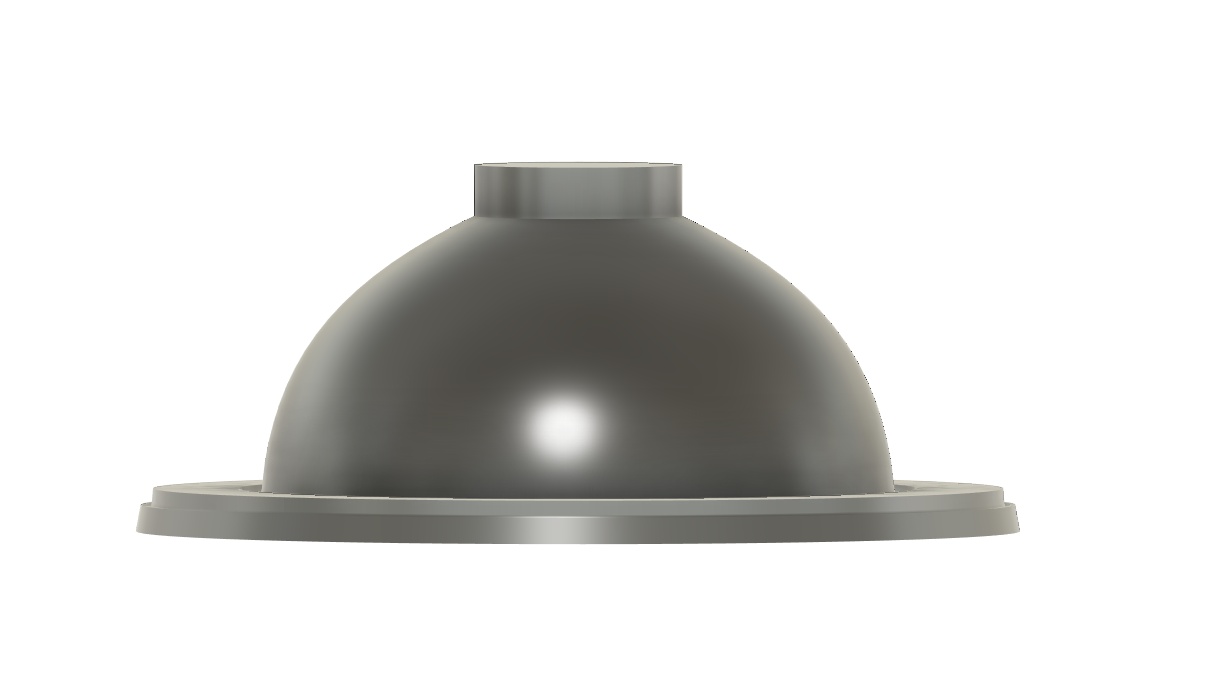
See below, this is essentially what I'm trying to prototype.
You can read more about the actual ideation, prototyping and test process over on my final project page, as this documentation is more about the actual process rather than the result. In short, I wanted to test out a bunch of different button types, so you'll see many different shapes being cast into the first mold.
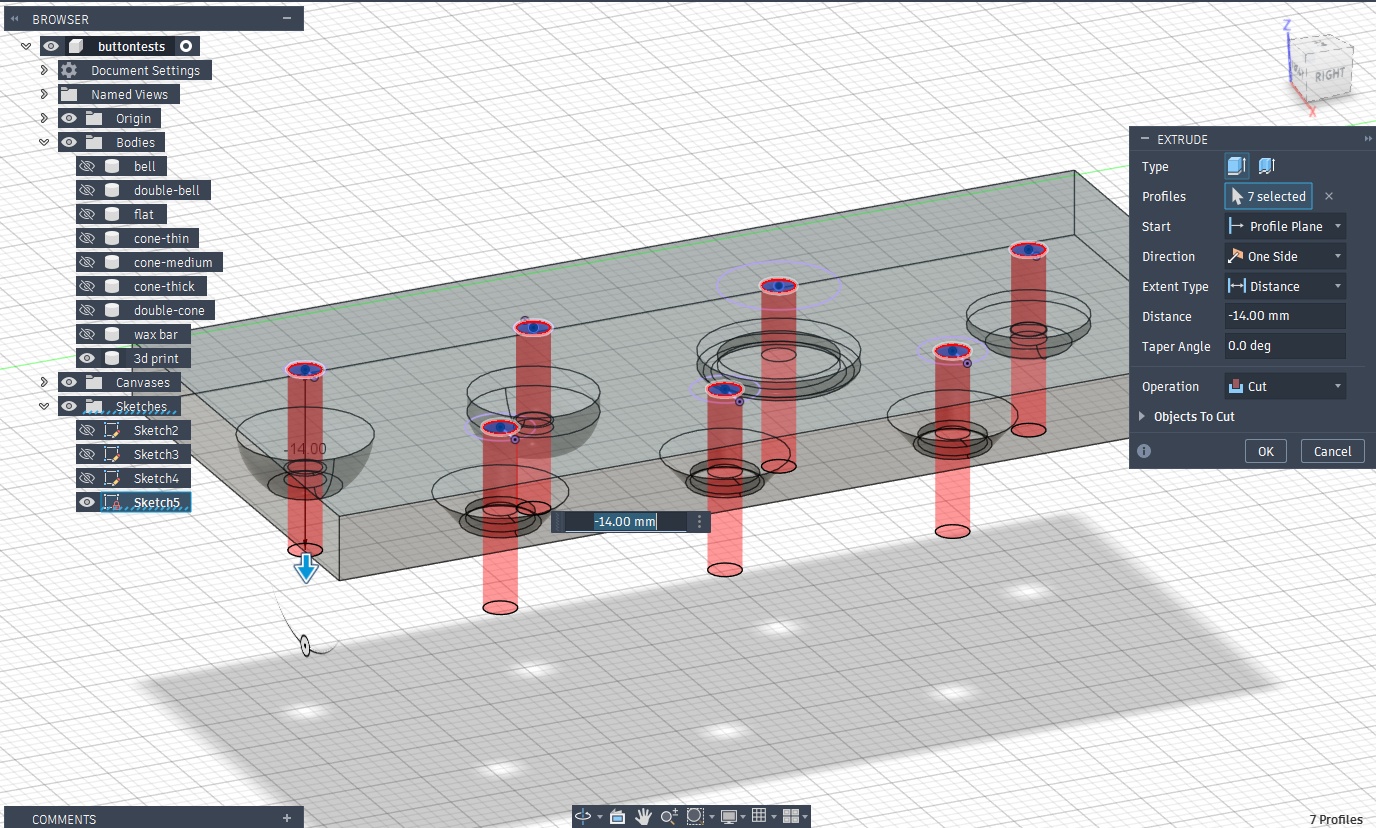
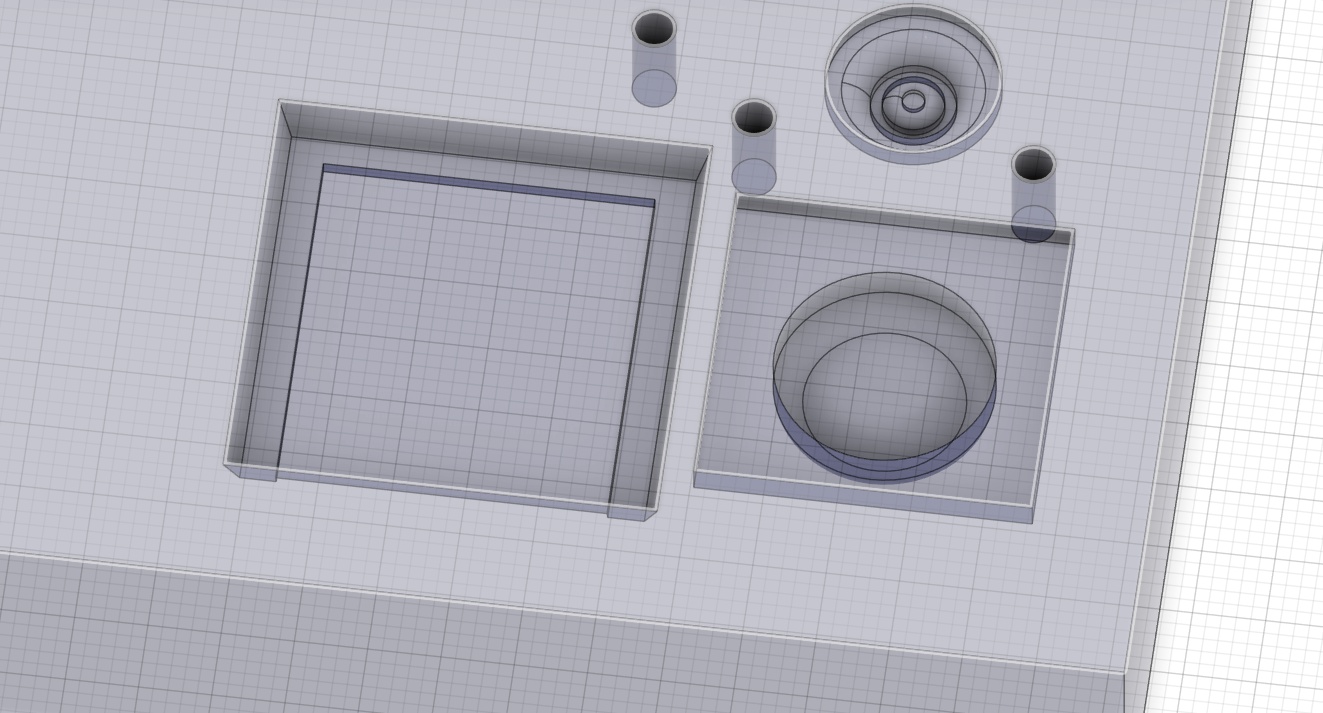
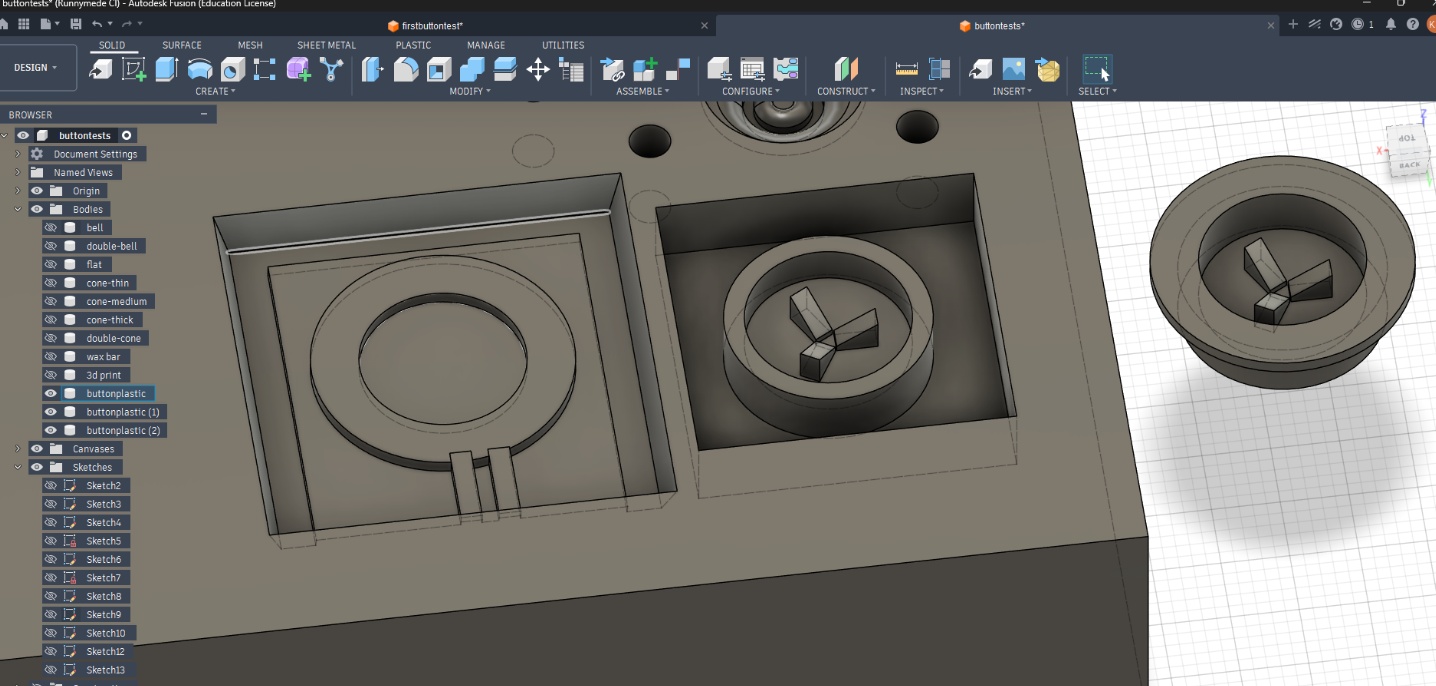
Since I'm creating a direct mold here, I'm going to flip my shapes upside down and cut them out of a shape that closely resembles the size of the wax block that I'm working with. This helps me get a better sense of scale for what I'm making, but it also is necessary to create your G-Code later on - your model needs a top layer face to process from.
Here's the tricky part. Since my model requires a thin wall layer for each button, when I cut the models out of the wax block shape, I end up with a bunch of newly created floating shapes in fusion. These are the parts needed for the press mold. Here I create another large 3D box to catch all of my floating pieces, and I join them together! From here, you can flip that mold upside down and place it inside of your wax block as the second half of this mold... or you can skirt the rules like I did - 3D printing this part of the mold to press fit inside of the wax mold. Hey it's still a smooth surface finish on one side!
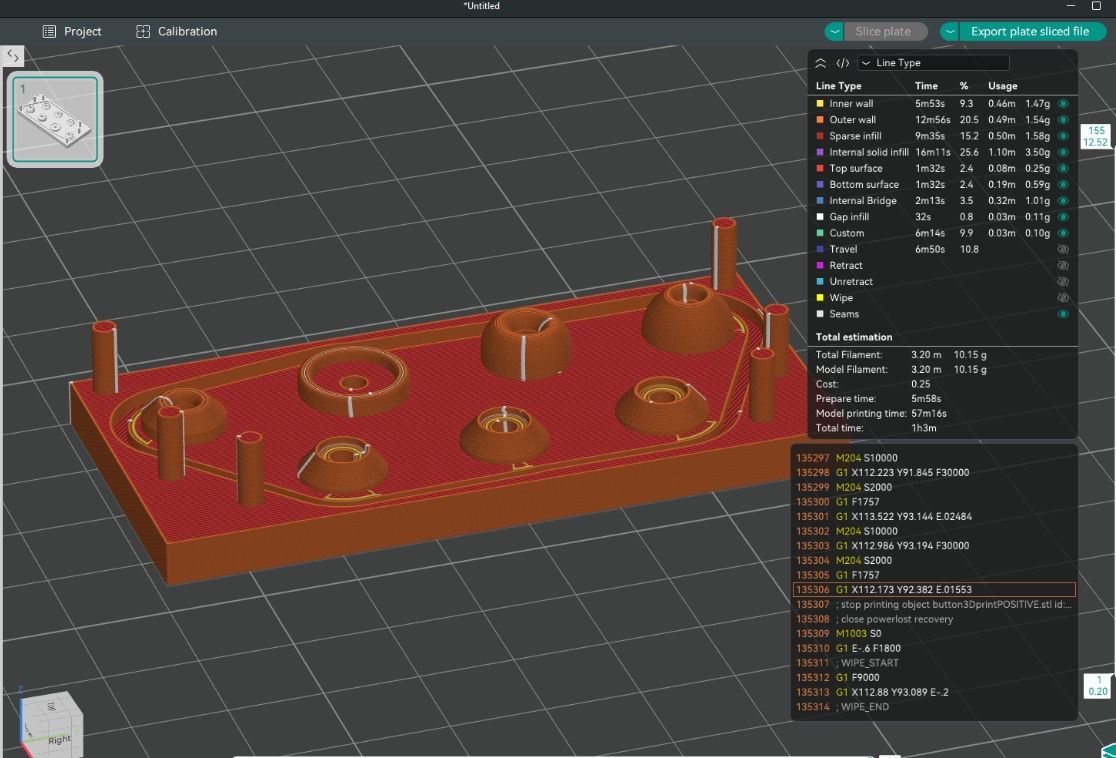
I actually think the smooth surface finish requirement noted above is a bit of a moot point these days. I pushed the P1S to print at the lowest possible layer height and the layer lines are completely indistinguishable in the final print. Anyways... If you're on my case about this one - please keep scrolling - I eventually do cast using only the machine wax!
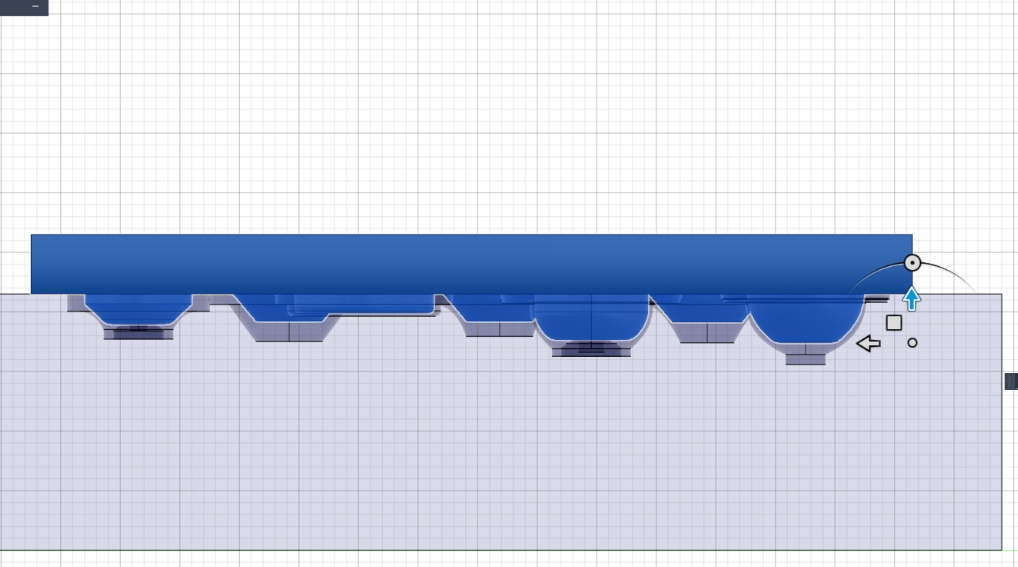
INCORRECTLY SPLITTING THE MOLDS
A quick tangent. Making two halves of a positive mold that eventually end up being a negative mold, which casts a positive object can be a REAL brain twister, and you're bound to mess something up along the way like I did. Here is another model I was working on, one that was actually a two part indirect mold. It was a button that would end up in my final project. Here's what went wrong along the way.
➔ ModsProject
Hello darkness my old friend.
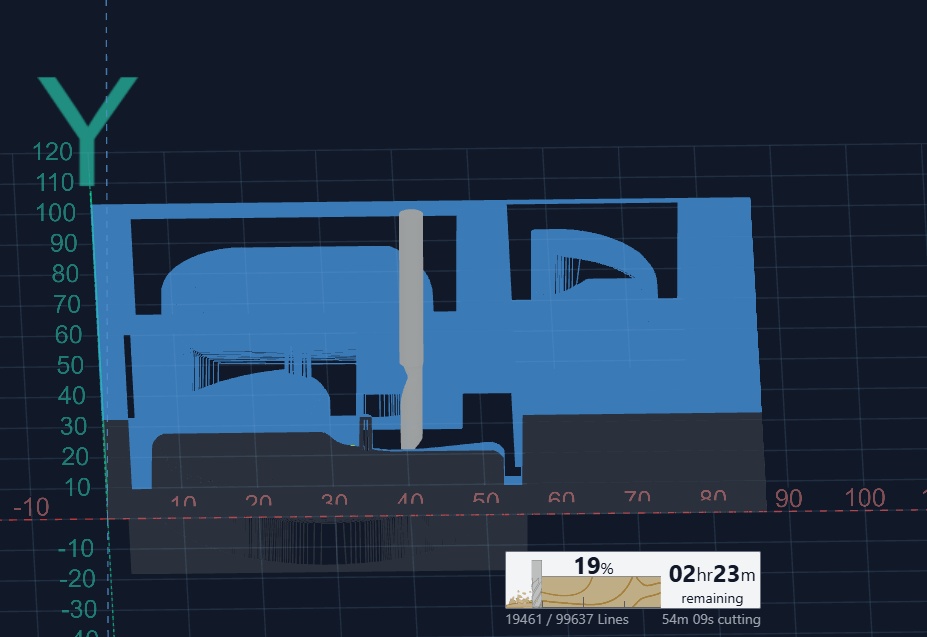
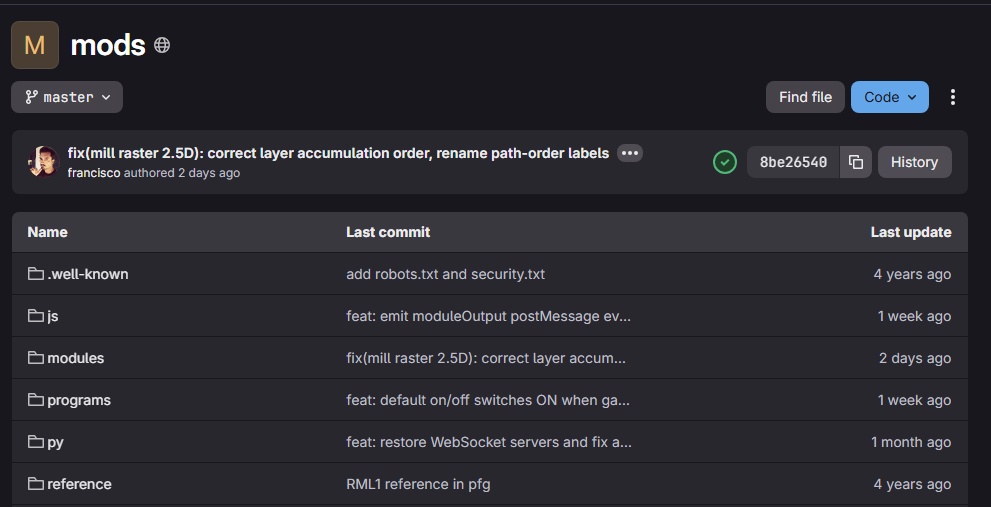
Just when I thought I had escaped mods in ESAN, we were back to use the site's 2.5D raster mill and 3D milling programs to generate the G-Code for Kannai's Genmitsu Cubiko. My first attempt at this was utter failure, which my mentor Yuichi later pointed out to me was because of a bug in modsproject that was later patched. Here's how you're supposed to use Mods Project with our machine setup (more on that below).

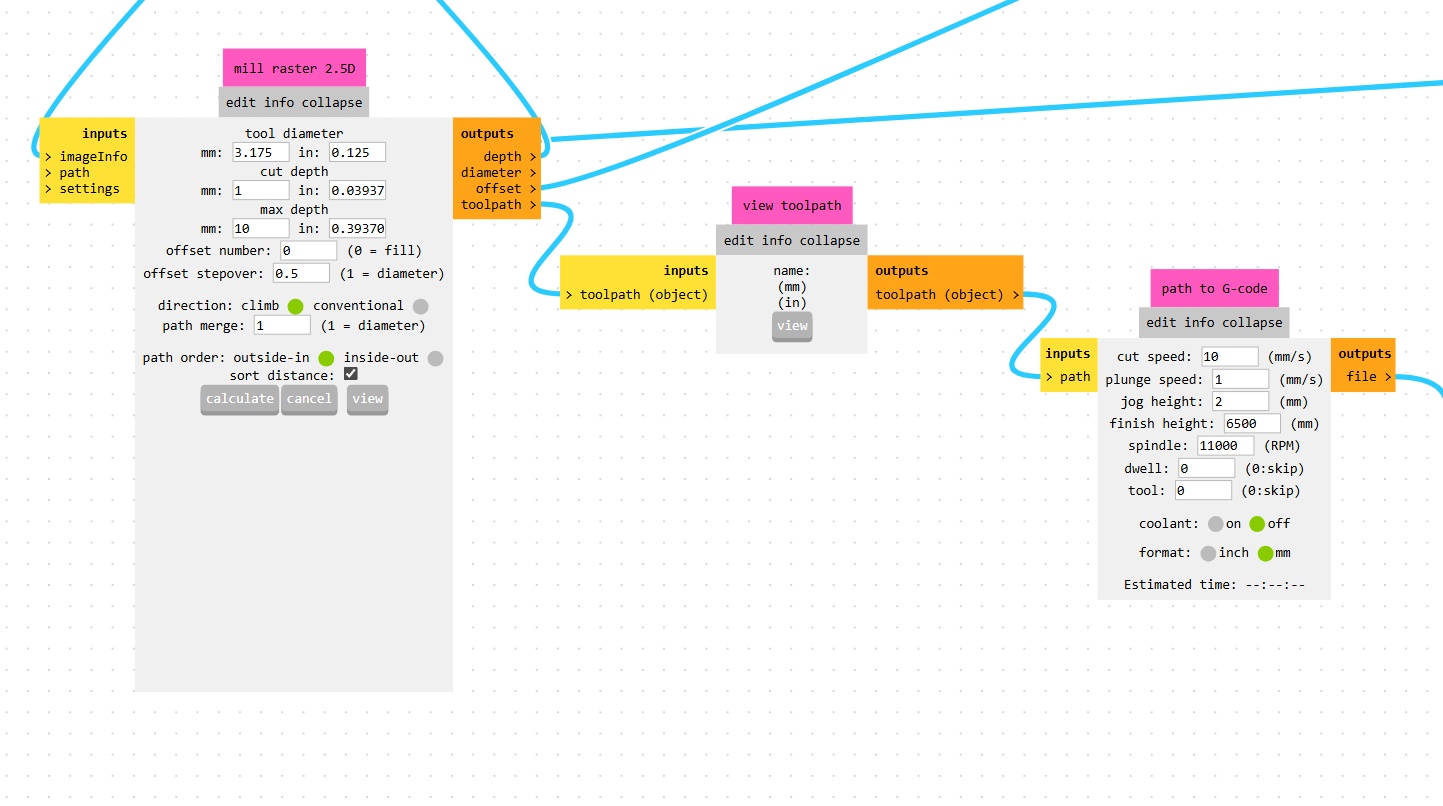
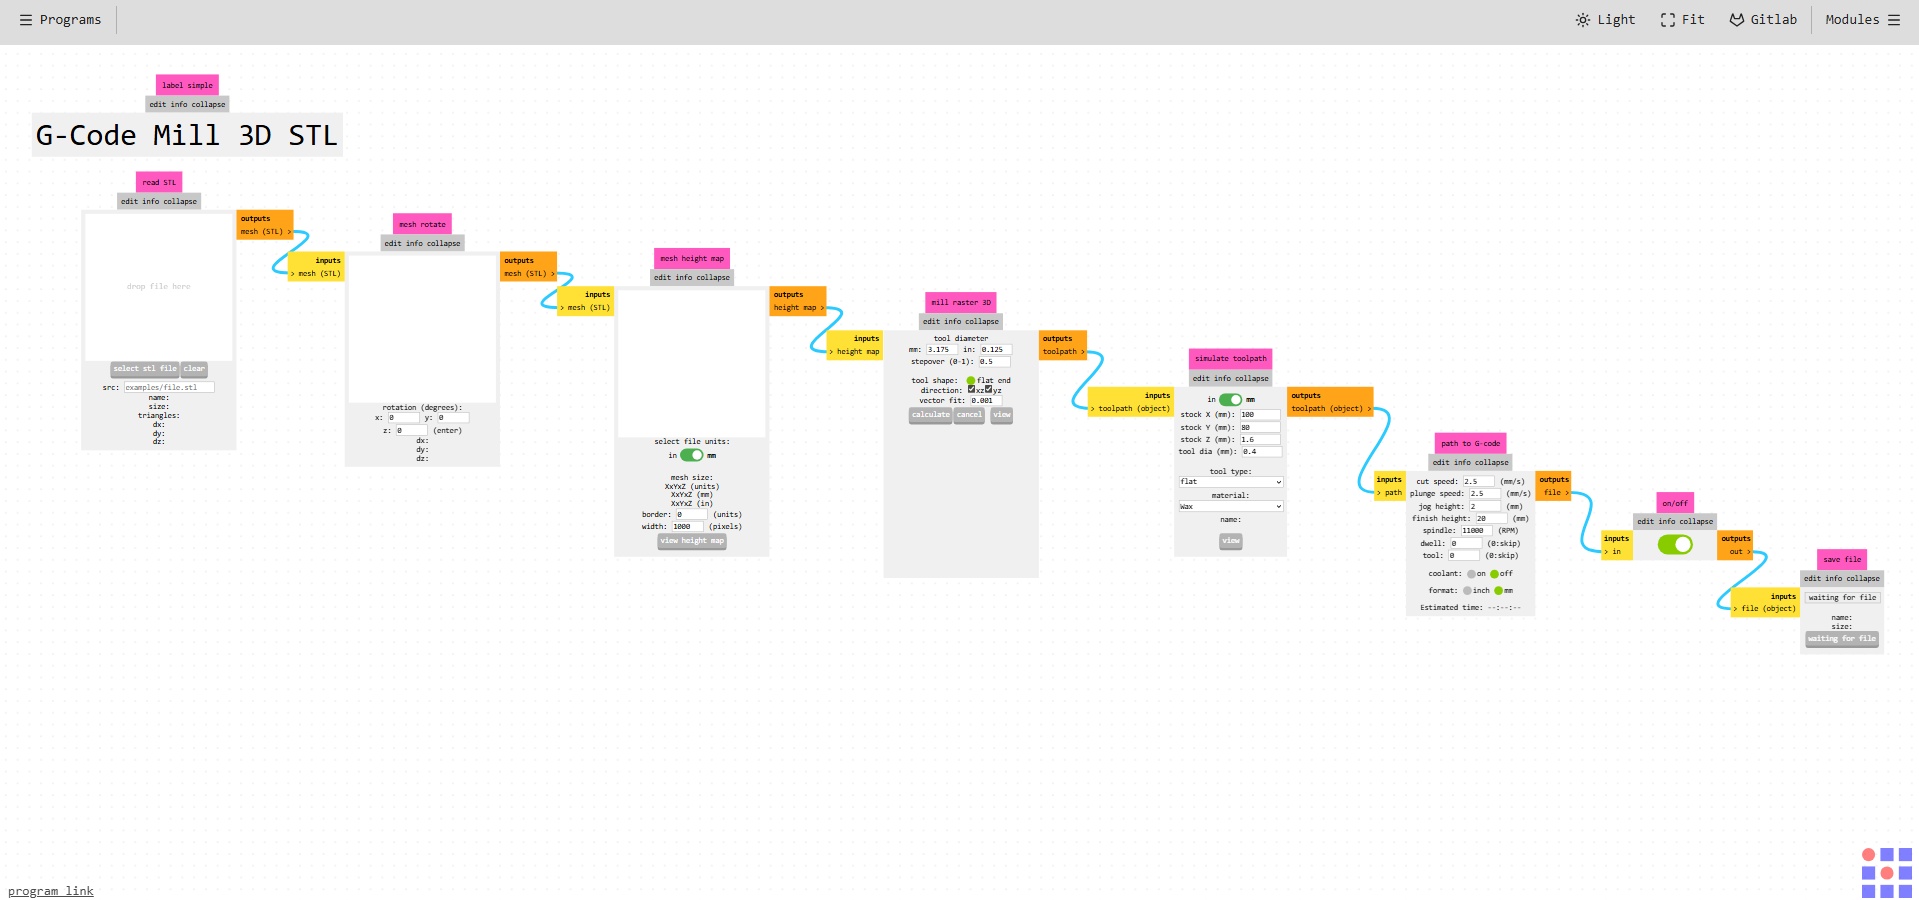
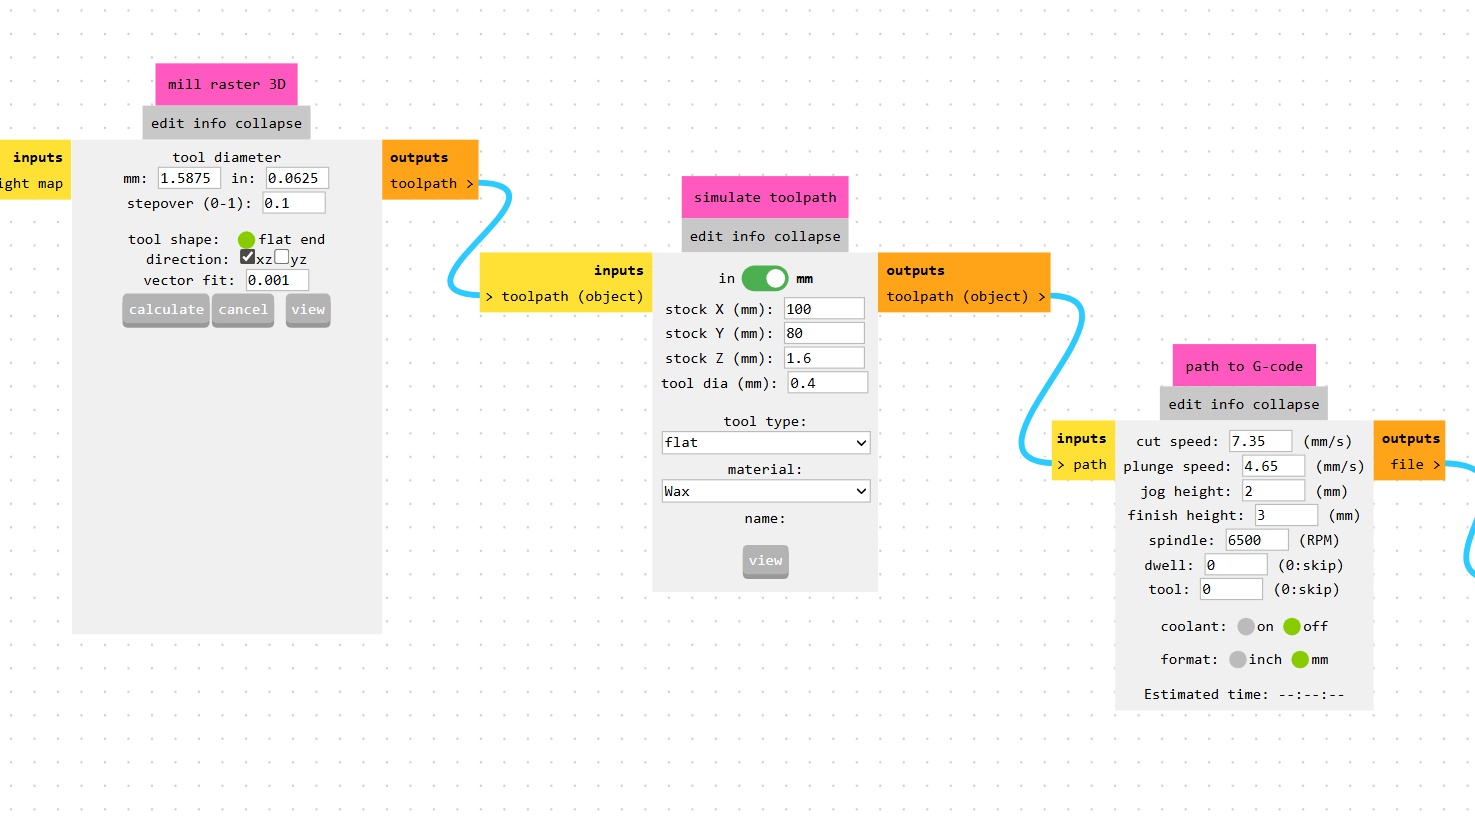
These files becomes your two passes on the milling machine. A rough cut meant to take away the outer perimeter and add some relief cuts to the next pass, the fine cut that handles all of the detail. Also be very sure that you unselect "xz" in mods for that cut, otherwise you're going to end up with double the machining time.
➔ gSender
We're using a new piece of software, at least for me, here at Kannai with the Genmitsu. Over the last few weeks I've been working with Candle to control the Genmitsu for boards, but we're moving forward with gSender this week for a bit more ease of use since we don't need height maps (thanks to Yuichi flat machining the face of the wax blocks prior to use needing them)!
gSender is mostly straight forward. You can manually control the machine and zero your axes - you can eyeball the X and Y, and use the paper trick for the Z axis, setting your Z axis to zero when you feel the slightest bit of resistance from the end mill.
From here you import your ROUGH.nc file first, do a quick check of your tool path by pressing the "Outline" button, and then you can click start!
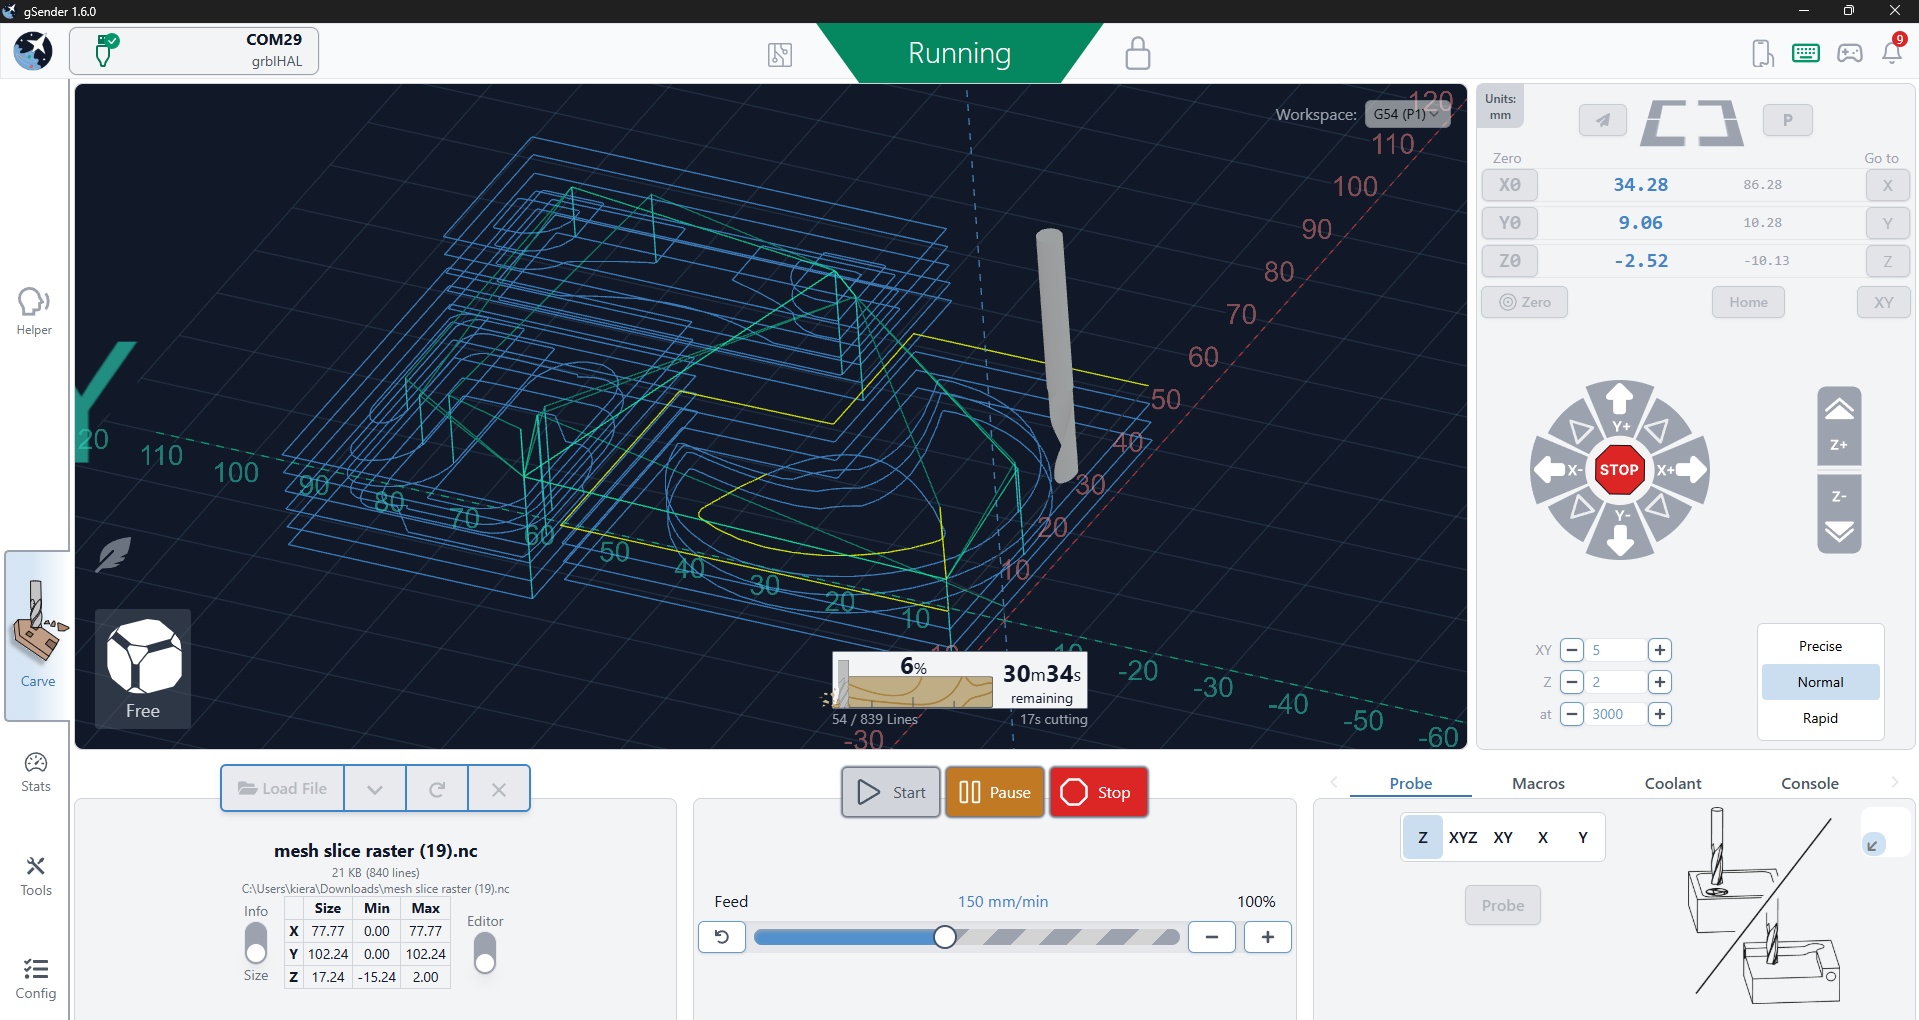
We had some issues where some G-code lines were causing the machine to pause with an "undefined" error every now and then. All we did to fix it was click start again. Will need to add this as a bug in the mods project repo at some point! Then the Genmitsu handles the heavy lifting. Remember to check your speeds and feed rates otherwise some of these jobs could take a really long time!
Once the rough pass is finished, be very sure you don't re-zero any of your axes in gSender. You can then import the FINE.nc and repeat the process.

One thing that it interesting to note in terms of what I learned. I thought the machine was going to do small Z-axis layer removals from the machinable wax, but it actually mills in the X direction, shaving off faces inside of the object - which I guess is why we have the rough paths in the first place!
Quick Note: For my first attempt, since I wasn't able to get modsproject working nicely, I actually used the Roland Modela. Since the software is entirely in Japanese, and lives on an old laptop here in Kannai - I was unable to document much of it's function. But my contemporary from last year Shuntaro Ito, has lots of documentation on how this specific machine works.
Casting
Compared to the above, casting is much more straightforward. Of course, when working with an chemicals, always take the time to review the MSDS and related documentation for safe handling and use.
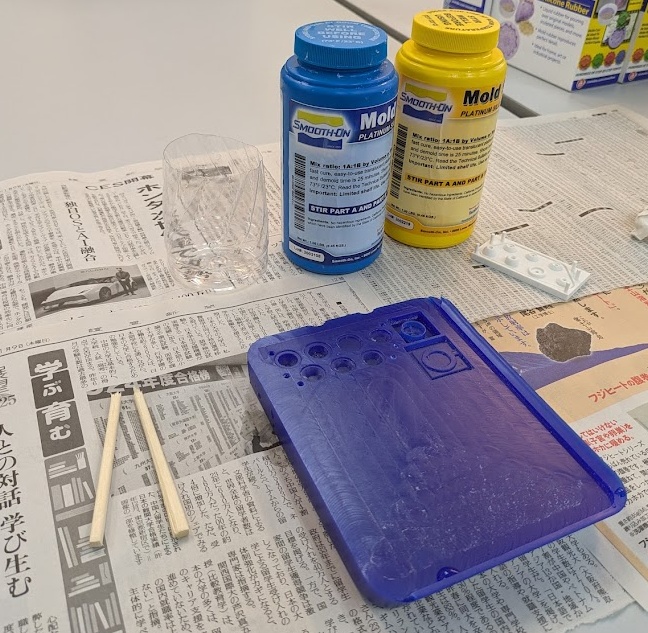
➔ Silicone
For my first silicone test, I'm using Mold Star 31T silicone rubber. The instructions are very simple: mix part A and B in equal volumes or weights and then pour in to your molds. The "pot time" is how long the material can be worked with until it begins to cure. The pot time for 31T is 5 minutes, meaning you have to work quickly - but not too recklessly as you may introduce bubbles - very bad!
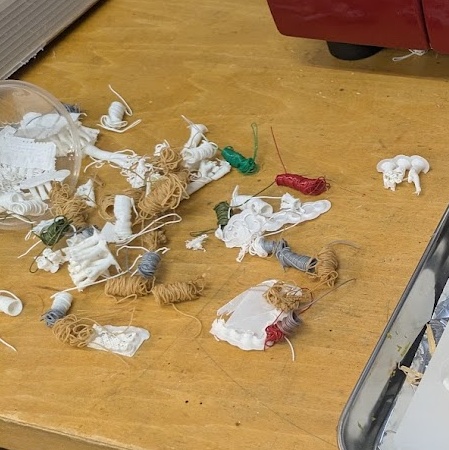
The photos here are from multiple different casting attempts because of just how quickly the material sets. When I'm working alone, I often don't have enough time to take many pictures during the mixing stage.
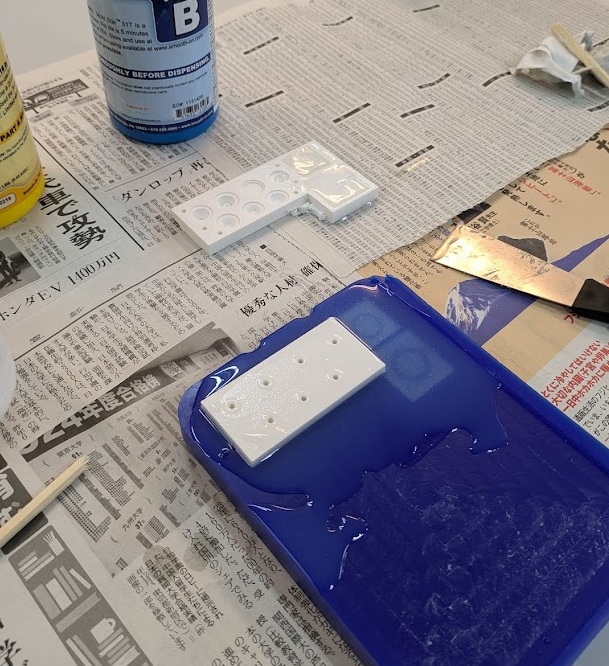
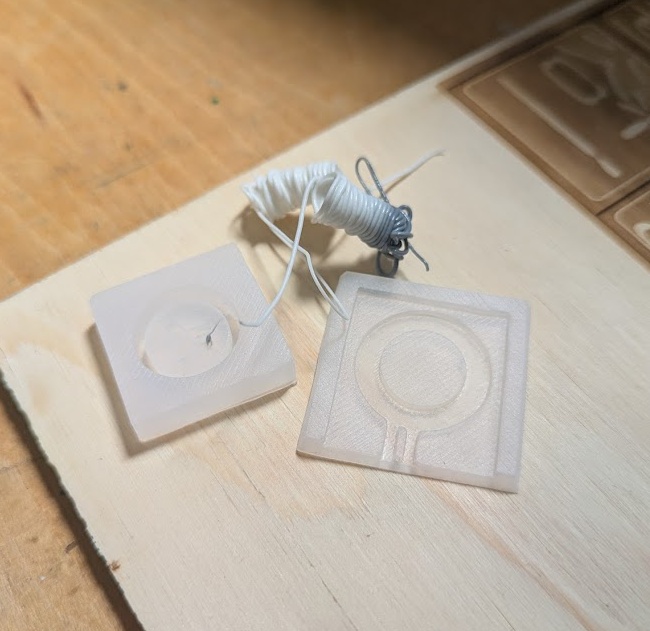
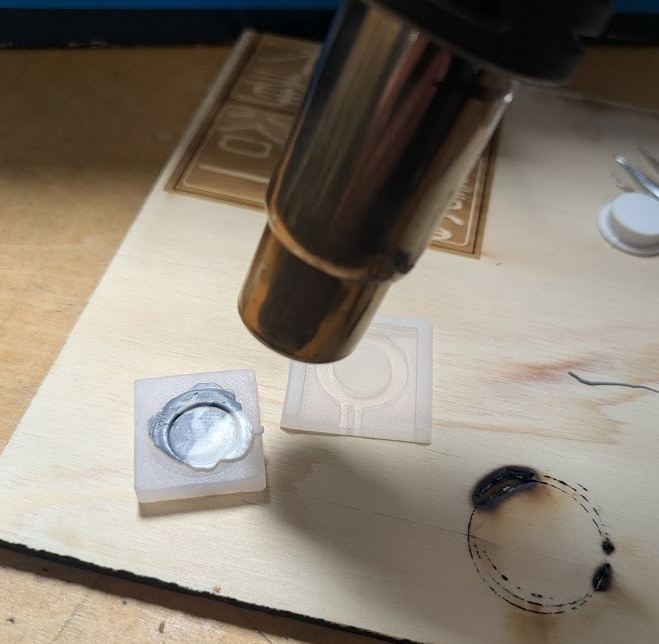
The curing time for 31T is about 25 minutes, but I've found it to be a good idea to wait at least triple that. One of my early attempts in casting the material ended poorly, when I tried separating the molds, the silicone was still tacky and stuck to both sides, ultimately destroying the cast.
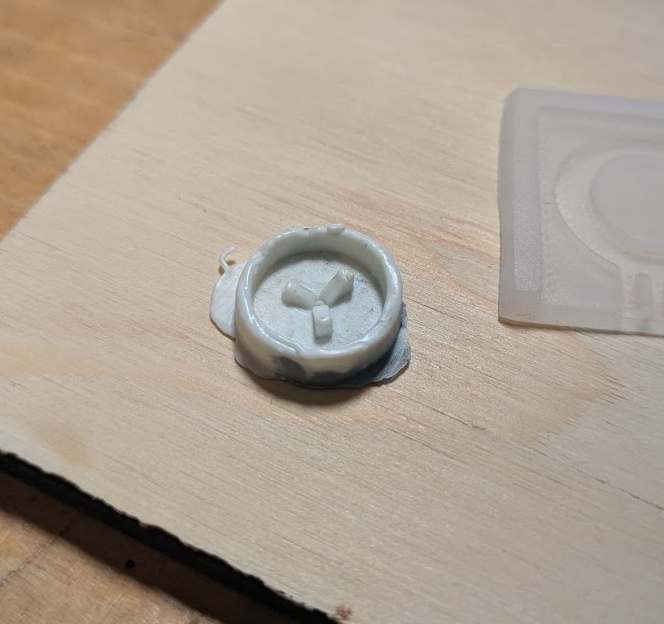
and the end result of the rubber button test from above! To have this properly work now on a PCB, I would need to recast this with a carbon pill or conductive material in the bottom nub of the dome. You can read more about my experimentation and ultimate direction of the button pads over on my final project page.
From here on out, you'll see some more of the tests and things I tried out this week, including some more silicone molds for casting biomaterials!
➔ PLA Scraps
I have a very large collection of PLA scraps from my printer at work and I really hate the idea of owning a printer for that reason, especially with all the waste that multimaterial prints create. I saw an Instagram reel (or YouTube short, or TikTok - I don't know anymore - we're all cooked) a few years ago about someone who created a silicone mold to heat their PLA scraps into a new shape, a clever way to reuse and create something special. I knew I would want to give this a try here in Kannai.
Unfortunately for me, Kannai doesn't keep their PLA waste like ESAN does, so I had to do a little bit of hunting before getting down to business. I emailed Fab Cafe Tokyo and Fab Lab Minatomirai to ask if they had any scraps to donate, and sure enough, they are both using their scraps for other projects, so I had to turn to the only resource left available to me: POOP!
Fortunately, Yuichi had not emptied the poop chute on the back of the P1S for a little while, so I had a small amount of scraps to test with. My first test was with a heat gun and small silicone mold of a button.
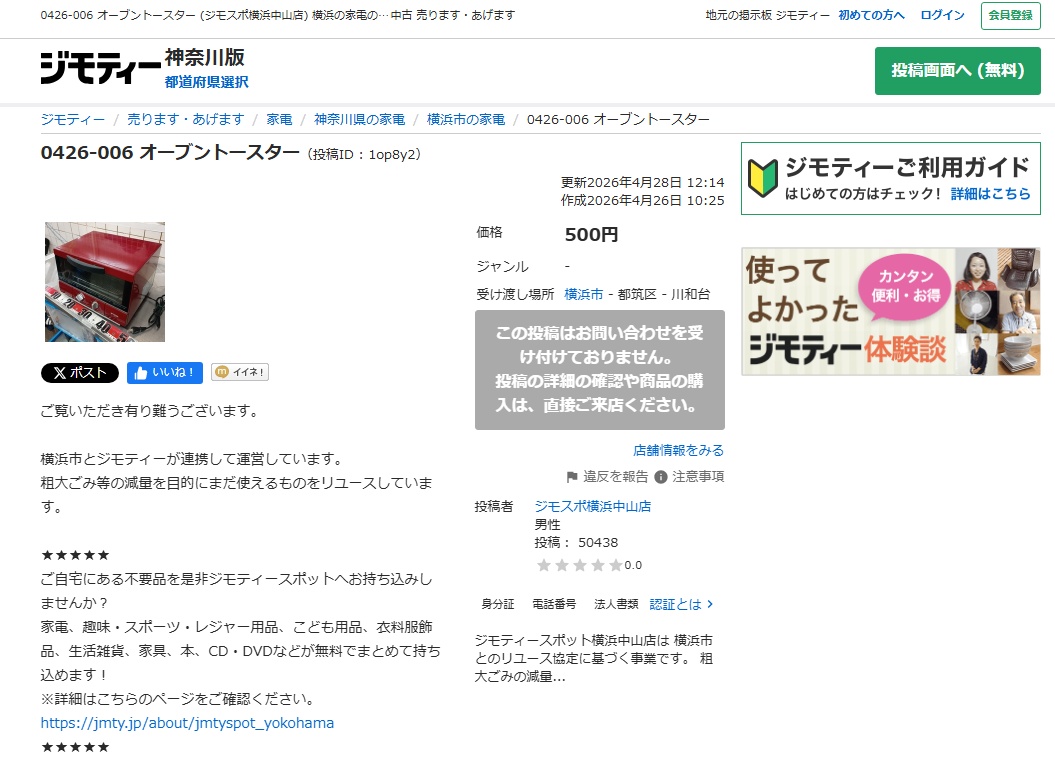
The heat gun process worked, but it took quite a long time, and it's not something I can just set up and let go for a bit without a fire risk. I knew that for a larger scale, I would need to a better setup. Yuichi sent me a link to a toaster oven at a second hand hardware store that would do the job! The nearest station to the store was about 40 minutes away, and then another 10-15 minute bike ride from there. So it was time for an adventure!
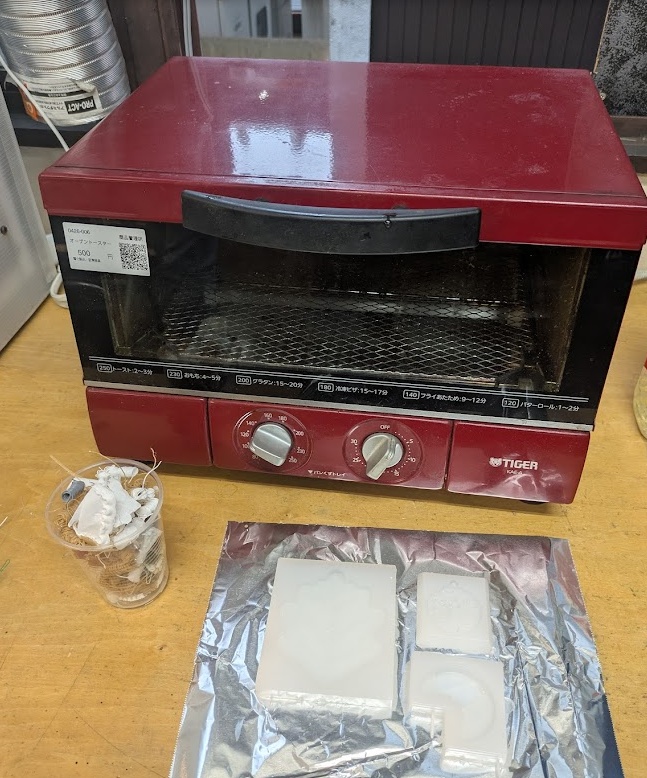
Toaster and poop ready to roll. Here's my process for getting a slick recycled PLA mold.
- Ideally you should be doing this in a very well ventilated space. The temperature you are melting the PLA is slightly below what our Bambu printer is doing it at, but the toaster itself isn't as temperature controlled and you will end up with more volatile compounds in the air that you would be better off not breathing.
- Gather your PLA scraps, ideally small pieces from the poop chute, support material, and the flow calibration strips that Bambu printers often leave at the front of the print bed.
- Snip up your pieces in to smaller chunks and set them into silicone molds - be sure your silicone is rated for high temps. Ours was rated to handle temps up to 450 degrees F.
- Preheat your oven to ~180-200 degrees Celsius (350-390f), and add your molds.
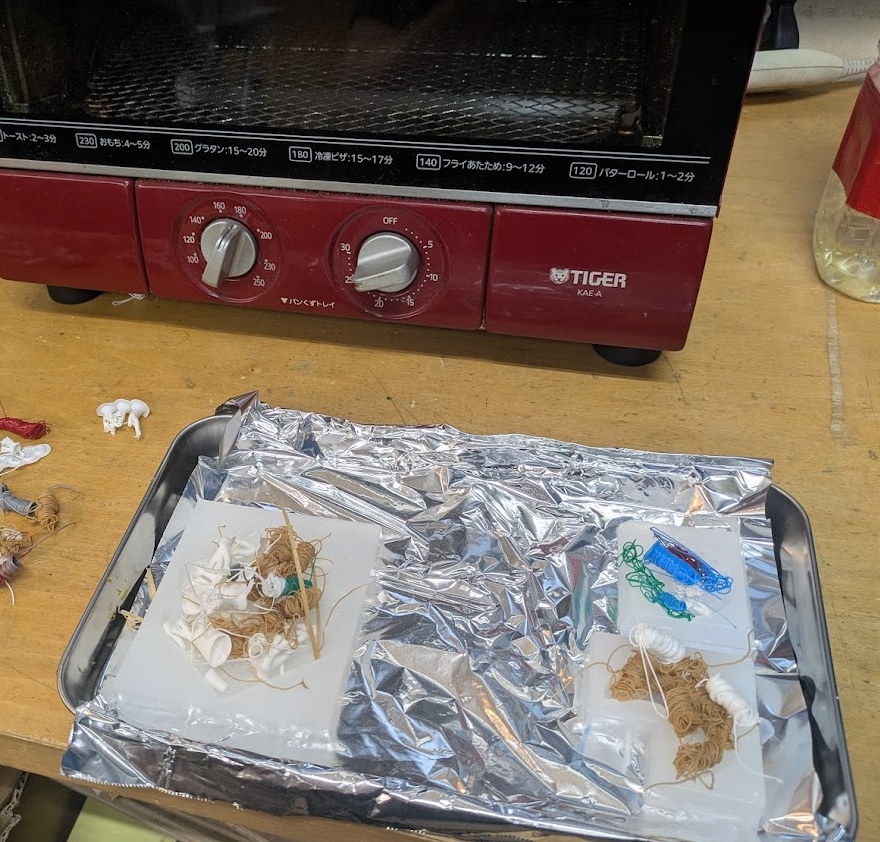
- Every 20-30 minutes, you'll need to pile on more PLA scraps as they begin to liquify and take the shape of the mold
- I left mine for about 3 hours, adding more PLA as needed. In the last 20 minutes, I upped the temp to 220 Celsius to help with degassing any trapped air bubbles
- Remove the molds and allow to cool for an hour. I used a metal spatula to flatten the bottoms (which are the tops in the molds) as soon as it came out of the oven.

and the end result!
The pictures don't show just how incredibly glossy the final result is. With a smooth surface silicone mold, you end up with a super clean layer-line free final product. I ran out of PLA scraps towards the end so I wasn't able to fully fill all of the molds. If I were to do this again (and I've gotta back in my classroom), I would probably get the first layer started with the heatgun to make sure all of the crevices are filled first, and then pile on the scraps in batches in the oven. Also helps to have a way to smooth out the bottom, so printing a silicone insert or machining something heat-safe to fit inside the top layer and can be pressed down would be a good addition.
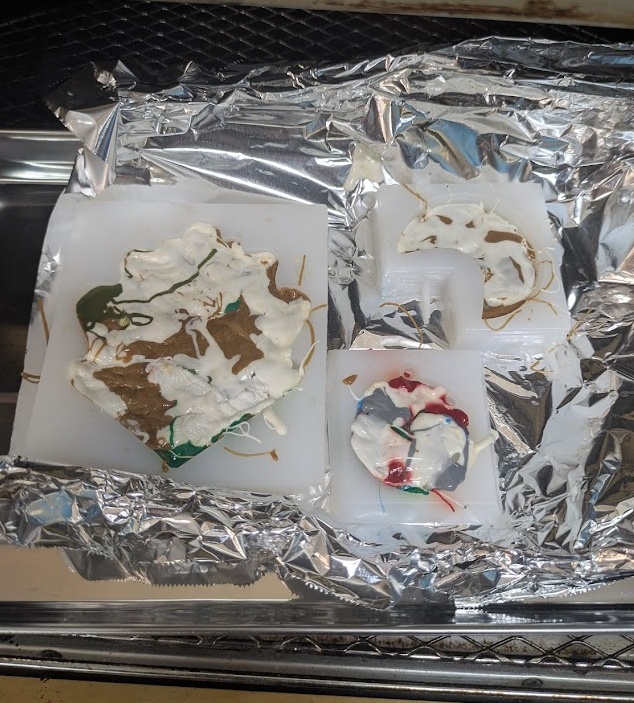
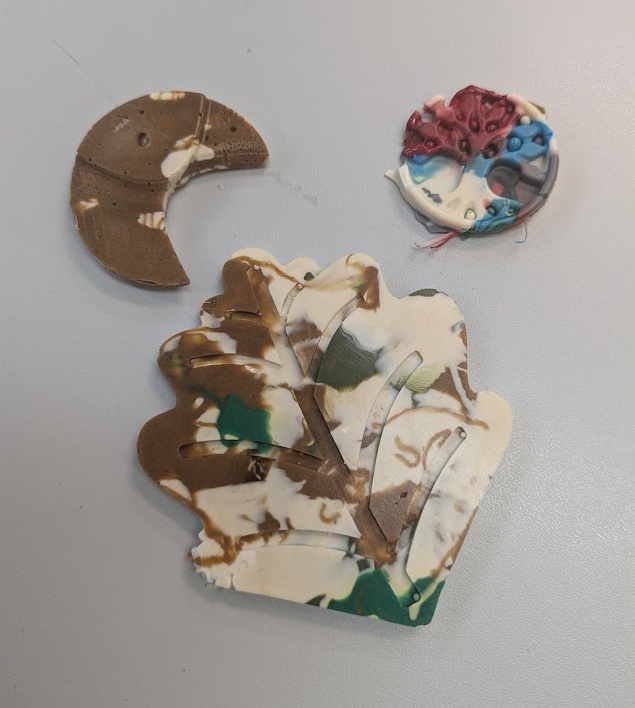
Biomaterials
➔ Modelling
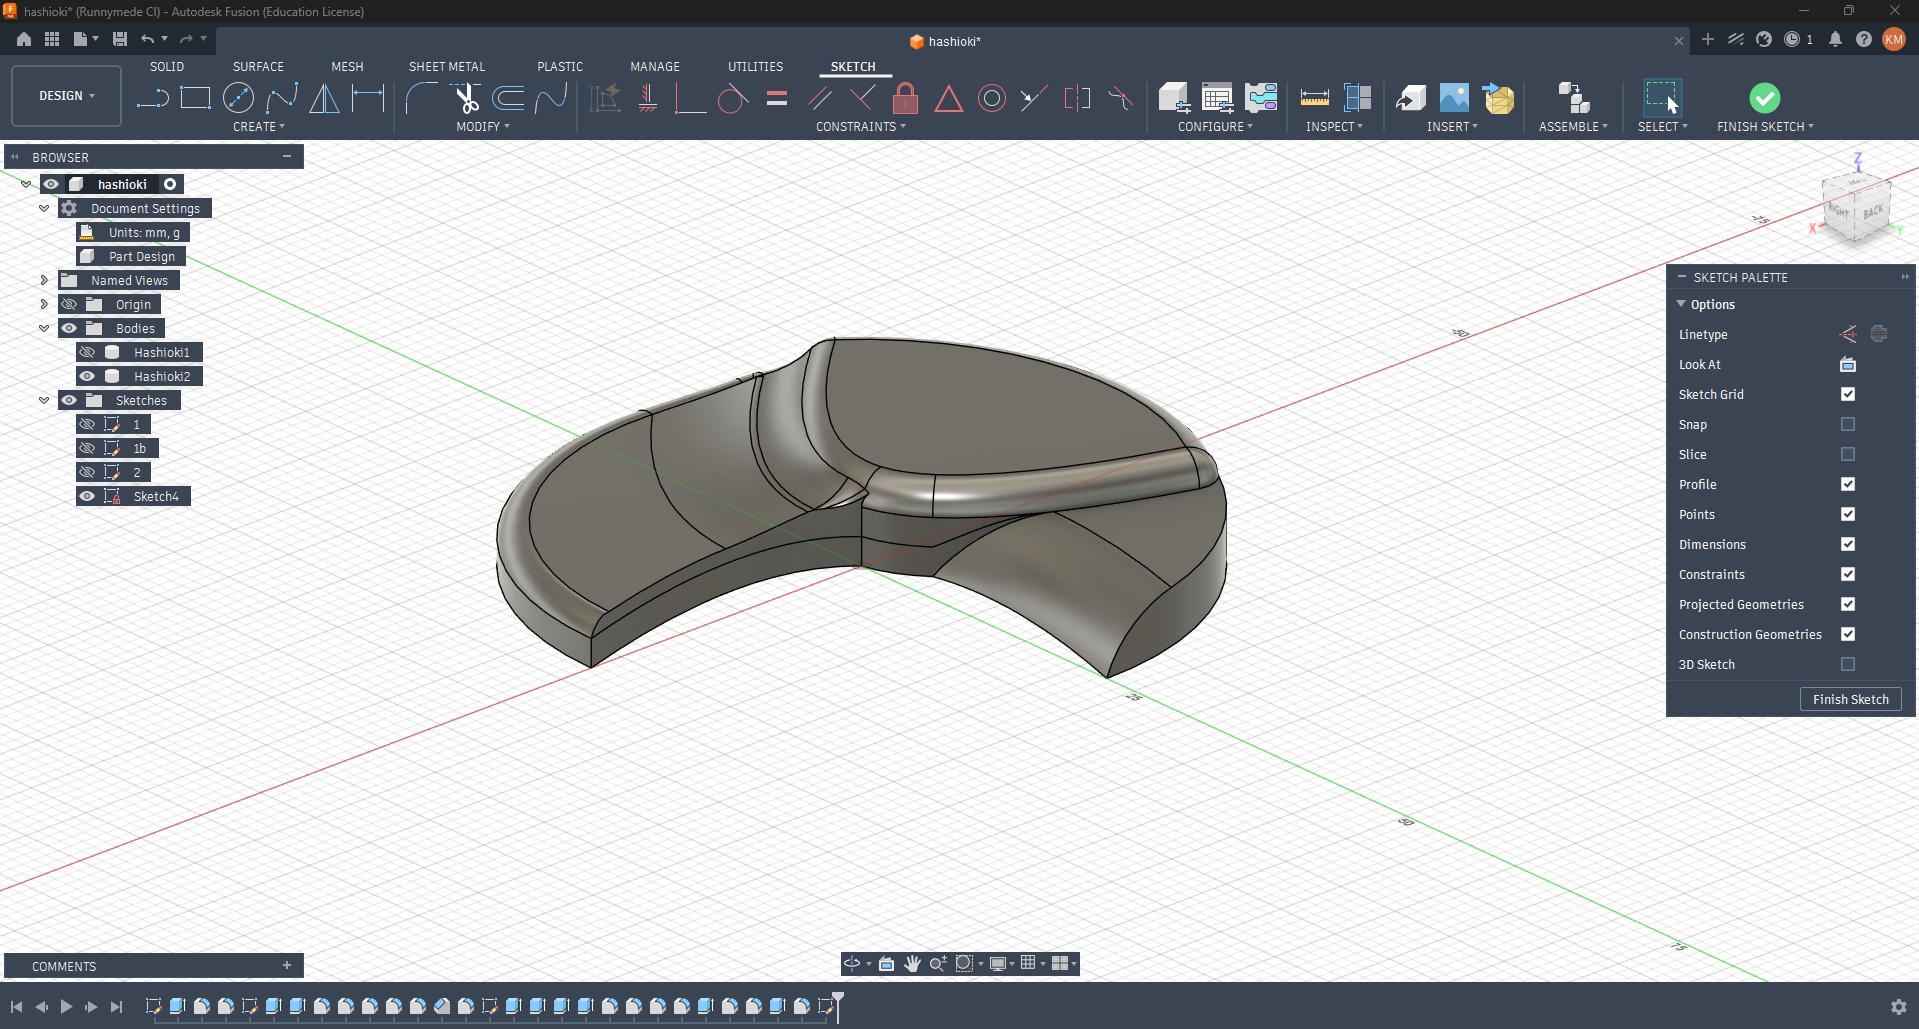
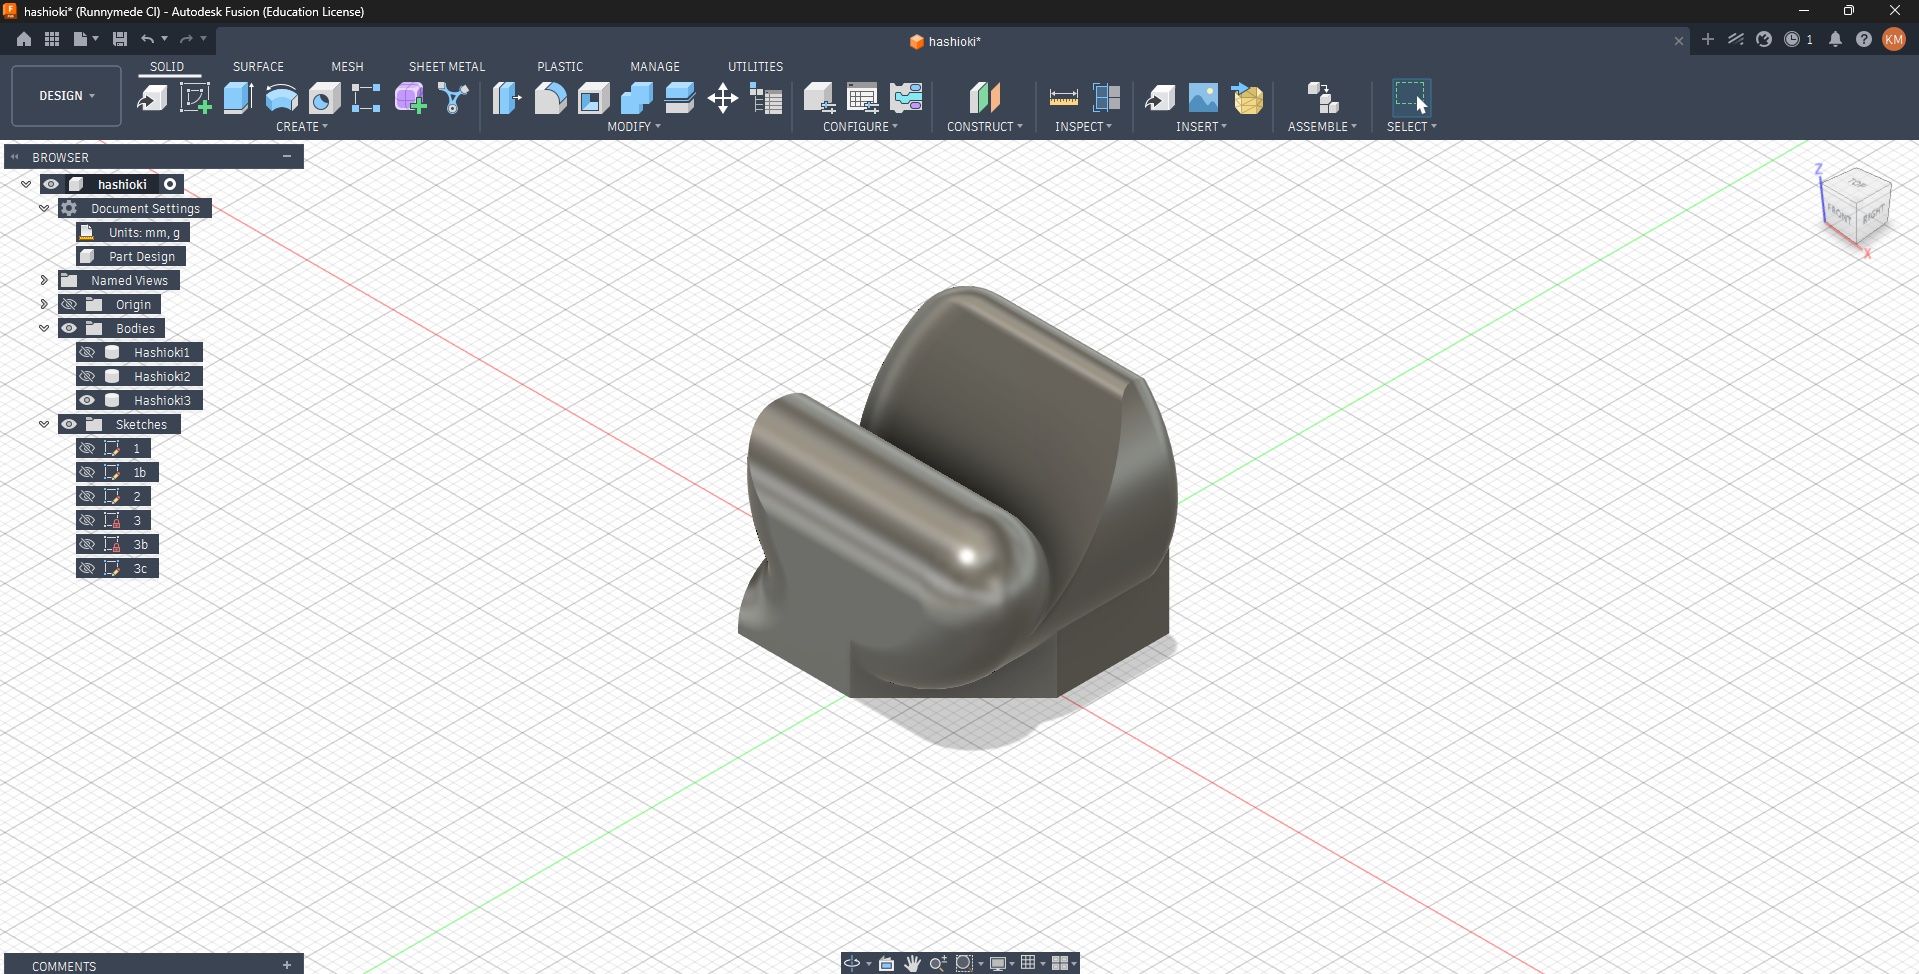
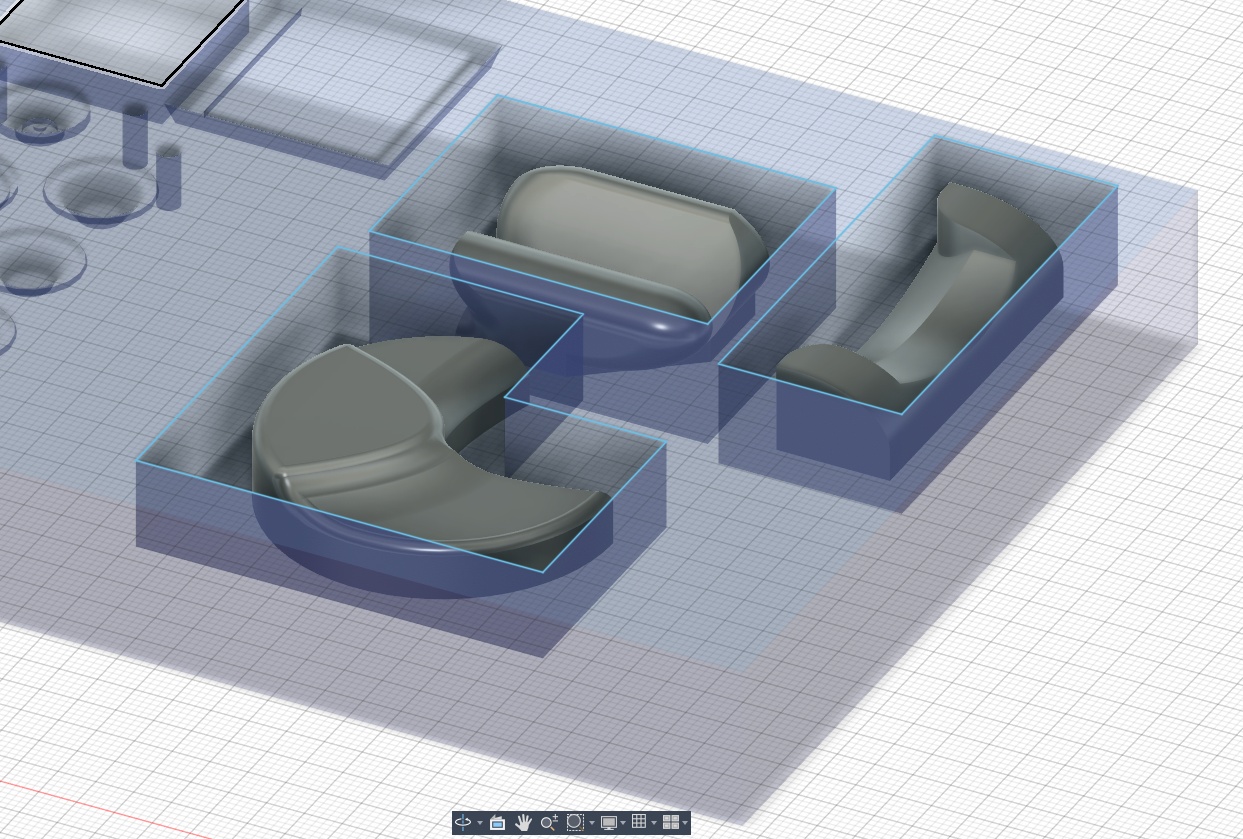
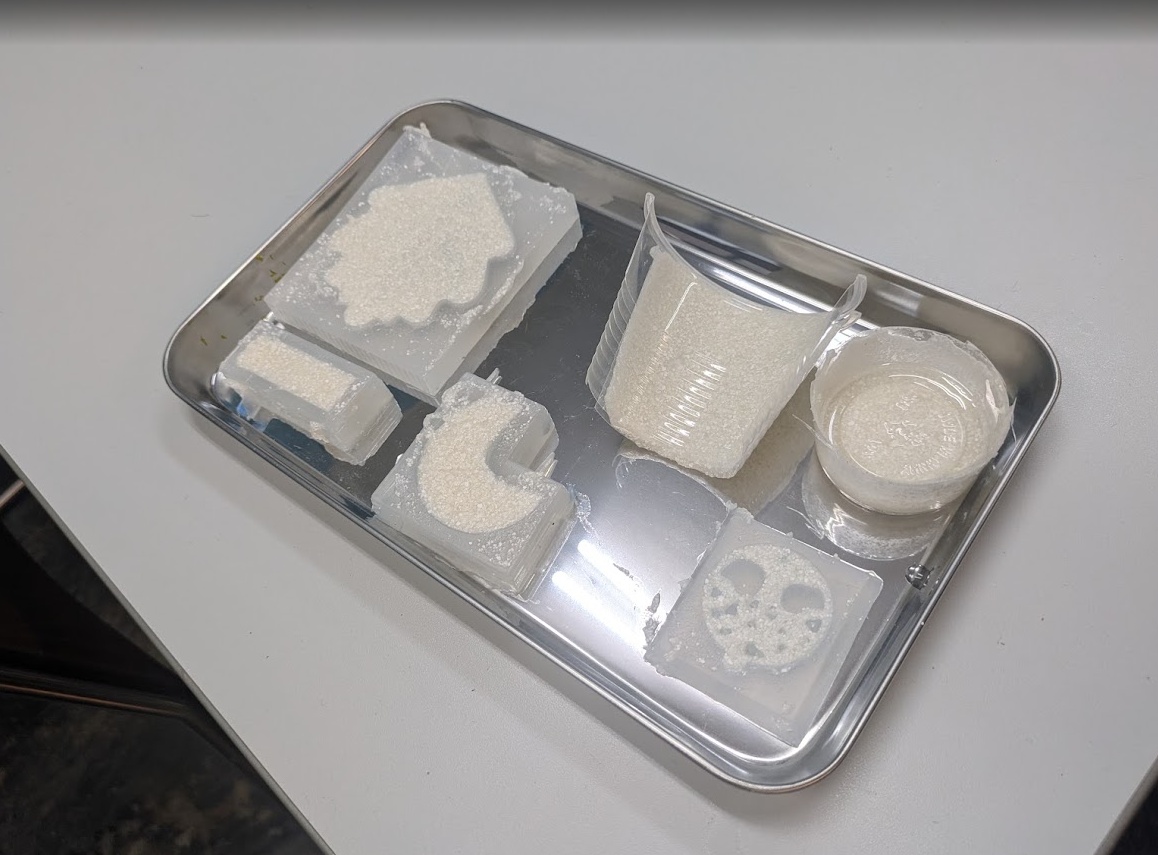
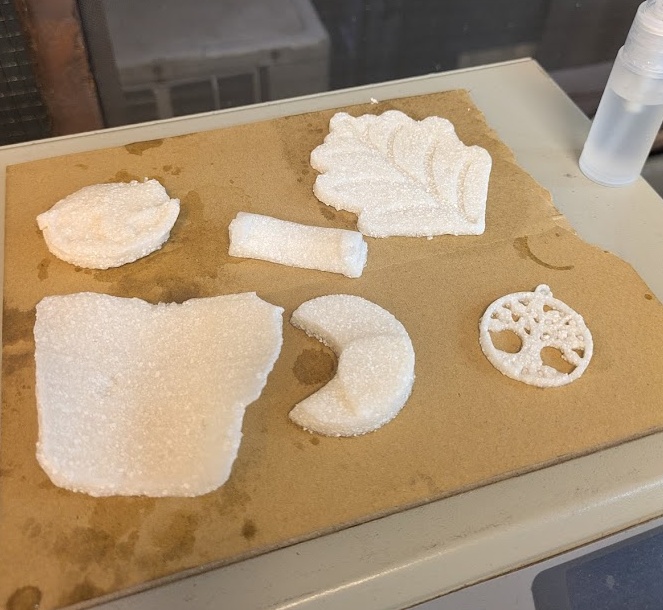
Needing a break from my final project prototyping, and worried that over complicating a mold for a biomaterial cast would make things difficult, I decided to let my creative energy flow for an hour and design some Hashioki, or chopstick holders. I started with simple shapes in Fusion and just added random fillets and chamfers until it looked interesting. Since these would be single part molds, I made sure they had a flat bottom and no overhangs that the machine wouldn't be able to access when milling.
➔ Recipes
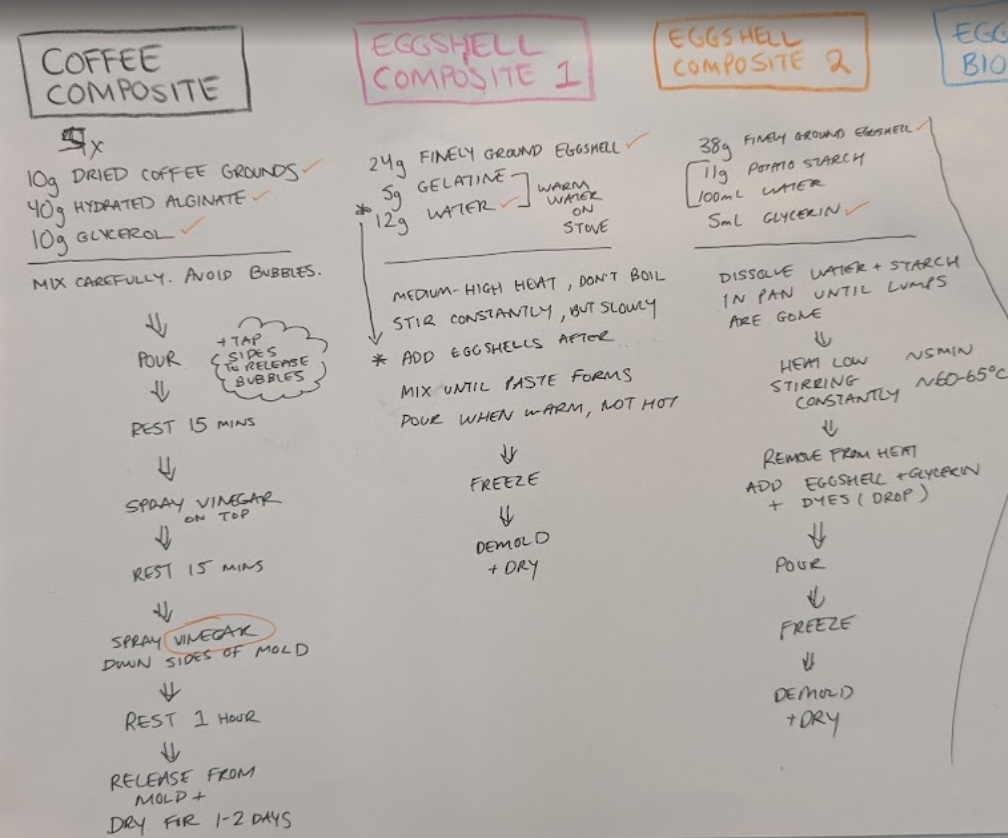
After being introduced to Materiom during our lecture this week, I was so excited to try out biomaterial casting this week. I found a few recipes that I thought would be simple enough to pull off, especially for someone living abroad. I found four recipes all working with coffee grounds or eggshells as their primary ingredient:
- Eggshell-Starch Biomaterial
- Coffee Composite Co02
- Gelatin and Eggshell Bioplastic
- Eggshell Biocomposite
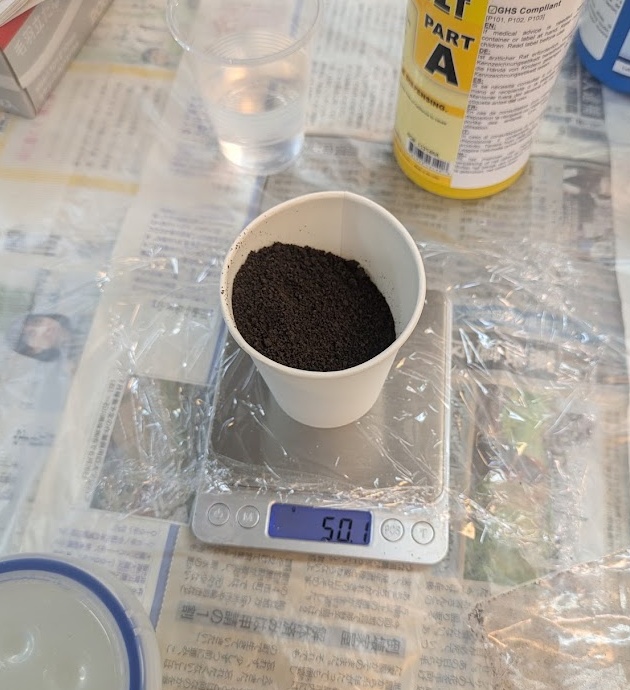
I collected my eggshells for a few days leading up to our casting day, and made the brave move of asking a local cafe for their spent coffee grounds in my so-so Japanese. The rest of my group members at Kannai contributed by collecting their own eggshells and coffee grounds, as well as purchasing some of the missing materials from the grocery store.
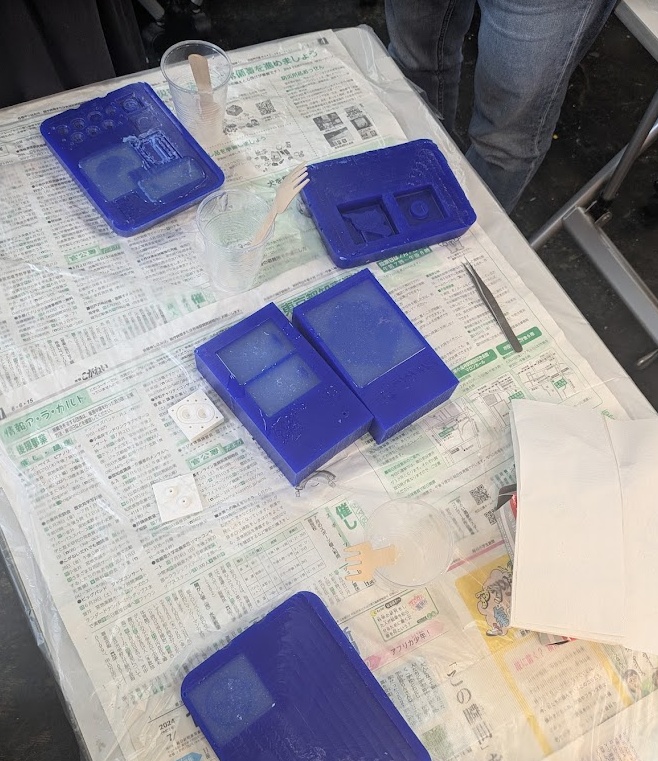
We spent the morning preparing our materials, including grinding down our egg shells by hand using a traditional Japanese suribachi and surikogi (mortar and pestle) and preparing some simple one and two part silicone molds to try out the materials.
➔ Eggshell Composite
We used this recipe for our main eggshell test, which involved creating a slurry out of potato starch and then adding the eggshells and glycerin. The resulting mixture was a course and slimy paste that could be poured into molds. The instructions say that after you've poured your molds, you can throw them in the freezer so you're able to pop them out of the molds and let them fully air dry.
As of the time of writing this, we're currently waiting for this composite to fully dry! Will update here with final results once they are available!
➔ Coffee Composite
Our next mixture was primarily based from spent coffee grounds, based on this recipe, mixed together with a glycerin and alginate solution that would cure when you spray it with acid after the mold as been set.
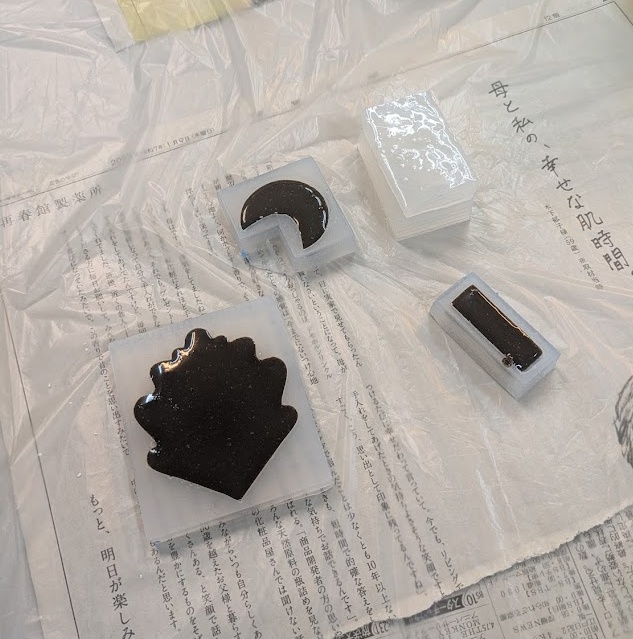
This mixture was so much more liquidy at first, we were worried it would not set. After returning from a lunch break, it still hadn't become solid enough to handle (and to spray the acid inside of the mold), so we made the decision to pop them in the freezer too. Sure enough after a few hours, it became a bit more firm to the touch, and you could actually feel the effect the acid had on the aliginate. We gave it one more quick soak in vinegar before setting it up to fully dry for the evening.
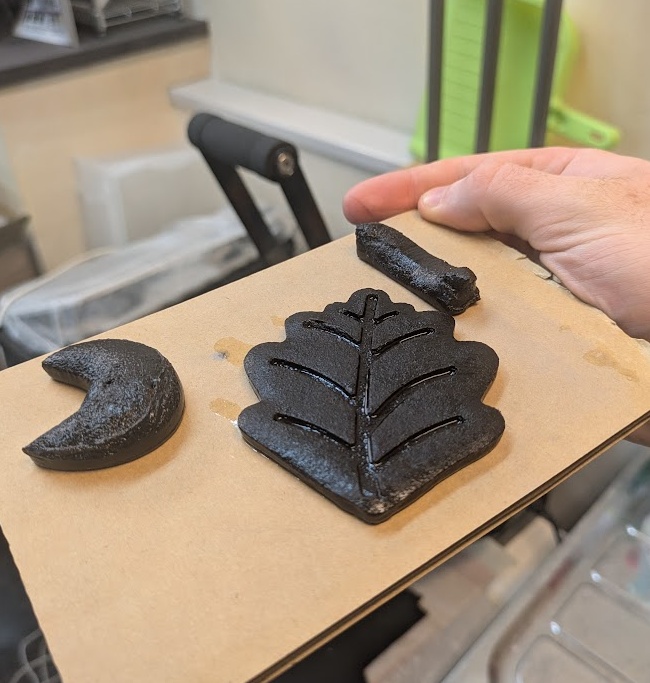
This one came out of the molds a LOT more moist but still firm and you can handle them without tearing. Again, we're waiting on these ones to dry, so I will update you here when they have fully set!
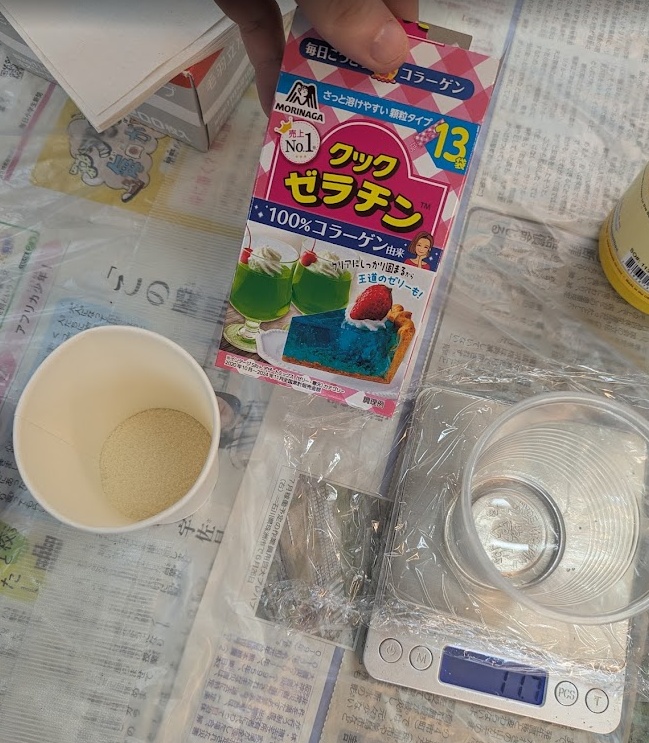
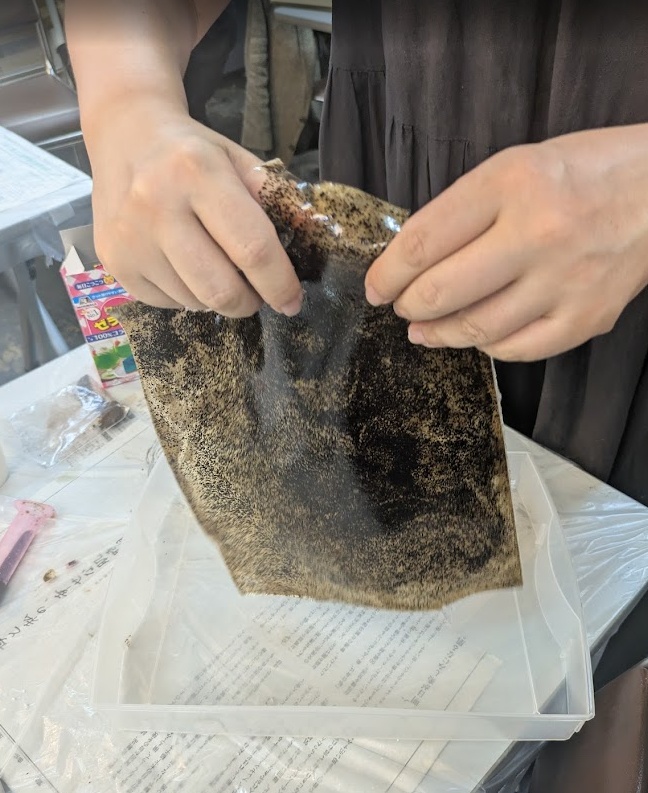
➔ Coffee Bioplastic
Our last casting attempt was an excuse for us to use up all of the coffee we had, and all of the leftover gelatin purchased. We were originally going to follow the recipe I listed above for the Eggshell Bioplastic, but we ran out of eggshells and decided to pivot to this receipe. Fumiko took the lead on this one, casting the material into a plastic tub for a thin sheet that we could pick up and play with. It was strong and had some stretch to it. Certainly amazing that we could create this just with materials found in a home kitchen!
Conclusion
Molding and casting was a highly anticipated week for me in this course. I now feel like I have the knowledge to cast some interesting work when I return to Canada. I'm excited to explore more casting forms, especially with recycled plastics and biomaterials. I think the hardest thing about molding and casting is just how time consuming it can be, especially when you're looking to machine a mold. I think that 3D printing molds is a much more time efficient way, and if you tune your printer correctly - does not have the surface finish issues that are being warned about in class.
All of the files I created for the button molds and hashioki are available here:
