Fab Academy Student Agreement
The Fab Academy is responsible for:
- Teaching principles and practices of digital fabrication
- Arranging lectures, recitations, meetings, and events for the class
- Evaluating and providing feedback on student work
- Offering clear standards for completing assignments
- Certifying and archiving student progress
- Supervising class preparation
- Reviewing prospective students, instructors, and labs
- Providing central staff and infrastructure for students, instructors, and labs
- Fund-raising for costs not covered by student tuition
- Managing and reporting on the program's finances, results, and impacts
- Publicizing the program
- Promoting a respectful environment free of harassment and discrimination
- Encourage a diverse, accessible, and equitable community
I am a Fab Academy student, responsible for:
- Attending class lectures and participating in reviews
- Developing and documenting projects assigned to introduce and demonstrate skills, in enough detail to be able to reproduce them
- Honestly reporting on my work, and appropriately attributing the work of others (both human and machine, including AI prompts)
- Being prepared to answer questions about my work
- Allowing the Fab Academy to share my work (with attribution) in the class for purposes compatible with its mission
- Working safely
- Leaving workspaces in the same (or better) condition than I found them
- Participating in the upkeep of my lab
- Ensuring that my tuition for local and central class costs is covered
- Following locally applicable health and safety guidance
- Recognizing limits on lab and staff time
- Promoting a respectful environment free of harassment and discrimination
Signed by committing this file in my repository,
Kieran Mills
[x] Plan and sketch a final project
[x] Read and sign the student agreement
[x] Build a personal website
[x] Work through a git tutorial

[x] Create an image conversion script for commits
[x] Create static site generator script using YAML
[x] Learn Obsidian to organize my thoughts
[ ] Create Apple shortcut for moving screenshots quickly

[ ] For my students: Create a tutorial on markdown
[ ] For my students: Create an intro to web design page
[ ] For my students: Create a tutorial on Git
Workflow
I've been excited to begin the Fab Academy because it's an opportunity for me to try project management and documentation principles as a student, not as an educator. I am a high school technology teacher, but my background is in Biomedical Science, so my experience with documentation comes from a very academic place, lots of lab reports and backing up my arguments with citations. I still haven't figured out what this documentation process is going to look like in the end. I'd like to incorporate more storytelling and process work but without having it be a massive stream of consciousness. Anyways, allow me to share my first attempt.
➔ Gear
As I've mentioned in my About Me page, I'm moving to Peru and Japan for 2.5 months each to complete the program. I'm normally a desktop computer user, so I've had to make the switch to a laptop. I managed to find a used Lenovo IdeaPad and 2020 iPad Air on Facebook Marketplace before leaving.
➔ Software
I'm looking to explore Obsidian as my primary notetaking and markdown software. I'm the kind of person who has so many lists that I have separate lists for my lists. I'm excited to explore using Obsidian and it's node/graph approach to organizing notes.
My primary workflow will utilize VSCode, the IDE that I'd say I have the most experience using (next to Atom, RIP) and it's the IDE that I encourage my high school students to try out if they are starting their computer science journeys, though I encourage the use of a lot of extensions to get started. For this clean install on my laptop for the course, I'm using: Live Server, Markdown All in One, Paste Image, and Prettier.
Making Websites
I've been making websites for years, and have tried so many different out-of-the-box solutions (Google Sites, Wix, Squarespace, etc.) but none of them really give me the flexibility and control over the look and feel and how my own workflow integrates, so I usually opt to make my own tools from scratch or modify bits of pieces of templates that I like.
➔ HTML
As an introduction for those reading who have never made a website before, think of HTML (Hypertext Markup Language) like the bricks of a house. Theoretically, you could build a home with just bricks and sleep on the floor, but it's not exactly pretty and doesn't provide you with any functionality, it's just a static frame. HTML allows you to decide where and what you put into your website, developing little rooms or zones (called "divs") where you can either add text/content directly, or placeholders that can be replaced by your JavaScript. It's what we call a "markdown" language, something that isn't "turing complete", which means you can't actually "code" in HTML - it can't respond or act based on any logic, it's simply a foundation.
➔ CSS
If we're using the house analogy here, think of CSS like putting up the drywall and giving everything a nice coat of paint. Basic CSS doesn't add a lot of functionality still, but hey, at least you've got something nicer to look at. To use CSS, you give each of your HTML divs a "class" that can inherit different properties, like text size, colour or even how a div should behave when it has been clicked or moused over. CSS still is not turing complete (and heaven forbid you ask me how to center a div) but it has a lot of nifty bells and whistles that have been added over the years, albeit with differing levels of support across browsers and devices. Oh the joys of web development.
➔ JavaScript
JavaScript is everything in your house that has function. The sink, the oven, the TV, the thermostat. Anything that you can interact with or something that interacts with you, that's what the role of JavaScript does in a website. JavaScript is a turing complete language, so you can get it to do different things based on different conditions. It can change the class of different divs dynamically, you can have it listen for clicks or button presses and react accordingly. You can even have it populate the entire website for you from essentially an empty HTML file! Sure, you can build a website with just HTML (and lots of people did just that back in the day), but if you want your site to be more than just a static display of the same information, you're going to need JS.
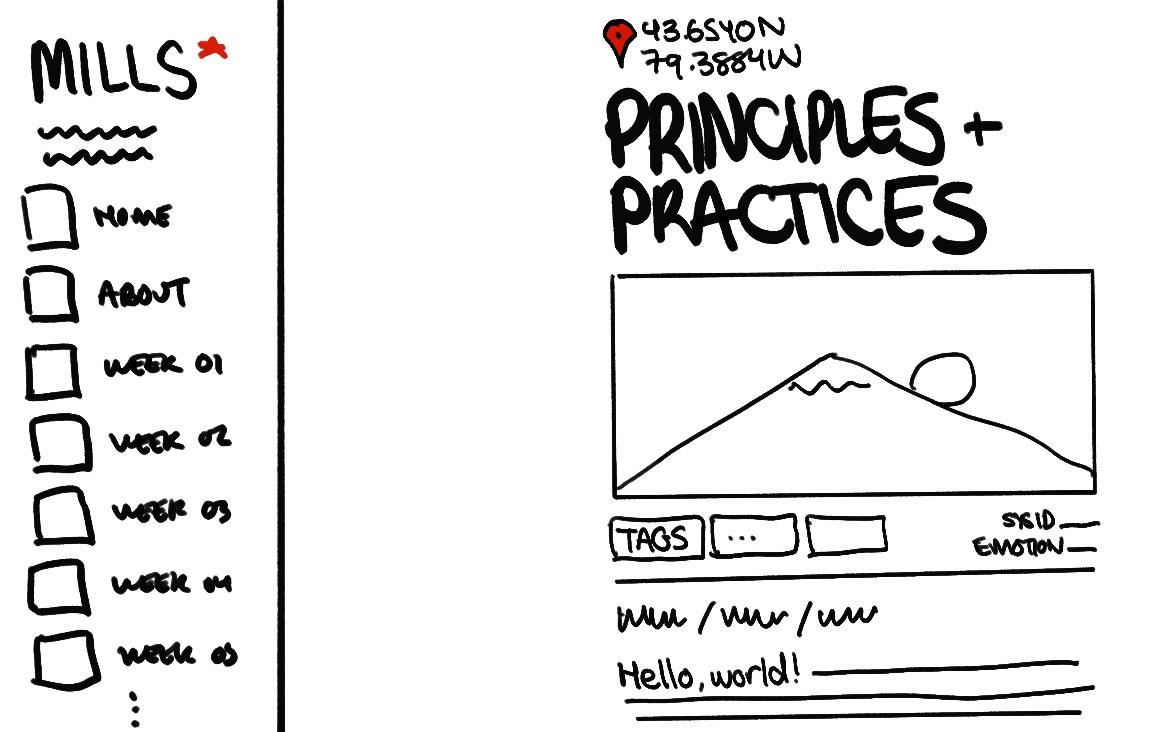
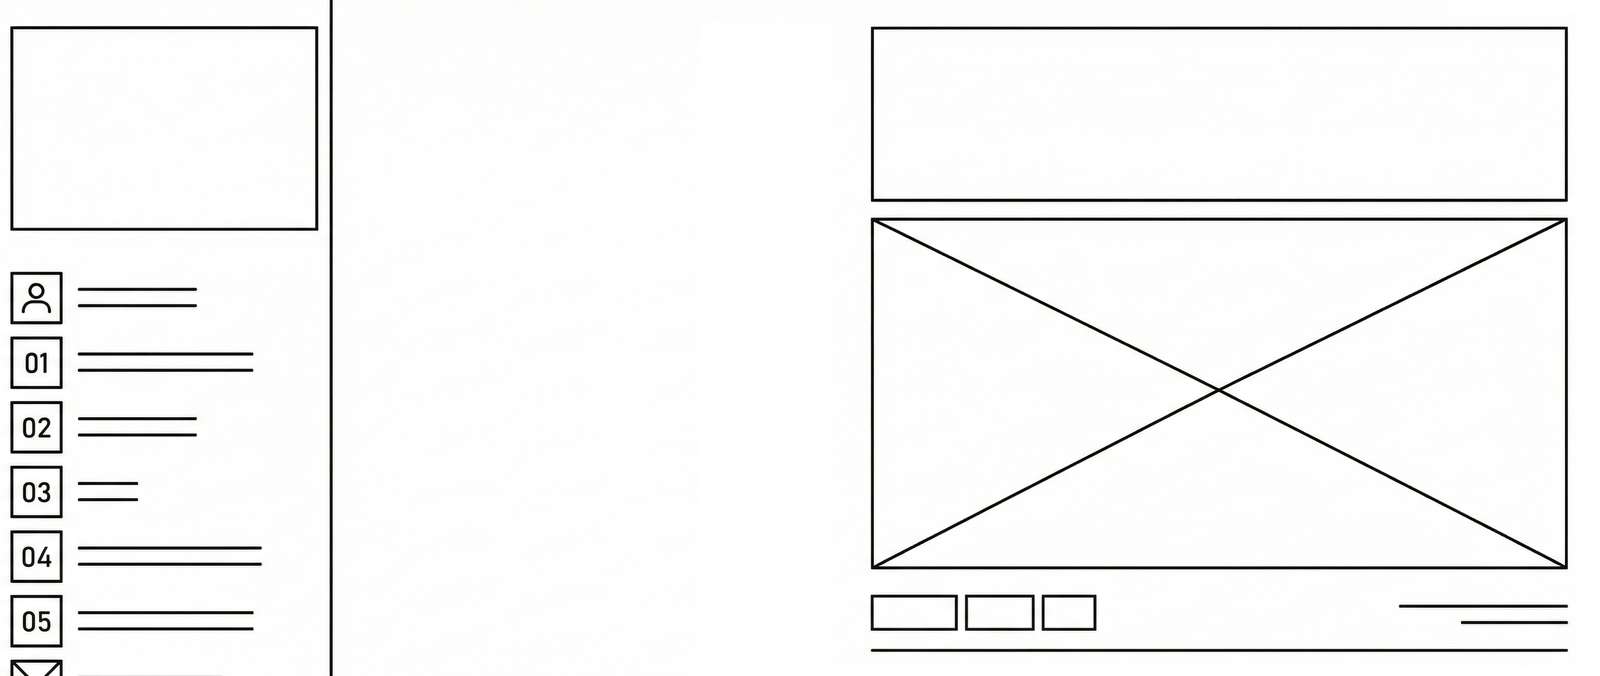
For this site, I wanted to challenge myself to design everything from the ground up. I actually began work on this site two months ago. I had an idea in my head of what I wanted it to look like early on, so I sketched out a wireframe, spent most of my time working on the CSS, and slowly over time it took shape.
Once I had a wireframe sketched out and a design language to work around in CSS, I spent a fair amount of time trying to get the Javascript to play nice with the rest of the HTML and CSS. Already stumbled into some weird behaviour when using a mobile resolution. If you wanna stress test the site, please send me feedback! It's not perfect, and I really wouldn't call myself an expert (always have trouble trying to center a div), but I'm happy with the way it turned out! For those still dipping their toes into web design, I highly recommend the w3schools responsive web design templates. This is usually my starting point, and I find the best way to learn how to achieve a certain look or effect is to find an example of it and tinker/modify it one line at a time to see how each property can be changed.
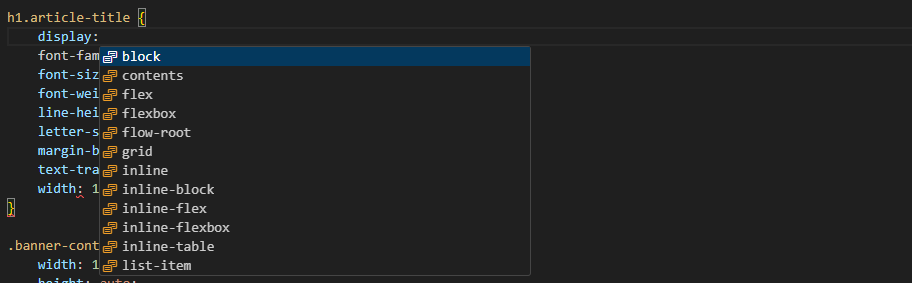
As a quick side note: I highly recommend that beginners still develop familiarity with the vocabulary and structure of the markdown languages of the web (i.e. HTML, CSS) as opposed to jumping to AI or an LLM to build sites for you, at least to start. As with any use of AI, an effective prompt is critical for an effective output. To create websites, you need to know how websites are created. Jump into the Inspect (F12) menu of any website to get a feel for how the content is laid out, what tags and classes belong to each div, and how the site is structured in HTML.
➔ Version 2
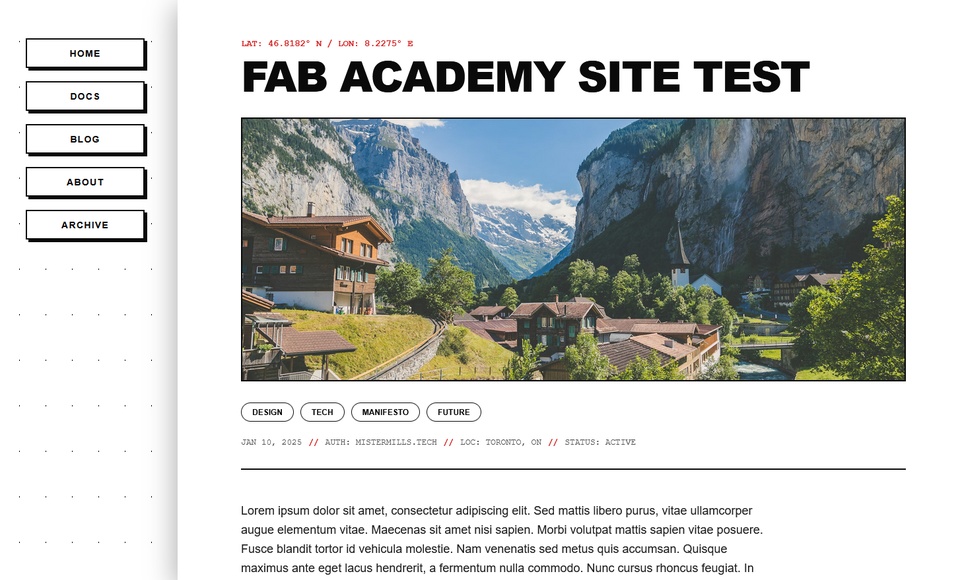
(UPDATE FROM FEBRUARY 16) Hilariously, I basically scrapped a lot of what I made and overhauled the site after getting through the first few weeks of the program after realizing the tools I developed for myself (which you'll read about more below) didn't cover all of the cases I needed for documentation. I also wasn't happy with the way the full aesthetic of the site came out, so I took some more time on the drawing board and refined the look with a more consistent visual appeal, something that looked more like a futuristic metro station with lots of high contrast elements and extra little pieces of text here and there (which I learned are called "greebles"). Anyways, even though it cost me a day or two of trying to redevelop the site from almost the ground up, I'm a lot happier with how it looks and have a lot more "tools" at my disposal.
SSG & Markdown
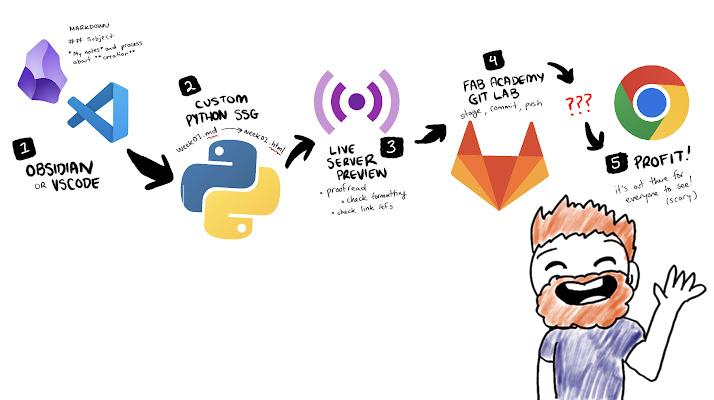
While I have made a lot of websites, I have hosted and managed very few. The world of webdev is quite intimidating for me. For this project, I wanted to try learning new pipelines that weren't just hardcoding every HTML, CSS and JavaScript file and uploading them manually to a web host. I'm still pretty intimidated by a lot of the popular javascript libraries and frameworks that I see these days (React, Svelte, etc.) so I needed to find an achievable stepping stone for this site. What I would need is a static site generator, or SSG.
Of course, the downside to creating your own frontend is that the SSGs that other wonderful people have already made don't play well without heavy modification. After some tinkering and thinking, I decided to have Gemini help me create a python script that could generate a static site from a markdown file created in Obsidian or VSCode.

Here is a template of a website I designed. Could you help me with creating a static site generator (SSG) in python that takes fileX.md file and outputs a fileX.html?
It was here that I learned I would want to use a YAML header to ensure the dynamic parts of this page (the banner image, title of the article, date, and even the coordinates at the top - which tell you which city I am in while writing!) were nicely transplanted into the HTML file. Here's an example of what the YAML looks like in this document:
---
title: "Principles & Practices"
date: "2026-01-26"
location: "Toronto, Canada"
coords: "43.6548° N 79.3884° W"
banner_image: "/public/images/banner01.jpg"
tags: ["WEB DEV", "CI/CD", "GIT"]
sys_id: "STILL_IN_CANADA"
status: "EXCITED"
week_num: 1
---
I also developed a few tools that I could use on the site that the SSG would dynamically swap out for custom CSS elements. For example, when I type:
((fullbox: THIS IS AN INFOBOX, TEXT ON THE RIGHT))
Here's some text inside of a box that occupies the full width of the view. Useful for segmenting ideas or bringing attention to the reader.
((/fullbox))
I get something that looks like this:
Here's some text inside of a box that occupies the full width of the view. Useful for segmenting ideas or bringing attention to the reader.
I also created different shortcodes that the SSG could detect and replace for images, slideshows and other kinds of dynamic content like dropdown menus that collapse/expand on click. You'll see more of them throughout the site.
I also needed the script to generate each page in the correct directories in my repository to make previewing and syncing to the main branch seamless. Took me a couple tries to get the image paths right (things got complicated because index.html, about.html and final-project.html are all in the root public directory, where as individual week assignments are in their own directory).
This is also where Paste Image comes in handy. I can paste images directly into my .md files in-line, and this extension will automatically make a copy of that file in my public/images directory and paste the correct file path in my working file. It also can be configured to save these screenshots as JPGs to reduce file size. I also modified the SSG script from above to incorporate the python library Pillow to scan for any large images and compress them further.
With these handy new tools in tow, my workflow was becoming a lot more organized and streamlined, I started to feel like I could get the hang of this webdev stuff. Of course I'd still like to add some new features to my site throughout the course (to-do list is currently in my gitlab README.md, maybe I'll find a better home for it), but the basic workflow is present to get me progressing through the course, which is:
Git and Version Control
I've technically used git two or three times before, but only because I was working with others who insisted I did to properly contribute to a group project. Needless to say I've had my fair share of file mishaps and times I wished I had a time machine. Jumping on the git train was a good move on my part. I was told that Windows 11 comes with git preinstalled, so I hopped in my terminal to try it out.
git --version
No such file or command 'git'.
Huh. Alright. I guess I'm installing it. I'll do it via command line with winget.
winget install --id Git.Git -e --source winget
Next thing to do is to set up my ssh key with the Fab Academy Gitlab.
ssh-add XXX/.ssh/id_ed25519
eval "$(ssh-agent -s)"
Get-Service ssh-agent | Set-Service -StartupType Automatic
Start-Service ssh-agent
Get-Service ssh-agent
cat XXX/.ssh/id_ed25519.pub | clip // copying the public key to my clipboard, not my private key
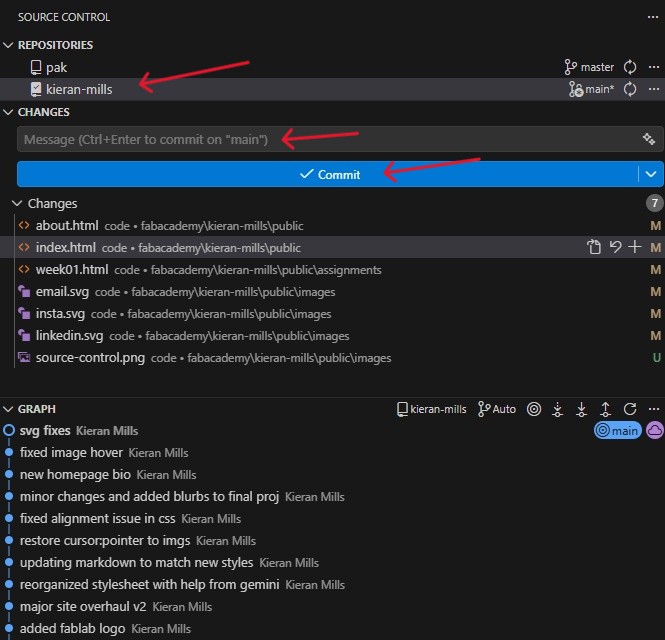
Then I was able to access the gitlab in terminal, navigate to my VSCode project directory and clone the repo using git clone. I had to set up my alias/name for the commits using git config user.name, made a small edit to the newly cloned index.html file and then I was able to make my first commit and push!
git commit -m "My first push! Changed a line in index.html"
git push

My next steps were to of course start copying over the site's content into the correct directories and files, making sure all my of references were maintained (spoiler alert: they did not).
And that brings us online! Welcome to Fab Academy 2026, folks! The next assignment for the week was to envision what a final project could look like for the course. You can find the work I started at this link here