Week 12 — Mechanical and machine design
This week’s topic: Mechanical and machine design. This page documents the group assignment on the vending-machine mechanism and my Wio + RFID + servo integration tests.
Group assignment
For Week 12, our group explored mechanical and machine design through the concept of a compact vending machine for XIAO development boards.
Assignment brief
- Develop a machine as a team, including its mechanism, structure, and test process.
- Record how the idea became a prototype and how the subsystems connect together.
Team roles (Week 12)
Our group split Week 12 work across mechanical design, electronics choices, firmware, and integration. The table below records the main responsibilities so it is clear how the subsystems came together.
| Member | Focus (summary) |
|---|---|
| Guannan | Idea generation, appearance design, servo program and testing |
| Tim | System workflow description, structural design, design assembly |
| Sunny | Idea generation, overall mechanical structure |
| Xin Ruili | Column-based design, product flow mechanism design |
| Maggie | Hardware selection and documentation (why Wio Terminal, servos, RFID) |
| Jenny | Column assembly, manual dispensing test |
| Emily | Materials (acrylic and frame), 3D-printed servo arm, design explanation |
| John Yu (me) | Assemble code testing — Wio Terminal + servo + RFID |
| Jerry | Idea generation, structural design |
| Dolphin | RFID programming and testing, PC backend dashboard |
| Henry Yu | Final assembly wiring (Wio + servo + RFID) |
| Meia | Prototype testing (tests 1–3), results explanation, PC backend dashboard |
| Alison | Final demo description, photos and video production |
My contribution: assemble code testing (Wio + Servo + RFID)
I was responsible for firmware bring-up and test: taking the separate pieces (controller, RFID input, and servo motion) and proving that one program on the Wio Terminal could run the RFID → validate → dispense path before the machine was wired into the final enclosure.
How I worked with teammates
- Servo side: I used Guannan’s servo routines and gate-angle parameters as the baseline, then checked them on the bench with the actual STS3215 so motion stayed repeatable (no double-release, no stall against the column).
- RFID side: I aligned with Dolphin on the card data format and read path so the Wio received a clear “authorized / not recognized” outcome, not just raw UID noise.
- Wiring handoff: Once the integrated sketch behaved on a loose setup, Henry Yu carried the same pin and bus choices into the final harness inside the cabinet.
Process (what I actually did, step by step)
- Subsystem smoke tests: Confirmed the Wio LCD and Grove port, verified RFID reads with serial logging, and exercised the servo through closed → open → closed with safe delays.
- Merge into one sketch: Combined the RFID event handler and the servo command path in a single state flow (idle → card detected → validate → dispense → return to idle), with on-screen status text so anyone watching the desk test could follow the state.
- Timing: Added a debounce / ignore window after a read so one tap did not trigger multiple dispense cycles; retested with different tag placement speeds.
- Integration checklist: Recorded pass/fail for “RFID only”, “servo only”, and “end-to-end dispense” so Meia’s later prototype tests could start from a known-good firmware revision.
- Issue log: When something failed (for example, servo not reaching the latch position or RFID mis-read under vibration), I noted whether it was electrical, mechanical slack, or code order so the mechanical team could adjust the column or arm in parallel.
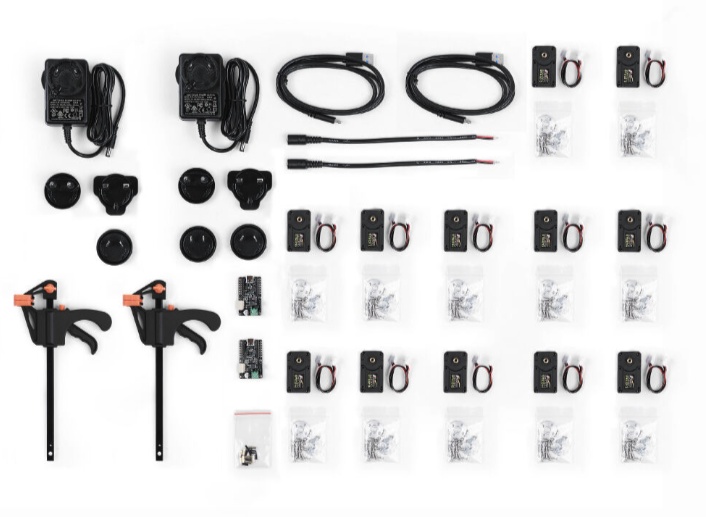
The photos below are the same modules we used on the bench while closing this test loop. They are not a single snapshot of the final cabinet, but they document the hardware stack the assembled code was written against.
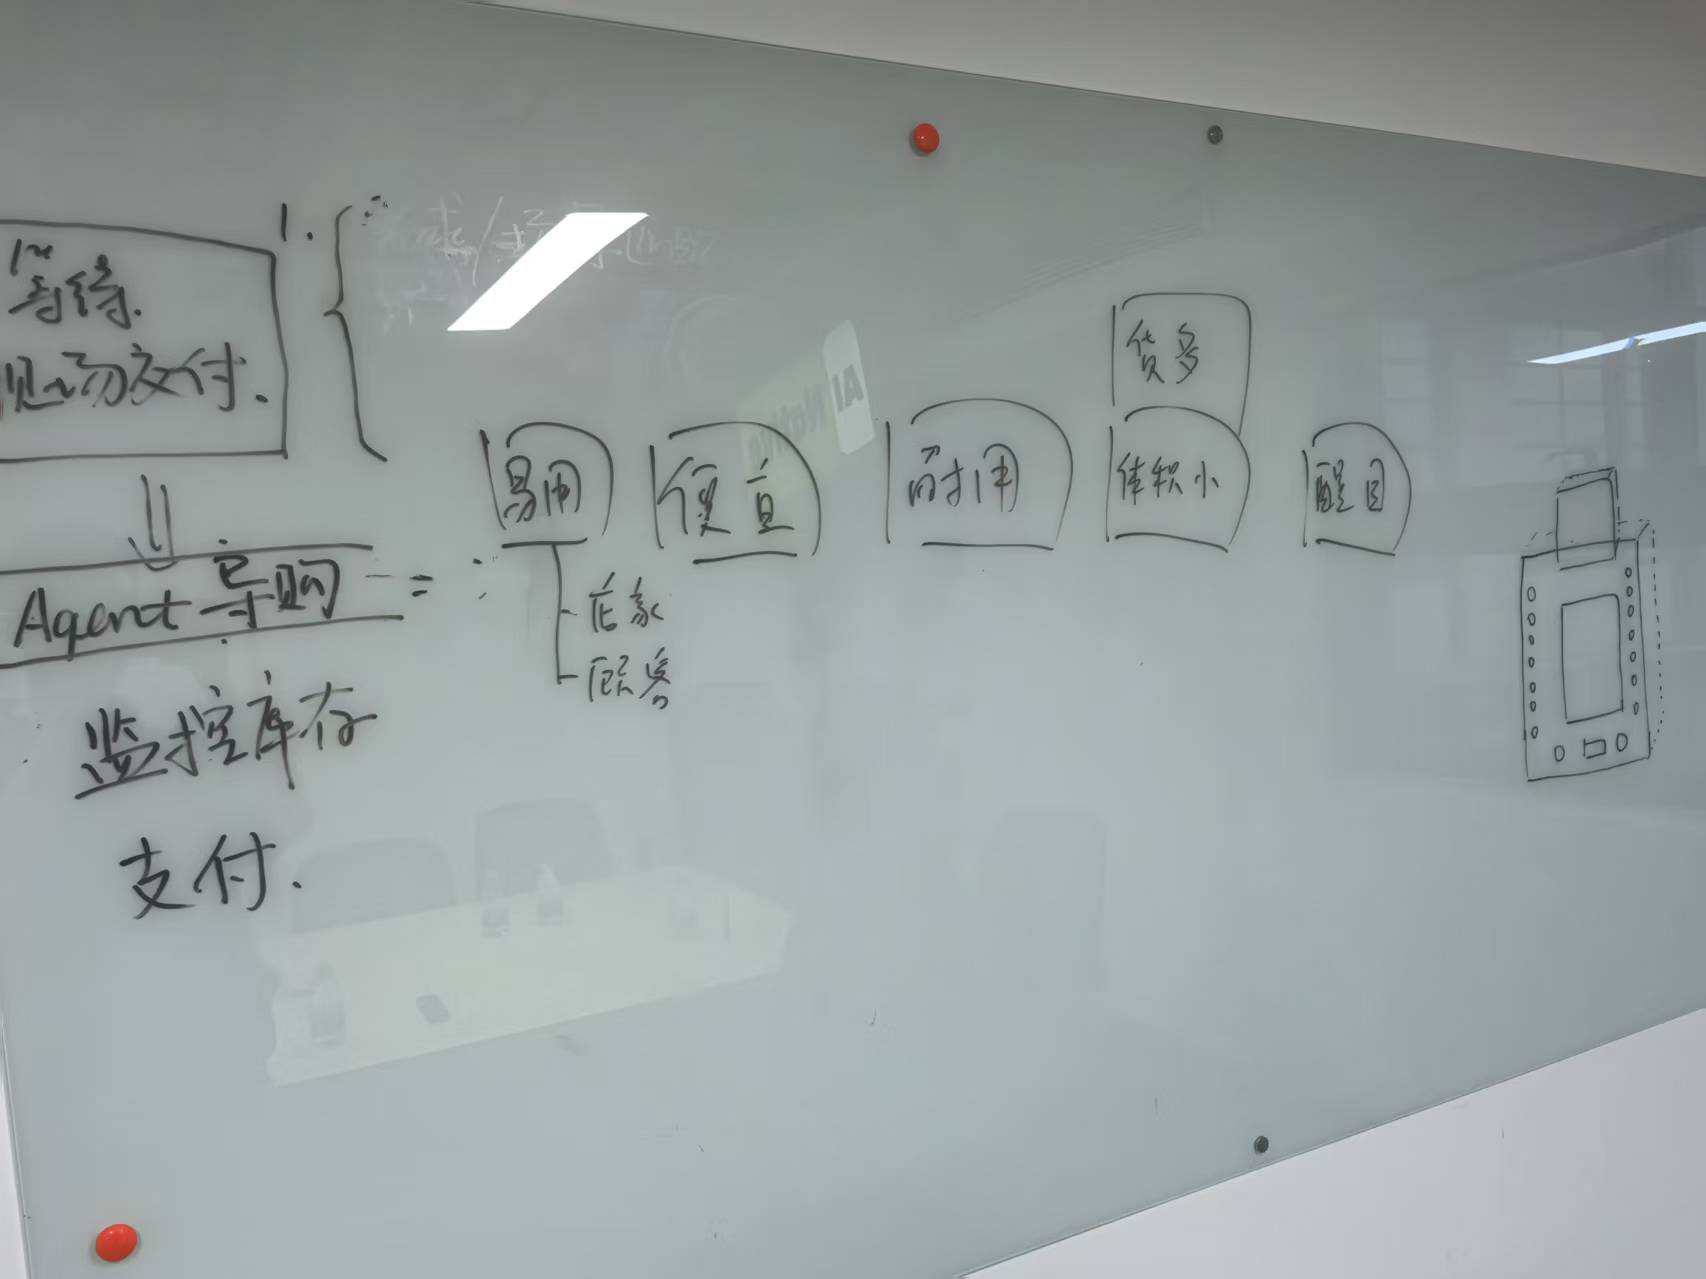
Idea generation
We picked a desk vending machine for Seeed XIAO boards because the lab actually runs short on them mid-semester. RFID tap, one servo gate, one board out: small enough to finish in a week but still mechanical + embedded together.
A vending column forced us to line up user flow, RFID input, servo timing, and acrylic tolerances in one cabinet. I had been treating “mechanical week” as brackets and arms; this was the first time I watched firmware and gate travel block each other on the same desk.
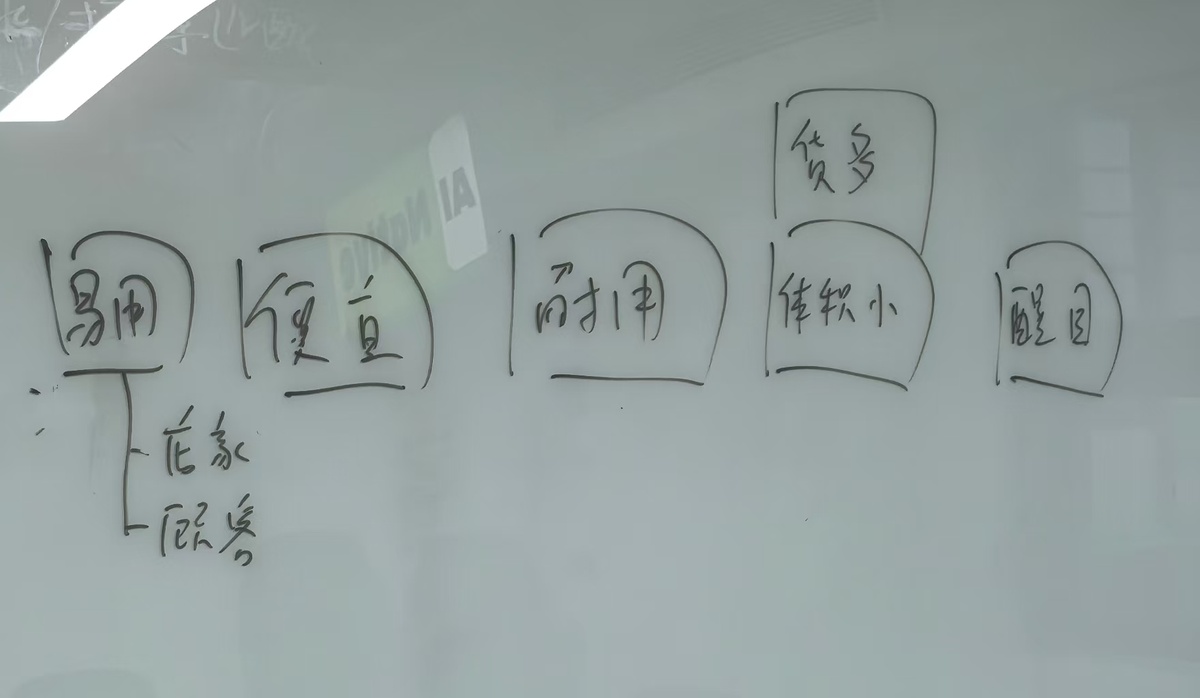
Design requirements
- Simple interaction: tap card, dispense one board.
- Lab parts: use acrylic, printed parts, Wio Terminal, RFID, and one servo.
- Repeatable gate: release one board without double-dropping.
- Desk scale: keep the cabinet small enough for the lab bench.
- Visible state: let us see the board stack and the Wio status text.
Planning and design
Once the concept was fixed, we organized the design around a vertical storage column. The XIAO boards would be loaded from above and stacked by gravity, while the lower gate would control the release of a single board for each purchase event.
Our plan combined transparent acrylic panels for the enclosure, 3D-printed parts for custom joints and moving interfaces, a Wio Terminal as the controller, and a serial bus servo to actuate the gate.

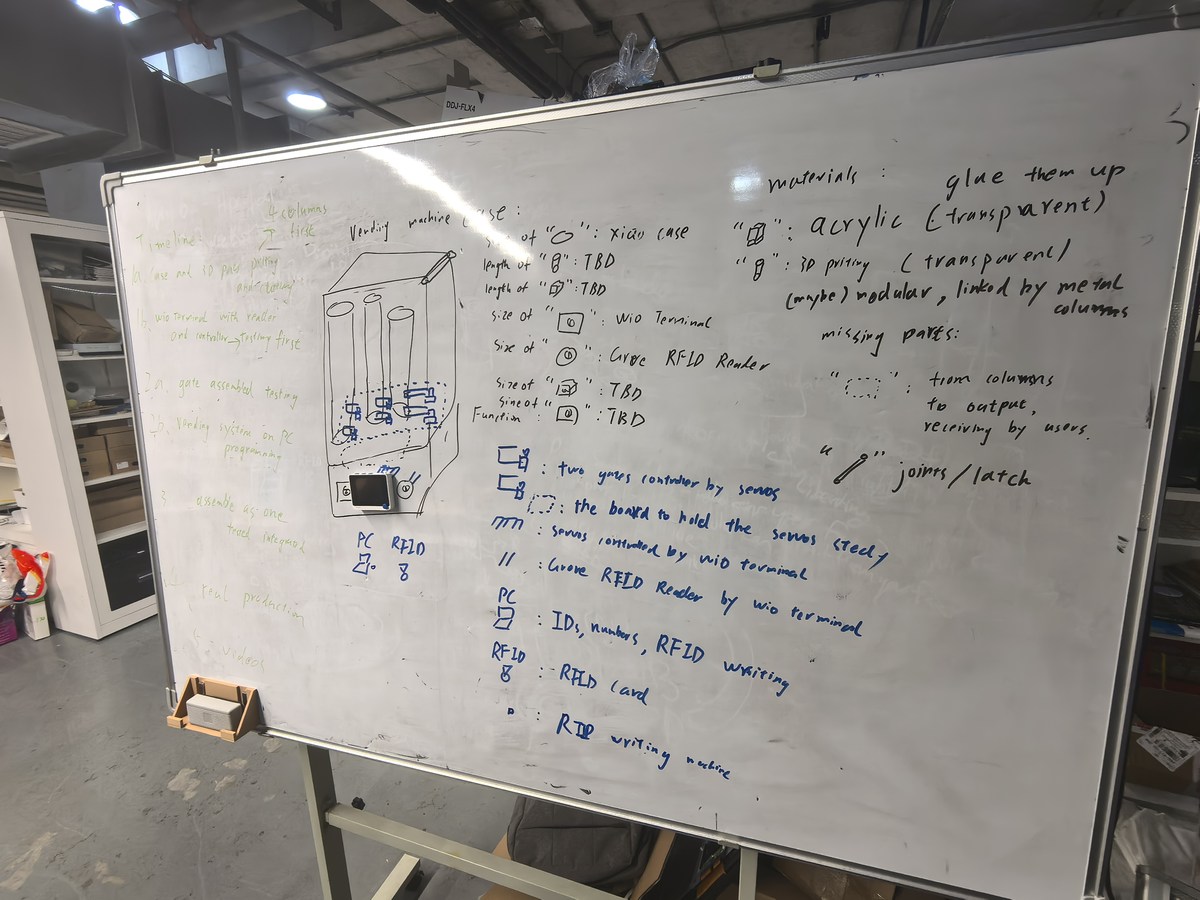
System map
The project was planned as a chain of simple actions. A PC-side system prepares the RFID card data, the user presents the card to the machine, the Wio Terminal interprets the input, and the servo drives the gate so that one XIAO board can be dispensed from the column.
- PC: handles the card-writing or transaction side of the workflow.
- RFID reader: provides the machine with user or purchase information.
- Wio Terminal: coordinates the logic and displays status feedback.
- STS3215 servo: converts the control signal into mechanical motion.
- Storage column: keeps the boards aligned and directs them toward the output path.
Timeline
| Phase | Task | Target |
|---|---|---|
| 1a | Case fabrication and 3D-printed part preparation | Week 12 |
| 1b | Wio Terminal, RFID reader, and controller testing | Week 12 |
| 2a | Gate mechanism testing | Week 12 |
| 2b | PC-side vending workflow programming | Week 12 |
| 3 | Assembly, integration, and recording | Week 12 |
| 4 | Sturdier enclosure and cleaner wiring | Week 15 |
Component selection
Maggie documented why each part made the cut: parts we could buy locally, Grove cabling for fast rewires, and a serial servo with position feedback so the gate does not drift after a dozen dispense cycles.
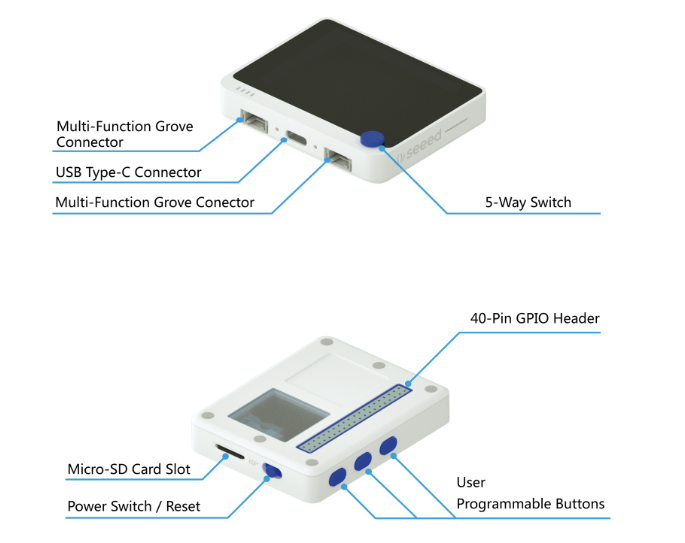
Central controller: Wio Terminal
The Wio Terminal is the cabinet brain: built-in LCD for “waiting / dispensing / error” text, Grove port for the RFID module, and enough GPIO for the STS3215 without a second display board.
- The built-in LCD can present status information directly to the user.
- Grove headers speed up bench rewires when the column geometry still moves daily.
- The board size is small enough to integrate into the machine body.
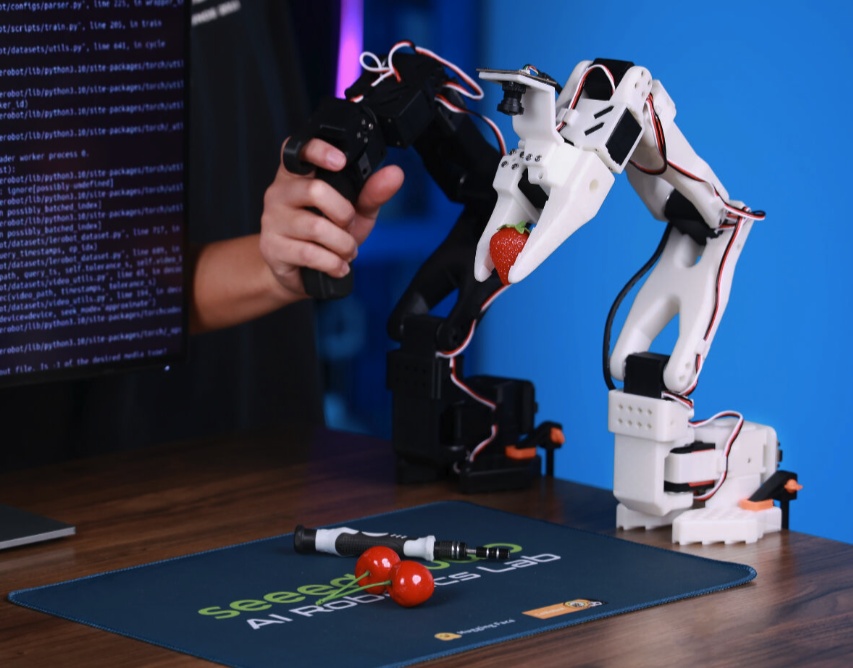
Moving parts: STS3215 serial bus servo
Gate motion uses an STS3215 serial bus servo: bus addressing if we add a second actuator later, and position readback so we can confirm “closed” before opening again. That helps avoid double drops.
- Bus communication can simplify wiring when multiple actuators are involved.
- Position feedback helps avoid double dispensing.
- The torque was enough for our small PLA gate test.
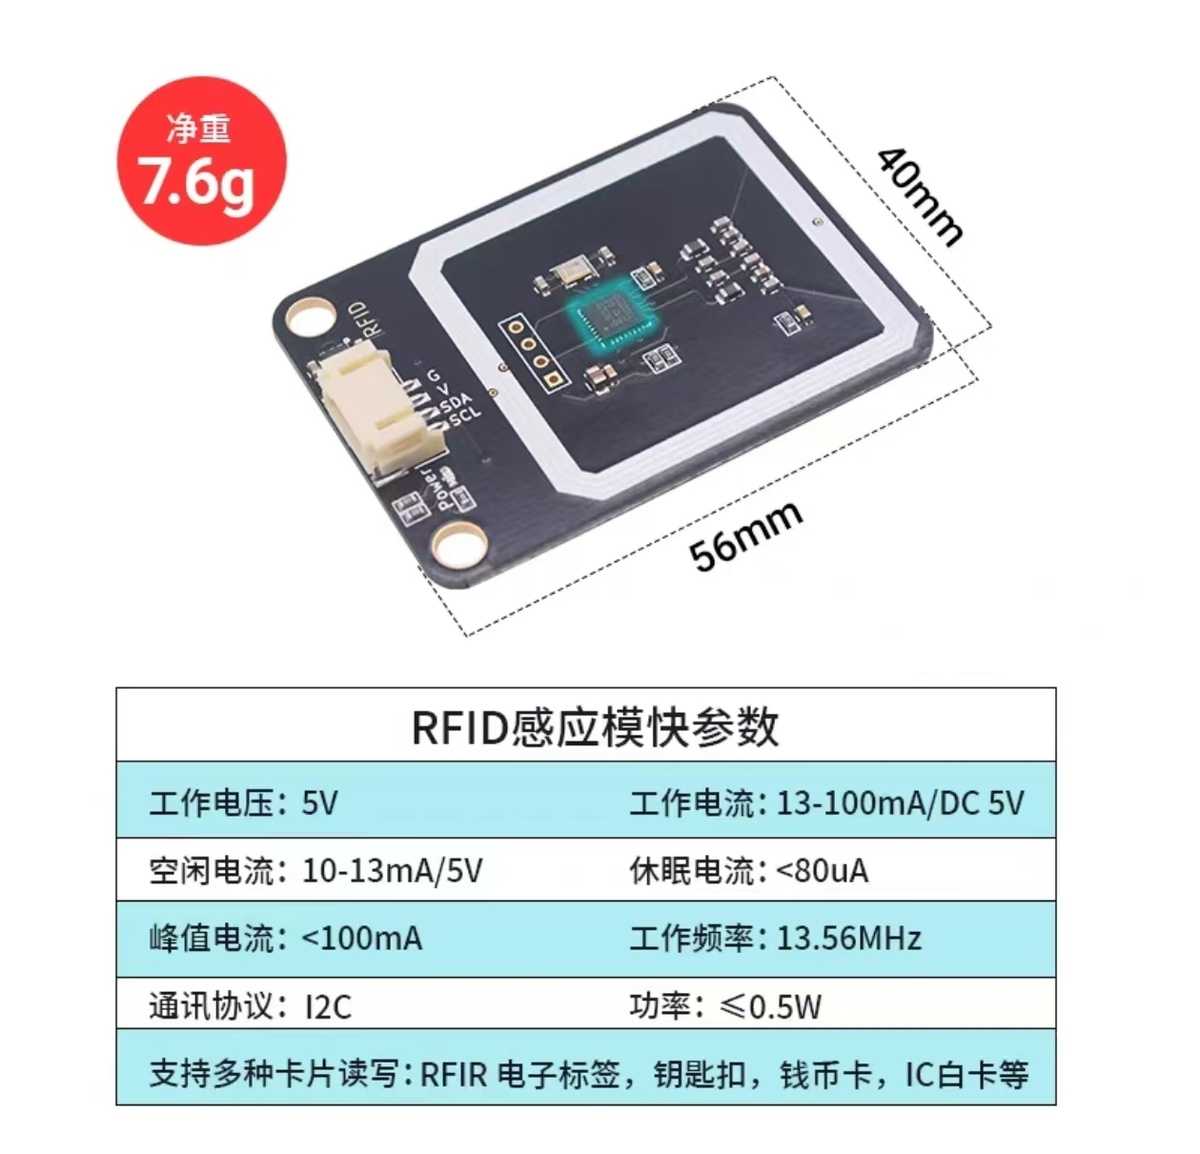
Payment and identification: Grove RFID reader
To handle identification and card-based interaction, we used a Grove RFID reader. In this design, the RFID module acts as the input device that starts the vending sequence.
In the intended workflow, information is written to the card first, then the user taps the card on the vending machine. After the controller confirms the input, it sends the command that releases the product.
Prototype testing
Before full assembly we ran subsystem tests so a failure pointed to firmware, RFID, or mechanics instead of everything at once. My Wio integration pass (above) sits between those single-board checks and Meia’s full cabinet tests: RFID in, servo out, with a logged checklist revision.
- Controller test: check screen output and basic peripheral communication.
- RFID test: verify that card reading works as expected.
- Servo test: observe whether the gate can move to repeatable positions.
- Structure test: see whether the boards can move down the column smoothly.
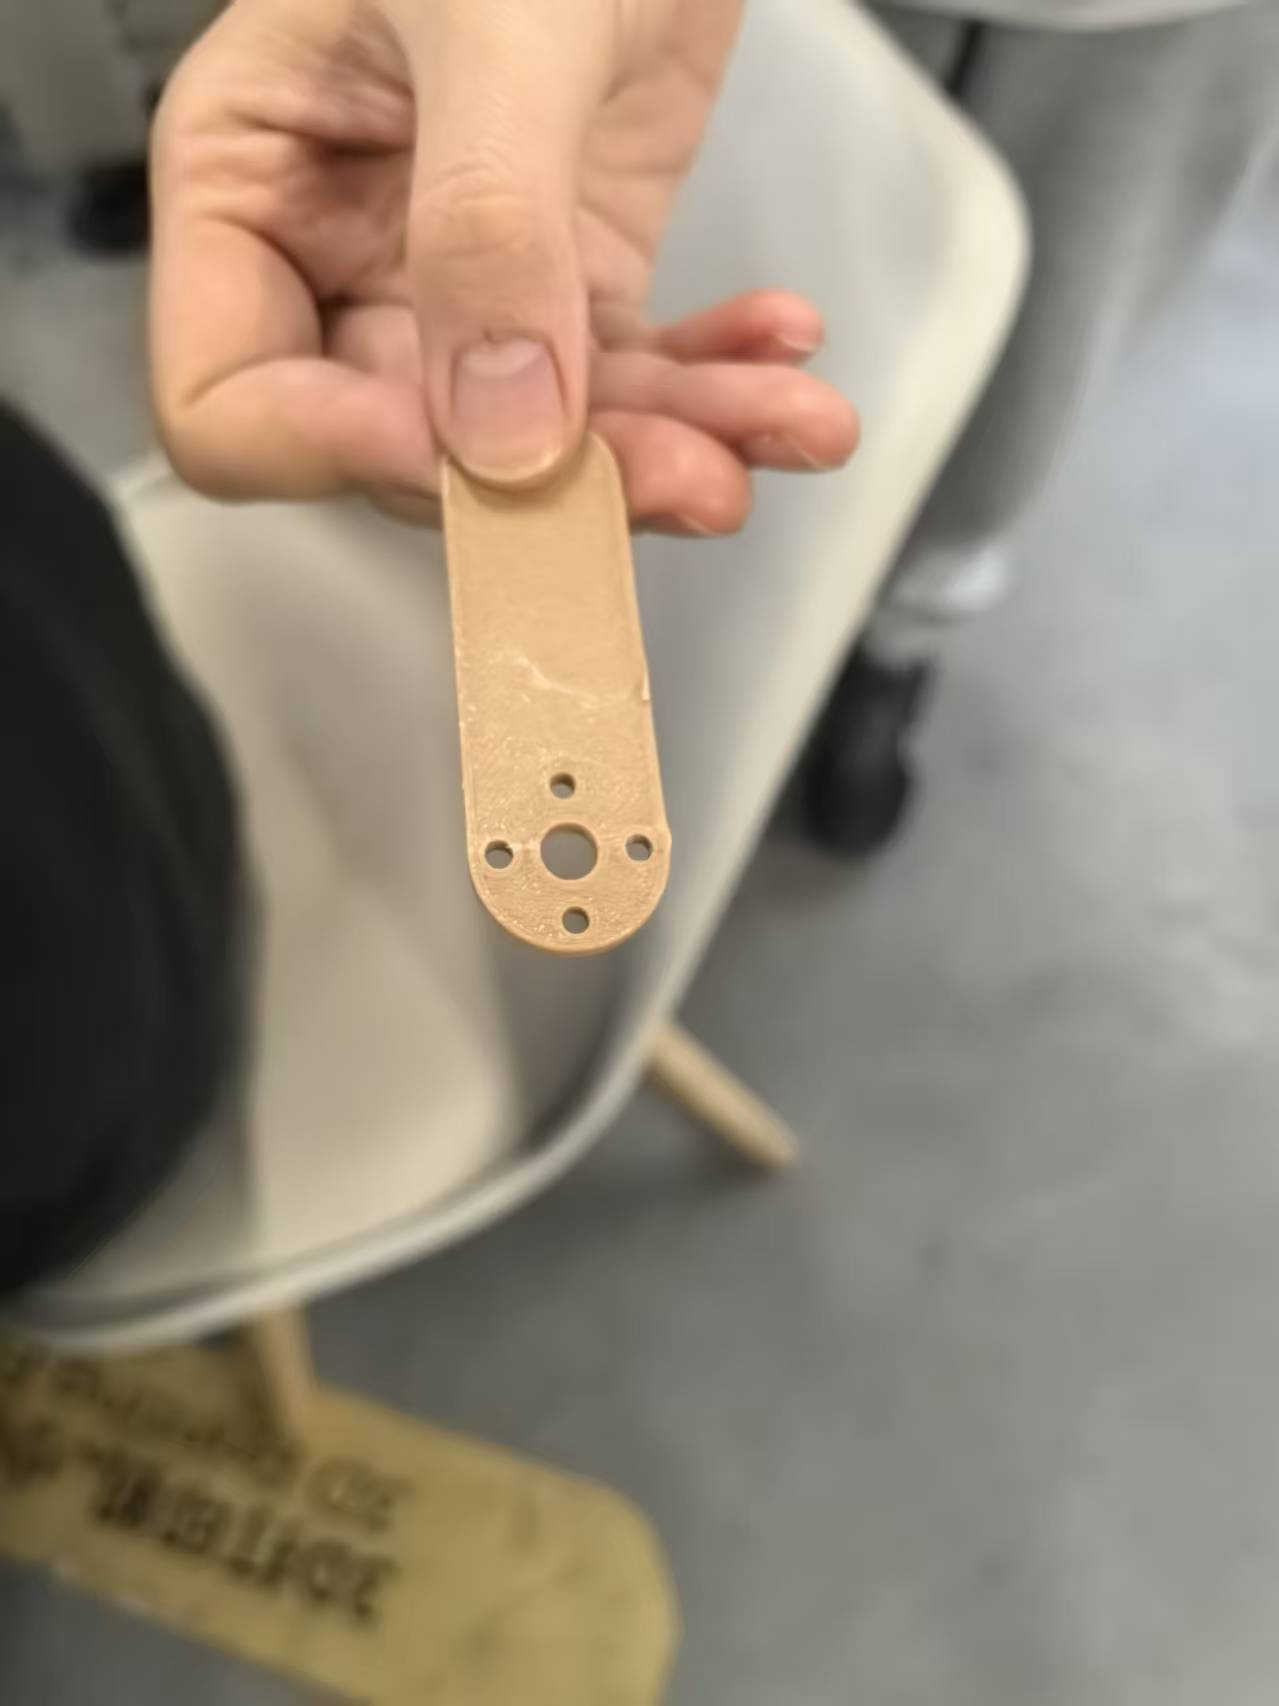
Integration: servo and warehouse column
After the separate tests, we connected the actuator to the storage column. This was where code errors and mechanical slack started to look the same.
We prepared a custom 3D-printed arm between the servo horn and gate latch. It converts servo rotation into the push/pull motion for the dispenser.
The printed arm between the STS3215 horn and the latch was only a few grams of PLA, but when it flexed, the gate either double-dropped a board or stalled. That interface detail mattered more than tweaking servo angles in code.
Mechanical design notes
- The column relies on gravity so the next board can move into place without a second actuator.
- The gate travel has to be tuned carefully to release one item instead of several.
- Transparent panels let us see jams and show the board stack during the demo.
- A modular structure makes later adjustment and replacement easier.
Results
- Vertical acrylic column + gravity-fed XIAO stack; transparent panels for inventory visibility.
- Wio Terminal + Grove RFID + STS3215 gate chosen and documented with photos.
- Bench tests split controller, RFID, servo, and column motion before full assembly.
- I closed RFID → validate → servo dispense on a loose Wio setup and logged pass/fail rows for Meia’s later prototype runs; Henry Yu reused the same pin map in the final harness.
- The next revision should make the enclosure sturdier and clean up the wiring.
I used Cursor to code the Wio Terminal bring-up sketch for RFID read, servo gate motion, and serial logging on the bench setup above. I still checked each pin against our wiring photo and tuned gate travel in hardware before treating a dispense cycle as repeatable.