Week 1: Principles and practices, presentations
Week 1 has two parts: Principles and practices (plan and sketch a
potential final project) and project management (Git, SSH, Fab Cloud
GitLab, GitLab Pages, student agreement, and this documentation site). The Git workflow
follows the
Fab Academy recitation on version control & GitLab. The live site is plain HTML/CSS; pushing to main runs CI that copies the
repo root into public/ for Pages (see .gitlab-ci.yml).
Principles and practices — final project plan and sketch
For Fab Academy I want the final project to stay testable: each subsystem should work on the bench before I put it on the robot. The working title is Forest Fairy (森之精灵), a mobile plant companion built around a live chili pepper plant. For Week 1 I used AI image generation to produce an exploded-view concept sketch so I could check how sensing, compute, and motion might fit before CAD and PCB work took over. It is a planning visual, not a photograph of the build.
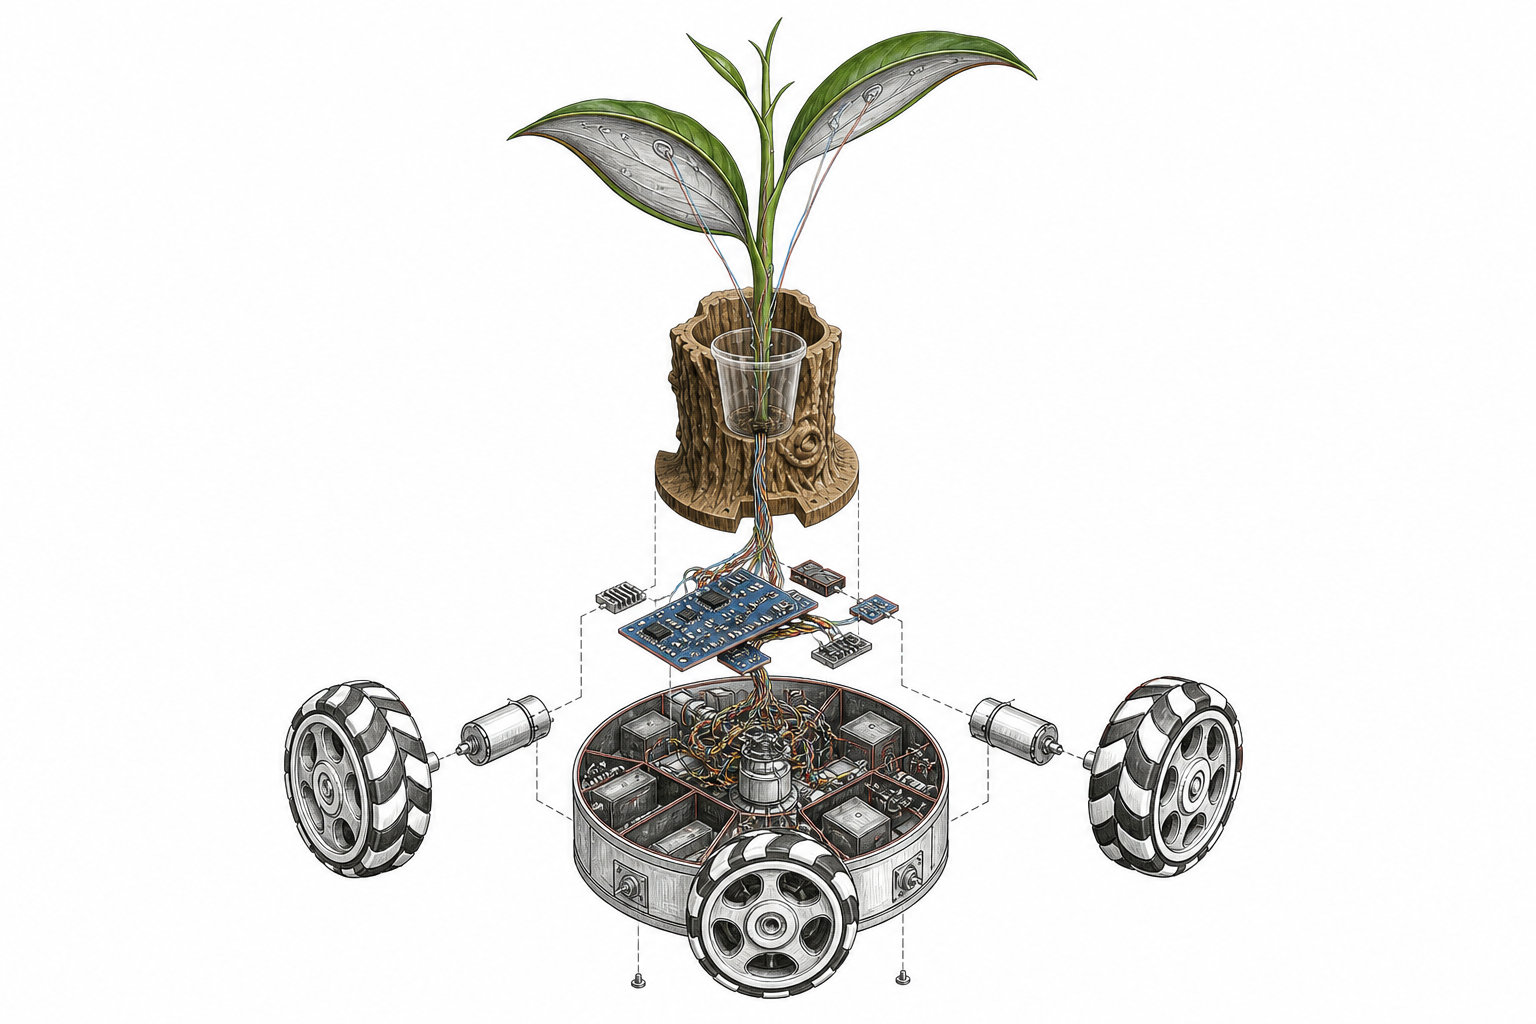
Project concept
I broke the project into three parts I can test separately: sense, interpret, act. Bench first, then on the robot. It should read light, temperature, humidity, soil moisture, and plant-side electrochemical traces; show chili status on an OLED; move on a 120° holonomic chassis when calibration and safety gates allow; and leave room for cautious AI interpretation instead of copying human vital-sign metaphors onto a plant.
I am the primary builder and daily tester at Chaihuo Makerspace. The audience I have in mind is curious makers, students, and visitors who want to see environmental and plant signals become motion and dialogue, not a clinical dashboard borrowed from human medicine.
This AI concept image is the Week 1 baseline; ongoing CAD, BOM, and bench evidence live on final-project.html and in later weekly pages.
Project management — Git, agreement, and archive
Notes, screenshots, and workflow for Week 1 part 2: SSH keys, cloning the documentation repo, commits and pipelines, image compression, and the signed student agreement.
Why I set this up this way
Week 1 is mostly infrastructure: I needed a reliable loop from this laptop to Fab Cloud GitLab so the documentation site and assignment pages stay versioned like any other project. Before doing that I had no SSH key on the machine, so the first small hurdle was generating one and learning where GitLab expects it in the UI. Not difficult once mapped, but easy to mix up with HTTPS remotes if you are new to Git.
Another practical snag was connectivity: the first ssh -T test sometimes
sits until the network cooperates. I noted that here because it is a normal field
issue, not a sign that the key is wrong. After the path worked once, the recurring
habit became status → add → commit → push, then glance at the pipeline
for Pages.
There was no ~/.ssh folder yet, so I created an Ed25519 key
with ssh-keygen and copied the public key to the clipboard for
GitLab.
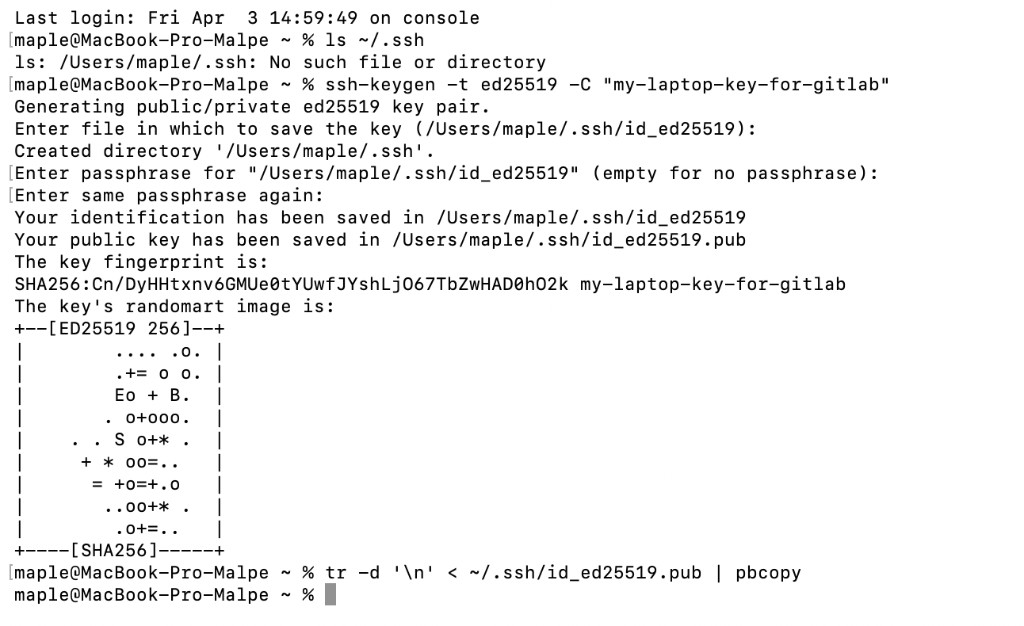
id_ed25519.pub (newline
stripped) on macOS.
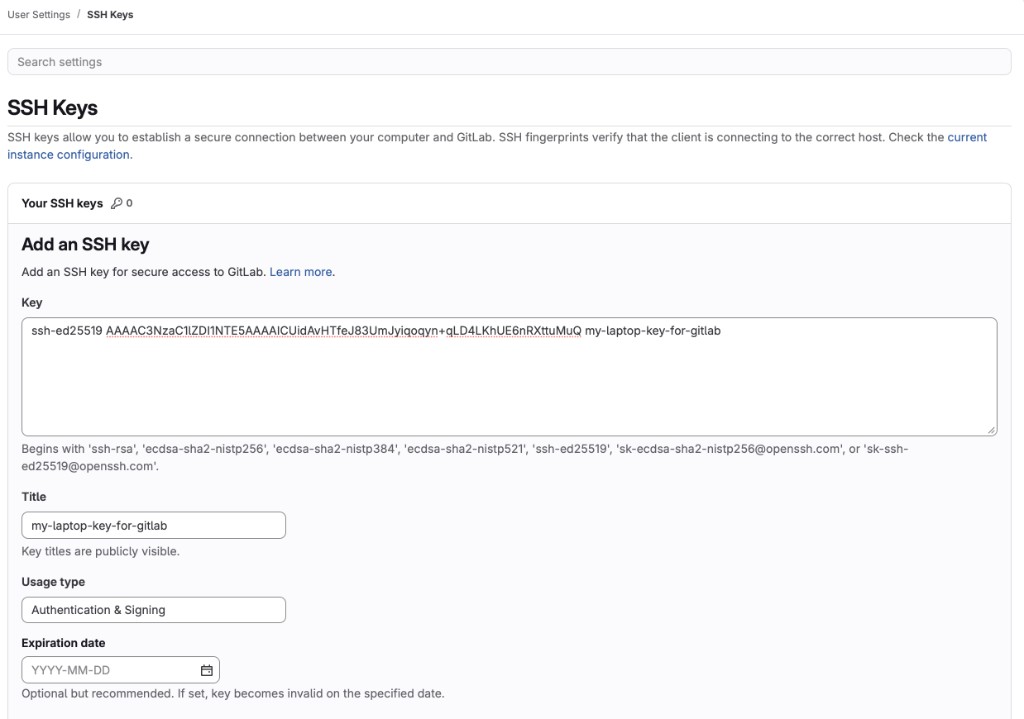
In GitLab I opened Preferences → SSH Keys, pasted the key, set a title, and saved it so the server trusts this laptop.
I tested the setup with ssh -T git@gitlab.fabcloud.org. On the
first try I had to type yes to store the host fingerprint;
then GitLab returned “Welcome to GitLab”, which confirms SSH authentication
works. (On some networks the command can hang until the connection
improves.)
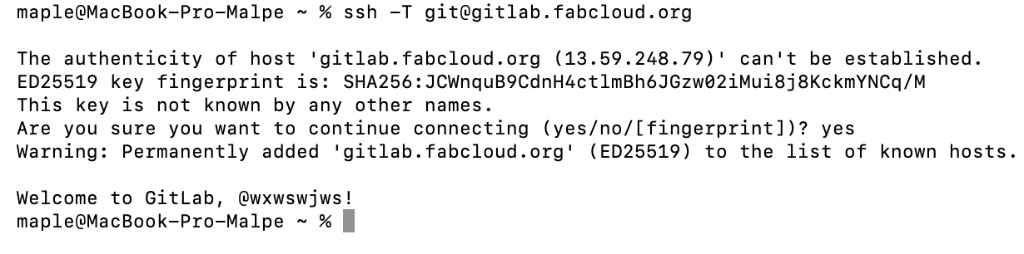
known_hosts and successful welcome message.
I used the SSH clone URL from the project page, cloned into a folder named
john-yu, ran cd john-yu, and checked
git status on branch main.
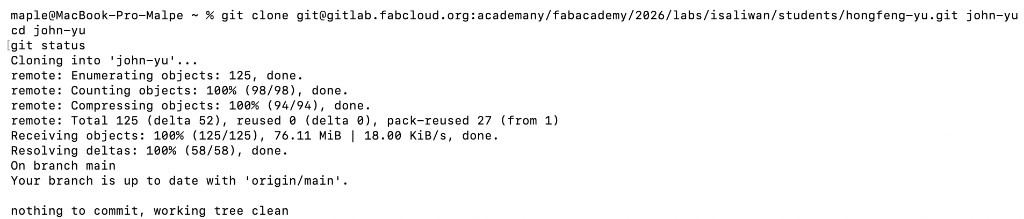
I edited index.html at the repository root, then ran
git add index.html, git commit, and
git push. The CI job copies HTML and assets into
public/ for GitLab Pages. I opened GitLab
CI/CD → Pipelines and verified the latest pipeline passed for that
commit.
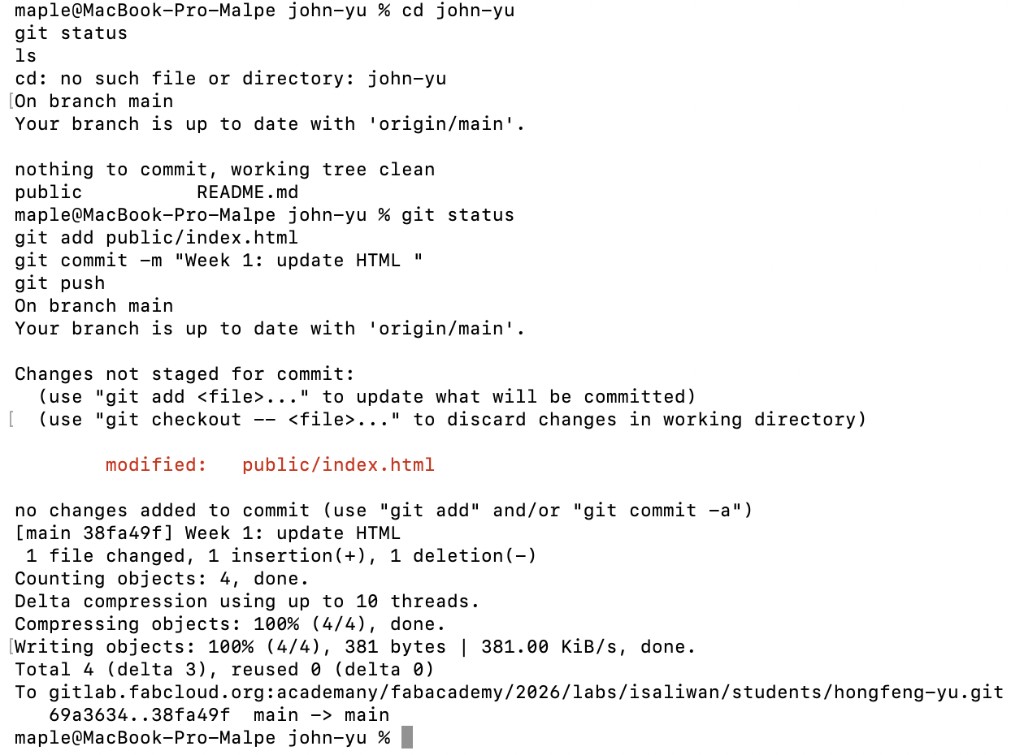
origin/main.
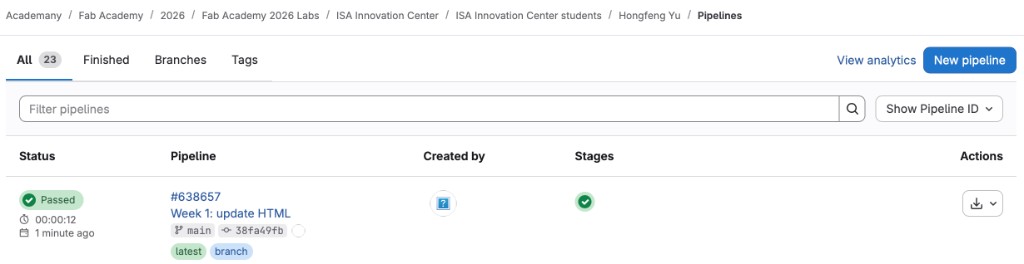
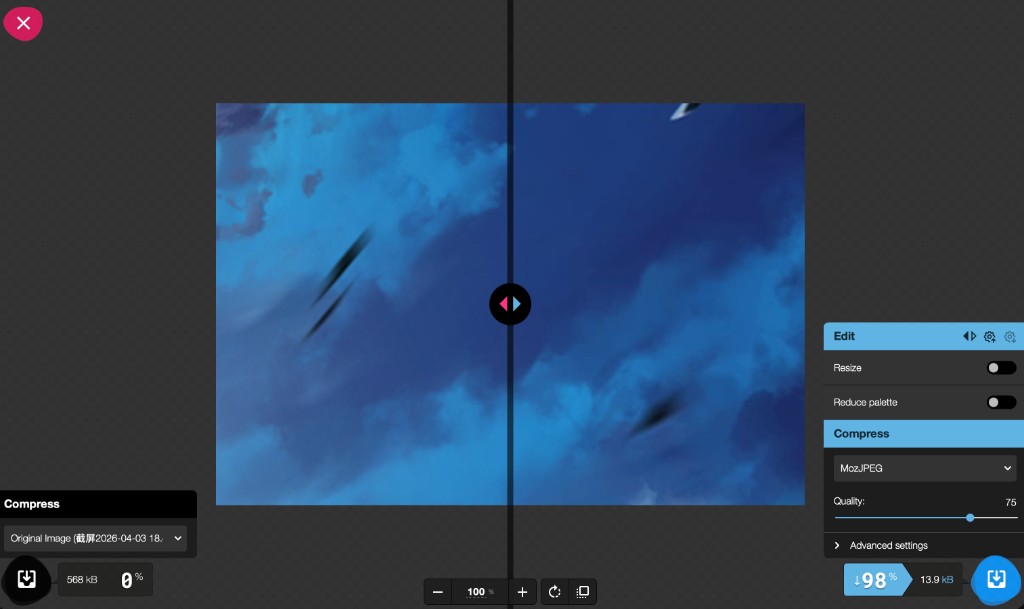
I shrank a screenshot in
Squoosh
(MozJPEG), saved it under images/, linked it from
index.html, and pushed the image and HTML together. Small files
keep the documentation site quick to load.
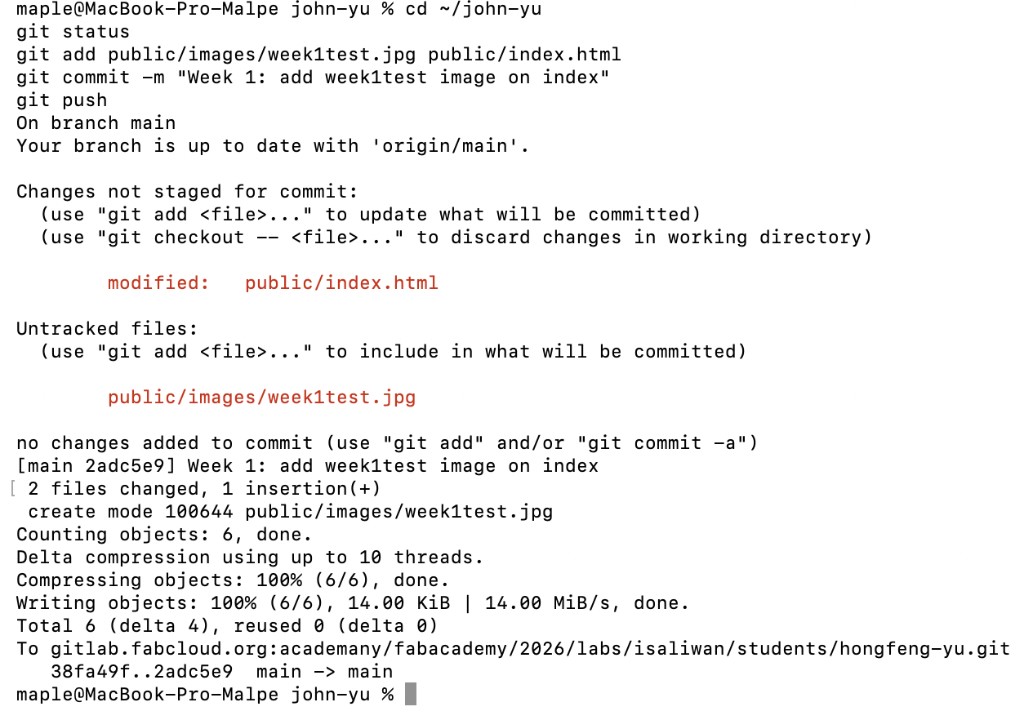
git add for the new image and index.html, then
push with a message describing the image on the home page.
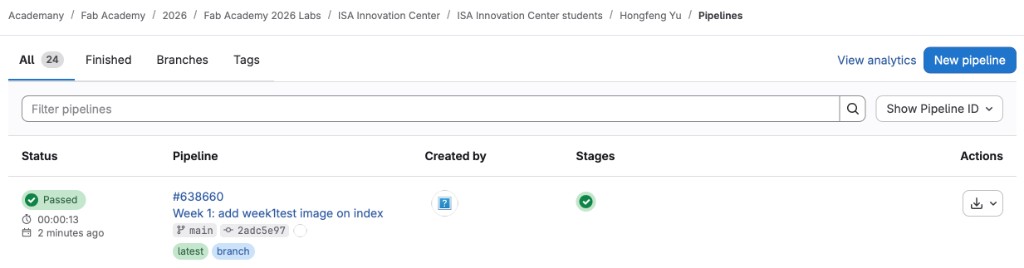
Day-to-day commands I use look like this:
git status → git add … →
git commit -m "…" → git push.
git add .
git commit -m "describe changes"
git push
For Week 1 I committed the Fab Academy student agreement as assignments/students.md, following the official template at fabacademy.org/2026/doc/students.md, and signed it as John Yu.
References: Fab Academy — version control & GitLab, GitLab SSH, GitLab Pages, and Squoosh.
How I developed this website
I built this Fab Academy site in Cursor. I used the editor chat with ChatGPT 5.5 and Composer 2.5 for layout, typography, and CSS experiments, then checked the HTML myself instead of treating the generated page as final.
The home page started with three interlocking gear icons as the main visual. I then carried that look into the weekly assignment pages: background images and button styles so each week reads as part of one site, not a stack of disconnected HTML files.
When the structure felt stable, I pushed the repo to Fab Academy GitLab Pages so the live site stays tied to the same git history as my weekly documentation.