Week 14, Interface and Application Programming
Table of Contents
- Overview
- Resources
- Group Assignment
- Coding
- Testing
- Files
Overview
This week, I wrote some code to make the UI of the site that'll be used to control the robot.
Resources
- I used Arduino IDE to write my code.
- I got help from ChatGPT.
Group Assignment
This is the group assignment.
Coding
Idea
I'll write code to make a wireless connection to my PCB through Wi-Fi, and I'll write HTML to generate the site. There will be a start page at first. When you click "Open" or something similar, the program will show a page with buttons to control the robot. These will probably be "Start Program", "Back", and "Stop" for now.
Final Version

Process
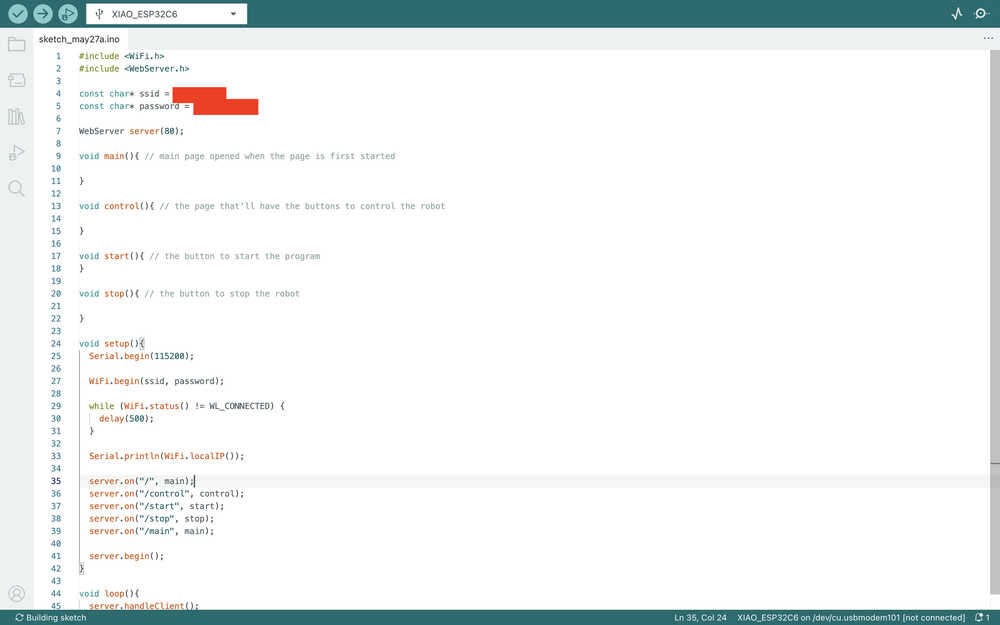
I started by copying and pasting my code from week 11.
This is how I changed the code for now. The main function will start when the site is first opened. Then, the control function will start if the button is pressed. Then, the start, stop, or main function will start depending on what the user clicks.
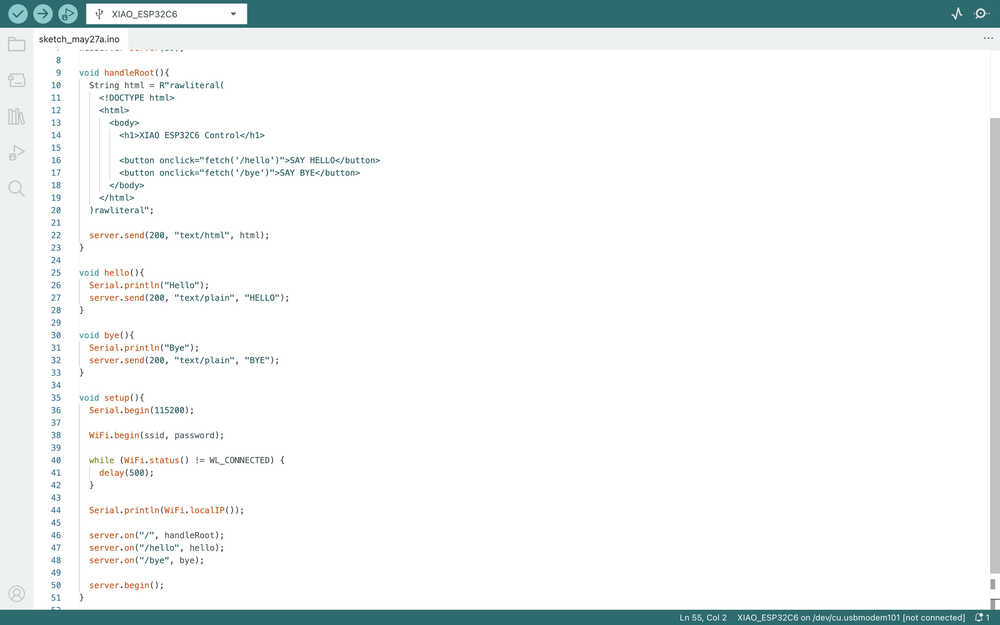
I wrote these into the functions:
The main page only has a start button. The control page has three buttons, two of which is to control the robot. However, the actual code parts will be filled after I actually write them. I'll write some simple code in the testing part to test whether the site works or not.
The page currently looks like this.
Now, I'll work on visuals.
I asked ChatGPT How can I edit the settings of this "<button onclick="fetch('/control')">START</button>" button? As in, how can I change how it looks, how can I change whether it's centered etc. without using css?. Apparently, I can just write "style" etc. next to "onclick" to do this.
This is the code I wrote for the main page:
void main(){ // main page opened when the page is first started
String html = R"rawliteral(
<!DOCTYPE html>
<html>
<head>
<style>
button:hover{
background-color: rgb(0, 101, 0) !important;
color: rgb(201, 255, 194) !important;
transform: scale(1.08);
}
</style>
</head>
<body style="background-color: lightgreen; font-family: 'Courier New', Courier, monospace;">
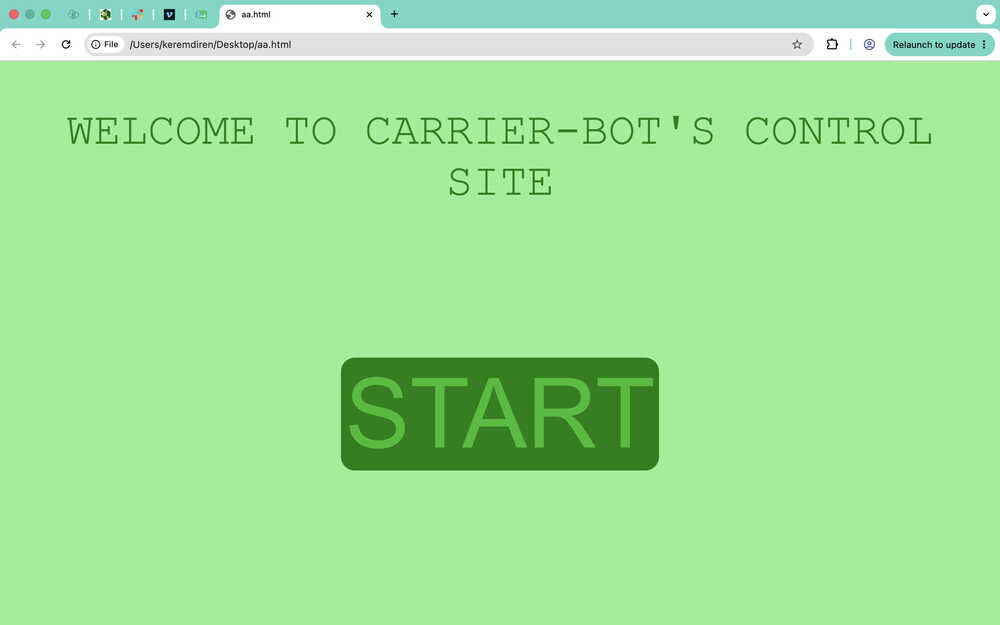
<p style="color: green; text-align: center; font-size: 65px">WELCOME TO CARRIER-BOT'S CONTROL SITE</p>
<div style="text-align: center; padding-top: 150px;">
<button onclick="fetch('/control')" style="background-color: green; color: rgb(37, 188, 37); cursor: pointer; border: none; align-content: center; font-size: 140px; text-align: center; border-radius: 20px">START</button>
</div>
</body>
</html>
)rawliteral";
server.send(200, "text/html", html);
}
This part basically creates a title and a button. When the button is hovered, it scales to 1.08 times its original size. It also changes color when it is hovered on. The change when the button is hovered it defined in the "head" part of the code. The title is defined in the "p" part. The button is defined in the "button" part. The "div" the button is in, in this case, makes it so that there is some space between the title and the button. The background color and the font of the text is defined in the "body" part, which means that the background is light green; the font being defined in the "body" part applies the font to all text in it. The last line basically sends this HTML code to the site so it can be loaded.
It looks like this:
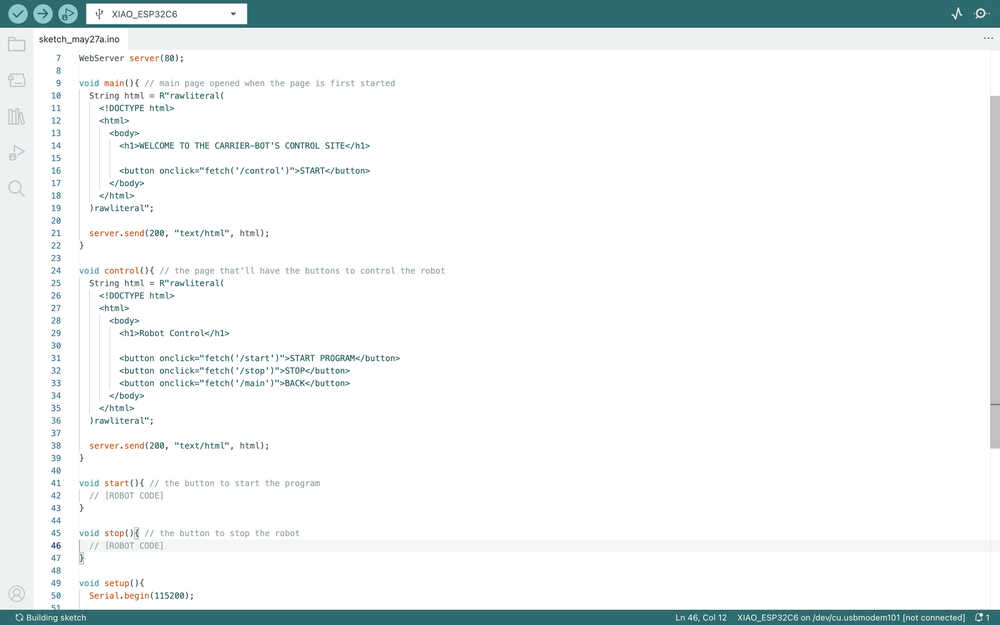
This is the code I wrote for the control page:
void control(){ // the page that'll have the buttons to control the robot
String html = R"rawliteral(
<!DOCTYPE html>
<html>
<head>
<style>
button:hover{
background-color: rgb(0, 101, 0) !important;
color: rgb(201, 255, 194) !important;
transform: scale(1.08);
}
</style>
</head>
<body style="background-color: lightgreen; font-family: 'Courier New', Courier, monospace">
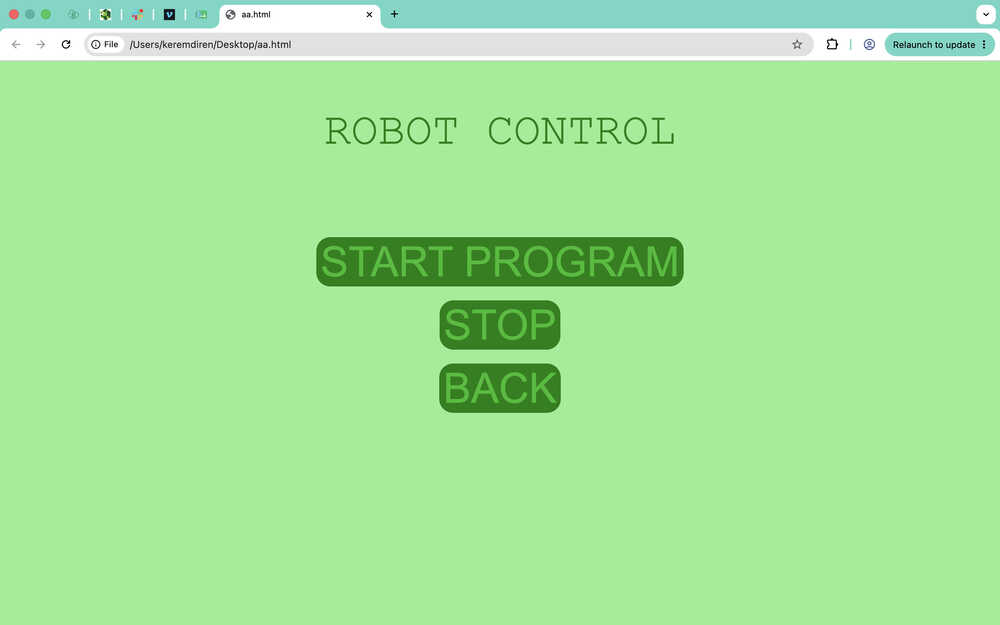
<p style="color: green; text-align: center; font-size: 65px">ROBOT CONTROL</p>
<div style="text-align: center; padding-top: 50px;">
<button onclick="fetch('/start')" style="background-color: green; color: rgb(37, 188, 37); cursor: pointer; border: none; align-content: center; font-size: 60px; text-align: center; border-radius: 20px;">START PROGRAM</button>
<div style="padding-top: 20px;">
<button onclick="fetch('/stop')" style="background-color: green; color: rgb(37, 188, 37); cursor: pointer; border: none; align-content: center; font-size: 60px; text-align: center; border-radius: 20px;">STOP</button>
</div>
<div style="padding-top: 20px;">
<button onclick="fetch('/main')" style="background-color: green; color: rgb(37, 188, 37); cursor: pointer; border: none; align-content: center; font-size: 60px; text-align: center; border-radius: 20px;">BACK</button>
</div>
</div>
</body>
</html>
)rawliteral";
server.send(200, "text/html", html);
}
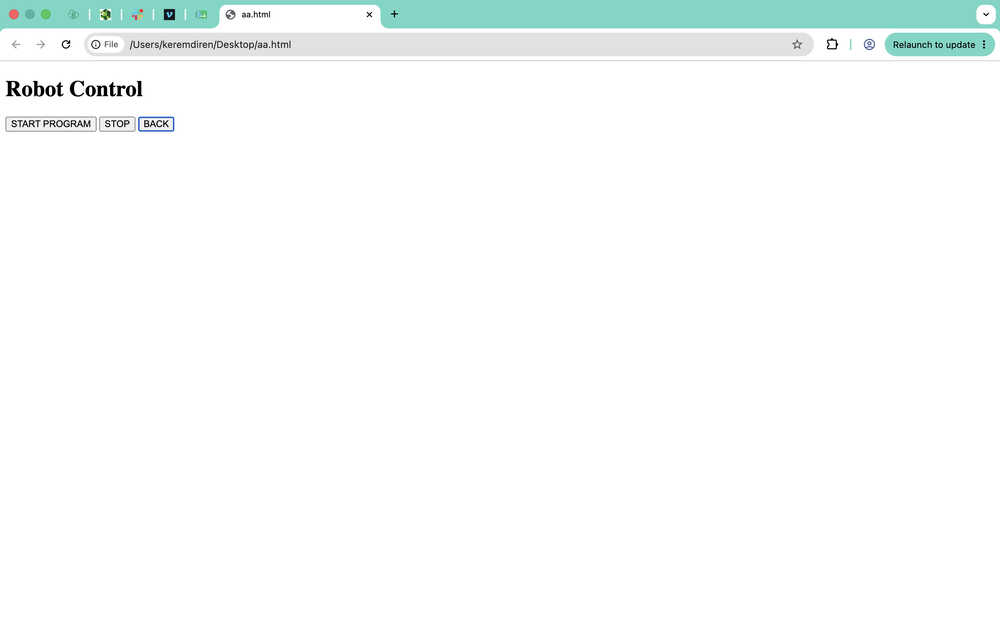
This is pretty similar to the previous code. Except, this time, there are three buttons and the sizes are a bit different. Since there are three buttons, I used "div" two more times to make space between the buttons.
It looks like this:
Testing
I'll be testing my code with my PCB to see if I can communicate with the PCB using the site I created.
This is the temporary code I added to the start and stop function.
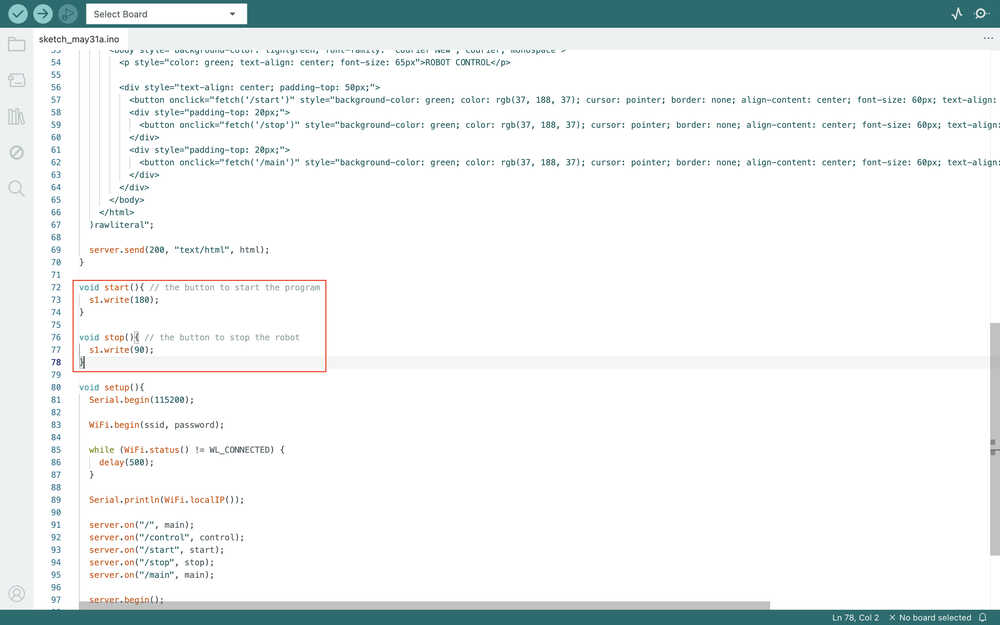
While compiling, the program gave an error and said that the main function had to return an integer. I realized that the title had to be handleRoot (or maybe the problem was the title being main). Basically, I changed the name of the main function to handleRoot, and the program worked.
When I started the code, I had a problem with changing pages. After asking ChatGPT, I learned that I had to write the page changing buttons like <button onclick="window.location.href='/main'">BACK</button>, which makes a lot of sense. Also, after changing the pages manually, I had to wait some time for the servo to change its speed etc. Apparently, that is because I had to use always send something to the site. The example ChatGPT wrote was server.send(200, "text/plain", "Stopped");. I changed the code accordingly (you can find the full code by downloading the zip file below).
Video of the code working:
Files
Here are the files.